1
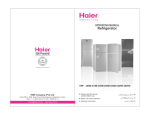
I nsp i r ed li vi ng
OPERATING MANUAL
Deep Freezer
QA Passed
QA
Passed
HDF-245SD / 285SD
HDF-345SD / 405SD
HNR Company (Pvt) Ltd.
Head Office : 63/B, Mega Tower Main Buleward, Gulberg-III, Lahore.
UAN: 11 11 HAIER (42437) Tel: 042 - 35879105 - 7
[email protected]
www.haier.com.pk
Please read this manual
carefully before use.
Retain it for future reference.
Warranty Card inside.
Service Centres
LAHORE
KARACHI
GUJRAT
92-B, Sharif Colony,
Iftikhar Ahmed
Malik Road
Tel: 042-5879105-7
C-16 Block#.5
Rashid Minhas Road
Nr. NIPA Chorangi
Tel: 021-4817834-7
Tariq Plaza Nr. Bandan
Marriage Hall,
Rahman Shaheed Road
Tel: 053-2107114/3537928/9
LAHORE (2)
KARACHI (2)
GUJRANWALA
62-2-C-2
Town Ship
Tel: 042-5117863,5122333
C-21,Sector 31 E
Lakhnow Co operative
Housing Society Korangi
Road, Near Nasir Jump
Tel: 021-5060512,5060656
GMS Area Bismillah
Market, G.T Road
Opp. Gold Marriage Hall
Tel: 055-3847177/3843194
PESHAWAR
RAWALPINDI
SIALKOT
Haier Plaza
G.T Road
Nr. Haji Camp
Tel: 091-2262910
951 - B, near kali tanki,
Opp. MC girls high
school, Satellite town,
Tel: 051-4582410,4451585
Al-Hadi Town, Defence Road,
Pakka Peyya Stop,
Opp. Mehar CNG,
Tel: 052-3612011/3612279
MULTAN
BAHAWALPUR
HYDERABAD
178-A Shamsabad,
Eidgah Road,
Tel: 061-4577406
H.No.44/278 Central
Jail Road, Arif Town
Tel: 062-3101460,2883015
Banglow No.342/A
Block # 6,
Latif abad # 6,
Tel: 022-3862792,2900265
QUETTA
SUKKUR
JHELUM
Banglow # 4-29/1
Mir Ahmed Khan Road
Tel: 081-2838508,2821179
Banglow No.C473/2
Queens Road
Tel: 071-5621462-63
Major Nawaz Shaheed
Colony, Mehdi
Shaheed Road
Tel: 054-4620250,627231
FAISALABAD
SARGODHA
D.G KHAN
36 / 8 New Civil Lines
Behind State bank of
Pakistan
Tel: 041-2620876-7
67 A Shahzad Park
P.A.F Road
Tel: 0483-741526-8
House # 4, Block No. 17,
Street No. 4,
Laghari Colony
Tel: 064-2466483
SAHIWAL
66/E Scheme # 2 Near
Cakes & Bakes, College
Chowk, Farid Town.
Tel: 040-4271600-02
UAN: 11 11 HAIER (42437)
[email protected]
www.haier.com.pk
Important Safeguards
Table of Contents
PAGE
Parts
1
Important Safeguards
2-4
Electric Control Panel
5
Freezer Installation
6
Energy Saving Tips
7
Operating the Freezer
Read all instructions before using this
appliance. When using this appliance,
a l w a y s ex e r c i s e ba s i c s a f e t y
precautions, including the following.
-1
1)
Use this appliance only for its
intended purpose as described in
this use and care guide.
-2
2)
This freezer must be properly
installed in accordance with the
installation instructions before it
i s used. S ee grounding
instructions in the installation
section.
-3
3)
Never unplug your freezer by
pulling out the power cord.
Always grip plug firmly and pull
straight out from the power
socket.
4)
Repair or replace immediately all
electric service cords that have
become frayed or otherwise
damaged. Do not use a cord that
shows cracks or abrasion
damage along its length or either
the plug or connector end.
5)
Unplug your freezer before
cleaning or before making any
repairs.
8-9
Care and Cleaning
10
Defrosting
11
Useful Hints
12
Troubleshooting
13-15
Parts
Hinge
Yes
Sealing gasket
Yes
Food Basket
Yes
Drainage Plug
Yes
Ventilation grill for compressor
Yes
Lock
Yes
Light
Yes
Control
Yes
1
-4
-5
-6
Note: If for any reason this product
r eq ui r es s er v i ce , w e s t ro ng l y
recommend that a certified technician
performs the service.
6)
Do not use any electrical device
or any sharp instruments in
defrosting your freezer.
-7
7)
If your freezer is not being used,
we recommend that you remove
the doors. This will reduce the
possibility of danger to children.
-8
2
Important Safeguards
8)
After your freezer is in operation,
do not touch the cold
surface in the freezer
compartment, particularly when
hands are damp or wet. Skin
may adhere to these extremely
cold surfaces.
Important Safeguards
-8
DANGER
-9
9)
Do not refreeze foods, which
have been thawed completely.
10) This freezer should not be
recessed or built in an enclosed
cabined. it is designed for
freestanding installation only.
11)
For future Reference please
save these instructions.
-10
Do not operate your freezer in the
presence of explosive fumes.
-11
12) Use of any extension cord is not
recommended.
-12
13) Remove all packing before
commencing freezer operation.
-13
14) Do not overfill the freezer. Where
possible, large blocks of meat
should be cut and wrapped in
smaller pieces. Space should be
left between packages of food to
enable air to circulate at all times.
-14
15) N e ve r p lac e co m b us t ible ,
explosive or volatile liquid, gas or
other materials in the freezer.
-15
16) Do not leave beverages such as
beer, soft drinks or other liquids,
packaged in glass containers in
the freezer, such liquids will
expand upon freezing and can
cause the glass to break.
-16
Risk of child entrapment.
Before you throw away your
old freezer, take off the door.
Leave the shelves in place so
that children may not easily
climb inside.
Warning: please take care of
children, to keep lands and
feet from punching and gaps in
cabin or back which made by
metal, in order to avoid
accident.
Thank you for using our
product. This easy to use
manual will guide you in
getting the best use of your
freezer.
Remember to record the
model and serial number. They
are on a lable in back of the
freezer.
Model number
Serial number
17) Do not put water directly in to the
tank of the freezer.
-17
3
Date of purchase
4
Electric Control Panel
Freezer Installation
The main functions of the electronic
control panel are:
1)
-1
The control panel is numbered
1,2,3,4,5,6,7. This refers to the
temperature on the inside of
the freezer. The temperature is
lowered by turning the dial in
clockwise direction.
1)
The freezer is designed for freestanding installation only.
2)
Install the freezer on a base
strong enough to support it when
fully loaded. Ensure the freezer is
on a stable surface to minimize
noise and vibration.
3)
When moving the freezer, never
tilt at an angle more that 45 as
this could damage the
compressor and freezer system. If
the freezer is tilted over 45 , or has
been stored on its side, allow the
freezer to stand upright for at least
24' hours prior to plugging it back
in, this will allow the refrigerant to
settle.
4)
Install the freezer in a wellventilated area away from any
heat source or direct sunlight. Air
must be allowed to circulate freely
around the freezer. Allow at least 3
inches (7.5 cm) of clearance
space for the top, back and sides.
5)
Install the freezer in a dry place
to prevent rust from forming on
the compartment body and to
avoid the risk of damaging the
electric insulation.
Refrigerate: When dial is near the "1"
po s itio n, t he int e rior av e ra ge
temperature of freezer is
approximately 10 C ~ -2 C.
Freeze: When dial is near the "2-7"
po s itio n, t he int e rior av e ra ge
temperature of freezer is
approximately -2 C~ -26 C.
When you change the dial from
refrigerate function to freeze function,
the food in the freezer should be taken
out to avoid freeze.
2)
The green lamp indicates that
the appliance is connected to a
power supply. The green lamp
illuminates when the freezer is
connected to an appropriate
power supply.
-2
Electric Connection
Precautions
3)
The yellow lamp illuminates
w he n t he " Quic k Fr eez e"
function is working. Quick
freezing can retain the original taste
of the food.
-3
4)
-4
All con tro l e quipment is
installed on the control panel
situated on the exterior of the
freezer.
5
and
1)
IMPORTANT: For personal safety,
this appliance must be properly
earthed.
2)
The rated voltage for this
appliance is 220V to 240V. In the
event that your regional power
su pp l i er c on no t m e et th i s
requirement, please use a safe
and reliable automatic voltage
regulator with a minimum output of
500W to avoid damaging the
compressor.
6
Energy Saving Tips
3)
Operating Your Freezer
A 13 Amp, 3 Pin Plug and 5 Amp
fuse only must be used for this
freezer to avoid serious damage.
The plug should always be wired
in accordance with the following
codes.
Voltage supply
To start your freezer it must be
connected to a 220 volt, 50 Hz A.C.
power supply. Failure to do so may
invalidate the guarantee.
Green and Yellow Earth (E)
Blue
Neutral (N)
Brown
Live (L)
Once the freezer is properly plugged in,
the green power light will illuminate,
indicating that the freezer is in
operation.
It is safest to consult a qualified
electrician at all times.
Temperature/Cold Control
4)
5)
In the event of an electrical short
circuit, grounding reduces the risk
of electric shock by providing an
escape wire for the electrical
current. This appliance is fitted
with a cord having a grounding
wire with a grounding plug. This
plug must be plugged in to an
outlet that has been properly
installed and grounded.
The temperature control dial has
settings from "1"-"7". Where "1" is the
warmest and "7" is the coldest
temperature setting. Turn the control
knob to higher numbers for colder
temperatures.
During extremely hot weather and
frequent lid opening, it is advisable to
select a higher setting to ensure that
food remains frozen.
Consult a qualified electrician or
service centre if the grounding
instructions are not completely
understood or if any doubt exist as
to whether the appliance is
properly grounded.
Initially, set the temperature control
knob to the "5" setting by turning the
knob in a clock wise direction. After 30
minutes, you should notice an obvious
decrease in the interior temperature of
the freezer.
Energy Saving Tips
*
Do not place your freezer nest to a
heating vent, cooker, in direct
sunlight or in the vicinity of any
other heat-producing source.
*
Deep the door closed as much as
possible, especially in hot and
humid weather.
*
Defrost the freezer every few
months or when the frost becomes
6mm (1/4") thick or more.
*
Let the freezer to run for a further 12
hours before placing your food inside,
allowing some space between items to
allow air to circulate properly. After
using the freezer for 24 hours, adjust
the temperature control to the setting
that is best suited to your need.
Power Cut
If you unplug your freezer or
experience an electrical outage, ideally
wait five minutes before plugging the
appliance back in.
Cover foods securely to reduce
moisture build up inside the
freezer.
7
8
Operating Your Freezer
Care & Cleaning
Fast/Quick Freeze Switch
IMPORTANT
Before Cleaning, always switch refrigerator off and remove plug from the power supply.
Your freezer is equiped with a
Fast/Quick Freeze switch (amber) for
quicker freezing of fresh food.
PART
It is recommended that the Fast/Quick
Freeze switch be switched on 12 hours
in advance, before loading the freezer
with a lot of fresh food and left on for 24
hours after loading. When all freezing
is complete, switch off the Fast/Quick
Freeze switch.
* Wash using warm water and a mild detergent e.g. soap or
dishwashing liquid.
* Rinse through, wipe clean and dry.
* DO NOT USE HARSH CLEANERS OR ABRASIVES.
* Waxing is recommended if humidity is high to prolong the life
of your freezer. Use a good quality car wax or appliance wax.
DO NOT USE WAX ON PLASTIC PARTS.
* DO NOT USE BLEACH OR PETROL BASED PRODUCTS TO
CLEAN YOUR FREEZER.
* DO NOT PLACE HOT OR HEAVY OBJECTS ON THE
SURFACE OF THE FREEZER TO AVOID DAMAGING THE
SURFACE OR DEFORMING THE GASKET.
Interior
* Wash with a warm water solution containing either a mild
detergent or baking soda solution (2 table spoons/30g baking
soda to 1 liter warm water).
* Wipe clean and dry.
Lid Liner /
Gasket /
Food Basket
* Wash using only warm water, a mild detergent.
* Rinse and dry.
* Liquids such as oil and juice stick easily to the gasket to clean,
wipe with lukewarm water to extend the life of the plastic.
Food Basket
The freezer is equipped with three
removable food baskets for storing
items at a higher level. Where food is
dripping, place it into a tray before you
start freezing, to prevent contaminating
other food already in the freezer.
Lamp Control Switch
HOW TO CLEAN
Exterior
The tilt switch controlling the lamp is
inside the lid. It controls the lamp
automatically when opening or closing
the lid.
Lock and Key
Those freezers which have hand locks.
Allow you to secure the freezer
contents from theft or to simply keep
children out of the freezer.
To lock the lid, close the lid securely,
insert the key into the lock and tum
clockwise until the lid is latched and
locked.
To unlock, turn the key in the opposite
direction and remove key.
9
10
Defrosting
Useful Hints
Defrosting
Pull the drain dial out and rotate it untill
the triangle points downwards. When
done return the triangle to the up
position, push the dial back in and
replace the plug inside the freezer
compartment.
If the frost on the freezer walls reaches
a thickness of 6mm or greater, the
freezer requires defrosting. It should
not be necessary to defrost the freezer
more than once every few months and
the defrosting process is best carried
out when the stock of food is at low
level.
Cleaning and temperature setting
Wipe the interior of the freezer and
drain hole with a cloth or clean as
described in the "Care and Cleaning"
section of this manual. Reinsert drain
plug and plug the power cord back into
the power source/socket.
Defrosting
Before defrosting, turn the thermostat
to the lowest temperature setting for
about four hours. This will enable you
to remove any remaining food from the
freezer at its lowest temperature. Food
removed from the freezer should then
be warpped in several layers of
newspaper and placed in a cold
refrigerator. Remember that any rise in
temperature will shorten the life of the
frozen food considerably. Thawed food
should not be re-frozen.
Turn the temperature control to the
desired setting. You may wish to use
the Fast/Quick Freeze feature for a few
hours and then adjust the temperature
control to the desired settings.
Useful Hints
* If your freezer is to be out of service
for any length of time, ensure that
interior is carefully cleaned and
dried as per the "Care and
Cleaning" instructions given in the
manual. Leave the lid open and
disconnect the plug from the power
supply.
Once all food has been removed from
the freezer, disconnect the power by
removing the plug from the power
source/socket.
* Hot foods should be allowed to
cool before being placed inside
the freezer.
To help remove the frost, use the
plastic defrosting scraper provided. DO
NOT USE SHARP OR METALLIC
INSTRUMENTS TO REMOVE THE
ICE. Defrosting usually takes a few
hours. To defrost faster, keep the door
open and place a bowel of warm water
inside the freezer.
* Don't try to freeze too much fresh
produce at any one time.
* Carry out regular cleaning of the
exterior as per the "Care and
Cleaning" instructions given in the
manual. This is important if the
freezer is subjected to high humidity
and heavy condensation.
Draining the freezer
Turn the inner plug in the bottom of the
freezer compartment. Place a try or
other water receptacle beneath the
outer drain dial/plug (front lower left of
the freezer).
* Bulb replacement - Always turn off
the power supply and remove plug
before removing light cover.
11
12
Troubleshooting
Troubleshooting
Safety Notes
Troubles/Problem
* When disposing of an old freezer,.
ALWAYS remove lid as a safeguard
against small children getting
trapped inside.
Green indicating
light is off
* Don not store flamm able or
explosive substances in the freezer
cabinet.
* Do not store any fizzy drinks in the
freezer.
The temperature is
not low enough.
* Do not store any liquids contained in
glass in the freezer.
Reasons
Solutions
Power is off.
check your main circuit.
The plug is not inserted.
Insert plug and switch on socket.
The fuse is blown/bumt.
Change the fuse (5 amp)
The indicating lamp is out of use.
Change the indicating tamp bulb.
Circuit breaker tripped.
Reset breaker.
Cable is damaged.
Call electrician to repair.
Temperature setting is not low enough.
Turn dial to higher number setting.
The freezer is in direct sunlight or
close to a heat source.
Change freezer location.
Too much food has been stored at one
time.
Take off some load in the freezer.
The door is being opened too often.
Keep door closed for longer.
The floor is not level.
Change the position of the freezer
until the noise level is reduced.
Too much dust on motor fan.
Clean the fan.
The thermostat setting is too low.
Turn the dial to increase the
temperature.
The quick freezing switch is on
and the yellow lamp is lit.
Turn the quick freeze switch to its
normal (off) position when the
fast/quick freeze period has finished.
Spoilt food.
Remove spoiled food from freezer
and any other food it has been in
contact with.
Food not wrapped correctly.
Ensure food with strong odor is
tightly covered (freezer bags are best)
Interior requires deaning.
Clean per "Care and Cleaning"
instructions.
No baking soda in place.
Place an open box of baking soda
inside the freezer. Replace every
3 months.
Troubleshooting
The table below provides some
guidance to solving an apparent minor
operating problems that might occur
occasionally.
It is important to recognize that the
following three situations are a part of
the normal operation and use of the
freezer.
Too much noise/
vibration.
The compressor
works continuously.
1) There is a sound of liquid flowing in
the system when the freezer is
switched on.
THIS IS NORMAL AND IS THE
SOUND OF THE REFRIGERANT
FLOWING THROUGH THE SYSTEM.
Strong odors in the
freezer.
2) The exterior of the freezer is warm
and the compressor is extremely hot
and burns on touching. THIS IS
NORMAL
3) There is condensation on the
surface.
THIS IS ESPECIALLY COMMON IN
CLIMATES WITH HIGH HUMIDITY
AND IS NOT A DEFECT.
CLEAN THE CONDENSATION WITH
A DRY CLOTH.
13
14
Troubleshooting
15