1
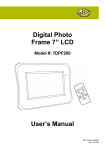
Digital Photo Frame 7” LCD with Atomic Clock Model #: 7DPF300RCC User’s Manual PID # 161300-109239 Rev. 071011 All brand name and trademarks are the property of their respective owners USER’S RECORD: To provide quality customer service and technical support, it is suggested that you keep the following information as well as your store receipt and this user’s manual. Date of Purchase: ________________________________ Model Number: ________________________________ Serial Number: ________________________________ Product Rev Number (located below the UPC on the package): ____________________ FCC RADIATION NORM: FCC This equipment has been tested and found to comply with limits for Class B digital device pursuant to Part 15 of Federal Communications Commission (FCC) rules. FCC Compliance Statement These limits are designed to provide reasonable protection against frequency interference in residential installation. This equipment generates, uses, and can radiate radio frequency energy, and if not installed or used in accordance with the instructions, may cause harmful interference to radio communication. However, there is no guarantee that interference will not occur in television reception, which can be determined by turning the equipment off and on. The user is encouraged to try and correct the interference by one or more of the following measures: Reorient or relocate the receiving antenna Increase the separation between the equipment and the receiver Connect the equipment into an outlet on a circuit different from that to which the receiver is connected to. CAUTION! The Federal Communications Commission warns the user that changes or modifications to the unit not expressly approved by the party responsible for compliance could void the user’s authority to operate the equipment. 2 PACKAGE CONTENTS: Your new Digital Photo Frame will ship with the following items: - Digital Photo Frame 7” LCD with Atomic Clock - Remote Control - AC Power Adapter - USB Cable - User’s Manual - Warranty Information SYSTEM SPECIFICATIONS: Your new Digital Photo Frame complies with the following specifications: - Screen Dimensions: 7.0 inches - Resolution: 480 x 234 - Brightness: 250 cd/m2 - Contrast: 200:1 - Photo File Format: JPEG - Memory Card Formats: SD, MMC, MS, or CF - Usage Options: Manual, Remote Control, or Slideshow - Power Supply: AC 100~120V DC 12V - Operating Temperature: -5C to +50C - Max Power Consumption: 12W - Supported Operating Systems: Windows® 2000, XP, Vista, Mac® OS 10.3 or Above 3 HARDWARE DESCRIPTION: Display Screen Atomic Clock and Calendar display AC Power Adapter Photo Frame Stand USB Cable Remote Control CF Card Slot USB Port Power Jack SD/MMC/MS Card Slot Remote Control MENU ESC AUTOPLAY ZOOM ENTER Press to open the “Settings” menu or the control menu when a photo is being displayed manually. Press to exit a setup screen, AUTOPLAY, or go back to the previous screen. Press to display photos one by one at a preset interval. NOTE: When this function is running, all other buttons will not function except “ESC”. Press to zoom in while a photo is displayed manually. Press to rotate the photo clockwise 90 degrees while a photo is displayed manually. Press to select an option or a photo. Press to save a changed setting in the setup screen. Press to navigate up and down or to view the previous or next photo while photo is being displayed manually. These buttons can also be used to move the photo up or down after a photo has been zoomed in. Press to navigate left and right or to move the photo to the right or left after a photo has been zoomed in. 4 Built-in Photo Frame Control UP/DOWN ENTER ON/OFF SWITCH ESC/MENU LEFT/RIGHT ON/OFF SWITCH Switch to turn the Digital Photo Frame ON or OFF. ENTER Press to select an option or a photo. Press to save a changed setting in the setup screen. Press and hold to open the setup screen or the control menu when a photo is being displayed manually. Press to function as the “ESC” button on the Remote Control. Press to navigate up and down or to view the previous or next photo while photo is being displayed manually. These buttons can also be used to move the photo up or down after a photo has been zoomed in. Press to navigate left and right or move the photo to the right or left after a photo has been zoomed in. ESC/MENU UP/DOWN LEFT/RIGHT Atomic Clock / RCC (Radio Control Clock) Control SET Clock Buzzer MANUAL MODE ZONE/DST Battery Compartment UP MANUAL ZONE/DST UP SET MODE Press and hold to start searching for the automatic time signal. Press again to stop the time signal search. Press to switch between different time zones. Press and hold to enable/disable Daylight Saving when the clock is displaying time. When setting the alarm or manually setting the time, press to increase the flashing value. When the RCC is displaying time, press to switch the temperature unit between Fahrenheit and Celsius. When the RCC is in alarm mode, press to enable/disable alarm. When displaying time, press and hold to manually set the clock. When in alarm mode, press and hold to manually set the alarm clock. When setting either time or alarm, press to go to the next parameter. Press to change the RCC display between the time and the alarm. 5 HARDWARE INSTALLATION: 1. Attach the enclosed Stand onto the back of your Digital Photo Frame with a screw driver (not included). 2. Connect the power jack of the enclosed AC Power Adapter to your Digital Photo Frame, and plug the other end into an electric outlet. 3. Place your Digital Photo Frame on a flat and steady surface. 4. Your Digital Photo Frame is now ready to be used. 6 USING THE ATOMIC CLOCK: 1. Remove the battery insulation film from the battery compartment of your photo frame, and the radio-controlled signal search will start. Note: During the signal search, please shut down the photo frame to reduce interference and restart the photo frame when the signal search is complete. It is best to unplug the AC adapter from the unit as well. 2. The wave symbol will keep flashing after the clock starts. The flashing icon indicates the radio-controlled circuit is working. It is recommended to place the clock in a vertical position in the direction of Colorado. In some cases, the update will take up to 24 hours to complete. The wave symbol stops blinking when the radio-controlled signal is received successfully. If the clock does not automatically set, please see below to set the clock manually. Press and hold the “MANUAL” button to manually stop the searching. 3. Press the “ZONE/DST” button until the desired time zone is displayed on the map. IMPORTANT NOTES: Possible Sources of Interference: All radio-controlled receivers may be subject to certain interferences. Interferences can be caused by, for example, a thunderstorm between you and Colorado, metallic elements in buildings (such as metal window frames), domestic appliances, as well as TV sets, PCs and laptops can interfere with the reception. Moreover, the transmitter may shut down temporarily. If your clock cannot receive a signal then try moving the clock to a different location. If there is interference with the reception, hold the “MANUAL” button until the clock beeps to start the searching again. Time Update: The clock will update automatically at 2:00 AM, 3:00 AM and at 4:00 AM. It will attempt to update again at the next hour if a signal is not received. You can start it searching for reception manually by holding the “MANUAL” button until the clock beeps and the signal symbol starts flashing. To Set The Time Zone: Press the “ZONE/DST” button until the desired time zone is displayed on the map. MANUAL CLOCK OPERATION: 1. To set the Calendar, press and hold the “SET” button until the clock beeps once, then press the “SET” button four (4) times until you get to the Year flashing. Set the desired year using the “UP” button. Then press the “SET” to move to the Month setting again using the “UP” button to set the appropriate month. Press “SET” button to Move to the day setting, using the “UP” button move change the day to the correct day and press the “SET” button to return to normal time mode. Note: The day of the week is automatically set based on the date. 2. To set the Time: a. Press and hold the “SET” button until the clock beeps once to adjust the 12 or 24 hour display format using the “UP” button. Then press the “SET” button. b. Press the “SET” button again to set the Hour using the “UP” button until the correct hour is displayed. c. Press the “SET” button again to set the Minute using the “UP” button until the correct minutes are displayed. d. Press the “SET” button four (4) times to return to normal time mode. 3. To set the Alarm: a. In Normal mode press the “MODE” button and ALM is displayed. b. Press and hold the “SET” button until the clock beeps once. 7 c. d. e. f. Press the “UP” button until the desired hour is displayed. Press the “SET” button then the “UP” button until the correct minute is displayed. Press the “SET” button to exit the alarm setting mode. Press the “UP” button to enable or disable the alarm. When the alarm is active a Bell is displayed. g. The alarm will sound for one (1) minute every day when the alarm time arrives. Pressing any key will shut the alarm off. 4. To use the Daylight Saving Feature, press and hold the ZONE/DST until the Sun symbol appears. Press and hold ZONE/DST again to remove the DST feature. 5. For normal operation, a. Press the “ZONE/DST” button until the desired time zone is displayed on the map. b. Press and hold the “SET” button until the clock beeps to adjust the 12 or 24 hour display format using the “UP” button. Press the “SET” button again to exit the set mode and return to the normal time mode. c. Press the “UP” button (while in normal time mode) to change the Celsius or Fahrenheit format for the temperature. d. Press the “MODE” button to choose whether the normal time or the alarm time display is on the clock. CLOCK TROUBLESHOOTING: Symptom or Problem : Clock will not set Display is Dim Time is wrong Cause and / or Solution : 1. Position the clock to face Colorado 2. Set manually 1. Replace battery 1. Reset the Time zone 2. Manually set the clock 3. Use the DST feature 8 USINGTHE DIGITAL PHOTO FRAME: 1. Make sure that you have properly connected the AC Power Adapter; refer to the Hardware Installation instructions above if necessary. 2. Carefully insert your memory card into the proper slot as shown below following the orientation guide on the memory card. 3. Turn on your Digital Photo Frame and the below screen will appear. 4. Use the enclosed Remote Control or the Built-in Control and select the icon on the left to enter the Card Selection Menu. Choose the media card you want to view; the photos stored in the selected card will be displayed on the screen as thumbnails. 12 thumbnails can be shown on screen at one time. 9 5. Select the photo you want to view by pressing the “Enter” button on the Remote Control or on the Built-in Control. Pressing the “Menu” button on the Remote Control will show the options below. Zoom in. Zoom out. Rotate photo clockwise 90 degrees. . Rotate photo counterclockwise 90 degrees. Opens the “Settings” Menu. 6. Select the “Settings” icon to open the “Settings” Menu. Language Select this to choose the language you want your “Settings” menu to be. Slide Interval Select this to set the time interval between pictures for “AUTOPLAY” mode. The time limit can vary from 3 seconds to 60 seconds. File Enabling this option will show the file name and order of the files being Description displayed onscreen. Folder Mode Enabling this option will show the folders in the memory instead of displaying all of the photos as thumbnails at the same time. Aspect Ratio Select this to have the photos displayed at the ratio of the picture or by expanding to the full screen size of your Digital Photo Frame. LCD Power Select this to set the “LCD power saving” mode. Select the time for Saving your Digital Photo Frame to turn off automatically according to the time limit, or select “Off” to disable this function. Default Setting Select this to change all settings back to factory default settings. System Information Select this to show the system information for your Digital Photo Frame. 10 CONNECTING TO A COMPUTER: 1. Make sure all memory cards have been removed from your Digital Photo Frame. 2. Turn on your computer. 3. Plug the USB mini-B connector end of the enclosed USB Cable to your Digital Photo Frame. 4. Plug the USB-A connector end of the USB Cable into an available USB port on your computer. 5. Your computer will detect and install the necessary drivers automatically. 6. Your Digital Photo Frame can now be used as a Card Reader. 11 WARRANTY INFORMATION: Gear Head, LLC warrants that this product shall be free from defects in materials and workmanship for one year. If the product is defective, Gear Head, LLC’s sole obligation under this warranty shall be at its election, subject to the terms of this warranty, to repair or replace any parts deemed defective. This warranty is for the exclusive benefit of the original purchaser and is not assignable or transferable. THIS WARRANTY IS MADE IN LIEU OF ALL OTHER WARRANTIES, EXPRESS OR IMPLIED, AND ANY IMPLIED WARRANTIES, INCLUDING THE IMPLIED WARRANTIES OF MERCHANTABILITY AND FITNESS FOR A PARTICULAR PURPOSE, ARE LIMITED TO THE TERMS OF THIS WARRANTY, UNLESS OTHERWISE PROHIBITED BY LAW. Exclusions To the fullest extent permitted by law, Gear Head, LLC expressly disclaims and excludes from this warranty any liability for damages, including but not limited to general, special, indirect, incidental, consequential, aggravated, punitive or exemplary damages, and economic loss (even if Gear Head™ is informed of their possibility), third party claims against you, including for any loss or damages, and claims or damages related to loss of, or, damage to, your records or data. This warranty does not apply to any product the exterior of which has been damaged or defaced. This warranty will be voided by misuse, improper physical environment, improper repair, acts of God, war or terror, commercial use, and improper service, operation or handling. Technical Support Gear Head™ provides Technical Support Monday - Friday from 9:00 am – 5:30 pm Eastern Time. Before calling, please make sure you have available the Model # (located on the front page of your User’s Manual) and information regarding your computer’s operating system. Please contact our technicians at 1-866-890-7115 Return Merchandise for Service Any claim under this warranty must be made in writing to Gear Head, LLC, at the address provide by our technician, within 30 days after the owner discovers the circumstances giving rise to any such claim, and must include a copy of this warranty document, a receipt or copy of your invoice marked with the date of purchase, and the original packaging. You may obtain service by calling the technician for a Return Merchandise Authorization (RMA) number. The RMA number must be prominently displayed on the outside of the shipping carton and the package must be mailed to Gear Head™ postage prepaid. 12