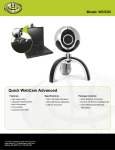
Download Gear Head WC5351 Webcam User Manual
Transcript
Quick WebCam Advanced
Model #: WC535I
User’s Manual
PID # 031080-109244
Rev. 070816
2
All brand name and trademarks are the property of their respective owners
USER’S RECORD:
To provide quality customer service and technical support, it is suggested that you keep the
following information as well as your store receipt and this user’s manual.
Date of Purchase:
________________________________
Model Number:
________________________________
Serial Number:
________________________________
Product Rev Number (located below the UPC on the package):
____________________
FCC RADIATION NORM:
FCC
This equipment has been tested and found to comply with limits for Class B digital device pursuant
to Part 15 of Federal Communications Commission (FCC) rules.
FCC Compliance Statement
These limits are designed to provide reasonable protection against frequency interference in
residential installation. This equipment generates, uses, and can radiate radio frequency energy,
and if not installed or used in accordance with the instructions, may cause harmful interference to
radio communication. However, there is no guarantee that interference will not occur in television
reception, which can be determined by turning the equipment off and on. The user is encouraged
to try and correct the interference by one or more of the following measures:
§
Reorient or relocate the receiving antenna
§
Increase the separation between the equipment and the receiver
§
Connect the equipment into an outlet on a circuit different from that to which the receiver is
connected to.
CAUTION!
The Federal Communications Commission warns the user that changes or modifications to the
unit not expressly approved by the party responsible for compliance could void the user’s authority
to operate the equipment.
3
PACKAGE CONTENTS:
Your new Webcam will ship with the following items.
-
Quick WebCam Advanced
-
Driver CD
-
User’s Manual
-
Warranty Information
SYSTEM REQUIREMENTS:
Please be sure that you meet all of the system requirements below to avoid difficulties during
installation.
-
IBM® PCs or 100% Compatibles
-
Windows® 2000, XP, Vista
-
An Available USB 2.0 Port (backward compatible with USB 1.1)
-
An Available Mic-in Port
-
CD-ROM Drive (for driver installation)
-
Intel® Pentium III 450MHz or Above
-
64MB of System RAM or Above
-
800x600 Color Display Monitor Resolution or Above
-
20MB Available HDD Space or Above
-
32MB Video Card RAM or Above
-
Sound Card For Audio Output Required
SYSTEM SPECIFICATIONS:
Your new Webcam complies with the following specifications.
-
USB Interface; Bus Powered
-
Video Resolution (Max): 640 x 480; Snapshot Resolution (Max): 800 x 600
4
PRIOR TO INSTALLATION:
For Windows® 2000, XP, Vista
To avoid any hardware conflict and/or error, please visit www.windowsupdate.com and install the
most recent updates for your operating system. Please also visit your motherboard manufacturer’s
website and install the most recent updates available for your video and sound card.
For Windows® 2000
Windows® 2000 users are recommended to have Service Pack 4 installed. You can determine if
you have Service Pack 4 by right-clicking “My Computer”, and then selecting “Properties”.
Select the “General” tab and the Service Pack you have will be listed under “System”. If Service
Pack 4 is not listed, please visit www.windowsupdate.com and install it.
For Windows® XP
Windows® XP users are recommended to have Service Pack 2. You can determine if you have
Service Pack 2 by right-clicking “My Computer”, and then selecting “Properties”. The Service
Pack you have will be listed under “System”. If Service Pack 2 is not listed, please visit
www.windowsupdate.com and install it.
5
INSTALLATION:
1. Turn on your computer.
2. After Windows® has loaded; insert the enclosed Driver CD into the CD-ROM drive of your
computer.
3. The setup screen will start automatically. If it does not start automatically, please click
“Start”, then “Run…”, type “D:\Setup.exe” into the dialog box. (NOTE: “D:\” represents the
drive letter assigned to the CD-ROM drive you are using. If D is not the letter assigned to
your CD-ROM drive, please replace D with the appropriate drive letter). Then click “OK”.
4. Select your language, and then click “OK” to continue.
5. Make sure your Webcam is not connected to your computer, and then click “OK” to
continue.
6. At the welcome screen, click “Next” to continue.
7. Click “Next” to start the installation.
For Windows® XP Users: Windows® may notify you that the software that you are
installing has not passed Windows® Logo testing; if this occurs, please click “Continue
Anyway” to continue.
For Windows® Vista Users: If the “Windows Security” dialog box appears during the
installation, please click “Install” to continue.
8. After the installation is complete, click “Finish” to close the wizard.
9. Plug the USB connector for your Webcam into an available USB 2.0 port on your computer.
10. Windows® will detect your Webcam and start the “Found New Hardware Wizard” for your
Webcam.
NOTE: For Windows® 2000 users, your computer will automatically install the necessary
drivers. Please proceed to Step 15.
For Windows® Vista Users: Select the “Locate and install driver software
(recommended)” option to start the installation, then click “Continue” under the User
Account Control screen. Then please proceed to Step 15.
11. Windows® may ask for your permission to connect to the Internet and search for the best
driver; if this occurs, please select “No, not this time” and then click “Next” to continue.
12. Select the option “Install the software automatically (Recommended)”, and then click
“Next” to continue.
13. Windows® may notify you that the software that you are installing has not passed Windows®
Logo testing; if this occurs, please click “Continue Anyway” to continue.
14. After the installation is complete, click “Finish”.
15. Restart your computer.
16. Once your computer has restarted and Windows® has loaded, your Webcam is ready to be
used.
LED INDICATORS:
There is an LED indicator on your Webcam, which indicates the current status of your Webcam.
LED Indicator
Status Description
Green
Off
The Webcam lens is disabled; or, inactive.
No connection.
On
The Webcam is connected and ready to be used.
6
USING THE AMCAP SOFTWARE:
1. Turn on your computer.
2. After Windows® has loaded; click “Start”, then select “All Programs” (for Windows® 2000
users, select “Programs”), then select “PC Camera PAC7302”, and then click “AMCap” to
start the AMCAP software.
3. If this is the first time you have run the AMCAP software, it may not show the video signal
from your Webcam automatically. To show the video signal for your Webcam manually,
click “Options”, and then click “Preview”.
4. Within a short moment, the video signal from your Webcam will show in the AMCAP screen.
Adjusting Lens Focus
Depending on the distance between you and your Webcam, the video signal from your Webcam
may be out of focus and you may have to adjust the lens focus manually. To adjust the lens focus
manually, please turn the focus knob on your Webcam as shown below.
Taking a Snap Shot
1. Make sure your computer is turned on and you have installed and connected your Webcam
to your computer.
2. Press the “Snapshot” button on your Webcam.
3. If the AMCAP software is not running, it will start up automatically. Press the “Snapshot”
button again to take a snapshot. If the AMCAP software is already running, a snapshot will
be taken immediately after you press the “Snapshot” button on your Webcam.
4. The captured snapshot will be opened in the “SnapShot Reader” screen. The captured
snapshot is not saved automatically; please make sure you save it manually before closing
the “SnapShot Reader” screen. To save the snapshot, click “File”, then click “Save” and to
save the file to a specified location.
7
AMCAP Configuration Toolbar
Using the toolbar at the top of the AMCAP window, you can access the property settings of the
AMCAP software. Below is a list of properties which can be configured:
Option
Attributes
Description
File
Set Capture File…
Select this option to open the “Set
Capture File” dialog box and set the
file name of the captured video file.
Figure
At the “Set Capture File” dialog box,
select a location to save the captured
video file, then specify a file name
(NOTE: please include the AVI file
extension at the end of the file name;
for example, “myvideo.avi”), and then
click “Open”.
Allocate File Space… After you set the capture file, you can
select this option to open the “Set File
Size” dialog box and change the
amount of reserved disk space for the
captured video file.
At the “Set File Size” dialog box, the
“Free disk space” shows the total
available disk space on your local
drive. Input the amount of disk space
(in MB) to reserve for the captured
video file, and then click “OK”.
NOTE: This option is only to reserve a
specified amount of free disk space for
the captured video file, and it does not
limit the file size of the captured video
file.
Save Captured Video Select this option to open the “Set
As…
Capture File” dialog box and save the
captured video file as a new file.
At the “Set Capture File” dialog box,
select a location to save the captured
video file, then specify a new file name
(NOTE: please include the AVI file
extension at the end of the file name;
for example, “myvideo2.avi”), and
then click “Open”.
Device
Exit
Select this option to exit the AMCAP
software.
Device Name
(depending on your
system
configuration)
This section lists all connected
video/audio capture device(s) on your
computer (NOTE: Please note that you
must select a video capture device and
an audio capture device before you
can use your Webcam with AMCAP).
If you have multiple video/audio
devices and want to change the
device(s) for video/audio capturing with
AMCAP, select to check the device(s)
on the list.
8
Option
Preview
Select this option to show the video
signal of your Webcam.
MPEG2
This function is built for other versions
Webcams and is non-functional for this
model. Selecting this will generate an
error message and the “Preview” will
be blank until this option is deselected.
Audio Capture
Filter…
Select this option to open the
“Properties” page and configure the
attributes for audio capturing. After you
are done, click “OK” to save the
change(s).
Video Capture
Filter…
Select this option to open the
“Properties” page and fine-tune the
image color and effect of the video
signal from your Webcam. After you
are done, click “OK” to save the
change(s).
Save Settings – To save your
settings, click the “Save” button under
the “Default” list.
Reset Settings – To reset to the
factory default settings, click the
“Reset” button under the “Default”
list.
Restore Custom Settings – To
restore saved settings, click the
“Restore” button under the “Default”
list.
Video Capture Pin…
Select this option to open the
“Properties” page and configure the
attributes for video streaming. After
you are done, click “OK” to save the
change(s).
TIPS: Setting these options to lower
levels can help minimize the file size of
the captured video file.
9
Capture Start Capture / Stop
Capture
To start capturing, select the “Start
Capture” option, then a dialog box will
appear to confirm, click “OK” to start.
To stop capturing, select the “Stop
Capture” option.
Capture Audio
To enable audio capturing, select and
check this option. After you have
enabled this option, you can start
capturing video with sound.
To disable audio capturing, select and
un-check this option.
Master Stream
Select this option and then select the
source for master streaming (None,
Audio, or Video).
Set Frame Rate…
Select this option to specify frame rate
(per second) for video capturing.
To specify a frame rate (per second),
check to enable the “Use Frame Rate”
option, then input the frame rate (per
second), and then click “OK” to save
the changes.
To disable the frame rate setting, uncheck the “Use Frame Rate” option,
and then click “OK”.
Set Time Limit…
Select this option to open the “Capture
Time Limit” dialog box.
To set a time limit for video capturing,
check to enable the “Use Time Limit”
option, then input the time limit (in
seconds), and then click “OK” to save
the changes.
To disable the time limit function, uncheck the “Use Time Limit” option,
and then click “OK”.
Help
About…
Select this option to check the version
of your copy of AMCAP software.
10
TROUBLESHOOTING:
Problem
1. The Webcam shows no
image after you have
connected it to your computer.
Solutions
-
2. The captured video (or the
snapshot) is blurred.
-
Make sure you have installed the drivers for your Webcam following the
procedures listed in the Installation section in this manual.
Make sure the USB connector for your Webcam is properly and securely
connected to an available USB 2.0 port on your computer.
Make sure the “Preview” option is checked and enabled under Options in the
AMCAP software.
If the problem still occurs; exit the AMCAP software (or the application you are
attempting to use with your Webcam), re-connect your Webcam to your
computer, and then start the AMCAP software again (or the application you
are attempting to use with your Webcam).
Make sure your Webcam is placed on a flat and stable surface while you are
using it. Moving your Webcam while in use may influence the operation of the
lens in your Webcam.
Check if there is anything on your Webcams lens; if yes, clean the lens with a
soft dry cloth.
If the problem still occurs; you may fine-tune the image color and quality by
going into Options > Video Capture Filter in the AMCAP software.
3. The video images turn slow
when viewing in high
resolution mode.
-
When using your Webcam in high resolution mode, the volume of
transmission data will be larger and may affect the overall performance of
your system including real-time video streaming. In this case, we recommend
you to upgrade the hardware of your system; or, use your Webcam in a lower
resolution mode. An example to lower the video streaming quality and
improve overall performance; go into Options > Video Capture Pin in the
AMCAP software, and then change the “Color Space / Compression” option
to “I420”.
4. There are strips or black
shadows on the video images.
-
Make sure you are using the optimal resolutions and color settings for your
monitor display. If you are not sure, please refer to the User’s Manual of your
monitor display for more information.
If the problem still occurs; set the monitor display color to 24-bits or 32-bits
True Color, and then try again.
5. While using various instant
messaging programs (e.g.
Windows® Messenger), image
and/or sound are/is missing.
-
Make sure you have tried the solutions mentioned from Problem 1 earlier in
this section.
If the problem still occurs; please check and make sure that you have properly
configured the video and audio sources of the program that you are
attempting to use with your Webcam.
11
WARRANTY INFORMATION:
Gear Head, LLC warrants that this product shall be free from defects in materials and
workmanship for the reasonable lifetime of the product. If the product is defective, Gear Head,
LLC’s sole obligation under this warranty shall be at its election, subject to the terms of this
warranty, to repair or replace any parts deemed defective. This warranty is for the exclusive
benefit of the original purchaser and is not assignable or transferable. THIS WARRANTY IS
MADE IN LIEU OF ALL OTHER WARRANTIES, EXPRESS OR IMPLIED, AND ANY IMPLIED
WARRANTIES, INCLUDING THE IMPLIED WARRANTIES OF MERCHANTABILITY AND
FITNESS FOR A PARTICULAR PURPOSE, ARE LIMITED TO THE TERMS OF THIS
WARRANTY, UNLESS OTHERWISE PROHIBITED BY LAW.
Exclusions
To the fullest extent permitted by law, Gear Head, LLC expressly disclaims and excludes from this
warranty any liability for damages, including but not limited to general, special, indirect, incidental,
consequential, aggravated, punitive or exemplary damages, and economic loss (even if Gear
Head™ is informed of their possibility), third party claims against you, including for any loss or
damages, and claims or damages related to loss of, or, damage to, your records or data. This
warranty does not apply to any product the exterior of which has been damaged or defaced. This
warranty will be voided by misuse, improper physical environment, improper repair, acts of God,
war or terror, commercial use, and improper service, operation or handling.
Technical Support
Gear Head™ provides Technical Support Monday - Friday from 9:00 am – 5:30 pm Eastern Time.
Before calling, please make sure you have available the Model # (located on the front page of your
User’s Manual) and information regarding your computer’s operating system.
Please contact our technicians at
1-866-890-7115
Return Merchandise for Service
Any claim under this warranty must be made in writing to Gear Head, LLC, at the address provide
by our technician, within 30 days after the owner discovers the circumstances giving rise to any
such claim, and must include a copy of this warranty document, a receipt or copy of your invoice
marked with the date of purchase, and the original packaging. You may obtain service by calling
the technician for a Return Merchandise Authorization (RMA) number. The RMA number must be
prominently displayed on the outside of the shipping carton and the package must be mailed to
Gear Head™ postage prepaid.
12


