1
WARNING! Do not expose the apparatus to dripping or splashing. Do not
place objects filled with liquids near the apparatus.
AVERTISSEMENT!N'exposez pas l'appareil à l'égoutture ou à
l'éclaboussement. Ne placez pas les objets remplis de liquides près de
l'appareil.
WARNUNG! Setzen Sie den Apparat nicht Bratenfett oder dem Spritzen aus.
Setzen Sie nicht die Gegenstände, die mit Flüssigkeiten nahe dem Apparat
gefüllt werden.
WARNING! To reduce the risk of fire or electrical shock, do not expose this
apparatus to rain or moisture.
AVERTISSEMENT!Pour réduire le risque du feu ou de choc électrique,
n'exposez pas cet appareil à la pluie ou à l'humidité.
WARNUNG!Um das Risiko des Feuers oder des elektrischen Schlages zu
verringern, setzen Sie diesen Apparat nicht Regen oder Feuchtigkeit aus.
WARNING! Equipment must be connected to a Mains socket outlet with a
protective earthing connection.
AVERTISSEMENT!L'équipement doit être relié à une sortie de douille de
forces à un raccordement de mise à la terre protecteur.
WARNUNG!Ausrüstung muss an einen Hauptleitungseinfaßungsanschluß
mit einem schützenden Erdunganschluß angeschlossen werden.
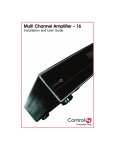
MS616A Switch 16 Channel
Audio
Installation and Setup Guide
•
Communicates with control devices via Ethernet 10/100 port and ZigBee
(a wireless standard for mesh-networking).
Backlighting feature turns on with any button push or Select Dial push and stays lit
for a preset time (default is 30 seconds).
About the Switch 16 Channel Audio
Front View
Connect Input and Output Devices
1. Connect audio source devices (such as CD changers or players, tuners,
iPods, or tape players) you want included in the system to the audio in jacks.
2. Connect amplifiers or amplified speakers as needed to the audio out jacks.
Connect to the Network and Power
1
Network Requirement: Ethernet or ZigBee 802.15.4 mesh network
Table 1-1. MS616A Technical Specifications
Inputs
# of Channels
16 L/R Stereo Pairs
Input Connectors
RCA Jacks
Input Impedance
10 kΩ typical
Supported Models
Nominal Input Level
-14 dBV
This installation guide covers this Switch 16 Channel Audio model:
Maximum Input Level
+4 dBV
• Europe: EFMS616A/N1B
• UK: EFMS616A/T1B
Outputs
# of Channels
16 L/R Stereo Pairs
What’s in the Box
Output Connectors
RCA Jacks
The following items are included in your Escient Switch 16 Channel Audio
Output Impedance
50 Ω typical
Nominal Output Level
-14 dBV
Maximum Output Level
+4 dBV
•
•
•
Escient Matrix Switch 16 Channel Audio (MS616A)
IEC power cord
This manual
Safety Instructions
Zone (Output) Control:
1.
2.
3.
4.
5.
6.
7.
Available Gain
Mute (-75 dB) to -40 to +8 dB
Treble
-12 to +12 dB, 2 dB steps, High Shelving EQ
Bass
-12 to +12 dB, 2 dB steps, Low Shelving EQ
Balance
L/R
Read these instructions.
Keep these instructions.
Heed all warnings.
Follow all instructions.
Do not use this apparatus near water.
Clean only with dry cloth.
Do not block any ventilation openings. Install in accordance with the manufacturer’s instructions.
8. Do not install near any heat sources such as radiators, heat registers, stoves,
or other apparatus (including amplifiers) that produce heat.
9. Do not defeat the safety purpose of the polarized or grounding-type plug. A
polarized plug has two blades with one wider than the other. A grounding-type
plug has two blades and a third grounding prong. The wide blade or the third
prong is provided for your safety. If the provided plug does not fit into your outlet, consult an electrician for replacement of the obsolete outlet.
10.Protect the power cord from being walked on or pinched, particularly at plugs,
convenience receptacles, and the point where they exit from the apparatus.
11.Only use attachments/accessories specified by the manufacturer.
12.Use only with the cart, stand, tripod, bracket, or table specified by the manufacturer, or sold with the apparatus. When a cart is used, use caution when
moving the cart/apparatus combination to avoid injury from tip-over.
13.Unplug this apparatus during lighting storms or when unused for long periods
of time.
14.Refer all servicing to qualified service personnel. Servicing is required when
the apparatus has been damaged in any way, such as when a power-supply
cord or plug is damaged, liquid has been spilled or objects have fallen into the
apparatus, the apparatus has been exposed to rain or moisture, does not operate normally, or has been dropped.
Input Power Requirement:
Voltage
100-240V~
Frequency
50/60 Hz
Amps
0.12/0.06 Amps
Watts
14.4 Watts
Additional Resources
The following resources are available:
•
•
Your Escient-authorized reseller
Escient Web Site: http://www.escient.co.uk
Features and Benefits
•
•
•
•
Switches up to 16 input sources to up to 16 simultaneous output zones.
Adjustable gain, treble, bass, and balance for each zone
Audio sensing on inputs
Device chassis is three standard rack units (RU) tall and rack mountable conforming to EIA 19” rack standards (13.3 cm x 44 cm x 35.6 cm)
This chapter describes, in general terms, how to set up physical connections
required for the Switch 16 Channel Audio and all associated devices. Refer to any
device-specific documentation for additional installation instructions.
To set up the logical connections required, refer to Escient Composer Pro User
Guide software documentation.
Requirements and Specifications
Technical Specifications
3. Connect to the Network and Power
4. Set Up Logical Connections
5. Static IP Modifications
2
3
1. Front Display—For displaying or setting audio switch settings and navigating
system menus
2. Buttons—For choosing options or menus displayed in the front panel user
interface
3. Select Dial—For scrolling through and selecting screen elements or options
displayed in the LCD
1. If you are using an Ethernet connection for the Switch 16 Channel Audio, plug
the data cable from the home network connection into the Switch 16 Channel
Audio RJ-45 port (labeled Ethernet) and the network port in your wall or at the
network hub or switch.
2. Connect the power cord provided to the back of the Switch 16 Channel Audio
and to the power outlet. Once the power cord is connected, the Switch 16
Channel Audio should power up.
Set Up Logical Connections
Back View
Physical and logical connections are required in order to control, navigate, and
use the Switch 16 Channel Audio as designed.
Thus far you have set up the physical connections for the Escient Switch 16
Channel Audio. To complete the logical setup, trained installers must use a PC
connected (and with Escient Composer software installed) to the home network. If
you are a trained Escient installer, refer to the Composer Help file.
Network Configuration
1
2
3
4
1. Power Plug Port—For standard IEC cord (included). Supports universal AC
input (100-240 VAC 50/60 Hz).
2. Ethernet—RJ-45 for a 10/100 Mb Ethernet connection
3. Audio In (Left-Right pairs) 1-16—RCA jacks for stereo channel input for up
to 16 stereo analog sources
4. Audio Out (Left-Right pairs) 1-16—RCA jacks for stereo channel line output
for up to 16 amplifiers
Source Inputs
Each of the 16 signal sensing analog audio inputs (the RCA style ports) is labeled
1-16 for each individual source.
Audio Outputs
The system automatically creates generic source names displayed in the front of
the device. To change these names, you must update your system using
supported system designing software (such as Composer Pro on a PC). For more
information, refer to the documentation that shipped with your Escient controller or
contact your professional installer or reseller.
Front Display
The best method of initially setting up system routing for the Switch 16 Channel
Audio is using Composer Pro software on a PC (for trained installers only). You
can also make adjustments from the front display.
The front display allows you to set or change audio source routing and change
zone settings for volume, bass, treble, and mute. The display also shows the
current source and zone activity.
To set the network configuration:
1. At the In to Out Assignments screen, press the Network button.
2. On the Network Configuration screen, choose an Ethernet or ZigBee network
by rotating and pressing the Select Dial.
IMPORTANT! When making logical connections in Composer,
identify the device as the network type (Ethernet or Zigbee) that you
choose on the device network configuration. To avoid unexpected
behavior, do not identify the device as both network types.
IMPORTANT! En établissant les rapports logiques dans le
compositeur, identifiez le dispositif comme type de réseau (Ethernet
ou Zigbee) ce vous choisissent sur la configuration réseau de
dispositif. Pour éviter le comportement inattendu, n'identifiez pas le
dispositif en tant que les deux types de réseau.
WICHTIG! Wenn Sie logische Beziehungen im Komponisten
herstellen, identifizierenen Sie die Vorrichtung als die Netzart
(Ethernet oder Zigbee) diese Sie wählen auf der
VorrichtungsNetzwerkkonfiguration. Um unerwartetes Verhalten zu
vermeiden, identifizierenen Sie die Vorrichtung nicht als beide
Netzarten.
3. If the switch is set to use a ZigBee network, the EUID, Gateway, and ZigBee
channel number are displayed. This screen has two menu options:
• Identify: When identifying the switch in Composer, press this button.
• Back: Returns to the Network Configuration screen.
4. If the switch is set to use an Ethernet network, the MAC address, method of
obtaining a network IP address, the device’s IP address, Subnet Mask, and
Gateway are displayed.
The Switch 16 Channel Audio, by default, uses DHCP to obtain a network
IP address.
Set Up the Switch 16 Channel Audio
This device operates as part of the Escient home system, which requires physical
and logical connections to function as designed.
Essential setup tasks include:
1. Connect Input and Output Devices
2. Connect Input and Output Devices
If the local area network does not support DHCP, you can configure the
switch to use a Static IP address instead:
a. Press the Select Dial to enter Edit mode.
b. Press the Down or Up button (or rotate the Select Dial) to choose Static IP.
Edison Test Lab (ETL)
Manage Outputs
View Output Assignments
To view output assignments:
Set Front Display Preferences
To set your viewing preferences for the front display:
1. On the Output to Input screen, press the Display button. The Display Configuration screen displays.
The screen consists of 16 output zones and any assigned input source. The
shaded arrow indicates the Output currently selected.
To explore these menu options, press the buttons on the front panel:
•
Use the Select Dial to scroll the number up or down and edit as needed,
then press the Select Dial to move to the next field within the number.
•
•
Setup: Displays an output-specific screen. The most recent screen accessed
is displayed by default, but you can choose to view a different output’s setting
by changing the Output number.
Network: Displays the Network Configuration screen. From this screen, you
can select Ethernet or Zigbee.
Display: Displays the Display Configuration Screen.
Configure an Output
To change output source or settings:
•
•
1. Ensure your Switch 16 Channel Audio is powered up and that the In to Out
Assignments screen displays in the front display.
2. On the In to Out Assignments screen, view the current input-to-output assignments.
c. Press OK (or press the Select Dial).
d. Press Save (or press the Select Dial).
5. Edit the IP, Mask, and GWay fields for the Static IP network: Use the Select
Dial to select a line, then press the dial.
This product has been tested by ETL and has been found to be in
compliance with:
UL 60065: 2003: Seventh Edition, “Standard for Audio/Video and
Musical Instrument Apparatus for Household, Commercial, and
Similar General Use”
CSA C22.2 No. 60065-03: Issued: 2003, First Edition, Revision: 2007 “Audio,
Video and Similar Electronic Equipment”
Europe
CE Declaration of Conformity
Use the buttons and/or the Select Dial to choose a setting to change: Once
you press the Select button (or press the dial), you enter Edit mode.
2. In Edit mode, use the buttons or Select Dial to change the highlighted setting
then press the OK button (or press the dial) to save the change and exit.
• Brightness: Supported range: 0 to 100
• Contrast: Supported range: 0 to 100
• Backlight Timeout: Supported settings are:
• OFF (always off)
• 1 to 90 seconds (default is 30 seconds)
• ON (always on)
• Reset Defaults: Restores factory defaults.
Regulatory Compliance
This product complies with standards established by the following regulatory
bodies:
1. On the Output to Input screen, press the Setup button to view the output settings of the default output screen (which is the last output screen accessed).
European Contact Information
DMI Europe
5653 MA Eindhoven
The Netherlands
Phone: +312507889
Fax: +312507840
web: www.dm-i.eu
email: [email protected]
United States Contact
Information
Escient
6640 Intech Blvd. Suite 250
Indianapolis, IN 46278
Phone: 317.616.6789
Fax: 317.616.6790
web: www.escient.co.uk
email: [email protected]
Product: Switch16 Channel Audio (Model # MS616A)
The undersigned hereby declares, on behalf of Escient Corporation, that the
above-referenced product, to which this declaration relates, is in conformity with
the provisions of:
•
•
•
Council Directive 89/336/EEC (May 3, 1989) on Electromagnetic Compatibility
Council Directive 1999/5/EC (Mar 9, 1999) on Radio & Telecommunication
Terminal Equipment (R&TTE)
Council Directive 73/23/EEC (Feb. 19, 1973) on Low Voltage Equipment
Safety
Council Directive 93/68/EEC (Jul. 22, 1993) Amending Directives 89/336/EEC
and 73/23/EEC
6. When finished editing, press Save.
•
Use Switch 16 Channel Audio
and has been tested to the requirements of, and shown to be in compliance
with, the following requisite standards:
•
This chapter introduces the user interface available to Switch 16 Channel Audio
users and common system tasks you can perform with the Switch 16 Channel
Audio from the front display.
NOTE: Following initial setup, you may never need to manually change settings on the
Switch 16 Channel Audio. This device is managed by the Escient system. The use of
this chapter is completely optional.
This device assists in fulfilling a room-specific music request. To play music, use a
system navigation device available to your current room to choose a specific
music source or a device. That device may or may not need to make use of this
switch.
2.
3.
View Output Assignments
Once you complete the physical and logical setup tasks, you can view or change
setup configuration in the Switch 16 Channel Audio front display.
When you power up the Switch 16 Channel Audio, the following System Status
screen appears momentarily.
4.
5.
6.
7.
8.
9.
The System Status screen is then replaced by the In to Out Assignments screen.
From the output screen, you can: (1) change to another output screen; (2)
change the output settings on the screen; or (3) toggle to the Input Signal
Sensing screen.
If the output-specific screen you want to view did not display, use the Select
Dial to highlight and select the output number and then change it.
(Optional) Change settings for the current output using the supported ranges:
• Input: Displays the number of the currently assigned input source and any
label given to the input source. You can change this setting to any available
input sources.
• Gain: Supported range: Mute and -44 to +4 dB (default: 0 dB)
• Treble: Supported range: -12 to +12 dB (default: 0 dB)
• Bass: Supported range: -12 to +12 dB (default: 0 dB)
• Balance: Supported range: -50 to +50dB (default: 0 dB)
To toggle to view input signal sensing information, press the Inputs button.
To exit the screen, press the Exit button.
Rotate the Select Dial to highlight a setting.
Press the Select Dial to enter edit mode.
Rotate the dial to change the setting; then press the dial to Save the new setting and exit edit mode or, to exit without saving, use the Cancel button.
Press the Inputs button to go to the Input Signal Sensing screen, or press the
Exit button to return to the Output to Input screen.
Check Signal Status
1. From the Output to Input screen, press the Setup button, then press the Inputs
button to access the Input Signal Sensing screen.
•
North America
FCC
FCC ID: R33C416S2EB
This device complies with Part 15 of the FCC Rules. Operation is subject to the
following two conditions: (1) This device may not cause harmful interference, and
(2) this device must accept any interference received, including interference that
may cause undesired operation.
This equipment has been tested and found to comply with the limits for a Class B
digital device, pursuant to Part 15 of the FCC Rules. These limits are designed to
provide reasonable protection against harmful interference in a residential
installation. This equipment generates uses and can radiate radio frequency
energy and, if not installed and used in accordance with the instructions, may
cause harmful interference to radio communications. However, there is no
guarantee that interference will not occur in a particular installation. If this
equipment does cause harmful interference to radio or television reception, which
can be determined by turning the equipment off and on, the user is encouraged to
try to correct the interference by one of the following measures:
•
•
•
•
Reorient or relocate the receiving antenna.
Increase the separation between the equipment and receiver.
Connect the equipment into an outlet on a circuit different from that to which
the receiver is connected.
Consult the dealer or an experienced radio/TV technician for help.
IMPORTANT! Changes or modifications not expressly approved by
Escient could void the user’s authority to operate the equipment.
Once you make an assignment, the screen displays the assignment. For
example, Output 1 is mapped to Input 1.
2. On the Input Signal Sensing screen, a shaded circle appears by the device
connection number of any input device with a signal present.
IMPORTANT! Les changements ou les modifications pas
expressément approuvés par Escient ont pu vider l'autorité de
l'utilisateur pour actionner l'équipement.,
View Network Settings
WICHTIG! Die Änderungen oder Änderungen nicht ausdrücklich
genehmigt durch Escient konnten die Berechtigung des Benutzers
aufheben, um die Ausrüstung zu betreiben.,
To view network settings:
1. Press Network.
2. From the Network Configuration screen, select Ethernet or Zigbee.
3. To return to the Network Configuration screen, press Back.
Industry Canada
IC: R33C416S2EB
This Class B digital apparatus complies with Canada ICES-003.
Cet appareil numérique de la classe B est conforme à la norme NMB-003 du
Canada.
•
•
•
EN 300-328 V1.7.1 (2006-10), Electromagnetic Compatibility and Radio Spectrum Matters (ERM); wide band transmission systems; data transmission
equipment operating in the 2.4 GHz ISM band and using wide band modulation techniques.
EN 55024:1998 incorporates: EN61000 (4-2, 4-3, 4-4, 4-5, 4-6, 4-8, 4-11 and
A1 & A2)
EN 61000-3-2:2005, Limits for harmonic current emissions
EN 61000-3-3:2002, Limitation of voltage fluctuations and flicker in low voltage
supply systems
IEC 60065:2001+ and 1: 2005 "Standard for Audio/Video and Electronic
Equipment"
Australia/New Zealand
AS/NZS CISPR 22: 2006—Information Technology Equipment--Radio
disturbance characteristics.
Dansk: Vigtigt! Lederen med grøn/gul isolation må kun tilsluttes en
klemme mærket
eller
Norsk: Apparatet må tilkoples jordet stikkontakt.
Suomi: Laite on liitettävä suojamaadoituskoskettimilla varustettuun pistorasiaan.
Svensk: Apparaten skall anslutas till jordat uttag.
Recycling
Warranty
Limited 2-year Warranty. Refer to www.escient.co.uk/warranty
About this Document
Copyright © 2004-2009 Escient. Escient and the Escient logo are registered
trademarks of D&M Holdings, Inc. All other trademarks are properties of their
respective owners.
Part Number: MS616A_0409