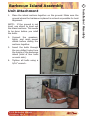
1
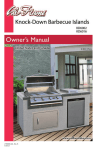
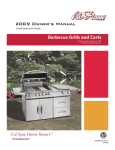
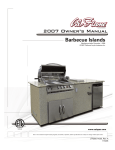
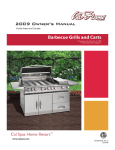
LTR20091036, Rev. A
12/16/08
Barbecue Island Assembly . . . . . . . . . . 5
Unit Attachment . . . . . . . . . . . . . . . . . . . . . . 5
Stucco and Tile Application . . . . . . . . . . . . . 6
Rock / Stone Application . . . . . . . . . . . . . . . 7
Granite Kit Instructions . . . . . . . . . . . . . . . . 9
Griddle and Griddle Storage . . . . . . . . . . . . 10
Light Switch Installation . . . . . . . . . . . . . . 11
Cleaning and Maintenance . . . . . . . . . . 12
About Natural Stone . . . . . . . . . . . . . . . . . . 12
Granite Top . . . . . . . . . . . . . . . . . . . . . . . . . 13
Tile . . . . . . . . . . . . . . . . . . . . . . . . . . . . . . . . 14
Synthetic Panel . . . . . . . . . . . . . . . . . . . . . . 16
2009 Warranty . . . . . . . . . . . . . . . . . . . 17
Copyright 2008-2009 LMS, Inc. All rights
reserved. Duplication without written
consent is strictly prohibited.
Cal Flame ® is a registered trademark.
Due to continuous improvement programs, all models, operation, and/or
specifications are subject to change without prior notice.
LTR20091036, Rev. A
12/16/08
CONTACT INFORMATION
For customer service, please contact
your authorized dealer immediately. If
you need additional information and/or
assistance, please contact:
Customer Service Department
1462 East Ninth Street
Pomona, CA 91766
Toll Free: 1-800-CAL-SPAS
Fax: 1-909-629-3890
www.calspas.com
Safety Instructions
1
Placement and Location
• Cal Flame™ grills and carts are designed for outdoor use
only.
•
Never locate this appliance in an enclosed room, under a sealed
overhead structure, or in any type of enclosed area such as a garage, shed, or breezeway. Keep clear of trees and shrubs.
•
Do not place this grill under or near windows or vents that can be
opened into your home.
•
Cal Flame™ grills are not intended for installation in or on recreational vehicles or boats.
•
Maintain sufficient distance as to not overheat any overhead combustible material such as a patio cover.
•
The area surrounding your new grill should be kept clean and free
from flammable liquids and other combustible materials such as
mops, rags or brooms, as well as solvents, cleaning fluids, and
gasoline.
•
Do not use the grill, grill cabinet, or area surrounding the grill as a
storage area for flammable or plastic items. Do not store the liquid
propane (LP) cylinder in the vicinity of this or any other appliance
when it is not being used.
Set-Up
•
Before installing built in grills in enclosures, copy all product information such as model number, serial number and type of grill
(e.g. natural gas or LP) and store information in a safe place. This
information is located on a plate located behind the grill and is visible when the hood is lowered or on the right side of the chassis.
There is an area on the back cover of this manual where you can
write down this information.
•
We recommend that a licensed contractor install your Cal Flame™
grill. Installation must conform to local codes, or in the absence
of local codes, with either the National Fuel Gas Code, ANSI
Z223.1 / NFPA54, Natural Gas and Propane Installation Code,
2009 Barbecue Islands
LTR2009103, Rev. A
www.calspas.com
Safety Instructions
WARNING: Improper installation, adjustment, alteration,
service or maintenance can cause injury or property damage. Read
the installation, operating and maintenance instructions thoroughly
before installing or servicing this equipment.
Safety Instructions
2
CSA B149.1, or Propane Storage and Handling Code, B149.2),
as applicable.
•
Your Cal Flame™ grill or cart must be plugged into a permanent,
grounded 110V outlet with a dedicated 15A GFCI breaker in accordance with local codes or the National Electrical Code, ANSI /
NFPA 70, or the Canadian Electrical Code, CSA C22.1.
•
Do not use an extension cord to supply power to your Cal Flame™
grill or cart. Such use may result in fire, electrical shock or other
personal injury. Do not install a fuse in the neutral or ground circuit. A fuse in the neutral or ground circuit may result in an electrical shock hazard. Do not ground this appliance to a gas supply
pipe or hot water pipe. Keep any electrical supply cords and the
fuel supply hose away from any heated surfaces.
•
To prevent fire and smoke damage, remove all packaging material
before operating grill.
•
Before you start cooking, clean the entire grill thoroughly with hot,
soapy water. This is necessary to remove residual solvents, oil and
grease used in the manufacturing process. The grates should also
be thoroughly cleaned in the same manner.
Operation
•
In the event that a burner goes out, turn burner knobs to the full
OFF position, fully open the grill hood and let it air out. Do not attempt to use the grill until the gas has had time to dissipate.
•
Never use the grill if the drip pan is not properly installed. Drip
pan should be pushed all the way to the rack located just under
the grill. Fire or explosion can result from an improperly installed
drip pan.
•
Keep all electrical supply cords and the rotisserie motor cord away
from the heated areas of the grill.
•
Never use the grill or side burner in windy conditions. If used in a
consistently windy area a windbreak will be required. Always adhere to the specified clearances listed in this manual.
•
Never line the grill or side burners with aluminum foil.
•
When the unit is not in use, be sure to turn off the gas at the LP
tank.
2009 Barbecue Islands
www.calspas.com
LTR20091036, Rev. A
3
Do not install or operate your grill unit in such a manner that the
cross ventilation openings are blocked. Fresh air must be able to
pass though installed vents to safeguard against residual gas accumulation. Failure to allow proper ventilation may cause fire or
explosion.
•
When handling LP gas line and connectors, do not allow them to
come in contact with any metal surfaces of the cart or cabinet. Do
not drop LP connectors.
•
Gas sources to the grill and side burners must be regulated. Do
not operate grill or side burners if regulators have been removed,
fire or explosion can occur.
•
Never leave the grill and side burners unattended when in use.
When using pots and pans, boil-overs will cause smoking and
greasy boil-overs may ignite.
•
Always use the proper size pan. Select utensils with flat bottoms
large enough to cover the burner. The use of under-sized utensils
exposes the sides of the utensils to direct contact with a portion
of the flame. This can scorch utensils and hamper cleanup. Excessive flames on large stainless steel pots can result in permanent
discoloration. For best results, we recommend commercial quality
aluminum pans and utensils.
•
Always position handles of utensils so they do not extend over adjacent work areas or cooking areas. This reduces the risk of burns,
ignition of flammable materials, and spillage due to accidental contact with the utensils.
•
Do not use water on grease fires. Never pick up a flaming pan.
Turn the appliance off and smother the flaming pan with a tightfitting lid, a cookie sheet or a flat tray. For flaming grease outside
of the pan, smother it with baking soda or use a dry chemical or
foam-type fire extinguisher.
•
Never allow clothing, pot holders or other flammable materials
come in contact with or be close to any grate, burner or hot surface until it has fully cooled. Never wear loose fitting or hanging
garments while using your grill. Fabric may ignite and result in
personal injury.
•
When using the grill, do not touch the grill rack, burner grate, or
immediate surroundings as these areas become extremely hot and
can cause burns.
2009 Barbecue Islands
LTR2009103, Rev. A
www.calspas.com
Safety Instructions
•
Safety Instructions
4
•
Only use dry pot holders and do not use a towel or other bulky
cloth in place of pot holders. Moist or damp pot holders used on
hot surfaces can cause burns.
•
Do not heat any unopened glass or metal container of food on the
grill. Pressure may build up and cause the container to burst, possibly resulting in serious personal injury or damage to the grill.
•
Do not reach over your grill or any other surfaces when hot or in
use.
Maintenance and Repair
•
Spiders and other insects can nest in the burners of the grill and
block the gas and airflow to the burner ports. This creates a dangerous condition that can result in a fire behind the valve panel. Inspect and clean the burners periodically and follow the guidelines
in the Cleaning and Maintenance section of this manual.
•
Unless specifically recommended in this manual, do not repair or
replace any part of the grill. A qualified technician should perform
all service. Any repairs made by a non- LMS approved dealer technician will void your warranty.
Storage
•
When your gas grill is not in use, turn off the gas at the supply
cylinder.
•
Storage of a grill or cart indoors is permissible only if the supply
cylinder is disconnected and removed.
Precautions Regarding Children
•
Never leave children unattended in the area where the grill is being used.
•
Do not store items of interest to children around or below the grill
or cart.
•
Never allow children to sit or stand on any part of the grill or cart.
2009 Barbecue Islands
www.calspas.com
LTR20091036, Rev. A
Barbecue Island Assembly
5
1. Place the island sections together on the ground. Make sure the
ground where the barbecue is placed is as level as possible for best
alignment.
NOTE: If the ground is not
level, use shims to level out
the island sections. This needs
to be done before you intall
the bolts.
2. Connect the speakers,
lights, and main power
cables before sliding the
sections together.
3. Insert the bolts through
the pre-drilled holes from
the inside of the barbecue
island (total of four bolts
on each side).
4. Tighten all bolts using a
9/16” wrench.
2009 Barbecue Islands
LTR2009103, Rev. A
www.calspas.com
Installation / Assembly
Unit Attachment
Installation / Assembly
6
Stucco and Tile Application
1. Prepare and fill the gap or seam line with speed set.
2. Using your fingertips, push and flatten out the speed set into the
seam line.
NOTE: Allow the speed set to dry before proceeding with the next
step.
3. Using a small brush or hopper gun, apply stucco to the seam line.
4. Mix grout with water in a container.
5. Fill the tile seam line with grout using a small spatula or your finger.
6. Clean the grout with a damp rag.
7. Let the grout and stucco dry for at least three hours.
2009 Barbecue Islands
www.calspas.com
LTR20091036, Rev. A
7
1. Place the island sections together on the ground.
2. Make sure the ground where the barbecue is place is as level as
possible for best alignment.
NOTE: If the ground is
not level, use shims to
level out the island sections. This needs to be
done before you place
the bolts.
3. Connect the speakers, lights, and main
power cables before
sliding the sections
together.
4. Insert the bolts
through the predrilled holes from
the inside of the
barbecue island (total of four bolts on
each side). Tighten
all bolts using a
9/16” wrench.
5. Prepare mortar in a
container.
6. Apply mortar to
the gaps left open
between the island
assembly (front and
back).
7. Let it dry for 15 to 30 minutes and brush the area where the mortar
mix was applied.
8. Prepare grout in a second container.
2009 Barbecue Islands
LTR2009103, Rev. A
www.calspas.com
Installation / Assembly
Rock / Stone Application
Installation / Assembly
8
9. Fill the tile seam with grout using a small spatula or your finger.
10. Clean the grout with a damp rag.
11. Let the grout and mortar dry for at least three hours.
2009 Barbecue Islands
www.calspas.com
LTR20091036, Rev. A
9
Granite kits come in the following colors. Each contains various tinting
colors as listed below:
Sapphire
Brown
Giallo
Veneziano
New Venetian Gold
Uba Tuba
(Labrador)
Black
Red-Brown
White
Black
White
Yellow
Yellow
White
Blue
Black
Blue
Green
Brown
White
1. Pour a small amount of epoxy resin and a small drop of each tint
color on a piece of a cardboard.
NOTE: Refer to the granite tint color reference chart
2. Apply a small amount of the first tint color to the epoxy resin using
a mixing stick and mix well.
3. Apply a small amount of the second tint color to the epoxy resin
and mix well.
4. Apply a small amount of
the next tint colors, one
at a time to the epoxy
resin and mix well.
5. Compare color of mixed
epoxy resin with the color of the counter top.
6. If the colors do not
match,
add
small
amounts of tint color
(one at a time) and mix
until the resin mixture
matches the color of the
granite top.
7. Add a small amount of
hardener to the matching resin mixture and
mix well.
2009 Barbecue Islands
LTR2009103, Rev. A
www.calspas.com
Installation / Assembly
Granite Kit Instructions
Installation / Assembly
10
8. Quickly fill one portion of the seam line with the epoxy mixture.
Remove the excess epoxy material from the seam line using a
razor blade.
9. Let the epoxy material cure for five minutes.
10. Pour a small amount of epoxy and hardener separately on a piece
of cardboard.
11. Mix the epoxy material well with the hardener.
12. Quickly apply the epoxy mixture to the seam line. Remove the
excess epoxy material from the seam line using a razor blade.
13. Let the epoxy material cure for five minutes.
14. Repeat the previous steps until all the seam line is filled with epoxy
mixture.
15. Clean the surface of the seam line with acetone.
Griddle and Griddle Storage
Similar to installing a drawer, you need to have a cutout on your barbecue island as shown below. Align the enclosure as shown, opening
facing out. Make sure the enclosure is aligned horizontally. Tighten the
mounting screws on both side of the enclosure to lock the enclosure in
place. Slide the griddle into the enclosure to test the installation.
2009 Barbecue Islands
www.calspas.com
LTR20091036, Rev. A
11
If you have the hardware interior island option, you will need to install
the light kit. The kit consists of a 12-volt light, a wiring harness and a
microswitch and bracketry.
The microswitch mounts to the bracket with a supplied set of screws
and nuts.
Once you mount the the switch bracketry, choose a location for the
light. The light can be mounted anywhere in the island that provides
you with the light you need for your internal storage area.
The 12-volt light portion of your kit will have the necessary mounting
hardware. Be sure to keep the light within the range of the provided
wire harness and the hot portions of the grill.
LED Lights
The switch for the LED lights is located in a covered utility box on the
side of the barbecue island. Flip it up to turn all the lights on.
2009 Barbecue Islands
LTR2009103, Rev. A
www.calspas.com
Installation / Assembly
Light Switch Installation
Cleaning and Maintenance
12
Cleaning and Maintenance
About Natural Stone
A natural characteristic of granite and marble is its inherent lack of
uniformity. Because it is a completely natural material, it can have a
great deal of variation in color, shade, finish, tint, hardness, strength,
and so on.
Any time you use natural stone, you can always expect differences
from one tile to the next. You will frequently see dry seams, pit or fossils. These areas are often filled in at the factory. Over time through
normal use, the fill may work its way out.
Even though stone tile is a natural product, it nevertheless can be affected by extremes in weather. Both marble and granite are decorative
and durable, but they have different compositions and wear differently
in the elements.
We recommend barbecue island owners keep their island covered if
they are concerned about damage from constant exposure to weather.
This is particularly true in areas where there is snow, ice, or very hot
weather.
Stone is porous, especially marble, and often has natural fissures in the
surface. Constant exposure to extreme heat or cold can cause these
natural features to expand and eventually crack.
Although the stone has been properly finished and is suitable for use in
an outdoor environment, Cal Spas does not apply a weather sealant to
our countertops. We never wish to second-guess how our customers
want to use their barbecues or the locale they will use them in, so we
leave the choice of applying a weather sealant entirely up to owners.
We do not recommend any specific brand or manufacturer, although
there are literally hundreds of excellent products on the market customers may choose from.
In addition to maintaining the stone tile surfaces, barbecue island owners need to know that the grout between the tile, while it is durable,
can also be affected by both extremes in weather and by normal use.
Grout is much easier to repair than stone tile and gaps between the tile
can cause water to seep into the barbecue island and cause damage
to the interior.
In those instances where natural cracks occur, we recommend having
an experienced tile worker filling them with a material of a complementary color. After the filler sets and is sanded smooth, apply a weather
sealant to help prevent further cracking.
2009 Barbecue Islands
www.calspas.com
LTR20091036, Rev. A
13
Clean stone surfaces with a few drops of neutral cleaner, stone soap
(available from Monticello Granite) or a mild liquid dishwashing detergent and warm water. Use a clean rag for best results.
Too much cleaner or soap may leave a film and cause streaks.
Do not use products that contain lemon, vinegar or other acids on the
granite the high acid content may etch the surface.
Rinse the surface thoroughly after washing with the soap solution and
dry with a soft cloth.
Change the rinse water frequently.
Do’s
•
•
•
•
Dust surfaces frequently
Clean surfaces with mild detergent or stone soap
Thoroughly rinse and dry the surface after washing
Blot up spills immediately
Don’ts
•
•
•
•
Don’t use vinegar, lemon juice or other cleaners containing acids.
Don’t use cleaners that contain acid such as bathroom cleaners,
grout cleaners or tub & tile cleaners.
Don’t use abrasive cleaners such as dry cleansers or soft cleansers.
Don’t mix bleach and ammonia; this combination creates a toxic
and lethal gas.
Scratches and Chips
Small scratches are visible because they are lighter in color than the
surrounding areas. Making them darker will hide them. On dark stones,
we have had success using permanent black magic markers. Do not
use them on lighter stones. Apply the marker to the scratch, let it dry,
and then rub it off the surrounding area.
Both marble and granite may chip when subjected to a sudden impact.
If you have a large chip, try to find the loose pieces. They can often be
epoxied back into place. The chip can also be filled with colored epoxy
to match the surrounding stone. Repairing this kind of damage should
be left to other knowledgeable professionals.
2009 Barbecue Islands
LTR2009103, Rev. A
www.calspas.com
Cleaning and Maintenance
Granite Top
Cleaning and Maintenance
14
Tile
If spillage occurs, then clean up as soon as possible.
Care
•
Protect against chipping by using a cutting board.
•
Protect against scratches, especially on natural stone tiles.
•
Avoid hard blows that can chip the tile.
•
Standing water or other liquids can deteriorate tile and grout, and
should always be removed.
Cleaning
Wash with detergent solution, and rinse. To clean dingy grout, occasionally apply a solution of chlorine bleach and water to stand not
more than 5 minutes; rinse thoroughly and wipe dry. General-purpose
household cleaners may also be used if label says can be used on
ceramic tile; follow directions exactly. NEVER use scouring powders or
other abrasives as they will scratch the finish.
Stain Removal Guide
Stain
Removal Agent
Grease and fats
Soda and water or commercial spot lifter
Inks and colored dyes
Household bleach
Blood
Hydrogen Peroxide or household bleach
Coffee, tea, food, fruit, Neutral cleaner in hot water followed by hylipstick, juices
drogen peroxide or household bleach
Caution: Vinegar may damage some tile.
2009 Barbecue Islands
www.calspas.com
LTR20091036, Rev. A
15
•
Do test scouring pads in a small area first.
•
Do use a silicone sealer on grout joints if continuous staining is a
problem.
•
Do read and follow label directions for all cleaners.
•
Do keep this information and refer to it when necessary.
•
Do not combine ammonia and household bleaches.
•
Do not use harsh cleaning agents (such as steel wool pads) which
can scratch or damage the surface of your tile.
•
Do not place sharp object on tile surface.
•
Never use wax to clean tile surface.
Care and Maintenance of Tile Grout
Grout may present a special cleaning problem because it is susceptible
to many staining agents.
Apply a silicone sealer to grout joints several times a year for maximum
protection.
In addition to keeping the grout clean, be sure to keep grout joints in
good repair. Scrape out loose, cracked or powdery joints and refill with
a good grout.
One common grouting trouble spot is the joint between the tub and
and the wall in your bathroom. As the house or tub settles, the grout
may crack and crumble. It’s relatively simple to remedy. Remove the
old grout with a sharp pointed tool, watching out that you don’t scratch
tile or tub. Then dry the joint thoroughly and fill with a flexible tub or
wall caulking compound, such as silicone rubber caulking.
2009 Barbecue Islands
LTR2009103, Rev. A
www.calspas.com
Cleaning and Maintenance
DO’s and DON’Ts of Tile Care
Cleaning and Maintenance
16
Synthetic Panel
Do’s
•
Do dust surfaces frequently.
•
Do clean synthetic panels with water and mild detergent.
Don’ts
•
•
•
•
Don’t use any cleaning chemical to clean or wash synthetic
panels.
Don’t use vinegar, lemon juice or other cleaners containing acids.
Don’t use cleaners that contain acid such as bathroom cleaners.
Don’t mix bleach and ammonia; this combination creates a toxic
and lethal gas.
2009 Barbecue Islands
www.calspas.com
LTR20091036, Rev. A
2009 Warranty
17
All Cal Flame models are warranted to be free from defects in material
and workmanship at time of delivery. This limited warranty is only valid
on Cal Flame models delivered in the United States or Canada and extends through the selling dealer to the original purchaser at the original
site of installation. This warranty becomes valid at time of purchase
and ends either by specified time-frame listed above or upon owner
transfer or relocation.
Structure: LMS warrants the structural frame to maintain its integrity
for the lifetime of the barbecue island.
Components: LMS warrants stainless steel mountings against deterioration and corrosion for the lifetime of the barbecue island.
Decorative Finishes: LMS warrants the decorative finishes at time
of delivery, including, but not limited to, stucco, grout, brick, rock, tile,
granite, and foot rest.
Defects: LMS warrants the barbecue islands and associated hardware
from defects in material and workmanship for a period of one year
from the original date of purchase.
Manufacturer Warranty
The appliance warranty is extended through the manufacturer of the
product. These items include, but are not limited to, the following: Stereos, speakers, refrigerators, keg refrigerators, umbrellas, accessories,
televisions, and DVD players.
Stereo systems are delivered with their own manufacturer’s warranty.
For more information, see their warranties in the owner’s information
package that was delivered with your barbecue island.
Warranty Performance
In the event of a malfunction or defect covered under the terms of this
warranty, a factory authorized service agent of LMS will perform the
necessary repairs. To obtain service, contact the selling dealer. In the
event the consumer is unable to obtain satisfactory customer service
from the selling dealer or service agent, written notification must be
given to the LMS Customer Relations Department within 30 days of
the reported failure. There will be no charge for parts or labor on a
2009 Barbecue Islands
LTR2009103, Rev. A
www.calspas.com
2009 Warranty
LMS, Inc. offers the following limited warranty against defects in material and workmanship on Cal Flame barbecue islands and components.
2009 Warranty
18
covered item. However, the service agent may assess a reasonable
travel or mileage charge per service call. If LMS determines that repair
of a covered item is not feasible, LMS reserves the right to replace the
defective merchandise with merchandise equal in value to the original
purchase price. Warranty repair and / or replacement is the sole discretion of LMS and this warranty does not cover costs therein, including
but not limited to: freight, removal, re-installation, etc. This warrant
is non-transferable and may not be extended beyond the above mentioned time frames under any circumstances, by any of LMS’s representatives.
Warranty Limitations
This warranty is void if the barbecue island has been subject to negligence, alteration, misuse, repairs, dings, dents, scratches, or incorrect
and / or prohibited applications, as specified in the owner’s manual.
Gas lines must be installed by a licensed plumber only or local gas
company agent. Incorrect electrical installation by unlicensed electricians, service by non-LMS authorized representatives, acts of God and
other cases beyond the control of LMS are not covered by this warranty. Please refer to the owner’s manual for examples of exclusions
and common acts invalidating this warranty. This limited warranty applies only to barbecue islands used for personal, family, and outdoor
household purposes. This warranty does not apply to labor charges on
barbecue islands, replacement parts and hardware. This limitation is
retroactive and applies to all barbecue islands manufactured from 2000
and hereafter.
Examples of common acts invalidating this warranty include but are
not limited to:
•
Scratches caused by normal use.
•
Damage caused by extreme weather conditions (hot, cold, etc.)
•
Damage caused by dirt, sand, and/or water damage.
•
Damage caused by continued operation of the barbecue with either known or unknown problems.
•
Damage caused by direct sunlight.
•
Damage caused as a result of failure to follow the operating instructions as defined in this owner’s manual.
This limited warranty applies only to barbecues normally used for personal, family, or household purposes and specifically excludes commercial barbecue islands.
2009 Barbecue Islands
www.calspas.com
LTR20091036, Rev. A
19
LMS shall not be liable for loss of use of the barbecue islands or other
incidental or consequential costs, expense or damages, which may include, but are not limited to, removal of permanent deck or other custom fixtures or the necessity for crane removal. Any implied warranty
shall have duration equal of the applicable warranty stated above.
Natural stone: Rock, travertine, marble, granite, etc. may be characterized by dry seams, pits, chips, cracks, and fossils that are often filled
with grout during installation. These are normal imperfections and are
not considered defects.
Legal Remedies
This limited warranty gives you specific legal rights. You may have
other rights, which may vary from state to state.
Customer Service
For customer service, contact the authorized selling dealer immediately. If you need additional information or assistance, please contact
the LMS Customer Relations Department at 1462 E. Ninth St., Pomona
CA 91766 or call (800) 225-7727.
See your Cal Flame barbecue dealer for a copy of the applicable warranty, details and any questions you may have regarding the warranty
coverage on your barbecue.
Don’t forget to register your new product at www.
calspas.com.
2009 Barbecue Islands
LTR2009103, Rev. A
www.calspas.com
2009 Warranty
Disclaimers
20
WARNING
If the information in this manual is not followed exactly, a fire or
explosion may result causing property damage, personal injury or
loss of life.
Do not store or use gasoline or other flammable vapors and liquids
in the vicinity of this or any other appliance.
Do not store an LP cylinder not connected for use in the vicintiy of
this or any other appliance. A fire resulting in serious injury or death
may occur.
If you are installing a natural gas grill, you are responsible for ensuring that the natural gas line installed is safe to use. LMS, Inc. will
not be held responsible for an improperly installed gas line.
DANGER
What To Do If You Smell Gas
• Shut off gas to the appliance.
• Extinguish any open flame.
• Open lid.
• If odor continues, keep away from the appliance and immediately call your gas supplier or your fire department.
2009 Barbecue Islands
www.calspas.com
LTR20091036, Rev. A
21
2009 Barbecue Islands
LTR2009103, Rev. A
www.calspas.com
LMS Customer Service Department
1462 East Ninth Street
Pomona, CA 91766
Toll Free: 1-800-CAL-SPAS
Fax: 1-909-629-3890
www.calspas.com
LTR20091038, Rev. A
12/16/08