1
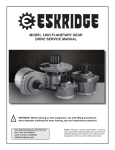
MODEL 130L PLANETARY GEAR DRIVE WITH
INTEGRAL BRAKE SERVICE MANUAL
!
WARNING: While working on this equipment, use safe lifting procedures,
wear adequate clothing and wear hearing, eye and respiratory protection.
THIS SERVICE MANUAL IS EFFECTIVE:
S/N: 56079 TO CURRENT
DATE: 10/01/02 TO CURRENT
VERSION: SM130LD2IB-AD
NOTE: Individual customer specifications (mounting
case, output shaft, brake assembly, etc.) may vary from
exploded drawing and standard part numbers shown.
If applicable, refer to customer drawing for details.
14
5C
5E
6
25A
5D
25B
5B
5A
35C
3
BRAKE ASSEMBLY
(REFER TO BRAKE
EXPLODED DRAWING)
5F
5E
35B
35A
16B
20C
4
20D
30B
16B
1
12
25D
25C
30A
20B
7E
7D
14
20A
7B
16A
7E
7F
2
7A
7C
EQUIPPED WITH PATENTED "LOAD-N-LOCK"
(U.S. PATENT NO. 5746517).
R
SHAFT RETENTION SYSTEM.
X130LD2IB-AB,
Page 1 of 2
Effective date 10/01/02
Model 130L service manual, SM130LD2-AE Page 1
Eskridge, Inc. Olathe, Ks. 913-782-1238
Effective serial # 56079
www.eskridgeinc.com
MODEL 130L WITH
INTEGRAL BRAKE
RATIO'S
BASE
ITEM QTY
OUTPUT SHAFT
1
2
1
3
4
30
30A
1
1
(1)
1
3
3
6
6
3
1
(1)
1
3
3
3
6
3
1
2
(1)
1
2
--1
1
1
1
--8
8
16
16
--2
30B
1
35
35A
35B
35C
1
1
5
5A
5B
5C
5D
5E
5F
6
7A
7B
7C
7D
7E
7F
12
14
16
16A
16B
20
20A
20B
20C
20D
25
25A
25B
25C
25D
X130LD2IB-AB,
Page 2 of 2
Effective date 10/01/02
Effective serial # 56079
1
*
DOUBLE PLANETARY
26.52:1
6.00
4.42
33.15:1
7.50
4.42
36.00:1
6.00
6.00
45.00:1
7.50
6.00
DESCRIPTION
A130 - ROUND FLANGE
B130 - SQUARE FLANGE
E130 - RECTANGULAR
F130 - FLANGELESS
C130 - CUSTOM
D1 23 T 8/16 DP SPL 2.25" LG
D2 3.000" DIA, 5/8" SQ KEY
D3 23 T 8/16 DP SPL 1.22" LG
D4 23 T 8/16 DP SPL 2.72" LG
D5 3.500" DIA, 7/8" SQ KEY
C1 CUSTOM
INTEGRAL BRAKE
INPUT SHAFT 1-6B
CARRIER ASSEMBLY-SECONDARY
CARRIER (SEC)
PLANET GEAR (SEC)
PLANET SHAFT (SEC)
BRG - SEC. PL.
THRUST WASHER - PLANET
ROLL PIN - SEC. PL. 3/16 X 7/8
SUN GEAR
CARRIER ASSEMBLY-PRIMARY
CARRIER (PRI)
PLANET GEAR (PRI)
PLANET SHAFT (PRI)
BRG - PRI. PL.
THRUST WASHER - PLANET
ROLL PIN - PRI. PL. 1/8 X 7/8
RING GEAR
CARRIER THRUST WASHER
SEAL KIT
SHAFT SEAL O-RING
OUTPUT SHAFT BEARINGS
OUTER CONE
OUTER CUP
INNER CONE
INNER CUP
HARDWARE
BOLTS - COVER
LOCKWASHERS - COVER
BOLTS - RING
HARD WASHERS - RING
PLUGS /GREASE ZERK
PLUG - RING
1/4 NPT (SOC. HD.)
GREASE FITTING
MISCELLANEOUS
SHIMS
SPLIT RING
LOCK RING
81-004-0342
81-004-0592
81-004-3072
81-004-1142
81-004-1392L
81-004-0992L
81-004-1412L
81-004-0942L
81-004-1152L
(SEE BRAKE EXPLODED DRAWING)
13-004-9022
13-005-2001
13-004-1062
13-004-1082
13-004-1152
13-005-2031
13-004-1042
13-004-1112
80-004-1151 (
*
13-004-9062
13-004-9022
13-005-2001
13-005-2011
13-004-1062
13-004-1072
13-004-1082
13-004-1092
81-004-0061
01-105-0500
81-004-1561
01-153-0210
13-004-1142
13-004-1152
13-005-2041
13-005-2031
13-004-1052
13-004-1042
13-004-1122
13-004-1112
13-004-1021
01-105-0590
81-004-1561
01-153-0180
81-004-2362
13-004-9062
13-005-2011
13-004-1072
13-004-1092
13-004-1152
13-005-2041
13-004-1052
13-004-1122
81-004-2711
81-016-2941
01-405-0270
01-402-0420
---------------01-102-0020
01-103-0020
01-102-0030
01-103-0030
---------------01-150-1670
01-166-0010
01-150-1460
01-166-0120
---------------01-207-0041
01-207-0020
01-215-0040
----------------QUANTITY DETERMINED BY PRELOAD REQUIRED AND PART STACK-UP)
81-004-8101
81-004-8111
Model 130L with integral brake service manual, SM130LD2IB-AD Page 2
Eskridge, Inc. Olathe, Ks. 913-782-1238
www.eskridgeinc.com
8
EFFECTIVE FOR:
FROM S/N: 73000 10-01-02
TO: CURRENT
4
Model 10 Integral Brake
QTY
1
2
3
4
5
6
1
1
1
1
7
8
9
10
11
12
13
14
15
* * *
* *
ITEM
1
1
1
1
1
1
2
1
PART NO.
DESCRIPTION
13-004-9012
(VARIES)
13-004-9032
13-004-9042
01-261-0501
01-288-0072
CASE - SAE 'A' 2 & 4-BOLT
SHAFT (SEE GEARBOX EXPLODED DRAWING)
PISTON
BACKING PLATE
SPRING (3/4 X 1 BLUE)
FRICTION DISC (ROTOR)
01-288-0082
01-160-0670
01-112-0230
01-400-0220
01-400-0260
01-402-0690
01-402-0830
01-208-0020
01-208-0070
SEPARATOR PLATE (STATOR)
RETAINING RING
THRUST WASHER
BACKUP RING
BACKUP RING
O-RING
O-RING
PLUG (SAE #4)
PLUG (SAE #6)
10
12
5
3
13
11
NOTES:
2
*
1. QTY OF SPRINGS MUST BE 2,4,5,6,8 OR 10 AS DETERMINED BY SPECIFIC
BRAKE REQUIREMENTS.
**
2. TOTAL QTY OF FRICTION DISCS (ITEM 6) AND SEPARATORS (ITEM 7)
MUST EQUAL 8. FULL COMPLEMENT BRAKE INCLUDES
4 FRICTION DISCS (ITEM 6) AND 4 SEPARATORS (ITEM 7).
OPTIONS:
7
1. SEAL KIT, P/N 95-016-2541 (INCLUDES 1 EACH, ITEMS 10,11,12,13)
2. FRICTION DISC KIT 95-016-2551 (INCLUDES 4 EACH ITEM 6)
3. SEPARATOR PLATE KIT 95-016-2561 (INCLUDES 4 EACH ITEM 7)
6
>>> NOTE THAT BRAKE IS SHOWN INVERTED
(UPSIDE-DOWN) RELATIVE TO EXPLODED
DRAWING OF PLANETARY GEARDRIVE.
9
1
15
14
X10IB-AA
ECN -----
12-13-02
Model 130L with integral brake service manual, SM130LD2IB-AD Page 3
Eskridge, Inc. Olathe, Ks. 913-782-1238
www.eskridgeinc.com
LUBRICATION & MAINTENANCE
Using the chart below, determine an appropriate lubricant viscosity. Use only EP (extreme pressure) or API GL-5 designated lubricants.
Change the lubricant after the first 50 hours of operation and at 500 hour intervals thereafter. The gear drive should be partially disassembled to inspect gears and bearings at 1000 hour intervals.
Recommended ambient and operating temperatures for conventional and synthetic gear lubricants
-50
-25
0
25
50
75
100
125
150
175
200
225
250 F
107
121 C
80W90 conventional
75W90 conventional
85W140 conventional
Min Ambient/operating temp
Max Operating temp
Max Ambient temp
75W90 synthetic
80W140 synthetic
-45
-32
-18
-4
10
24
38
52
66
79
93
Note: Ambient temperature is the air temperature measured in the immediate vicintiy of the gearbox. A Gearbox exposed to the direct rays of
the sun or other radiant heat sources will operate at higher temperatures and therefore must be given special consideration. The max operating
temp must not be exceeded under any circumstances, regardless of ambient temperature.
If your unit was specified “shaft up” or with a “-Z” option, a grease zerk was provided in the base housing. For shaft-up operation, the
output bearing will not run in oil and must be grease lubricated. Use a lithium based or general purpose bearing grease sparingly every
50 operating hours or at regular maintenance intervals. Over-greasing the output bearing should be avoided as it tends to fill the housing
with grease and thicken the oil
ESKRIDGE MODEL 130L OIL CAPACITIES
Operating Position
Oil Capacity
Oil Level
Single/Double
stage
Horizontal Shaft
3.0 pints / 1.4 l
To horizontal centerline of
gear drive
Vertical Shaft (Pinion Up)
5.0 pints / 2.4 l
To side port on gear drive
base
Vertical Shaft (Pinion Down)
5.0 pints / 2.4 l
To midway on upper/
primary gear set
ESKRIDGE PART NUMBER INTERPRETATION
Note: All non custom Eskridge Geardrives are issued a descriptive part number which includes information regarding the Model, means of shaft retention, base style, shaft style, input mounting, input shaft size, overall ratio and
various available options. For a detailed breakdown of this information, please refer to Eskridge product specification sheets found at: http://www.eskridgeinc.com/geardrives/gearprodspecs.html
Model 130L with integral brake service manual, SM130LD2IB-AD Page 4
Eskridge, Inc. Olathe, Ks. 913-782-1238
www.eskridgeinc.com
Unit Teardown
1)
Scribe a diagonal line across the outside of the unit from the
cover/brake (3) to the base (1) before disassembly to aid in the
proper positioning of pieces during reassembly.
2)
Remove drain plugs (30B & 15 of brake exploded drawing)
and drain oil from unit. The oil will drain out more quickly and
completely if warm.
3)
Remove
the
8
lockwashers (25B).
4)
Remove the cover/brake (3), thrust washer(s)/bearing(s) (14),
and input gear (4). Inspect o-ring (16B); discard if damaged or
deformed.
5)
Lift the planet carrier assembly out of the unit .
6)
Remove secondary carrier assembly. Remove ring gear (12),
if necessary by removing the 16 1/2-13 12-point cap-screws
(25C & 25D). Inspect the gear to base O-ring (16B); as before,
discard if damaged or deformed.
7)
3/8-16
cap-screws
(25A)
and
The unit is now disassembled into groups of parts.
The area(s) requiring repair should be identified by thorough
inspection of the individual components after they have been
cleaned and dried.
Carrier Assembly Teardown
Rotate planet gears (7B pri/5B sec) to check for abnormal
noise or roughness in bearings (7D pri/5D sec). If further inspection or replacement is required, proceed as follows.
Base Subassembly Teardown
1)
Remove the lock ring (35C) using a heel bar or puller; if
using a heel bar, be sure not to pry against the cage of
the inner output shaft bearing (20C). Remove the split ring
segments (35B) and shims (35A).
Caution: Since the shaft is no longer positively retained,
care should be taken to avoid personal injury. Care should
also be taken not to damage it while pressing through
base.
Note: Removing the shaft from the base assembly damages
the shaft seal and the seal will need to be replaced.
2)
Place base (1) external side down, on a plate or table.
Press output shaft out bottom of base by applying a load
to internal end of shaft until it passes through inner shaft
bearing cone (20C).
3)
A gear puller may be used to remove the outer bearing
cone (20A) from the shaft (2). If reusing old bearing cone,
do not pull on or damage roller cage. Remove the shaft
seal (16A) for inspection or replacement.
4)
Lubricate inner lip of new shaft seal (16A) and slide it onto
the shaft (2) until it fits snugly over the shaft seal diameter
with the open side toward the inside of the gear drive.
Note: Press bearing cone onto output shaft by pressing
on inner race only. DO NOT press on roller cage, as it may
damage bearing.
5)
Inspect inner and outer bearing cups (20D & 20B). If cups
are damaged, drive them out using a brass drift and utilizing the bearing knock-out notches in the base (1)
1)
Drive roll pins (7F pri/5F sec) completely into the planet shafts
(7C pri/5C sec).
2)
Slide planet shafts (7C pri/5C sec) out of carrier (7A pri/5A
sec).
1)
Remove planet gears (7B pri/5B sec), washers (7E pri/5E sec)
and bearings (7D pri/5D sec) from carrier (7A pri/5A sec).
Clean all foreign material from any magnetic oil plugs located on base (1).
2)
Place base (1) exterior side up on work table.
3)
4)
5)
Base Reassembly
Inspect the planet gear (7B pri/5B sec), bearing bore and planet shaft (7C pri/5C sec) and bearings (7D pri/5D sec). Check
for spalling, bruising or other damage and replace components
as necessary.
3)
Apply a layer of lithium or general purpose bearing grease
to the roller contact surface of outer bearing cup (20B).
4)
Press outer bearing cone (20A) onto the shaft until it seats
against the shoulder.
Remove roll pins (7F pri/5F sec) from planet shafts (7C pri/5C
sec) using a 1/16 pri/ 3/16 sec inch pin punch.
5)
Place the shaft (2) with the bearing (20A) into the base
(1).
6)
Flip shaft/base assembly, and apply lithium or
general purpose bearing grease to roller contact surface of the inner cup (20D)., then press
inner bearing cone (20C) onto shaft (2) until it seats against
inner bearing cup (20D).
7)
Prior to installation of the shaft seal (16A), the preload may result in a rolling torque which varies between 50 to 350 in-lb. The bearing preload should be
tailored to your application; a low-speed application may
require a high pre-load, while high-speed applications
usually benefit from low pre-load. Adding shims (35A) will
increase the pre-load on the bearing set. Determine your
pre-load requirement and install shims to obtain this preload.
Carrier Reassembly
1)
Insert the bearings (7D pri/5D sec) into the planet gears (7B
pri/5B sec). Place a planet washer (7E pri/5E sec) on top and
bottom of planet gear and slide into carrier (7A pri/5A sec).
2)
Planet shafts (7C pri/5C sec) should be installed with chamfered end of 1/16 pri/3/16 sec
inch
roll pin hole towards out-side diameter of
carrier (7A pri/5A sec); this will ease alignment of holes while
inserting roll pins (7F pri/5F sec).
3)
Drive roll pin (7F pri/5F sec) into the carrier hole and into planet shaft to retain parts. Repeat for remaining planet gears.
Model 130L with integral brake service manual, SM130LD2IB-AD Page 5
Eskridge, Inc. Olathe, Ks. 913-782-1238
www.eskridgeinc.com
8)
NORMAL OPERATING
POSITION OF
BACKING PLATE
Install the Load-N-Lock™ segments (35B) over the shims
(35A) and into the groove in the shaft (2). Finally, install the
lock ring (35C) over the segments (35B).
Detent
shoulder
Brake Subassembly Teardown
The 10” integral brake is spring loaded (normally applied) and
requires hydraulic pressure to release. All brakes are individually tested at the factory for function, leaks and static breakaway torque and are tested to be within +/-20% of the rated
torque. Because the brake is integral with the gear drive it is
designed to run “wet.” Brake holding torque will be affected by
the actual lubricant used but it is intended for operation with
EP 80/90 gear oil. Orientation of the gearbox also affects the
performance of the brake. With the gearbox mounted horizontally or vertically, pinion-up, the clutch plates will be bathed in
oil and the holding torque will be in the -20% range. With the
gearbox mounted in the vertical, output-down orientation, the
brakes plates will not run in oil and the holding torque should
be in the +20% range.
Continuous
Intermittent
MaxOperating release
pressure (psi)
1500 psi
3000 psi
max Operating Speed
(rpm)
2000 rpm
3000 rpm
Max Operating Temperature (deg F)
170° F
200° F
Oil Volume Required to
Release Brake
0.62 in3
Seal Compatibility
Mineral Based Hydraulic Oil
Backing Plate (4)
Remove the retaining ring (8) as follows:
Gap
Spiral Wound
Retaining Ring (8)
Backing Plate (4)
NOTE: The retaining ring (8) is normally under very high
spring load. DO NOT attempt to remove it without first releasing spring load by depressing the backing plate (4) as
described above. Personal injury and/or damage to the
brake will result if this step is not followed.
2)
Remove springs (5).
8)
Remove piston (3) as follows: Apply low air pressure (2030 psi) to the brake release port while holding one hand on
top of the piston (3). It is a good idea to first place a shop
rag over the piston. The air will force the piston (3) out of
the case (1).
4)
Remove the friction discs (6), separator plates (7), O-rings
(12, 13) and back-up rings (10,11) and thrust washer (9)
from case (1).
1)
Clean all parts prior to inspection.
Note: Item numbers in this section refer to the exploded drawing of the integral brake found on page 3.
1)
Flush
BACKING PLATE DEPRESSED
FOR INSTALLATION OR
REMOVAL OF RETAINING RING
Brake Inspection
a)
With brake assembly oriented large end up as shown in
exploded view, apply downward force on backing plate
(4) to compress springs (5). Each spring exerts about
300 pounds of force.
2)
Case (1): grooves for O-rings and retaining ring should be
clean and free of nicks and dings. Inspect retaining ring
groove for any yielding. Replace housing (1) if yielding
has occured.
b)
Press the plate as far as it will go (about 1/16 inch of travel). This can be done with a hydraulic press or a piece of
(at least 1/2-13) all-thread, washers and hex nuts through
the middle of the brake.
3)
Shaft (2): Should be free of heavy wear. Gear teeth should
show no signs of pitting or surface spalling. Spline on inside and outside of shaft should not show any fretting wear
beyond surface discoloration.
c)
With backing plate (4) pressed away from the retaining
ring (8), start the retaining ring out of the groove by prying
the end of it with a screw driver.
4)
Piston (3): Should be free of all scratches, nicks and dings
on the two diameters that seal against O-rings in the case.
Only very minor scratches may be dressed with 600 grit
and finer emory paper to a 32 micro-inch finish or better.
d)
Grab the end of the retaining ring with your hands and
with a circular motion, work the retaining ring the rest of
the way out of the groove.
5)
Backing plate (4): Shoulder that bears against retaining
ring (3) should be square and free of nicks and dings.
6)
Springs (5): May be reused if no signs of cracks or rust.
Springs do eventually fatigue and fail after many cycles
so it is always recommended that they be replaced during
non-routine servicing.
7)
Friction & separator plates (6 & 7): May be reused if not
excessively worn. There should be 8 parts total in the friction pack, 1-4 friction discs and 4-7 separator plates. Replace friction discs if the full stack measures less than .775
inches height. This height represents a 10% reduction in
holding torque versus “new”.
8)
Retaining ring (8): Should lay relatively flat and round in
Model 130L with integral brake service manual, SM130LD2IB-AD Page 6
Eskridge, Inc. Olathe, Ks. 913-782-1238
www.eskridgeinc.com
the free state. Replace if height measures more than .25” when
checked on a flat surface or if the 2 spiral coils do not lay one on
top of the other.
9)
Back-up & O-rings (10, 11, 12 & 13): It is recommended that
they be replaced during non-routine servicing. They may be
reused if replacements are not available only if they are free of
cuts and wear. Be sure to check all surfaces.
All subassembly service or repairs should be
complete at this time. Continue to Unit Assembly to complete unit buildup.
Unit Reassembly
1)
Install the secondary carrier assembly onto the output
shaft; align the splines of the carrier (5A) with the output
shaft (2) splines and slide the carrier onto the shaft.
Note: Item numbers in this section refer to the gearbox exploded
drawing found on page 1 and 2.
2)
Lubricate o-ring(s) (16B) and install on the base (1) pilot
and cover (3) pilot.
1)
Install thrust washer (9) in case (1).
2)
Friction discs (6) may be installed dry or they may be pre-wetted
with gear oil. A friction disc (6) should be placed in the cased
(1) followed by a separator plate (7). Alternate with friction discs
(6) and separator plates (7) in exactly the same order as they
were removed. There must always be a separator plate (7) on
the exposed (piston ) end of the stack and a friction disc (6) on
bottom end of stack.
Caution: Hold ring gear(s) by outside diameter or use lifting device to prevent injury.
Brake Reassembly
3)
With the friction pack in place, align the splines of the friction
discs (6) using the shaft (item 12 from gearbox exploded
drawing). The shaft must be able to slip all the way through the
friction pack to the thrust washer (9).
4)
Install O-rings (12 & 13) such that they are nearest each other
with the back-up rings (10 & 11) to the outside.
5)
Lubricate the O-rings (12 & 13) and piston (3) with gear or hydraulic oil. Gently slide piston (3) into case (1) using heel of
both hands as far as it will go. Recheck spline alignment of
friction discs with the shaft (item 12 from gearbox exploded
drawing). Using a mallet or light force, press the piston into the
case (1) till it drops below the retaining ring groove.
6)
Install springs (5) into the piston (3). They must be evenly
spaced such that spring force is always balanced side-to-side.
7)
Set backing plate (4) with stepped side up, on top of springs (5)
in case (1). Set the retaining ring (8) on stepped lip on backing
plate (4). Using hydraulic press or suitable apparatus (mentioned above), press and hold the backing plate (4) as far as it
will go below retaining ring groove. Refer to detail view in Dissassembly instructions.
8)
Using your hands, install the retaining ring (8) in its groove in the
case (1). Start one end into the groove and work the rest of it
into the groove with a circular motion. A flat-blade screwdriver
or awl may help in the installation but no other tools should be
needed. If the retaining ring doesn’t go in freely then the backing plate is not pressed far enough into the case (1).
9)
When installed, release the load against the backing plate (4).
Check that the ring is properly seated in the groove and below
the detent shoulder in backing plate (4). Refer to detail view in
disassembly instructions.
10)
Reinstall shaft (12, gear drive drawing or 2, brake drawing)
and verify that it will insert through the brake to the thrust washer (9). If not, apply pressure to the release ports to disengage
the brake. Shaft must insert all the way through to the thrust
washer (9) in order for the brake unit to install properly on the
gear drive
3)
Align gear teeth of secondary ring gear (12) with
the gear teeth of the planet gears (5B) and place
on base then align mounting holes of ring gear
with holes in base. Use the scribed line made
during disassembly for reference.
4)
Install and torque the 16 1/2-13 12-point-head capscrews (25C) with hard washers (25B). The torque for the
cap-screws: 110 ft-lb dry, 90 ft-lb if the fasteners are
lubricated.
5)
Install the primary carrier assembly and sun gear (6) into
the secondary carrier.
6)
Install the input gear (4).
7)
Install the thrust bearing (14) Refer to exploded view for
details.
8)
Noting the scribed line made during disassembly, (with
lubricated o-ring in place) align and install the cover/
brake (3). Install the 8 3/8-16 hex-head cap-screws and
lockwashers (25A and 25B). Tighten to a torque of 45
ft-lb dry, 35 ft-lb if the fasteners are lubricated.
9)
Release the brake with hydraulic pressure on one of the
release ports and, using a splined shaft to drive the input
gear (4) ensure that the unit spins freely.
10)
Fill the unit to the proper level, as specified, with rec-
.
Model 130L with integral brake service manual, SM130LD2IB-AD Page 7
Eskridge, Inc. Olathe, Ks. 913-782-1238
www.eskridgeinc.com