1
Quick Setup Guide
Start Here
HL-5470DW(T)
HL-6180DW(T)
Thank you for choosing Brother, your support is important to us and we value your business. Your Brother product
is engineered and manufactured to the highest standards to deliver reliable performance, day-in and day-out.
Please read the Product Safety Guide first, then read this Quick Setup Guide for the correct setup and installation
procedure.
To view the Quick Setup Guide in other languages, please visit http://solutions.brother.com/.
(HL-6180DW(T)) In USA:
Please go to the Brother Solutions Center at http://solutions.brother.com/ and click Manuals on your model page
to download the other manuals.
Note
Not all models are available in all countries.
1
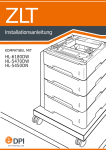
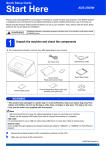
Unpack the machine and check the components
Installer CD-ROM
Drum Unit and Toner Cartridge
Assembly
(pre-installed)
Quick Setup Guide
AC Power Cord
Product Safety Guide
ENG Version 0
1
WARNING
WARNING indicates a potentially hazardous situation which, if not avoided,
could result in death or serious injuries.
CAUTION
CAUTION indicates a potentially hazardous situation which, if not avoided, may
result in minor or moderate injuries.
WARNING
• Plastic bags are used in the packing of your machine. Plastic bags are not toys. To avoid the danger
of suffocation, keep these bags away from babies and children and dispose of them correctly.
• If you use a Lower Tray, DO NOT carry the machine with the Lower Tray as you may be injured or cause
damage to the machine because it is not attached to the Lower Tray.
Note
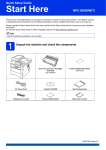
• Keep a minimum gap around the machine as shown in the illustration.
150 mm (6 in.)
150 mm
(6 in.)
150 mm
(6 in.)
150 mm
(6 in.)
• The components included in the box may differ depending on your country.
• We recommend that you save the original packaging.
• If for any reason you must ship your machine, carefully repack the machine in the original packaging to avoid
any damage during transit. The machine should be adequately insured with the carrier. For how to repack
the machine, see Packing and shipping the machine in the User's Guide.
• Illustrations in this Quick Setup Guide are based on the HL-5470DW.
• The interface cable is not a standard accessory. Buy the appropriate interface cable for the connection you
want to use (USB or Network).
USB cable
It is recommended to use a USB 2.0 cable (Type A/B) that is no longer than 2 meters (6 feet).
Network cable
For HL-5470DW(T), use a straight-through Category 5 (or greater) twisted-pair cable for 10BASE-T,
100BASE-TX Fast Ethernet Network.
For HL-6180DW(T), use a straight-through Category 5e (or greater) Shielded Twisted-Pair (STP) cable for
10BASE-T, 100BASE-TX Fast Ethernet Network or 1000BASE-T Gigabit Ethernet Network. When you
connect the machine to a Gigabit Ethernet Network, use the network devices complying with 1000BASE-T.
2
2
Remove the packing
material from the
machine
d
Take out the drum unit and toner cartridge
assembly.
Important
DO NOT connect the AC power cord yet.
a
b
Remove the packing tape from the outside of
the machine.
Open the MP tray a, and remove the packing
tape b from the MP tray support, then close
the MP tray.
e
f
c
Press the front cover release button and open
the front cover. Remove the silica gel pack a.
CAUTION
CAUTION
g
Remove the orange protective material from
the drum unit and toner cartridge assembly.
Hold the drum unit and toner cartridge
assembly level with both hands and gently
shake it from side to side several times to
distribute the toner evenly inside the cartridge.
Put the drum unit and toner cartridge assembly
firmly back in the machine.
DO NOT eat the silica gel pack. Please throw
away. If ingested, seek medical attention
immediately.
h
Close the front cover of the machine.
3
a
b
3
Load paper in the paper
tray
c
d
Pull the paper tray completely out of the
machine.
Fan the stack of paper well to avoid paper jams
and misfeeds.
Put the paper in the tray and make sure:
The paper is below the maximum paper
mark (bbb) a.
Over filling the paper tray will cause paper
jams.
The side to be printed on is face down.
The paper guides touch the sides of the
paper so it will feed properly.
While pressing the green paper-guide release
lever a, slide the paper guides to fit the paper
size you are loading in the tray. Make sure that
the guides are firmly in the slots.
e
f
Put the paper tray firmly back in the machine.
Make sure that it is completely inserted into the
machine.
Lift up the support flap a to prevent paper from
sliding off the face-down output tray.
Note
For Legal or Folio size paper, press the release
button a in the bottom of the paper tray and then
pull out the back of the paper tray.
(Legal or Folio size paper are not available in
some regions.)
4
For more information about recommended
paper, see Recommended paper and print
media in the User's Guide.
4
Important
DO NOT connect the interface cable
yet.
a
b
5
Turn on the machine
Connect the AC power cord to the machine and
then connect it to an AC power outlet.
Wireless setup
(if needed)
For wireless setup using a Macintosh computer or
mobile device, go to a.
For Windows® users (all connections) and Macintosh
users using the USB and wired network connections,
go to b.
a
Turn the machine's power switch on.
If you are using a Macintosh computer or a
mobile device on a wireless network, press a to
choose Yes.
Then go to step 9 on page 17 to continue the
wireless setup.
After finishing the wireless setup you will need
to return to step 6 to finish the machine setup.
Note
If you want to change the language on your
machine first, you can choose No and you will be
able to configure the wireless settings later.
b
If you are using a Windows® computer or want
to connect your Macintosh using USB or wired
network, press b to choose No.
Then go to step 6.
The wireless setup for Windows® users will be
covered in later steps.
5
a
6
Print a test page
Press Go. The machine will print a test page.
Check that the test page has printed correctly.
Note
This function will not be available after the first
print job you send from your computer.
a
b
c
d
7
Set your language
Press a or b to choose General Setup.
Press OK.
Press OK to choose Local Language.
Press a or b to choose your language.
Press OK.
Press Cancel.
Now go to
Next page to install the printer driver.
6
8
Choose your connection type
These installation instructions are for Windows® XP Home/XP Professional/XP Professional x64 Edition,
Windows Vista®, Windows® 7, Windows Server® 2003/2003 x64 Edition/2008/2008 R2 and Mac OS X (versions
10.5.8, 10.6.x and 10.7.x).
Note
You can visit us at http://solutions.brother.com/ where you can get product support, the latest driver updates
and utilities, and answers to frequently asked questions (FAQs) and technical questions.
Windows®
Macintosh
7
Macintosh
Note
To connect your iOS or Android™ device or Windows® Phone to your Brother machine using Wi-Fi Direct™,
please download the Wi-Fi Direct™ Guide at http://solutions.brother.com/.
Windows®
Windows® and Macintosh,
go to page 17
Wireless Network
For Wireless Network
Macintosh
Windows®, go to page 11
Macintosh, go to page 15
Wired Network
For Wired Network
USB
Windows®, go to page 8
Macintosh, go to page 10
Windows®
For USB Interface Users
USB
Windows®
For USB Interface Cable Users for Windows®
a
9
Before you install
b
Click Install Printer Driver, and click Yes if
you accept the license agreement.
Make sure that your computer is ON and you
are logged on with Administrator rights.
Important
• If there are any programs running, close them.
• The screens may differ depending on your
operating system.
b
Turn off the machine and make sure the USB
interface cable is NOT connected to the
machine. If you have already connected the
cable, disconnect it.
Note
For Windows Vista® and Windows® 7 users,
when the User Account Control screen
appears, click Allow or Yes.
c
Choose Local Connection (USB) and then
click Next.
Note
If you want to install the PS driver (BR-Script3
printer driver), choose Custom Install and then
follow the on-screen instructions.
d
10
a
Follow the on-screen instructions until this
screen appears.
Install the printer driver
Put the installer CD-ROM into your CD-ROM
drive. If prompted, select your model and
language.
e
Note
Connect the USB cable to the USB port
marked with the
symbol on your machine,
and then connect the cable to your computer.
If the Brother screen does not appear
automatically, go to My Computer (Computer),
double-click the CD-ROM icon, and then
double-click start.exe.
f
Turn the machine on.
The installation will automatically start.
8
USB
Windows®
Important
DO NOT cancel any of the screens during the
installation. It may take a few seconds for all
screens to appear.
g
h
When the On-Line Registration screen
appears, make your selection and follow the
on-screen instructions. Once you have
completed the registration process, click Next.
When the Setup Complete screen appears,
check the box of the action you want to
perform, and then click Finish.
Note
The installation is now
complete.
XML Paper Specification Printer Driver
The XML Paper Specification Printer Driver is the
most suitable driver for Windows Vista® and
Windows® 7 when printing from the applications
that use the XML Paper Specification documents.
Please download the latest driver by accessing
the Brother Solutions Center at
http://solutions.brother.com/.
9
Macintosh
Note
USB
Finish
Windows®
Depending on your security settings, a Windows®
Security or antivirus software window may appear
when using the machine or its software. Please
allow or permit the window to continue.
USB
Macintosh
For USB Interface Cable Users for Macintosh
a
9
Before you install
Make sure your machine is connected to the
power and your Macintosh is ON. You must be
logged on with Administrator rights.
Important
10
a
b
Install the printer driver
Put the installer CD-ROM into your CD-ROM
drive.
Double-click the Start Here OSX icon. If
prompted, select your model.
For users of Mac OS X 10.5.7 or lower, upgrade
to Mac OS X 10.5.8 - 10.7.x. (For the latest
drivers and information for the Mac OS X you are
using, visit http://solutions.brother.com/.)
Note
If you want to add the PS driver (BR-Script3
printer driver), please go to the Brother Solutions
Center at http://solutions.brother.com/ and visit
FAQ's on your model page for instructions.
b
Choose Local Connection (USB) and then
click Next. Follow the on-screen instructions.
Note
Connect the USB cable to the USB port
marked with the
symbol on your machine,
and then connect the cable to your Macintosh.
c
c
It may take a few minutes for the installation to
complete.
d
e
Choose your machine from the list, and then
click OK.
When this screen appears, click Next.
Make sure your machine's power switch is on.
Note
When the Brother Support screen appears,
make your selection and follow the on-screen
instructions.
Finish
10
The installation is now
complete.
Wired Network
Windows®
For Wired Network Interface Cable Users for Windows®
(For Peer-to-Peer network users)
9
Before you install
TCP/IP
TCP/IP
a Router
b Machine
Note
If you are going to connect the machine to your
network, we recommend that you contact your
system administrator prior to installation.
a
d
• If there are any programs running, close them.
a
port marked with a
Install the printer driver
Put the installer CD-ROM into your CD-ROM
drive. If prompted, select your model and
language.
Note
If the Brother screen does not appear
automatically, go to My Computer (Computer),
double-click the CD-ROM icon, and then
double-click start.exe.
b
Click Install Printer Driver, and click Yes if
you accept the license agreement.
symbol.
Note
For Windows Vista® and Windows® 7 users,
when the User Account Control screen
appears, click Allow or Yes.
c
Choose Wired Network Connection
(Ethernet) and then click Next.
Note
If you want to install the PS driver (BR-Script3
printer driver), choose Custom Install and then
follow the on-screen instructions.
11
Macintosh
Wired Network
Remove the protective cap from the Ethernet
Make sure your machine's power switch is on.
Windows®
• The screens may differ depending on your
operating system.
Connect the network interface cable to the
Ethernet port, and then connect it to a free port
on your hub.
10
Make sure that your computer is ON and you
are logged on with Administrator rights.
Important
b
c
Wired Network
d
Choose Brother Peer-to-Peer Network
Printer and then click Next.
Note
Choose the option of the Firewall setting, and
then click Next.
e
The installation will automatically start.
Important
DO NOT cancel any of the screens during the
installation. It may take a few seconds for all
screens to appear.
Note
• If prompted, choose your machine from the list,
and then click Next.
• If there is more than one of the same model
connected on your network, the IP Address and
Node Name will be displayed to help you
identify the machine.
• You can find your machine’s IP Address and the
node name by printing out the Printer Settings
Page. See Print the Printer Settings
Page on page 31.
f
When the On-Line Registration appears,
make your selection and follow the on-screen
instructions. Once you have completed the
registration process, click Next.
g
When the Setup Complete screen appears,
check the box of the action you want to
perform, and then click Finish.
Note
Depending on your security settings, a Windows®
Security or antivirus software window may appear
when using the machine or its software. Please
allow or permit the window to continue.
Finish
The installation is now
complete.
Note
XML Paper Specification Printer Driver
The XML Paper Specification Printer Driver is the
most suitable driver for Windows Vista® and
Windows® 7 when printing from the applications
that use the XML Paper Specification documents.
Please download the latest driver by accessing
the Brother Solutions Center at
http://solutions.brother.com/.
12
Windows®
Wired Network
Windows®
For Wired Network Interface Cable Users for Windows®
(For shared network users)
9
Before you install
10
a
Install the printer driver
Put the installer CD-ROM into your CD-ROM
drive. If prompted, select your model and
language.
Note
TCP/IP
If the Brother screen does not appear
automatically, go to My Computer (Computer),
double-click the CD-ROM icon, and then
double-click start.exe.
b
a
b
c
d
Click Install Printer Driver, and click Yes if
you accept the license agreement.
Client computer
Computer known as “Server” or “Print server”
TCP/IP or USB
Machine
Note
If you are going to connect the machine to your
network, we recommend that you contact your
system administrator prior to installation.
Important
c
• If there are any programs running, close them.
b
Make sure your machine's power switch is on.
Note
If you want to install the PS driver (BR-Script3
printer driver), choose Custom Install and then
follow the on-screen instructions.
d
e
Choose Network Shared Printer and then
click Next.
Choose your machine’s queue, and then click
OK.
13
Macintosh
• The screens may differ depending on your
operating system.
Choose Wired Network Connection
(Ethernet) and then click Next.
Wired Network
Make sure that your computer is ON and you
are logged on with Administrator rights.
Windows®
a
Note
For Windows Vista® and Windows® 7 users,
when the User Account Control screen
appears, click Allow or Yes.
Wired Network
Note
Contact your administrator if you do not know the
location or the name of the machine queue on the
network.
f
The installation will automatically start.
Important
DO NOT cancel any of the screens during the
installation. It may take a few seconds for all
screens to appear.
g
h
When the On-Line Registration screen
appears, make your selection and follow the
on-screen instructions. Once you have
completed the registration process, click Next.
When the Setup Complete screen appears,
check the box of the action you want to
perform, and then click Finish.
Note
Depending on your security settings, a Windows®
Security or antivirus software window may appear
when using the machine or its software. Please
allow or permit the window to continue.
Finish
The installation is now
complete.
Note
XML Paper Specification Printer Driver
The XML Paper Specification Printer Driver is the
most suitable driver for Windows Vista® and
Windows® 7 when printing from the applications
that use the XML Paper Specification documents.
Please download the latest driver by accessing
the Brother Solutions Center at
http://solutions.brother.com/.
14
Windows®
Wired Network
Macintosh
For Wired Network Interface Cable Users for Macintosh
a
9
Before you install
Make sure your machine is connected to the
power and your Macintosh is ON. You must be
logged on with Administrator rights.
Important
10
a
b
Install the printer driver
Put the installer CD-ROM into your CD-ROM
drive.
Double-click the Start Here OSX icon. If
prompted, select your model.
For users of Mac OS X 10.5.7 or lower, upgrade
to Mac OS X 10.5.8 - 10.7.x. (For the latest
drivers and information for the Mac OS X you are
using, visit http://solutions.brother.com/.)
Note
If you want to add the PS driver (BR-Script3
printer driver), please go to the Brother Solutions
Center at http://solutions.brother.com/ and visit
FAQ's on your model page for instructions.
b
Remove the protective cap from the Ethernet
port marked with a
symbol.
c
Note
It may take a few minutes for the installation to
complete.
d
• You can find your machine’s MAC Address
(Ethernet Address) and IP Address by printing
out the Printer Settings Page. See Print the
Printer Settings Page on page 31.
d
Make sure your machine's power switch is on.
15
Macintosh
Note
• If there is more than one of the same model
connected on your network, the MAC Address
(Ethernet Address) will be displayed after the
model name.
Windows®
Connect the network interface cable to the
Ethernet port, and then connect it to a free port
on your hub.
Choose your machine from the list, and then
click OK.
Wired Network
c
Choose Wired Network Connection
(Ethernet) and then click Next. Follow the
on-screen instructions.
Wired Network
e
When this screen appears, click Next.
Note
When the Brother Support screen appears,
make your selection and follow the on-screen
instructions.
Finish
16
The installation is now
complete.
Macintosh
For Wireless Network Users
For Wireless Network Interface Users
9
Before you begin
First you must configure the wireless network settings of your machine to communicate with your wireless access
point/router. After the machine is configured to communicate with your wireless access point/router, computers
and mobile devices on your network will have access to the machine. To use the machine from a computer, you
will need to install the printer driver. The following steps will guide you through the configuration and installation
process.
Important
• If you are going to connect the machine to your network, we recommend that you contact your system
administrator prior to installation. You must know your wireless network settings before you proceed with this
installation.
• If you have previously configured the wireless settings of the machine, you must reset the network (LAN)
settings before you can configure the wireless settings again.
1. On your machine, press a or b to choose Network, and press OK.
2. Press a or b to choose Network Reset, and press OK.
3. When Reboot OK? appears, press a to choose Yes for reboot.
Note
• To achieve optimum results with normal everyday document printing, place the Brother machine as close to
the wireless access point/router as possible with minimal obstructions. Large objects and walls between the
two devices as well as interference from other electronic devices can affect the data transfer speed of your
documents.
Due to these factors, wireless may not be the best method of connection for all types of documents and
applications. If you are printing large files, such as multi-page documents with mixed text and large graphics,
you may want to consider choosing wired Ethernet for a faster data transfer or USB for the fastest throughput
speed.
• Although the Brother HL-5470DW(T) and HL-6180DW(T) can be used in both a wired and wireless network,
only one of the connection methods can be used at a time.
• If you use your machine in an IEEE 802.1x supported wireless network, see Using IEEE 802.1x
authentication in the Network User's Guide.
Infrastructure Mode
a Wireless access point/router
b Wireless Network machine (your machine)
c Wireless capable computer connected to
the wireless access point/router
Macintosh
17
Windows®
e Mobile device connected to the wireless
access point/router
Wireless Network
d Wired computer connected to the wireless
access point/router
For Wireless Network Users
10
Choose your wireless setup method
The following instructions will offer three methods for setting up your Brother machine on a wireless network. If
you began the wireless setup from step 5 on page 5 (for Macintosh and mobile devices), go to method b (Setup
Wizard). For all other users, choose the method you prefer for your environment.
Note
To setup your machine in any other wireless environment, you can find instructions in the Network User's
Guide.
a
Setup using the Installer CD-ROM and temporarily using a USB cable (Windows® only)
It is recommended that you use a PC wirelessly connected to your network for this method.
Important
• You need to temporarily use a USB cable during configuration (cable not included).
• If you are using Windows® XP, or using a network cable to connect your computer with your wireless
access point/router, you need to know the SSID and Network Key of your wireless access point/router
before you proceed. Please write down your wireless network settings in the area below.
• Please do not contact Brother Customer Service for assistance without the wireless security
information. We cannot assist you in locating your network security settings.
Item
Record the current wireless network settings
SSID (Network Name)
Network Key (Security Key/Encryption Key)
* The Network Key may also be described as the Password, Security Key or Encryption Key.
Note
• If you do not know this information (SSID and Network Key), you cannot continue the wireless setup.
• How can I find this information (SSID and Network Key)?
1. You should see the documentation provided with your wireless access point/router.
2. The initial network name could be the manufacturer’s name or the model name.
3. If you do not know the security information, please consult the router manufacturer, your system
administrator, or internet provider.
Now go to
18
page 20
For Wireless Network Users
b
Manual setup from the control panel using the Setup Wizard (Macintosh, mobile devices and
Windows®)
If your wireless access point/router does not support WPS (Wi-Fi Protected Setup™) or AOSS™,
write down the wireless network settings of your wireless access point/router in the area below.
Important
Please do not contact Brother Customer Service for assistance without the wireless security
information. We cannot assist you in locating your network security settings.
Item
Record the current wireless network settings
SSID (Network Name)
Network Key (Security Key/Encryption Key)
* The Network Key may also be described as the Password, Security Key or Encryption Key.
Note
• If you do not know this information (SSID and Network Key), you cannot continue the wireless setup.
• How can I find this information (SSID and Network Key)?
1. You should see the documentation provided with your wireless access point/router.
2. The initial network name could be the manufacturer’s name or the model name.
3. If you do not know the security information, please consult the router manufacturer, your system
administrator, or internet provider.
Now go to
c
page 22
One push setup using WPS or AOSS™ (Windows® and Macintosh)
If your wireless access point/router supports automatic wireless (one-push) setup (WPS or AOSS™)
Macintosh
19
Windows®
page 24
Wireless Network
Now go to
For Wireless Network Users
Setup using the Installer CD-ROM and temporarily using a USB
cable (Windows® only)
11
Note
Setup the wireless
settings
Important
• You need to temporarily use a USB cable during
configuration (cable not included).
If you want to install the PS driver (BR-Script3
printer driver), choose Custom Install and then
follow the on-screen instructions.
d
• If you are using Windows® XP, or using a
network cable to connect your computer with
your wireless access point/router, you need to
know the SSID and Network Key of your
wireless access point/router you wrote down in
step 10-a on page 18 before you proceed.
Note
Note
• If you choose Network Shared Printer, choose
your machine’s queue, and then click OK.
• Choose the option of the Firewall setting, and
then click Next.
e
If you use your machine in an IEEE 802.1x
supported wireless network, see Using IEEE
802.1x authentication in the Network User's
Guide.
a
If the Brother screen does not appear
automatically, go to My Computer (Computer),
double-click the CD-ROM icon, and then
double-click start.exe.
Note
For Windows Vista® and Windows® 7 users,
when the User Account Control screen
appears, click Allow or Yes.
20
If the Important Notice screen appears, read the
notice. Check the box after you confirm the SSID
and Network Key, and then click Next.
f
Click Install Printer Driver and then click Yes
if you accept the license agreement.
Note
c
Choose Yes, I have a USB cable to use for
installation, and then click Next.
Put the installer CD-ROM into your CD-ROM
drive. If prompted, select your model and
language.
Note
b
Choose Brother Peer-to-Peer Network
Printer or Network Shared Printer, and then
click Next.
Choose Wireless Network Connection and
then click Next.
g
Temporarily connect the USB cable (not
included) directly to the computer and the
machine.
Do one of the following:
If the Installation confirmation screen
appears, check the box and click Next, go
to h.
Otherwise, go to i.
For Wireless Network Users
h
i
Check Yes if you want to connect with the listed
SSID. Click Next and go to k.
k
The wizard will search for wireless networks
available from your machine. Choose the SSID
that you wrote down for your network in step
10-a on page 18, and then click Next.
Confirm the wireless network settings and then
click Next. The settings will be sent to your
machine.
Note
• The settings will remain unchanged if you click
Cancel.
• If you want to manually enter the IP address
settings of your machine, click Change IP
Address and enter the necessary IP address
settings for your network.
• If the wireless setup failure screen appears,
click Retry.
Note
• If the list is blank, check that the wireless access
point/router has power and is broadcasting the
SSID, and then see if the machine and the
wireless access point/router are within range for
wireless communication. Then, click Refresh.
• If your wireless access point/router is set to not
broadcast the SSID you can manually add it by
clicking the Advanced button. Follow the
on-screen instructions for entering the Name
(SSID), and then click Next.
j
Enter the Network Key you wrote down in step
10-a on page 18, and then click Next.
l
Disconnect the USB cable between the
computer and the machine and then click Next.
Wireless setup is now complete. A four
level indicator at the right of your
machine’s LCD will show the wireless
signal strength of your wireless access
point/router.
To install the printer driver, continue to
step 13-e on page 28.
Now go to
page 28
Macintosh
Wireless Network
21
Windows®
Note
If your network is not configured for
Authentication and Encryption, the ATTENTION!
screen will appear. To continue configuration,
click OK.
For Wireless Network Users
Manual setup from the control panel using the Setup Wizard
(Macintosh, mobile devices and Windows®)
11
Note
Setup the wireless
settings
• If a list of SSIDs is not displayed, make sure
your wireless access point/router is on. Move
your machine closer to the wireless access
point/router and try starting from b again.
Important
• If your wireless access point/router is set to not
broadcast the SSID you will have to manually
add the SSID name. For details, see
Configuring your machine when the SSID is not
broadcast in the Network User's Guide.
You must have the wireless settings you wrote
down for your network in step 10-b on page 19
before you proceed.
Note
If you use your machine in an IEEE 802.1x
supported wireless network, see Using IEEE
802.1x authentication in the Network User's
Guide.
a
b
c
If you began the wireless setup from step 5 on
page 5 (for Macintosh and mobile devices), go
to c.
f
g
All other users, go to b.
To delete the characters you have entered,
press the Back key.
Press a or b to choose Setup Wizard and
press OK.
For more information, see Entering Text for
Wireless Settings on page 27.
When WLAN Enable? is displayed, press a to
accept. This will start the wireless setup wizard.
d
e
22
The machine will search for available SSIDs. It
will take several seconds to display a list of
available SSIDs.
If a list of SSIDs is displayed, use the a or b key
to choose the SSID you wrote down in step
10-b on page 19, then press OK.
Do one of the following:
If the wireless access point/router of the
selected SSID supports WPS and
WPS is available appears, press a and
go to f.
If you are using an authentication and
encryption method that requires a Network
Key, go to g.
If your authentication method is Open
System and your encryption mode is None,
go to h.
Enter the Network Key you wrote down in step
10-b on page 19.
To enter a character or number, hold down or
repeatedly press the a or b key until the
character you want appears, and then press
OK.
On your machine, press a or b to choose
Network and press OK.
Press a or b to choose WLAN and press OK.
Otherwise press Cancel to exit from the
wireless setup wizard.
To connect your machine using the automatic
wireless mode, press a to choose Yes. (If you
choose No, go to g to enter the Network Key.)
When Press WPS on rtr appears, press
the WPS button on your wireless access
point/router, and then press a twice. Go to h.
Press OK when you have entered all the
characters, then press a for Yes to apply your
settings.
h
Your machine will now try to connect to your
wireless network using the information you
have entered.
A connection result message appears on the
LCD and a WLAN report will automatically be
printed.
If the connection failed, check the error code on
the printed report and refer to
Troubleshooting on page 25.
For Wireless Network Users
Wireless setup is now complete. A four
level indicator at the right of your
machine’s LCD will show the wireless
signal strength of your wireless access
point/router.
For computer users, please install the
printer driver.
For Macintosh Users:
Now go to
step 12 on page 30
For Windows® Users:
Now go to
step 12 on page 28
For mobile device users who began the
setup from step 5 on page 5, go back to
step 6 to continue the machine setting.
Note
For Mobile Device users, please go to the User’s
Guide for the application you are using (e.g.
Brother iPrint&Scan or other applications) for
additional details on how to use your machine
with the application. To download the User’s
Guide for the application you are using, please go
to the manuals download selection on your
model’s home page of the Brother Solutions
Center at http://solutions.brother.com/.
Windows®
Macintosh
Wireless Network
23
For Wireless Network Users
One push setup using WPS (Wi-Fi Protected Setup) or AOSS™
(Windows® and Macintosh)
11
a
Note
Configure the wireless
settings
If your wireless access point/router supports WPS
(PIN Method) and you want to configure your
machine using the PIN (Personal Identification
Number) Method, see Configuration using the
PIN Method of WPS (Wi-Fi Protected Setup) in
the Network User's Guide.
Confirm your wireless access point/router has
the WPS or AOSS™ symbol as shown below.
f
b
Place the Brother machine within range of your
WPS or AOSS™ access point/router. The
range may differ depending on your
environment. Refer to the instructions provided
with your wireless access point/router.
If you began the wireless setup from step 5 on
page 5, go to d.
c
d
e
All other users, go to c.
On your machine, press a or b to choose
Network and press OK.
Press a or b to choose WLAN and press OK.
Press a or b to choose WPS/AOSS and press
OK.
If the connection failed, check the error code on
the printed report and refer to
Troubleshooting on page 25.
Wireless setup is now complete. A four
level indicator at the right of your
machine’s LCD will show the wireless
signal strength of your wireless access
point/router.
To install the printer driver, continue to
step 12.
For Windows® Users:
Now go to
When WLAN Enable? is displayed, press a to
accept. This will start the wireless setup wizard.
page 28
Otherwise press Cancel to exit from the
wireless setup wizard.
For Macintosh Users:
When Press Key on rtr appears, press
the WPS or AOSS™ button on your wireless
access point/router. See the user’s guide for
your wireless access point/router for
instructions. And then press a.
This feature will automatically detect which
mode (WPS or AOSS™) your wireless access
point/router uses to configure your machine.
24
A connection result message appears on the
LCD and a WLAN report will automatically be
printed.
Now go to
page 30
For Wireless Network Users
Troubleshooting
Important
Please do not contact Brother Customer Service for assistance without the wireless security information. We
cannot assist you in locating your network security settings.
How can I find the wireless settings (Network Name (SSID) and Network Key)
1. You should see the documentation provided with your wireless access point/router.
2. The initial network name could be the manufacturer’s name or the model name.
3. If you do not know the security information, please consult the router manufacturer, your system
administrator or internet provider.
* The Network Key may also be described as the Password, Security Key or Encryption Key.
* If the wireless access point/router is set to not broadcast the SSID, the SSID will not automatically be detected.
You will have to manually enter the SSID name. See Configuring your machine when the SSID is not broadcast
in the Network User's Guide.
WLAN report
If the WLAN report that printed shows that the connection failed, check the error code on the printed report and
refer to the following instructions.
Error code
Recommended Solutions
The wireless setting is not activated, turn the wireless setting to ON.
TS-01
- If a LAN cable is connected to your machine, disconnect it and turn the wireless setting of
your machine to ON.
1. On your machine, press a or b to choose Network and press OK.
2. Press a or b to choose WLAN and press OK.
3. Press a or b to choose Setup Wizard and press OK.
4. When WLAN Enable? is displayed, press a to accept. This will start the wireless setup
wizard.
The wireless access point/router cannot be detected.
1. Check the following 4 points.
25
Macintosh
Wireless Network
2. If you manually entered the SSID and security information (SSID/authentication
method/encryption method/Network Key) the information may be incorrect.
Reconfirm the SSID and security information and reenter the correct information as
necessary.
See How can I find the wireless settings (Network Name (SSID) and Network
Key) on page 25 to confirm.
Windows®
TS-02
- Make sure that the wireless access point/router is powered on.
- Move your machine to an obstruction-free area, or closer to the wireless access
point/router.
- Temporarily place your machine within about one meter (3.3 feet) from the wireless
access point/router when you are configuring the wireless settings.
- If your wireless access point/router is using MAC address filtering, confirm the MAC
address of the Brother machine is allowed in the filter. See Print the Printer Settings
Page on page 31.
For Wireless Network Users
Error code
Recommended Solutions
The wireless network and security setting you entered may be incorrect.
Reconfirm the wireless network settings.
TS-03
* Check if the entered or selected SSID/authentication method/encryption
method/UserID/Userpass are correct.
See How can I find the wireless settings (Network Name (SSID) and Network
Key) on page 25 to confirm.
The Authentication/Encryption methods used by the selected wireless access point/router
are not supported by your machine.
For infrastructure mode, change the authentication and encryption methods of the wireless
access point/router. Your machine supports the following authentication methods WPA™,
WPA2™, OPEN and Shared key. WPA supports TKIP or AES encryption methods. WPA2
supports AES for the encryption method. OPEN and Shared key correspond to WEP
encryption.
If your problem is not solved the SSID or network settings you entered may be incorrect.
Reconfirm the wireless network settings.
Combined table of authentication and encryption methods
TS-04
Authentication method
WPA-Personal
WPA2-Personal
OPEN
Shared key
Encryption method
TKIP
AES
AES
WEP
NONE (without encryption)
WEP
See How can I find the wireless settings (Network Name (SSID) and Network
Key) on page 25 to confirm.
For ad-hoc mode, change the authentication and encryption methods of your computer for
the wireless setting.
Your machine supports OPEN authentication method only, with optional WEP encryption.
TS-05
The security information (SSID/Network Key) is incorrect.
Reconfirm the SSID and security information (Network Key).
If your router uses WEP encryption, enter the key used as the first WEP key. Your Brother
machine supports the use of the first WEP key only.
See How can I find the wireless settings (Network Name (SSID) and Network
Key) on page 25 to confirm.
TS-06
The wireless security information (Authentication method/Encryption method/Network Key)
is incorrect.
Reconfirm the wireless security information (Authentication method/Encryption
method/Network Key) in the table of TS-04.
If your router uses WEP encryption, enter the key used as the first WEP key. Your Brother
machine supports the use of the first WEP key only.
See How can I find the wireless settings (Network Name (SSID) and Network
Key) on page 25 to confirm.
26
For Wireless Network Users
Error code
Recommended Solutions
The machine cannot detect a wireless access point/router that has WPS or AOSS™
enabled.
If you would like to configure your wireless settings using WPS or AOSS™, you must operate
both your machine and the wireless access point/router.
Confirm your wireless access point/router supports WPS or AOSS™ and try starting again.
TS-07
If you do not know how to operate your wireless access point/router using WPS or AOSS™,
see the documentation provided with your wireless access point/router, ask the manufacturer
of your wireless access point/router or ask your network administrator.
Two or more wireless access points/routers that have WPS or AOSS™ enabled are
detected.
TS-08
- Confirm that only one wireless access point/router within range has the WPS or AOSS™
method active and try again.
- Try starting again after a few minutes in order to avoid interference from other wireless
access points/routers.
Entering Text for Wireless Settings
Hold down or repeatedly press the a or b key to select a character from the list below:
(space) !"#$%&'() +,-./0123456789:;<=>?@
ABCDEFGHIJKLMNOPQRSTUVWXYZ[\]^_`abcdefghijklmnopqrstuvwxyz{|}~
Press OK to confirm the current character and then enter the next character.
Press the Back key to delete the characters you have entered.
Windows®
Macintosh
Wireless Network
27
Wireless Network
Windows®
Install the Printer Driver for Windows®
12
a
Before you install
c
Note
If you want to install the PS driver (BR-Script3
printer driver), choose Custom Install and then
follow the on-screen instructions.
Make sure that your computer is ON and you
are logged on with Administrator rights.
Important
d
• If there are any programs running, close them.
• The screens may differ depending on your
operating system.
b
a
Install the printer driver
Choose Brother Peer-to-Peer Network
Printer or Network Shared Printer, and then
click Next.
Note
• If you choose Network Shared Printer, choose
your machine’s queue, and then click OK.
Make sure the machine power switch is on.
13
Choose Wireless Network Connection and
then click Next.
• Choose the option of the Firewall setting, and
then click Next.
e
Choose the machine from the list, and then
click Next.
Put the installer CD-ROM into your CD-ROM
drive. If prompted, select your model and
language.
Note
If the Brother screen does not appear
automatically, go to My Computer (Computer),
double-click the CD-ROM icon, and then
double-click start.exe.
b
Note
If you are using WEP and the LCD displayed
‘Connected’ but your machine is not found,
make sure you entered the WEP key correctly.
The WEP key is case sensitive.
Click Install Printer Driver, and click Yes if
you accept the license agreement.
f
The installation will automatically start.
Important
DO NOT cancel any of the screens during the
installation. It may take a few seconds for all
screens to appear.
Note
For Windows Vista® and Windows® 7 users,
when the User Account Control screen
appears, click Allow or Yes.
g
h
28
When the On-Line Registration screen
appears, make your selection and follow the
on-screen instructions. Once you have
completed the registration process, click Next.
When the Setup Complete screen appears,
check the box of the action you want to
perform, and then click Finish.
Wireless Network
Windows®
Note
Depending on your security settings, a Windows®
Security or antivirus software window may appear
when using the machine or its software. Please
allow or permit the window to continue.
Finish
The installation is now
complete.
Note
XML Paper Specification Printer Driver
The XML Paper Specification Printer Driver is the
most suitable driver for Windows Vista® and
Windows® 7 when printing from the applications
that use the XML Paper Specification documents.
Please download the latest driver by accessing
the Brother Solutions Center at
http://solutions.brother.com/.
Windows®
Macintosh
Wireless Network
29
Wireless Network
Macintosh
Install the Printer Driver for Macintosh
12
a
Before you install
e
Choose your machine from the list, and then
click OK.
Make sure your machine is connected to the
power and your Macintosh is ON. You must be
logged on with Administrator rights.
Important
For users of Mac OS X 10.5.7 or lower, upgrade
to Mac OS X 10.5.8 - 10.7.x. (For the latest
drivers and information for the Mac OS X you are
using, visit http://solutions.brother.com/.)
Note
• If there is more than one of the same model
connected on your network, the MAC Address
(Ethernet Address) will be displayed after the
model name.
Note
• You can find your machine’s MAC Address
(Ethernet Address) and IP Address by printing
out the Printer Settings Page. See Print the
Printer Settings Page on page 31.
If you want to add the PS driver (BR-Script3
printer driver), please go to the Brother Solutions
Center at http://solutions.brother.com/ and visit
FAQ's on your model page for instructions.
13
a
b
f
When this screen appears, click Next.
Install the printer driver
Put the installer CD-ROM into your CD-ROM
drive.
Double-click the Start Here OSX icon. If
prompted, select your model.
Note
When the Brother Support screen appears,
make your selection and follow the on-screen
instructions.
Finish
The installation is now
complete.
Note
c
d
Choose Wireless Network Connection and
then click Next.
Follow the on-screen instructions.
Important
DO NOT cancel any of the screens during the
installation. It may take a few minutes for the
installation to complete.
Note
If your wireless settings fail, the Wireless Device
Setup Wizard screen appears. Follow the
on-screen instructions to complete the wireless
configuration.
30
If you began the wireless setup from step 5 on
page 5, go back to step 6 to continue the machine
setting.
For Network Users
Web Based Management
(web browser)
Reset the network settings to the
factory default
The Brother print server is equipped with a web server
that allows you to monitor its status or change some
of its configuration settings, using HTTP (Hyper Text
Transfer Protocol).
To reset all network settings of the print server to its
factory default, follow the steps below.
Press a or b to choose Network.
Press OK.
Note
Windows®
We recommend
Internet
Explorer® 7.0/8.0 or Firefox® 3.6 for Windows®
and Safari 4.0/5.0 for Macintosh. Please also
make sure that JavaScript and Cookies are
always enabled in whichever browser you use. To
use a web browser, you will need to know the IP
Address of the print server. The IP Address of the
print server is listed on the Printer Settings Page.
a
b
a
Open your browser.
Type “http://machine’s IP address/” into your
browser’s address bar (where “machine’s IP
address” is the IP address of the Brother
machine or the print server name).
For example: http://192.168.1.2/
b
c
Press a or b to choose Network Reset.
Press OK.
When Reboot OK? appears, press a to
choose Yes for reboot.
The machine will re-start.
Print the Printer Settings Page
The Printer Settings Page lists all the current printer
settings, including network settings.
a
b
Press a or b to choose Machine Info..
Press OK.
Press OK to choose Print Settings.
The machine will print the current printer
settings.
Note
If the IP Address on the Printer Settings Page
shows 0.0.0.0, wait for one minute and try again.
Note
If you have configured an optional login
password, you must enter it when prompted to
access the Web Based Management.
For more information, see Web Based
Management in the Network User's Guide.
31
Other Information
Brother CreativeCenter
Get inspired. If you're using Windows®, double-click
the Brother CreativeCenter icon on your desktop to
access our FREE web site with many ideas and
resources for personal and professional use.
Mac users can access Brother CreativeCenter at this
web address:
http://www.brother.com/creativecenter/
32
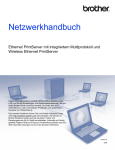
Options and Consumables
Options
The machine has the following optional accessories. You can expand the capabilities of the machine by adding
these items. For more information about the optional Lower Tray Unit and compatible SO-DIMM Memory, visit us
at http://solutions.brother.com/.
For installing the SO-DIMM Memory, see Installing extra memory in the User's Guide.
Lower Tray Unit for HL-5470DW and HL-6180DW
LT-5400
The lower paper tray unit can hold up to 500 sheets
of paper. When the tray is installed, the machine
expands total input capacity up to 800 sheets for the
HL-5470DW, 1,050 sheets for the HL-6180DW.
SO-DIMM Memory
You can increase the memory by installing one
SO-DIMM (Small Outline Dual In-line Memory
Module).
Consumables
When the time comes to replace consumable items, an error will be indicated by the LCD on the control panel. For
more information about the consumables for your machine, visit us at http://www.brother.com/original/ or contact
your local Brother reseller.
Toner cartridge
Drum unit
For replacing the consumable items, see Replacing consumable items in the User's Guide.
33
Trademarks
The Brother logo is a registered trademark of Brother Industries, Ltd.
Brother is a registered trademark of Brother Industries, Ltd.
Microsoft, Windows, Windows Server and Internet Explorer are either registered trademarks of Microsoft Corporation in the United States
and/or other countries.
Windows Vista is either a registered trademark or trademark of Microsoft Corporation in the United States and/or other countries.
Apple, Macintosh, Safari and Mac OS are trademarks of Apple Inc., registered in the U.S. and other countries.
Wi-Fi Direct, Wi-Fi Protected Setup, WPA and WPA2 are marks of the Wi-Fi Alliance.
AOSS is a trademark of Buffalo Inc.
Android is a trademark of Google Inc.
Each company whose software title is mentioned in this manual has a Software License Agreement specific to its proprietary programs.
Any trade names and product names of companies appearing on Brother products, related documents and any other
materials are all trademarks or registered trademarks of those respective companies.
Compilation and Publication
Under the supervision of Brother Industries, Ltd., this manual has been compiled and published, covering the latest product descriptions and
specifications.
The contents of this manual and the specifications of this product are subject to change without notice.
Brother reserves the right to make changes without notice in the specifications and materials contained herein and shall not be responsible for
any damages (including consequential) caused by reliance on the materials presented, including but not limited to typographical and other
errors relating to the publication.
Copyright and License
©2012 Brother Industries, Ltd. All rights reserved.
This product includes software developed by the following vendors:
©1983-1998 PACIFIC SOFTWORKS, INC. ALL RIGHTS RESERVED.
©2008 Devicescape Software, Inc. All rights reserved.
This product includes the “KASAGO TCP/IP” software developed by ZUKEN ELMIC, Inc.