1
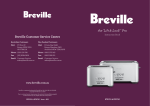
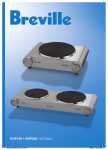
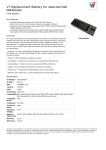
BR3736 BT320&905 Booklet.qxd
13/1/04
4:52 PM
Page A
Freestyle
Breville is a registered trademark of Breville Pty. Ltd.
ABN 98 000 092 928
Breville Customer Service Centre
Toaster
Australian Customers
✉
Breville Customer Service Centre
Locked Bag 2000
Botany NSW 2019
AUSTRALIA
☎
Customer Service:
Fax
(02) 9384 9601
Email Customer Service
1300 139 798
[email protected]
New Zealand Customers
✉
Breville Customer Service Centre
Private Bag 94411
Greenmount
AUCKLAND, NEW ZEALAND
☎
Customer Service:
Fax
0800 288 513
Email Customer Service
09 271 3980
BT320
BT905
[email protected]
w w w. b rev i l le . co m . a u
INSTRUCTIONS FOR USE
© Copyright. Breville Pty. Ltd. 2003
Due to continual improvements in design or otherwise,
the product you purchase may differ slightly from
the one illustrated in this booklet.
PRINTED ON
RECYCLED PAPER
Model BT320/905
Issue 1/03
BR3736 BT320&905 Booklet.qxd
13/1/04
4:52 PM
Page 2
Freestyle Toaster
CONTENTS
Page
Breville Recommends Safety First
4
Know your Breville Toaster
5
Operating your Breville Toaster
6
Care and Cleaning
7
Congratulations
on your purchase of a new Breville Freestyle Toaster
2
BR3736 BT320&905 Booklet.qxd
13/1/04
4:52 PM
Page 4
BREVILLE RECOMMENDS SAFETY FIRST
We at Breville are very safety conscious. We design and manufacture consumer products with
the safety of you, our valued customer foremost in mind. In addition we ask that you exercise a
degree of care when using any electrical appliance and adhere to the following precautions.
READ ALL INSTRUCTIONS BEFORE OPERATING
AND SAVE FOR FUTURE REFERENCE
• This toaster should not be used near or
below curtains or other combustible
material and it should be supervised at
all times when in use.
• Do not immerse appliance or cord in
water or any other liquid.
• The appliance is not intended for use
by young children or infirm persons
without supervision.
• Do not leave the appliance unattended
when in use. Young children should be
supervised to ensure that they do not
play with the appliance.
• Always use the appliance on a dry,
level surface.
This Breville toaster is
electronically controlled
and will not lock down into
the toast position until the
toaster is plugged into a
230/240 volt power point
and switched on.
• Do not let the cord hang over the edge of
a table or counter, become knotted or
touch hot surfaces.
• Care must be taken not to touch any
hot surfaces, do not store or cover the
appliance until the unit has fully
cooled down.
• Always switch the power off at the outlet
and then remove the plug before
attempting to move the appliance, when
the appliance is not being used and
before cleaning.
• Regularly inspect the supply cord, plug
and actual appliance for any damage. If
found damaged in any way, immediately
cease use of the appliance and return the
entire appliance to the nearest
authorised Breville service centre for
examination, replacement or repair.
• Ensure that bread to be toasted is the
correct size for the toaster and does not
protrude above the bread slice opening
and is not too thick or long that it will
jam or wedge the bread carriage.
KNOW YOUR BREVILLE TOASTER
2 slice electronic toaster with cool
touch exterior (BT320)
Electronic browning control delivers
consistent toasting results
Extra wide self-centring toasting
slots adjust automatically to
toast thick or thin bread
Electronic cancel, reheat and frozen
bread settings
Toasting light
4 slice electronic toaster with cool
touch exterior (BT905)
High lift lever raises muffins higher
for safer removal
FROZEN
REHEAT
CANCEL
NEVER OPERATE TOASTER ON ITS SIDE AND NEVER ADD ANY FOOD
SUBSTANCE TO THE BREAD OR MUFFINS AS THIS CAN LEAD TO
4
ELECTROCUTION OR FIRE.
Removable slide
out crumb tray
Tidy cord storage
5
BR3736 BT320&905 Booklet.qxd
13/1/04
4:52 PM
Page 6
OPERATING YOUR BREVILLE TOASTER
1. Insert the power plug into a 230/240 volt
power outlet and then turn the power on.
2. Place bread, muffins or crumpets into the
bread slots.
3. Select the desired browning setting on
the browning control knob. (No.1 lightest, No.6 - darkest).
When using the toaster for the first time,
we suggest you toast on setting No.3.
Varying types of bread and personal
preference may require a different browning
setting, eg. raisin toast and white lighttextured breads may require a lower setting,
whilst heavier textured rye breads may
require a darker setting.
4. Press the high lift lever down until it
clicks into place. Toasting cycle will
automatically commence.
5. The toaster turns off when the desired
toast colour is achieved and automatically
raises the toast. The toasting process can
be stopped at any time by pressing the
CANCEL button.
If the toaster is not
plugged in and switched
on at the power outlet the
high lift lever will not
click into place.
HIGH LIFT
To remove smaller items such as muffins, lift
the high lift lever approximately 20mm above
the starting position.
In the unlikely event that the bread or
muffin becomes jammed, switch the power
off at the power outlet. Remove the power
plug from the power outlet and then carefully
ease the bread out of the toaster, ensuring
that you do not damage the element.
3. Wipe the outside of the toaster with a
slightly dampened cloth and polish with a
soft dry cloth.
4. To clean the interior, turn the toaster
upside down over the sink and shake
crumbs free.
To toast frozen bread, place the bread into
the toasting slots, select the desired
Browning Setting, lower the high lift lever
until it clicks into place then press the
Frozen Button.
FROZEN
REHEAT
CANCEL
REHEATING TOAST
This function allows you to reheat toast
without additional toasting. To reheat, place
toast into toasting slots, lower the high lift
lever until it clicks into place and press the
Reheat Button.
OTHER ITEM WITH A KNIFE OR ANY OTHER OBJECT, AS CONTACT
WITH LIVE ELEMENTS MAY NOT ONLY DAMAGE THE ELEMENT, BUT
CAUSE ELECTROCUTION.
The crumb tray should be cleaned regularly.
Do not allow breadcrumbs to accumulate in
the bottom of the toaster.
1. Always switch the power off at the outlet
and then remove the plug before cleaning
your toaster.
2. To remove any crumbs from the toaster,
slide out the crumb tray from under the
toaster, empty and replace it in the
toaster before using again.
TOASTING FROZEN BREAD
NEVER ATTEMPT TO EXTRACT JAMMED TOAST, MUFFINS OR ANY
6
CARE AND CLEANING
DO NOT USE THE TOASTER WITHOUT THE SLIDE OUT CRUMB TRAY
IN PLACE.
DO NOT ALLOW CRUMBS TO BUILD UP IN THE CRUMB TRAY. CRUMB
TRAY SHOULD BE CLEANED REGULARLY.
7