1
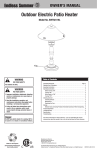
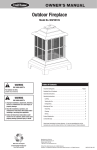
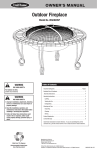
®
OWNER’S MANUAL
Outdoor Electric Patio Heater
Model No. EWT700SP
WARNING
FOR YOUR SAFETY:
For Outdoor Use Only
WARNING
FOR YOUR SAFETY:
1. Improper installation, adjustment, alteration,
service or maintenance can cause injury or
property damage.
2. Read the installation, operation, and
maintenance instructions thoroughly before
installing or servicing this equipment.
3. Failure to follow these instructions could
result in fire or explosion, which could
cause property damage, personal injury, or
death.
Danger
Do NOT use electric heater for cooking. NOT to
be used in or on boats or recreational vehicles.
Made from 70% Bagasse
(Environmentally Friendly Sugar
Cane Pulp By-product)
Table of Contents
Important Safeguards . . . . . . . . . . . . . . . . . . . . . . . . . . . . . . . . . . . . . . . . . . . Page 2
Exploded View & Hardware . . . . . . . . . . . . . . . . . . . . . . . . . . . . . . . . . . . . . . . . . . . 3
Assembly Instructions . . . . . . . . . . . . . . . . . . . . . . . . . . . . . . . . . . . . . . . . . . . . . . . 4
Operating Instructions . . . . . . . . . . . . . . . . . . . . . . . . . . . . . . . . . . . . . . . . . . . . . . 6
Before Turning “ON” . . . . . . . . . . . . . . . . . . . . . . . . . . . . . . . . . . . . . . . . . . . . . 6
Turning “ON” . . . . . . . . . . . . . . . . . . . . . . . . . . . . . . . . . . . . . . . . . . . . . . . . . . . 6
While Heater is “ON” . . . . . . . . . . . . . . . . . . . . . . . . . . . . . . . . . . . . . . . . . . . . . 6
Turning “OFF” . . . . . . . . . . . . . . . . . . . . . . . . . . . . . . . . . . . . . . . . . . . . . . . . . . 6
Cleaning and Care . . . . . . . . . . . . . . . . . . . . . . . . . . . . . . . . . . . . . . . . . . . . . . . . . . 6
Cleaning Surfaces . . . . . . . . . . . . . . . . . . . . . . . . . . . . . . . . . . . . . . . . . . . . . . . 6
Maintenance . . . . . . . . . . . . . . . . . . . . . . . . . . . . . . . . . . . . . . . . . . . . . . . . . . . 6
Replacing the Fuse . . . . . . . . . . . . . . . . . . . . . . . . . . . . . . . . . . . . . . . . . . . . . . . 6
Storage . . . . . . . . . . . . . . . . . . . . . . . . . . . . . . . . . . . . . . . . . . . . . . . . . . . . . . . . . . 6
Between Uses and During Periods of Extended Inactivity or When Transporting . 6
Product Registration . . . . . . . . . . . . . . . . . . . . . . . . . . . . . . . . . . . . . . . . . . . . . . . . 7
Limited Warranty . . . . . . . . . . . . . . . . . . . . . . . . . . . . . . . . . . . . . . . . . . . . . . . . . . . 7
Specifications . . . . . . . . . . . . . . . . . . . . . . . . . . . . . . . . . . . . . . . . . . . . . . . . . . . . . 7
Troubleshooting . . . . . . . . . . . . . . . . . . . . . . . . . . . . . . . . . . . . . . . . . . . . . . . . . . . . 7
Save these instructions for future reference. If you are assembling this unit for
someone else, give this manual to him or her to read and save for future reference.
Manufactured in China for:
Blue Rhino Global Sourcing, Inc.
Winston-Salem, NC USA
1.800.762.1142, www.bluerhino.com
© 2007 Blue Rhino Global Sourcing, Inc. All Rights Reserved
Endless Summer® is a Registered Trademark of Blue Rhino Global Sourcing, Inc.. All Rights Reserved.
EWT700SP-OM-107 E
®
Outdoor Patio Heater Model No. EWT700SP
IMPORTANT SAFEGUARDS
When using electrical appliances, basic safety precautions should always
be followed including the following:
1. Read all instructions before using this heater.
2. Do not touch hot surfaces.
3. This heater is hot when in use, especially the dome. To avoid burns, do
not let bare skin touch hot surfaces. Keep combustible material such
as electrical cords, furniture, papers, clothes, and curtains at least 3
feet (0.9 M) away from the front of the heater and away from the sides
and rear.
4. To protect against electrical shock do not immerse cord, plugs, or
heating element in water or other liquids.
5. Close supervision is necessary when any appliance is used by or near
children.
6. Unplug from outlet when not in use and before cleaning. Allow to cool
before putting on or taking off parts.
7. Do not operate any heater with a damaged cord or plug or after the
heater malfunctions, has been dropped or has been damaged in any
manner. Return appliance to the nearest authorized service facility for
examination, repair, or adjustment.
8. This heater is not intended for commercial use.
9. The use of accessory attachments not recommended by the appliance
manufacturer may cause injuries.
10. Do not let cord touch hot surfaces, hang over edge of table or counter
where it can be pulled on by children or tripped over unintentionally.
11. Do not place on or near a hot gas or electric burner, or in a heated
oven.
12. Always push any control to “OFF”, then remove plug from wall outlet.
13. Do not use appliance for other than intended use.
14. Use only on properly grounded outlet.
15. Do not run cord under carpeting. Do not cover cord with throw rugs,
runners, or similar coverings. Arrange cord away from traffic area and
where it will not be tripped over.
16. Do not insert or allow foreign objects to enter any ventilation or
exhause opening as this may cause an electric shock or fire, or
damage the heater.
17. SAVE THESE INSTRUCTIONS.
Safety First
DANGERS and Cautions
T his heater is for outdoor use only.
T his heater is NOT for commercial use.
T his is for use with electricity.
A
lways unplug the heater if it is not being used.
D
o not store or use gasoline or other flammable vapors and liquids in
the vicinity of this or any other appliance.
A
void the use of an extension cord because the extension cord may
overheat and cause a risk of fire.
D
o not use 16 gauge extension cords. Damage to household wiring
and/or fire could result.
L onger detachable power-supply cords or extension cords are
available and may be used if care is exercised in their use.
If a longer detachable power-supply cord or extension cord is used,
a. The cord shall be no. 14 AWG minimum size and rated not less than
2,000 watts.
b. The marked electrical rating of the cord set or extension cord
should be at least as great as the electrical rating of the appliance,
and
c. The cord should be arranged so that it will not drape over the
countertop or tabletop where it can be pulled on by children or
tripped over unintentionally.
ELECTRIC SHOCK CAN KILL OR RESULT IN SERIOUS INJURY. TO
PREVENT ELECTRICAL SHOCK:
a. Use only with GFI (Ground Fault Interrupter) protected circuit.
b. Do not use heater when raining.
c. To prevent heater from being splashed or falling into water, do not
use heater within 10 feet of pool, pond, or other body of water.
d. Keep heater and cord dry and out of rain at all times.
e. Do not operate heater that has a damaged cord, plug, or metal probe.
Call our customer service for a replacement cord. This cord is made
specifically for this heater.
f. Never remove grounding plug, or use with an adapter to two prongs.
g. Keep electric plugs off ground, and dry.
h. In case of fire, turn heater “OFF,” unplug heater from outlet, and
allow fire to burn out. Do not use water to put out a fire in this or
another electrical appliance.
i. Do not use water or other liquid spray to clean heater without first
unplugging electric cord and removing heating element.
j. Do NOT place the heater near a bed because objects such as pillows
or blanckets can fall off the bed and be ignited by the heater.
k. To prevent a possible fire, do not block air intakes or exhause in any
manner. Do not use on soft surfaces, like a bed, where opening may
befcome blocked.
T he use of alcohol, or prescription or non-prescription drugs may
impair the consumer’s ability to properly assemble or safely operate
the appliance.
N
ever use lighter fluid, lava rocks, gasoline, kerosene, or alcohol with
this product.
D
o not store or use gasoline or other flammable liquids or vapors
within 25 feet (7.62 m) of this appliance.
A
heater has hot and arcing or sparking parts inside. Do not use
in an explosive atmosphere. Keep heater area clear and free from
combustible materials, gasoline and other flammable vapors and
liquids.
D
O NOT use this heater near any unprotected combustible
constructions.
D
o not alter this heater in any manner.
D
o not use the heater unless it is COMPLETELY assembled and all
parts are securely fastened and tightened.
T his heater should be thoroughly inspected on a regular basis.
U
se only Blue Rhino Global Sourcing, Inc. factory authorized parts. The
use of any part that is not factory authorized can be dangerous. This
will also void your warranty.
D
o not use this appliance without reading “Operating Instructions” in
this manual.
D
o not touch metal parts of heater until it has completely cooled
(about 45 min.) to avoid burns, unless you are wearing protective gear
(pot holders, gloves, BBQ mittens, etc.).
D
o not use in or on boats or recreational vehicles.
D
o not leave a lit heater unattended, especially keep children and pets
away from heater at all times.
D
o not attempt to move heater when in use. Allow the heater to cool
before moving or storing.
A
lways use your heater on a hard, non-combustable level surface.
U
se extreme caution on wooden decks.
K
eep all electrical cords away from a hot heater.
A
fter a period of storage and/or nonuse, inspect for any abrasion,
wear, cuts to the electrical cord.
T he use of accessory attachments not recommended by the appliance
manufacturer may cause injuries.
S
tore products indoors when not in use – out of the reach of children.
Servicing should be done only while the heater is disconnected from
the power supply.
To ensure continued protection against electrical shock, connect only
to properly grounded outlets.
Do not immerse in water. Disconnect electric cord from outlet before
cleaning, servicing and/or removing heating element. To reduce the
risk of electric shock, use with GFI protected electric outlet only.
High temperatures may be generated under certain abnormal
conditions. Do not partially or fully cover or obstruct this heater.
P
lease use protective gloves when assembling this product.
D
o not force parts together as this can result in personal injury or
damage to the product.
Use this heater only as descibed in this manual. Any other use not
recommended by the manufacturer may cause fire, electrical shock, or
injury to persons.
D
eaths, serious injury or damage to property may occur if the above is
not followed exactly.
page no.
Contact 1.800.762.1142 for assistance. Do not return to place of purchase.
Parts List
Exploded View
1
Finial
56-01-417
2
Dome
56-01-418
3
Thermal Baffle
56-01-476
4
Ceramic Insulator*
5
Dome Brace
6
Upper Power Cord*
7
Bulb Power Cord*
8
Heat Reflector
56-01-420
9
Bulb Clip (4)
56-01-452
10
Halogen Bulb
56-01-421
11
Heat Reflector Spacer
56-01-422
12
Wire Guard
56-01-423
13
Post Support
56-01-424
14
Post
56-01-484
Upper Body Assembly
56-01-483
2
56-01-419
3
15
Shroud Cover*
16
Shroud Gasket (2)*
17
Tip Switch*
18
Shroud Support Bracket*
19
Controller*
20
Inner Shroud Support Pole*
21
Inner Shroud Support Bar*
22
Pin Connector*
23
Inner Shroud Support Bracket*
24
Main Power Cord
25
Corner Shroud Bracket (4)*
26
Side Shroud Panel (3)*
27
Back Shroud Panel*
28
Power Switch Assembly*
29
Restoration Switch Assembly* 56-01-439
30
Fuse (250V, 20A)*
31
Fuse Cap*
32
Fuse Support Bracket*
33
Base
34
Power Cord Bracket*
35
Weight Plate
1
4
5
7
6
8
9
10
11
12
56-01-480
13
14
15
56-01-455
16
17
18
19
56-01-438
20
21
22
56-01-441
23
25
25
26 24
26
56-01-442
26
56-01-454
28
27
29
* Pre-assembled
30
31
32
16
33
34
35
Tools Required for Assembly (Not Included)
Hardware
A
B
Screw
5/32” x 10 mm Stainless Steel Phillips Truss Head
2 pcs
Screw
3/16” x 10 mm Black Nickel Plated Phillips Truss
Head
4 pcs
#2 Phillips Head Screwdriver
®
Outdoor Patio Heater Model No. EWT700SP
Assembly Instructions
1
DO NOT RETURN PRODUCT TO STORE.
For assistance call 1.800.762.1142 toll free. Please have
your owner’s manual and serial number available for
reference.
2
Attach Post
For Easiest Assembly:
• To avoid losing any small components or hardware,
assemble your product on a hard level surface that does
not have cracks or openings.
• Clear an area large enough to layout all components and
hardware.
• When applicable, tighten all hardware connections by
hand first. Once the step is completed, go back and fully
tighten all hardware.
• Follow all steps in order to properly assemble your
product.
Note: Two (2) adults may be required for assembly.
3
Attach Head Assembly
4
Attach Inner Power Cord
page no.
Contact 1.800.762.1142 for assistance. Do not return to place of purchase.
5
Attach Base Assembly and Shroud Gasket
Note: Rubber ring must be placed in the round opening in the base.
B
7
Attach Finial
x4
6
Attach Power Cord Bracket
A
x2
®
Outdoor Patio Heater Model No. EWT700SP
Operating Instructions
Cleaning and Care (continued)
NOTE: Heater functions best WITHOUT an extension cord.
4. Inspect heater before each use.
If an extension cord is necessary:
Illustration 1
• Use a UL approved, 3 prong plug (grounded)
cord shall be no. 14 AWG minimum size and
rated not less than 2,000 watts.
5. Have heater inspected annually and repairs should be made by a qualified service
person.
6. Do not clean heater with combustible or corrosive cleaners. Use warm, soapy water.
7. Do not paint engine, engine panels or dome.
• Never connect two or more extension cords
together.
8. This heater should be thoroughly cleaned on a regular basis.
• Use the shortest extension cord possible.
9. After a period of storage and/or non use, inspect for any abrasion, wear or cuts to the
power cord.
• Keep connections dry and off the ground.
• Avoid draping the electric heater cord where
children or animals could encounter it.
Before Turning “ON”
Cleaning Surfaces
Power switch in the “ON”
position
1. Make sure all labels, packaging and protective films
have been removed from the heater.
Illustration 2
2. Heater should be thoroughly inspected before each
use, and by a qualified service person at least
annually.
1. Wipe surfaces clean with mild dishwashing detergent or baking soda.
2. For stubborn surfaces use a citrus based degreaser and a nylon scrubbing brush.
3. Wipe clean with damp cloth.
Note: While cleaning your unit, be sure to keep the area around the heating element dry at all
times. Do not submerge the heating element. If the heating element is submerged in water, do
NOT use it. It must be replaced.
Illustration 5
Maintenance
Turning “ON”
To enjoy years of outstanding performance from
your heater, make sure you perform the following
maintenance activities on a regular basis:
1. Make sure the power button is in the “OFF” position.
(Illustration 1)
2. Plug the power cord into a dry GFI (Ground Fault
Interrupter) 3 plug outlet. (Illustration 2)
3. Push the power button in the “ON” position.
(Illustration 3)
1. Keep exterior surfaces clean.
Connecting the power cord to a
dry GFI 3 plug outlet.
2. Air flow must be unobstructed. Keep circulating air
passages around th ebulb clean.
4. Push the restoration button (Illustration 4). This will start the heater.
Replacing the Fuse
Note: When restarting the halogen bulb will start up slowly before getting to full power.
1. Make sure the power button is in the “OFF” position.
Metal Screw
While Heater is “ON”
If heater tips over, the heater will automatically
turn “OFF”.
Illustration 3
2. Unplug the power cord from the wall outlet.
3. Using a screwdriver, remove the fuse cover.
(Illustration 5)
1. IMMEDIATLEY unplug power cord from the wall outlet.
Note: ONLY replace the old fuse with a
250V 20A fuse.
2. Carefully turn the heater upright.
5. Reattach the fuse cover.
C
AUTION: Dome, pole and shroud cover may
be hot. Use heat resistant gloves to set heater
upright.
Note: Do not over tighten
6. Follow the Turning “ON” instructions or the Storage
Instructions.
3. Turn the power button to the “OFF” position.
Power switch in the “OFF”
position
Remove old fuse
Storage
Illustration 4
Between Uses and During Periods of Extended Inactivity or
When Transporting:
D
o NOT use the heater if there is any sign of
damage. A qualified technician should inspect
and make any nescessary repairs before the
heater is used again.
1. Push the power button into “OFF” .
2. Unplug the power cord from the wall outlet.
5. Plug the power cord into a dry GFI (Ground Fault
Interrupter) 3 plug outlet. (Illustration 2)
3. Store heater upright in an area sheltered from direct contact with inclement weather (such
as rain, sleet, hail, snow, dust and debris).
6. Push the power button in the “ON” position.
(Illustration 3)
7. Push the restoration button (Illustration 4). This will
start the heater.
Illustration 6
4. Carefully remove the old fuse, and replace with the
new fuse. (Illustration 6)
If heater tips over:
4. Inspect heater to ensure no damage.
If no damage continue to next step.
If there is damage call a qualified technician to inspect
and make any necessary repairs.
Remove fuse cover
4. If desired, cover heater to protect exterior surfaces and to help prevent build up in air
passages.
Restoration Button
Note: When restarting the halogen bulb will start up
slowly before getting to full power.
Turning “OFF”
1. Push the power button to the “OFF” position.
2. Unplug the power cord from the wall outlet.
Cleaning and Care
Notices
1. Abrasive cleaners will damage this product.
2. Never use oven cleaner to clean any part of heater.
3. Do not clean any heater part in a self cleaning oven. The extreme heat will damage
the finish.
W
ait until heater is cool before covering.
page no.
Contact 1.800.762.1142 for assistance. Do not return to place of purchase.
Product Registration
Specifications
For faster warranty service, please register your product immediately at www.bluerhino.com or
call 1.800.762.1142.
Certifications:
CSA International Requirement 22.2 No. 46-M1988
UL 1278
Limited Warranty
Fuel:
Electric
Blue Rhino Global Sourcing, Inc (“Vendor”) warrants to the original retail purchaser of this
product, and to no other person, that if this product is assembled and operated in accordance
with the printed instructions accompanying it, then for a period of one (1) year from the date
of purchase, all parts in such product shall be free from defects in material and workmanship.
Vendor may require reasonable proof of your date of purchase. Therefore, you should retain
your sales slip or invoice. This Limited Warranty shall be limited to the repair or replacement of
parts, which prove defective under normal use and service and which Vendor shall determine
in its reasonable discretion upon examination to be defective. Before returning any parts, you
should contact Vendor’s Customer Service Department using the contact information listed
below. If Vendor confirms, after examination, a defect covered by this Limited Warranty in any
returned part, and if Vendor approves the claim, Vendor will replace such defective part without
charge. If you return defective parts, transportation charges must be prepaid by you. Vendor will
return replacement parts to the original retail purchaser, freight or postage prepaid.
Power:
Maximum 1,200 Watts
This Limited Warranty does not cover any failures or operating difficulties due to accident,
abuse, misuse, alteration, misapplication, improper installation or improper maintenance or
service by you or any third party, or failure to perform normal and routine maintenance on
the product as set out in this owner’s manual. In addition, the Limited Warranty does not cover
damage to the finish, such as scratches, dents, discoloration, rust or other weather damage,
after purchase.
Made In:
China
Voltage:
120V AC
Frequency:
60 Hz
Net Weight:
33 lbs / 15 Kgs
Unit Dimensions:
22.9 in L x 22.9 in W x 40.8 in H / 58 cm x 58 cm x 103.5 cm
Manufacturer:
Blue Rhino Global Sourcing, Inc
This Limited Warranty is in lieu of all other express warranties. Vendor disclaims all warranties
for products that are purchased from sellers other than authorized retailers or distributors,
including the warranty of merchantability or the warranty of fitness for a particular purpose.
VENDOR ALSO DISCLAIMS AND ANY ALL IMPLIED WARRANTIES, INCLUDING WITHOUT
LIMITATION THE IMPLIED WARRANTIES OF MERCHANTABILITY AND FITNESS FOR A PARTICULAR
PURPOSE. VENDOR SHALL HAVE NO LIABILITY TO PURCHASER OR ANY THIRD PARTY FOR ANY
SPECIAL, INDIRECT, PUNITIVE, INCIDENTAL, OR CONSEQUENTIAL DAMAGES. Vendor further
disclaims any implied or express warranty of, and assumes no responsibility for, defects in
workmanship caused by third parties.
This Limited Warranty gives the purchaser specific legal rights; a purchaser may have other
rights depending upon where he or she lives. Some jurisdictions do not allow the exclusion or
limitation of special, incidental or consequential damages, or limitations on how long a warranty
lasts, so the above exclusion and limitations may not apply to everyone.
Vendor does not authorize any person or company to assume for it any other obligation or
liability in connection with the sale, installation, use, removal, return, or replacement of its
equipment, and no such representations are binding on Vendor.
Blue Rhino Global Sourcing, Inc.
Winston-Salem, North Carolina USA
(800) 762-1142
Troubleshooting
Problem
Possible Cause
Prevention/Cure
Unit will not operate
Not plugged in
Plug cord into grounded outlet
Fuse is blown
Replace fuse
Loose wiring
Call Customer Care Center
Reset Button is not activated
Press restoration button
Bulb is worn out
Contact Customer Care at 1.800.762.1142 for new bulb and
replacement instructions.
If problems can not be corrected by using these methods, please contact 1.800.762.1142 for assistance.
®
Outdoor Patio Heater Model No. EWT700SP