1
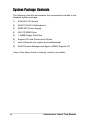
®
AP110
Pentium III IDE RAID Server
®
User’s Manual
Disclaimer/Copyrights
Checklist
No part of this manual, including the products and software described in it, may be
reproduced, transmitted, transcribed, stored in a retrieval system, or translated into
any language in any form or by any means, except documentation kept by the purchaser
for backup purposes, without the express written permission of ASUSTeK COMPUTER
INC. (“ASUS”).
ASUS PROVIDES THIS MANUAL “AS IS” WITHOUT WARRANTY OF ANY KIND,
EITHER EXPRESS OR IMPLIED, INCLUDING BUT NOT LIMITED TO THE IMPLIED
WARRANTIES OR CONDITIONS OF MERCHANTABILITY OR FITNESS FOR A
PARTICULAR PURPOSE. IN NO EVENT SHALL ASUS, ITS DIRECTORS,
OFFICERS, EMPLOYEES OR AGENTS BE LIABLE FOR ANY INDIRECT, SPECIAL,
INCIDENTAL, OR CONSEQUENTIAL DAMAGES (INCLUDING DAMAGES FOR
LOSS OF PROFITS, LOSS OF BUSINESS, LOSS OF USE OR DATA,
INTERRUPTION OF BUSINESS AND THE LIKE), EVEN IF ASUS HAS BEEN
ADVISED OF THE POSSIBILITY OF SUCH DAMAGES ARISING FROM ANY
DEFECT OR ERROR IN THIS MANUAL OR PRODUCT.
Product warranty or service will not be extended if: (1) the product is repaired, modified
or altered, unless such repair, modification of alteration is authorized in writing by
ASUS; or (2) the serial number of the product is defaced or missing.
Products and corporate names appearing in this manual may or may not be registered
trademarks or copyrights of their respective companies, and are used only for
identification or explanation and to the owners’ benefit, without intent to infringe.
The product name and revision number are both printed on the product itself. Manual
revisions are released for each product design represented by the digit before and
after the period of the manual revision number. Manual updates are represented by
the third digit in the manual revision number.
For previous or updated manuals, BIOS, drivers, or product release information, contact
ASUS at http://www.asus.com.tw or through any of the means indicated on the following
page.
SPECIFICATIONS AND INFORMATION CONTAINED IN THIS MANUAL ARE
FURNISHED FOR INFORMATIONAL USE ONLY, AND ARE SUBJECT TO CHANGE
AT ANY TIME WITHOUT NOTICE, AND SHOULD NOT BE CONSTRUED AS A
COMMITMENT BY ASUS. ASUS ASSUMES NO RESPONSIBILITY OR LIABILITY
FOR ANY ERRORS OR INACCURACIES THAT MAY APPEAR IN THIS MANUAL,
INCLUDING THE PRODUCTS AND SOFTWARE DESCRIBED IN IT.
Copyright © 2001 ASUSTeK COMPUTER INC. All Rights Reserved.
Product Name:
AP110
Manual Revision: 1.00 E767
Release Date:
June 2001
2
Contents
Disclaimer/Copyrights ....................................................... 2
ASUS Contact Information ................................................ 6
FCC/CDC Statements ........................................................ 7
Safety Precautions ............................................................. 8
Introduction: About This Manual .......................... 9
Audience ........................................................................... 10
Contents ........................................................................... 10
Conventions ..................................................................... 11
References ........................................................................ 11
System Package Contents .............................................. 12
Chapter 1: System Overview .............................. 13
1.1
1.2
1.3
1.4
System Features ...................................................... 14
Front Panel Features ............................................... 15
Rear Panel Features ................................................ 16
Internal Features ...................................................... 17
Chapter 2: Hardware Setup ................................ 19
2.1 Remove the Front Cover ......................................... 20
Unlock the Front Panel .............................................. 20
Remove the Screws ................................................... 20
Remove the Panel ..................................................... 20
2.2 Remove the Chassis Cover .................................... 21
Remove the Screws ................................................... 21
Remove the Cover ..................................................... 21
2.3 Motherboard Placement .......................................... 22
Placement Direction ................................................... 22
Motherboard Screws .................................................. 22
2.4 Install a CPU ............................................................. 23
CPU Socket Location ................................................. 23
CPU Orientation ......................................................... 23
Unlock the CPU Socket ............................................. 24
Insert the CPU ........................................................... 24
Secure the CPU ......................................................... 25
Connect the Fan Cable .............................................. 25
3
Contents
2.5 Install System Memory ............................................ 26
DIMM Sockets Location ............................................. 26
Install a DIMM ............................................................ 26
2.6 Install a Hard Disk Drive .......................................... 27
HDD Metal Cage ........................................................ 27
Remove the HDD Cage ............................................. 27
Install the HDD ........................................................... 28
Replace the HDD Cage ............................................. 28
Connect the Cables ................................................... 29
IDE HDD Cabling ....................................................... 29
2.7 Replace the Covers ................................................. 30
Re-install the Cover ................................................... 30
Re-install the Panel .................................................... 30
Chapter 3: Powering Up ..................................... 31
3.1 Getting Started ......................................................... 32
Connect a Monitor ..................................................... 32
Connect the Power Cord ........................................... 32
Power On ................................................................... 32
Check Power Status .................................................. 32
Chapter 4: Hardware Options ............................ 33
4.1 IDE RAID Kit ............................................................. 34
IDE RAID Kit Contents ............................................... 34
HDD Tray Frame ........................................................ 35
Hot-swap HDD Tray ................................................... 35
4.2 Install a Hot-swap HDD ........................................... 36
Install HDD Tray Frame ............................................. 36
Remove HDD Tray Cover .......................................... 37
Install an IDE Drive .................................................... 38
4.3 RAID Configuration ................................................. 39
Connect IDE Cables .................................................. 39
Install a RAID Card .................................................... 39
4.4 Removing a Hot-swap HDD Tray ............................ 40
Connect Power Cables .............................................. 40
4.5 CD-ROM Drive .......................................................... 41
Remove the CD-ROM Drive ...................................... 41
Re-install the CD-ROM Drive ..................................... 42
4
Contents
Appendix A: Power Supply ................................. 43
A.1 General Description ................................................. 44
A.2 Specifications .......................................................... 45
Input Characteristics .................................................. 45
Output Characteristics ............................................... 45
Over-Voltage Protection (OVP) .................................. 45
Appendix B: Troubleshooting ............................. 47
B.1 Simple Fixes ............................................................. 48
5
ASUS Contact Information
ASUSTeK COMPUTER INC. (Asia-Pacific)
Marketing
Address:
Telephone:
Fax:
Email:
150 Li-Te Road, Peitou, Taipei, Taiwan 112
+886-2-2894-3447
+886-2-2894-3449
[email protected]
Technical Support
Tel (English):
Tel (Chinese):
Fax:
Email:
Newsgroup:
WWW:
FTP:
+886-2-2890-7123
+886-2-2890-7113
+886-2-2893-7775
[email protected]
news2.asus.com.tw
www.asus.com.tw
ftp.asus.com.tw/pub/ASUS
ASUS COMPUTER INTERNATIONAL (America)
Marketing
Address:
Fax:
Email:
6737 Mowry Avenue, Mowry Business Center, Building 2
Newark, CA 94560, USA
+1-510-608-4555
[email protected]
Technical Support
Fax:
BBS:
Email:
WWW:
FTP:
+1-510-608-4555
+1-510-739-3774
[email protected]
www.asus.com
ftp.asus.com.tw/pub/ASUS
ASUS COMPUTER GmbH (Europe)
Marketing
Address:
Fax:
Email:
Harkortstr. 25, 40880 Ratingen, BRD, Germany
+49-2102-442066
[email protected] (for marketing requests only)
Technical Support
Hotline:
MB/Others: +49-2102-9599-0
Notebook: +49-2102-9599-10
Fax:
+49-2102-9599-11
Support (Email): www.asuscom.de/de/support (for online support)
WWW:
www.asuscom.de
FTP:
ftp.asuscom.de/pub/ASUSCOM
6
FCC/CDC Statements
Federal Communications Commission Statement
This device complies with FCC Rules Part 15. Operation is subject to the
following two conditions:
•
•
This device may not cause harmful interference, and
This device must accept any interference received including
interference that may cause undesired operation.
This equipment has been tested and found to comply with the limits for a
Class B digital device, pursuant to Part 15 of the FCC Rules. These limits
are designed to provide reasonable protection against harmful interference
in a residential installation. This equipment generates, uses and can radiate
radio frequency energy and, if not installed and used in accordance with
manufacturer’s instructions, may cause harmful interference to radio
communications. However, there is no guarantee that interference will not
occur in a particular installation. If this equipment does cause harmful
interference to radio or television reception, which can be determined by
turning the equipment off and on, the user is encouraged to try to correct the
interference by one or more of the following measures:
•
•
•
•
Reorient or relocate the receiving antenna.
Increase the separation between the equipment and receiver.
Connect the equipment to an outlet on a circuit different from that to
which the receiver is connected.
Consult the dealer or an experienced radio/TV technician for help.
WARNING! The use of shielded cables for connection of the monitor
to the graphics card is required to assure compliance with FCC
regulations. Changes or modifications to this unit not expressly
approved by the party responsible for compliance could void the user’s
authority to operate this equipment.
Canadian Department of Communications Statement
This digital apparatus does not exceed the Class B limits for radio noise
emissions from digital apparatus set out in the Radio Interference Regulations
of the Canadian Department of Communications.
This class B digital apparatus complies with Canadian ICES-003.
7
Safet y Precautions
Electrical Safety
IMPORTANT
•
•
•
•
Before installing or removing signal cables, ensure that the
power cables for the system unit and all attached devices
are unplugged.
To prevent electrical shock hazard, disconnect the power
cable from the electrical outlet before relocating the
system.
When adding or removing any additional devices to or from
the system, ensure that the power cables for the devices
are unplugged before the signal cables are connected. If
possible, disconnect all power cables from the existing
system before you add a device.
If the power supply is broken, do not try to fix it by yourself.
Contact an authorized dealer.
CAUTION
This product is equipped with a three-wire power cable
and plug for the user’s safety. Use the power cable with
a properly grounded electrical outlet to avoid electrical
shock.
Operation Safety
IMPORTANT
•
•
•
•
•
8
Any mechanical operation on this server must be
conducted by certified or experienced engineers.
Before operating the server, carefully read all the manuals
included with the server package.
Before using the server, make sure all cables are correctly
connected and the power cables are not damaged. If any
damage is detected, contact your dealer as soon as
possible.
To avoid short circuits, keep paper clips, screws, and
staples away from connectors, slots, sockets and circuitry.
Avoid dust, humidity, and temperature extremes. Place the
server on a stable surface.
“About This Manual” introduces the
contents of this document. This part
includes the target audience, chapter
description, and conventions used. It also
lists other sources of information that are
not contained in this manual.
AP110 Server User’s Manual
About This Manual
Introduction
9
Audience
This installation guide is intended for system integrators, and
experienced users with at least basic knowledge of configuring an
entry-level server.
Contents
This manual contains the following parts:
1. Introduction: About This Manual
This part introduces the contents of this document. It includes the
target audience, chapter description, and conventions used. It also
lists other sources of information that are not contained in this
manual.
2. Chapter 1: System Overview
This chapter describes the general features of the AP110 server.
It includes sections on front panel and rear panel specifications.
3. Chapter 2: Hardware Setup
This chapter lists the hardware setup procedures that you have to
perform when installing system components.
4. Chapter 3: Powering Up
This chapter tells how to get started with the AP110 server after
you have installed the basic components.
5. Chapter 4: Hardware Options
This chapter gives information on how to install the optional IDE
RAID kit. You will also find the procedure for removing and installing
the CD-ROM drive in this chapter.
6. Appendix A: Power Supply Information
This appendix gives information on the 250-watt switching power
supply that comes with the AP110 server.
7. Appendix B: Troubleshooting
This appendix lists the common problems that you may encounter
while using the AP110 server. It lists the possible causes of the
problems and offers solutions. You may refer to this part and try to
solve simple problems before calling customer support.
10
Introduction: About This Manual
Conventions
Symbols
To make sure that you perform certain tasks properly, take note of
the following symbols used throughout this manual.
WARNING: Information to prevent injury to yourself when
trying to complete a task.
CAUTION: Information to prevent damage to the components
when trying to complete a task.
IMPORTANT: Information that you MUST follow to complete
a task.
NOTE: Tips and information to aid in completing a task.
References
Refer to the following sources for additional information and for product
and software updates.
1. ASUS CUV-2LSV Series Motherboard User’s Manual
This manual contains detailed information about the CUV-2LV
motherboard.
2. ASUS Websites
The ASUS websites worldwide provide updated information on
ASUS hardware and softare products. The ASUS websites are
listed in the ASUS Contact Information on page 6.
3. Optional Documentation
Your product package may include optional documentation such
as a CD-ROM manual, warranty flyers, and others that may have
been added by your dealer. NOTE: These documents are not part
of the standard server package.
AP110 Server User’s Manual
11
System Package Contents
The following checklist enumerates the components included in the
standard system package.
1)
ASUS AS-15 Chassis
2)
ASUS CUV-2LV Motherboard
3)
250W ATX Power Supply
4)
50X CD-ROM Drive
5)
1.44MB Floppy Disk Drive
6)
Support CD with Drivers and Utilities
7)
User’s Manuals (for system and motherboard)
8)
ASUS System Management Agent (ASMA) Support CD
If any of the above items is missing, contact your dealer.
12
Introduction: About This Manual
This chapter describes the general
features of the AP110 server. It includes
sections on front panel, rear panel, and
internal features of the server.
AP110 Server User’s Manual
System Overview
Chapter 1
13
1.1 System Features
The ASUS AP110 Server is a stylish tower chassis that accommodates
the ASUS CUV-2LV motherboard. The server is powered by Intel®
Pentium® III/Celeron™ processor, and supports the latest I/O, audio,
and video technologies through the chipsets embedded on the
motherboard.
Following are highlights of the server’s many features.
14
•
Processor: Support for Intel Pentium III/Celeron processor
running up to over 1GHz
•
Memory: Three DIMM sockets that support Intel PC133/PC100compliant DIMMs, NEC’s VC133-compliant Virtual Channel (VC)
SDRAM, or Enhanced Memory System’s High-speed DRAMs
(HSDRAMs) up to 3GB
•
System Chipset: VIA Apollo Pro133A composed of VT82C694X
North Bridge that supports 133/100/66MHz Front Side Bus (FSB),
and 133/100/66MHz memory bus, and VT82C686A South Bridge
with PCI Super I/O integrated peripheral controller
•
LAN Chipset: Two Intel 82559 Fast Ethernet LAN controller that
fully supports 10BASE-T/100BASE-TX
•
VGA Chipset: ATI RAGE-XL controller with 4MB video memory
•
Storage: Four external bays that support two optional 5.25-inch
IDE hot-swap drives, one 50X CD-ROM, and 1.44MB floppy drive;
internal 3.5-inch drive bays available for two additional IDE drives
•
Expansion: Four PCI expansion slots
•
Power Supply: 250-watt ATX power supply with a 115Vac/
230Vac voltage selector switch
•
Security: Equipped with security keylocks for chassis and
hot-swap drives
Chapter 1: System Overview
1.2 Front Panel Features
The AP110 front panel is designed with a door on the upper part
secured by a keylock. When locked, the door provides security to the
hot-swap IDE drives and other internal components because neither
the front panel nor the chassis cover cannot be removed.
When the door is open, you can easily access the hot-swap IDE
drives (if available), floppy disk drive, and CD-ROM drive.
Chassis Keylock
Front Panel Door
Floppy Disk Drive
Power LED
IDE HDD LED
Hot-Swap IDE Drives (optional)
Power Button
Reset Button
CD-ROM Drive
AP110 Server User’s Manual
15
1.3 Rear Panel Features
The AP110 rear panel includes the external I/O ports. The following
picture shows the cable connectors and the devices that you connect
to the ports.
AC Power
PS/2 KB
PS/2 Mouse
USB
Serial
Parallel
VGA
RJ-45
Voltage Selector
The switching power supply that
came with the server has a voltage
selector switch below the power
socket. Use this switch to select the
appropriate voltage according to the
voltage supply in your area.
If the voltage supply in your area is
100-127V, set the switch to 115V.
If the voltage supply in your area is
200-240V, set the switch to 230V.
115V/ 230V
Voltage Selector
CAUTION
Setting the switch to 115V in a 230V environment will
seriously damage the server.
16
Chapter 1: System Overview
1.4 Internal Features
The standard components inside the AP110 server include the
motherboard, power supply, floppy and CD-ROM drives, and cables.
The picture below shows the standard components and the optional
IDE RAID kit that consists of hot-swap drive tray sets, IDE RAID
card, and IDE cables.
1
2
3
4
8
5
7
6
1.
2.
3.
4.
5.
6.
7.
8.
Power Supply
Floppy Disk Drive
Hot-swap Drive Trays (optional)
CD-ROM Drive
3.5-inch Internal Device Bays
IDE Cables for Hot-swap Drives (optional)
IDE RAID Card (optional)
CUV-2LV Motherboard
NOTE
The IDE RAID kit is optional and does not come with all
models. If your server includes a RAID kit, it comes already
pre-installed in the chassis.
AP110 Server User’s Manual
17
18
Chapter 1: System Overview
This chapter describes the hardware
setup procedures that you have to
perform when installing system
components.
AP110 Server User’s Manual
Hardware Setup
Chapter 2
19
2.1 Remove the Front Cover
Follow these steps to remove the front panel.
Unlock the Front Panel
Insert the system key to the keylock
and turn it 90 degrees counter
clockwise to unlock the front panel
cover.
Chassis Keylock
Remove the Screws
Front Panel Screws
Use a Phillips screwdriver to remove
the two screws that secure the front
panel to the main chassis.
Remove the Panel
1. Close the panel door.
2. Place your hands on the upper
part of the panel and pull it
firmly.
20
Chapter 2: Hardware Setup
2.2 Remove the Chassis Cover
Follow these steps to remove the chassis cover.
Remove the Screws
Remove the screws that secure the
cover to the main chassis. The
locations of the screws are indicated
by circles.
Remove the Cover
Slide the cover for about an inch
toward the front and lift it out of the
chassis.
AP110 Server User’s Manual
21
2.3 Motherboard Placement
NOTE
The motherboard and other internal components of the
AP110 server are already installed as indicated in section
“1.4 Internal Features”. Refer to the motherboard user’s
manual for detailed technical information about the
motherboard.
When removing the motherboard, you need to remove the
hot-swap trays and the CD-ROM drive first, because they
overlap with the motherboard. Refer to Chapter 4 for the
procedure to remove the drives.
Placement Direction
When installing the motherboard,
make sure that you place it into the
chassis correctly. The edge with the
external ports goes to the rear part
of the chassis.
Rear Panel
Motherboard Screws
Place nine (9) screws in the holes
indicated by circles to secure the
motherboard to the chassis. Do not
overtighten the screws. Doing so
may damage the motherboard.
22
Chapter 2: Hardware Setup
2.4 Install a CPU
The Socket 370 on the CUV-2LV motherboard supports a Pentium
III/Celeron CPU. This section tells you how to install a CPU.
The following pictures show the CPU socket location on the
motherboard, and the Pin 1 mark on a CPU.
CPU Socket Location
The CPU socket is located beside
the rear panel connectors. Note the
Pin 1 location on the socket.
Pin 1
CPU Fan Connector
CPU Socket 370
CPU Orientation
A CPU has a mark (usually a notch
or a gold mark) on one corner to help
you identify the correct orientation
when inserting it to the socket.
Match the marked corner of the CPU
to Pin 1 on the socket.
Marked Corner
NOTE
In most cases, when you buy a CPU, the fan heatsink is
already attached to the CPU.
AP110 Server User’s Manual
23
2.4 Install a CPU
Unlock the CPU Socket
Unlock the socket by pressing the
lever sideways then lifting it up to a
90°-100° angle.
Insert the CPU
1. Position the CPU above the
socket such that its notched or
marked corner matches the
socket corner near the end of
the lever.
2. Carefully insert the CPU into
the socket until it fits in place.
Marked Corner
Socket Pin 1
CAUTION
The CPU fits only in one orientation. Do not force the CPU
into the socket to prevent bending the pins and damaging
the CPU. If the CPU does not fit completely, check its
orientation or check for bent pins.
24
Chapter 3: Hardware Setup
2.4 Install a CPU
Secure the CPU
Push down the lever to secure the
CPU to the socket. The lever clicks
in place indicating that the socket is
locked.
NOTE
The fan heatsink picture above is for reference only. The
fan heatsink that you purchased may not look exactly the
same as shown. Refer to the documentation that comes
with the CPU for more information.
Connect the Fan Cable
Connect the CPU fan cable to the
3-pin CPU_FAN connector on the
motherboard.
Fan Cable
CPU_FAN Connector
AP110 Server User’s Manual
25
2.5 Install System Memor y
DIMM Sockets
Location
The motherboard has three Dual
Inline Memory Module (DIMM)
sockets that support 3.3V SDRAM
modules in 32, 64, 128, 256, 512MB,
or 1GB densities.
DIMM Sockets
Install a DIMM
1. Unlock a DIMM socket by
pressing the retaining clips
outward. Align a DIMM on the
socket such that the notches
on the DIMM match the breaks
on the socket.
2. Firmly insert the DIMM into the
socket until the retaining clips
snap back in place and the
DIMM is properly seated.
DIMM Notch
Socket Break
Installed DIMM
CAUTION
DIMMs are keyed with notches so that they fit in only one
direction. DO NOT force a DIMM into a socket to avoid
damaging the DIMM.
26
Chapter 3: Hardware Setup
2.6 Install a Hard Disk Drive
The AP110 server comes with drive bays for internal hard disk drives.
You can install up to two internal hard disk drives.
HDD Metal Cage
The HDD metal cage is located right
under the CD-ROM drive bay. You
have to remove the cage from the
chassis to conveniently install a hard
disk drive.
HDD Metal Cage
Remove the HDD Cage
1. Remove the screws (indicated
by circles) that secure the HDD
cage to the front of the chassis.
Cage Screw
2. Remove the screw on the side
of the HDD cage.
3. Pull the HDD cage out of the
chassis.
Cage Screw
AP110 Server User’s Manual
27
2.6 Install a Hard Disk Drive
Install the HDD
1. Insert the HDD into the cage
(label side up) until the holes
on the sides align.
2. Secure the HDD with four
screws (two on each side).
Replace the HDD Cage
1. Carefully insert the HDD cage
back into the chassis until it fits
in place.
2. Secure the cage with the
screws you removed earlier.
28
Chapter 2: Hardware Setup
2.6 Install a Hard Disk Drive
Connect the Cables
1. Connect one end of the IDE
cable to the IDE connector at
the back of the drive, matching
the red stripe on the cable with
Pin 1 on the IDE connector.
2. Connect a power cable (plug
marked P3 or P4) to the power
connector at the back of the
drive.
IDE Cable
Red Stripe to Pin 1
Power Cable
(P3 or P4)
3. Connect the other end of the
IDE cable to the primary IDE
connector (blue connector) on
the motherboard.
Primary IDE Connector
IDE HDD Cabling
The picture on the left shows an
installed HDD.
AP110 Server User’s Manual
29
2.7 Replace the Covers
NOTE
If you are installing optional components such as the IDE
RAID kit, proceed to Chapter 4 before replacing the covers.
Re-install the Cover
1. Place the cover from the top of
the chassis, leaving about an
inch from the rear edge.
2. Slide the cover toward the rear
panel until it fits in place.
Re-install the Panel
1. Align the bottom edge of the
panel to the chassis.
2. Firmly push the panel with both
hands until it fits in place.
3. Open the panel door.
4. Secure the panel with the two
screws that you removed
earlier.
5. Lock the front panel with the
system key.
30
Chapter 2: Hardware Setup
Chapter 3
Powering Up
This chapter tells how to get started with
the AP110 server. Powering up the server
basically includes connecting the cables
and turning power on.
AP110 Server User’s Manual
31
3.1 Getting Star ted
Make sure that you have completed the basic system installations in
Chapter 2, then follow these steps to start up the server.
Connect a Monitor
Connect a monitor by plugging hte
monitor cable to the video port (blue
port) on the server rear panel.
Video Port
Connect the Power Cord
1. Adjust the voltage selector to
the correct voltage in your area.
2. Connect a power cord to the
power connector on the rear panel.
3. Plug the power cord to a grounded
wall socket.
Voltage Selector
Power Connector
Power On
Turn on the server by pressing the
power button on the front panel.
Power Button
Check Power Status
After turning on the power, the power
LED lights up. If it doesn’t, check the
power connection.
Power LED
32
Chapter 3: Powering Up
This chapter tells how to install the
optional IDE RAID kit.
AP110 Server User’s Manual
Hardware Options
Chapter 4
33
4.1 IDE RAID Kit
The AP110 server supports a maximum of four hard disk drives, two
external and two internal. The external HDD bays are available for
an IDE RAID configuration using the optional IDE RAID Kit.
This chapter tells about external HDD installation using the IDE RAID
kit. Refer to Chapter 3 for instructions on internal HDD installation.
NOTE
The IDE RAID kit is optional and does not come with all
models. If your server includes a RAID kit, it comes already
pre-installed in the chassis.
IDE RAID Kit Contents
Hot-swap HDD Tray Sets
RAID Card
ATA/100 IDE
Cables
Screws
Security Keys
NOTE
The IDE RAID kit also includes a diskette that contains the
IDE drivers and a RAID card user’s manual.
34
Chapter 4: Hardware Options
4.1 IDE RAID Kit
HDD Tray Frame
The HDD tray frame is a separate
unit that holds the hot-swap drive
tray. A 64-pin male connector is
found on the rear of the frame. This
connector matches the 64-pin
female connector at the back of the
hot-swap drive tray.
64-pin Male Connector
The back of the tray frame is an HDD
fan, an IDE connector (male), and a
power connector.
HDD Fan
IDE Connector
Power Connector
Hot-swap HDD Tray
64-pin Female Connector
The hot-swap drive tray is an
enclosure that holds the HDD. The
drive tray interior includes an IDE
cable and a power cable.
Power Cable
IDE Cable
Hot-swap HDD Tray
with Cover
AP110 Server User’s Manual
35
4.2 Install a Hot-swap HDD
Install HDD Tray Frame
1. Insert an HDD tray frame into
one external drive bay as
shown.
2. Secure the frame with four
screws (two on each side).
NOTE: Align the front screws
with the holes labeled 1.
3. Follow steps 1 and 2 to install
the second HDD tray frame.
The picture on the right shows the
two installed HDD tray frames.
Frame Screw
Align with Hole 1
36
Chapter 4: Hardware Options
4.2 Install Hot-swap HDD
Remove HDD Tray
Cover
The hot-swap drive tray has a cover
that you have to remove before you
can install a hard disk.
To remove the tray cover:
1. Pull up the lever on the front of
the tray. Doing this action
slides the tray cover backward
about a quarter of an inch.
2. Following the direction of the
arrow in the picture, use a
finger to flip out the metal latch
on the front corner of the cover
to disengage it from the tray.
Tray Lever
3. Slide the cover all the way
back to remove it.
Metal Latch
AP110 Server User’s Manual
37
4.2 Install Hot-swap HDD
Install an IDE Drive
1. Connect the IDE cable to the
IDE connector at the back of
the drive.
2. Connect the power cable to the
power connector at the back of
the drive.
IDE Cable
Power Cable
3. Carefully place the drive into
the tray until it fits in place.
4. Secure the drive with four
screws (two on each side).
5. Align the tray cover to the rails
at the back of the tray, then
slide the cover forward until the
metal latch clicks in place.
6. Insert the hot-swap drive tray
into the bay until it is flushed to
the front panel.
7. Lock the hot-swap drive tray
with the security key to prevent
unauthorized access.
8. Do steps 1 to 7 to install the
other hot-swap drive.
38
Installed Hot-Swap
Drive Trays
Chapter 4: Hardware Options
4.3 RAID Configuration
This section presents only the physical hardware connections of the
RAID card, hot-swap HDDs, and IDE and power cables. For detailed
instructions on RAID configuration, refer to the user’s manual that
came with the IDE RAID kit.
Install a RAID Card
1. Remove the cover opposite the
PCI1 expansion slot.
2. Carefully insert the golden
fingers of the RAID card into
the slot until the card is
properly seated.
RAID Card
Connect IDE Cables
1. Connect one end of an IDE
cable to the IDE1 connector on
the RAID card, and the other
end to the back of a hot-swap
drive frame.
2. Connect one end of the second
IDE cable to the IDE2
connector on the RAID card,
and the other end to the
second hot-swap drive frame.
IDE2 Connector
IDE1 Connector
IMPORTANT
Use two separate IDE cables for IDE1 and IDE2
connections.
AP110 Server User’s Manual
39
4.3 RAID Configuration
Connect Power Cables
Connect the power cables, with
plugs labeled P5 and P6, to the
power connectors at the back of the
hot-swap drive frames.
Power Cables
4.4 Removing a Hot-swap HDD Tray
In the future, you might need to
remove the drive tray and
replace a hot-swap HDD.
To remove a hot-swap drive
tray:
1. Unlock the drive tray you
desire to remove.
2. Lift up the tray handle.
3. Pull the tray out of the bay.
4. Refer to section 4.2 for
instructions on installing a hotswap HDD.
40
Chapter 4: Hardware Options
4.5 CD-ROM Drive
The server comes with the CD-ROM drive already installed. This
section tells how to remove and re-install the CD-ROM drive.
You will need to remove the CD-ROM drive for either one of the
following reasons:
1. You need to replace the drive
2. You need to remove the motherboard. The CD-ROM drive
overlaps with the top right corner of the motherboard, so you
can not get it out without moving the drive outward.
Remove the CD-ROM Drive
1. Disconnect the power and IDE
cables from the drive.
2. Remove the four screws (two
on each side) that secure the
drive to the chassis.
3. Carefully pull the drive out of
the chassis.
Power and
IDE Cables
CD-ROM
Screws
NOTE
If you are doing the above procedure for the purpose of
removing the motherboard, you do not have to completely
remove the drive from the chassis. Simply pull out the drive
for about an inch, or until you can access the motherboard.
In this instance, you also have to pull out the hot-swap drive
trays because they, too, overlap with the motherboard.
Top Right Corner
of the Motherboard
Hot-swap HHD Trays
and CD-ROM Drive
Pulled Out
AP110 Server User’s Manual
41
4.5 CD-ROM Drive
Re-install the CD-ROM
Drive
1. Align the CD-ROM drive to its
bay and carefully push it
inward until it is flushed to the
front panel.
2. Secure the drive with the
screws that you removed
earlier (two on each side).
NOTE: Align the front screw
with the hole labeled 1.
CD-ROM
Screws
Align with Hole 1
3. Connect the IDE cable to the
IDE connector at the back of
the drive, matching the red pin
stripe on the cable with Pin1 on
the IDE connector.
4. Connect the power cable
labeled P2 to the power
connector at the back of the
drive.
IDE Cable
Red Stripe to Pin 1
Power Cable (P2)
42
Chapter 4: Hardware Options
Appendix A
Power Supply
This appendix gives information on the
250-watt switching power supply that
comes with the AP110 server.
AP110 Server User’s Manual
43
A.1 General Description
The server comes with a 250W ATX power supply with universal AC
input that includes PFC and ATX-compliant output cables and
connectors. The power supply has an internal cooling fan.
The power supply has seven plugs labeled P1 to P7. The picture
below shows the specific device assignments for the plugs.
P2
P4
P3
P1.
P2.
P3.
P4.
P5.
P6.
P7.
44
P1
P5
P6
P7
Motherboard ATX Power
CD-ROM Drive
Internal HDD
Internal HDD
Hot-swap HDD
Hot-swap HDD
Floppy Disk Drive
Appendix A: Power Supply
A.2 Specifications
Input Characteristics
Input Voltage Range
Min
Nom
Max
Range 1
90V
115V
135V
Range 2
180V
230V
265V
Input Frequency Range
47 Hz to 63 Hz
Maximum Input ac Current 9A max at 115Vac
5A max. at 230Vac, maximum load
Inrush Current
70A max. at 115Vac,
full load cold start at 25°C
Efficiency
68% min. at nominal input,
maximum load
Output Characteristics
Output
Load Range
Voltage
Min
Max
Min
Max
Max
+5V
1.5A
25.0A
-5%
+5%
50mVp-p
+12V
0.2A
8.0A
-5%
+5%
120mVp-p
-12V
0A
0.8A
-10%
+10%
150mVp-p
-5V
0A
0.5A
-5%
+5%
100mVp-p
+5Vsb
0A
2.0A
-5%
+5%
100mVp-p
+3V3
0A
14.0A
-5%
+5%
50mVp-p
Regulation
Ripple
Over-Voltage Protection (OVP)
Output Voltage
Maximum Voltage
+5V
6.5V
+12V
15.6V
+3.3V
4.3V
NOTE
The power supply will shut down and latch off for shorting
+5V, +12V, -12V, -5V, or +3.3V. By shorting +5Vsb, the power
supply can latch down or automatically recover when the
fault condition is removed.
AP110 Server User’s Manual
45
46
Appendix A: Power Supply
This appendix lists the common problems
that you may encounter while using the
AP110 server. It lists the possible causes
of the problems and offers solutions. You
may refer to this part and try to solve
simple problems before calling customer
support.
AP110 Server User’s Manual
Troubleshooting
Appendix B
47
B.1 Simple Fixes
NOTE
Some problems that you may encounter are not due to
defects on the system or the components. These problems
only requires simple troubleshooting actions that you can
perform by yourself.
Problem
The power LED on the server
and/or the monitor do not light
up
Action
1. Make sure that the 115V/230V
voltage selector switch is set to
the correct voltage supply in
your area.
2. Check the power cable
connection on the system rear
panel if properly connected.
3. Make sure that the power
cables are connected to a
grounded power outlet.
4. Press the power button to
make sure that the system is
turned on.
The keyboard does not work
Check the keyboard cable if properly
connected to the keyboard port.
The mouse does not work
Check the mouse cable if properly
connected to the mouse port.
The system does not perform
power-on self tests (POST) after
it was turned on
1. Check the memory modules
and make sure you installed
the DIMMs the system
supports.
2. Make sure that the DIMMs are
properly installed on the
sockets.
48
Appendix B: Troubleshooting
Problem
The system continuously beeps
after it was turned on
Action
1. Check the memory modules
and make sure you installed
the DIMMs the system
supports.
2. Make sure that the DIMMs are
properly installed on the
sockets.
The message “Non-system disk
or disk error” appears
Check if bootable HDD is active.
RAID HDD is only detected as
1024MB
1. Boot from DOS/Win9x floppy
disk.
2. Run FDISK utility to delete all
partition
3. Reboot the system and run
FDISK /MBR.
RAID HDD shows incorrect size
when you execute FDISK
If the RAID set is larger than 64GB,
try using SPFDISK utility to solve the
problem.
PCI-IDE RAID controller does
not detect HDDs
Press F6 and load the PCI-IDE RAID
driver when booting from Windows
NT/200 OS CD.
Onboard IDE HDD is unstable
Install the VIA utility drivers from the
ASUS support CD.
Network connection not
available
1. Make sure the network cable is
connector the RJ-45 port on
the rear panel.
2. Make sure that you have
installed the network drivers
from the motherboard support
CD.
AP110 Server User’s Manual
49
50
Appendix B: Troubleshooting