1
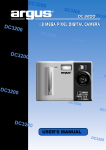
DC-1512E
USER MANUAL
Package Contents:
Argus 1512E Digital Camera
AAA Batteries
USB Cable
Installation CD
0-01_151EmanualR1.indd 1
/1/0 1:51:1 PM
Table of Contents
Safety And General Information ........................2
Getting To Know Your Camera ...........................5
Before Using The Camera ..................................6
Operating The Camera .......................................8
Installing The Software .......................................11
Downloading Pictures ........................................12
Frequently Asked Questions .............................13
Specification .......................................................14
Safety and General Information
Thank you for purchasing the Argus DC-1512E. We hope that you
enjoy this camera for years of trouble-free operation. Please read this
manual carefully before using the camera and follow the instructions to
avoid any damage that could be caused by improper operation.
Caution
The software CD-ROM packaged with the camera is designed to be
used with a personal computer only. Do not attempt to play this CDROM on a stereo or CD player as this may cause damage to both
the disc and the CD player.
0-01_151EmanualR1.indd /1/0 1:51:1 PM
Before Using Your Camera
Use your camera to shoot several trial images before taking pictures
of important subjects to ensure proper operation. Any loss caused by
the malfunction of this product (such as costs of photography or loss of
benefit generated by the photography) is not the responsibility of Argus
Camera Company and no compensation will be given for it.
Copyright information
Unless agreed by the rightful owner, pictures taken with this digital
camera cannot be used in violation of copyright law. Moreover, when
there is a “No Photography” restriction in place, you cannot record any
performance, improvisation, or exhibit even for personal use. Any transfer of pictures or memory cards with data must be conducted under the
constraints of copyright law.
Caution when using the camera
This product consists of intricate electrical parts. To ensure the camera
photographs normally, do not drop or hit the camera when taking pictures. Avoid using or placing the camera in the following locations:
1. Damp and dusty places.
2. Sealed vehicles or other places exposed to direct sunlight or subject to
extremely temperatures.
3. Turbulent environments.
Do not open the battery cover when the power is on as this may cause a
loss of images.If the camera has gotten wet, immediately turn the power
OFF and remove the batteries.
0-01_151EmanualR1.indd /1/0 1:51:1 PM
This camera is a precision electronic device. Do not attempt to service
this camera yourself. Opening or removing the cover may expose you to
dangerous voltages or other risks. Further, avoid exposing this camera
to direct sunlight as doing so could cause a fire. Do not attempt to dry it
with an external heat source.
How to maintain your camera
1. If the lens, LCD display, or viewfinder is dirty, please use the accompanying cleaning cloth to wipe the surface clean. Avoid touching these
areas with your fingers.
2. When not in use, keep the camera in its carrying case, otherwise you
risk scratching the lens, LCD display or viewfinder.
3. Do not use soap, detergent, or other solution to clean the camera, use
a clean, soft cloth only.
0-01_151EmanualR1.indd /1/0 1:51:1 PM
Getting To Know Your Camera
0-01_151EmanualR1.indd 5
/1/0 1:51:1 PM
LCD Display
The LCD screen will display different symbols when the
MODE button is pressed consecutively, and the interpretations are as follows:
Before Using The Camera
Open the battery compartment located at the back of the
appliance and place three AAA alkaline batteries according to the direction shown on the diagram at the bottom
0-01_151EmanualR1.indd /1/0 1:51:1 PM
of the compartment. Then close the compartment and
press the MODE button. The number 26 will appear on
the LCD screen. This indicates that it is ready to take 26
“high-resolution” photographs and the memory is empty.
When the LCD screen flashes, which indicates low battery power, it is time to replace the batteries.
Note: Do not change the battery until after you connect
the camera to a computer. Otherwise the previously
taken photographs will be erased.
Important Note: We strongly recommend that you do
not use rechargeable batteries in order not to affect the
performance of your camera.
About Your Digital Camera
Using this digital camera will be a new experience. You
no longer need films and do not need to worry about
aging (colors fading) of your precious pictures. You can
also store all your photos on your computer and on CDROM. After taking pictures, you can now touch them up
0-01_151EmanualR1.indd /1/0 1:51:1 PM
in order to correct imperfections due to poor conditions.
You can also send your photos via the Internet and use
your camera as a webcam allowing for online interactive
discussions with your family and friends.
Functions and Characteristics
Camera Function: The camera can capture photos and
digitally store the images within the internal memory.
Computer Interface: The digital camera does not use
films . The photos can be transferred directly onto your
computer by using the supplied USB cable software. You
can now enjoy your photos immediately, print them or
send them to your friends via the internet.
Video Function: When connected to a computer, the
camera functions as a web cam. It can be used to conduct a “face-to-face” conversation with images on the
internet.
0-01_151EmanualR1.indd /1/0 1:51:1 PM
Timer: The camera has a time delay of 10 seconds accompanied by a beep. After 10 seconds, the camera will
take the photograph automatically.
Continuous Shooting: In certain cases, you may wish
to record a group of consecutive images. Your camera
can take such succession photos.
Automatic Exposure Control: The camera automatically controls exposure in poor light conditions. You no
longer have to worry about aperture or shutter speed
control.
Automatic Shutdown: After 30 seconds of inactivity the
camera automatically shuts down, reducing the consumption of batteries to a minimum. Alkaline batteries
allow you to take more than 200 photographs.
Applications Supplied: The camera is supplied with
a powerful photo processing program that allows you to
capture, save, touch up, transform, print and send your
0-01_151EmanualR1.indd /1/0 1:51:1 PM
photos, in any manner that you want. It also allows you
to transform the camera into a video camera and link it
up to most image processing programs, network management programs and video programs used.
Operating the Camera
Taking Photos
This is the default mode when the camera is turned on.
Press the shutter button. You will hear a beep and camera takes a photo. The number displayed on the LCD
screen will decrease by one. If the brightness is too low,
the camera will beeps twice indicating that the photo cannot be taken.
Sleep Mode
The camera goes into sleep mode automatically after 30
seconds of inactivity. If it is not connected to a computer
via the USB cable, you can manually turn it to sleep mode
by pressing the MODE button until “OFF” is shown on the
LCD screen. Then press the shutter button, a beep will
10
0-01_151EmanualR1.indd 10
/1/0 1:51:1 PM
be heard at the same time to confirm your choice. The
energy consumption of the camera is very low in sleep
mode, extending its battery life. The camera can remain
in sleep mode for up to 100 hours. To use your camera
again just simply press the MODE button.
Timer Mode
Press the MODE button until the LCD screen displays the
. Press the shutter button and the camera counts
down for 10 seconds accompanied by short beep then
gives off a long beep before taking a photo.
AVI Mode
Press the MODE button until the LCD display shows
Press and hold the shutter button and the camera will
continuously capture for about 6 frames per second.
.
Continuous Capture
Press the MODE button until the LCD display shows
.
Press the shutter button and the camera will capture for
about 3 frames per second.
11
0-01_151EmanualR1.indd 11
/1/0 1:51:1 PM
Deleting Images
To delete all, press the MODE button until the LCD
screen displays the
and then press the shutter button to confirm your choice. The number will blink; press
the shutter button again to confirm. All the photos stored
in the camera will be deleted but the previously chosen
resolution mode will not change.
To delete the last image taken, press the MODE button
until the LCD screen displays
the and then press
the shutter button to confirm. The last photo taken will be
deleted.
Changing Resolution
You can toggle the resolution setting of the camera
between “High Resolution Mode” (640 x 480) and “Low
Resolution Mode” (320 x 240). The camera is set to
“High Resolution Mode” by default. To change to “Low
Resolution Mode”, press the MODE button until you see
and press the shutter button to confirm. If you want to
12
0-01_151EmanualR1.indd 1
/1/0 1:51:0 PM
change back into “High Resolution”, repeat the procedure and toggle the setting from “Low Resolution Mode ”
to “High Resolution Mode.”
Changing Frequency
Modify the anti-flicker frequency if you decide to take
photos in rooms with fluorescent light bulbs. Press the
MODE button until the LCD screen displays the “Change
to 50/60 Hz” mode and then press the shutter button to
confirm.
Changing the Compression Mode
Press the MODE button until the LCD screen displays
“Hd” and then press the button to confirm.
Installing The Software
Insert the CD in you CD-ROM drive and the application
runs automatically. An interface will appear. On the right
of the interface, there are four buttons.
13
0-01_151EmanualR1.indd 1
/1/0 1:51:0 PM
Installation of Arcsoft
Click “Install Arcsoft PhotoImpress 4.0”, and then follow
the step-by-step instructions to complete the installation.
14
0-01_151EmanualR1.indd 1
/1/0 1:51:0 PM
Installation of Driver
After completing the Arcsoft installation, the interface will
appear, Click on “Install Driver” and follow the step-bystep instructions to complete the installation. After successful installation of driver, restart your computer.
Downloading Picture
Connect the camera to your computer using the supplied USB cable. Double click “Dual Mode Camera” on
the computer desktop and the interface will appear on
screen. Click on “My DSC” and “Download Photos.”
Click on “Select All” then “Save.” Save the image files to
My Document folder (or to wherever you want to save the
pictures).
15
0-01_151EmanualR1.indd 15
/1/0 1:51:1 PM
After having saved the photos, you can empty the memory of you camera (Delete all photos) and start taking
pictures again.
Uploading a Photo with a Resolution of 1.3M Pixels
A: Before uploading photos, select “Edit image” button.
B: Select the “Increase Resolution” button (You can select “High Quality Mode” to get better image), then select
the “OK” button to ESC.
Frequently Asked Questions
Here are the most commonly encountered problems:
Camera will not turn on:
Battery is not properly installed - Remove and reinstall
the batteries.
Insufficient battery voltage- Do not use old batteries or
batteries with mixed battery life.
16
0-01_151EmanualR1.indd 1
/1/0 1:51:1 PM
Image is blurred / out of focus:
Subject is out of focal range - Ensure that there is at
least 1.5m (5 ft.) between the camera lens and subject.
Camera moved during the shot - Hold the camera
steady while taking the picture.
Computer does not recognize camera:
The camera driver has to be installed before picture
download.
Ensure that camera is connected the rear USB port of
the computer.
Check in Device Manager, under Imaging Devices and
see if the computer is recognizing the camera.
Argus Technical Support:
(888) 552 -7487
[email protected]
www.arguscamera.com
17
0-01_151EmanualR1.indd 1
/1/0 1:51:1 PM
Technical Specifications
Resolution: 300K Pixels (640X480) VGA
Colors: 24 bits
Lens: Non-spherical Lens
Aperture: 1: 2.6
Focus: f=5.4 mm
Image variation: 0.5m –infinity
Illumination: 100 --16000 (lux)
Storage Capacity: 16 Mbits
Photos:
26 high-resolution (640X480 pixels)pictures
52 compression high-resolution pictures
104 low-resolution (176X144 pixels)pictures
208 compression low-resolution pictures
Power supply:
AAA Battery or when connected to computer, power will
be supplied from computer via USB connection.
Interface: USB port
18
0-01_151EmanualR1.indd 1
/1/0 1:51:1 PM
System compatibility:
Pentium II and above Personal Computers
Windows 98SE/2000/ME/XP Operating System
32 MB or above Memory (64 MB or above Recommended)
60 MB Hard Disk Capacity
CD-ROM Drive
Color Monitor (Not Lower than 800*600, 24 Bit)
USB interface
19
0-01_151EmanualR1.indd 1
/1/0 1:51:1 PM