Download Apex Digital PD-480 Portable DVD Player User Manual
Transcript
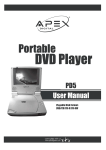
Portable
DVD Player
PD-480
User Manual
Playable Disk Format:
DVD/CD/CD-R/CD-RW
www.apexdigitalinc.com
Table of Contents
FCC and Safety Information................................................................................... 4
Important Safety Instructions................................................................................. 5
Precautions....................................................................................................... 6
Quick Guide
Getting to Know Your Portable DVD Player.................................................................7
Unpacking....................................................................................................... 7
Front View Diagram..............................................................................................................7
Left Side Diagram................................................................................................................ 8
Front Side Diagram.............................................................................................................. 8
Right Side Diagram.............................................................................................................. 8
Remote Control Diagram....................................................................................................... 9
Battery Installation for the Remote Control.............................................................................. . . 9
Remote Control Operation Range............................................................................................10
Quick Operation Guide.......................................................................................... 1 1
Quick Operation.................................................................................................................11
Using the Battery Pack.......................................................................................... 1 4
CHARGING THE BATTERY PACK ...............................................................................................14
Chapter 1. DVD
1-1 DVD Playback............................................................................................... 15
Basic Playback...................................................................................................................15
Stopping Playback and Returning to The Menu Screen (If a Menu Is Available on The Disc).......................15
Stopping Playback..............................................................................................................1 6
Rapid Advance (Rapid Reverse).............................................................................................. 1 6
Slow Playback.................................................................................................................16
Skipping Ahead or Back to Chapters.........................................................................................16
Still Picture(PAUSE).............................................................................................................16
A-B Repeat Viewing.............................................................................................................17
Playing in a favorite order.....................................................................................................17
1-2 Convenient functions....................................................................................... 1 8
Displaying the Information of the Scene....................................................................................18
Changing Audio Soundtrack Language..................................................................................... . 18
Clearing/Displaying Subtitles(A)..............................................................................................18
Changing Subtitle Language(B)............................................................................................... 18
Activating AFF (Active Full Screen function)...............................................................................19
Viewing From Another Angle..................................................................................................19
To Mute the DVD Player........................................................................................................20
Using a DVD Menu...............................................................................................................20
Using the Menu Function...................................................................................................... 2 0
Selecting Scenes by Title/Chapter Number.................................................................................21
Selecting Scenes by Time......................................................................................................21
2
Table of Contents-continued
Chapter 2. Audio CD
2-1 Audio CD Playback........................................................................................... 2 2
Basic Playback...................................................................................................................22
Stopping Playback.............................................................................................................. 2 2
Rapid Advance (Rapid Reverse)............................................................................................. . 2 2
Skipping Ahead or Back to Tracks............................................................................................23
Pause Playback..................................................................................................................23
2-2 Display [Audio CDs]....................................................................................... 23
Clearing/Displaying the Information of the Playing Track.................................................................23
Chapter 3. Setup
3-1 Language Setup..............................................................................................24
Language Setting................................................................................................................24
3-2 VIDEO Setup..................................................................................................25
TV Aspect Ratio Settings..................................................................................................... . 2 5
Adjusting the Brightness and Sharpness................................................................................... . 2 6
3-3 AUDIO Setup..................................................................................................27
Digital Out Setting..............................................................................................................27
3-4 Custom Setup.................................................................................................28
Parental Control Setting [DVD]...............................................................................................2 8
Password Setting [DVD]........................................................................................................29
Default Setting..................................................................................................................30
Chapter 4. For Your Reference
4-1
4-2
4-3
4-4
Troubleshooting............................................................................................. 31
Disc Handling and Maintenance..........................................................................32
Definition of Terms.........................................................................................33
Specifications................................................................................................ 33
3
FCC and Safety Information
CAUTION:
This unit employs a laser. Due to possible eye injury, only qualified service personnel should
remove the cover or attempt to service this device. Use of controls or adjustments or performance of procedures other than those specified herein may result in hazardous radiation exposure.
NOTE:
This equipment has been tested and found to comply with the limits for a Class B digital device
pursuant to part 15 of the FCC Rules. These limits are designed to provide reasonable protection
against harmful interference in a residential installation. This equipment generates, uses and can
radiate radio frequency energy and, if not installed and used in accordance with the instructions,
may cause harmful interference to radio communications. However, there is no guarantee that
interference will not occur in a particular installation. If this equipment does cause harmful interference to radio or television reception, which can be determined by turning the equipment off
and on, the user is encouraged to try to correct the interference by one or more of the following
measures:
– Reorient or relocate the receiving antenna.
– Increase the separation between the equipment and receiver.
– Connect the equipment into an outlet on a circuit different from that to which the receiver is
connected.
– Consult the dealer or an experienced technician for help.
This product incorporates copyright protection technology that is protected by method claims of certain U.S. patents and other intellectual property rights owned by Macrovision Corporation and other
rights owners. Use of this copyright protection technology must be authorized by Macrovision
Corporation, and is intended for home and other limited viewing uses only unless otherwise authorized by Macrovision Corporation. Reverse engineering or disassembly is prohibited.
Since it is usual for DVD movies to be released at different times in different regions of the world, all
players have region codes and discs can have an optional region code. If you load a disc of a different region code to your player, you will see the region code notice on the screen. This player displays
region 1 discs only.
Never make or change connections with the power switched on.
CAUTION VISIBLE AND INVISIBLE LASER RADIATION WHEN OPEN AVOID EXPOSURE TO BEAM
(WARNING LOCATION: INSIDE ON LASER COVERSHIELD)
CLASS 1
LASER PRODUCT
4
Important Safety Instructions
1. Read these instructions.
2. Keep these instructions.
3. Heed all warnings.
4. Follow all instructions.
5. Do not use this apparatus near water.
6. Clean only with a damp cloth.
7. Do not block any of the ventilation openings. Install in accordance with the manufacturer’s instructions.
8. Do not install near any heat sources such as radiators, heat registers, stoves, or other apparatus (including
amplifiers) that produce heat.
9. Do not defeat the safety purpose of the polarized-type plug. A polarized plug has two blades with one wider
than the other. The wide blade is provided for your safety. When the provided plug does not fit into your outlet, consult
an electrician for replacement of the obsolete outlet.
10. Protect the power cord from being walked on or pinched particularly at plug, convenience receptacles, and the point
where they exit from the apparatus.
11. Only use attachments/accessories specified by the manufacturer.
12. Use only with a cart, stand, tripod, bracket, or table specified by the manufacturer or sold with the apparatus. When a
cart is used, use caution when moving the cart/apparatus combination to avoid injury from tip-over.
13. Unplug this apparatus during lightning storms or when unused for long periods of time.
14. Refer all servicing to qualified service personnel. Servicing is required when the apparatus has been damaged in
any way; such as when the power-supply cord or plug is damaged, liquid has been spilled or objects have fallen
into the apparatus, the apparatus has been exposed to rain or moisture, does not operate normally, or has been
dropped.
Outdoor use or wet location applications:
An apparatus that does not comply with the requirements in Appendix A# (Outdoor Use and Wet Location Apparatus)
shall be marked or the instruction manual packed with the word WARNING and the following or equivalent: To reduce
the risk of fire or electric shock, do not expose this apparatus to rain or moisture.
A Class II APPARATUS shall be permanently marked with the words DOUBLE INSULATION or Double insulated and
When servicing use only identical replacement parts.
WARNING: To reduce the risk of fire or electric shock, do not expose this apparatus to rain or moisture. The apparatus shall not be exposed to dripping or splashing and no objects filled with liquids, such as vases, shall be placed on the
apparatus.
5
Precautions
Please read these precautions before operating this unit.
Power cord protection
To avoid any malfunctions of the unit, and to protect against electric shock, fire or personal injury, please
observe the following.
Hold the plug firmly when connecting or disconnecting the AC power cord.
Keep the AC power cord away from heating appliances.
Never put any heavy object on the AC power cord.
Do not attempt to repair or reconstruct the AC power cord in any way.
Placement
Avoid placing the unit in areas of:
direct sunlight or heating radiators, or closed automobiles
high temperature (over 350C) or high humidity (over 90%)
much dust as the internal parts may be seriously damaged.
Non-use periods
When the unit is not being used, turn it off. When left unused for a long period of time, the unit should be
unplugged from the household AC outlet.
No fingers or other objects inside
Touching internal parts of this unit is dangerous, and may cause serious damage to the unit. Do not
attempt to disassemble the unit.
Do not put any foreign object on the disc tray.
Keep away from water/magnet
Keep the unit away from flower vases, tubs, sinks, etc. If liquids are spilled into the unit, serious
damage could occur.
Never bring a magnet or magnetized object near the unit.
Stacking
Place the unit in a horizontal position, and do not place anything heavy on it.
Condensation
Moisture may form on the lens in the following conditions:
immediately after a heater has been turned on
in a steamy or very humid room
when the unit is suddenly moved from a cold environment to a warm one
If moisture forms inside this unit, it may not operate properly. In this case, turn on the power and wait
about one hour for the moisture to evaporate.
If there is noise interference on the TV while a broadcast is being received
Depending on the reception condition of the TV, interference may appear on the TV monitor while you
watch a TV broadcast and the unit is left on. This is not a malfunction of the unit or the TV. To watch a TV
broadcast, turn off the unit.
6
Getting to Know Your Portable DVD Player
Quick Guide will instruct you to install your Portable DVD Player in a quick and easy way. Please
carefully follow the instructions to set up your Portable DVD Player.
Unpacking
First inventory the contents of your Portable DVD player package.
Portable DVD Player
1
Ni-MH Battery Pack
1
Audio Cable (white, red)
1
External Power Adapter
1
Video / Coaxial Cable
1
Cigarette Lighter Adapter
1
Remote Control
1
User Manual
1
NOTE: You may purchase additional accessories for this and other Apex products by visiting our
“Accessory Store” at www.apexdigitalinc.com. Keep the packaging materials, you may need them to
transport your player in the future.
Warning: Changes or modifications made to this equipment, without expressly written consent by us or parties authorized by us will void all manufacturer warranties.
Front View Diagram
1
2
2
4
5
3
1.
3.
5.
LCD screen
OPEN/PUSH button
STOP button
2.
4.
7
SPEAKERS
PLAY/PAUSE button
Getting to Know Your Portable DVD Player-continued
Left Side Diagram
1
2
1.
2.
DC IN jack for PLAYBACK ONLY
POWER ON/OFF button
Front Side Diagram
1
1. Remote Sensor
Right Side Diagram
1
1.
2.
3.
4.
2
3
4
Volume Adjustment
Headphone jack
Audio Output jack
Video/Coaxial output jack
En8 8
Getting to Know Your Portable DVD Player-continued
Remote Control Diagram
SETUP
MENU
MUTE
DISPLAY
TITLE
SUB-T
GOTO
PLAY
II/STEP
STANDBY
ENTER
1
2
3
4
5
6
7
8
9
10
STOP
REPEAT
A-B
PRGM
AUDIO
1
2
3
4
ANGLE
ZOOM
SLOW
AFF
5
6
7
8
9
0
+10
SHIFT
11
1.
3.
5.
7.
9.
11.
13.
15.
17.
19.
21.
STANDBY button
DISPLAY button
FAST REVIEW button
PAUSE/STEP button
PREVIOUS button
NUMBERS buttons
MENU button
SUB-T button
UP button
ENTER button
DOWN button
2.
4.
6.
8.
10.
12.
14.
16.
18.
20.
22.
12
13
14
15
16
17
18
19
20
21
22
SETUP button
TITLE button
FAST FORWARD button
LEFT button
NEXT button
MUTE button
GOTO button
PLAY button
RIGHT button
STOP button
SHIFT button
Battery Installation for the Remote Control
Insert the battery and match the (+) and (-) on battery to the marks inside the battery compartment.
First-time use:
Remember to remove the insulating Mylar Tape from the battery
compartment.
Service life of battery
1. The battery normally lasts for about one year although this depends on how often and for
what operations the remote control is used.
2. If the remote control unit fails to work even when it is operated near the player, replace
the battery.
3. Use a 3V lithium battery, CR2025 available from a local retailer.
9
Getting to Know Your Portable DVD Player-continued
Remote Control Operation Range
Point the remote control unit no more than about 12 feet from the remote control sensor and
o
within about 30 of the front of the unit.
remote sensor
ND
STA
Y
PLA
BY
DIS
TU
SE
T
II/S
LE
P
F
AF
4
DIO
AU
+10
STO
Y
PLA
3
7
W
SLO
GM
0
PR
TO
R
GO
TE
TE
MU
2
6
OM
ZO
EN
A-B
9
B-T
SU
NU
ME
AT
1
30o
P
TIT
EP
PE
RE
GLE
AN
5
8
IFT
SH
The operating distance may vary according to the brightness in the room.
Note:
1. Do not point bright lights at the remote control signal sensor.
2. Do not place objects between the remote control unit and the remote control signal
sensor.
3. Do not use this remote control unit while simultaneously operating the remote control unit
of any other equipment.
10
Quick Operation Guide
Quick Operation
STEP 1.
Connect it to Power (A)
Please connect the applied AC adaptor to the DC IN jack on the Left side of this Portable DVD
Player.
(A)
11
Quick Operation Guide-continued
STEP 2.
Connect it with headphones or connect it to external equipment. (B)
If you want to enjoy higher listening and viewing quality, you can connect this Portable DVD player to external equipment, such as a TV or an amplifier.
Note:
1.
Before connecting, make sure to turn off the power of this Portable DVD Player and
external equipment.
(B)
(Yellow) (Orange)
(White) (Red)
1
2
3
4
Note: Make sure the external equipment
supports the audio/video input feature.
Back/front panel of external equipment
1
(White) Left audio output of TV or amplifier
2
(Red) Right audio input of TV or amplifier
3
(Yellow) Video input on TV
4
(Orange) Coaxial digital audio input of digital amplifier
To playback, select your input source (VIDEO 1, AUX,
ETC) based on your connections.
12
Quick Operation Guide-continued
STEP 3.
Slide POWER button to turn on the Portable DVD Player. (C)
(C)
STEP 4.
Press
<OPEN/PUSH> to open the disc cover. (D)
(D)
STEP 5.
Gently hold the edge of the disc, then place and press down firmly near center
spindle with printed side up.
Note: Make sure the printed side of the disc is facing up.
STEP 6.
Close the disc cover.
STEP 7.
Press
<PLAY> to play the disc.
13
Using the Battery Pack
Battery charge
indicator
DC IN jack for charge
and playback
Before using the battery pack, make sure to charge it first.
You could choose to charge the battery pack directly or charge it while the battery pack is
attached to the Portable DVD player.
PD480BAT
The provided battery can be recharged about 300 times. It takes about 4-5 hours to recharge
the battery, then the red indicator will turn green and flash. A fully charged battery can
power the unit for about 2.5 hours. Power consumption depends on the operations of the
player such as brightness of the screen, volume level, environment, temperature, and how
many times you use PAUSE, STOP, FF and REW.
You may purchase additional batteries and other APEX accessory items by visiting our
accessory Store online at www.apexdigitalinc.com.
Note: If you do not use the battery for a long time, please charge it before storing and
recharge it every 3 months. This will prolong the battey life.
CHARGING THE BATTERY PACK
STEP 1.
Connect the AC adapter to the DC IN jack on the left side of the
battery pack and a household power outlet. ( As shown in figure A )
(A)
DC IN jack
STEP 2.
The battery charge indicator will turn red and start charging.
STEP 3.
When the battery pack is fully charged, the battery charge indicator will turn
green and flash.
En1414
1-1 DVD Playback
Preparation
Connect the portable DVD player with the AC adaptor and/or battery pack, and playback through
headphones, speakers, or home theater system.
To connect to home theater or stereo system:
Turn on the TV set, and select “Video” as the TV input.
Turn on the home theater/stereo system and select the input source which you connected the
portable DVD player.
Basic Playback
1 Slide POWER ON/OFF switch to POWER ON.
2 Press <OPEN/PUSH> button to open the disc cover.
3 Place Disc in the tray with the printed side up.
Hold the disc without touching the playable surface, position it with the printed title side facing up, align it
with the guides, and press the disc firmly onto the center spindle.
4 Close the disc cover.
Close the disc cover, the portable DVD player will start playback automatically.
If the disc contains one or more titles, a menu screen will appear on the screen.
<< NOTE: Proceed with steps 5 and 6 when a menu is available on the disc >>
5
Press < /
6 Press
/ / > to choose the preferred selection.
<ENTER> or
<PLAY>.
The player will start playback of the selected item.
Stopping Playback and Returning to The Menu Screen (If a Menu Screen Is Available on
The Disc)
Press
<MENU>.
The portable DVD player stops playback, and then displays the menu screen.
After operation
When the portable DVD player is not in use, remove the disc and slide POWER ON/OFF switch to turn off
the player. Then close the display panel.
<< NOTE >>
The disc continues to spin while the menu is displayed even after the player has finished playing a
particular disc. When no further selections are to be played, be sure to press the
<STOP>
button to clear the menu screen.
If the disc is placed in upside down (and it is a single sided disc), the player’s display will appear “BAD
DISC”.
For your reference:
When
appears while a button is being operated, it means that the corresponding operation is prohibited by the player.
En1515
1-1 DVD Playback-continued
Stopping Playback
Press
<STOP> to stop.
Rapid Advance (Rapid Reverse)
Press
<REW> or
<FF> during playback.
Normal playback is resumed when you press
<PLAY>.
The speed of advance ( x2, x4, x8, x20, play ) or reverse ( x2, x4, x8, x20, play )
changes for each press of the
<FF> or
<REW> button.
Slow Playback
Press
<SHIFT> and “7” several times to slow playback
1/2
1/4
1/6
1/7
Normal
Playback
To return to normal playback
Press
<PLAY>.
Skipping Ahead or Back to Chapters
You can skip a specific chapter or track during playback.
Skipping Ahead
Press
<NEXT> during playback.
Skips a chapter each time you press the button.
Skipping Back
Press
<PREVIOUS> during playback.
Skips a chapter each time you press the button.
Still Picture (PAUSE/STEP)
Press
<PAUSE/STEP> once during playback.
The screen image is paused.
Press
<PAUSE/STEP> button several times, the screen image will playback frame
by frame.
To return to normal playback
Press
<PLAY>.
En1616
1-1 DVD Playback-continued
Repeat Viewing
Press
<SHIFT> and then “1” during playback.
Each time you
<SHIFT>, press the “1” button, the disc will repeat a chapter or title.
Press once: Repeat. OFF(Repeat state displayed)
Press twice: Repeat. CHAPTER (Repeat chapter)
Press three times: Repeat. TITLE (Repeat title)
Press four times: Repeat. off (Repeat cancelled)
To return to normal playback press the
Press
<SHIFT> key, then press “1”.
<SHIFT> then “1” (Repeat) several times until “Off” appears on the screen.
<< NOTE >>
Repeat playback works only with discs for which the elapsed playing time appears on the player’s
display during playback.
Repeat playback may not work correctly with some DVDs.
A-B Repeat Viewing
This DVD player allows you to playback a specific segment repeatedly.
Press
segment.
<SHIFT> and then “2” during playback to select the start point of the specific
Press
<SHIFT> and then “2” twice during playback to select the end point of the
specific segment.
To return to normal playback, press the
cancel A-B repeat.
<SHIFT> key and then “2” a third time to
Playing in a favorite Order
Press
<SHIFT> and then “3”.
Program menu displays on the screen
Program Input
Title/Chapter
1____4____7____10____
2____5____8____11____
3____6____9____12____
Play Program
Clear All
Use the number button(s) and
<Down>
<LEFT> or
<RIGHT> to select the
Title/Chapter number in order.
Use the
<DOWN> button to select Play Program, then press
En1717
<ENTER> to start.
1-2 Convenient functions
Displaying the information of the Scene
Displaying the Information of the Scene
Press
<DISPLAY> during playback.
Press
<DISPLAY> to display the title number, chapter number, and other
information on screen.
Press
<DISPLAY> until the information on screen disappeares.
Changing Audio Soundtrack Language
1 Press
<SHIFT> and “4” during playback.
2 Press “4” until the preferred language is selected.
For your reference:
If the preferred language is not selected even after pressing the button several times, it may indicate
that language is not available on the disc.
You can also change the audio language during initial setup to a different language, if available. (This
functions only on discs with multiple languages.)
When you turn on or remove the disc, the portable DVD player will playback the language which is
selected at the initial setting. If you select a language which is not recorded on the disc, the portable
DVD player will playback a prior language programmed on the disc.
Activating AFF (Active Full Screen Function)
AFF (Active Full Screen Function) allows you to fill the TV screen viewing area when playing a widescreen
formated DVD. Press AFF on your remote control to eliminate (1:85 aspect ratio) or reduce the black bars
on the top and bottom of the screen.
Press <SHIFT> and then “8” to activate AFF(Active Full Screen Function)
After
AFF
Before
AFF
Zooming a Picture
This DVD player allows you to zoom into a picture as well as shift the zoom point.
Press
<SHIFT> and then “6” several times during normal playback or slow-motion.
The player magnifies in the center of the picture.
1
If you press
<UP>
<DOWN>
To cancel the zoom function, press
2
3
OFF
<RIGHT> buttons during playback, the zoom point shifts.
<SHIFT> and “6” until zoom off.
En1818
1-2 Convenient functions-continued
Clearing/Displaying/Changing Subtitle Language
If a disc provides subtitles, you can choose to hide or display them. (This operation works only
with discs that provide subtitles.)
Press
<SUBTITLE> during playback to display subtitles or hide them. When you press
<SUBTITLE> twice, the first subtitle recorded on the disc will display. The rest of the subtitles
recorded will display in sequence as you press the button continually.
You may switch to another language with this key, or you can turn off the subtitle by pressing
this key until “SUBTITLE OFF” appears on the screen.
You can change the subtitle language, if available.
1 Press
<SUBTITLE> during playback
When no subtitles are recorded “
“ will display instead of the language number.
2 Press
<SUBTITLE> until the preferred language is selected.
<< NOTE: In some cases, the subtitle language may not change immediately to the selected one.>>
For your reference:
You can change the subtitle language with the initial settings, if available.
When the preferred subtitle language is not selected even after pressing the button several
times, it may indicate that the language is not available on the disc.
When you turn on or remove the disc, the portable DVD player will playback the subtitle
language selected during initial setup. If you select a subtitle language which is not recorded
on the disc, the portable DVD player will playback a prior subtitle language programmed on
the disc.
Viewing From Another Angle
Some special featured DVD discs may contain scenes which have been shot simultaneously from a
number of different angles. For these discs, the same scenes can be viewed from different angles
using the <ANGLE> button. (The recorded angles vary depending on the disc programming.)
1 Press <ANGLE> during playback.
2 Press <ANGLE> until the preferred viewing angle is selected.
Press <ANGLE> button to change the viewing angle.
<< NOTE >>
ANGLE will only function on discs where different angles have been recorded.
The viewing angles are shown on the player’s display and you can select one from them for viewing.
En19
19
1-2 Convenient functions-continued
To Mute the DVD Player
In some cases, you may need to mute the portable DVD player temporarily. The portable DVD
player provides a MUTE function for your selections.
Press
<MUTE> button during playback.
When “
” appears on the screen, the portable DVD player is muted. To resume the sound, press the
button until “
” disappears from the screen.
X
X
Using a DVD Menu
Some DVD discs have unique menu structures called DVD menus. For example, DVDs programmed
with complex contents provide guide menus, and those recorded with various languages provide
menus for audio and subtitle language. Although the DVD menu’s contents and operation vary
from disc to disc, the following explains basic operation when this feature is used.
1 Press
<TITLE> in stop mode.
The DVD menu available on the disc now appears.
2 Press < /
/ / > to select the preferred item.
3 Press
<ENTER>.
You now enter to the selected item.
To enter another menu screen
Repeat steps 2 and 3.
To return to the previous menu screen
Press
<TITLE>.
Using the MENU Function
1 Press
<ENTER>.
2 Press
<MENU>.
A DVD chapter menu with brief broadcast of each paragraph now appears. You may see the introduction of
each chapter and then decide with which chapter to start first.
3 Press <
/ / / > or number button(s) to select the preferred item.
<< Note: The menu details vary depending on discs recorded. >>
En
2020
1-2 Convenient functions-continued
Selecting Scenes by Title/Chapter Number
Allows you to locate specific titles/chapters of scenes to playback.
1 Press
2 Press
<GOTO> during playback.
<DOWN> button,
<LEFT> button and
<RIGHT> button to move
the cursor to title or chapter
3 Press the number buttons to specify the preferred title or chapter.
4 Press
<ENTER>.
The portable DVD player will start playback from selected title/chapter numbers.
Selecting Scenes by Time
1 Press
<GOTO> during playback.
2 Press the number buttons to specify the scene time desired.
Example: To locate “01 hr. 50 min. 00 sec.”, press “1”, “5”, “0”, “0” and “0”.
3 Press
<ENTER>.
The portable DVD player will start playback from the specified position.
<< NOTE >>
These operations work only with discs for which the elapsed playing time appears on the portable
DVD player’s display during playback.
For some discs, playback may start from a different place, even when the steps above have been
performed correctly.
For your reference:
When “
” appears while you are pressing a button, it may indicate that the corresponding operation
is prohibited by the portable DVD player.
En2121
2-1 Audio CD Playback
Preparation
Connect the portable DVD player with the AC adaptor and/or battery pack, and playback through
headphones, speakers, or home theater system.
To connect to home theater or stereo system:
Turn on home theater/stereo system and select the input source wich you connected.
Basic Playback
1 Slide POWER ON/OFF to switch on.
2 Press <OPEN/PUSH> button to open the disc cover.
3 Place disc in the tray with the printed side up.
Hold the disc without touching the playable surface, position it with the printed title side facing up,
align it with the guides, and press the disc firmly onto the center spindle.
4 Close the disc cover. CD will automatically play.
Stopping Playback
Press
<STOP> to stop.
Rapid Advance (Rapid Reverse)
Press
<REW> or
<FF> during playback.
Normal playback is resumed when you press
<PLAY>.
The speed of advance ( x2, x4, x8, x20, play) or reverse ( x2, x4, x8, x20, play)
changes for each press of the
<FF> or
<REW> button.
En2222
2-1 Audio CD Playback-continued
Skipping Ahead or Back to Tracks
Skipping Ahead
Press
<NEXT> during playback.
A track is skipped each time you press the button.
Skipping Back
Press
<PREVIOUS> during playback.
The player skips a track each time the button is pressed.
Pause Playback
Press
<PAUSE> once during playback.
The player will pause playback.
To return to normal playback
Press
<PLAY>.
2-2 DISPLAY [Audio CDs]
Clearing/Displaying the Information on the CD
Press
<DISPLAY> during playback.
Press
<DISPLAY> to display the elapsed time, track number and other information on the
screen.
En2323
3-1 Language Setup
Language Setting
Allows you to set various languages for the on screen display (OSD).
You can select a preferred subtitle language among various languages that have been recorded on
DVD discs.
You can select a preferred soundtrack language among various languages that have been recorded
on DVD discs.
You can select a preferred DVD Menu language among various languages that have been recorded
on discs for the disc menu messages display.
1 Press
<SETUP> then press
2 Press
<DOWN> button to select “preferred item”, and then press
3 Press
<UP> button/
<ENTER>.
<ENTER>.
<DOWN> direction button to select the preferred
language.
4 Press
<ENTER>.
Language
Language
Video
OSD
OSD Menu
Menu
Audio
Audio
Subtitle
Subtitle
Audio
DVD Menu
Close Caption
: Move
Rating
English
Francais
English
Espanol
Chinese
Auto
Off *
Japanese
French
English
Francais
German
Espanol
On
Off*
: Select
SETUP:
To finish the setup operation
Press
<SETUP> to exit.
For your reference:
If the language selected is not recorded on the disc, the portable DVD player will playback the top-priority language of the disc.You can also switch Close Caption ON, if the Close Caption is recorded on the
disc and your TV supports the Close Caption function. When you use the Close Caption you should switch
the subtitle off.
En2424
3-2 Video Setup
TV Aspect Ratio Settings
Depending on your TV screen size, you can select your preference for optimal viewing of conventional (4:3) Pan & Scan. (4:3 LB) Letter Box movies or Widescreen (16:9).
1 Press
<SETUP>
2 Press
<RIGHT> direction button to select “Video”, and then press
3 Press
<DOWN> button to select TV Shape, and then press
4 Press
<UP> button /
5 Press
<ENTER>. (see notes below)
<ENTER>.
<ENTER>.
<DOWN> button to select the preferred TV display.
Language
Language
Video
Audio
OSD
Brightness
Menu
English
Audio
Sharpness
Subtitle
TV Shape
Japanese
Rating
Chinese
French
4:3 PS*
German
4:3 LB
16:9
: Move
: Select
SETUP:
To finish the setup operation
Press
<SETUP> to exit SETUP MENU screen.
4:3 Pan Scan
Select 4:3 PS for a conventional size TV set. Video material formatted in the pan & scan style is played.
Portions of the program material maybe cut off on the left and right edges.
4:3 Letter Box
Select 4:3 LB for a conventional size TV set. Black bands appear at top and bottom of screen (letter-box
style). But allow for the true aspect ratio of the widescreen programming.
Video material not formatted in the pan & scan style is played in the letter-box style.
16:9 Wide
Select 16:9 for a wide-screen TV set. Played in “FULL” size.
Setting the wide-screen TV to “FULL” mode is also necessary.
Each screen shows an example when the video material for a widescreen is played.
En2525
3-2 Video Setup-continued
Adjusting the Brightness and Sharpness
You can also adjust the Brightness and the Sharpness.
1 Press
<SETUP>
2 Press
<RIGHT> direction button to select “VIDEO”, and then press
3 Press
<UP> button/
4 Press
<RIGHT> direction button or
<ENTER>.
<DOWN> button to select the Brightness or Sharpness.
<LEFT> direction button to select the
preferred Brightness or Sharpness.
Language
Language
Video
Audio
Rating
OSD
Brightness
Menu
English
08
Chinese
Audio
Sharpness
Subtitle
TV Shape
Japanese
French
German
: Move
To finish the setup operation
Press
<SETUP> to exit SETUP MENU screen.
En
26 26
: Select
SETUP:
3-3 Audio Setup
Digital Out Setting
The portable DVD player provides two options, “PCM” and “RAW” for the digital out setting.
For your reference:
If you have a Dolby Digital 5.1 or DTS capable amplifier that supports coaxial connection, you must set
the audio output to RAW. If you have a 2-channel Dolby Digital amplifier, you must set the audio output
to PCM
1 Press
<SETUP>.
2 Press
<RIGHT> direction button to select “AUDIO”, and then press
<ENTER>.
3 Press
<UP> button/
preference and then press
<DOWN> button to select your “Digital Out”
<ENTER>.
Language
Language
Video
OSD
Digital
Menu Out
Audio
Audio
English
PCM
Chinese
RAW*
Japanese
Subtitle
French
Rating
German
: Move
To finish the setup operation
Press
<SETUP> to exit.
En 27
27
: Select
SETUP:
3-4 Custom Setup
Parental Control Setting [DVD]
A built-in viewer rating setting enables you to lockout video programming that you do not want
children to view. For example, if you set it to PG-13, then this portable DVD player will not play
the videos rated R, NC-17 or Adult unless the correct password is entered.
1 Press
<SETUP>.
2 Press
<RIGHT> direction button to select “Rating”,
3 Press
<DOWN> button to select “RATING” and then press
4 Press
<ENTER> until preferred rating is highlighted.
5 Press
<UP> button to select Password and enter a 4-digit password, then
press
then press
<ENTER>.
<ENTER>.
<ENTER>.
NOTE: If you had locked the rating, you will need to enter your password to unlock the
rating before you can change it.
Over-riding password is “3308”.
6 Press
<SETUP> to exit.
Language
Language
Video
Audio
OSD
Password
Menu
English
**********
Chinese
Audio
Rating
Subtitle
Load Factory
Japanese
8.Adult
French
Reset
German
: Move
: Select
Rating
SETUP:
For your reference:
You can use the parental control lock ONLY with DVD discs featured with the parental lock function.
Some discs may not be encoded with specific rating leve information though its disc jacket says that
it is for “adults”. For those discs, RATINGS lock will not function.
En2828
3-2 Custom Setup-continued
Password Setting [DVD]
You can change the password to the portable DVD player by selections.
1 Press
<SETUP>.
2 Press
<RIGHT> direction button to select “Rating”, and then
press
<ENTER>.
3 Enter your old password and then press
<ENTER> to unlock the old password
if you have locked it before.
4 Enter your new password and then press
<ENTER>.
NOTE: Over-ride password is “3308”.
Language
Language
Video
OSD
Password
Menu
English
**********
Chinese
Audio
Rating
Subtitle
Load Factory
Japanese
8. Adult
French
Reset
German
: Move
To finish the setup operation
Press
Audio
<SETUP> to exit SETUP MENU screen.
En 29
29
: Select
Rating
SETUP:
3-4 Custom Setup
Load Factory Setting
You may reset the DVD player in CUSTOM SETUP to the original settings by loading the factory
default.
1 Press
<SETUP>.
2 Press
<RIGHT> direction button to select “Rating”, and then
press
3 Press
press
<ENTER>.
<UP> button /
<DOWN> button to select “Load Factory” and then
<ENTER>.
Language
Language
Video
Audio
OSD
Password
Menu
English
**********
Chinese
Audio
Rating
Subtitle
Load Factory
Japanese
8. Adult
French
Reset
German
: Move
En
30 30
: Select
Rating
SETUP:
4-1 Troubleshooting Guide
Before requesting service for this portable DVD player, check the chart below for a possible cause of the
problem you are experiencing. Some simple checkups or a minor adjustment on your part may eliminate the
problem and restore proper operation.
We encourage you to visit our website at www.apexdigitalinc.com and review the customer support and
FAQ’s page for updates to this list. You may register to validate your warranty at our website and order
accessories for your product.
SYMPTOM (COMMON)
No power.
The player does not start playback
when PLAY is pressed.
The player starts playback but stops
immediately.
No picture.
No sound.
Distorted sound.
No audio at Digital Output.
Distorted picture.
Picture is distorted during rapid
advance or rapid reverse.
No rapid advance (or rapid reverse)
playback.
No 4:3 (16:9) picture.
No subtitles.
No operations perform with the
remote control.
No key operation (by the DVD player
power and/or the remote control) is
effective.
PLAY does not start playback even
when title is selected.
Audio soundtrack and/or subtitle
language is not the one selected
at the initial settings.
Alternative audio soundtrack
(or subtitle) languages cannot be selected.
Angle cannot change.
I forgot my password for parental
control.
The battery charge indicator does not
turn on when connected to power supply.
REMEDY
·
·
·
·
·
·
·
·
·
·
·
·
·
·
·
·
·
·
·
·
·
·
·
·
·
·
·
Insert the power plug securely into the power outlet.
Check if the ON/OFF button on the right of the player is set to on.
Check if no power at the AC outlet by plugging in another appliance for a test.
Recharge the battery.
Condensation has formed: wait about 1 to 2 hours to allow the player to dry out.
This player cannot play discs other than DVDs and audio CDs.
Check if the disc is defective by trying another disc.
Check the region (local) code.
Disc may have been placed in the tray upside down.
The disc may be dirty and may require cleaning.
Ensure that the disc is installed with the label side up.
Ensure that the equipment is connected properly.
Ensure that the input setting for the TV is “Video”.
Check if external equipment is on.
Select the same channel and source on the TV as on the player.
Check if the LCD is on.
Ensure that the equipment is connected properly and firmly into jacks.
If using a HiFi amplifier, try another sound source.
Check the Audio Output Setting menu to make sure that Analog Output is selected.
Check the Volume Adjustment.
Ensure that the input settings for the TV and stereo system are proper.
No sound is heard during still picture (pause).
Check the digital connections.
Check if the audio format of the selected audio language matches your receiver capabilities.
Check the disc for fingerprints and clean it with a soft cloth, wiping it from center to edge.
Sometimes a small amount of picture distortion may appear. This is not a malfunction
This is normal occurrence.
· Some discs may have sections which prohibit rapid advance (or rapid reverse).
·
·
·
·
·
·
·
·
·
·
·
Choose the correct setup “TV DISPLAY” item which matches the TV set used.
Subtitles appear only with discs that contain them.
Subtitles are hidden from the TV screen. (Refer to page 18 for directions)
Check the batteries are installed with the correct polarity (+ and –).
The batteries are depleted: replace them with new ones.
Point the remote control unit at the remote control signal sensor and operate.
Operate the remote control unit at a distance but no more than 6 meters from the
remote control signal sensor.
Remove the obstacles between the remote control unit and remote control signal
Turn the unit off and then back to on. Alternatively, turn off the unit, disconnect the AC
cord and then re-connect it. (The player may not be operating properly due to
lightning, static electricity or some other external factor.)
This may be a result of the parental lock function that has been set.
Confirm the parental setting in the setup menu.
If the audio soundtrack and/or subtitle language does not exist on the disc, the
language selected at the initial settings will not be seen/heard.
· An alternative language can not be selected may result of no more than one language
available.
· This function depends on software availability. Even if a disc has a number of angles
recorded, these angles may be recorded for specific scenes only.
· Enter overriding password: 3308
· Reset the battery pack by disconnect the power supply for 30 seconds. Connect the
power supply again to charge battery pack.
En3131
4-2 Disc Handling and Maintenance
Handling Precautions
Hold the disc by the edges to avoid fingerprints. (A)
Fingerprints, dirt and scratches can cause skipping and distortion.
Do not write on the label side with a ball-point pen or other writing utensils.
Do not use record cleaning sprays, benzine, thinner, static electricity prevention liquids or any other solvent.
Be careful not to drop or bend the disc.
Do not install more than 1 disc on the disc tray.
Do not try to close the disc cover on an improperly installed DVD.
Be sure to store the disc in its exclusive case when not in use.
If the surface is soiled (B)
Wipe gently with a soft, damp (water only) cloth.
When wiping discs, always move the cloth from the center hole toward the outer edge.
(If you wipe the discs using a circular motion, circular scratches are likely to occur, which will cause noise.)
(A)
(B)
If the disc is brought from a cold to a warm environment, moisture may form on the disc
Wipe this moisture off with a soft, dry, lint-free cloth before using the disc.
Improper disc storage
You can damage discs if you store them in the following places:
Areas exposed to direct sunlight
Humid or dusty areas
Areas directly exposed to a heat outlet or heating appliance
Maintenance
Be sure to turn the unit off and disconnect the AC power cord.
Wipe this unit with a dry soft cloth. If the surfaces are extremely dirty, wipe clean with a cloth which has
been dipped in a weak soap-and-water solution and wrung out thoroughly, and then wipe again with a dry
cloth.
Never use alcohol, benzine, thinner, cleaning fluid or other chemicals. And do not use compressed air to
remove dust.
En3232
4-3 Definition of Terms
Angle
Recorded onto certain special edition DVD discs are scenes that have been simultaneously shot from a number
of different angles (the same scene is shot from the front, from the left side, from the right side, etc.). With
such discs, the ANGLE button can be used to view the scene from different angles.
Chapter Number
These numbers are recorded on DVD discs. A title is subdivided into many sections, each of which is numbered,
and specific parts of video presentations can be searched quickly using these numbers.
DVD
Refers to a high-density optical disc on which high-quality pictures and sound have been recorded by means of
digital signals. Incorporating a new video compression technology (MPEG II) and high-density recording technology, DVD enables aesthetically pleasing full-motion video to be recorded over long periods of time (for
instance, a whole movie can be recorded).
DVD has a structure consisting of two 0.6 mm thin discs which are adhered to each other. Since the thinner the
disc, the higher the density at which the information can be recorded, a DVD disc has a greater capacity than
a single 1.2 mm thick disc. Since the two thin discs are adhered to each other, there is the potential to achieve
double-sided play sometime in the future for even longer duration play.
Subtitles
These are the printed lines appearing at the bottom of the screen which translate or transcribe the dialogue.
They are recorded on DVD discs.
Time Digit
This indicates the play time which has elapsed from the start of a disc or a title. It can be used to find a specific scene quickly. (It may not work with some discs.)
Title Number
These numbers are recorded on DVD discs. When a disc contains two or more movies, these movies are numbered as title 1, title 2, etc.
Track Number
These numbers are assigned to the tracks which are recorded on audio CDs. They enable specific tracks to be
located quickly.
4-4 Specifications
Portable DVD Video Player
Power Supply
~120V-240V. 60Hz
Power Consumption
9W
Mass
4.18 lbs.
External Dimensions
5.98x1.57x5.51 inches (W/H/D)
Laser
Semiconductor Laser, wavelength 650mn
Outputs
Video Output
1.0V(p-p), 75ohms, negative sync
Audio Output (digital output)
0.5V(p-p), 75ohms
Audio Output (analog audio)
2.0V(rms), 10Komhs
En3333
Limited Warranty
PORTABLE DVD PLAYERS
90 DAYS LABOR/ONE YEAR REPLACEMENT OF PARTS
WHO IS COVERED?
Proof of purchase is required to receive warranty service such as the original sales receipt showing original date
of purchase from an authorized APEX Digital, Inc. dealer in N. America. Keep your original box and packaging
in case your unit needs to be shipped to us. You will need to prepay shipping and APEX will pay the cost of
shipping the unit back to you. You are required to email or call Customer Support for proper instructions to ship
unit for repair. A return authorization number is required prior to acceptance by Apex. Register your product
online at www.apexdigitalinc.com.
WHAT IS COVERED
Warranty repair from the original date of purchase: One (1) year replacement of parts; 90 day limited labor warranty coverage. If you don’t have proof of purchase, your unit will be considered out-of-warranty & will
be charged at a flat labor rate.
WHAT IS EXCLUDED?
Your warranty does not cover:
- Labor charges for installation or setup of the product, adjustment of customer controls on the product, and
installation or repair of antenna systems outside of the product.
- Product repair and/or part replacement because of misuse, accident, unauthorized repair or other cause not
within the control of Apex Digital, Inc.
- A product that requires modification or adaptation to enable it to operate in any country other than the country for which it was designed, manufactured, approved and/or authorized, or repair of products damaged by
these modifications.
- Incidental or consequential damages resulting from the product. (Some states do not allow the incidental or
consequential damages, so the above exclusion may not apply to you. This includes, but is not limited to, prerecorded material, whether copyrighted or not.)
-Shipment and service to a NON-AUTHORIZED repair facility.
BEFORE REQUESTING SERVICE:
In the event after following all of the operating instructions including the Troubleshooting Guide and reviewing updated FAQ’s on the Customer Support & FAQ page of our website, www.apexdigitalinc.com, should you
find that service is still necessary, email or call Customer Support for an RA number.
ORDERING ACCESSORIES:
You may purchase parts and accessories by visiting www.apexdigitalinc.com under Accessories or email/call for
pricing and availability of your request.
WHERE IS SERVICE AVAILABLE?
If you previously registered your product(s) online at www.apexdigitalinc.com go to MY ACCOUNT and email
your request. Otherwise, go to PRODUCT REGISTRATION, enter your information and submit to set up your
account. Then email your request. You may also call us at (909) 930-1239 Monday-Friday, 7am-6pm
(California).
This warranty gives you specific legal rights. You may have other rights which vary from state/province to state/province.
A
P
E
X
D
I
G
I
T A
L


