1
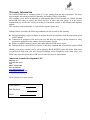
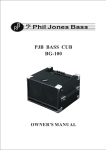
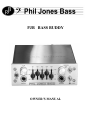
PJB BASS BUDDY
OWNER’S MANUAL
CONTENTS
Read First ----------------------------------------------------------------------------------Page 1
General Overview & Introduction ----------------------------------------------------Page 2
Front & Back Panel Overview ---------------------------------------------------------Page 2
Front & Back Panel Description ------------------------------------------------------Page 3
Operation -----------------------------------------------------------------------------------Page 4
Specifications-------------------------------------------------------------------------------Page 6
Service/Warranty information ---------------------------------------------------------Page 7
READ THIS FIRST
Thank you for purchasing the Bass Buddy. A great deal of dedication and passion went into
designing and building this no-compromise, high performance unit. It was concieved to be a
dedicated tool for the “conessieur” bassist. Before using the Bass Buddy please read ALL the
instructions . Reading this manual will enable you to get the best performance from it and it will
give you many years of service.
•
•
•
•
•
•
•
•
•
Keep all original packing.
Never use this product in the vicinity of water or liquids.
Do not operate this unit with a damaged power cord or plug or if the unit is damaged.
Do not locate this unit near any heat source.
This unit must be connected only to the power unit supplied.
For safety do not leave the power supply plugged into a power source for long periods of
time when not in use.
Do not use the Bass Buddy power supply unit on any other aparatus.
To prevent damage to unit from battery leakage, always use high-quality brand name
batteries. Remove any batteries from unit if stored for a pieriod of time.
Do not use Monster brand instrument cables as they are not compatible with PJB
electronics. Using a Monster cables can damage PJB jack sockets and is not covered by
PJB waranty.
1
OVERVIEW OF THE BASS BUDDY
•
•
•
•
•
•
•
•
•
•
Switch able Active / Passive input matches both magnetic and piezo pickups.
Powerful 5 Band Graphic EQ.
Natural Sounding Optical Limiter.
Hi-fi Stereo Headphone Output.
Low Noise Pre-amp output.
World-class Studio Quality, Balanced Line output.
10 watt RMS wideband amplifier.
Worldwide AC voltage operation.
Works on two 9-volt batteries.
Ultra low noise, low distortion state of the art electronics.
FRONT & BACK PANEL OVERVIEW
VOLUME
COMPRESSION
50Hz
160Hz
630Hz
2.5KHz
12KHz
OFF
+18dB
+18dB
0dB
0dB
ACTIVE
MIN
MAX
MAX
MIN
ON
OFF
PASSIVE
-18dB
-18dB
ON
BASS INPUT
S/N:
HEADPHONE
XXXXX
9-VOLT
DC IN 18-VOLT
9-VOLT
MIN
MAX
VOLUME
LINES OUT
AUX INPUT
SPEAKER 8Ω
2
POWER
1. PASSSIVE/ ACTIVE BASS INPUT SWITCH.
This switch allows you to match the BassBuddy to match either active or passive basses either with
magnetic or piezo pickups.
PASSIVE - Higher sensitivity, high impedance input (120mV/ 4.7MΩ). For bass instruments that do
not have active electronics, suited for older ‘vintage’ basses. This setting is precisely matched to high
impedance pickups enabling them to faithfully reproduce the true frequency and dynamic range of the
instrument.
ACTIVE- Lower sensitivity input setting (300mV/100KΩ) for basses with onboard electronics. Input
matched for low signal to noise ratio and optimum transfer function of electrical signal from modern
high-end basses.
2. VOLUME CONTROL.
This is the volume control for bass input only. It does not control the level of the stereo auxiliary input
socket (14) on back panel. When setting up your tone or plugging in your instrument, you should keep
this control at a low level. All instruments are different when it comes to how much output is from the
pickups. Likewise for players: depending on how hard or soft you play.
3. INSTRUMENT INPUT JACK.
This is a standard ¼ inch mono jack socket. We recommend that you DO NOT use “Monster” Brand
cables because we have found compatibility issues with their jack plugs and our input sockets. USING
“MONSTER” BRAND CABLES CAN DAMAGE THE INPUT JACK OR OTHER SOCKETS ON
THE BASS BUDDY Should any damage occur from using MONSTER CABLES warrantee for
repairs to unit are not covered under PJB warranty.
4. 5-BAND GRAPHIC EQUALIZER.
This is a dedicated bass instrument equalizer designed to give you optimized tone of your instrument.
The frequency bands have been set precisely so that your desired tone can be achieved with the
minimum amount of sliders. The EQ filters are set at: 60Hz -160Hz - 630Hz - 2.5KHz and 12KHz
with 18dB of boost or cut. This EQ typically has more control than other equalizers on your sound, so
do not use too much boost as this can overdrive other electronic components in your chain.
Be careful not to use excessive boost on lower frequencies as you may end up damaging your
headphones. If you hear distorted tones on the lower notes, this could be you headphones overloaded.
Back off the volume immediately.
5. COMPRESSION ADJUSTMENT LEVEL.
This will vary the level of the limiter threshold. The compression ratio is 3dB to 1. Adjust this to suit
your playing style and output power of instrument. Note that turning this control clockwise increases
the threshold level and so reduces compression. More compression is added by turning the control
counter-clockwise, like backing off the volume control.
6. HEADPHONE OUTPUT JACK.
This jack accepts ¼ inch stereo headphone jacks. A ¼ inch to mini jack adaptor plug is supplied for
headphones with smaller jack plugs.
7. LIMITER INDICATOR.
This blue L.E.D (Light Emitting Diode) will light up when the signal is being compressed. This will
vary on how hard the instrument is played and how the threshold is adjusted
8. LIMITER ON/OFF SWITCH.
Sends signal through limiter or bypass.
9. POWER ON/OFF SWITCH.
10. POWER LED INDICATOR
With power switched on the LED light will turn bright blue.
3
11. DC POWER SUPPLY INPUT SOCKET
Use only the dedicated PJB unit for the Bass Buddy.
12. BATTERY COMPARTMENT – REMOVABLE COVER.
13. STEREO INPUT VOLUME CONTROL.
Use to control the level of backing/rhythm track.
14. STEREO MINI-JACK INPUT.
Input feed from music or backing tracks. This input goes directly in stereo to feed the headphones only.
It is not connected to the 5 Band EQ or line outputs.
15. PRE AMPLIFIER OUTPUT JACK.
These are used for driving a power amplifier or feeding a tuner. This output only carries the bass
instrument signal
16. HIGH LEVEL LINE OUT AND SPEAKER OUT JACK.
The Bass Buddy will work on any speaker load from 16Ω down to 4Ω, which is the safe maximum
load for this amplifier. Any load with impedances less than 4Ω will cause the internal amplifier fuse to
blow. If this output socket is shorted out this will blow the internal fuse and render the internal
amplifier to shut down until the fuse is replaced. This fuse should only be replaced by qualified service
engineers. This output only carries the bass instrument signal
17. XLR- DIRECT OUTPUT SOCKET.
This is an ultra-low impedance (100Ω) balanced line out for use with recording or PA mixing consoles.
This output is not controlled by the volume control. Changing output level on your instrument will
however, vary DI output. This output only carries bass instrument signal and is post EQ and limiter.
OPERATION
Remove battery plate (12) on back panel, by un-screwing the 2 thumb-screws. Inside the battery
compartment are 4 springs, the top two marked + and the lower 2 marked -. It is essential that the
batteries are connected with correct polarity. Insert batteries side by side with the connectors facing
inwards. Both batteries are inserted with the same location of positive + (smaller) terminal on top.
Picture showing battery insertion.
Then place the cover back on the unit.
For AC power just plug in power supply into DC supply input socket. Then plug AC line into AC
power outlet (11).
4
Using Bass Buddy on Battery Power.
To conserve battery life, when the Bass Buddy is on battery power, the 10 watt internal amplifier is
not connected. The typical running time of the Bass Buddy on battery power is around 3 hours with
high-quality, conventional disposable batteries and is depending on how loud the headphone volume is.
More volume means less battery time.
Using the Bass Buddy on AC Power
The Bass Buddy is supplied with a “smart” voltage sensing power supply. It will operate on any AC
voltage from 100v to 240v 50-60Hz. On AC power all functions of Bass Buddy are operable.
Connect up an instrument to the Bass Buddy instrument jack (3). Select the switch to either active or
passive instrument depending on what you are using. Keep the EQ controls in center position (flat
response) then gradually turn up the volume control (2) until the sound level is comfortable.
Adjust EQ (4) to you taste and style of playing. Bear in mind that the EQ level of cut and boost (+/18dB) is about twice as much as some other equalizers. So it use sparingly at first.
If you are using the Bass Buddy with a stereo source, link up with respective cables. Gradually raise
the volume control on back panel (13) until the sound level is comfortable and balances with your
instrument.
Using headphones.
The Bass Buddy is a high performance unit but it will only sound as good as the headphones you are
using. We recommend that you use professional grade, recording studio headphones. Cheap
headphones will lack ability to reproduce good bass tones and may be of impedance that does not
match the bass buddy. The Bass Buddy works best with headphones between 16-60ohms
Like speakers, some cheaper headphones may have difficulty reproducing lowest frequencies at high
volume levels. Headphones can vary greatly in efficiency, frequency response and overall
transparency and dynamics. This will have a major effect on how the Bass Buddy and your Bass will
sound. You should audition a few good quality headphones to see what suits your taste.
Using 10 watt- internal amplifier, to an extension speaker.
This is a low-output amplifier for practice. It is ideal for use at home and can be even connected to
quality hi-fi speakers without harm.
Connect up a speaker between 4-16 ohms to the speaker out jack (16). Never short out this socket. If
you do it can blow amplifier’s protective, internal fuse. If this fuse should blow, the amplifier will be
only feature that does not function. Amplifier will operate by replacing fuse. This fuse is only
accessible inside unit and should only be replaced by a qualified service technician.
Setting up the Limiter
The Bass Buddy limiter has a preset compression ratio of 3 to 1. For each additional increase of 3dB
above the set threshold, the increase in level is actually 1dB. So the dynamic range of your instrument
is reduced. First set up the limiter by having compression control (5) set fully clockwise. Now switch
on limiter (4). Start playing and turn control (14) (counter-clockwise). You will see the blue light start
to come on and that is indication that limiter is now working. Set this control to suit your taste.
5
Using the Stereo input.
A stereo mini jack (14) on rear of unit will accept a variety of input sources. Such as headphone output
from a computer, I-Pod, MP3 player drum machine, etc. Using the Stereo RCA adaptor, Bass Buddy
will accept signals from home audio or recording equipment such as CD player outputs or Mixer
outputs. This level control is independent of the front instrument volume control (3).
Note.
The output sockets (15) Pre-amp Line Out, (16) Loudspeaker Out and (17) Balanced XLR out only
carry bass instrument signals not stereo input program.
Specifications
Input Sensitivity:
Passive: 120mV Active: 300mV Line in: 300mV
Input Impedance:
Passive Input: >4MΩ/22pF
Active Input: >100KΩ/22pF
Stereo Line Input: >50KΩ
Graphic EQ: 5 Band 50Hz 160 Hz 630Hz 2.5KHz 12KHz +/- 18dB Cut & Boost
Pre Amp Output Impedance: 20KΩ
Bal. Line Output Impedance: 100Ω
Headphone output: 93mW into 55Ω-150mW into 32Ω - 250mW into 16Ω
Line Output: 1.2V
Balanced Output: 120mV
Speaker power output: Maximum 10W/4Ω at 10% THD.
S/N: < 82dB
Battery Current Drain: 160mA
Maximum AC Power Consumption: 15 watts.
Amplifier Protection (10Watt Amplifier.): 1 amp anti-surge. (Internal Fuse)
Dimensions: 5.35in Wide x 1.75in High x 7.3 in depth.
Net Weight: 2 lbs
Included Parts
6 ft AC power cord
AC Adaptor Power Unit with detachable AC cord
Mini Jack -1/4 Headphone adaptor
Stereo Mini Jack – Stereo RCA.
Stereo Mini Jack Cable
Lint Free polishing cloth
Padded, Carrying Case.
6
Warranty Information
The BASS BUDDY has a warranty period of 2 years, starting from the date of purchase. The buyer
must complete and return the enclosed warranty card within 14 days of purchase.
This warranty covers defect in materials or workmanship that occurs in normal use. Within warranty
period PJB will repair or replace the defect unit free of labor and parts charge. It is the buyer’s
responsibility to use the unit strictly according to instructions written in this manual and amplifier
manual.
This warranty is not transferable; it is provided to original owner only.
Damage/defects caused by the following conditions are not covered by this warranty:
Improper handling, neglect or failure to operate the unit in compliance with the instructions given
in user manual;
Connection or operation of the unit in any way that does not comply with the technical or safely
regulations applicable in the country where the product is used;
Repairs or modifications by anyone other than authorized PJB service agent;
Damages/defects caused by force majeure or any other condition that is beyond the control of PJB.
Should you need any warranty service, please bring the BASS BUDDY back to the dealer from whom
you purchased, along with your sales receipt. Depending on the complexity of the repair work, your
dealer may return the defect unit to PJB service center for repair or replacement.
American Acoustic Development LLC.
8559 Page Ave
St. Louis, MO 63114
USA
Phone: 314 814 1264
Fax: 636 536 1338
www.philjonesbass.com
[email protected]
Please fill this in for your records.
Serial Number: ______
____
Date Purchased: ______
___
Dealer: ______
____
7