1
3
shoot ’n share
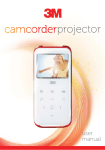
Camcorder Projector
Operator’s Guide
Guide de l’utilisateur
Guía del usuario
Model CP40
July 2010
78-6971-1565-3-A
Table of Contents
Getting Started................................................................. 7
Product overview................................................................................... 7
Package Content................................................................................... 8
Reading LED indicators......................................................................... 9
Charging the battery.............................................................................. 9
Inserting a memory card (optional)........................................................ 10
Power Projector ON/OFF...................................................................... 10
Set language......................................................................................... 10
Menu Navigation.................................................................................... 11
Understanding Status Icons.................................................................. 11
Basic Operations............................................................. 13
Recording a video clip........................................................................... 13
Taking a still picture............................................................................... 13
Projecting files....................................................................................... 14
Connecting Projector to Media Devices................................................ 18
Advanced Operations..................................................... 21
Menu Setting items................................................................................ 21
Flicker Setting Table.............................................................................. 22
Battery Life Indicator.............................................................................. 22
Specifications.................................................................. 23
Troubleshooting.............................................................. 25
Limited Warranty............................................................. 26
Thank You For Choosing 3M
This product has been produced in accordance with 3M quality and safety standards to
provide smooth and trouble-free use in the years to come. For optimum performance,
please follow the operating instructions carefully.
Important Notice
All statements, technical information, and recommendations related to 3M’s products are
based on information believed to be reliable, but the accuracy or completeness is not
guaranteed. Before using this product, you must evaluate it and determine if it is suitable for
your intended application. You assume all risks and liability associated with such use. Any
statements related to the product which are not contained in 3M’s current publications, or any
contrary statements contained on your purchase order shall have no force or effect unless
expressly set forth in a written agreement signed by an authorized officer of 3M.
Technical Support Contact
For technical support, call 1-866-631-1656 or email [email protected]
Trademarks and Copyrights
3M is a trademark of 3M Company.
VGA and XGA are trademarks of International Business Machines Corporation.
S-VGA is a registered trademark of the Video Electronics Standards Association.
No publication or commercial use may be made of this material without the express written
permission of 3M.
FCC Compliance Statement:
This device complies with Part 15 of the FCC Rules. Operation is subjected
to the following two conditions: (1) this device may not cause harmful
interference, and (2) this device must accept any interference received,
including interference that may cause undesired operation.
This equipment has been tested and found to comply with limits for a
Class B digital device, pursuant to Part 15 of the FCC rules. These limits
are designed to provide reasonable protection against harmful interference in residential
installations. This equipment generates, uses, and can radiate radio frequency energy, and if
not installed and used in accordance with the instructions, may cause harmful interference to
radio communications.
However, there is no guarantee that interference will not occur in a particular installation. If this
equipment does cause interference to radio or television equipment reception, which can be
determined by turning the equipment off and on, the user is encouraged to try to correct the
interference by one or more of the following measures:
-Reorient or relocate the receiving antenna.
-Move the equipment away from the receiver.
-Plug the equipment into an outlet on a circuit different from that to which the receiver is
connected.
-Consult the dealer or an experienced radio/television technician for additional suggestions.
You are cautioned that any change or modifications to the equipment not expressly approved
by the party responsible for compliance could void Your authority to operate such equipment.
If the time arises to throw away your product, please
recycle all the components possible.
Batteries and rechargeable batteries are not to be
disposed in your domestic waste! Please recycle
them at your local recycling point.
Together we can help to protect the environment.
Care and Safety Information:
Please read, understand, and follow all safety information contained in these
instructions prior to the use of this projector. Retain these instructions for future
reference.
INTENDED USE
The 3M™ Mobile Pocket Cinema is designed to operate with the 3M-specified
accessories and in a normal office and home environment.
• 10°~35°C (50°~95°F)
• 10~80% RH (without condensation)
• 0~1829 m (0~6000 feet) above sea level
The ambient operating environment should be free of airborne smoke, grease,
oil and other contaminants that can affect the operation or performance of
the projector. Use of this product in adverse conditions will void the product
warranty.
EXPLANATION OF SIGNAL WORDS AND SYMBOLS
WARNING:
Indicates a potentially hazardous situation, which, if not
avoided, could result in death or serious injury and/or
property damage.
CAUTION:
Indicates a potentially hazardous situation, which, if not
avoided, may result in minor or moderate injury and/or
property damage.
Warning: Hazardous Voltage
WARNING
To reduce the risk associated with hazardous voltage:
• Do not modify this product in any way. Use only 3M approved replacement
components.
• Do not attempt to service this projector. There are no user serviceable parts.
Service to be performed only by a 3M-authorized service provider using 3Mapproved system components.
• Do not use the wall power supply in a wet environment.
• Do not use the wall power supply with a damaged wall power supply.
Replace damaged part prior to use.
WARNING
To reduce the risk associated with fire and explosion:
• Do not immerse the projector in any liquid or allow either to get wet.
• Use only 3M approved power supply provided.
• Do not dispose of the projector by incineration or fire.
• Do not operate this projector in any environment above 35°C (95°F).
• Do not expose or store projector in direct sunlight, or excessive heat (>60°C
or 140°F) moist or caustic environments.
To reduce the risks associated with driver distraction in a moving motor
vehicle:
• Do not use this projector in a moving motor vehicle.
To reduce the risk associated with fire and explosion, battery leakage or
overheating:
• Do not immerse the projector in water or allow to get wet.
• Use only the 3M specified wall charger or automobile charger.
• Do not use the projector if it gives off an odor, or generates excessive heat.
• Keep away from exposed flames if the projector leaks liquid or emits an odor.
• Flush the eyes with water and seek medical attention if the projector leaks
liquid and the battery electrolyte gets in the eyes.
To reduce the risks associated with choking:
• Keep the projector, the microSD card and other small parts away from young
children.
CAUTION
To reduce the risk associated with environmental contamination:
• Dispose of all system components in accordance with applicable government
regulations.
To reduce the risks associated with bright LED light:
• Do not stare directly into the projector lens.
To reduce the risks associated with tripping and falling:
• Position the charging cord and data cables so that they can not be tripped
over.
To reduce the risks associated with hearing loss:
• Be sure to read earphone manufacturer’s instructions with respect to volume
level.
• User is responsible to set a safe volume level.
LED LIGHT OUTPUT
CLASS 1
LED
PRODUCT
IEC60825-1 :1993+A1
:1997+A2:2001
Maximum Radiant Power: 0.59 mW
SAVE THESE INSTRUCTIONS
Usage Notice:
Do:
• Turn off the power switch and unplug the power adapter before cleaning the
projector.
• Use a soft dry cloth with mild detergent to clean the display housing.
• Unplug the power adapter if the projector will not be used for a long period of
time.
• Operate the projector when the ambient room temperature is within 5 ~ 35°C.
• Operate the projector when the Relative Humidity is 5 ~ 35°C, 80% (Max.),
non-condensing.
Do not:
• Block the ventilation opening.
• Use abrasive cleaners, waxes or solvents to clean the unit.
• Operate projector under the following conditions:
In extremely hot, cold or humid environments.
In areas susceptible to excessive dust and dirt.
Near any appliance generating a strong magnetic field.
In direct sunlight.
Getting Started
Product overview
Projection button
Shutter button
Record button
Up arrow (Zoom in)
Menu button
Return button
Right arrow (LED light)
Left arrow
(Folder)
OK button
Down arrow
(Zoom out)
Focus switch
Micro SD card slot
IR receiver
Power Switch
Mic
Tripod socket
Speaker
Camcorder
Lens
Power/Charging LED
HDMI out
DC In/USB connector
AV input / Headphone output
LED Light
7
Projection
Lens
Package Content
Projector
Quick Guide
USB cable
CD
AV cable (RCA
female to mini jack)
8
AC power adapter
Reading LED indicators
The Power LED turns orange when the projector is charging.
The Power LED turns green when the AC power adapter is connected and the
projector is in standby mode. Also indicates a fully charged battery.
Charging the battery
1 Connect one end of the supplied AC adapter to the USB
port of the projector and the other end to a wall outlet.
OR
Connect one end of the supplied USB cable to the USB
port of the projector and the other end to a powered PC.
Note: Projector power switch must be Off to charge the
battery.
2 The Power LED turns orange and the charging starts.
3 When the Power LED turns green, the battery is fully charged.
Charging Method
Charging time
Projector power switch Off, connected to AC
adapter
around 4 hours
Projector power switch Off, connected to
computer with USB cable
around 7 hours
Projector power switch On and AC adapter or
USB cable connected
no charging
9
Inserting a memory card (optional)
1 Open the Micro SD card cover.
2 Gently insert the card as indicated (contacts facing
upward) until the card reaches the end of the slot.
3 When the card is fully seated, the icon (
) will appear
on screen. Note: The Micro SD card is spring loaded. To
remove the card, gently push inward to release the card
and then slide it outward to remove it from the projector.
4 Replace the Micro SD card cover.
Power Projector ON/OFF
Power ON - Slide power switch to the “ON” position.
Power OFF - Slide power switch to the “OFF” position.
Set language
1 Power on the projector.
2 Press the MENU button to enter the Setting screen.
3 Press the Up/Down (
/
) arrows to navigate to the Language item, and then
Press the OK button to confirm.
4 Use the Up/Down (
/
) arrows to select a language.
5 Press the OK button to confirm the setting.
10
Menu Navigation
How to
Action
Display a menu
Press the MENU button.
Select a menu option
Press the Up/Down/Left/Right button.
Execute action (go to highlighted sub
menu or select highlighted menu item)
Press the OK button.
Exit menu or go back to previous
menu
Press the Return button (when in sub-menu).
Understanding Status Icons
The following LCD icons display at the top of the screen to indicate current projector
settings.
00:03:12
1
Video resolution (QVGA, VGA,
DVD, HD 720p)
Internal memory/SD card inserted
Picture resolution (3M, 5M, 8M)
Battery life (empty battery ----> full
battery)
LED light (On, Off)
Zoom ratio indicator
Recording time
11
Basic Operations
Recording a video clip
1 Press the Up/Down (
/
) arrows to zoom in or zoom out.
2 Press the Record (
) button to start recording.
3 Press the Record (
) button again to stop recording.
4 While in recording mode, press the OK/Quick Playback (
) button to pause
recording. Press the (
) button again to resume recording.
The power saving feature will automatically stop the video recording after 25 minutes. If
you want to continue recording, press the “Record” button again.
To improve image quality in low light conditions, press the Right arrow to turn on the LED
light. Press again to turn off LED light.
Option
Icon
Description
On
Enable LED light.
Off
Disable LED light.
Taking a still picture
1 Press the Up/Down (
2 Press the Shutter (
/
) arrow button to zoom in or zoom out.
) button to take a picture.
To improve image quality in low light conditions, press the Right arrow to turn on the LED
light. Press again to turn off LED light.
Option
Icon
Description
On
Enable LED light.
Off
Disable LED light.
13
Projecting files
1 Press the OK/Quick Playback (
) button or the Left ( ) arrow.
2 Press the Up/Down arrows to select target folder.
3 When selecting one file, press the OK button to play it.
4 Press the Projection button (
) to project. (
turns white in standby mode.)
mode;
turns blue in working
• There are two ways to view the files.
OK/Quick Playback button
Left button
DCIM
Quick Playback
Video
Picture
0001/0001
DCIM
100MEDIA
0001/0001
100MEDIA
100MEDIA
0001/0001
100MEDIA
PICT0010.JPG
100MEDIA
0005/0012
CLIP0007.MP4
00:00:07
PICT0005.JPG
1MB
CLIP0008.MP4
00:05:12
PICT0007.JPG
611KB
PICT0010.JPG
809KB
PICT0011.JPG
486KB
0005/0012
14
During Playback
• Playing Video
1 Press Left/Right arrow to move to previous/next file.
Press and hold Left/Right arrow button to fast forward and fast rewind.
2 Use Up/Down arrow to control volume.
3 Press the OK button to pause the video (press OK again to resume). The
following status information will display.
Icon
Item
Description
Fast
Rewind
Press Left button: scroll the files up.
Press and hold Left button: fast rewind.
Pause
Press to pause a Video file during playback.
Play
Press to play a selected Video file.
Fast
Forward
Press Right button to scroll the files down.
Press and hold Right button to fast forward. Right button: fast
forward.
• Playing Photo
1 Press the Up/Down arrow to select target folder or a photo displayed in preview
mode.
2 After a photo is selected, press the OK button to display full size of this photo.
3 Press the Left/Right arrow to display previous or next photo.
Item
Description
Zoom in/out
Press the Up/Down arrow.
Lock/Release zoom ratio
When the zoom ratio is greater than 1.0x, press the OK button.
Browse the enlarged
picture
When the zoom ratio is locked, use the four-way arrow to browse
the picture.
15
• Menu items in Playback mode
For playback video or photo files, press the Menu (
) button to set up the following
features. When you are done, press the Menu button to exit the menu screen.
Item
Description
Delete
Delete the files.
Repeat
Repeat playing files in the folder. There are four options: Off, Single, All,
and Random.
Slide show
speed
Set the Slide show speed at 3, 5, or 8 seconds.
Icon
Enable/Disable OSD icons to display on the screen.
Note: When giving a presentation using PowerPoint/PDF documents, please save the
PPT/PDF file into .jpeg format.
Adjust the Focus
Turn the Focus wheel to adjust the image sharpness and
clarity.
16
Adjusting the Projected Image
Projection Distance
(A)
Screen size - Width
(B)
Screen Size - Height
(C)
Screen Diagonal
(D)
(cm)
(inch)
(cm)
(inch)
(cm)
(inch)
(cm)
19.0
7.5
12.2
4.8
9.1
3.6
15.2
(inch)
6.0
38.1
15
24.4
9.6
18.3
7.2
30.5
12.0
63.5
25
40.6
16.0
30.5
12.0
50.8
20.0
101.3
39.9
65.0
25.6
48.8
19.2
81.3
32.0
133.0
52.4
85.3
33.6
64.0
25.2
106.7
42.0
158.5
62.4
101.6
40.0
76.2
30.3
127.0
50.0
190.2
74.9
121.9
48.0
91.4
36.0
152.4
60.0
206.6
81.1
132.1
52.0
99.1
39.0
165.1
65.4
17
Connecting Projector to Media Devices
Composite AV Cable
This projector connects to most DVD players, SAT-Receivers, Portable Media Players and Game
consoles with the projector AV cable (supplied) and the composite AV cable that came with the
media device.
Projector
AV cable Composite AV-out
(rouge)
(rouge)
cable
Sortie AV
<câble AV>
(blanc)
DVD Player/
SAT-Receiver
(blanc)
(jaune)
(jaune)
Portable Media
Player
Game console
1 Connect Composite AV-out cable to media player.
2 Connect projector cable to AV jack on projector.
3 Connect projector’s AV cable to composite AV cable from media device (yellow to
yellow, white to white and red to red).
White might be black on some Media players or cables.
Please make sure that your media player is enabled with AV-out function.
18
HDMI Cable
This projector connects to most HD Digital TV’s with an optional (not included) HDMI
cable.
TV
HDMI In
HDMI Out
HDMI cable (Optional)
1 Turn on your HDTV.
2 Connect the HDMI-in connector (the bigger end) of the HDMI cable to the HDTV.
3 Turn on the projector.
4 Connect the other end of the HDMI cable to the HDMI Out jack on your projector.
5 Switch the HDTV to “HDMI input” mode.
Note: The HDMI cable is a standard mini-HDMI to HDMI cable. It is available at most
electronics stores.
19
Advanced Operations
Menu Setting items
Item
Option
QVGA
Video
Resolution
VGA
Set the video resolution to VGA (640x480 pixels).
DVD
Set the video resolution to DVD (720x480 pixels).
HD(720P)
Picture
Resolution
Select Card
Beep
Description
Set the video resolution to QVGA (320x240 pixels).
Set the video resolution to HD 720P (1280x720 pixels).
3M
Set the picture resolution to 3 mega pixels.
5M
Set the picture resolution to 5 mega pixels.
8M
Set the picture resolution to 8 mega pixels.
Internal
memory/ Micro
SD card
Select the storage devices between internal memory and Micro SD card.
Off
Disable beep sound.
On
Enable beep sound.
Icon
On/Off
Clock
-
Set date and time.
Language
-
Select the language used for OSD.
Keypad
Sensitivity
-2 ~ +2
Set the sensitivity of the touch-pad.
Display Auto Off
On/Off
Enable/Disable the LCD monitor display for power-saving purpose.
Flicker
50Hz
60Hz
No
Format
Default
Enable/Disable OSD icons to display on the screen.
Yes
Cancel action.
will be gone.
No
Cancel action.
Yes
Restore factory defaults. Note that your current settings will be
overridden.
21
Flicker Setting Table
Region
England
Germany
France
Italy
Spain
Netherlands
Russia
Setting
50Hz
50Hz
50Hz
50Hz
50Hz
50Hz
50Hz
Region
Portugal
America
Taiwan
China
Japan
Korea
Thailand
Setting
50Hz
60Hz
60Hz
50Hz
50/60Hz
60Hz
50Hz
Battery Life Indicator
Icon
Description
Full battery
Half-Full battery
Low battery
Empty battery
Note 1: When the “Battery Low” message appears, the projector will automatically power
off.
Note 2: When the battery icon indicates “low battery”, you continue using the projector
without interruption by plugging projector into the AC power adapter.
22
Specifications
Item
Description
Light Source
RGB LED
LCD Display
2.4” (6 cm) LCD
Brightness
14 Lumens (AC Mode); 12 Lumens (Battery Mode)
Aspect Ratio
4:3
Resolution
640 x 480 (VGA) Pixels
Projection Image Size
15 cm ~ 165.1 cm (6” ~ 65” Diagonal)
Projection Distance
19 cm ~ 206 cm
Contrast Ratio
200:1
Zoom & Focus
Manual
Projection Source
External from 3-in-1 AV jack, build-in memory or memory card
Play Back Format
Photo: JPEG
Video: MPEG-4( ASF), H.264(MP4), M-JPEG(AVI)
compatible with bundle software
Audio: MP3
Sensor Resolution
5M
Video Clip
HD 720p, DVD, VGA, QVGA
Image Resolution
8M, 5M, 3M
Lens Focus
Fixed
Output
HDMI, Audio
Audio Speaker
Mono
Built-in Memory
32MB
Memory Slot
MicroSD up to 32GB
Power Supply
AC power adapter (5V/2A) or embedded rechargeable
battery 2100mAH
Battery Life
Up to 120 minutes
Power consumption
Working mode: 5 W
Standby mode (Projector light off): 3.5W
Operation temperature
0°C ~ 35°C
23
Item
Description
Dimension (LxWxH)
125 x 62 x 24 mm
Package Content
AV cable (RCA female to mini jack), USB cable,
AC power adapter, Quick Guide,CD
Note:
- Advanced Systems Format (*.ASF)
- Video CD (*.DAT)
- MPEG (*.MPG; *.MPEG; *.MPE)
- RealMedia Video (*.RMVB)
- Windows Media Video (*.WMV)
- Microsoft PowerPoint (*.ppt, *.pps)
- MPEG4 MP4 (H.264)
24
Troubleshooting
If your projector does not seem to be functioning properly, check the items below before you
contact an authorized service center.
Symptom
Check Point
The projector can not be
turned on.
• Ensure the battery is fully charged or the AC power adapter
is properly connected.
• Use the projector in a darker environment.
The projected image is
too dark.
• Increase the brightness by using the AC power adapter.
• Project the image on a flat, white surface.
• Decrease the size of projected image.
The projected image
is dim.
• Adjust the focus. Please refer to “Adjusting the Focus”
section.
• Check if the lens is dirty.
• Replace with an image of higher resolution.
• Ensure the image format is compatible.
The image is not played.
• Replace with another file or memory card.
• Convert the file with the attached AMC software.
No image is projected
when an AV device is
connected.
• Ensure the connected device is equipped with AV-out
function.
• Check if the AV Cable is connected, and the projector is
switched to AV-in function.
• Check if the AV Cable is plugged correctly.
The surface temperature
of projector feels warm.
It is normal for this projector to generate moderate heat
during normal operation. Always keep the ventilation slots
free of dirt or obstructions and operate the projector in a
properly ventilated environment.
25
Limited Warranty
This warranty applies to the continental US only. The warranty terms, conditions, remedy and
limitations may vary in other countries. Contact your local 3M company for warranty information.
• The 3M™ Camcorder Projector Shoot ‘n Share CP40 (the “3M product”) is warranted to be free
from defects in material or manufacture for a period of 1 year from the date of purchase.
• All other accessories included with the 3M product are warranted to be free from defects in
material or manufacture for a period of 1 year from the date of purchase.
• Optional product accessories that are not sold as part of the 3M product are subject to individual
warranties.
THE WARRANTIES STATED ABOVE ARE EXCLUSIVE AND ARE MADE IN PLACE
OF ANY AND ALL WARRANTIES, EXPRESS OR IMPLIED WARRANTIES OR
CONDITIONS, INCLUDING ANY IMPLIED WARRANTY OF MERCHANTABILITY
OR FITNESS FOR A PARTICULAR PURPOSE, OR ANY INDUSTRY PRACTICE
OR CUSTOM OR TRADE USAGE.
In the event the 3M product fails to conform to the above stated warranties within the
applicable warranty period, your exclusive remedy shall be, at 3M’s option, to replace
or repair the 3M product or to refund the purchase price of the 3M product. All
replaced parts or products become property of 3M. If the product is repaired, 3M will
repair the defective part(s) with a new or used part(s). If the 3M product is replaced,
3M will replace the 3M product with the same or equivalent model and with a new or
refurbished 3M product. In the case of an approved warranty claim, the replacement
3M product will carry only the remaining term of the original 3M product’s warranty
period as stated above. For warranty service, you must provide proof of the date of
the original purchase else the manufacturing code date will be used to establish the
start date of the warranty. The following are exclusions to the above listed warranty:
a.
This warranty does not cover 3M product that is modified or damaged through improper storage,
misuse, abuse, accident, vandalism, improper installation, neglect, improper shipping, damage
caused by acts of war, disasters such as fire, flood, and lightning, improper electrical current,
software problems, interaction with non-3M products, or service other than by an 3M Authorized
Service Provider, neglect or mishandling by any person. Normal wear and tear is not covered
under warranty.
26
b.
3M product is designed to operate in the typical indoor environment. This warranty does not
cover 3M product used outside of the following circumstances:
•
•
•
•
c.
100V–240V AC, 50/60 Hz
10˚–30˚C (50˚–86˚F)
10–80% RH (without condensation)
0–1829 m (0–6000 feet) above sea level
The air intake and exhaust vent must be clear of obstructions. Inadequate air ventilation will
cause the 3M product to malfunction or will cause damage to the 3M product which will void the
warranty.
d.
This warranty does not cover any additional costs including, but not limited to, those associated
with removal, cleaning or installation of the 3M product, adjustments, (mechanical or electronic)
made to the 3M product.
e.
This warranty covers only normal use of the product. 24-hour-per-day or other excessive
continual use causes strain and is not considered normal use.
f.
This warranty does not cover consumables (e.g., batteries).
g.
This warranty is not transferable.
h.
3M is not responsible for warranty service should the 3M label or logo or the rating label or
serial number be removed unless otherwise stated in writing for the purposes of private labeling
for partnership requirements.
i.
This warranty does not cover postage, insurance, or shipping costs incurred in presenting your
3M product for warranty service. Said costs are the customer’s responsibility. If a claimed defect
cannot be identified or reproduced in service, the customer may be held responsible for cost
incurred. Should your warranty upgrade include a “change out” service and the claimed defect
cannot be identified or reproduced by the technician, the customer will be responsible for call
out costs.
FAILURE TO FOLLOW THE INSTRUCTIONS CONTAINED IN THE APPROPRIATE 3M PRODUCT
MANUAL OR TO USE THE 3M PRODUCT IN ACCORDANCE WITH 3M’S INTENDED USE
STATEMENT, WILL VOID ALL WARRANTIES AND LIMITED REMEDIES.
27
EXCEPT AS SPECIFICALLY STATED IN THE APPLICABLE 3M PRODUCT MANUAL, 3M SHALL NOT BE
LIABLE FOR ANY INDIRECT, INCIDENTAL, SPECIAL OR CONSEQUENTIAL DAMAGES (INCLUDING,
BUT NOT LIMITED TO, LOSS OF PROFITS, REVENUE OR BUSINESS) RESULTING FROM, OR IN ANY
WAY RELATED TO PERFORMANCE, USE OR INABILITY TO USE ANY OF THE 3M PRODUCT. This
limitation applies regardless of the legal theory upon which damages are sought.
For warranty support, please call or write your local 3M office or a 3M Authorized Service Provider to
obtain an RMA # (Return Material Authorization number) before returning the product. If you are inside
the Continental United States of America, please contact 3M Customer Service at 1-866-631-1656 or
email [email protected].
What 3M Will Do To Correct Problems:
•
If your 3M product requires service, 3M will ask you to bring or send the 3M product,
securely packaged in its original container or equivalent, along with proof of the date of
original purchase, to your 3M Service Dealer or 3M Service Center.
•
3M will, at its option, repair or replace the defective unit without charge for parts or labor.
Return of the 3M product will be at 3M’s expense.
•
When warranty service involves the exchange of the 3M product or of a part, the item
replaced becomes 3M property.
•
The exchanged 3M product or part may be new or previously refurbished to the
3M standard of quality, and at 3M’s option, the replacement may be another model of
like kind and quality.
•
3M’s liability for replacement of the warranted 3M product or part will not exceed the
original retail selling price of the 3M product. Exchange or replacement products or parts
assume the remaining warranty period of the product covered by this limited warranty.
28
82-703-90020v1.0
3M is a trademark of 3M Company. All other trademarks or registered
trademarks are property of their respective companies.
3
Projection Systems
3M Austin Center
3M Mexico, S.a. de C.V.
3M Canada
6801 River Place Blvd.
Austin, TX 78726-9000
800-328-1371
www.3M.com/meetings
[email protected]
Apartado Postal 14-139
Mexico, D.F. 07000
Mexico
P.O. Box 5757
London, Ontario
N6A 4TI
3M Europe
Boulevard de l'Oise
95006 Cerge Pontoise
Cedex
France
Please Recycle. Printed in USA.
© 3M 2010. All Rights Reserved.
78-6971-1565-3-A