1
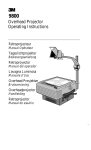
1700
Overhead Projector
Operating Instructions
Rétroprojecteur
Manuel de l’opérateur
Tageslichtprojektor
Bedienungsanleitung
Retroproyector
Manual del operador
Lavagna Luminosa
Manuale d’Uso
Overheadprojektor
Bruksanvisning
Overheadprojector
Handleiding
Retroprojetor
Manual do usuário
Main Menu
INTENDED USE
Before operating the machine, please read the entire manual
thoroughly. The 3M™ Overhead Projector 1700 was
designed, built and tested for use indoors, using 3M brand
lamps and nominal local voltages.
IMPORTANT SAFEGUARDS
When using your overhead projection equipment, basic
safety precautions should always be followed, including
the following:
1. Read and understand all instructions before using.
Pay particular attention to areas where this symbol
! is shown.
2. Close supervision is necessary when any appliance
is used by or near children. Do not leave appliance
unattended while in use.
! 3.
Care must be taken as burns can occur from
touching hot parts.
4. Do not operate appliance with a damaged cord or if
the appliance has been dropped or damaged until it
has been examined by a qualified service
technician.
! 5.
Position the cord so that it will not be tripped over,
pulled, or contact hot surfaces.
6. If an extension cord is necessary, a cord with a
current rating at least equal to that of the appliance
should be used. Cords rated for less amperage
than the appliance may overheat.
7. Always unplug appliance from electrical outlet
before cleaning and servicing and when not in use.
Never yank cord to pull plug from outlet. Grasp plug
and pull to disconnect.
The use of other replacement lamps, outdoor operation or
different voltages has not been tested, and could damage the
projector or peripheral equipment and/or create a potentially
unsafe operating condition.
!
8.
9.
10.
11.
12.
13.
14.
!
15.
16.
17.
Let appliance cool completely before putting away
or when replacing lamp.
To reduce the risk of electric shock, do not
immerse this appliance in water or other liquids.
To reduce the risk of electric shock, do not
disassemble this appliance, but take it to a
qualified technician when service or repair work is
required. Incorrect reassembling can cause electric
shock when the appliance is used subsequently.
The use of an accessory attachment not
recommended by the manufacturer may cause a
risk of fire, electric shock, or injury to persons.
Do not overload accessory circuit (if equipped).
Connect this appliance to a grounded outlet.
Disconnect this unit from its source of supply
before replacing the projection lamp.
This unit is equipped with optical lenses and
should not be exposed to direct sunlight.
Keep ventilation openings free of any obstructions.
This unit is connected by a special power cord that,
if damaged, has to be replaced by the same type
of power cord. This part can be ordered from your
local 3M dealer and has to be installed by a
qualified service technician.
SAVE THESE INSTRUCTIONS
The information contained in this manual will help you
operate and maintain your Overhead Projector.
THANK YOU
Thank you for choosing 3M overhead projection equipment.
This product has been produced in accordance with 3M’s
highest quality and safety standards to ensure a smooth and
troublefree use in the years to come. Your purchase of this
product proves that you appreciate this.
For optimum performance we kindly ask you to follow these
operating instructions carefully. We hope you will enjoy using
this high performance product in your meeting, training and
presentation sessions.
Part Identification List
1.
2.
3.
4.
5.
6.
7.
8.
9.
10.
11.
12.
13.
14.
15.
16.
Open Projection Head
Projection Mirror
Singlet Lens (1705, 1708)Triplet Lens (1720, 1750)
Arm
Focus Knob
Post
Post Latch
Post Cradle
On/Off Power Switch
High/Low Brightness Switch (1708, 1720, 1750)
Color Tuning Knob (1708, 1720, 1750)
Lamp Changer (1708, 1720, 1750)
Top Cover Release Latch (with interlock)
Top Cover Stage Glass
Cord Storage
Power Cord
3M 1700 Operator’s Guide
17. Machine Identification Plate
1
Main Menu
4.
Plug in power cord into projector and wall outlet (4) and
depress on/off power switch.
Operating The Projector
5.
Read the Important Safeguards before operating this
projector.
6.
Place LCD projection panel or film transparency in the
center of stage glass (4).
Set lamp brightness to “ High” or “ Low” position. See
“ High/Low Lamp Control” below.
Rotate focus knob (5) for sharpest image.
Set Up Projector
1.
Raise the post (1) until it locks into place.
2.
3.
Raise projection mirror (2) to adjust screen elevation.
Remove power cord (3) from storage area.
!
7.
Caution
Do not illuminate lamp with projection mirror in the closed
position. Heat from the lamp may produce parts that are hot
to the touch and damage the optics.
1.
Push power switch “ ON” to illuminate lamp.
|= ON
O = OFF
2.
3.
4.
Rotate projector (1) until projected light beam is
perpendicular (90°) to the screen surface. The height at
the left and right sides of the projected image should be
equal.
Adjust angle of projection mirror (2) to raise or lower the
image on the screen.
For best results, tilt projection screen (3) toward
projector until the width of the projected image is equal
at both the top and bottom.
8.
If yellow/orange or blue colors appear in corners of
image, rotate color tuning dial to remove colors. See
Color Tuning.
Fold Down Projector
1.
2.
3.
4.
5.
6.
2
Depress ON/OFF power switch, then unplug power cord
from outlet. Coil cord into cord storage area.
Close projection mirror.
Rotate focus knob (1) clockwise to raise projection head
to maximum position.
Release post latch (2) and lower post until it locks in the
post cradle.
Rotate focus knob (3) counterclockwise to lower head
until it stops.
To move the projector, lift it from the bottom.
3M 1700 Operator’s Guide
Main Menu
Lamp Changer (1708, 1720, 1750)
Optical Adjustment (1708, 1720, 1750)
If the selected lamp (position 1 or 2) is burned out or missing,
slide lamp changer lever (1) to select alternate lamp.
Turn the color tuning dial (2) to eliminate any yellow/orange
to brown or blue corners. A color–free projection stage will
produce the sharpest color images.
ü Important
Slide lever fully left or right until it stops.
ü Important
Lamp will not illuminate unless the top cover of the
projector is closed.
High/Low Lamp Control (1708, 1720, 1750)
Activate High/Low switch (3) to select High (brightest) or
Low (normal) lamp illumination.
a.
b.
= Brightest image, normal lamp life
= Standard image, extended lamp life
ü Note
Operating the lamp control switch in the LOW setting will
extend the life of the lamp.
Lamp Replacement
1.
2.
Push power switch to “ OFF” and unplug projector.
Release cover latch and lift up top cover.
3.
After lamp has cooled, release spring clip
(1) and raise condenser lens frame to access lamp.
4.
5.
Pull lamp out (2) and discard.
Push new lamp (3) fully and squarely into socket.
EHJ - 250W, 24V (1705, 1708, 1720)
EVD - 400W, 36V (1750)
Do not touch bulb glass with fingers.
6.
7.
Close condenser lens frame and secure with spring clip (1).
Close top cover and plug in power cord.
!
!
Caution
To avoid burns to the fingers, allow projector parts to cool
before replacing lamp.
Use care when placing hands inside projector body. Sharp or
rough edges could cause abrasions or cuts to fingers.
!
!
Caution
If a lamp cracks or breaks and deposits glass fragments
inside the projector body, use a vacuum cleaner to remove.
Touching sharp glass could result in cuts to your fingers.
3M 1700 Operator’s Guide
Caution
Caution
When the top cover is in the open position, use care not to tip
it over. If the cover slams shut, it could result in pinching or
bruises to your fingers.
3
Main Menu
Troubleshooting
Problem
Lamp does not illuminate but fan
motor runs.
Neither lamp nor fan energize.
Fan motor does not run but lamp
illuminates.
After replacing a burned out lamp, the
new lamp fails.
Short lamp life: Lamps seem to fail
before expected life span.
Projected image is wider at the top
than bottom (Vertical Keystoning).
Projected image higher on one side
(Horizontal Keystoning).
Projected image is dim.
Projected image does not have
uniform brightness.
Yellow/orange to brown or blue colors
appear in corners of image.
Color, focus or image problem.
Probable Causes
a.
b.
c.
a.
b.
c.
a.
b.
a.
b.
Solution
Lamp changer control not engaged.
Lamp not seated properly.
Burned out lamp.
Projector not plugged in.
Stage cover not completely closed.
No power at wall outlet.
Fan blade/motor obstructed.
Burned out fan motor.
Defective lamp was installed.
Possible electrical problem.
a. Defective lamps.
a.
b.
c.
a.
b.
c.
a.
b.
a.
b.
a.
b. High line voltage.
b.
a. Screen not aligned at 90° angle to projected a.
light beam.
a. Projector not aligned at 90° angle to screen. a.
a. Dirty stage glass, lenses, mirrors.
b. Condenser lens bracket open or retaining
clip not engaged.
c. High/low lamp control setting incorrect.
a. Lamp not aligned properly.
a.
b.
a. Lamp not at best location for projector to
screen distance.
a. Optics out of alignment.
a.
c.
a.
a.
Fully slide lamp changer control until it stops.
Seat lamp squarely in socket.
Replace lamp.
Plug projector into outlet.
Close stage cover to engage safety interlock.
Verify outlet has power.
Call for service.
Call for service.
Replace lamp.
If new lamp fails immediately, you may have
an electrical problem. Call for service.
Document actual lamp life, then contact Lamp
Supplier or 3M Service Center.
Have electrical line checked by an electrician.
Tilt projection screen toward projector until
image width is equal at top and bottom.
Rotate projector until image height is equal on
both sides.
Remove surface dirt.
Close and secure lens bracket with retaining
clip.
Set control to high for brightest image.
Properly seat lamp in socket. Fully slide lamp
changer into position 1 or 2.
Rotate color tuning dial to remove colors in
corners.
Call for service.
Cleaning
For best performance, use 3M™Overhead Cleaner 676 to keep
your projector free of excess dust and surface dirt.
Stage Glass and Lenses: Use 3M overhead cleaner and a soft,
lint–free cloth to remove surface dirt from the stage glass,
projector lens and bottom of Fresnel lens.
!
Caution
The projection mirror is a front–surface mirror and to avoid
damage to the lens surface, the lens must not be wiped clean.
Projection Mirror: Use a soft brush to remove surface dirt
from the projection mirror.
4
3M 1700 Operator’s Guide
Main Menu
Service Information – Service Information – Service – Información de Servicio –
Servizio assistenza – Service – 3M-Service – Serviço informativo
English:
Contact your supplier or 3M sales office where you purchased your unit.
Français:
Contactez votre distribution ou le bureau de vente 3M où vous avez acheté votre appareil.
Deutsch:
Wenden Sie sich bitte an lhren 3M Händler oder den technischen Kundendienst der 3M, wenn Sie
Serviceinformationen benötigen. Die zentrale Service–Nr. der 3M Deutschland GmbH lautet: Tel.
0130/114969
Español:
Póngase en contacto con su proveedor o con la oficina de ventas 3M, en la que compró su aparato.
Italiano:
Contattare il Vostro fornitore oppure 3M visual informa, Tel. 02–70352630.
Norsk:
Henvend deg til forhandleren eller til 3M–salgskontoret hvor du har kjøpt apparatet.
Nederlands:
Neem contact op met uw leverancier of de 3M vestiging waar u uw apparaat hebt gekocht.
Português:
Contacte o serviço de vendas da 3M ou o fornecedor onde adquiriu o seu aparelho.
COUNTRY
Austria
COMPANY NAME
3M Östereich Ges.m.b.H.
ADDRESS
Brunner Fieldstraße 63
LOCATION
A–2380 Perchtoldsdorf
Belgium
3M Belgium N.V./S.A.
Hermeslaan 7
B–1831 Diegem
Denmark
3M Denmark
Fabriksparken 15
DK–2600 Glostrup
Finland
Suomen 3M OY
PL 26 Sinimaentie 6
02630 Espoo 63
France
3M France
Boulevard de l’Oise
F–95006 Cergy
Germany
3M Deutschland GmbH
Hammfelddamm 11
D–41453 Neuss
Greece
3M Hellas Ltd.
Gr 15125 Maroussi
Gr–14110 Heraklaon
Athens
Ireland
3M Ireland
7th Floor, 3M House Adelphi Centre,
Dun Laoghaire
Co. Dublin
Italy
3M Italia SpA Sistemi Visual
Via S. Bovio 3
Loc. San Felice
20090 Segrate Milano
Netherlands
3M Nederland BV
Industrieweg 24
NL–2382 NW Zoeterwoude
Norway
3M Norge A/S
Hvamveien 6
N–2013 Skjetten
Portugal
Minnesota (3M)
de Portugal, Lda.
Rua Conde de Redondo, 98
P–1169 Lisboa Codex
Spain
3M España, S.A.
Juan Ignacio Luca de Tena 19–25
Madrid 28027
Sweden
3M Svenska AB
Bollstanacsvægen 3, Rotebro
SE–19189 Sollentuna
Switzerland
3M (Schweiz) AG
Eggstraße 93
CH–8803 Rüschlikon
Turkey
3M Ticaret A.S.
Buyukere Cad. Ucyol Mevkii
Normanin Is
Merkezi No: 414-416
Maslak 80670 Istanbul
United Kingdom
3M UK
3M House PO Box 1
Berkshire RG 1211 JU
Bracknell
3M 1700 Operator’s Guide
5
Main Menu
SAFETY POINTS TO NOTE:
Use an alternating current only. Check that the supply voltage is the same as that stated on the rating plate of the appliance.
U.K. only! How to connect the flex to a plug:
IMPORTANT - The wires in the mains lead are coloured in accordance with the following code:
Green and Yellow
Earth
Blue
Neutral
Brown
Live
Please read the instructions given below before connecting the flex to a plug.
If in doubt, please consult a qualified electrician. As the colours of the wires in the
mains lead of this appliance may not correspond with the coloured markings identifying
the terminals in your plug, proceed as follows:
The wire which is coloured green and yellow must be connected to the terminal which is marked
with the letter E, or the symbol <> , or coloured green or green and yellow.
The wire which is marked brown must be connected to the terminal which is marked
with the letter L or coloured red.
The wire which is coloured blue must be connected to the terminal which is marked
with the letter N or coloured black.
Replacement fuses of 10 amp should be used which have A.S.T.A. and B.S. 1362 approval.
Attention:
The plug, if severed from the mains lead, must be destroyed, as a plug with bared flexible
cord is hazardous if engaged in a live socket outlet.
English:
The models 1700 series fulfill 73/23/EEC, 89 / 336 EEC.
Français:
Le type 1700 est conforme à 73 / 23 / EEC, 89 / 336 EEC.
Deutsch:
Das Model 1700 erfüllt 73/23/EEC,89/336 EEC.
Español:
El modelo 1700 cumple las normas 73/23/EEC y 89/336 EEC.
Italiano:
Il modello 1700 è conforme alle norme 73 / 23 / EEC, 89 / 336 EEC.
Norsk:
Modellen 1700 oppfyller 73/23/EEC,89/336 EEC.
Nederlands: Dit model 1700 is conform met 73 / 23 / EEC, 89 / 336 EEC.
Português: O modelo 1700 cumpre as normas 73 / 23 / EEC, 89 / 336 EEC.
6
3M 1700 Operator’s Guide
Main Menu
Accessories – Accessoires – Zubehör – Accesorios – Accessorio – Tilbehør –
Accessories – Accessórios
Overhead Cleaner
Nettoyant pour rétroprojecteur
Tageslichtprojektor-Reiniger
Limpiador para retroproyectores
Prodotto di pulizia per proiettori
Rengjøringsmiddel for Overhead Prosjektører
Overhead schoonmaakmiddel
Limpador de Retroprojectores
78-8095-4140-8 70-0705-6877-2
Roller Attachment
Fixations à roulettes
Rollen-Baugruppe
Accesorio de rodillo
Avvolgitore del cavo elettrico
Hjul med feste
Rolhulpstuk
Accessório de rodas
78-6969-8506-4
3M 1700 Operator’s Guide
Lamp
Lampe
Lampe
Bombilla
Lampadina
Lampe
Lamp
Lâmpada
Dust Cover
Housse anti-poussières
Staubschutzhaube
Cubierta para polvo
Copertura antipolvere
Støv beskytter
Stofhoes
Capa anti-pó
EHJ DY-9920-0520-6 78-8062-0930-6
EVD DY-0210-0010-3 78-6969-7970-3
78-6969-7216-1 HA5792
Write-on Film Roll
Rouleau de pellicule sur laquelle on peut écrire
Schreibfolie
Rollo de película
Pellicola
Rull med film som det kan skrives på
Filmrol om op te schrijven
Rolo de filme
285 mm x 15 m
78-6969-1751-3 AF4311
7
All statements, technical information, and recommendations related to Seller’s products are based on information believed to be reliable, but the
accuracy or completeness thereof is not guaranteed. Before utilizing the product, the user should determine the suitability of the product for its intended
use. The user assumes all risks and liability whatsoever in connection with such use.
Any statements or recommendations of the Seller which are not contained in the Seller’s current publications shall have no force or effect unless
contained in an agreement signed by an authorized officer of Seller. The statements contained herein are made in lieu of all warranties, expressed or
implied, including but not limited to the implied warranties of merchantability and fitness for a particular purpose which warranties are hereby expressly
disclaimed.
SELLER SHALL NOT BE LIABLE TO THE USER OR ANY OTHER PERSON UNDER ANY LEGAL THEORY, INCLUDING BUT NOT
LIMITED TO NEGLIGENCE OR STRICT LIABILITY, FOR ANY INJURY OR FOR AN DIRECT, INDIRECT, INCIDENTAL OR
CONSEQUENTIAL DAMAGES SUSTAINED OR INCURRED BY REASON OF THE USE OF ANY OF THE SELLER’S PRODUCTS.
Visual Systems Division
6801 River Place Boulevard
Austin, Texas 78726-9000
Printed in U.S.A.
E3M 2/98 78-6970-7581-6 Rev. A