Download Miller Electric Big Blue 401DXQ Specifications
Transcript
DM173 413C
January 1997
Eff. w/Serial Number KG214633
Miller.
Processes
Stick
The Power ofBlue.
TIG
(SMAW) Welding
(GTAW) Welding
(CAC-A) Cutting
~
Air Carbon Arc
With
Optional Equipment:
and
Gouging
Flux Cored
(FCAW) Welding
Description
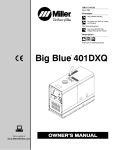
Engine Driven Welding Generator
ct
Big
Blue 401 DXQ
(~L~ 'OPY
~J~T) FOL~
0
Il
Visit our website at
w.MU1erWe~$S~Crn1~
OWNERS
MANUAL
Call
1 -800-4-A-MILLER
for your local
Miller distrihutor.
TABLE OF CONTENTS
SECTION 1
EMF Information
1-4.
Service
You
always get
fast,
the
reliable response you
need. Most replacement
SECTION 1
1-1.
be in your
hands in 24 hours.
parts
can
1-2.
1-3.
Support
1-4.
Need fast
answers
to the
Contact your distributor.
The expertise of the
distributor and Miller is
there to help you, every
step of the way.
Miller offers a Technical
Manual which provides
more detailed service and
parts information for your
unit. To obtain a Technical
contact your local
distributor. Your distributor
Manual,
Welding
supply you with
Process Manuals
suchasSMAW, GTAW,
GMAW, and GMAW-P
For practical information
Principales
normes
1-6.
Information
sur
our
Diesel
exhaust and
some of its constituents
are known to the State of
California to cause
cancer, birth defects, and
other reproductive harm.
engine
2-3.
Symbols And
Definitions
13
SPECIFICATIONS
14
12
Weld, Power, And Engine Specifications
14
3-2.
Dimensions, Weights, And Operating Angles
Duty Cycle And Overheating
14
15
3-5.
Volt-Ampere Curves
AC Auxiliary Power
3-6.
Fuel
3-3.
3-4.
15
16
Consumption
16
SECTION 4INSTALLATION
17
4-4.
Installing Welding Generator
Activating The Dry Charge Battery
Connecting The Battery
Engine Prestart Checks
4-5.
Installing
Pipe
20
4-6.
Connecting To Weld Output Terminals
Selecting Weld Cable Sizes
20
4-3.
4-7.
Muffler
17
18
19
19
THE WELDING GENERATOR
21
22
5-1.
Front Panel Controls
22
5-2.
Manual Shutoff Lever
23
5-3.
Remote NV Control
6-1.
23
AUXILIARY EQUIPMENT
120 Volt And 240 Volt Duplex Receptacles
Optional Auxiliary Power Receptacles
SECTION 7
MAINTENANCE & TROUBLESHOOTING
7-1.
Routine Maintenance
7-2.
Maintenance Label
7-3.
Servicing
7-4.
Oil And Fuel
24
24
25
26
26
27
Air Cleaner
28
System Components
Adjusting Engine Speed
29
7-5.
7-6.
Overload Protection
31
7-7.
Optional Spark Arrestor Inspection And Cleaning
Troubleshooting
31
30
32
SECTION 8
ELECTRICAL DIAGRAM
34
SECTION 9
RUN-IN PROCEDURE
35
8-1.
Wetstacking
8-2.
Run-In Procedure
8-3.
Run-In
WARRANTY
=
9
Label For CE Products
3-1.
SECTION 10
=
9
Rating
7-8.
The following terms are
used interchangeably
throughout this manual:
Stick
SMAW
TIG
GTAW
8
Manufacturers
6-2.
65
6
le fonctionnement
8
champs Ølectromagnetiques
Label Definitions
SECTION 6OPERATING
Proposition
Warning
5
7
de sØcuritØ
DEFINITIONS
SECTION 5OPERATING
CALIFORNIA
5
2-2.
website at
www.MlHerWetds.com
les
5
Warning
4-2.
welding, process applica
tions, and Miller products,
visit
LIRE AVANT UTILISATION
2-1.
4-1.
on
4
des
1-5.
SECTION 3
can
SECtJRITE
symboles
Dangers relatits au soudage a Iarc
Dangers existant en relation avec le moteur
Dangers supplØmentaires en relation avec linstallation,
SECTION 2
3
4
CONSIGNES DE
Signification
2
And Maintenance
et Ia maintenance
tough welding questions?
also
READ BEFORE USING
1-6.
1-3.
gives
you
-
1-5.
1-2.
Your distributor
SAFETY PRECAUTIONS
Symbol Usage
Arc Welding Hazards
Engine Hazards
Additional Symbols For Installation, Operation,
Principal Safety Standards
1-1.
Using Load Bank
Procedure Using Resistance
PARTS LIST
35
36
Grid
37
38
Conformity for
European Community (CE) Products
Declaration of
NOTE
This in formation is provided for units with CE certification
~
Manufacturers
Name:
M ill e r Electric M fg. Co.
Manufacturers
Address:
1635 W.
Declares that the
con forms
to the
WI 54914 USA
B j g B I u efi 401 DXQ
product:
following
Street
Spencer
Appleton,
(see rating label on unit).
Directives and Standards:
Directives
Low
Voltage
Directive: 73/23/EEC
Machinery Directives: 89/392/EEC,91 /368/EEC, 93/C 133/04, 93/68/EEC
Noise Emission Directive: 79/113/EEC
Noise level of
Welding
Electromagnetic compatibility
Generators: 84/535/EEC
Directives: 89/336/EEC, 92/31/EEC
Standards
Safety Requirements
Rotating
Rotating
for Arc
Electrical Machines
Electrical Machines
Welding Equipment
Part 1:
Rating
Part 1: EN 60974-1: 1990
and Performance: IEC 34-1: 1994
Part 5: Classification of
electrical machines
degrees of protection provided by
(IP code): IEC 34-5: 1991
enclosure of
rotating
Insulation coordination for
Part 1:
equipment within low-voltage systems:
Principles, requirements and test: IEC 664-1: 1992
Electromagnetic compatibility (EMC) Product
European
Contact:
Mr.
standard for
Luigi Vacchini, Managing
Europe S.P.A.
MILLER
Via Privata Iseo
20098 San Giuliano
Milanese, Italy
Telephone:
Fax:
dec_coni 1/96
39(02)98290-1
39(02)98281-552
arc
welding equipment:
Director
EN5O1 99:
August
1995
SECTION 1
-
SAFETY PRECAUTIONS
-
READ BEFORE USING
rorn
1-1.
SyrnbolUsge
Means Warning! Watch Out! There are possible
hazards with this procedure! The possible hazards are
shown in the adjoining symbols.
a
A Marks
1-2
not
safety related.
Welding Hazards
Arc
The
This group of symbols means Warning! Watch Out! possible
ELECTRIC SHOCK, MOVING PARTS, and HOT PARTS hazards.
Consult symbols and related instructions below for necessary
actions to avoid the hazards.
special safety message.
a
~T Means ~Note
A
shown below
symbols
to call attention to and
are used throughout this manual
identify possible hazards. When you
symbol, watch out, and follow the related instructions
safety information given below is
only a summary of the more complete safety Information
found in the Safety Standards listed in Section 1-5. Read and
follow all Safety Standards.
see
the
Use
only well-maintained equipment. Repairor replace damaged
at once. Maintain unit according to manual.
parts
safety harness
Wear
a
Keep
all
to avoid the hazard. The
A Only qualified persons should Install, operate, maintain,
repair this unit.
A
_nd_5/97
and
Clamp
or
panels
and
clamp when
contact with any metal
During operation, keep everybody, especially children, away.
good
above floor level.
securely
in
place.
metal-to-metal contact to
the weld
as near
Insulate work
working
covers
work cable with
worktable
if
as
workpiece
practical.
not connected to
workpiece to prevent
object.
Do not connect more than one electrode
weld output terminal.
or
work cable to any
single
ELECTRIC SHOCK
live
Touching
can
electrical
parts
kill
can
ARC RAYS
cause
burn eyes and skin
fatal
Arc rays from the welding process produce intense
visible and invisible (ultraviolet and infrared) rays
shocks or severe burns. The electrode and work
circuit is electrically live whenever the output is on.
The input power circuit and machine internal
also live when power is on. In semiautomatic or
automatic wire welding, the wire, wire reel, drive roll housing, and all
circuits
can
that
can
bum eyes and skin.
Sparks fly off from the
weld.
are
touching the welding wire are electrically live. Incorrectly
improperly grounded equipment is a hazard.
metal parts
installed or
Wear
Do not touch live electrical parts.
Wear
Wear a welding helmet fitted with a proper shade offilterto protect
your face and eyes from arc rays and sparks when welding or
watching (see ANSI Z49.1 and Z87.1 listed in Safety Standards).
approved safety glasses with side shields
under your
helmet.
dry, hole-free insulating gloves and body protection.
yourself from work and ground using dry insulating mats
or covers big enough to prevent any physical contact with the
work or ground.
Insulate
Do not use AC output in damp areas, if movement is confined,
a danger of falling.
or
Use protective screens or barriers to protect others from flash and
glare; warn others not to watch the arc.
Wear
protective clothing made from durable, flame-resistant
(wool and leather) and foot protection.
material
if
there is
output ONLY
Use AC
If AC output is
unit.
if
required,
use remote
output control if present
on
or stop engine before installing or
Lockout/tagout input power according
CFR 1910.147 (see Safety Standards).
Disconnect input power
this equipment.
servicing
to OSHA 29
Properly
Owners
install and ground this equipment according to its
Manual and national, state, and local codes.
Always verify the supply ground check and be sure that input
power cord ground wire is properly connected to ground terminal
in disconnect box or that cord plug is connected to a properly
grounded receptacle outlet.
When
making input connections,
conductor first
attach
proper
grounding
double-check connections.
Frequently inspect input power cord for damage or bare wiring
replace cord immediately if damaged bare wiring can kill.
Turn off all
equipment when
Do not
worn,
use
drape
If earth
grounding
a
cables
separate
use.
damaged, undersized,
Do not
with
not in
over
your
or
poorly spliced cables.
body.
of the workpiece is required, ground it directly
cable
do not use work clamp or work cable.
Do not touch electrode if you are in contact with the work,
or another electrode from a different machine.
FUMES AND GASES can be hazardous
~
required for the welding process.
ground,
Welding produces fumes
these fumes and gases
health.
and gases. Breathing
be hazardous to your
can
____________
Keep your head
out of the fumes. Do not breathe the fumes.
If inside, ventilate the area and/or
remove welding fumes and gases.
If ventilation is poor,
Read
the
Material
manufacturers
use an
use
exhaust at the
arc
to
approved air-supplied respirator.
Data Sheets (MSDS5) and the
instructions for metals, consumables, coatings,
Safety
cleaners, and degreasers.
Work in
a confined space only if it is well ventilated, or while
wearing an air-supplied respirator. Always have a trained watchperson nearby. Welding fumes and gases can displace air and
lower the oxygen level causing injury or death. Be sure the
breathing air is safe.
Do not weld in locations near degreasing, cleaning, or spraying
operations. The heat and rays of the arc can react with vapors to
form highly toxic and irritating gases.
Do not weld on coated metals, such as galvanized, lead, or
cadmium plated steel, unless the coating is removed from the
weld area, the
area
is well ventilated, and if necessary, while
wearing an air-supplied respirator. The coatings and any metals
containing these elements can give off toxic fumes if welded.
OM-173 413
Page
1
HOT PARTS
WELDING can cause fire or explosion
on
drums,
pipes,
can
hot
Allow
cooling period before maintaining.
protective gloves and clothing when
working on a hot engine.
Do not touch hot engine parts or just-welded
closed containers, such as tanks,
can cause them to blow up. Sparks
off from the welding arc. The flying sparks,
Welding
or
fly
workpiece,
and hot
equipment
Wear
fires
can cause
and burns. Accidental contact of electrode to metal objects can
cause sparks, explosion, overheating, or fire. Check and be sure the
area
is safe before
parts bare-handed.
doing any welding.
NOISE
yourself
Protect
and others from
Do not weld where
flying sparks
strike flammable material.
can
possible, tightly
(10.7 m) of the welding arc.
them with approved covers.
cover
can
and hot metal.
flying sparks
Remove all flammables within 35 ft
this is not
Noise from
Wear
welding sparks and hot materials from welding can
easily go through small cracks and openings to adjacent areas.
Watch for fire, and
that
aware
fire
can cause
keep
welding
on
a
fire
I I
partition
or
some
approved
unless
they
on
the hidden side.
closed containers such
are
as
tanks, drums,
properly prepared according
or
pipes,
(see
to AWS F4.1
Safety Standards).
unknown
Do not
to
and
as
causing
~
going
cut off
or
protective garments
welding wire
such as leather
a
H
keep away.
welding, gouging,
arc
....ERS
or
spot
lighter or matches,
process, be
Injure eyes.
excessive heat,
compressed gas cylinders
slag, open flames, sparks, and arcs.
or
an
cylinder
upright position by securing to
prevent falling or tipping.
a
stationary
rack to
Keep cylinders away from any welding or other electrical circuits.
Welding, chipping, wire brushing, and grinding
cause sparks and flying metal. As welds cool,
they can throw off slag.
Wear approved safety glasses with side
shields even under your welding helmet.
Never
drape
Never allow
Never weld
Use
only
injure or kilt.~
a
a
welding
torch
over a
on a
pressurized cylinder
will result.
shielding gas cylinders, regulators, hoses,
for the specific application; maintain them
parts in good condition.
and
and
Turn face away from valve outlet when
in
connected for
shielding gas supply when
not in use.
use or
Always
ventilate confined spaces
or use
Read and follow instructions
associated
opening cylinder
valve.
place over valve except when cylinder is in
Shut off
ap
cylinder.
explosion
fittings designed
Keep protective cap
proved air-supplied respirator.
cylinder.
gas
to touch any
welding electrode
correct
associated
OF GAScan.
carefully.
mechanical shocks,
Install cylinders in
can
to treat them
sure
from
Protect
support
FLYING METAL
explode if darnaged~
gas cylinders contain gas under high
pressure. If damaged, a cylinder can explode.
Since gas cylinders are normally part of the welding
gloves, heavy
1
~BUILDUP.
can
Shielding
at
cap.
Remove any combustibles, such as a butane
from your person before doing any welding.
use.
equipment,
compressed gas cylinders,
publication P-i listed in Safety
on
and CGA
Standards.
14: Engine Hazards
FUEL
:
can cause
Stop engine and
or adding fuel.
tire
or
.:,.
STEAM AND HOT COOLANT
expIosIon~
let it cool off before
Do not add fuel while smoking
sparks or open flames.
or
if unit is
Do not overfill tank
spill fuel.
Dispose
of rags in
Page
2
allow
If fuel is
a
room
spilled,
fireproof
for fuel to
If the
near
container.
engine
is
warm
and
checking
burn
engine
is
is needed,
follow the next two statements.
expand.
clean up before
can
If possible, check coolant level when
cold to avoid scalding.
checking
any
OM-173 413
near
pipes.
shirt, cuffless trousers, high shoes, and
Do not
wearers
ers
welding area as
traveling long, possibly
electric shock and fire hazards.
Remove stick electrode from holder
tip when not in use.
~
protection if noise level is
Wearers should consult their doctor before
contact
I
ear
close to the
current from
welder to thaw frozen
Wear oil-free
can
welding operations.
prevent welding
paths
use
equipment
____________
Connect work cable to the work
practical
or
MAGNET CflELDScanaftectpace
Pacemaker
Do not weld
processes
high.
extinguisher nearby.
ceiling, floor, bulkhead,
on a
damage hearing.
damage hearing.
If
Be alert that
Be
bums
can cause severe
starting engine.
Wear
Turn
safety glasses
and
gloves and put
and
cap slightly
completely removing
cap.
let
pressure
a
rag
over
escape
radiator cap.
slowly before
MOVING PARTS
BAT~ERV ACID
Injury
cart cause
Do not
Keep away from fans, belts, and rotors.
Keep all doors, panels, covers, and guards
closed and securely in place.
Stop engine before installing
only qualified people
and troubleshooting
Have
or
connecting
guards
remove
enance
as
tip battery.
Replace damaged battery.
Reinstall
panels
or
finished and before
with water.
unit.
or covers
for maint
necessary.
LUST GASES
prevent accidental starting during servicing, disconnect
negative () battery cable from battery.
loose
immediately
Flush eyes and skin
To
Keep hands, hair,
parts.
EYES~
BURN SKIN and
can
and tools away from
clothing,
guards and close
starting engine.
doors when
moving
servicing
is
~
Use
in
outside
equipment
ventilated
kill
can
well-
open,
areas.
engine exhaust
building air in
If used in a closed area, vent
outside and away from any
takes.
Before working on generator, remove spark plugs or injectors to
keep engine from kicking back or starting.
Block
flywheel
that it will not turn while
so
working on generator
components.
ENGINE HEAT
Do
can cause
locate
not
unit
combustible surfaces
BATrERY EXPLOSION can BU ND.
Keep exhaust
on,
or
tire
or
over,
near
flammables.
and exhaust
pipes way from
flammables.
Always wear a face shield, rubber gloves, and
protective clothing when working on a battery.
Stop engine before disconnecting or connect
ing battery cables or servicing battery.
Do not allow tools to
Do not
use
welder to
Observe correct
Disconnect
1-4.
cause
sparks
charge batteries
polarity (+
and
)
on
or
working
jump
on a
battery.
start vehicles.
batteries.
EXHAUST SPARKS
fire
can cause
engine exhaust sparks cause fire.
approved engine exhaust spark arrestor
required areas see applicable codes.
Do not let
Use
in
cable first and connect it last.
negative ()
Symbols For InstaItat~on, Operation, And Maintenance
AddlUonal
EALLK~G UNIT
Use
when
lifting eye
can
casŁ
to lift unit
OVERUSE
Injury~
only, NOT running
Allow
can cause
OVERHEATING
cooling period; follow rated duty cycle.
________
trailer,
gear, gas cylinders,
accessories.
or
any
other
starting
Use equipment of adequate capacity to lift and
support unit.
If
Reduce current
using lift forks to move unit, be sure forks
beyond opposite side of unit.
are
long enough
to weld
Do not block
or
reduce
or
duty cycle before
again.
filter airflow to unit.
to
extend
STATIC
Put
(ESD} can damage
on
handling
FLYING SPARKS
Wear
a
can cause
face shield to
Injury
can cause
fires
Use proper
store, move,
or
wrist
strap
BEFORE
parts.
static-proof bags and
or ship PC boards.
boxes to
protect eyes and face.
Shape tungsten electrode only on grinder with
proper guards in a safe location wearing prop
er face, hand, and body protection.
Sparks
grounded
boards
PC boards
keep flammables away.
TILTING OF TRAILER
Use
tongue jack
or
can cause
blocks to
Injury
support weight.
Properly install welding generator onto trailer
according to instructions supplied with trailer.
OVERHEATING
can
damagemotors.
unplug equipment before starting or
stopping engine.
Do not let low voltage and frequency caused
by low engine speed damage electric motors.
Turn off or
Do not connect 50
tacle where
or
60 Hertz motors to the 100 Hertz recep
applicable.
READ INSTRUCTIONS
only genuine MILLER replacement parts.
engine maintenance and service
according to this manual and the engine
Use
Perform
manual.
OM-173 413
Page
3
H F RADIATION
can cause
Interference
ARC WELDING
High-frequency (HF.) can interfere with radio
navigation, safety services, computers, and
communications equipment.
Have only qualified persons familiar with
electronic equipment perform this installation.
such
To reduce
possible,
If notified
by
at once.
the FCC about interference,
Have the installation
stop using the
and maintained.
Be
area
is
possible interference, keep weld cables as short as
together, and down low, such as on the floor.
close
welding operation
equipment.
sure
according
Keep high-frequency source doors and panels tightly shut,
keep spark gaps at correct setting, and use grounding and
shielding to minimize the possibility of interference.
this
100 meters from any sensitive elec
welding machine is installed and grounded
to this manual.
If interference still occurs, the user must take extra measures
as moving the welding machine, using shielded cables,
such
using
I .5
computer-driven equipment
and
robots.
Locate
tronic
regularly checked
as
Be sure all equipment in the welding
electromagnetically compatible.
is
equipment
energy can interfere with
electronic equipment such as
computers
installation.
user
Interference
Electromagnetic
sensitive
responsible for having a qualified electrician
promptly correct any interference problem resulting from the
The
can cause
line
filters,
or
shielding the
work
area.
Pnnclpal Safety Standards
and Cutting, ANSI Standard Z49.1, from American
550 N.W. LeJeune Rd, Miami FL 33126
of
Compressed Gases
Safety in Welding
Safe
Welding Society,
P-i, from Compressed Gas Association, 1235 Jefferson Davis
Highway, Suite 501, Arlington, VA 22202.
Safety and Health Standards, OSHA 29 CFR 1910, from Superinten
dent of Documents, U.S. Government Printing Office, Washington,
D.C. 20402.
Recommended Safe Practices for the Preparation for Welding and
Cutting of Containers That Have Held Hazardous Substances,
American Welding Society Standard AWS F4.1, from American
Welding Society, 550 N.W. LeJeune Rd, Miami, FL 33126
National Electrical Code, NFPA Standard 70, from National Fire
Protection Association, Batterymarch Park, Quincy, MA 02269.
1-6
Welding current, as it flows through welding cables, will cause electro
magnetic fields. There has been and still is some concern about such
fields. However, after examining more than 500 studies spanning 17
years of research, a special blue ribbon committee of the National
Research Council concluded that: The body of evidence, in the
committees judgment, has not demonstrated that exposure to powerfrequency electric and magnetic fields is a human-health hazard.
However, studies are still going forth and evidence continues to be
examined. Until the final conclusions of the research are reached, you
may wish to minimize your exposure to electromagnetic fields when
To
in
Cylinders, CGA Pamphlet
Code for Safety in Welding and Cutting, CSA Standard Wi 17.2, from
Canadian Standards Association, Standards Sales, 178 Rexdale
Boulevard, Rexdale, Ontario, Canada M9W 1 R3.
Safe Practices For Occupation And Educational Eye And Face
Protection, ANSI Standard Z87.1,from American National Standards
Institute, 1430 Broadway, New York, NY 10018.
Cutting
And
NFPA Standard 51 B, from National
Association, Batterymarch Park, Quincy, MA 02269.
Welding Processes,
Fire Protection
EME Information
Considerations About Welding And The Effects Of Low Frequency
Electric And Magnetic Fields
cutting.
reduce magnetic
welding
Handling
or
OM-173 413
Page
fields in
the
workplace,
use
the
following
Keep
2.
Arrange cables
3.
Do not coil
4.
Keep welding power source and cables
operator as practical.
5.
Connect work
4
or
together by twisting
or
taping them.
to one side and away from the
drape cables
clamp
to
around your
workpiece
as
operator.
body.
as
far away from
close to the weld
as
possible.
About Pacemakers:
Pacemaker wearers consult your doctor first. If cleared by your doctor,
following the above procedures is recommended.
then
procedures:
cables close
1.
SECTION 1
-
CONSIGNES DE SECURITE
UTI LISATION
-
LIRE AVANT
rom
~1-1
Signification
symboles
Signifie Mise en garde! Soyez vigilant! Cette procedure
prØsente des risques de danger! Ceux-ci sont identifis
par des symboles adjacents aux directives.
4A
A
des
_nd_fre 5/97
Identifie
un
message de sØcuritØ
Ce groupe de symboles signifie Mise en garde! Soyez vigilant! lly a des
risques de danger relies aux CHOCS ELECTRIQUES, aux PIECES EN
particulier.
MOUVEMENTet aux PIECES CHAU DES. Reportez-vous aux symboles
at aux directives ci-dessous at in de connaltre les mesures a
~
NOTA
Signifie
viter tout
nest pas relatif a Ia sØcuritØ.
prendre pour
danger.
Dangersrelatifs aU Soudage~:Fa!c~H..
A
symboles prØsentØs ci-aprŁs sont utilisØs tout au long du
present manuel pour attirer votre attention et identifier lea
risques de danger. Lorsque vous voyez un symbole, soyez
vigilantetsuivez lea directives mentionnØes afin dØviter tout
danger. Les consignes de sØcuritØ prØsentØes ci-aprŁs ne
Ne pas toucherlØlectrode quandon est en contactavec Ia
une electrode provenant dune autre machine.
font que rØsumer linformation contenue dans lea normes de
sØcuritØ ØnumØrØes ala section 1-5. Veuillez lire et respecter
Porter
Les
toutes
ces normes
piŁce, Ia terre ou
Nutiliser quun materiel en bon Øtat. RØparer ou remplacer sur-le-champ
las piŁces endommagees. Entretenir lappareil conformØment A ce
manuel.
hamais de sØcuritØ quand
un
Maintenir solidement
de sØcuritØ.
en
travaille
on
place tousles
en
hauteur.
panneaux et capots.
Fixerle cable de retourde
facon a obtenir un bon contact mØtal-mØtal avec
piŁce a souder ou a table de travail, le plus prŁs possible de Ia soudure.
Isoler Ia pince de masse quand pas mis a Ia piŁce pour Øviter Ia contact
avec tout objet metallique.
Ia
A
lutilisation,
Linstallatlon,
doivent Œtre confiØs
A
Au
cours
qu
lentretien et les reparations
des personnes quallfiØes.
de lutilisation, tenir toute personne Ł lØcart et
les enfants
ne
plus
.
.
particulierement
LES RAYONS DE L.ARC peuvent pro
voquer des brUlures dane lee yeux et~
sur Ia peau
I
I
UN CHOC
~
ELECTRIQUE peut tuer
~_..
simple
______________
terre
prØsentent
No
un
danger.
jamais toucher los piŁces electnques
Porter des
La rayonnement de larc
.......
contact avec des piŁces Ølectnques peut
provoquer une electrocution ou des blessuras 9raVes.
LØlectrode et le circuit de soudage sont sous tension des
que lappareil eat sur ON. La circuit dentrØe at les circuits
intemes de lappareil sont egalement sous tension a ce
moment-l. En soudage semi-automatique ou automatique, Jo fil, Ie dOvidoir, le
logement des galets d entrainement at lea piŁces metalliques en contact avec
le tilde soudaga sont sous tension. Des matØriels mal installØs ou mal mis ala
Un
gants
et des
sous
sacs ne
procØde
de
soudage genere
infrarouges)
peau. Des Øtincelles sont
projetØes pendant
Ia
soudage.
Porter un casque de soudage muni dun Øcran de filtre appropriØ pour pro
teger votre visage et vos yeux pendant le soudage ou pour regarder (voir
ANSI Z49.1 at Z87.1 ØnumØre dans les
Porter des
trop ØlevØ.
protections approuvŁs pour
normes
de
sØcuritØ).
las oreilles si le niveau sondre est
Utiliserdas Øcrans ou des barriŁres pourprotegerdes tiers de lØclair at de
lØblouissement; demander aux autres personnes de ne pas regarderlarc.
tension.
vOtemerits de protection
du
des rayons visibles at invisibles intenses (ultraviolets et
susceptibles de provoquer des brOlures dans les yeux et sur Ia
________________
comportant pas
de trous.
Porterdes vŒtemonts de
sistant
feu
au
(lame
ou
protection constituØ dans une matiŁro durable, rØ
at une protection des pieds.
cuir)
Sisoler de Ia piŁce et de Ia terre au moyen de tapis ou dautres moyens
isolants suffisamment grands pour empŒcher le contact physique Øventuel
avec Ia piŁce ou Ia terre.
Ne passe servir de
source
Ølectrique
humides, dans les endroits confines
Se servir dune
Acourant
ou
l o
Olectrique Acourant
le demande.
source
procØdØ de soudage
electriqua dans
on
les
zones
risque de tomber.
electrique UNIQUEMENT si
Si lutilisation dune source electrique courant electnque savŁro nØces
se servir de Ia fonction do tØlecommande si Iappareil en est equipe.
Couper lalimentation ou arrŒter le moteur avant de proceder a
linstallation, a Ia reparation ou a lentretien de lappareil. DØverrouiller
lalimentation selon Ia norme OSHA 29 CFR 191 0.147 (voir normas de
sØcuritØ).
Installer et mettre a Ia terre correctement cat appareil conformØment A son
manuel dutilisation at aux codes nationaux, provinciaux et municipaux.
Toujours verifier Ia terre du cordon dalimentation Verifier
et
sassurerque
le tilde terre du cordon dalimentation eat bien raccordØ ala borne de terre
du sectionneur ou qua Ia fiche du cordon eat raccordØe a une pnse
correctement mise A Ia terre.
En effectuant lea raccordements dentrØe fixer dabord Ia conducteur do
mise a Ia terre appropne et contra-verifier las connexions.
frequemment le cordon dalimentation pour voir sil nest pas
remplacer le cordon immØdiatement siI
dommage ou dØnudŁ
endommage un cable dØnudØ peut provoquer une electrocution.
Verifier
lappareil
hors tension quand on
Ne pas utiliser des cables uses,
mal episses.
no
Le
soudage genera des fumØes at des gaz.
pout Œtre dangereux pour
saire,
Mettre
I
le
en
eat
lutilise pas.
endommages, de grosseur insuffisante ou
Eloigner votra tŒte des fumØes. Ne pas respirer las fumØes.
A Iinterieur, ventiler Ia zone atlou utiliser un echappement au niveau de
arc pour lŁvacuation des fumØes at des gaz de soudaga.
Si Ia ventilation est insuffisante, utiliser un respirateur a alimentation dair
homologue.
Lire Ies specifications de sØcuritØ des matØnaux (MSDS5) at las instruc
tions du fabricant concemant las mØtaux, las consommables, les
revOtemants, las nettoyants et les dOgraisseurs.
Travaillardans
SI Ia piŁce soudØe doit Œtre mise a Ia terre, le faire directement avec un
cable distinct ne pas utiliser le connecteur da piŁce ou le cAble de retour.
un
espaca farmØ seulement siI est bion ventilØ
ou en
por.
respirataura alimentation dair. Demandertouiours A un surveillant
dOment formØ de se tenir A proximitØ. Des fumØes et des gaz de soudage
peuvant deplacer lair at abaissar Ia nivaau doxygene provoquant des
blessures ou des accidents mortals. Sassurer que lair de respiration ne
presonte aucun danger.
Na pas souder dans des androits situØs a proximitØ dopØrations do dØ
graissago, de nattoyage ou do pulverisation. La chaleur at las rayons da
Iarc peuvent reagir en presence do vapours at former des gaz hautement
tant
un
toxiquas
at irritants.
No pas souderdes metaux munis dun rovŒtement, tels qua lacier galvani
sØ, plaque en p10mb ou au cadmium a moms quo 10 revOtement nait ete
de soudure, quo Iendroit soit bion vontilØ, ot si nØcos
un raspirateur A alimentation dair. Les revOtements at
renfermant
tous los mØtaux
cos ØlØments peuvent degagar des fumOes
toxiques an cas de soudage.
anlevØ dans Ia
Ne pas enrouler lea cAbles autour du corps.
Leur inhalation
votre sante.
saire,
en
zone
portant
OM-173 413
Page
5
LE.SOUDAGE pØt provoqiiæ.
cendieou une.epiiion.
In
Le
Prevoirunepertodede refroidissementavantdeffec
des
tuer des travaux dentretien.
soudage effectue sur des conteneurs fermOs tels que
reservoirs, tambours ou des conduites peut provoquer
leur aclatement. Des atinceltes peuvent Otre projetees de
larc de soudure. La projection dØtincelles, des piŁces chaudes et des
Oquipementschauds peut provoquerdes incendies et des brOlures. Le contact
accidental de electrode avec des objets metalliques peut provoquer des
etincetles, une explosion, un surchauffement ou un incendie. Avant de
commencer le soudage, verifier et sassurer que tendroit ne presente pas de
danger.
Se
esbrO lures~
provoqerd
protager et dautres
personnes de Ia
projection detincelles
Porter des gants et des vŁtements de
sur un moteur chaud.
protection pour
travailler
Ne pas toucher ~ mains
recemment soudOes.
nues es
LE:BRurr
et de metal
parties chaudes du
piŁces
moteur ni les
p~utaffecter.rqu~e.:,
~
chaud.
Ne pas souderdans un endrolt i o
substances intlammables.
des etincelles peuvent tomber surdes
Deplacer toutes es substances Intlammables a une distance de 10,7
larc de soudage. En cas dimpossibitite tes recouvrir soigneusement
des protections homologues.
m
Le bruit des processus et des
louie.
Oquipements peut affecter
de
Porterdes
avec
protections approuvOs pour los
oroilles si
te niveau sondre est trop OlevO.
Des etincelles et des materiaux chauds du soudage peuvent tacilement
passer dans dautres zones en traversant de petites fissures et des
ouvertures.
Surveillertout declenchement dincendie et tenir
un
Le soudage effectue sur un plafond, plancher, paroi
clencher un incendie de lautre cOtO.
extincteur a
ou
I I
proximitØ.
LES CHAMPS MAGNETIQUES peuvent~
affecter lea stlmulateurscardlaques
separation peut dO
soudage surdes conteneurs ferrnOs tels que des reser
voirs, tambours,
conduites, a moms quits naient ete prepares
correctement contormOment a AWS F4. 1 (voir les normes de securitO).
Ne pas effectuer le
ou
1=9
I
-
S
.~
Les porteurs dun
dabord consultor leur mØdecin avant de
Ne pas utiliser le poste de
En cas de
non
soudage pour degeler
des conduites
gelees.
SI des BOUTEILLES sont
-~
utilisation, enlever Ia baguette dOlectrode du porte-electrode
.
ou
sapprocher
des operations de soudage a larc, de gougeage
de soudage par points.
Brancher le cable sur Ia piŁce le plus pras possible de Ia zone de soudage
pour eviter le transport du courant sur une longue distance par des che
mins inconnus eventuels en provoquant des risques detectrocution et
dincendie.
-
couper Ia fit a Ia pointe de contact.
-
~
Porter des vOtements de protection dOpourvus dhuile tels que des gants
en cuir, une chemise en matOriau lourd, des pantalons sans revers, des
chaussures hautes et un couvre chet.
ou
endomma-]
gØes, eHS1oUrrorftexpioSer....:...,J
Des bouteifles de gaz protecteur contiennent du gaz sous
haute presslon. Si une bouteilte est endommagØe, elle
peut exploser. Du tait que es bouteiltes de gaz font
______________
Avant de souder, retirertoute substance combustible de
quun atlumeur au butane ou des atlumettes.
vos
normatement partie du
poches tetles
avec
arcs.
Placer los bouteilles debout
dans
Le soudage, tOcaillement, to passage de Ia piŁce
a Ia brosse en fit de for, et te meutage gOnOrent
des Otincettes et des particutes mOtattiques votan
tes. Pendant Ia pOriode de refroidissement des soudures, ettes risquent
du taitier.
Porter des lunettes de sOcurite
avec
manipuler
Proteger las bouteilles de gaz comprimO dune chaleur excessive, des
mecaniques, du taitler, des flammes ouvertes, des Øtincelles et des
_____
projeter
es
chocs
DES PAFITICULES VQLANTES.
~.:les yeur
de
procOde de soudage,
precaution.
ecrans tatOraux ou un ecran facial.
un
en
las fixant dans un support stationnairo ou
de se renverser.
porte-bouteilles pour las ompOcher de tomber ou
Tenir las bouteiltes
OloignOes
des circuits de
soudage
ou
autres circuits
electriques.
Ne
jamais placer
Une electrode de
teitle.
Ne
jamais
une
torche de
soudage
ne
soudage
dolt
souder une bouteilte
jamais
sur une
entrer
pressurisOe
boutoilto a gaz.
en
contact avec une bou
risque dexploston.
Utiliserseulement des bouteilles do gaz protecteur, regulateurs, tuyaux at
raccords convenables pour cotta application specifique; las maintonirainsi
que les elements assoclOs en bon Otat.
Ne
Farmer Ialimentation
non
du gaz protecteur
en cas
de
Dangers
F
en cas
dutitisation
utilisation.
Veiltertoujours a bien aOrertes espaces confines ou se servirdun respi
rateur dadduction dair homologue.
14
pastenirta tetoenface data sortie en ouvrant Ia soupape data bouteille.
Maintenirle chapeau de protection sur Ia soupape, sauf
ou de branchement de Ia bouteilte.
Lire at suivre es Instructions concemant los bouteilles do gaz comprtmO,
los Oquipements associOs ot los publication P-i CGA OnumOrOes dans es
normos de sOcurite.
existent en relation avec Le moteur
LA VAPEUR El LE LIQLHDE DE
REFROIDISSEMENT CHAUD peUvent
LE CARSURANT MOTEUR peut pro.
voquer un incendte ou une explosion
provoqy~des brOlures
Ne pas faire le
ArrOtorlo moteuravant do verifier Ia niveau decarbu
rant ou do faire te plein.
II
No pas tairo 10 plein en fumant ou proche dune
ce detincellos ou dune tiamme nue.
rofroidissement
de so brOter.
sour
plein do carburanta ras bord; prOvoirda Iaspace pourson
expansion.
Jotor los chiffons dans
Page
prOfOrabto
Silo moteur est chaud at quo 10
une
do
verifier le
liquide do
fois Ia moteur ref roidi pour Ovifor
tiquide doit etre vertfie, operer
comme
suivant:
Faire attention do no pas renvorser do carburant.
rant renversO avant do faire dOmarrer to moteur.
OM-173 413
ost
6
un
recipient ignifugo.
Nottoyor tout
carbu
Mottro dos tunettos do sOcuritO ot dos gants,
bouchon du radiateur.
placer
DOvissor to bouchon lOgŁremont of laissor Ia vapour
dontever Ia bouchon.
un
torchon
sOchapper
sur
10
avant
DES OR AMES MOBILES peuvent
provoquer des blessures
No pas approcher es mains des ventilateurs,
roles et autros piŁces en mouvomont.
Maintenir fermØs et fixement
voquer des brlures dans lea YEUX et
~
iurIaPEAU.~
cour
No pas renverser Ia batterie.
I
place los portes,
panneaux, recouvrements et dispositifs de protection.
ArrOter le moteur avant dinstallor
ou
brancher
en
Remplacer
une
batterie
endommagee.
Rincer immØdiatement lea yeux et Ia peau a leau.
lappareil.
Demander seulement a un personnel qualifie denlever les dispositifs de
sØcuntØ ou lea recouvrements pour effectuer, all y a lieu, des travaux
dentretien et de depannage.
Pour
empecher tout demarrage accidentel pendant
es
travaux dentre
tien, dØbrancher le cable negatif () de batterie de Ia borne.
Ne pas approcher lea mains, cheveux, vØtements lches et outils des
ganes mobiles.
or
Utiliserlequipementa
Remettre en place les panneaux ou lea dipositifs de protection et fermer
lea portes a Ia fin des travaux dentretien et avant do faire dØmarrer le
moteur.
Avant dintervenir, dØposer les bougies
en route accidentolle du moteur.
Bloquer 10 volant moteur pour Øviter
sur
le
ou
sa
injecteurs
pour Oviter Ia mise
lextOrieurdans des zones
ou
vertes et bien ventilØos.
En cas dutilisatlon dans un ondroit fermØ Øvacuer les gaz dechappe
mentdu moteurvors loxtØrieurŁ distance des entrØes dairdans lesbAti
ments.
rotation lors dune intervention
gØnerateur.
LEXPLOSION
DE
L~.ABArrERiEpeut
LA CHALEUR DU MOTEUR peut
incend j~i: ~
~
voquŁrn
-
pro-i
.:~.
RENDREAVEUGLE
Ne pas placer lappareil sur, au-dessus
tØ de surfaces inflammables.
protection faciale, des gants
caoutchouc et vŒtements de protection lors dune
Toujours porter
tervention
sur
uno
Eviter de provoquer des Øtincelles
batteno.
ou
avec
les outils en travaillant
pourchargerles
Observer Ia
)
Debrancherle cable
(+
correcte
negatif ()
a
distance
los
produits inflammablos do
lØchappement.
batteries
ou
sur
NT!
LE tTINCELLES ALEHAPPEME
peuventpro~oqUei~UnncendIe~~..J
Ia
des ye
EmpŁcher los Øtincelles dØchappement du
et
en
a proximi
do brancher lea cables de
Ne pas utiliser le poste de soudage
hicules de dØmarrage rapide.
polaritØ
Tenir
in
Ia battene.
ArrOter le moteur avant de dØbrancher
batteno.
ou
en
sur
do provoquer
les batteries.
un
Utilisor uniquement un
voir codes en viguour.
premier lieu. Le rebrancheren demier
lieu.
moteur
Incendlo.
paro-etlncollos approuvØ
1-4. Dangers
:pp1~mentair~en rØlatin avec Ibistallation, le to nctin:n !ment
H
~
.:.....tI maintenance
:::::H:::
::
..
..
LA CHUTE DE LAPPAREIL
LEMPLOJ
peut
.
.
.
lanneau
de levage uniquement pour
soulever lapparoil
lui-mOme
sans chariot, do
bouteilles do gaz, romorque, ou autros accessoires.
Øquipement de levago
pour lever lappareil.
santo
un
do
RØdulre le courant
..
.
.
.
~
E11NCELLES
VOLANTES risquent de provoquer des blessures
~
~
Øcran facial pour
proteger
le
.
visage
au
.
:.~:::
tungstŁne uniquement
a Ia mouleuse dotØe do
du corps.
risquent do causer un incendie
Øloignertoute substance
.~
Etablirlaconnexionaveclabarrettedeterreavantde
manipulerdes
cartos ou des
ArrOter
ou
marrer ou
dØconnecter lequipement
darrŒter le moteur.
pochettes
pour stocker, dØplacer
circuits imprimes.
Ne pas brancherde moteurde 50
ou
ou
expØdier
antistatiques
des caries do
:UNEREM QRQUE QUIBAUL::~
entratner di~ bIØsures~
supports de Ia remorque
poids.
des blocs
ou
pour soutenir 10
avant de dØ
.:LES INSTRUCTIONS.
frØquence trop faibles.
de 60Hz ala
ot des boites
comme
No pas laisser tourner 10 moteur trop lentement sous
risque dendommager le motour electrique a cause
tension et dune
piŁces.
______________
Installer convenablement le poste sur Ia remorque
indiquØ dans le manuel sy rapportant.
mager le moteur electrique
lieu.
.
piuvent ehd~mthagerIei::~cIrcuits~
imprimØs
Utilisor los
LESURCHAUFFEMENIPeut endrn.
dune
...
LES CHARGES ELECTRO STATIQUES
Utiliser des
protectours. Cette manoeuvre est a exØcuterdans un endroit sOr lorsque
Ion Porte lequipement homologue do protection du visage, des mains et
Los Øtincelles
inflammable.
5,
~
et lea
yeux.
Affuterr lØloctrode
le facteur do marcho avant do
Ne pas obstruer los passages dair du poste.
..
_________
un
ou
poursuivre le soudago.
capacitØ suff I-
oppose de lappareil.
Porter
:.;
marche nominal.
En utilisant des fourches do levage pour dØplacer lunitØ, sassurer
quo les fourches sont suff isamment longues pour dØpasser du ctØ
LES
peut
LaisserlØquipementrefroidir; respecterlefacteurde
Utiliser
Utiliser
EXCESSIF
~suRcHAFER:LEouIpEMENT.~
~
.:
b~esŁer...
.
,
prise do 100Hz,
siI ya
Utiliser
MILLER.
uniquement
des
piŁces
do
Effecteur Ia maintenance et Ia mise
10 manuel et colul du moteur.
rechange
en
service
daprOs
OM-173 413
Page
7
I
LE
RAYONNEMENT
HAUTE
FRE~
Lenergie
Le
rayonnement
haute
frequence
services de sØcuritØ et
es
les
Veiller ace que tout
des interferences, arrØter immØdialement
le contrle
Veillera souder a
lappareil.
~j,.5,:..PrjflcjpaIØS. normes. dŁiØcuritØ
Safety in Welding and Cutting, norme
Welding Society, 550 N.W. Lejeune Rd,
ANSI Z49.1, do lAmerican
Miami FL 33126
Safety and Health Sandards, OSHA 29 CFR 1910, du Superintendent
of Documents, U.S. Government Printing Office, Washington, D.C.
20402.
RecommendedSafe Practice for the Preparation for Welding and Cut
ting of Containers That Have Held Hazardous Substances, norme
AWS F4.1, do IAmerican Welding Society, 550 N.W. Lojeune Rd, Mi
ami FL 33126
National Electrical Code, NFPA Standard 70, do Ia National Fire
Protection Association, Batterymarch Park, Quincy, MA 02269.
DonnØes
des
Information
sur
les
distance de 100 metres de tout
Veiller
ment a
ce
ce
quo ce poste de
mode demploi.
soudage solt pose et mis
lo
.;.
..
..~.::
Safe
Handling
of
.
Compressed Gases
in
cylinders, CGA Pamphlet
P-i, do Ia Compressed Gas Association, 1235 Jefferson Davis High
way, Suite 501, Arlington, VA 22202.
de sOcuritd en soudage, coupage et procØdes connexes,
CSA W117.2, de lAssociation canadienne de normalisation,
vento do normes, 178 Rexdale Boulevard, Rexdalo (Ontario) Canada
M9W 1R3.
Regles
norme
Safe Practices For Occupation And Educational Eye And Face Protec
tion, norme ANSI Z87.i, do lAmerican National Standards Institute,
1430
Broadway, New York,
NY 10018.
Cutting and Welding Processes, norme NFPA 51 B, de a National
Protection Association, Batterymarch Park, Quincy, MA 02269.
Afin de rØduire les
do
champs electromagnØtiques dans lonvironnement
Gardor los cables ensembles en los torsadant
attachant avoc du ruban adhØsif.
2
Mettre tous los cables du ctØ
3
No pas courber pas ot
votre corps.
node do recherche do 17 ans, un comitØ special ruban blou du
de preuvos, sui
National Research Council a conclu: Laccumulation
4
Garder le poste de
do vous.
pas dOmontrØ que Iexposition aux
eloctriques a haute frØquence reprØ
5
comitØ, na
Fire
travail, respecter les consignes suivantes
1
soudage, pendant son passage dane los cables de sou
dage, causora des champs electromagnØtiques. II y a eu et il y a
encore un certain souci a propos do tels champs. Cependant, aprŁs
avoir examine plus de 500 etudes qui ont ØtØ faites pendant une pØ
du
Ia terre conformØ
En cas dinterferences aprOs avoir pris les mesures precedentos, il incombo a lutllisateurde prendredes mesures supplØmentairestellesque
le deplacementdu poste, lutilisation de cables blindØs, lutilisation de fil
tres do ligne ou Ia pose de protecteurs dans Ia zone do travail.
Lo courant do
vant le
equlpement Ølec
champs e~ectromagnetiques
soudage Ølectrique et sur los effets, pour iorganisme,
champs magnetiques basso frØquence
sur
une
tronique sensible.
Øventuelles.
~1 -6
soudage soit compatible
de linstallation.
et lentretien
regullerement
MaintenirsoigneusementfermØs los portes et les panneauxdessources
de haute frequence, maintenir los Oclateurs a une distance correcte et
utilisor une terre et et un blindage pour rØduire les interferences
Effectuer
do provoquer
Pour rØduire Ia possibilite dlnterfØrence, maintenir los cables do souda
ge aussi courts que possible, los grouper, et los poser aussi bas que pos
sible (ex. par terre).
fiØ los interferences resultant de installation.
signale
do Ia zone de
Iequipement
OlectromagnOtiquement.
ordinateurs.
Demanderseulementdespersonnes qualif lees familiarisØes avecdes
Øquipemonts Ølectroniques de faire fonctionner installation.
Lutilisateurest tenu de faire corriger rapidement par un Olectncien quaIl
Si Ia FCC
electromagnetlque risque
des Interferences pour lequipement Ølectronlque
sensible tel que los ordinateurs et lØquipement corn
mandØ par ordinateur tel quo es robots.
(HF.) peut
equipements
provoquer des interferences avec les
et de communication,
de radionavigation
d~i
A L~ARC risque
provo4Uer ~ .1
LE SOUDAGE
QUENCE (H F) risque de provoquer
des h~iterf6rencŁi.;~
jugement
champs magnetiques et champs
sento un risque a Ia sante humaino. Toutefois, des etudes sont
toujours en cours et los preuves continuent a Œtre examinØes. En at
Relier Ia
pinco
do
ne
los
oppose de IopØrateur.
pas ontourer pas los cables autour do
soudage
masse
ou en
le
et les cables le
plus
plus prŁs possible
loin
do Ia
possible
zone
do
soudure.
Consignes
relatives
aux
stimulateurs
cardiaques
tendant quo los conclusions finales de Ia rechorcho soient Øtablies, il
vous sorait souhaitable de rØduire votro exposition aux champs Ølec
Los personnes qui portent un stimulateur cardiaque doivont avant tout
consulter leur docteur. Si vous Œtes declare apte par votre docteur, il
tromagnetiques pendant 10 soudage
est alors recommandØ do
OM-173 413
Page
8
ou
10 coupago.
respecter les consignes cidossus.
SECTION 2- DEFINITIONS
2-1.
Warning
Label Definitions
Waming!
Watch Out! There
possible hazards
symbols.
as
shown
are
by
the
Become trained and read the
instructions before working on the
machine or welding.
1
Electric shock from welding
electrode or wiring can kill.
1.1
Weardry insulating gloves.
Do
not touch electrode with bare
hand. Do not wear wet or
damaged gloves.
1 .2 Protect
yourself
from electric
shock by insulating yourself
from work and ground.
1.3 Do not work
is
2
2.1
on unit if engine
running. Stop engine first.
Breathing welding fumes can
be hazardous to your health.
Keep your head
of the
out
fumes.
2.2 Use forced ventilation
exhaust to
2.3 Use ventilating fan to
fumes.
3
3.1
Welding sparks
explosion or fire.
or
local
the fumes.
remove
remove
cause
can
Keep flammables away from
welding.
Do
weld
not
near
flammables.
3.2
Welding sparks
fires. Have
fire
a
can
cause
extinguisher
and
have
nearby,
watchperson ready to use it.
3.3 Do not weld on drums
closed containers.
4
or
a
any
Arc rays can burn eyes and
injure skin.
4.1 Wear hat and
Use
ear
safety glasses.
protection and button
collar.
shirt
Use
welding
helmet with correct shade of
filter. Wear complete body
protection.
5
Do not
(cover)
6
remove or
paint
Engine fuel plus flames
sparks can cause fire.
6.1 Do not smoke while
if near fuel.
6.2
or
fueling
or
Stop engine before fueling.
6.3 Do not fuel
7
over
the label.
Engine
a
hot
engine.
exhaust gases
can
kill.
7.1 Vent exhaust outside.
7.2 Use unit outside.
3/96
OM-173 413
Page
9
1
Warning! Watch Out! There
are possible hazards as
shown by the symbols.
2
Do not
matches
smoke and
and flames
keep
away
from battery.
3
Sparks
can
explosion
Wear
4
a
Battery
not
spill
battery
Battery
cause
explode.
to
gases
can
blind and
injure.
face shield.
acid
can
burn skin. Do
acid.
5
Read Owners
6
Wear rubber
7
Dead
8
Engine
9
Fully charged battery
10
Do not connect last negative
cable to dead
battery
connect instead to engine
block.
11
Jumper
Manual.
gloves.
battery
block
cables
observe
polarity and
make connections
numbered
in
sequence
shown.
12
Once dead
battery
disconnect
is
charged,
in
cables
sequence shown.
3196
Warning!
Watch Out! There
possible hazards as
shown by the symbols.
are
2
Moving parts,
rotors,
and
such
belts,
as
can
fans,
cut
fingers and hands and cause
injury. Keep away from moving
parts.
2
3/96
OM-173 413
Page
10
1
2
Warning! Watch Out There
are possible hazards as
shown by the symbols.
Hot muffler and exhaust
can
cause
severe
pipes
burns. Do
not touch hot muffler or
pipes.
2~
S-176 230
3196
1
Warning! Watch Out! There
are possible hazards as
shown by the symbols.
2
Engine fuel plus flames
sparks can cause fire.
or
Do not smoke while
near fuel.
or
3
fueling
if
4
Stop engine before fueling.
5
Do not fuel
6
Use Diesel Fuel
a
hot
engine.
only.
3/96
1
2
Warning! Watch Out! There
are possible hazards as
shown by the symbols.
Falling equipment can cause
injury and damage.
serious
3
lifting eye to lift or move
Use
only.
proper
equipment when lifting.
Use
unit
4
Do not
use
lifting eye
to lift and
support unit and trailer or other
heavy devices or accessories.
3/96
OM-173 413 Page 11
Remove unit from
S-177 571
shipping
crate. Remove Owners
Manual from unit. Follow
instructions to install muffler.
Read Owners Manual. Read
on unit.
labels
Use Diesel Fuel
fuel tank. Leave
only,
room
and fill
for
expansion.
Warningl Watch Outl There
are possible hazards as
shown by the symbols. Read
Owners Manual. Follow
instructions to activate
battery.
Check oil level. Add oil if
necessary.
During the first 50 hours of
operation, keep welding load
above 200 amperes. Do not
weld below 200 amperes of
output.
After the first 50 hours of
operation, change
the oil and
oil filter.
3/96
2-2.
Manufacturers
Rating
Label For CE Products
EN 60974-1
40AJ21V
325A/33V
504,/i 2V
400A/26V
n
=
1800 RPM
1P23
S-176 255-A
OM-173 413
Page
12
2-3.
Symbols
And Definitions
OM-173 413
Page
13
SECTION 3- SPECIFICATIONS
Weld, Power, And Engine Specifications
3-1.
Maximum
Amperage
Range
Rated
Welding
Output
OpenCircuit
Voltage
250 A, 30 V DC,
100% Duty Cycle
60%
Single-Phase,
Deutz F3L-1 011
kVA/kW,
26/13 A,
120/240 V AC,
Three-Cylinder,
60 Hz
Engine
3
(Average)
A, 33 V DC,
Duty Cycle
Engine
Fuel
Sound
Capacity
Power
11.3 US
100 Lwa
IP
Rating
DC
96
40400
325
Auxiliary
Rating
Power
Air/Oil-Cooled,
gal
(42.8 L)
29 HP Diesel
23
Dimensions, Weights, And Operating Angles
3-2.
Dimensions
40-1/2 in
Height
A
(625 mm)
24-5/8 in
Width
,
(1029 mm)
Do not exceed
running
(1422 mm)
56 in
Depth
A
Do not
could
A
23-1/4 in
(591 mm)
B
24-5/8 in
(625 mm)
C
11/l6in(l7mm)
D
2-7/8 in
(73 mm)
4-1/2in(114)mm)
E
F
22-9/16 in
G
27 in
(573 mm)
(686 mm)
30-3/8 in (772 mm)
H
Ref. ST-lb
J
41 -1/4 in
(1048 mm)
K
51-1/8 in
(1299 mm)
L
54in
21/32 in
M
(1372 mm)
(16.7 mm) Dia.
4 Holes
1/2 in
N
(12.7 mm)
10 Holes
Weight
1500 lb
OM-173 413
Page
(680 kg)
14
Dia.
850-F
or
operating angles while
engine damage will occur.
move or
tip.
operate unit where It
3-3.
Duty Cycle And Overheating
100%
Duty Cycle
At 250
Amperes
Duty Cycle is percentage of 10
minutes that unit can weld at rated
load without overheating.
A
Exceeding duty cycle
damage unit and
can
void
warranty.
Continuous Welding
60%
6 Minutes
Duty Cycle
At 325
Amperes
4 Minutes
Welding
Resting
1000
800
600
(1)
Ui
500
ci:::
Ui
400
0~
300
0
250
-J
Ui
200
150
100
10
15
20
25
30
X DUTY
3-4.
Volt-Ampere
40
50
60
80
100
CYCLE
Curves
The
volt-ampere curves show the
minimum and maximum voltage
and amperage output capabilities
100
of the
other
welding generator. Curves of
settings fall between the
curves
shown.
80
(n
H
60
-J
0
>
c~j
0
40
20
0
0
100
200
DC
300
400
500
AMPERES
SB-183 882
OM-173 413
Page
15
AC
3-5.
Auxiliary
Power
The
ac
power
curve
shows the
in amperes avail
120 and 240 volt
auxiliary power
able
at
the
receptacles.
300
150
~
::: ::
C)
<
75
150
50
100
25
50
0
0
5
0
AC
0
15
10
AMPERES
IN
20
10
240V
MODE
50
40
30
AC AMPERES
25
20
IN 120V MODE
rsb3.1 2/92ST-log
3-6.
Fuel
365-C
Consumption
The
curve
under weld
shows
or
typical fuel
power loads.
use
I
-J
10
r-r~
=
-J
7.57
1.67
2.00
6.81
1.50
1.80
6.06
1.33
1.60
5.30
1.17
1.40
4.54
1.00
1.20
-
3.79
0.83
1.00
-
3.03
0.67
0.80
-
2.27
0.50
0.60
-
1.51
0.33
0.40
0.76
0.17
0.20
0.00
0,00
0.00
0
50
I
I
I
I
I
I
I
I
100
150
200
250
300
350
400
450
500
DC WELD AMPERES AT 100X DUTY CYCLE
SB-137 487-A
OM-173 413
Page
16
SECTION 4- INSTALLATION
4-1.
Installing Welding Generator
A
Location
Airflow Clearance
Movement
18 in
Do Not Lift Unit From End
15 in
(460 mm)
OR
18 in
(4~m)
(460 mm)
Grounding
3
1
Generator Base
2
Metal Vehicle Frame
3
Equipment Grounding
Terminal
4
Grounding
Use #10 AWG
Cable
or
larger
insulated
copper wire.
OR
A
If unit does not have GFCI
GFCI
use
receptacles,
protected extension cord.
Electrically bond generator frame to
vehicle frame by metal-to-metal
contact.
2
installl 3/96
Ref. ST-BOO 652 I Ref. ST-800 477-A / ST-i 58 936-A / S-0854
OM-173 413
Page
17
4-2.
Activating
The
Dry Charge Battery
Remove
1
battery from
unit.
Protection
Safety
Glasses Or Face Shield
Eye
Rubber Gloves
Vent
Caps
Sulfuric Acid
Electrolyte
(1.265 Specific Gravity)
5
Well
Fill each cell with
bottom of well
A
electrolyte
(maximum).
Do not overfill
battery
to
cells.
Wait ten minutes and check elec
trolyte level. If necessary, add elec
trolyte
to
raise to
proper level.
Reinstall vent caps.
6
Battery Charger
A
Read and follow all instruc
tions supplied with battery
charger.
Charge battery for 12 minutes at 30
amperes or 30 minutes at 5 am
peres. Disconnect charging cables
and install
battery.
When
0
electrolyte is low, add
only distilled water to cells to
maintain proper level.
5 A For 30 Minutes
30 A For 12 Minutes
Tools Needed:
diybattl
OM-173 413
Page
18
2/96
S-0886
4-3.
Connecting
4-4.
Engine
The
Battery
Prestart Checks
OM-173 413 Page 19
4-5.
Installing
Muffler
Pipe
A
Stop engine
A
Do not blow exhaust toward
air cleaner or air Intake.
and let cool.
7~im~4~ \\
Tools Needed:
~
1/2 in
ST-8O1 376
1
Positive
(+)
Weld
Output
Terminal
2
Negative ()
Weld
Output
Terminal
For Stick
welding Direct Current
(DCEP), con
nect work cable to () terminal and
electrode holder cable to (+)
Electrode Positive
terminal.
For Direct Current Electrode
ative
(DCEN),
reverse
Neg
cable
connections.
For FCAW
cable to
er
()
cable to
welding, connect work
terminal and wire feed
() terminal.
Tools Needed:
-r 3/4in
Ref. ST-801 344
OM-173 413
Page
20
4-7.
Selecting
Weld Cable Sizes
Total Cable
100 ft
Welding
Amperes
10
(30 m)
60%
Or Less
60100%
(Copper) Length
In Weld Circuit Not
Exceeding
150ft
I
200ft
I
250ft
I
300ft
I
350ft
I
400ft
(45 m)
I
(60 m)
I
(70 m)
I
(90 m)
I
(105 m)
I
(120 m)
I
Duty
100%
10
I
I
I
Duty Cycle
Duty Cycle
Cycle
100
4
4
4
3
2
1
1/0
1/0
150
3
3
2
1
1/0
2/0
3/0
3/0
200
3
2
1
1/0
2/0
3/0
4/0
4/0
250
2
1
1/0
2/0
3/0
4/0
2-2/0
2-2/0
4/0
2-2/0
2-3/0
2-3/0
300
1
1/0
2/0
3/0
350
1/0
2/0
3/0
4/0
2-2/0
2-3/0
2-3/0
2-4/0
400
1/0
2/0
3/0
4/0
2-210
2-3/0
2-4/0
2-4/0
500
2/0
3/0
4/0
2-2/0
2-3/0
2-4/0
3-3/0
3-3/0
Weld cable size (AWG) is based on either a 4 volts
distributor for the mm2 equivalent weld cable sizes.
or
less
drop
or a
current
density
of at least 300 circular mils per ampere. Contact your
S-000l-E
OM-173 413 Page 21
SECTION 5- OPERATING THE WELDING GENERATOR
Front Panel Controls
5-1.
Ref ST-176 748-C
This unit has
a max
OCV control circuit
that resets The AmperageNoltage Con
trol to maximum when the arc breaks.
is struck, weld output con
trol returns to The front panel or remote
control setting. The AmperageNoltage
When an
adjusts amperage only
welding and does not adjust
circuit voltage.
when
open-
Switch
1
Ampere Range
A
Do not switch under load.
AmperageNoltage
output would be
trols set
OM-173 413
as
(Optional)
DC Ammeter
(Optional)
5
Remote NV Switch And
shown
Control
Page
22
se
140 A DC with con
(50%
of 90 to 190
(See
6
A).
Section
Magnetic
gine
Receptacle
5-3)
Shutdown Switch
To
B
(Optional)
Engine Control Switch
To Start: turn switch to Start while pressing
Shutdown switch. Release switches when
engine starts. Do not crank engine if engine
is still
runs
at idle
speed
at
no
load and weld
speed with load applied.
Use switch during start-up to bypass option
al engine shutdown system. System stops
engine if oil pressure is too low oroil temper
ature is too high.
7
Control adjusts amperage within range
lected by Ampere Range switch.
Weld
DC Voltmeter
4
arc
Control
2
3
tuming.
position, engine runs at weld/power
speed. In Run/Idle position (optional), en-
Stop:
turn switch to Off
Light goes
9
position.
Battery Charging Waming Light
on
when
Oil Pressure
battery
is not
charging.
Warning Light
Light goes on if oil pressure is too low. Light
also goes on if oil temperature is too high (if
unit has automatic shutdown option).
A Stop engine and
light goes on.
10
Engine
11
Oil Temperature
fix trouble if either
Hour Meter
Gauge/Switch
(Optional)
In Run
12
Oil Pressure
Gauge/Switch (Optional)
5-2.
Manual Shutoff Lever
Manual Shutoff Lever
1
Use lever to
stop engine if engine
control switch does not work.
Ref. ST-801 344
5-3.
Remote NV Control
r1~
Use switch to select front panel
remote amperage control.
Remote
Amperage
Remote A/V
2
1~Q~
Example: Combination
A/V Control Switch
1
A/V
2
Connect
RC3.
Control
optional
or
Receptacle RC3
remote control to
In Example:
Range =90 to 190 A
Percentage Of Range 50%
Max
140 A DC (50% of 90 to 190)
=
120-240
90-190
=
50
0
10
90
Max(14OADC)F
1
I~I
Min(66ADC)
I
A/V
Set Switch
Set
Range
Set
Percentage
Adjust Optional Remote Control
S-0774
OM-173 413 Page 23
SECTION 6- OPERATING AUXILIARY EQUIPMENT
6-1.
120 Volt And 240 Volt
Duplex Receptacles
A
If unit does not have GFCI
receptacles,
use
GFCI-pro
tected extension cord.
~ If a circuit breaker continues to
open, contact Factory Autho
rized Se,vice Agent.
U~ Auxiliary power is not affected
by
weld
output.
1
240 V 15 A AC
RC1
Receptacle
2
120 V 15 A AC
Receptacle
RC2
Receptacles supply 60 Hz singlephase power at weld/power speed.
3
Circuit Breakers CB1 And
CB2
CB1 protects RC1 and CB2 pro
tects RC2 from overload. If CB1 or
CB2 opens, the receptacle does
not work.
present
120 volts may still be
at RC2.
output from each duplex
receptacle is 1.8 kVA/kW, and 3
kVA/kW from all receptacles.
Maximum
2
EXAMPLE: If 10 A is drawn from
RC1, only 5 A is available at RC2:
(240
V
x
10
A)
+
(120
V
x
5
A)
=
3.0
kVA/kW
3
Ref. ST-176 748-C
OM-173 413
Page
24
6-2.
Optional Auxiliary
4~
17
Power
Receptacles
A
If unit does not have GFCI
receptacles,
*KD
use
GFCI-pro
tected extension cord.
~ If circuit breaker continues to
open, contact Factosy Autho
rized Service Agent.
~
Auxiia,y power is
by weld output.
GFCI
not affected
Receptacle Option
120 V 15 A AC GFCI
1
Recep
tacle GFCI1
Auxiliary power output and circuit
breaker protection is the same as
standard receptacles (see Section
6-1).
If
a ground fault is detected, GFCI
Reset button pops out and recep
tacle does not work. Check for
tools plugged in
Press button to reset.
faulty
~ At least
gine
at
once a
receptacle.
month,
run en
weld/power speed and
press test button to verify
GFCI is working properly.
2
240 V 13 A AC British
tacle RC1
3
240 V 16 A AC South African
Receptacle RC1
4
240 V 10 A AC Australian
Receptacle RC1
5
Circuit Breaker CB1
Recep
Receptacle supplies 60 Hz singlephase power at weld/power speed.
Maximum output is 3 kVA/kW.
CB1
protects the receptacle from
overload. If CB1 opens, the recep
tacle does not work. 120 volts may
still be present at the 240 V recep
tacle.
Combined output of all
is 3 kVA/kW.
receptacles
Ref. ST-176 748-C/ Ref. ST-169 671-A
OM-173 413
Page
25
SECTION 7- MAINTENANCE & TROUBLESHOOTING
7-1.
Routine Maintenance
A
Recycle engine
fluids.
Stop engine before maintaining.
See also
Engine Manual and Mainte
Service engine more
often during severe conditions.
nance
Label.
/
lOOh
fi
200h
Change Oil.
See Section
7-4.
l000h
3000 h
OM-173 413
Page
26
0)
D)
CD
0 CD
I a. CD
751-B
in) in) 5-176
(0.012 (0.020
F)
(72
13m (1/2in.)
0.3 0.5
20
266
067
std.
mm mm
C
17-956
ex.
in.
MIL ER Deutz
h
500
77.
F86
68 59 50 41 32 23 14
5. 4.
265
067
217
066
13 22 31 40
,~ 2.MILER
,~
16-426
MIL ER Deutz
~
~~I~iI~1
I~-
CDISF
std
std.
CD/SE,
h
h
API
250
750
17-469
Deutz
1064 7 852 4A P352
MIL ER Nelson Fram
bet er)
(or
5.9L(62qt)
1
std.I
h
10 0
anualy.
chekd
P10-275
be
should std.
Injectors
h
50
(0F)
AMIL ER 297C Donaldson CAK
AC
70206
Fram Nelson
20td.~
DF-2
it DIESL (1 .3
2-D
1-D, DF-1,
L
'
45
256
gal)
-18C
I~I
880
126
42.8
A
12V BCI 520
601
51
RPM
120
RPM
1850
8hstd.
~DIN
BS2869:A1,
975-81: DF-A,
D
80 C:
ASTM V -F
ff II
S<=.5%
~..
0
I C.)
C.) -u 0) Co 0) r) -J
7-3.
Servicing
Air Cleaner
A
Stop engine.
1
Intake Manifold
2
Service Indicator
3
Window
4
Reset Button
(Optional)
Service air cleaner element if red
band appears in window. A green
band means air cleaner is okay.
Press button to reset indicator.
2
A
3
Do not run
air cleaner
element.
without
with dirty
engine
or
Clean
or replace element if dirty or
damaged. Replace element yearly
or after six cleanings.
Cap
5
Dust
6
Baffle
7
Element
8
Plastic Fins
9
Housing
To Clean air filter:
9
87
6
5
Wipe off cap and housing. Remove
cap and dump out dust. Wipe dust
from inside cap and housing with
damp cloth. Remove element and
reinstall cap.
A
Do not clean
air hose.
housing
with
Clean element with compressed
air only. Keep nozzle at least 1 in
(25 mm) from inside of element.
Max. air pressure: 100 psi (690
kPa). Do not remove plastic fins.
Replace element if it has holes or
damaged gaskets.
Reinstall element and cap
(dust
ejector down).
Blow
Inspect
aircleaner2 6/96
OM-173 413
Page 28
ST-153 929-B / Rel. ST176 748-C / ST-153 585 / Ref. S-0698-B
7-4.
Oil And Fuel
System Components
~ii1
and let cool.
A
Stop engine
1
Oil Filter
2
Oil Drain Valve
3
Oil Fill
4
Primary Fuel Filter (Fuel/
Water Separator)
5
Petcock
6
Secondary
7
Fuel Shutoff Valve
8
Fuel Line
change oil
See
Fuel Filter
Drain
Sludge
9
To
Cap
Plug
and filter:
manual.
engine
A Close oil drain valve and
cap, and place In holder be
fore adding oil and running
engine.
To drain water from fuel
system:
fuel filter petcock
and drain water into metal contain
er. Close petcock when water-free
fuel flows.
Open primary
To
replace primary fuel
filter:
Close shutoff valve and turn filter
counterclockwise. Remove filter.
coat of fuel to gasket on
filter, Install new filter and turn
clockwise. Open shutoff valve.
Bleed air from fuel system accord
ing to engine manual.
Apply thin
new
3
6
Inspect fuel line, and replace
cracked
To
it
or worn.
replace secondary fuel filter:
See
engine
To drain
manual.
sludge
from fuel tank:
Put metal container under drain,
and remove sludge drain plug. Re
install
plug
when done.
A
After servicing, start engine
and check for fuel leaks.
A
Stop engine, tighten
nections
con
necessary, and
wipe up spilled fuel.
as
Close doors.
LI
Tools Needed:
~
7/l6in
LI I I I
Ref. ST-i 76 748-C / ST-801 334-A / Ref. 5-176 697 / Ref. S-0842
OM-173 413
Page
29
7-5.
Adjusting Engine Speed
After tuning engine, check engine
no load speed with a tachometer
(see table for no load speeds). If
adjust
necessary,
follows:
Start
Turn
speed
as
engine and run until warm.
AmperageNoltage Control to
100.
Standard Models:
Engine Speed Adjustment
1
Screw
2
Locking Nut
Loosen nut. Turn
gine
runs
Models
at
until
en
1850rpm. Tighten
nut.
With
screw
Automatic
Idle
(Optional)
3
Throttle Rod
4
Locknut
locknuts. Place engine
control switch in Run/Idle position.
Loosen
Turn throttle rod until engine runs
at idle speed. Tighten locknuts.
5
Engine Speed Adjustment
Screw
6
Locknut
Place engine
position.
control switch in Run
Loosen locknut. Turn
screw
until
engine runs at weld/power speed.
Tighten locknut.
A
Stop engine.
Tools Needed:
~ 3/8,7/16 in
Ref. ST-801 344-A
OM-173 413
Page
30
7-6.
Overload Protection
A
Stop engine.
~ If any fuse continues to open,
contact Facto,y Authorized
Se,vice Agent.
1
Magnetic Shutdown
Switch MS1
2
Fuse F
(See
Parts List For
Rating)
Fuse
F
protects magnetic shut
down switch MS1.
3
Throttle Solenoid Fuse F4
F4 protects the throttle solenoid
from overload on models with auto
matic idle option.
Check fuses and replace if open.
Tools Needed:
Ref. ST-801 344 / Ref. ST-156 199-B I ST-801 320-A
7-7.
Optional Spark
Arrestor
Inspection
And
Cleaning
A
Stop engine
1
Spark
2
Cleanout
and let cool.
Arrestor
Plug
Remove
plug
covering
cleanout hole.
3
Exhaust
and remove any dirt
Pipe
Start engine and run at idle speed
to blow outcleanout hole. If nothing
blows out of hole, briefly cover end
of exhaust pipe with fireproof
material.
A Stop engine
and let cool.
Reinstall cleanout
plug.
Tools Needed:
~ 3/8in
ST-800 523 I Ref. ST-176 748-c
OM-173 413
Page
31
Troubleshooting
7-8.
~tid~a~i~
A.
Welding
Remedy
Trouble
Check
No weld output.
position of Ampere Range switch.
Place AN control switch in Panel position, or place switch in Remote position and connect remote
perage control to Remote NV receptacle (see Section 5-3).
Check and
Have
secure
Factory
Use
output.
Be
Authorized Service
equipment from
Disconnect
Erratic weld
dry, properly
sure
connections to Remote NV
ac
Agent
am
receptacle.
slip rings,
check brushes and
receptacles RCI and
RC2
and field excitation circuit.
during start-up.
stored electrode.
connection to work
piece
is clean and
tight.
Remove excessive coils from weld cables.
Check and
Have
Low
or
high
weld
both inside and outside unit.
Factory Authorized Service Agent
check brushes and
slip rings,
and field excitation circuit.
Adjust engine speed (see Section 7-5).
output.
Have
open-circuit voltage.
Low
tighten connections
Factory Authorized Service Agent check field
Check
Have
engine speed,
and
Factory Authorized
adjust
if necessary
Service
current
regulator board
PCi.
(see Section 7-5).
Agent check integrated rectifier SR2, AmperageNoltage
control Ri,
and resistor R2.
Maximum weld
output only in each
ampere range.
B.
Auxiliary
Have Factory Authorized Service Agent check AmperageNoltage control R1,capacitor C8,
integrated rectifier SR4, and control relay CR2.
Power
Remedy
Trouble
No
output
receptacles.
auxiliary
at
power
Reset circuit breaker CB1 and/or CB2
Disconnect
Have
Low
or high output
receptacles.
OM-173 413
diode D8,
Page
at
32
auxiliary power
equipment
Factory
from
ac
(see Section
receptacles RC1
Authorized Service
Agent
Adjust engine speed (see Section 7-5).
6-1
or
and RC2
6-2).
during start-up.
check brushes and
slip rings,
and field excitation circuit.
Troubleshooting
7-8.
~I~d~$$~
A.
Welding
Remedy
Trouble
No weld
position of Ampere Range switch.
Check
output.
Place NV control switch in Panel position, or place switch in Remote
perage control to Remote A/V receptacle (see Section 5-3).
Check and
Have
secure
Factory
Disconnect
Use
Erratic weld output.
Be
connections to Remote A/V
Authorized Service
equipment
from
ac
Agent
connect remote am
receptacle.
check brushes and
receptacles
position and
RC1 and RC2
slip rings, and field excitation circuit.
during start-up.
dry, properly stored electrode.
sure
connection to work
piece is
clean and
tight.
Remove excessive coils from weld cables.
Check and
Have
Low
or
Factory
both inside and outside unit.
Authorized Service
Agent check brushes
and
slip rings,
and field excitation circuit.
Adjust engine speed (see Section 7-5).
high weld output.
Have
open-circuit voltage.
Low
tighten connections
Check
Have
Service
Factory Authorized
engine speed,
and
Factory Authorized
Agent
check field current
regulator board PCi.
adjust if necessary (see Section 7-5).
Service
Agent check integrated rectifier SR2, AmperageNoltage
control
Ri,
and resistor R2.
output only
Maximum weld
in
each
ampere range.
B.
Auxiliary
Factory Authorized Service Agent check AmperageNoltage control
integrated rectifier SR4, and control relay CR2.
Have
output
receptacles.
Remedy
auxiliary
at
power
Reset circuit breaker CB1 and/or CB2
Disconnect
Have
Low
or high output
receptacles.
OM-173 413
capacitor C8, diode 08,
Power
Trouble
No
Ri
Page
32
at
auxiliary power
equipment from
ac
(see Section
receptacles
Factory Authorized Service Agent
Adjust engine speed (see Section 7-5).
6-1
or
RC1 and RC2
6-2).
during start-up.
check brushes and
slip rings,
and field excitation circuit.
C.
Engine
Remedy
Trouble
Engine
Check fuel level.
does not start.
Check
optional
Open
fuel valve
(see Section 4-4).
shutdown switch fuse F and
replace
if open
(see Section 7-6).
Check battery and replace if necessary.
Check connections to
Engine Control
switch.
Check oil level. Optional automatic shutdown system stops
engine
if oil pressure
gets too low or oil tem
perature gets too high.
See
engine
Have
manual.
Factory
Authorized Service
Agent
check
engine charging system.
Check optional magnetic shutdown switch fuse F and replace if open (see Section 7-6).
Engine suddenly stops.
Check oil level.
perature gets
Engine slowly stopped; unable
engine.
to re-
Optional
high.
automatic shutdown
system stops engine if oil pressure gets too low or oil
tem
too
Check fuel level. Open fuel valve (see Section 4-4).
start
Engine does not stop when Engine
Control switch is placed in Off position.
Use manual shutoff leverto stop engine (see Section 5-2). Check connections to
Have Factory Authorized Service Agent check engine fuel solenoid.
Engine remains at idle speed when Engine Control switch is placed in Run/
Idle position and an arc is struck. (Mod
els with automatic idle option only.)
Have
Engine will not run at idle speed. (Models with automatic idle option only.)
Check throttle solenoid fuse F4, and
Battery discharges
between
uses.
Factory
Authorized Service
Agent
check
replace
Engine Control switch
if open
Factory Authorized Service Agent check Engine Control switch
Make
sure
Clean
battery, terminals, and posts
in Off
with
position when
baking soda and
Periodically recharge battery (approximately every
and idle module.
(see Section 7-6).
Have
Engine Control switch is
Engine Control switch.
three
and idle module.
unit is shut down.
water
solution; rinse with clear water.
months).
Replace battery.
Engine uses oil during
wetstacking occurs.
run-in
period;
Dry engine (see Section 9).
See
engine
manual
OM-173 413
Page
33
SECTION 8- ELECTRICAL DIAGRAM
~
dol
:: :
AW.
-
~pRr
L~II~J
SC-182 851-A
Figure
OM-173 413
Page
34
8-1. Circuit
Diagram
For
Welding
Generator
SECTION 9- RUN-IN PROCEDURE
run_in 1 6/96
9-1.
Wetstacking
____________________________
Welding Generator
1
Run
diesel
engines
rated
near
output during run-in period
to prop
erly seat piston rings and prevent
wetstacking. See nameplate or
rating label to find rated output.
~ Do not idle
engine longer than
necessary. Piston rings seat
faster if engine runs at weld!
power rpm, and the welding
generator is kept loaded dur
ing run-in.
2
Engine
Exhaust
Weistacking
Pipe
is unburned fuel and
oil in the exhaust
pipe
and
occurs
during run-in if the engine is run too
long at light load or idle rpm.
If exhaust
pipe
is coated with
a
wet, black, tar-like substance, dry
the
ing
engine using one of
run-in procedures.
the follow
See the
tional
engine manual for addi
engine run-in information.
OM-173 413
Page
35
9-2.
Run-In Procedure
Using
Load Bank
A Stop engine.
A
Do not touch hot exhaust
pipe, engine parts, or load
bank/grid.
A
Keep exhaust and
from flammables.
1
Load Bank
pipe away
Turn all load bank switches Off. If
needed, connect load bank to 115
volts
tor
2
ac wall receptacle or genera
auxiliary power receptacle.
Welding
Generator
Place AN range switch in maxi
mum position, AN control in mini
position, and Output Selector
(if present) in either DC
position.
mum
switch
3
Weld Cables
Connect load bank to
generator
weld output terminals using proper
size weld cables with correct
Observe
connectors.
correct
polarity.
Start engine and
minutes.
run
for several
Set load bank switches and then
adjust generator A/V control so
load equals rated generator output
(see nameplate).
Check
generator
and load bank
meters after first five minutes then
every fifteen minutes to be
generator is loaded properly.
UT Check oil/eve!
3-
ing run-in;
sure
frequently
dur
add oil if needed.
After one hour (minimum) place
A/V control in minimum position,
then turn off load bank to remove
load. Run engine several minutes
at no load.
A
Stop engine
4
Engine
and let cool.
Exhaust
Pipe
Repeat procedure if wetstacking is
present.
S-0683
OM-173 413
Page
36
9-3.
Run-In Procedure
Using
Resistance Grid
A Stop engine.
A
Do not touch
hot exhaust
or load
pipe, engine parts,
bank/grid.
A
Keep exhaust and
from flammables.
1
Resistance Grid
Use
grid
sized for
pipe away
generator rated
output.
Turn Off
2
grid.
Welding Generator
Place A/V range switch in maxi
position, A/V control in mini
mum position, and Output Selector
switch (if present) in either DC
mum
position.
3
Weld Cables
Connect grid to generator weld
output terminals using proper size
weld cables with correct connec
(polarity is not important).
tors
4
Voltmeter
5
Clamp-On Ammeter
Connect voltmeter and ammeter
as
shown, if not provided on
generator.
Start engine and
minutes.
Set
.5
grid
run
for several
switches and then
adjust
generator A/V control so load
equals rated generator output (see
nameplate).
Check generator and meters after
first five minutes then every fifteen
minutes to be sure generator is
loaded properly.
~ Check oil level frequently dur
ing run-in; add oil if needed.
After one hour (minimum), place
A/V control in minimum position,
then shut down grid to remove
load. Run engine several minutes
at no load.
A Stop engine
6
and let cool.
Engine Exhaust Pipe
Repeat procedure
present.
if
weistacking
is
S-0684
OM-173 413 Page 37
SECTION 10
Hardware is
common
PARTS LIST
and
not available unless listed.
7
9
10
11
12
96
22
95
23
/
67
68
69
70
72
71
75
76
Figure
OM-173 413
Page
38
10-1. Main
Assembly
11
34
29-
43
27.
26
44
Figure 10-2
61
59
57
53
62
ST-801 345-D
OM-173 413
Page
39
Item
No.
Dia.
Part
No.
Mkgs.
Description
Figure
1
.
175657
175724
Neg
039 046
Pos
039 047
601 879
601 880
2
175013
175012
3
+173322
173321
004130
173346
176751
176108
+173313
4
176105
176104
5
035968
6
173324
10-1. Main
Quantity
Assembly
TERMINAL, output bracket
BRACKET, brace terminal weld output
TERMINAL, pwr output black (consisting of)
TERMINAL, pwr output red (consisting of)
1
NUT, stl hex full fnsh .500-13
NUT, stl hex jam .500-13
PANEL, side LH
PANEL, side RH
DOOR, side LH
DOOR, side RH
BRACKET, support door
LATCH, paddle
LABEL, diesel engine maintenance
LABEL, warning battery explosion
1
COVER, top
LABEL, general precautionary
LABEL, warning falling equipment
WASHER, flat 3.625 ID x 5.875 OD
1
1
1
2
2
1
1
1
1
2
x
.O62thk
9
020185
124973
11
125467
12
125704
13
089517
14
175488
15
170615
16
168670
BASE
173326
PAN, base
108081
107972
8
115000
605 288
124941
19
089914
BOLT,
20
124668
HOLD DOWN,
010460
STUD, stl .312-18
CABLE, bat neg
032453
...23
111352
Figure
24
10-2
25
124406
26
173304
27
173307
...28
109591
29
176745
30
176744
124984
1
1
1
1
1
1
1
1
1
2
1
1
1
18
22
1
1
TERMINAL PROTECTOR,
CABLE, bat pos
17
1
1
10
7
1
1
SKIRT, base LH
SKIRT, base RH
TANK, fuel 11 gal (consisting of)
CAP, fuel
FITTING, pipe galv plug sq hd .25ONPT
FITTING, pipe brs elb st 1/8NPT
FITTING, hose brs barbed M 1/8tbg x 1/8NPT
HOSE, nprn SAE .125 ID x .343 OD x 7.000
FITTING, hose brs splice 1/8tbg x 1/8tbg
STRAP, fuel tank
ROD, fuel shutoff
UPRIGHT, base center
173325
1
L stl .312-18
BATTERY,
x
battery post
9.000
battery
x
2
1
1
1
10.000
1
1
stor 12V 3BOcrk
GENERATOR
1
1
BRACKET, mtg engine
COVER, air baffle bottom
COVER, air baffle top
CLAMP, muffler 1.7SOdia
PIPE, exhaust
PIPE, muffler extension elbow
BRACKET, mtg air cleaner
LH
1
1
1
2
1
1
1
32
,046545
RESTRICTION INDICATOR
1
33
,010089
FITTING, brs coupling 1/8
AIR CLEANER, intake
CLAMP, hose 1 .125-3.000clp dia
HOSE, aircleaner
CLAMP, hose 1.312-3.2SOclp dia
BAFFLE, air sides & bottom
BAFFLE, air
BOX, air exhaust
GUARD, beltLH
LABEL, warning moving parts
1
34
124986
35
010863
36
124985
37
023313
38
173303
39
173315
40
173306
..41
+175 078
176106
OM-173 413
Page
40
1
3
1
2
1
1
1
1
2
Item
No.
Dia.
Part
No.
Mkgs.
Description
Figure
173319
BOX, air intake engine
1
DIFFUSOR ASSEMBLY
1
173302
HOSE, CWC flexaust 2.500 ID x 6.000 Ig
CLAMP, hose 1 .875-3.75Oclp dia
PANEL, rear
GUARD, belt RH
GUARD, blower
CLAMP, modified
ENGINE, Deutz
173310
44
+175077
45
173320
173301
173903
47
.127648
48
+127994
+175936
.126388
.124946
.010 021
.072 082
+118679
52
.125663
53
.175937
54
TS1
....
.124974
55
124402
...56
071890
58
071730
072848
59
173929
60
176528
113 854
023 562
165 271
176 529
173 336
175 076
179 661
145 282
172 071
010 323
..70
084210
..71
106467
...72
175431
73.... CR99
74... Idle mod
75
...76
...
..
+090 104
.142 724
+176775
F4
+073429
77
+046432
...78
178 507
026 947
iT
038 621
038 620
081 499
010 146
181 122
...82
83...
SR1,2,4
035 704
D8
034 502
170 673
...86
...88....
Assembly (Continued)
067274
605 409
50
10-1. Main
Quantity
1
1
1
1
1
1
1
CLEVIS, throttle
BALL JOINT, .250-28
ROD, throttle
NUT, .250-28 LH
BRACKET, arm throttle
CLAMP, sti cush .562dia x .343mtg hole
BUSHING, stl .265 ID x .499 OD x .593 Ig
SCREW,M6-1.0x30
BALL JOINT, .250-28 LH
BRACKET, support solenoid
SOLENOID, 12VDC
BRACKET, mtg engine RH
RETAINER, mount eng/gen
TUBING, stl .875 OD x l2ga wall x 2.500
TUBING, nprn .875 ID x 2.500 OD x 2.000
BRACKET, mtg solenoid
FITTING, hose brs barbed elb fem 1/2tbg x 1/2NPT
HOSE, SAE .500 ID x .780 OD (order by ft)
CLAMP, hose .312-.875cIp dia
VALVE, oil drain 3/8-18NPTF
FITTING, hose brs barbed fem 1/2tbg x 3/8NPT
FITTING, adapter oil drain
GUARD, stator
BASE, filter w/adapter and vent
FITTING, hose brs barbed elb M 5/l6tbg x 1/4NPT
CLAMP, hose .520-.605c1p dia
CLAMP, hose .250-.625c1p dia
HOSE, SAE .312 ID x .560 OD x 19.000
FILTER, fuel spin-on
BRACKET, mtg separator fuel
RELAY, end 12VDC SPST
MODULE, pull to idle 5 pin
BRACKET, mtg comp panel auto idle
FUSE, mintr gI slo-blo 1 5A 32V
HOLDER, fuse mintr .250 x 1.250 panel mtg
INSULATION, terminal strip
STAND-OFF, insul .250-20 x 1.000 Ig
BLOCK, term 30A 4P
LINK, jumper term blk
BRACKET, mtg strip terminal
CLAMP, nyl .625c1p dia
PANEL, mtg components
1
1
1
1
1
1
2
2
1
1
1
1
1
4
4
1
1
2ff
2
1
1
1
1
1
2
3
1
2
1
1
1
1
1
1
1
1
1
1
2
1
I
1
RECTIFIER, integ 40A 800V
DIODE, zener 12V 50W
KIT, diode mounting
DIODE, board
3
1
1
Dl
128 299
08
170 674
R6
CR2
030 844
CAPACITOR BOARD
RESISTOR, WW fxd 25W 25 ohm
059 267
RELAY,encI12VDCDPDT
1
1
1
1
OM-173 413
Page
41
Dia.
Item
No.
Part
No.
Mkgs.
Description
Figure
173317
89
Figure
90
10-3
129074
CT1
92
....
,105370
111310
108163
...95....
128862
R2,3
96
085656
97
110069
98
175432
99
097829
116045
165669
168071
+When
ordering
*Recommended
10-1. Main
Assembly (Continued)
PANEL, front lower
PANEL, front w/components
1
REACTOR
1
TRANSFORMER, current
UPRIGHT, base front
FRAME, mtg reactor & fuel tank
RESISTOR, WW adj 375W 50 ohm
STRIP, mtg resistor
FITTING, flrd brs elb 1/4tbg x 1/4NPT
VALVE, shutoff fuel
BOLT, J stl .250-20 x 2.750
1
1
1
1
2
1
2
1
4
CONNECTOR & SOCKETS
CONNECTOR&SOCKETS
CONNECTOR & SOCKETS
component originally displaying
Spare Parts.
a
Quantity
a
precautionary label,
1
1
1
the label should also be ordered.
OPTIONAL
To maintain the factory original performance of your equipment, use only Manufacturers
Suggested
Replacement Parts. Model and serial number required when ordering parts from your local distributor.
Hardware is
common
and
not available unless listed.
20
21
ST-lw 922-E
Figure
OM-173 413
Page
42
10-2. Generator
Item
No.
Dia.
Part
Mkgs.
No.
Description
Figure
10-2. Generator
(Figure
Quantity
10-1 Item
24)
106426... INSULATOR
106 440... BUS BAR, rectifier
1
2
SR3
4
2
106 427... DIODE
1
4
048 420
ASSEMBLY, reverse polarity (consisting of)
CAPACITOR, rectifier
2
106 641
CAPACITOR
1
5
037 957
DIODE,
3
6
106425
7
173 066...
8
018 614...
3
*151 299
9
10
600 270
11
152 044
12
176 106...
13
124 855...
14
+174 002...
15
039 207
16
089 736...
17
024 617
18
053 390
19
089 737
035 776
INSULATOR
2
BRACKET, mtg brushholder
BRUSH SET, (consisting of)
BRUSH,contact
HOLDER, brush
CAP, brushholder
LABEL, warning moving parts
GUARD, stator
STATOR, gen (consisting of)
BAFFLE, air gen
ROTOR, gen (consisting of)
RING, retaining external
BEARING, ball
FAN, rotor
KEY, .375 x .375
1
3
1
1
1
can cause
serious
injury
2
1
1
1
1
1
1
1
x
2.000
1
STATOR, excitor
173 068... ENDBELL, gen (consisting of)
143220
0-RING, 2.859 IDx.139CS
173 323... BARREL, rectifier
106 430... DIODE ASSEMBLY, (consisting of)
048 420
CAPACITOR, rectifier
20
044 374...
21
22
23
24
rect 275A 300V RP
...
SR3
25
26
106 425
CAPACITOR
INSULATOR
27
037 956
DIODE,
046 819
SUPPRESSOR
106 641
28.
VR1,R4
...
*Recommended
Spare
+When
a
ordering
1
1
1
1
1
2
1
1
rect 275A 300V SP
3
1
Parts.
component originally displaying
a
precautionary label,
the label should also be ordered.
To maintain the factory original performance of your equipment, use only Manufacturers
Suggested
Replacement Parts. Model and serial number required when ordering parts from your local distributor.
OM-173 413
Page
43
fl~ Hardware is common and
not available unless listed.
1
Figure
10-4
4
21~$
5
6
7
8
18
9
10
11
15
14
13
12
ST.801 358-B
Figure
OM-173 413
Page
44
10-3.
Panel, Front
w/Components
Dia.
Item
No.
Mkgs.
Part
No.
Description
Figure
1
604103
RECEPTACLE,strdxgrd2P3Wl5A25OV
1
025 234
PLUG, str grd 2P3W 15A 250V
RECEPTACLE, str dx grd 2P3W 1 5A 1 25V
PLUG, str grd 2P3W 15A 125V Arrow Hart 5965V
CIRCUIT BREAKER, man reset 1 P 1 5A 25OVAC
KNOB, pointer
PLATE, ident control rating (order by model and serial number)
BOOT, toggle switch lever
GAUGE, pressure oil 15-20
GAUGE/SWITCH, temp oil 250 deg
KIT, oil line 44.000 in i/8NPT x 10mm
FITTING, pipe brs adapter 1/8NPT x 12 mm
LEVER, switch black
HOLDER, light md
BULB, incand fig base 12V
LENS, light md red
METER, hour 4-4OVDC
HANDLE, switch range
NAMEPLATE, (order by model and serial number)
SWITCH, ignition Sposn
PANEL, front upper
175
412
011 072
.
.
*048 317
011 609
..
5
032 897
..
7
....
RC2
170 901
073 690
8
....
CB1 ,2
139266
148 723
9
10
11
021 385
12
.129 860
13
.129 837
.128 829
.128 633
119 014
14
082 788
15
16....
PL1,2
18
*048 155
082 789
17
HM
145 247
019 754
19
20
21
Si
22
.
..
4
....
90)
1
..
RC1
10-1 Item
SWITCH, automatic shutdown (consisting of)
SWITCH, magnetic (consisting of)
FUSE, mintr gI 14A 32V
SWITCH, tgl SPDT 15A 125VAC
RECEPTACLE, twlk grd 2P3W 15A 125V
..
605960
6
w/Components (Figure
1
114 193
Ri
F
Front
RHEOSTAT, WW 300W 34 ohm
S3
MS1
Panel,
SWITCH, range (Figure 10-4)
1
2
3
10-3.
Quantity
172 070
127 618
.
1
-
1
1
1
1
1
1
2
1
1
1
1
1
1
1
1
2
2
2
1
1
1
1
i
OPTIONAL
*Recommended
Spare Parts.
To maintain the factory original performance of your equipment, use only Manufacturers
Suggested
Replacement Parts. Model and serial number required when ordering parts from your local distributor.
OM-173 413 Page 45
Item
No.
Part
No.
114 235
BRACKET, mtg switch (consisting of)
SPRING, ext x .312 OD x .042 wire x 1.875p1d
LOCATOR, quadrant
CONTACT BOARD ASSEMBLY, switch range (consisting of)
CONTACT BOARD, movable switc
CONTACT ASSEMBLY, movable (consisting of)
SPRING, pressure
004 998
011 980
011 645
011 075
011 953
011 074
011 644
.
Switch, Range (Figure 10-3 Item 1)
Figure
017 428
11
004 999
12.
011 012
100 623
10-4.
Quantity
114 193
010 671
.
Description
1
1
1
1
2
3
1
CONTACT
2
SPRING, pressure
CONTACT, stationary
CONTACT BOARD, stationary
SHIM, guide contact board
GUIDE, contact board movable
1
15
2
3
3
~ Hardware is
common
and
not available unless listed.
3
4
ST-oil 273
Figure
10-4. Switch,
Range
To maintain the factory original performance of your equipment, use only Manufacturers
Suggested
Replacement Parts. Model and serial number required when ordering parts from your local distributor.
OM-173 413
Page
46
Part
No.
Quantity
Description
OPTIONAL EQUIPMENT
043 096
042 318
..
RECEPTACLE KIT, 120V GFCI
ENGINE PROTECTION PACKAGE, (consisting of)
AUTOMATIC SHUTDOWN, low oil pres & hi temp
....
043088
....
041 671
....
1
1
(Fig 10-1, 10-3)
1
AUTOMATIC IDLE, (Fig 10-1, 10-3)
SERVICE INDICATOR KIT, (Fig 10-1)
1
1
OM-173 413
Page
47
Notes
__
___
___
This document in other languages
- français: Miller Big Blue 401DXQ


