1
Miller
Apri
1994
Form:
OM-168 256
Effective With Serial No. KE600689
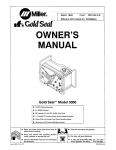
OWNERS
MANUAL
Gold Starfi 500SSX
CC/DC Welding Power Source
For SMAW and GTAW Welding
510
Amperes,
41 Volts
DC, At 35% Duty Cycle
Requires Three-Phase, 50/60
Overheating
Arc
(Dig)
Hz
Input Power
Protection
Control
Read and follow these instructions and all
blocks carefully.
Give this manual to the operator.
safety
Have
cover
1/94
only
trained and qualified persons
or service this unit.
install, operate,
For
Call your distributor if you do not understand
the directions.
or:
ST-cOO 599-H
'
1994 MILLER Electric
help,
call your distributor
MILLER Electric Mfg. Co., P.O. Box 1079,
WI 54912
414-734-9821
Appleton,
Mfg. Co.
PRINTED IN USA
7S~>
.
~-1 S
~
I
J
TRUE BLUETM LIMITED WARRANTY
MILLERS
(Equipment
This limited warranty
Subject
LtMITED WARRANTY
supersedes
Effective ,Janu ary 1, 1992
with a serial number preface of KC
all previous MtLLER warranties and is evr:tusive with
to the terms and coeditione betow, MtLLER Electric
other guarantees
or
warranties espreased
or
imptied.
Remote Controls
*
Appleton, Wisconsin, warrants to its original retail purchaser that new
MILLER equipment sotd after the effective date of this limited warranty is tree of de
tects in materiat and workmanship at the time it is shipped by MtLLER THtS WAR
RANTY IS EXPRESSLY tN LIEU OF ALL OTHER WARRANTIES. EXPRESS OR
Mtg. Co
no
newer)
or
Accessory Kits
.
Replacement Parts
BluerM
MILLERS True
tMPLtED. INCLUDtNG THE WARRANTIES OF MERCHANTABILITY AND FIT
Limited
Warranty
shall not
apply
to:
NESS.
Items furnished
I
which lime MILLER will
provide instructions
on
the warranty claim
procedures
MILLER shall honor warranty claims on warranted equipment listed below in the
warranty time periods Alt warranty time periods
equipment was delivered to the original retail purchaser. or
start on the date that the
to the distributor
Parts and Labor
Plasma Arc
Cuaing
*
relays
ehgines
or
warranty, if
or
as
contact
parts Ihet fail duels normal
rips, cuEing nozzles.
confactore
wear.
warranty claim covered by this warranty, the exclusive remedies
option. 11) repair. or (2) replacement: or, where authorized in
appropriate cases, (3) the reasonable costof repair or replace
ment alan authorized MILLER service station: or (4) payment of or credit for the pur
chase price (less reasonable depreciation based upon actual use) upon return of the
goods at customers risk and espense. MtLLERS option of repair or replacement
In the event of
writing by
Robots
2 Years
as
a
skull be. at MILLERS
Power Sources
Semi-Automatic and Automatic Wire Feeders
3
suck
THE USE AND MAINTENANCE OF WELDING EQUIPMENt
Transformer/Rectiher Power Sources
*
by others,
the manufacturers
MILLER PRODUCTS ARE INTENDED FOR PURCHASE AND USE BY COMMER
CIAL/INDUSTRIAL USERS AND PERSONS TRAINED AND EXPERIENCED IN
main power rectihers
Original
3 Years
2.
by
3 Years Labor
5 Years Parts
*
covered
Equipment that has been modified by any party other than MILLER. or equip
ment Ihat has been improperly installed, improperly operated or misused
based upon industry standards, or equipment which has not had reasonable
and necessary maintenance, or equipment which has been used for operation
outside of the specifications for the equipment.
3
event of such a failure within the
is sent
are
Consumable components: such
2
to be
avd
year ahei Ike equipment
but manufactured
any
followed.
one
by MILLER,
trade accessories. These items
will repair or replace any war
raeted parts or components that fail due to suck defects in material or workmanship.
MILLER must be notified in writing within thirty (30) days of such detect or failure, at
periods listed below. MILLER
Within the warranty
Parts and Labor
MILLER in
will be FO B
Engine Driven Welding Generators
(NOTE Engines are warranted separately by
for a period of Iwo years.)
*
*
Air
Factory at Appleton, Wisconsin. or FOB. eta MILLER authorized ser
facility as determined by MILLER Therefore no compensation or reimburse
Iransportafion costs of any kind will be allowed.
vice
the engine manufacturer
ment br
Compressors
TO THE EXTENT PERMITTED BY LAW. THE REMEDIES PROVIDED HEREfN
ARE THE SOLE AND EXCLUSIVE REMEDIES. IN NO EVENT SHALL MILLER BE
1 Year
4.
Parts and Labor
LIABLE FOR DIRECT INDIRECT. SPECIAL. INCIDENTAL OR CONSEQUENTIAL
DAMAGES IINCLUDING LOSS OF PROFIT), WHETHER BASED ON CON
TRACT TORT OR ANY OTHER LEGAL THEORY
Motor Driven Guns
*
*
Process Controllers
Water Coolant
Systems
ANY EXPRESS WARRANTY NOT PROVIDED HEREIN AND ANY
HF Units
*
Grids
*
Spot Welders
*
Load Banks
*
SDX Transformers
THEORY WHICH. BUT FOR THIS PROVISION. MIGHT ARISE BY IMPLICATION,
OPERATION OF LAW. CUSTOM OF TRADE OR COURSE OF DEALING. IN
CLUDING ANY IMPLIED WARRANTY OF MERCHANTABILITY OR FITNESS
FOR PARTICULAR PURPOSE, WITH RESPECT TO ANY AND ALL EQUIPMENT
Gear/Trailers
Running
*
IMPLIED WAR
RANTY. GUARANTY OR REPRESENTATION ASTO PERFORMANCE. ANDANY
REMEDY FOR BREACH OF CONTRACT TORT OR ANY OTHER LEGAL
*
MILLER.
FURNISHED BY MILLER IS EXCLUDED AND DISCLAIMED BY
Field Options
(NOTE Field options
warranty period
one
year
6 Months
S
are
covered under True
product they
whichever is greater I
of the
are
EluenM
installed in,
or
for the
br
a
Some states in the U.S.A
do not allow limitations of how long an implied warranty
lasts. or the euclusiori of incidental. indirect. special or consequential damages, so
the above limitation or evclusion may not apply to you. This warranty provides spe
remaining
minimum of
cilic
legal rights, and other rights may be available, but may vary from
In Canada,
90
B.
Days
or
Parts and Labor
Plasma
Cutting
legislation
in some
remedies other than
as
provinces provides
for certain additional warranties
staled herein, and 10 the eefenf that they may not be
waived, the limitations and esclusions set out above may nor apply. This Limited
Warranty provides specific legal rights, and of her rights maybe available, but may
MIG Guns/TIG Torches
*
state 10 slate.
Batteries
vary from province to province.
Torches
1
R EC EIVI NG-HAN
D LING
unpacking equipment, check carton for any damage that may have occurred dur)ng shipment. File any claims for
delivering carrier. Assistance for filing or settling claims may be Qbta)ned trom distributor and/or equ)pment
Transportation Department.
Before
loss
with the
manufacturers
When
requesting
Use the
or
following
)nformation about this
equipment, always provide
spaces to record Model
Designation
and Serial
or
Mctdel
Designation
and Serial
Style Number of your unit.
or
Style
or
damage
Number.
The information is located
on
the
ratin9 label
nameplate,
Model
__________
Serial
or
Style
No.
Date of Purchase
miller 9/93
ARC WELDING SAFETY PRECAUTIONS
WARNING
a
ARC WELDING
be hazardous.
can
PROTECT YOURSELF AND OTHERS FROM POSSIBLE SERIOUS INJURY OR DEATH. KEEP CHILDREN
AWAY. PACEMAKER WEARERS KEEP AWAY UNTIL CONSULTING YOUR DOCTOR.
In welding, as in most jobs, exposure to certain hazards occurs. Welding is safe when precautions are taken. The
safety information given below is only a summary of the more complete safety information that will be found in the
Safety Standards listed on the next page. Read and follow all Safety Standards.
HAVE ALL INSTALLATION,
QUALIFIED PEOPLE.
OPERATION, MAINTENANCE,
ELECTRIC SHOCK
can
kill.
5.
Touching live electrical parts can cause fatal shocks
or severe burns. The electrode and work circuit is
electrically live whenever the output is on. The input
power circuit and machine internal circuits are also
live when power is on. In semiautomatic or automatic
wire welding, the wire, wire reel, drive roll housing,
and all metal parts touching the welding wire are
electrically live. Incorrectly installed or improperly
grounded equipment is a hazard.
1.
2.
3.
install and
Properly
Owners
6.
When
dry, hole-free insulating gloves and body protection.
Insulate yourself from work and ground using dry insulating
Wear
Disconnect
~
input power
equipment.
or
stop engine before installing
or
this
ARC RAYS can burn eyes and skin;
NOISE can damage hearing.
this
equipment according
to its
making input connections,
attach
grounding
proper
conductor first.
7.
Turn off all
8.
Do not
when not in
equipment
use
use.
damaged, undersized,
worn,
or
poorly spliced
cables.
Do not wrap cables around your
body.
10.
9.
Ground the
electrical
11.
Do not touch electrode if in contact with the work
12.
Use
only well-maintained equipment.
damaged parts at once.
13.
Wear
a
14.
Keep
all
or covers.
servicing
ground
Manual and national, state, and local codes.
workpiece
Do not touch live electrical parts.
mats
4.
AND REPAIR WORK PERFORMED ONLY BY
safety
to
harness if
and
panels
good
a
working
covers
(earth) ground.
or
Repair
ground.
replace
or
above floor level.
securely
in
place.
ARC RAYS
2.
Wear
helmet fitted with
a proper shade of filter (see
Safety Standards) to protect your face and
eyes when welding or watching.
Wear approved safety glasses. Side shields recommended.
welding
a
ANSI Z49.1 listed in
Arc rays from the welding process produce intense
heat and strong ultraviolet rays that can burn eyes
and skin. Noise from some processes can damage
3.
4.
hearing.
Use
protective screens or barriers to protect others from flash
glare; warn others not to watch the arc.
Wear protective clothing made from durable, fIame-resi~tant
material (wool and leather) and foot protection.
and
NOISE
5.
1.
Use
approved
ear
plugs
or ear
muffs if noise level is
FUMES AND GASES
Q
can
high.
be hazardous
5.
~ to your health.
Welding producesfumes and gases. Breathing these
fumes and gases
be hazardous to your health.
can
6.
Keep
If inside, ventilate the
remove
3.
4.
welding
area
and/or
use
exhaust at the
arc
form
7.
cadmium
approved air-supplied respirator.
Read the Material Safety Data Sheets (MSDS5) and the
manufacturers instruction for metals, consumables, coatings.
use an
fire
area
explosion.
5.
Watch for fire, and
6.
Be
or
1.
Protect
2.
Do not weld where
3.
Remove all flammables within 35ff
yourself
and others from
flying sparks
flying sparks
can
(10.7 m) of the welding arc.
them with approved covers,
this is not
If
possible, tightly cover
Be alert that welding sparks and hot materials from welding can
easily go through small cracks and openings to adjacent areas.
FLYING SPARKS AND HOT METAL
cause
can
Chipping
and
can
grinding
or
spraying
react with vapors to
irritating gases.
unless the
galvanized, lead,
as
or
is removed from the
coating
is well ventilated, and if necessary, while
that
fire
keep
welding
on
a
fire
on a
extinguisher nearby.
ceiling, floor, bulkhead,
Do not weld
8.
Connect work cable to the work
9.
Do not
10.
closed containers such
use
as
as
tanks
or
drums.
close to the
welder to thaw frozen
pipes.
Remove stick electrode from holder
tip when
Wear oil-free
not in
or
Wear
cut off
welding
wire at
use.
protective garments such
as
shirt, cuftless trousers, high shoes, and
1.
partition
welding area as
practical to prevent welding current from traveling long, possibly
unknown paths and causing electric shock and fire hazards.
contact
11.
on
or
the hidden side.
7.
approved face shield
or
leather gloves,
a
heavy
cap.
safety goggles.
Side shields
recommended.
injury,
cool, they
aware
can cause
and hot metal.
strike flammable material.
arc can
wearing an air-supplied respirator. The coatings and any metals
containing these elements can give off toxic fumes if welded.
fire,
4.
on
Sparks and spatter fly off from the welding arc. The
flying sparks and hot metal, weld spatter, hot
workpiece, and hot equipment can cause fires and
burns. Accidental contact of electrode or welding wire
to metal objects can cause sparks, overheating, or
can cause
degreasing, cleaning,
coated metals, such
plated steel,
weld area, the
and cleaners,
WELDING
toxic and
highly
Do not weld
near
heat and rays of the
to
fumes and gases.
If ventilation is poor,
Do not weld in locations
operations. The
your head out of the fumes. Do not breathe the fumes,
1.
2.
a confined space only if it is well ventilated, or while
wearing an air-supplied respirator. Shielding gases used for
welding can displace air causing injury or death. Be sure the
breathing air is safe.
Work in
cause
throw off
flying
metal. As welds
2.
Wear proper
body protection
to
protect skin.
slag.
srI 9/92
J
CYLINDERS
explode
can
if
damaged.
gas cylinders contain gas under high
pressure. If damaged, a cylinder can explode. Since
gas cylinders are normally part of the welding
be sure to treat them carefully,
~
~J
I
1.
Protect
Install and
gas
secure
from
heat,
7.
upright position by chaining
equipment cylinder rack to
8.
cylinders
excessive
arcs.
in
~ylinders in
an
stationary support
prevent falling or ti~ping.
them to
a welding electrode to touch any cylinder.
only correct shielding gas cylinders, regulators, hoses, and
fittings designed for the specific application; maintain them and
associated parts in good condition.
Turn face away from valve outlet when opening cylinder valve.
Keep protective cap in place over valve except when cylinder is
Use
5.
6.
compress~ed
mechanical shocks, and
2.
other electrical
Never allow
4.
process~
.
or
circuits.
Shieldin~
~
Keep cylinders away from any welding
3.
or
a
associated
ENGINE EXHAUST GASES
E
on compressed gas cylinders,
equipment, and CGA publication P-i listed in Safety
ENGINES
can
1.
kill.
2.
Engines produce
use.
Standards.
WARNING
a
connected for
use or
Read and follow instructions
harmful exhaust gases.
FUEL
can
equipment outside
If used in
a
I
be hazardous.
in open, well-ventilated
areas.
closed area, vent engine exhaust outside and
building air intakes.
away from any
fire
cause
Use
can
or
1.
2.
Stop engine before checking or adding fuel.
Do not add fuel while smoking or if unit is near any sparks
or
open flames.
3.
Engine
fuel is
flammable.
highly
Allow
engine to cool before fueling. If possible, check and add
engine before beginning job.
allow room for fuel to expand.
not overfill tank
not spill fuel. If fuel is spilled, clean up before starting
fuel to cold
4.
Do
5.
Do
engine.
MOVING PARTS
can cause
3.
injury.
Have
only qualified people
maintenance and
Moving parts, such as fans, rotors, and belts can
fingers and hands and catch loose clothing,
4.
To
cut
2.
Keep all doors, panels,
securely in place.
Stop engine
before
covers,
installing
guards closed
and
and
connecting
generate explosive
iases.
r~.
~
.
.~
~
Y
STEAM AND PRESSURIZED HOT
COOLANT can burn face, eyes, and
skin.
The coolant in the
under pressure.
r adiator can
or
covers
for
prevent accidental starting during servicing, disconnect
cable from battery.
Keep hands, hair, loose clothing, and tools away from moving
Reinstall
panels
or
guards and close
starting engine.
doors when
servicing
is
finished and before
unit,
SPARKS can cause BATTERY GASES
TO EXPLODE; BATTERY ACID can
burn eyes and skin,
Batteries contain acid and
guards
necessary.
parts.
6.
or
as
negative () battery
5.
I.
remove
troubleshooting
1.
Always
2.
Stop engine
wear a
face shield when
before
working
disconnecting
or
on a
battery.
connecting battery
cables.
3.
Do not allow tools to
4.
Do not
5.
Observe correct
1.
use
sparks when working
cause
welder to
charge
polarity (+
batteries
and
)
on
or
jump
on a
battery.
start vehicles.
batteries.
Donotremoveradiatorcapwhenengineishot.Allowengine
to cool.
2.
Wear
3.
Allow pressure to escape before
gloves and put a rag
over
cap
area
when
removing
cap.
be very h ot and
completely removing cap.
PRINCIPAL SAFE.:TY STANDARDS
Safetyin Welding and Cutting, ANSI Standard Z49.i, from
Welding Society. 550 N.W. LeJeune Rd, Miami FL 33126
Safety and Health Standards, OSHA
29 CFR 1910, from
American
Printing Office, Washington,
Recommended Safe Practices for the
Preparation
Welding
That Have Held Hazardous Substances, Ameri
Standard AWS F4.1,from American Welding So
Welding Society
ciety, 550 N.W. LeJeune Rd, Miami,
FL 33126
National Electrical Code, NFPA Standard 70, from National Fire Pro
tection Association,
Sri 9/92
Batterymarch Park, Quincy,
MA 02269.
Code for
Safety in Welding and Cutting, GSA Standard Wi 17.2, from
Canadian Standards Association, Standards Sales, 178 Rexdale Bou
levard, Rexdale, Ontario, Canada M9W I R3.
and
Cutting of Containers
can
Handling of Compressed Gases in Cylinders, CGA Pamphlet
P-i, from Compressed Gas Association, 1235 Jefferson Davis High
way, Suite 501, Arlington, VA 22202.
Superinten
dent of Documents, U.S. Government
D.C. 20402.
for
Safe
Safe Practices For Occupation And Educational EyeAnd Face Protec
tion, ANSI Standard Z87.1, from American National Standards
Institute, 1430 Broadway, New York, NY 10018.
Cutting And Welding Processes, NFPA Standard 51 B, from National
Fire Protection Association, Batterymarch Park, Quincy, MA 02269.
PRECAUTIONS
SECURITE
DE
MISE EN GARDE
PROTEGEZ-VOUS,
ENFANTS
LE SOUDAGE
A
LARC
est
dangereux.
AUTRES, CONTRE LES BLESSURES GRAVES POSSIBLES OU LA MORT. NE LAISSEZ PAS LES
(A MOINS QUILS NAIENT CONSULTE UN MEDECIN).
NI LES PORTEURS DE STIMULATEUR CARDIAQUE
SAPPROCHER,
Le soudage,
precautions.
Ia plupart des activitØs industrielles, expose a certains risques. Le soudage nest pas dangereux lorsquon prend des
consignes de sØcuritØ suivantes ne font que rØsumer information contenue dans les normes ØnumØrØes ci-aprŁs. Lisez et
comme
Les
toutes
respectez
AINSI QUE LES
A LARC
EN SOUDAGE
ces normes.
QUALIFIEES DOIVENT
SEULES DES PERSONNES
FAIRE DES IRAVAUX
DINSTALLATION,
DE
REPARATION,
DENTRETIEN
ET
DESSAI.
LELECTROCUTION
Une
~
peut Œtre mortelle.
dØcharge Olectrique peut
vous
tuer
brUler gravement. LØlectrode et le circuit de
sont sous tension au
dØmarrage.
ou
Le circuit dentrØe et
Ia mise
en
marche.
En
sous
automatique
ou semi-automatique avec f ii, ce dernier, le support de
roquette, le logement des galets dentrainement et toutes les piŁces
metalliques
en
contact avec le f ii de
matŁriels mal installØs
ou
soudage
mal mis a Ia terre sont
3.
lsolez-vous de Ia tle a souder et de Ia mise ala terre
de
4.
petits tapis isolants
prise
DØconnectez Ia
ou
et non trouØs.
au
ou
ArrØtez tous
Nutilisez pas de cables uses,
calibre trop petits.
8.
Nenroulez pas de cables autour de votre corps.
Mettez ala terre Ia tle a souder au moyen dune bonne
terre.
9.
ou
11.
arrŒtez leur
peut
Ia peau; le BRUIT peut
casque de soudeur avec Łcran filtrant de teinte
(consultez Ia norme ANSI Z49 indiquee ci-aprŁs),
appropriee
pour vous protØger le visage et les yeux lorsque vous soudez ou
Les VAPEURS ET LES
dangereuses pour
2.
FUMEES
sont
3.
dair
4.
4.
es
relatives
aux
revŒtements et
signalØtiques
mØtaux,
aux
aux
5.
causer un
incendie
explosion.
mŁtallique peut provoquer des Øtincelles,
un
Łchauffement
7.
Ne travaillez dans
un
approuvŁs
espace confine que sil est bien ventilØ;
soudage peuvent dØplacer IoxygŁne
ou
de lair et
causer
des
Ia mort. Assurez-vous que lair est propre a Ia
Ne soudez pas a proximitØ dopŁrations de dŁgraissage, de
nettoyage ou de pulvØrisation. La chaleur et les rayons de larc
avec
des vapeurs et former des gaz hautement
et irritants.
Ne soudez pas de tles galvanisees ou plaquŁes en p10mb ou
cadmium sans les avoir grattØes a fond, car ces mØtaux, et
qui en contient, peuvent alors dŁgager des
fumeestoxiques. Assurez-vousdune bonneventilation etportez
un respirateur a adduction dair si cest nØcessaire.
5.
MŁfiez-vous des incendies et
gardez
un
extincteur a
poilØe
de
6.
7.
pas
quune soudure sur un plafond, un plancher,
paroi peut en enflammer lautre ctØ.
une
ou une
Ne soudez pas
un
recipient termŁ,
comme un
reservoir
ou un
tonneau.
8.
contre les Łtincelles et les
2.
Ne soudez pas dans un endroit o des Øtincelles peuvent
atteindre des matŁriELux inflammables.
Connectez le cable de
soudage le plus prŁs possible de Ia tIe
soudage pour empŒcher le courant de suivre un parcours
long et inconnu, et prØvenir ainsi les risques dØlectrocution et
dincendie.
Enlevez toutes les rnatiŁres inflammables dans
couvrez-Ies
Noubliez
cloison
de
Protegez-vous, ainsi que les autres,
projections.
un
rayon de
soigneusement avec
approuvØes.
MØfiez-vous des Øtincelles et des Øclats brlants, susceptibles
de pØnØtrer dans des aires adjacentes par de petites ouvertures
fissures.
hauteur.
en
ou un
1.
ou
en
Portez un casque antibruit ou des bouchons doreille
si le niveau de bruit est ØlevŁ.
peuvent rØagir
incendie.
des bches
travaillez
Ia main.
elles peuvent causer un incendie et des brlures. Le
contact accidentel de lelectrode
avec un objet
4.
vous
tout revŒtement
produit des Øtincelles et des projections. Avec Ia
chaleur intense degagee par a tle et les matØriels,
ou
harnais de sØcuritØ si
Entourez laire de soudage de rideaux ou de cloisons de
protection contre les coups darc ou lØblouissement; avertissez
les observateurs de ne pas regarder arc.
Portez des vØtements en tissus ignifuge durable (lame et cuir)
toxiques
produits nettoyants.
10,7 metres autourdE larc,
en bon Øtat. RŁparez ou remplacez
piŁces endommagees.
respiration.
6.
aux
Larc
3.
un
blessures
du fabricant
et es consignes
produits consummables,
Le SOUDAGE peut
ou une
les
et des chaussures de sØcuritØ.
5.
assurez-vous
fiches
le
que vous observez lexØcution dune soudure.
Portez des lunettes de sŁcuritØ approuvØes. Des Łcrans latØraux
de
approuvØ.
Lisez
avec
sinon, portez un respirateuraadduction dair. Lesgaz protecteurs
que laire de soudage est bien
ventilØe ou que les fumŁes et les vapeurs sont aspirØes a larc.
Si Ia ventilation est mauvaise, portez un respirateur a adduction
lintØrieur,
contact
prise de
sont recommandØes.
Ia sante.
soudage dŁgage des vapeurs et des fumŁes quil
est dangereux de respirer.
1. Ecartez le visage pour Łviter de respirer les
A
en
de
soudage (terre).
Fermez solidement touS les panneaux et les capots.
fumŁes.
2.
Øtes
Opisses ou
Nutilisez que des matØriels
Le
~.
vous
mal
Portez
3.
soudage produit une chaleur et des rayons
ultraviolets intenses, susceptibles de brUler les yeux et Ia peau. Le
bruit cause par certains procØdØs peut endommager louIe.
I
aprŁs utilisation.
endommages,
13.
Larc de
un
matŁriels
12.
Le RAYONNEMENT DE LARC
brUler Ies yeux et
IouIe.
Portez
et
den faire lentretien.
endommager
1.
es
Ne touchez pas a lØlectrode si
sur-le-champ
moyen
autres.
dentrØe des matOriels
moteur avant de les installer
~
secs
nationaux, provinciaux
applicables.
circuit de
2.
matØriels eta les mettre a Ia terre selon le
et les codes
7.
10.
dangereux.
ces
6.
sont sous tension. Des
Ne touchez pas a des piŁces sous tension.
Portez des gants et des vØtements isolants,
1.
locaux
soudage
__________
Veillez a installer
manuel dutilisation
soudage
les circuits internes des matØriels sont aussi
tension des
5.
vous
9.
10.
11.
Ne faites pas degeler des tuyaux avec un chalumeau.
Videz votre carquois porte-electrodes ou coupez le fil au tube
contact aprŁs le soudage.
Portez des vŁtements protecteurs
une chemise epaisse, un
cuir,
chaussures montarites et
un
non
huileux, tels des gants
pantalon
casque.
sans
revers,
en
des
LES ETINCELLES ET LES
PROJECTIONS BRULANTES peuvent
causer des blessures.
1.
Portez
Le
2.
Portez des vŒtements de
4.
EmpŒchez
piquage
et le
meulage produisent
Les BOUTEILLES
des Øclats de
endommagees peuvent
5.
exploser.
Les bouteilles contiennent des gaz protecteurs sous
haute pression. Des bouteilles endommagees peuvent
exploser. C;omme les bouteilles font normalement
procedØ de soudage, traitez-les avec soin.
Les bouteilles doivent Œtre protegees contre les sources de
chaleur intense, es chocs et les arcs de soudage.
partie
1.
6.
du
2.
Enchainez verticalement
3.
cadre fixe pour les empŒcher de tomber ou dŒtre renversØes.
Eloignez les bouteilles de tout circuit electrique ou de soudage.
MIS~
Les GAZ
es
bouteilles a
un
support
ou
a
7.
8.
un
EN GARDE
DECHAPPEMENT DES MOTEURS
ETRE MORTELS.
produisent
1.
tout contact entre une bouteille et une electrode.
Nutilisez que des bouteilles de gaz protecteur, des dØtendeurs,
des flexibles et des raccords conus pour chaque application
specifique; ces matØriels et les piŁces connexes doivent Œtre en
bon Øtat.
Ne mettez pas le visage devant le robinet de bouteille en
louvrant.
Remettez le chapeau de bouteille aprŁs utilisation.
Lisez et respectez les consignes relatives aux bouteilles de gaz
comprime et aux matØriels connexes, ainsi que Ia publication
P-i de Ia CGA, ØnumØrŁes dans les normes ci-dessous.
dechappement
des gaz
Utilisez des machines a lextØrieur dans des aires ouvertes et
2.
Si
vous
incendie
ou
3.
explosion.
Le carburarit est hautement inflammable.
1. ArrŒte:~ le moteur avant de verifier le niveau de
carburant ou de faire le plein.
2.
Ne faites pas le
plein
en
PI¨CES
Des
causer
fumant
dune
proche
ou
EN MOUVEMENT peuvent
2.
4.
5.
6.
moteur.
3.
Seules des personries
Des
qualifiees doivent dØmonter
ETINCELLES peuvent
des
2.
ACCUMUI.ATEUR peut brUler Ia peau et les
~
yeux.
Les accumjlateurs contiennent de
degagent d~s vapeurs explosives.
1. Portez toujours un Øcran facial
La
VAPEU R
ET
REFROIDISSEMENT
LE
lelectrolyte
et
travaillant
negative.
Napprochez
pas les mains ou es cheveux de piŁces en
mouvement; elles peuvent aussi accrocher des vŒtements
amples et des outils.
RØinstallez les capots ou les protecteurs et fermez les portes
aprŁs des travaux dentretien et avant de faire dŁmarrer le
4.
un accumulateur.
ArrŒtez le moteur avant de connecter ou de dØconnecter des
cables daccumulateur.
Nutilisez que des outils anti-Øtincelles pour travailler sur un
accumulateur.
Nutilisezpasunpostedesoudagepourchargerunaccumulateur
LIQUI DE
provisoirement un vØhicule.
polaritØ correcte (+ et -) de laccumulateur.
connecter
sur
5.
Utilisez Ia
DE
1.
Ntez
2.
Mettez des gants et posez un torchon sur le bouchon pour lter.
Laissez Ia pression sechapper avant dter
completement le
BRULANT SOUS
PRESSIONI peuvent brUler Ia peau et les
3.
~e U
ou des capots pour faire lentretien ou le depannage
nØcessaire.
Pour empŒcher un demarrage accidentel dun systŁme pendant
lentretien, dØbranchez le cable daccumulateur a Ia borne
ou
en
expansion.
moteur.
FAIRE EXPLOSER
UNACCUMULATEUR;LELECTROLYTEDUN
son
Faites attention de ne pas renverser de carburant. Nettoyez tout
carburant renversØ avant de faire dØmarrer le moteur.
protecteurs
des blessures.
Assurez-vous que les portes, les panneaux, les capots et les
protecteurs sont bien lermØs.
Avant dinstaller ou de connecter un systŁme, arrŒtez-en le
endroit confine, les
loin
dØtincelles ou dune flamme nue.
Si cest possible, laissez le moteur refroidir avant de faire le plein
de carburant ou den verifier le niveau au debut du soudage.
Ne faites pas le plein de carburant a ras bord : prØvoyez de
lespace pour
5.
source
Des piŁces en mouvement, telles des ventilateurs,
des rotors et des courroies peuvent couper les doigts
et les mains, ou accrocher des vŒtements amples.
1.
4.
un
dØchappement doivent Œtre envoyees a lextØrieur,
prises dair du btiment.
des
une
utilisez des machines dans
fumØes
causer un
dangereux.
bien ventilØes.
nocifs.
Le CARBURANT peut
protection individuelle appropriØs.
Les MOTEURS peuvent Œtre
PEUVENT
Les moteurs
metal. En refroidissant, Ia soudure peut projeter du laitier.
un Øcran facial ou des lunettes a coques approuvØes.
Des Øcrans latØraux sont recommandØs.
.
pas le bouchon de radiateur tant que le moteur na
refroidi.
pas
bouchon.
Le
liquide do refroidissement dun radiateur peut Œtre
brlant et sous pression.
PRINCIPALES NORMES DE
Safety in Welding and Cutting norme ANSI Z49. 1, American Welding
Society, 550, N.W. LeJeun~ Rd., Miami FL 33128.
Safety and Health Standarc~ OSHA 29 CFR 1910, Superintendent
of Documents, U.S. Government Printing Office, Washington D.C.
20402.
SECURITE
Safe Handling of Com~ressed Gases in Cylinders document P-i,
Compressed Gas Association, 1235 Jefferson Davis Highway, Suite
501, Arlington, Va 22202.
Code for Safety in Welding and Cutting norme CSA Wi 17.2, Asso
ciation canadienne de normalisation, Standards Sales, 176 Rexdale
Boulevard, Rexdale, Ontario, Canada M9W 1 R3.
Recommended Safe Practices For the Preparation For Welding and
GuthnQof Containers That F~ave Held Hazardous Substances, norme
AWS F4.i, American
Welding Society, 550,
N.W. LeJeune
Rd.,
Miami FL 33128.
National Electrical Code norme 70 NFPA, National Fire Protection
Association, Batterymarch Park, Quincy, MA 02269.
srlf 9/91
Safe Practices for Occupation and Educational Eve and Face Protec
ILQI:1, norme ANSI Z87.i ,American National Standards Institute, 1430
Broadway, New York, NY 10018.
Cutting
and Welding PrOcesses norme SiB NFPA, National Fire
Protection Association, Batterymarch Park, Quincy, MA 02269.
EMF INFORMATION
Considerations About
Magnetic
Welding
And The Effects Of Low Frequency Electric And
Fields
~
-
NOTE ~
following is a quotation from the General Conclusions Section
Congress, Office of Technology Assessment, Biological
Effects of Power Frequ9ncy Electric & Magnetic Fields
Background Paper, OTA-BP-E-53 (Washington, DC: U.S.
Government Printing Office, May 1989): .
there is now a very
large volume of scientific findings based on experiments at the
cellular level and from studies with animals and people which clearly
establish that low frequency magnetic fields can interact with, and
produce changes in, biological systems. While most of this work is
of very high quality, the results are complex. Current scientific
understanding does not yet allow us to interpret the evidence in a
single coherent framework, Even more frustrating, it does not yet
allow us to draw definite conclusions about questions of possible
risk or to offer clear science ~based advice on strategies to minimize
or avoid potential risks.
The
To reduce
of the U.S.
procedures:
.
magnetic fields
1.
Keep cables
2.
Arrange
3.
Do not coil
4.
Keep welding power
practical.
5.
Connect work clamp to
workplace,
together by twisting
close
cables to
in the
one
or
use
taping
the
following
them.
side and away from the operator.
.
or
drape cables around the body.
source
and cables
workpiece
as
as
far away
as
close to the weld
as
possible.
About Pacemakers:
above procedures are among those also normally
recommended for pacemaker wearers. Consult your doctor for
complete information.
1
The
modlO
4/93
TABLE OF CONTENTS
SECTION 1
-
SECTION 2
2-1.
2-2.
3-1.
3-3.
3-4.
3-5.
SPECIFICATIONS
Volt-Ampere Curves
Duty Cycle
SECTION 3
3-2.
SAFETY INFORMATION
2
INSTALLATION
Selecting A Location And Moving Welding Power Source
Selecting And Preparing Weld Output Cables
Connecting To Weld Output Terminals
Remote 14 Receptacle Information And Connections
Connecting Input Power
3
4
5
6
7
9
SECTION 4- OPERATION
SECTION 5
2
MAINTENANCE & TROUBLESHOOTING
5-1.
Routine Maintenance
13
5-2.
Overlo&J Protection
14
5-3.
Troubleshooting
14
SECTION 6- ELECTRICAL DIAGRAMS
SECTION 7
7-1.
7-2.
Figure
Figure
Figure
Figure
Figure
Figure
TUNGSTEN ELECTRODE
Selecting Tungsten Electrode
Preparing Tungsten
SECTION 8
17
20
21
PARTS LIST
8-1. Main
22
8-2. Panel, Rear
24
8-3.
24
Assembly
w/Components
Terminal Assembly, Pri
8-4. Swil:ch, PB
25
8-5. Rectifier, SCR
25
8-6. Panel, Front
w/Components
26
OM.168 256
4/94
SECTION 1
SAFE~TY INFORMATION
-
modl.1 2/93
Read all
safety messages throughout this
Obey all safety messages
Learn thi?
meaning
to avoid
manual.
injury.
of WARNING and CAUTION.
2
1
1
Safety Alert Symbol
2
Signal Word
2
!:
CA~
ELECTRIC SHOCK
can
kIII.~
Do not touch live electrical parts.
Disconnect
installing
or
WARNING means possible death
or serious injury can happen.
input power
servicing.
~
)~
~fl
before
iIIi1~I
CAUTION
w~OVING PARTS
S
S
Keep away
from
can
Injure.
moving parts.
Keep all panels and
operating.
covers
closed
means
possible minor
injury or equipment damage
happen.
can
3
Statement Of Hazard And
Result
4
Safety
wtten
-~_________
/
5
a
6
WARNIF~
READ SAFETY BLOCKS at start of
SectIon 3-1 berore proceeding.
I
5
Hazard
6
Safety Banner
7-H
NOTE
D~
Turn Off switch when
using high frequency.
Figure
1-1.
SECTION 2
Safety
Special instructions for best oper
ation not related to safety.
Information
Welding
Power Source
Description
Specifications
Type Of Output
Constant Current/Direct Currerlt
Welding Process
Shielded Metal Arc
(SMAW)
(CC/DC)
And Gas
Tungsten
Arc
(GTAW) Welding
70 Volts DC
Type Of Input Power
Three-Phase; 220, 380, 400, Or 415 Volts AC, 50/60 Hz
Overall Dimensions
See
Input Amperes At Rated Output
NOTE
SPECIFICATIONS
Table 2-1.
Open-Circuit Voltage
Symbol (If Available)
Read safety blocks for each sym
bol shown.
_____
7
Max
Instructions To Avoid
Hazard
Figure
3-2
102 A At 220 V,
59 A At 380
V,
56 A At 400 V,
54 A At 415 V
Rated Weld
Output
KVAJKW Used At Rated
Amperage Range
510
Output
Amperes,
41 Volts DC At ~I5%
Duty Cycle (see Section 2-2)
38.8 kVN25.6 kW
Low: 20
-
270
A;
High: 37-510 A
Weight
Net: 543 lb (246 kg);
568 lb (258 kg)
Ship:
OM-168 256
Page
1
2-1.
Volt-Ampere Curves
The volt-ampere curves show the
minimum and maximum voltage
and amperage output capabilities
of the welding power source.
Curves of other settings fall be
tween the curves shown.
Low
A~.
B.
Range
70
70
60
60
50
50
40
High Range
40
0
0
>
>
30
30
C.)
C.)
20
20
10
10
0
0
0
50
100
150
2D0
250
300
350
400
450
500
650
600
100
0
200
DC AMPERES
400
300
600
600
ssbl .110/91
Figure
2-2.
700
800
900
DC AMPERES
2-1.
Volt-Ampere
SB-084 850-A / SB-084 845-A
Curves
Duty Cycle
~AUTION
L
WELDING LONGER THAN RATED DUTY CYCLE
Do not weld at rated load
longer
can
damage
unit and void warranty.
than shown below.
warn7.1 8/93
Chart
Definition
1200
Duty Cycle
is percentage of 10
minutes that unit can weld at
rated load without overheating.
(1)
~O00
35%
Duly Cycle
At 510
Amperes
ii~ ~
3-1/2 Minutes
Welding
6-1/2 Minutes
Resting
Z DUTY
CYCLE
sbl .2 8/93
Figure
OM-168 256
Page
2
2-2.
Duty Cycle
Aol. SB-000 865-D
SECTION 3- INSTALLATION
3-1.
Selecting
A Location And
£~
Moving Welding
Power Source
~NARNING
ELECTRIC SHOCK
kill.
can
Do not touch live electrical parts.
I
FUMES can be hazardous; LACK OF
FRESH AIR AND PROP ER VEN
TILATION can be harmful.
Disconnect
input power conductors from de
energized supply line BEFORE moving welding
power
Do not breathe
source.
FIRE OR EXPLOSION can result from
placing unit on, over, or near com
bustible t~urfaces.
Do not iccate unit on, over,
surfaces.
Do not install unit
near
or near
Warranty is
~oid
or
fumes.
a
good
flammables.
FALLING EQUIPMENT
serious
personal Injury
can
and
cause
equipment
damage.
Use lifting eye to lift unit only, NOT running gear, gas
cylinders, or any other accessories.
filter airflow.
Use
equipment of adequate capacity
type of filter is used.
if any
fresh air
combustible
BLOCKED AIRFLOW causes over
heating and possible damage to unit.
Do not block
welding
Place unit only where there is
supply and proper ventilation.
to lift the unit.
cwarnhil 3/93
Movement
1
Lifting Eye
2
Lifting Forks
Use
lifting eye
move
lifting forks
using lifting forks,
If
OR
or
to
unit.
extend forks
beyond opposite side of unit.
Rating Label
3
Use
rating label to determine input
power needs.
Line Disconnect Device
4
Locate unit
er
near
correct
input pow
supply.
Location And Airflow
4
l8in
(460 mm)
18 in
~460 mm)
ssb9.1 12193- ST-BOO 402 I ST-000 599-H
Figure
3-1. Movement And Location Of
Welding
Power Source
OM-168 256 Page 3
NOTE LI~ii~
Overall dimensions
(A, B,
and
C)
include
lifting
eye, handles, hardware, etc.
I
Inches
Millimeters
A
30-1/4
769
B
22-3/4
578
C
35-3/4
908
D
1-1/2
38
E
32-3/4
832
F
1-1/8
29
G
20
508
H
7/l6Dia.
4 Holes
4 Holes
D
Front
~-
E
11 D~a.
1~
/
F
G
H
ST-153 600
:igure
3-2.
Selecting
Arid
3-2. Overal
Preparing
Dimensions And Base
Weld
Mounting
Hole
Layout
Output Cables
1
~
Weld
Output Cable
Determine total cable length in
weld circuit and maximum welding
amperes. Use Table 3-1 to select
proper cable size.
Use shortest cables
Do not
2
use
Terminal
Use
possible.
damaged cables.
Lug
of
lugs
proper amperage
capacity and hole size for connect
ing to work clamp or electrode hold
er, and weld
output terminals.
3
Insulated Electrode Holder
4
GTAW Torch
Install according to manufacturers
instructions.
5
For Example,
Total Cable
Length In Weld
Circuit
20 ft (6 m)
Work
Clamp
Install onto work cable.
=
10 ft
(3m)
Tools Needed:
c,~
th6.5
Figure
OM-168 256 Page 4
3-3.
Selecting
And
Preparing
Weld
Output Cables
11/92
S~0752
-
-~-,
-
-
p
-
Table 3-1. Weld Cable Size*
Total Cable
100 ft
(30 m) Or
(Copper) Length
I
150ff
Less
In Weld Circuit Not
200ft
(45 m)
I
(60 m)
250ff
I
(70 m)
Exceeding
300ff
I
350ff
I
400ft
(105_m)_j~120_m)
(90 m)
Welding
Amperes
10 To 60%
60 Thru 100%
Duty Cycle
Duty Cycle
100
4
4
4
3
2
1
1/0
1/0
150
3
3
2
1
1/0
210
3/0
3/0
200
3
2
1
1/0
2/0
3/0
4/0
4/0
250
2
1
1/0
2/0
3/0
4/0
2-2/0
2-2/0
300
1
1/0
2/0
3/0
4/0
2-2/0
2-3/0
2-3/0
350
1/0
2/0
3/0
4/0
2-210
2-3/0
2-3/0
2-4/0
400
1/0
2/0
3/0
4/0
2-2/0
2-3/0
2-4/0
2-4/0
500
2/0
3/0
4/0
2-2/0
2-3/0
2-4/0
3-3/0
3-3/0
600
3/0
4/0
2-2/0
2-3/0
2-4/0
3-3/0
3-4/0
3-4/0
700
4/0
2-2/0
2-3/0
2-4/0
3-3/0
3-4/0
3-4/0
4-4/0
800
4/0
2-2/0
2-3/0
2-4/0
3-4/0
3-4/0
4-4/0
4-4/0
900
2-2/0
2-3/0
2-4/0
3-3/0
3-4/0
4-4/0
4-4/0
1000
2-2/0
2-3/0
2-4/0
3-3/0
4-3/0
4-4/0
*Weld
3-3.
c able
size
(AWG)
is b ased
Connecting
4A
on
either
a
To Weld
4 volts or less
Output
can
Do not touch live electrical
Turn Off
drop
or a
current
density
Duty Cycle
of at least 300 circular mils per ampere.
5-0007-c
Terminals
~JVARNING
E LECTRIC SHOCK
S
10 Thru 100%
welding power
kill.
parts.
source, and disconnect
input power before making any weld output connections.
swarnl2.1 2193
Turn screw and open lower
door.
1
(+)
1
Positive
minal
2
Negative (-)
2:
For
Electrode
Weld
access
Output Ter
Weld
Output
Positive
connect work cable to
(DCEP),
negative ()
terminal and electrode holder cable
to positive (+) terminal.
For Electrode
reverse
Negative (DCEN),
cable connections.
Close door.
Tools Needed:
3/4in
~==~
Rel. ST-155 048-A
Figure
3-4. Weld
Oiitput
Connections
OM-168 256
Page
5
3-4.
Remote 14
Receptacle Information
And Connections
1
Remote 14 Receptacle Rd
(See Table 3-2)
2
Keyway
3
Plug
4
Threaded Collar
To connect to
keyway, insert
threaded collar.
~
receptacle, align
plug, and tighten
3
OR
>
sbl.1 12193
Figure
Ret. ST-coo 599-H / Ret. 5-0004-A / 5-0750
3-5. Remote 14 Connections
Table 3-2. Remote 14 Socket Information
OUTPUT
(CONTACTOR)
A
*The
AMPERAGE
remaining
sockets
OM-168 256 Page 6
are
Socket Information
Socket*
14
REMOTE
not used.
A
24 volts
B
Contact closure to A completes 24 volts
C
+10 volts dc
D
Remote control ciircuit
E
0 to +10 volts do
ac.
output
ac
contactor control circuit.
to remote control.
common.
input command signal
from remote control.
3-5.
Connecting Input
Power
WARNING
ELECTRIC SHOCK
Turn Off
Have
kill.
can
Do not touch live electrical
welding power
parts.
source, and disconnect
only qualified persons
input power before inspecting
or
installing.
install unit.
Installation must meet National Electrical Code and all other codes
A.
Positioning Jumper
swam3.1 2/93
Links
Jumper links allow operation on dif
ferent input voltages and are facto
ry set for the highest input voltage.
Check input voltage available at
site.
Remove top and right side panel to
jumper links.
check
Input Voltage Label
1
Look at jumper links and compare
link position with unit label.
1
2
Input Terminal Board
3
Input Voltage Jumper Links
Move links to match input voltage.
For example, use 220 volts posi
tion when 220 volts input power is
available.
Reinstall top and side
to Figure 3-7.
panel
or
go
on
0
I
220 VOLTS
380 VOLTS
~oo~ ~oo~ ~
oo~Oo oo~oo
~ ~L~
~L1 'L2 'L3
'L3
\
415 VOLTS
OOO~~1
o~ooo o~ooo O~OOo
400 VOLTS
oo~oo~
~j
ooO~O ooo~o
'L~ ~ ~L3
'L1 'L2 0L3
S-134 559-A
Tools Needed:
~ 3/Biii
cIJ===~u
3/8 in
ssb5.1
Figure
3-6.
2/92
Ref. 5T.094 762-E
Input Voltage Jumper Links Location
OM-168 256
Page
7
B.
Connecting Input
Power
Have only qualified persons make
this installation.
Line Disconnect Device Of
1
Proper Rating
2
Input Conductors
3
Grounding Conductor
Select size and length using
Table 3-3. Conductor rating must
with national, state, and
local electrical codes. Use Iugs of
properamperage capacity and cor
rect hole size.
comply
Strain Relief Connector
4
Insert conductors
through
strain
relief.
5
Input Terminal Board
6
Line Terminals
7
Welding
Power Source
Ground Terminal
Connect grounding conductor to
ground terminal first. Then connect
input conductors to line terminals.
8
Disconnect Device Ground
Terminal
Install and connect grounding
conductor and input conductors in
conduit or equivalent to deener
gized
line disconnect device.
Connect grounding conductor first,
then line
Be
input conductors.
grounding conductor goes
earth ground.
sure
to an
Reinstall side
9
Tools Needed:
panel.
Overcurrent Protection
Select type
and
size
using
Table 3-3. Install into deenergized
line disconnect device (fused dis
~ 3/8 in
3/8 in
connect switch
shown).
ssb2.4
Figure
3-7.
Input
1/94
5T-094 762-E
Power Connections
Table 3-3. Electrical Service
Requirements*
Input Voltage
220
380
400
415
Input Amperes At Rated Output
1C2
59
56
54
lEO
90
80
80
Recommended Standard Fuse Or Circuit
Breaker
In
Rating
Amperes1
Input Conductor Size
Max
In AWGIKcmII2
Input Conductor Length
In Feet
(MM2)
(Meters)3
4
130(140)
Grounding Conductor Size In AWGIKcmiI4 (MM2)
These values
are
2
or
6
210-19(a)
4 The
than
172
8
(8)
(52)
(8)
length is to prevent more
and 215-2(b) of NEC).
than
a
3%
voltage drop
8
(8)
8
190(58)
8
205
(8)
8
(8)
(62)
(8)
(NEC).
circuit breaker size is that closest to 150% of ratEd input amperage of the
circuit breaker sizing up to 200!. of rated input amperage.
or
Input conductor size is for insulated copper wire with 75C rating with
(Table 31 0-16 of NEC).
3 Maximum
8
(13)
calculated from the 1993 edition of the National Electrical Code
1 Recommended fuse
allows fuse
(19)
not more than three
welding power source. Article 630-12(a) of NEC
single current-carrying conductors in a cable or raceway
between service entrance and
input terminals of the welding
power
source
(Articles
grounding conductorshall be colored or identified as specified in the NEC. Grounding conductor size forcopperwire is not required to be larger
input conductor (Article 250-95 of NEC).
Ref S-0092-G
OM-168 256
Page
8
SECTION 4- OPERATION
I WARNING
ELECTRIC SHOCK
kill.
can
Always wear dry insulating gtoves.
Insulate
yourself from
work and
Do not touch live electrical
Keep
all
panels and
~
~~-
ground.
parts.
securely
covers
ARC RAYS can burn eyes and skin;
NOISE can damage hearing.
p
in
S
I,
I
Keep ycur head
Ventilate area,
breathing
can cause
Do not weld
near
Watch for fire;
on
Allow work and
body protection.
injury.
can cause
moving parts.
covers, and
guards closed
and
device.
or
MAGNETIC FIELDS FROM HIGH CUR
RENTS can affect pacemaker operation.
explosion.
Pacemaker
wearers
keep away.
flammable material.
over
Wearers should consult their doctor before
:~
keep extinguisher nearby..
Do not locate unit
Do not weld
fire
away from
Keep all doors, panels,
securely in place.
~1
Read Material Safety Data Sheets (MSDS5) and
manufacturers instructions for material used.
WELDING
MOVING PARTS
Keep
out of the fumes.
or use
helmet with correct shade of filter.
place
be hazardous
can
welding
Wear correct eye, ear, and
~
FUMES AND GASES
to your health.
Wear
near arc
......
welding, gouging,
or
going
spot welding opera
tions.
combustible surfaces.
closed containers.
equipment to
cool before
See Safety Precautions at beginning of manual for ba
sic welding safety information
handling.
swam6i 1O/9~
1
4
~0
8~ ~
Range Switch
2
Polarity
3
Voltmeter
(Optional)
4
Ammeter
(Optional)
5
Amperage Adjustment Control
6
Power Push Buttons Switch
7
Pilot
8
OutputlContactor Switch
9
Amperage Control Switch
10
Arc Control
Switch
(Optional)
Light
Ref. 5T-155 048-A
Figure
4-1. Controls
W ear the
following
1
Dry, Insulating
2
Safety
3
Welding
while
welding:
Gloves
Glasses With Side
Shields
Helmet With Correct
Shade Of Filter (See ANSI
Z49.1)
sb3.1 1/94
Figure
4-2.
Safety Equipment
1
Tools Needed:
~===~
Work
Clamp
Connect work clamp to a clean,
paint-free location on workpiece,
as close to weld area as possible.
Use wire brush or sandpaper to
clean metal at weld joint area. Use
chipping hammer
after welding.
Figure 4-3.
Work
to remove
slag
sb4 1 2./93
Clamp
OM-168 256
Page
9
WARNING
ELECTRIC SHOCK
can
kill.
Do not touch live electrical parts.
Do not touch weld
output terminals when
Do not touch electrode and work
clamp
contactor is
energized.
at the same time
swarn7.1 10/91
1
Output/Contactor Switch
Use switch to select way of control
ling unit output.
Weld output terminals are energized
when switch is On and Power is On.
For weld output, place switch in On
position.
OUTPUT
For remote output control, place
switch in Remote 14 position (see
Section 3-4).
\~J?~ (CONTACTOR)
~14~N
Ref. ST-168 257
Figure
4-4.
Output/Contactor
Control Switch
1
Arc Force Control
(Dig)
This control is used for SMAW
welding and is used to help start an
arc or make vertical or overhead
welds (control increases amper
age at low arc voltage).
When set at 0, short-circuit amper
age at low arc voltage is the same
as normal welding amperage.
When set at 100, short-circuit am
perage at low arc voltage in
creases to
help
arc
starting.
Select setting best suited for appli
cation. Numbers around control
are
for reference
only.
Set control at 0 for GTAW welding.
Figure
OM-168 256
Page
10
4-5. Arc Control
RANGE
SWITCH
1
Range Switch
Use switch to choose
output range.
Low gives better low amperage ad
justment (use with Low scale on
HIGH
Amperage Adjustment control).
High gives better high amperage
adjustment (use High scale).
2
Amperage Adjustment
Control
Use
A
control
to
select
weld
amperage.
AMPERAGE
3
Amperage Control Switch
PANEL
14
Use switch to select way of control
ling amperage adjustment.
For front panel control,
switch in the Panel position.
3
For remote control, place switch in
Remote 14 position (see Section
Example Of Combinatloii Remote Amperage Control
3-4).
RANGE
SWITCH
HIGH
800
260
A
place
4
Remote
5
Remote Hand Dial
6
Remote Foot Control
Fingertip
Control
AMPERM3E
~c~J
5
O~NE1.
6
600
A
G*OUTPUT
(cONTACTOR)
i:~
510
87
.)~ Set Amperage
Set Switches
Control
ST-159 059 / S-0769
Figure
4-6.
Amperage Adjustment Controls
1
Power Push Buttons Switch
Use buttons to turn unit, fan motor,
and pilot light On and Off.
2
Pilot
Light
2
Figure
4-7. Power Push Buttons Switch And Pilot
Light
OM-168 256
Page
11
I
~JVARNING
a
ARCING
Do not
Arcing
can
damago
change Polarity
inside switch
can
switch contacts.
position while welding.
Switch
damage contacts, causing
switch to fail.
1
1
~~~OLARITY
(-)/%.
Polarity Switch
Use switch to select weld
SWITCH
(+)/~.
Li
ELECTRODE
NEGATIVE
polarity.
_______________
ELECTRODE
POSITIVE
DO NOT SWITCH UNDER LOAD
Figure
Polarity Switch (Optional)
4-8.
1
Voltmeter
Voltmeter displays voltage at the
weld output terminals, but not nec
essarily
cable
2
the
welding
resistance,
due to
arc
poor
connec
tions, etc.
2
Ammeter
Ammeter
displays weld amperage
output of unit.
Figure
\
}
))I
) WeldiD
Select
Electrode
Install&
Connect
Equipment
4-9. Voltmeter And Ammeter
))
)~
Put On
Personal Safety
Equipment
(Optional)
~\\
)
Set Controls
~,J)
Insert
Electrode
Into Holder
)~we)
Begin
ssb7.1 9/92
Figure
\
)
Install &
Connect
Equipment
j)~1stall
&
4-10.
Sequence
Connect~~
High-Frequency
Unit
Of Shielded Metal Arc
Select
~
J)
))
)~
O~I~) WeIdin~)
Insert
Tungsten (See
Section 7)
________________
____________
____________
)
On
Shielding Gas
Turn On
)
)
High-Frequen
Unit
Welding (SMAW)
Tungsten
Into Torch
______________
))I~~~ntrolD.~
Put On
Per sonal Safety
Equipment
________________
Turn
Powe
Source
Welding
Begin
______________
ssb8.1 12/92
Figure
OM-168 256
Page
12
4-11.
Sequence Of Gas Tungsten Arc Welding (GTAW)
SECTION 5- MAINTENANCE & TROUBLESHOOTING
I~WARNING
ELECTRIC SHOCK
can
Do not tcuch live electrical
MOVING PARTS
kill.
parts.
can cause
injury.
Keep away from moving parts.
Turn Off welding power source, and disconnect
input power before inspecting, maintaining, or
servicing.
HOT PAFITS
can cause severe
Allow
cooling
servicing.
period
before
burns.
maintaining
or
ance
to
be
performed only by qualified
Bwam8.1 2)93
5-1.
Routine Maintenance
Turn Off all power before
maIntaInIng.
3 Months
ST-000 599-H
Figure
5-1. Maintenance Schedule
OM-168 256 Page 13
5-2.
Overload Protection
a
READ SAFETY BLOCKS at start of
Sectio n 5 bet or e proceeding.
WARNING
~-~ffIj
-~
When overheated, thermostat
output stops, and cooling
fan keeps running.
Let fan run for
15 minutes.
opens,
Start
welding.
ssblO.1 1/94ST-000
599-H
Figure 5-2. Overheating
5-3.
Troubleshooting
~IVARNING
ELECTRC SHOCK
can
MOVING PARTS
kill.
Do not tcuch live electrical parts.
Keep
away from
can caus a
injury.
moving parts.
Turn Off
welding power source, and disconnect
input power before inspecting, maintaining, or
servicing.
HOT PARTS
Allow
can cause severe
cooling period
before
burns.
servicing.
Troubleshooting
to be
performed only by qualified
persons.
swam9.1 2/93
Table 5-1.
Welding
Trouble
No weld
output;
inoperative.
unit
Trouble
Section
Remedy
completely
-~
Place line disconnect switch in the On position.
3-5B
]
Check for open line luse(s), and replace if necessary. Check
and reset circuit breakers.
Check for proper
input connections.
Check for proper jumper link positions.
Thermostat TP1 opEn. Allow
fifteen minutes.
a
cooling
Check push button Power switch
obstructions.
No weld output;
pilot light PL1
on.
-~
Clean and
tighten
period of approximately
linkage for restrictions
or
3-5B
-~
3-5B
-~
3-5A
-~
5-2
-~
all weld connections.
Place Output (Contactor) switch in the On
Remote Contactor Control To RC1.
-~
-~
position
Check remote contactor control switch for proper
ohmmeter, and rEplace if necessary.
or
connect
operation
with
-~
-~
an
Have Factory Authorized Service Station/Service Distributor
check control board PCi.
OM-168 256
Page
14
-~
3-3
Figure
4-4
Trouble
Low
or
Remedy
1
minimum weld output.
-~
Check for proper lina
voltage.
Check for open line fuse(s), and
and reset circuit breakers.
Clean and
Place
---
replace if necessary. Check
all weld connections.
tighten
Amperage
Section
control switch in the correct
position.
Have Factory Authorized Service Station/Service Distributor
check control board PCi and/or hall device HD1.
Maximum weld output.
I-..
Erratic weld output.
Excessive line current
opens
or
line
fuse(s)
-~
--~
3-5B
--~
3-3
--~
Figure
4-6
--~
Have Factory Authorized Service Station/Service Distributor
check Amperage Adjustment control, control board PCi and/or
hail device HD1.
--~__
Check for proper input connections.
-.-~
Use proper size and
-
type electrode.
Check for proper input connections.
3-5B
-
3-5B
-~
repeatedly.
Check for proper
jumper link positions.
Check for shorted tan motor FM leads, and
Fan motor
inoperative and/or over-
-~
3-5A
repair
if necessary.
Check for fan blade obstruction.
-~
--
--
--
-~
--
heating.
Replace fan
Wandering
arc; poor control of arc
-~
motor
FM, if necessary.
Reduce gas flow rata.
direction.
Select proper size
Properly
Tungsten electrode oxidizing and not
remaining bright after conr~lusion of
-~
tungsten.
prepare tungsten.
Shield weld
zone
from drafts.
weld.
Increase
postf low time.
Check and tighten all gas
--~
fittings.
Water in torch. Refer to torch Owners Manual for
ing replacement, and repair torch as necessary.
---
part(s) requir
--a
OM-168 256
Page
15
NOTES
OM-168 256
Page
16
SIECTION 6- ELECTRICAL DIAGRAMS
u~
~
.~
w
Ui
>
>
I
F
U)
0
0~
I~ E
.~
0
.~
~
.~) ~
U
(.).~
0
~. Q)
g)
0
LL~
~
0
0
SC-137 779-A
Figure
6-1. Circuit
Diagram
For
Welding
Power Source
OM-168 256
Page
17
GND.
Figure
OM-168 256
Page
18
6-2.
GND.
Wiring Diagram
For
Welding
Power Source
zm 0
Cl)
0
C.)
0) 0)
-4 -.1 -4
(1 0) -u
cD
SECTION 7- TUNGSTEN ELECTRODE
mod2.1 1/94
N OTE
see yourdistributorfora handbookon the Gas Tungsten
Welding (GTAW) process.
Foradditionalinformation,
Arc
I
Wear clean
7-1.
Selecting Tungsten
gloves
to
prevent contamination of tungsten electrode.
Electrode
Table 7-1.
Tungsten Size
Amperage Range
Electrode Diameter
DC
Electrode
Argon
Negative/Straight Polarity
-
Gas
DC
Argon Electrode
Positive/Reverse Polarity
Type,
Polarity
-
AC
Argon UsIng
High Frequency
AC
Argon
Wave Using
Balanced
High Freq.
Pure
Tungsten
(Green Band)
Up
.010
*
to 15
.020
5-20
*
.040
15-80
Up
to 15
lip
to 10
5-20
10-20
*
10-60
20-30
1/16
70-150
10-20
50-100
30-80
3/32
125-225
15-30
100-160
60-130
1/8
225-360
25-40
150-210
100-180
5/32
360-450
40-55
200-275
160-240
3/16
450-720
55-80
250-350
190-300
1/4
720-950
80-125
325-450
250-400
Uptol5
2% Thorium Alloyed
Tungsten (Red Band)
.010
Upto25
Upto2O
.020
15-40
15-35
5-20
.040
25-85
*
20-80
20-60
1/16
50-160
10-20
50-150
60-120
3/32
135-235
15-30
130-250
100-180
1/8
250-400
25-40
225-360
160-250
5/32
400-500
40-55
300-450
200-320
3/16
500-750
55-80
400-500
290-390
1/4
750-1000
80-125
600-800
340-525
Upto2O
Up
Zirconium
Alloyed
Tungsten (Brown Band)
.010
.020
*
.040
15-35
5-20
*
20-80
20-60
*
1/16
3/32
*
1/8
*
5/32
*
*
*
3/16
1/4
Typical argon shielding gas flow
Not
rates are 15 to 35 cfh
(cubic
feet per
to 15
*
50-150
60-120
130-250
100-180
225-360
160-250
300-450
200-320
400-550
290-390
600-800
340-525
hour).
Recommended.
The figures listed are intendi~d
manufacturers.
OM-168 256
Page
20
as a
guide
and
are a
composite
of recommendations from American
Welding Society (AWS)
and electrode
S-0009
7-2.
Preparing TLungsten
1
1
Tungsten
2
Balled End
Electrode
Ball end of tungsten before welding
by applying either an ac amperage
slightly higher than what is recom
mended for a given electrode diam
eter (see NO TAG), or a dc elec
trode positive amperage.
2
Ret. S.0161
Figure
7-1.
Preparing Tungsten
For AC Oir DC Electrode Positive
(DCEP) Welding
~AUTION
F LYING SPARKS AND HOT METAL
can cause
injury
and start fires.
Shapetur~gsten electrode only on grinderwith proper guards in a safe location wearing properface, hand, and body protection.
Keep f(ammables away.
wam2.1 9/91
12
1
Tungsten
2
Tapered End
Electrode
Grind end of tungsten on fine grit,
hard abrasive wheel before weld
ing. Do not use wheel tor other jobs
or tungsten can become contami
nated causing lower weld quality.
kT-~
2-1/2 Times
Electrode Diameter
Ref. S.0161
1
i~:::::/~~
1
Stable Arc
2
Flat
Diameter of this flat detormines
amperage capacity.
3
Grinding
4
Straight Ground
Wheel
4
Ideal
Tungsten Preparation
Stable Arc
1
~
Ref. S.0162
1
Arc Wander
2
Point
3
Grinding Wheel
4
Radial Ground
~
~__,_~
4
Wrong Tungsten Preparation
Figure
7-2.
Preparing Tungsten
Wandering Arc
For DC Electrode
Ret. S-0162
Negative (DCEN) Welding
OM-168 256
Page
21
Cl) m C,
0 z Co
-I Cl)
!
C/) -I
13
)
4
14
17
16
18
2
25,~
I-I
19
21
8-5
Fig
20
8-6
Fig
11
0
0) 0) 1%) 0)
(0 cD F) r%)
C -Im
P -~
a
(a, (a,
3 a.
Dia.
Item
No.
Part
No.
Mkgs.
Description
Figure
1
4~006 016
109 035
.
.
.
2
006 017
..
3
4
026 627
..
004 214
..
5
091 164
..
6
134 771
035 279
Z
Fig
7
.
..
...
TEl
.
.
...
C21
.
.
.
..
.
.
..
.
.
.
.
8
.
.
9
.
.
.
9
10
ii
C22,23
...
PCi
RC1
PLG1
PLG2
.
.
8-2
..
..
..
..
038 138
..
..
137674
..
137771
..
097 918
..
084553
..
**~4~ 281
058 972
..
..
.
048 280
.
058 971
.
PANEL,
..
.
..
..
080 509
..
.
13
090 781
.
14
138 378
..
.
15
139785
..
137 055
.
137 057
.
.
..
137 056
..
..
.
16
Ti
...
17
18
.
19
.
20
.
.
21
...
SRi
039 210
Fig 8-6
.
.
..
22
.
23
24
.
25
.
R6
...
When
.
.
HA1,HD1
.
..
.
.
..
W
D10,ii
ordering
.
a
..
..
..
140 121
.
144 017
..
134826
137 900
082 456
..
1
1
1
1
2
1
rear
w/components
1
1
1
2
2
1
1
2
1
CONNECTOR, rect pin 20-i4ga Amp 350416-i
CONNECTOR, rect 29skt plug Amp 531590-3
GROMMET, scr No. 3/10 panel hole .312sq .375 high
035815
.
1
TERMINAL ASSEMBLY, triple voltage (Fig 8-3)
CAPACITOR
CAPACITOR
BRACKET, mtg terminal board
CIRCUIT CARD, root pass
CONNECTOR w/SOCKETS, (consisting of)
CONNECTOR, rect skt 20-l4ga Amp 350415-1
CONNECTOR & PINS, (consisting of)
.
..
2
STABILIZER
12
..
Assembly
PANEL, side
LABEL, warning electric shock can kill etc
COVER, top
GASKET, lifting eye
BUSHING, snap-in nyl 1.625 ID x 2.000mtg hole
FRAME, upright base
PLUG, protective .640sq
.
..
8-1. Main
Quantity
2
1
3
CIRCUIT CARD BO)(
BRACKET, mtg
rectilier
1
(included w/SR1)
2
BASE
1
TRANSFORMER, power main 220/380/400/415
(consisting of)
COIL, pri/sec RH 8i center
COIL, pri/sec LH
RESISTOR, WW fxd 375W 12 ohm
PANEL, front w/components
RECTIFIER, SCR (Fig 8-5)
BRACKET, mtg hall
CIRCUIT CARD, halli booster
..
KIT,
..
DIODE ASSEMBLY
1
2
1
1
1
1
1
1
1
contactor
component originally displaying
a
precautionary label,
1
the label should also be ordered.
**lncluded w/PC1.
BE SURE TO PROVIDE MODEL AND SERIAL NUMBER WHEN ORDERING REPLACEMENT PARTS.
OM-168 256 Page 23
Item
No.
Dia.
Part
No.
Mkgs.
Description
Figure
..1...FM..
116 190
..2
131 361
3
032611
158 289
4
8-2.
Quantity
Panel, Rear vt/Components (Fig 8-1 Item 7)
MOTOR, 1/l2hp 230V 1550rpm
CHAMBER, plenum 14 in
BLADE, fan 14 in 3wg 23cIeg .375 bore CCW
PANEL, rear
1
1
1
1
4-
ST-004 988-D
4
Figure
8-2.
Panel, Rear w/Components
5
7
ST-136 574
Figure
Part
No.
Item
No.
601 835
038 058
3.. .038887
4
010 913
Figure
1
.
.
.
.
.
2
.
.
.
.
.
.
.
.
.
5..
.
.
.
.
038618
.
.
6.. .601836
7
8
Assembly,
Pri
Description
038 138
..
8-3. Terminal
.
.
.
.
.
010 915
.
.
.
.
.
038 888
.
.
8-3. Terminal
Assembly,
Pri
(Fig
Quantity
8-1 Item
8)
NUT, brs hex 10-32
TERMINAL BOARD, primary
36
STUD,priboardbrslo-32x1.375
18
WASHER, flat brs .218 ID x .460 OD
LINK,jumpertermbdpri
NUT, brshex.250-2Ojam hvy
WASHER, flat brs .250 ID x .625 OD
STUD, pri board brs .250-20 x 1.500
1
x
.O3lthk
x
.O3lthk
6
BE SURE TO PROVIDE MODEL AND SERIAL NUMBER WHEN ORDERING REPLACEMENT PARTS.
OM-168 256
Page
24
18
6
6
3
I
Item
No.
Part
No
Description
Quantity
________
8-4. Switch, PB
046 745
Figure
059 885
BUTTON, push reset red
SPRING, cprsn .430 OD x .040 wire x 1 .SOOstnls
PUSH BUTTON SET, w/cable & housing
BRACKET, mtg switch PB
SWITCH, Jim leaf actg SPDT
..2... 018606
3... 045 546
4... 081 008
5... 027 878
(Fig
8-6 lltem
11)
5
1\~~
*9
4
ST-080 214-B
8-4.
Figure
Switch, PB
-S
5
6
7
8
4
5
6
ST-048 899-K
Figure
Item
No.
Dia.
Part
No.
Mkgs.
SRi
1
..
..
C7-12
140 121
Figure
048 420
.
.
082 852
.
.
3
4
048 779
.
.
082 694
.
.
028516
.
.
097 397
.
.
045 109
.
.
117275
.
.
.
.
.
.
.
..
.
.
SCR1 -6
..
TP1
.
.
.
..
..
.
.
.
.
026 701
8
114 530
Rectifier, SCR
Description
2
.
8-5.
8-5.
Rectifiei~ SCR (Fig
Quantity
8-1 Item
21)
CAPACITOR, rectifier
BUS BAR, output rec~ifier
HEAT SINK, rectifier snowflake 1.000
CLAMP, thyristor recl:ifier 5.500
PIN, spring CS .125x.250
THYRISTOR, SCR 300A 300V
HEAT SINK, rectifier snowflake 1.000
THERMOSTAT, NC
INSULATION, thermostat
BAR, mtg rectifier
6
2
6
3
12
6
3
1
1
2
BE SURE TO PROVIDE MODEL AND SERIAL NUMBER WHEN ORDERING REPLACEMENT PARTS.
OM-168 256
Page 25
N)
~?L__
I
/~
/
/
/
/
/
/
/
/
/
/
\
-
6
-9
0
N) C~)
\
N)
I) 0
C) C
CD Cl)
CD 3
-n CD C -ICD
0
0) 0)
01 0) -u CD CD 1~) 0)
C)
D)
CD
-n
0
N
Item
No.
Dia.
Part
No.
Mkgs.
Description
Figure
1
2
....
R3
...
....
S3
...
089085
Ri
...
084206
3
4
009 156
..
+158258
.
6
...
6
...
6
...
6
...
7
...
014
C15
C17
C18
RC1
...
143935
143934
...
143933
...
143936
...
143976
...
079 534
134734
134731
079 739
8
...
9
....
S2,4... 011609
R5
...
072462
...
072590
046745
10
11
PB1
12
04,5... 087337
13
20
NEG... 039046
POS... 039047
601976
039045
039049
601880
039044
601879
+109449
21
605583
22
134327
14
15
16
16
17
18
19
23...
PL1
...
25
+When
048573
097 926
097 922
24
ordering
a
w/Components (Fig
8-1 Item
20)
NAMEPLATE, (order by model and serial number)
POTENTIOMETER, C sltd sft 1/12W 2.5K ohm
PANEL, front
SWITCH, tgl SPST 20A 125VAC
RESISTOR, MF .25W 3.32K ohm
CONNECTOR, w/leads (consisting of)
LEAD ASSEMBLY, elect
LEAD ASSEMBLY, elect
LEAD ASSEMBLY, elect
LEAD ASSEMBLY, elect
CONNECTOR wTrERMINALS, (consisting of)
CONNECTOR, circ skt push-in 14-l8ga Amp 66358-6
CONNECTOR, circ 14 pin plug Amp 21 3571-2
CONNECTOR, circ pin push-in 14-l8ga Amp 21 3603-1
CONNECTOR, circ clamp str rlf Amp 206322-2
SWITCH, tgl SPDT iSA 125VAC
POTENTIOMETER, wishaft lock (consisting of)
LOCK, pot .375-32 x .250d1a shaft
SWITCH, PB (Fig 8-4)
CAPACITOR
TERMINAL, pwr outpul: black (consisting of)
TERMINAL, pwr outpul: red (consisting of)
SCREW, cap stl hexhd .500-13 x 1.500
TERMINAL BOARD, black
TERMINALBOARD, red
NUT, stl hex jam .500-13
BUS BAR, term bd
NUT, stl hex full .50013
DOOR, access front
CATCH, spr loaded door
130257
5
8-6. Panel, Front
Quantity
.
.
..
1
1
1
1
1
1
1
1
1
1
1
14
..
2
1
1
1
2
1
1
1
1
1
1
1
1
1
1
LABEL, warning general precautionary
LIGHT, md red lens 28V
1
KNOB, pointer
KNOB, pointer
1
component originally displaying
1
1
a
precautionary label,
the label should also be ordered.
BE SURE TO PROVIDE MODEL AND SERIAL NUMBER WHEN ORDERING REPLACEMENT PARTS.
OM-168 256
Page
27
Miller
April
Form:
1994
OM-168 256
Effective With Serial No. KE600689
OWNERS
MANI UAL
Gold Starfi 500SSX
CC/DC
Welding
Power Source
For SMAW and GTAW
Welding
510 Amperes, 41 Volts DC, At 35%
Requires Three-Phase,
Overheating
Arc
50/60 Hz
Duty Cycle
Input Power
Protection
(Dig) Control
Give this manual to the operator.
Read and follow these instructions and all
blocks carefully.
safety
Have
only trained and qualified persons
install, operate,
or
For
service this unit.
Call ycur distributor if you do not understand
the directions.
cov&
1/94
-
ST-000 599-H
'
IJ
1994 MILLER E~ectflc
or:
help,
call your distributor
MILLER Electric Mfg. Co., P.O. Box 1079,
414-734-9821
WI 54912
Appleton,
Mfg. Co.
PRINTED IN usA
I
J
TRUE BLUETM LIMITED WARRANTY
MILLERS
Effective
(Equipment
-
a
January 1. 1992
preface of KC~
serial number
all previous MILLER marrasties and is exclusive with
supersedes
This limited warranty
with
the terms and conditions below. MILLER Electric
Subjectto
Mfg. Co., Appleton. Wisconsin, warrants
LIMITED WARRANTY
to its
original
retail purchaser that
other guarantees or warranties expressed or
implied.
Remote Controls
new
Accessory Kits
MILLER equipment sold after the effective dale of this limited warranty is tree of de
fects in material and workmanship at the time it is shipped by MILLER THIS WARRANTY IS EXPRESSLY IN LIEU OF ALL OTHER WARRANTIES. EXPRESS OR
-
no
newer)
or
Replacement Pans
T~ue
MILLERS
IMPLIED. INCLUDING THE WARRANTIES OF MERCHANTABILITY AND FIT
Limited Warranty shall not
Blue
apply
to:
NESS.
-
1.
by MILLER. but manufactured by others, such as engines or
trade accessories. These items are covered by the manufacturers warranty, if
2.
Consumable components: such
Items furnished
Within the warranty periods listed below, MILLER will repair or replace any war
ranted parts or components that fail due to such defects in material or workmanship.
MILLER must be notified
in
writing within thirty (30) days of such defect
which time MILLER will provide instructions on the warranty claim
followed.
MILLER shall honor warranty claims
event of such a failure within the
start on the dare
one
on
or
any.
failure, at
procedures lobe
and
warranted equipment listed below in the
All warranty time periods
original
or
contact
as
pans that fail due to normal
Equipment that
3
tips, cuBing nozzles, contscfors
wear.
has been modified
mcxl that has been
warranty time periods.
hat tee equipment was delivered to the
relays
by any party other than MILLER, or eqsip
improperly installed, improperly operated or misused
based upon industry standards, or esuipmenl which has not had reasonable
and necessary maintenance, or equipment which has been used for operation
retail purchaser, or
year after the equipment is sent to the distributor.
outside of the specifications for the equipment.
r.
5 Years Pans
MILLER PRODUCTS ARE INTENDED FOR PURCHASE AND USE BY COMMER
CIALINDUSTRIAL USERS AND PERSONS TRAINED AND EXPERIENCED IN
main power rectdiers
Original
*
2.
3 Years Labor
THE USE AND MAINTENANCE OF WELDING EQUIPMENT
Pans and Labor
3 Years
Transformer/Rectifier Power Sources
*
Plasma Arc
Cutting
li-i the event of a
3.
Robots
Pans and Labor
2 Years
Engine Driven Welding Generators
(NOTE Engines are warranted separately by
tsr a perisd of Iwo years.)
Air Compressors
4.
vice
the
engine
manufacturer
Systems
Grids
*
Spot
Load Banks
Gear/Trailers
covered under True Blue
are
warranty period of the product they
one
B Months
6.
90
year
whichever
are
installed
Some states
for the remaining
minimum of
lasts,
in, or br a
greater.)
is
or
the U.S A
do not allow limitations of how
special
or
long an implied warranty
consequential damages, so
Batteries
or
Pans and Labor
MIG GurisiTIG
Plasma
Torches
legislation
in some orovinces
remedies other than
waived,
*
in
the euclusion of incidental, indirect,
the above limitation or seclusion may not apply to you. This warranty provides spe
cific legal rights, and other rights may be available, but may vary from state to slats.
In Canada,
Days
BASED ON CON
Options
(NOTE. Field sprions
S
reimburse
CLUDING ANY IMPLIED WARRANTY OF MERCHANTABILITY OR FITNESS
FOR PARTICULAR PURPOSE, WITH RESPECT TO ANY AND ALL EQUIPMENT
FURNISHED BY MILLER1S EXCLUDED AND DISCLAIMED BY MILLER.
SDX Transformers
Field
or
RANTY. GUARANTY OR REPRESENTATION AS TO PERFORMANCE, AND ANY
REMEDY FOR BREACH OF CONTRACT TORT OR ANY OTHER LEGAL
THEORY WHICH, BUT FOR THIS PROVISION. MIGHT ARfSE BY IMPLICATION,
OPERATION OF LAW, CUSTOM OF TRADE OR COURSE OF DEALING, IN
Welders
Running
facility as determined by MILLER. Therefore no compensation
transportation costs of any kind wilt be allowed
ANY EXPRESS WARRANTY NOT PROVIDED HEREIN AND ANY IMPLIED WAR
HF Units
*
by this warranty, the exclusive remedies
(2) replacement: or. where authorized in
DAMAGES (INCLUDING LDSS OF PROFIT), WHETHER
TRACT TORT OR ANY OTHER LEGAL THEORY
Process Controllers
Water Coolant
repair: or
TO THE EXTENT PERMITTED BY LAW, THE REMEDIES PROVIDED HEREIN
ARE THE SOLE AND EXCLUSfVE REMEDIES. IN NO EVENT SHALL MILLER BE
LIABLE FOR DIRECT INDIRECT SPECIAL. INCIDENTAL OR CONSEQUENTIAL
Motor Driven Guns
*
)fl
ment for
Parts and Labor
Year
1
claim covered
ootron:
writing by MILLER in appropriate cases. (3) the reasonable cost of repair or replace
ment stan authorized MILLER service station: or (4) payment ofor credit for the pur
chase price (less reasonable depreciation based upon actual use) upon return of the
goods at customers risk and expense. MILLERS option of repair or replacement
will be F 0 B Factory at Appleton. Wisconsin, or F O.B. eta MILLER authorized ser
Semi-Automatic and Automatic Wire Feeders
*
warranty
shall be. at MILLERS
Power Sources
Warranfy
as
provides for
certain additional warranties
stated herein, and to the extent that
they may
not be
he limitations and exclusions set out above may not apply. This Limited
provides specific legal rights, and other rights may be available, but may
vary from province to Brovrnce.
Cutting Torches
aI
fi
RECEIVING-HANDLING
Unpacking equipment, check carton for any damage that may have occurred during shipment.
delivering carrier. Assistance for filing or settling claims may be obtained from distributor
Transportation Department.
Before
with the
File any Claims for loss or damage
and/or equipment manufacturers
-
When
requesting information
Use the
or
following
about this
equipment, always provide
spaces to record Model
Designation
and Serial
or
Model
Style
Designation
and Serial
or
Style Number.
Number of your unit. The information is located
on
the
rating label
nameplate.
Model
__________
Serial
or
Style
No.
Date of Purchase
miller 9/93
ARC WELDING SAFETY PRECAUTIONS
I
WARNING
ARC WELDING
be hazardous.
can
PROTECT YOURSELF AND OTHERS FROM POSSIBLE SERIOUS INJURY OR DEATH. KEEP CHILDREN
AWAY. PACEMAKER WEARERS KEEP AWAY UNTIL. CONSULTING YOUR DOCTOR.
In welding, as in most jobs, exposure to certain hazards occurs. Welding is safe when precautions are taken. The
safety information given below is only a summary of the more complete safety information that will be found in the
Safety Standards lisl:ed on the next page. Read and follow all Safety Standards.
HAVE ALL
INSTALLATION, OPERATION, MAINTENANCE,
AND REPAIR WORK PERFORMED ONLY BY
QUALIFIED PEOPLE.
ELECTRIC SHOCK
can
kill.
5.
Touching live electrical parts can cause fatal shocks
or severe burns. The electrode and work circuit is
electrically live whenever the output is on. The input
power -circuit and machine internal circuits are also
live when power is on. In semiautomatic or automatic
wire welding, the wire, wire reel, drive roll housing,
and all metal parts touching the welding wire are
electrically live. Incorrectly installed or improperly
grounded equipment is a hazard.
1.
Do not touch live electrical parts.
2.
Wear
3.
dry, hole-free insulating gloves and body protection.
Insulate yourself from work and ground using dry insulating
6.
Disconnect input power
servicing this equiprrent.
or
~
...
or
burn eyes and
can
skin;
damage hearing.
can
equipment according
making input connections,
When
7.
Turn off all
8.
Do not
to its
attach proper
grounding
equipment when
use
not in use.
damaged, undersized,
worn,
poorly spliced
or
cables.
Do not wrap cables around your
body.
10.
Ground the
electrical
11.
Do not touch electrode if in contact with the work
12.
Use
9.
13.
14.
ARC RI~YS
NOISE
stop engine before installing
this
ground
Manual and national, state, and local codes.
conductor first.
mats or covers.
4.
install and
Properly
Owners
workpiece
to a
good
well-maintained
only
damaged parts
a
Keep
all
or
Repair
ground.
replace
or
at once.
harness if
safety
Wear
equipment.
(earth) ground.
and
panels
above floor level.
working
securely
covers
in
place.
ARC RAYS
2.
Wear
helmet fitted with
welding
a
a
proper shade of filter (see
Safety Standards) to protect your face and
eyes when welding or watching.
Wear approved safety glasses. Side shields recommended.
ANSI Z49. 1 listed in
Arc rays from the welding process produce intense
heat and ~trong ultraviolet rays that can burn eyes
and skin. Noise from some processes can damage
3.
4.
hearing.
protective screens or barriers to protect others from flash
glare; warn others not to watch the arc.
Wear protective clothing made from durable, flame~esistant
material (wool and leather) and foot protection.
Use
and
NOISE
5.
1.
Use
approved
ear
plugs
or ear
muffs if noise level is
FUMES AND GASES
can
high.
be hazardous
5.
to your health.
Weldingproducesfumesandgases. Breathingthese
fumes and gases
be hazardous to your health,
can
6.
Keep
2.
If inside, ventilate the area and/or use exhaust at-the arc to
.
remove
3.
4.
welding
an
Safety Data Sheets (MSDSs)
and the
coatings,
explosion.
5.
Watch for fire, and
6.
Be
fire
or
aware
yourself
and others from
flying sparks
4.
11.
possible,
t
ghtly
cover
FLYING SPARKS AND HOT METAL
cause
can
Do not
spraying
galvanized, lead,
as
coating
or
is removed from the
fire
extinguisher nearby.
ceiling, floor, bulkhead,
on
closed containers such
paths
use
and
causing
as
partition
as
tanks
or
drums.
close to the
electric shock and fire hazards.
welder to thaw frozen
pipes.
tip when
Wear oil-free
or
Wear
cut off
welding
wire at
not in use.
protective garments
such
as
shirt, cuffless trousers, high shoes, and
1.
or
the hidden side.
on
Remove stick electrode from holder
contact
approved face shield
or
leather
a
gloves, heavy
cap.
safety goggles. Side
shields
recommended.
injury.
Chipping and grinding cause flying
cool, they can throw off slag.
or
react with vapors to
welding area as
practical to prevent welding current from traveling long, possibly
and hot metal.
Be alert that welding sparks and hot materials from welding can
easily go through small cracks and openings to adiacent areas.
this is not
can
a
on a
Do not weld
10.
flying sparks
fire
keep
welding
Connect work cable to the work
(10.7 m) of the welding arc. If
them with approved covers,
Remove all flammables within 35 ft
can
is well ventilated, and if necessary, while
8.
strike flammable material.
Do not weld where
3.
unless the
7.
9.
2.
that
can cause
unknown
1,
area
Sparks and spatter fly off from the welding arc. The
flying sparks and hot metal, weld spatter, hot
workpiece, and hot equipment can cause fires and
burns. Accidental contact of electrode orwelding wire
to metal o~iects can cause sparks, overheating, or
can cause
degreasing~cleaning,
wearing an air-supplied respirator. The coatings and any metals
containing these elements can give off toxic fumes if welded.
fire.
Protect
plated steel,
weld area, the
and cleaners,
WELDING
near
Do not weld on coated metals, such
cadmium
approved air-supplied respirator.
instruction for metals, consumables,
Read the Material
manufacturers
7.
fumes and gases.
If ventilation is poor, use
Do not weld in locations
operations. The heat and rays of the arc
form highly toxic and irritating gases.
f the fumes. Do not breathe the fumes,
your head out
1.
a confined space only if it is well ventilated, or while
wearing an air-supplied respirator. Shielding gases used for
welding can displace air causing injury or death. Be sure the
breathing air is safe.
Work in
metal. As welds
2.
Wear proper
body protection
to
protect skin.
Sri 9/92
CYLINDERS
explode
can
if
damaged.
Keep cylinders away from any welding
3.
or
other electrical
circuits.
Shielding
gas cylinders contain gas under high
pressure. If damaged, a cylinder can explode. Since
gas cylinders are normally part of the welding
process, be sure to treat them carefully.
Never allow
a welding electrode to touch any cylinder.
Use only correct shielding gas cylinders, regulators, hoses, and
4.
5.
associated
Protect compressed gas cylinders
mechanical shocks, and arcs.
2.
cylinders in
them to a stationary support
prevent falling or tipping.
Install and
an
secure
or
from
excessive
heat,
Engines produce harmful
Keep protective cap
place over valve except when cylinder is
in
connected for
use or
use.
Read arid follow instructions
8.
associated
equipment,
FUEL
ENGINES
can
kill.
compressed gas cylinders.
publication P-i listed in Safety
on
and CGA
can
fire
cause
or
be hazardous.
can
outside in open, well-ventilated
1.
Use
2.
If used in
closed area, vent engine exhaust outside and
away from any building air intakes.
1.
Stop engine before checking
2.
Do not add fuel while
exhaust gases.
explosion.
4~j~
Turn face away
Standards.
ENGINE EXHAUST GASES
ENGINE
in
7.
WARNING
a
for the
parts
6.
in
upright position by chaining
equipment cylinder rack to
specific application: maintain them and
good condition.
from valve outlet when opening cylinder valve.
fittings designed
equipment
areas.
a
adding fuel.
or
smoking
or
if unit is
near
any sparks
or
open flames.
3.
Engine
fuel is
flammable.
highly
Allow
engine to cool before fueling. If possible,
engine before beginning job.
check and add
fuel to cold
4.
Do not overfill tank
5.
Do not
spill
allow
fuel. If fuel is
for fuel to expand.
spilled, clean up before starting
room
engine.
MOVING PARTS
can cause
injury.
3.
only qualified people remove guards or
troubleshooting as necessary.
Have
covers
for
maintenance and
Moving parts, such as fans, rotors, and belts can
fingers and hands and catch loose clothing.
4.
To prevent accidental starting
negative () battery cable from
5.
Keep hands, hair, loose clothing, and tools away from moving
parts.
cut
1.
Keep all doors, panels,
securely in place.
2.
Stop engine before installing
covers,
and
guards
closed and
6.
or
connecting
unit,
explosive
STEAM AND PRESSURIZED HOT
COOLANT can burn face, eyes, and
skin.
(-~
~
~
The coolant in the
r adiator can
panels
or
guards and close doors
starting engine.
when
disconnect
servicing
is
finished and before
SPARKS can cause BATTE RY GASES
TO EXPLODE; BATTERY ACID can
burn eyes and skin,
Batteries contain acid and generate
gases.
Reinstall
during servicing,
battery.
wear
face
s hield
working
when
1.
Always
2.
Stop engine before disconnecting
a
on a
battery.
connecting battery
or
cables.
3.
Do not allow tools to
4.
Do not
5.
Observe correct
1.
Do not
use
remove
sparks when working
cause
welder to
charge
polarity (+
batteries
and
)
radiator cap when
on
or
on a
battery.
jump start vehicles.
batteries.
engine
is hot. Allow
engine
to cool.
2.
Wear
gloves and put a rag
3.
Allow pressure to escape before
over
cap
area
when
removing cap.
be very ho t and
under pressure.
completely removing
cap.
PRINCIPAL SAFETY STANDARDS
Safety in Welding and Cutting, ANSI Standard Z49.1, from
Welding Society, 550 NW. LeJeune Rd. Miami FL 33126
American
Safe
Handling
of
Compressed Gases
in
Cyfinders, CGA Pamphlet
P-i, from Compressed Gas Association, 1235 Jefferson Davis High
way, Suite 501,
Arlington,
VA 22202.
Safetyand Health Standards, OSHA
29 CFR 1910, from Superinten
dent of Documents, U.S. Government Printing Office, Washington,
D.C. 20402.
Preparation for Welding and
Cutting of Containers That Have Held Hazardous Substances, Ameri
can Welding Society Standard AWS F4. 1, from American Welding So
Safety in Welding and Cutting, CSA Standard WI 17.2, from
Canadian Standards Association, Standards Sales, 178 Rexdale Bou
levard, Rexdale, Ontario, Canada M9W 1 R3.
Code for
Recommended Safe Practices for the
ciety, 550
N.W. LeJeune Rd, Miami, FL 33126
National Electrical Code, NFPA Standard 70, from National Fire Pro
tection Association, Batterymarch Park, Quincy, MA 02269.
sri 9192
Safe Practices For Occupation And Educational EyeAnd Face Protec
tion, ANSI Standard Z87.1, from American National Standards
Institute, 1430 Broadway, New York, NY 10018.
Cutting And Welding Processes, NFPA Standard SiB, from National
Fire Protection Association, Batterymarch Park, Quincy, MA 02269.
PRECAUTIONS
SECURITE
DE
E EN GARDE
LE SOUDAGE
PROTEGEZ-VOUS, AINSI QUE LES AUTRES, CONTRE
A LARC
dangereux.
NAIENT
CONSULTE UN MEDECIN).
Ia plupart des activitØs industrielles, expose a ~ertains risques. Le soudage nest pas dangereux lorsquon prend des
consignes de sØcuritØ suivantes ne font que rØsumer rinfomiation contenue dans les normes ØnumØrØes ci-aprŁs. Lisez et
comme
Les
toutes
respectez
est
LES BLESSURES GRAVES POSSIBLES OU LA MOnT. NE LAISSEZ PAS LES
ENFANTS SAPPROCHIER, NI LES PORTEURS DE STIMULATEUR CARDIAQUE (A MOINS QUILS
Le soudage,
precautions.
A LARC
EN SOUDAGE
ces nonnes.
SEULES DES PERSONNES QUALIFIEES DOIVENT FAIRE DES TRAVAUX DINSTALLATION, DE
DESSAI.
LELECTROCUTlON
peut Œtre mortelle.
5.
dechargo electnquo peut vous tuer ou vous
bn~lergravement. L.Ølectrode et le circuit de soudage
sont sous :ension au demarrage. Le circuit dentrØe et
les circuit:~ internes des matØriels sont aussi
tension des Ia mise
en
sous
En soudage
dernier, le support de
3.
lsolez-vous do la tlE~ a souder et de Ia mise a Ia terre
4.
de petits tapis isolants ou autres.
DØconnectez Ia pnse dentrØe des matŁriels
moteur avant de
C~
es
installer
ou
locaux
6.
7.
marche.
automatiquo ou semi-automatique avec fil, ce
roquette, le logement des galets dentrainement et toutes les piŁces
metalliques en contact avec le fil de soudage sont sous tension. Des
matØnels mal installØs ou mal mis a Ia terre sont dangereux.
1. Ne touchez pas a des piŁces sous tension.
2. Portez des gants et des vØtements isolants, secs et non trouØs.
au
8.
9.
ces
DENTRETIEN
matØriels eta
es
et los codes
nationaux, provinciaux
ET
mettre ala terre selon le
et
applicables.
ArrŒtez tous los matØnels aprŁs utilisation.
Nutilisez pas de cables uses, endommagØs, mal
ØpissØs ou
calibre trop petits.
Nenroulez pas de cables autour do votre corps.
Mettez ala terre a tOlo a souder au moyen dune bonne
de
prise do
terre.
10.
Ne touchez pas a lØlectrode
circuit de
11.
si
vous
Œtes
10
en contact avec
soudage (terre).
en bon Øtat. RØparez ou remplacez
piŁces endommagees.
Nutilisez que des matØnels
sur-le-champ
moyen
arrØtez leur
ou
Veillez a installer
manuel dutilisation
Une
REPARATION,
les
harnais de sØcuntØ si
travaillez
hauteur.
12.
Portez
13.
Fermez solidement tousles panneaux et los capots.
un
vous
en
den faire Ientretien.
Le RAYONNEMENT DE LARC
peut
brUler les yeux et Ia peau; Ie BRUIT peut
endommager I ouie.
2.
que vous observez IexØcution dune soudure.
Portez des lunettes do sØcuntØ approuvØes. Des Øcrans latØraux
sont recommandØos.
3.
Larc de
Entourez laire de soudage do ridoaux ou do cloisons do
protection contre les coups darc ou lOblouissement; avortissez
les obsorvateurs do no pas regardor Iarc.
Portez des vØtoments en tissus ignifugo durable (lame et cuir)
sDudage produit une chalour ot des rayons
ultraviolets intenses, susceptiblos do brUler les yeux et Ia peau. Le
bruit cause par cortains procØdes pout endommager louIe.
4.
casque de soudeur avec Łcran filtrant do teinto
(consultez Ia norme ANSI Z49 indiquŁe ci-aprŁs),
5.
Portez un casque antibruit ou des bouchons doroillo
si le nivoau de bruit est ØlovØ.
5.
No travaillez dans un ospace confine quo sil ost bien ventilØ;
sinon, portez un respirateuraadduction dair. Les gaz protocteurs
de soudage peuvent deplacer loxygene do lair et causer des
1.
Portez
un
appropnØe
pour vous proteger 1 visage et los youx lorsquo vous soudez ou
I
I
Les VAPEURS ET LES
FUMEES
sont
dangereuses pour Ia sante.
Le soudao degage des vapours of des fumØes quil
est dangereux do respiror.
1. Ecariez 10 visage pour Øviter de rospirer les
~
U
et des chaussures de sØcuritØ.
blessures
6.
assurez-vous quo lairo do soudago est bien
que los fumØes et los vapours sont aspirØos a arc.
Si Ia ventilation est mauvaise, portez un respirateur adduction
3.
dair
4.
ou
approuvØ.
Lisoz
es
rolatives
fiches
aux
revŒtements et
sigiialŁtiques
mØtaux,
aux
aux
toxiques
7.
et los consignos du fabncant
produits consummablos, aux
incendie
causer un
5.
explosion.
6.
produit des Øtincelles ot dos projections. Avoc Ia
chaleur intense degagee par a tle et los matØriels,
causer un
incondie et dos brlures.
IØlectrode
des Øtincolles,
7.
Le
un
Un
objet
Łchauffement
ou un
avec
8.
ainsi quo les autres, contre los Øtincelles et los
Protegez-vous,
projections.
2.
Ne soudoz pas daris un endroit o dos Øtincelles pouvont
atteindre des matØriaux inflammables.
4.
Enlevez toutes les rnatiŁres inflammablos dans
ou
couvrez-les
un
rayon de
soigneusemont
avec
MØfiez-vous des Łtincelles et des Øclats brOlants,
de penŁtrer dans des aires
ou
et irritants.
MØfiez-vous des incendies et
gardez
un
extinctour a
portØe
de
quune soudure sur un plafond, un plancher, une
paroi peut en enflammer lautro ctØ.
Ne soudez pas un recipient fermØ, comme un reservoir ou un
Noubliez
pas
ou une
adjacentes
soudago be plus prŁs possible do Ia tOle
soudage pour empØchor 10 courant do suivre un parcours
long et inconnu, ot prØvonir ainsi los risques dØbectrocution of
Connectez 10 cable de
do
1.
10,7 metres autourdo arc,
des bches approuvÆes.
do
Ne soudez pas do fobs galvanisØes ou plaqueos en p10mb ou
en cadmium sans les avoir grattees a fond, car ces mØtaux, et
cloison
incendie.
3.
dØgraissage,
tonneau.
contact axidontol do
metallique pout provoquer
do
Ia main.
Larc
elles peuvent
proximitØ doperations
tout revØtement qui en contiont, peuvent alors degagor des
fumØes toxiques. Assurez-vous dune bonne ventilation et portez
un respirateur a adduction dair Si cest nØcessaire.
produits nettoyants.
Le SOUDAGE peut
ou une
Ne soudez pas a
nettoyago ou de pulvensation. La chaleur.et los rayons do larc
peuvent reagir avoc des vapeurs ot former des gaz hautement
A IintØrieur,
ventilØe
Ia mort. Assuroz-vous quo lair est propre a Ia
respiration.
fumØes.
2.
ou
approuvØs
par de
susceptibles
petites ouvertures
fissures.
___________________________________________
dincendie.
9.
10.
Ne faites pas dOgeber des tuyaux avec un chalumeau.
Vidoz votre carquois porte-electrodes ou coupez 0 fib au tubecontact
11.
aprŁs
be
soudage.
Portez des vŁtoments protecteurs non huibeux, tols des gants en
cuir, uno chemise Øpaisse, un pantabon sans rovers, des
chaussures montantes et
un
casque.
>
LES ETINCELLES ET LES
PROJECTIONS BRULANTES peuvent
causer des blessures.
Le
piquage
et le
meulage produisent
Les BOUTEILLES
1.
des Øclats de
endommagØes peuvent
2.
4.
5.
exploser.
Les bouteilles contiennent des gaz protecteurs sous
haute pression. Des bouteilles endommagØes peuvent
exploser. Comme les bouteilles font normalement
6.
partie du procØdØ de soudage, traitez-les avec sam.
1. Les bouteilles doivent Œtre protØgØes contre es sources de
chaleur intense, les chocs et les arcs de soudage.
8.
7.
Enchamnez verticalement es bouteilles a un support ou a un
cadre fixe pour les empŒcher de tomber ou dŒtre renversØes.
3. ~Eloignez es bouteilles de tout circuit Ølectnque ou de soudage.
2.
metal. En refroidissant, Ia soudure peut projeter du laitier.
Portez un Øcran facial ou des lunettes a coques approuvØes.
Des Øcrans latØraux sont recommandØs.
Portez des vŒtements de protection individuelle appropriØs.
Empechez tout contact entre une bouteille et une electrode.
Nutilisez que des bouteilles de gaz protecleur, des dØtendeurs,
des flexibles et des raccords concus pour chaque application
spØcifique: ces matØriels et les piŁces connexes doivent Œtre en
bon Øtat.
Ne mettez pas le visage devant le robinet de bouteille en
louvrant.
Remettez le chapeau de bouteille apres utilisation.
Lisez et respectez les consignes relatives aux bouteilles de gaz
comprime et aux matØriels connexes, ainsi que Ia publication
P-i de Ia CGA, ØnumØrØes dans les normes ci-dessous.
MISE EN GARDE
Les GAZ
Les MOTEURS peuvent Œtre
DECHAPPEMENT D ES MOTEURS
ETRE MORTELS.
1.
des gaz
produisent
dechappemertt
Utilisez des machines a lextØrieur dans des aires ouvertes et
2.
Si
utilisez des machines dans
vous
fumØes
dechappement
endroit confine, les
doivent Œtre envoyØes a lextØneur, loin
un
des pnses dair du bÆtiment.
Le CARBURANT peut causer un incendle ou
une
3.
explosion.
Le carburant est hautement inflammable.
1. ArrŒtez le moteur avant de verifier le niveau de
carburant ou de faire le plein.
2.
Ne faites pas le
plein
en
fumant
ou
proche
dune
4.
source
Des PIECES EN MOUVEMENT peuvent
causer
4.
1.
Assurez-vous que les portes, les panneaux,
protecteurs
es
capots
5.
Avant dinstaller
3.
Seules des personnes
ou
de connecter
ne pas renverser de carburant. Nettoyez tout
carburant renversØ avant de faire dØmarrer le moteur.
ou des capots pour faire lentretien ou le dØpannage
nØcessaire.
Pour empŒcher un demarrage accidentel dun systŁme pendant
lentretien, dŁbranchez le cable daccumulateur a Ia borne
negative.
Napprochez
pas les mains
ou
les cheveux de
piŁces
en
mouvement; elles peuvent aussi accrocher des vØtements
et les
sont bien fermØs.
2.
expansion.
Faites attention de
protecteurs
des blessures.
Des piŁces en mouvement, telles des ventilateurs,
des rotors et des courroies peuvent couper les doigts
et es mains, ou accrocher des vŒtements amples.
son
et des outils.
RŁinstallez les capots ou les protecteurs et fermez les portes
aprŁs des travaux dentretien et avant de faire dØmarrer le
amples
un
systŁme, arrŒtez-en
le
6.
moteur.
qualifiØes
doivent dØmonter des
Des E11NCELLES peuvent FAIRE EXPLOSER
UNACCLJMULATEUR; LELECTROLYTE DUN
ACCUMULATEUR peut brUler Ia peau et les
moteur.
2.
3.
yeux.
Les accumulateurs contiennent de lØlectrolyte
des vapeurs explosives.
1. Portez toujours un Øcran facial en travaillant
et
4.
sur
5.
ET
DE
VAPEUR
LE
LIQUIDE
REFROIDISSEMENT BRLANT
sous
1.
PRESSION peuvent brUler Ia peau et
2.
dØgagent
La
es
un accumufateur.
ArrŒtez le moteur avant de connecter ou de dØconnecter des
cables daccumulateur.
Nutilisez que des outils anti-Øtincelles pour travailler sur un
accumulateur.
Nutilisezpasunpostedesoudage pourchargerun accumulateur
ou connecter provisoirement un vØhicule.
Utilisez Ia polantØ correcte (+ et -) de laccumulateur.
Notezpaslebouchonderadiateurtantquelemoteurnapas
refroidi.
3.
veux
Mettezdesgantsetposezuntorchonsurlebouchonpourloter.
Laissez Ia pression sechapper avant doter complŁtement le
bouchon.
Le liquide de ref roidissement dun radiateur peut etre
brUlant et sous pression.
PRINCIPALES NORMES DE
Safety in Weldingand Cutting norme ANSI Z49. 1, American Welding
Society, 550, N.W. LeJeune Rd., Miami FL 33128.
and Health Standards OSHA 29 CFR 1910, Superintendent
of Documents, U.S. Government Printing Office, Washington D.C.
20402.
SECURITE
Safe Handling of Compressed Gases in Cylinders document P-i,
Compressed Gas Association, 1235 Jefferson Davis Highway, Suite
501, Arlington, Va 22202.
Safety
Recommended Safe Practices For the Preparation For Welding and
Cutting of Containers That Have Held Hazardous Substances norme
AWS F4.1, American Welding Society, 550, N.W. LeJeune Rd.,
Miami FL 33128.
norme 70 NFPA, National Fire Protection
Association, Batterymarch Park, Quincy, MA 02269.
National Electrical Code
srlt 9191
Code for Safety in Welding and Cutting norme CSA Wi 17.2, Asso
ciation canadienne de normalisation, Standards Sales, 176 Rexdale
Boulevard, Rexdale, Ontario, Canada M9W 1 R3.
Safe Practices for Occupation and Educational Eye and Face Protec
norme ANSI Z87. 1, American National Standards Institute, 1430
Broadway, New York, NY 10018.
jj~,
and Welding Processes norme 51 B NFPA, National Fire
Protection Association, Batterymarch Park, Quincy, MA 02269.
Cutting
~
~
I
dØtincelles ou dune flamme nue.
Si cest possible, laissez le moteur refroidir avant de faire le plein
de carburant ou den vØnfier le niveau au debut du soudage.
Ne faites pas le plein de carburant a ras bord : prØvoyez de
lespace pour
5.
I
I
bien ventilØes.
PEU VENT
Les moteurs
nocits.
I
dangereux.
26
25
24
22
EMF INFORMATION
Considerations About
NOTE ~
Magnetic
Welding And
The Effects Of Low
Frequency
Electric And
Fields
following is a quotation from the General Conclusions Section
Congress, Offics of Technology Assessment, Biological
Effects of Power Frequency Electric & Magnetic Fields
Background Paper, OTA-BP-E-53 (Washington, DC: U.S.
Government Printing Officl3, May 1989): ~.
there is now a very
large volume of scientific findings based on experiments at the
cellular level and from studi3s with animals and people which clearly
establish that low frequency magnetic fields can interact with, and
produce changes in, biological systems. While most of this work is
of very high quality, the results are complex. Current scientific
undeTstanding does not yet allow us to interpret the evidence in a
single coherent framework. Even more frustrating, it does not yet
allow us to draw definite conclusior~s about questions of possible
risk or to offer clear science-based advice on strategies to minimize
The
To reduce
of the U.S.
procedures:
magnetic
fields in the
workplace,
1.
Keep cables close together by twisting
2.
Arrange cables
3.
Do not coil
4.
Keep welding power
practical.
5.
Connect work clamp to workpiece
or
use
taping
to one side and away from the
the
following
them.
operator.
.
or
avoid potential risks.
or
drape cables
around the
body.
source and cables as far
as
away
as
close to the weld
as
possiblp.
About Pacemakers:
The above procedures are among those also normally
recommended for pacemaker wearers. Consult your doctor for
complete information.
TABLE OF CONTENTS
SECTION 1
-
SAFETY INFORMATION
SECTION 2- SPECIFICATIONS
2-1.
2-2.
Volt-Ampere
Duty Cycle
Curves
2
2
SECTION 3- INSTALLATION
3-1.
3-2.
3-3.
3-4.
3-5.
A Location And
3
And
4
Moving Welding Power Source
Preparing Weld Output Cables
Connecting To Weld Output Terminals
Remote 14 Receptacle Information And Connections
Connecting Input Power
Selecting
Selecting
5
6
7
9
SECTION 4- OPERATION
SECTION 5- MAINTENANCE & TROUBLESHOOTING
5-1.
Routine Maintenance
13
5-2.
Overload Protection
14
5-3.
Troubleshooting
14
SECTION 6- ELECTRICAL DIAGRAMS
SECTION 7
7-1.
7-2.
17
TUNGSTEN ELECTRODE
Selecting Tungsten Electrode
Preparing Tungsten
20
21
SECTION 8- PARTS LIST
Figure
Figure
Figure
Figure
Figure
Figure
Assembly
w/Components
Terminal Assembly, Pri
8-1. Main
8-2. Panel, Rear
8-3.
8-4. Switch, PB
8-5. Rectifier, SCR
8-6. Panel, Front
w/Components
OM-168256-4/94
SECTION 1
SAFEETY INFORMATION
-
modl.1 2/93
Read all
safety messages throughout this
Obey all safety messagos
Learn the
to avoid
meaning of WARNING
manual.
injury.
and CAUTION.
1
2
1
2
~
t~!~!f~
2
;i~ii~ieiI
~
ELECTRIC SHOCK
Do not touci live
Disconnect
instsiling
or
can
CAU
3
-
MOVING PARTS
kill
electctdai pacts.
input power
servicing.
1
tlI1~~U
Keep
betorejj_4
can
injure.
away from moving pacts
Keep all panels
I
SignaJ
Symbol
CAUTION
means possible minor
injury or equipment damage can
happen.
I
w~
Alert
Word
WARNING means possible death
or serious injury can happen.
3
and covers closed
Safety
Statement Of Hazard And
Result
4
5
Safety Instructions
To Avoid
Hazard
-
5
a
6
6
WA~~~
READ SAFETY BLOCKS at start of
Section 3-1 before proceeding.
NOTE
~
Safety
using high frequency.
NOTE
Special
ation
Figure
1 -1.
SECTION 2
-
Table 2-1.
Safety
safety.
SPECIFICATIONS
Welding
Power Source
-
Description
Type Of Output
Constant Current/Direct Current
Welding Process
Shielded Metal Arc
Open-Circuit Voltage
instructions for best oper
not related to
Information
Specifications
Max
Symbol (if Available)
Banner
Read safety blocks for each sym
bol shown.
7
Turn Off switch when
Hazard
(SMAW)
(CC/DC)
Aid Gas
Tungsten
Arc
(GTAW) Welding
70 Volts DC
Type Of Input Power
Three-Phase; 220, 380, 400, or 415 Volts AC, 50/60 Hz
Overall Dimensions
See Figure 3-2
Input Amperes At Rated Output
102 A At 220 V,
59AAt380V,
56 A At 400 V,
54 A At 415 V
Rated Weld
510
Output
KVA/KW Used At Rated
Output
Amperes,
41 Volts DC At 35%
Duty Cycle (see Section 2-2)
38.8 kVAI25.6 kW
Amperage Range
Low: 20 270 A;
High: 37-510 A
Weight
Net: 543 lb (246 kg);
Ship: 568 lb (258 kg)
-
OM-168 256
Page
1
Volt-Ampere Curves
2-1.
The
volt-ampere curves show the
minimum and maximum voltage
and amperage output capabilities
of the welding power source.
Curves of other settings fall be
tween the curves shown.
A.
Low
B.
Range
High Range
70
60
60
60
60
40
40
0
>
30
30
C)
C)
a
a
20
20
10
10
0
0
0
60
100
150
200
250
300
350
400
450
500
550
600
0
100
200
400
300
DC AMPERES
600
500
ssbl.1 10/91 SB-084
Figure
2-2.
700
800
900
DC AMPERES
2-1.
Volt-Ampere
850-A/SB-084 845-A
Curves
Duty Cycle
CAUTION
4A
WELDING LONGER THAN RATED DUTY CYCLE
Do not weld at rated load
longer than
can
damage
unit and void warranty.
shown below.
wam7.1 8/93
Definition
Chart
0
1200
10
Duty Cycle
is percentage of 10
minutes that unit can weld at
rated load without
overheating.
Minutes
Ui
I00
uJ
0.
35%
Duty Cycle
At 510
400
Amperes
9
Ui
300
0
20
3-1/2 Minutes
welding
6-1/2 Minutes
Resting
z
20
30
DUTY
CYCLE
sbl .2 8/93
Figure
OM-168 256
Page
2
2-2.
Duty Cycle
-
Ref. SB-000 865-D
SECTION 3- INSTALLATION
3-1.
Selecting
A Location And
Moving Welding
Power Source
WARNING
ELECTRIC SHOCK
can
FUMES can be hazardous; LACK OF
FRESH AIR AND PROPER VEN
TILATION can be harmful.
kill.
Do not touch live electrical parts.
Disconnect input power conductors from doenergized supply line BEFORE moving welding
Do not breathe
bource.
power
welding fumes.
Place unit only where there is
supply and proper ventilation.
FIRE O~R EXPLOSION can result from
unit on, over, or near com
bustible surfaces.
a
good fresh air
placing
Do not locate unit on, over,
surfaces.
Do not ~nstall unit
near
or near
combustible
flammables
BLOCK:ED AIRFLOW causes over
and possible damage to unit.
FALLING EQUIPMENT
personal Injury
damage.
serious
or
filter airflow.
Use
Warranty
i:s void if any
cause
equipment
Use lifting eye to lift unit only, NOT running gear, gas
cylinders, or any other accessories.
heating
Do not Dlock
can
and
equipment of adequate capacity to
type of filter is used.
lift the unit.
Swamll.l 3/93
Movement
1
Ufting Eye
2
Ufting
Use
Forks
lifting eye
move
or
lifting
forks to
unit.
If using lifting forks, extend forks
beyond opposite side of unit.
OR
3
Rating
Label
Use rating label to determine
power needs.
Input
2
Une Disconnect Device
4
Locate unit
er
near
correct
input pow
supply.
_______________________________________
Location And Airflow
-
4
18 in
(460 mm)
18 in
(460 mm)
ssb9.1 12/93
FIgure
3-1. Movement And LocatIon Of
Welding
-
5T-800 402 / ST~o00 599-H
Power Source
OM-168 256
Page
3
NOTE ~
Overall dimensions (A, B, and C) include
lifting
eye, handles, hardware, etc.
Front
0
~
r-
Inches
Millimeters
A
30-1/4
769
B
22-3/4
578
C
35-3/4
908
D
1-1/2
38
E
32-3/4
832
F
1-1/8
29
G
20
508
H
7I16Dia.
4 Holes
4 Holes
11 Dia.
~F
G
ST-153
Figure
3-2.
Selecting
And
3-2. Overall Dim ensions And Base
Preparing
Weld
Mounting
Hol e
Layout
Output Cables
1
Weld Output Cable
Determine total cable length in
weld circuit and maximum welding
amperes. Use Table 3-1 to select
proper cable size.
Use shortest cables
Do not use
2
possible.
damaged
cables.
Terminal Lug
lugs of proper amperage
capacity and hole size for connect
ing to work clamp or electrode hold
Use
er, and weld
output terminals.
3
Insulated Electrode Holder
4
GTAW Torch
Install according to manufacturers
instructions.
5
For Example,
Total Cable
Length
Work
Clamp
Install onto work cable.
In Weld
Circuit =20 ft (6 m)
Tools Needed:
z=~
sD6.5
Figure
OM-168 256
Page
4
3-3.
Selecting
And
Preparing
Weld
Output Cables
11192
S-0752
Table 3-1. Weld Cable Slze*
Total Cable
100 ft
(30 m) Or
(Copper) Length
I
150ft
Less
(45 m)
10 To 60%
60 Thru 100%
Duty Cyclie
Duty Cycle
4
4
In Weld Circuit Not
200ft
I
250ft
(60 m)
J
(70 m)
I
10 Thru 100%
4
3
Exceeding
I
300ft
(90 m)
350ft
I
40Qft
(105 m)
(120 m)
Duty Cycle
2
1
1/0
1/0
-
Weld cable size
3-3.
3
3
2
1
1/0
2/0
3/0
3/0
3
2
1
1/0
2/0
3/0
4/0
4/0
2
1
1/0
2/0
3/0
4/0
2-2/0
2-2/0
1
1/0
2/0
3/0
4/0
2-2/0
2-3/0
2-3/0
1/0
2/0
3/0
4/0
2-2/0
2-3/0
2-3/0
2-4/0
1/0
2/0
3/0
4/0
2-2/0
2-3/0
2-4/0
2-4/0
2/0
3/0
4/0
2-2/0
2-3/0
2-4/0
3-3/0
3-3/0
3/0
4/0
2-2/0
2-3/0
2-4/0
3-3/0
3-4/0
3-4/0
4/0
2-2/0
2-3/0
2-4/0
3-3/0
3-4/0
3-4/0
4-4/0
4/0
2-2/0
2-3/0
2-4/0
3-4/0
3-4/0
4-4/0
4-4/0
2-2/0
2-3/0
2-4/0
3-3/0
3-4/0
4-4/0
4-4/0
2-2/0
2-3/0
2-4/0
3-3/0
4-3/0
4-4/0
(AWG)
is b ased
Connecting
on
either
To Weld
a
4 volts or less
Output
drop
or a
current
density
of at least 300 circular mils per ampere.
S-0007-D
Terminals
I ~JVARNING
E
LECTRIC SHOCK
can
Do not touch live electrical
Turn Off
welding
kill.
parts.
power source, and disconnect
inpuI~ power before making any weld output connections.
swaml2.1 2/93
Turn screw and open lower
door.
Positive
minal
1
1
2
(+) Weld Output
Negative ()
2
access
Ter
Output
Weld
Terminal
For
NJ
Electrode
Positive
connect work cable to
(DCEP),
negative ()
terminal and electrode holder cable
to
Positive
Negative
positive (+) terminal.
For Electrode Negative (DCEN),
reverse cable connections.
Close door.
Routo al/cables under bar.
Tools Needed:
~3/4in
~==~
Ref. ST-155 048-A
Figure
3-4. Weld
Output Connections
OM-168 256
Page
5
3-4.
Remote 14
Receptacle Information
And Connections
2
1
Remote 14 Receptacle Rd
(See Table 3-2)
2
Keyway
3
Plug
4
Threaded Collar
To connect to receptacle, align
keyway, insert plug, and tighten
threaded collar.
.-
3
OR
sb7.1 12/93
Figure
-
Ref. ST-000 599-H / Ref. S0004-A / S-0750
3-5. Remote 14 Connections
-
Table 3-2. Remote 14 Socket Information
Socket*
REMOTE 14
ouTpuT
(CONTACTOR)
A
The
AMPERAGE
remaining
OM-168 256
sockets
Page
6
are
not used.
Socket information
-
A
24 volts
B
Contact closure to A
C
+10 volts dc
ac.
output
completes
24 volts
ac
contactor control circuit.
to remote control.
0
Remote control circuit
E
0 to +10 volts dc
common.
input command signal from
remote control.
3-5.
Connectin~i Input
Power
I WARNING
ELECTRIC SHOCK
can
kill.
Do not touch live electrical parts.
Turn Off
welding
power source, and disconnect
input
power before
inspecting
or
installing.
Have only qualified persons install unit.
Installation must meet National Electrical Code and all other codes.
A.
Positioning Jumper
swam3.1 2/93
Links
Jumperlinks allow operation on dif
ferent input voltages and are facto
ry set for the highest input voltage.
Check input voltage available at
site.
2
Remove top and right side panel to
check jumper links.
Input Voltage Label
1
Look at jumper links and compare
link position with unit label.
2
Input Terminal Board
3
Input Voltage Jumper
Links
Move links to match input voltage.
For example, use 220 volts posi
tion when 220 volts input power is
available.
Reinstall top and side panel
on
380 VOLTS
220 VOLTS
~oo~ ~oo~ t~oo~ oo~oo oo~OO oo~oo
'Li 'L2~L3
'L.f
2~3
400 VOLTS
ooo~o ooo~o
\
Figure
or
go
3-7.
415 VOLTS
~
~1 'L~L3
to
I
o~ooo o~ooo o~ooo
~Li 'L2'L3
S-134 559-A
Tools Needed:
~3/8in
C~~J1J
3/8 in
ssbs.r 2192
Figure
3-6.
Input Voltage Jumper
Ref. ST-094 782-E
Links Location
OM-168 256
Page
7
B.
Connecting Input Power
Have
only qualified persons make
this installation.
Line Disconnect Device Of
1
Proper Rating
2
Input Conductors
3
Grounding Conductor
Select size and length using
Table 3-3. Conductor rating must
comply with national, state, and
local electrical codes. Use lugs of
properamperage capacity and cor
rect hole size.
Strain Relief Connector
4
Insert conductors
relief.
through
strain
Input Terminal Board
5
6
Line Terminals
7
Welding Power Source
Ground Terminal
Connect grounding conductor to
ground terminal first. Then connect
input conductors to line terminals.
Disconnect Device Ground
Terminal
8
Install and connect grounding
conductor and input conductors in
conduit or equivalent to deener
gized line disconnect device.
Connect grounding conductor first,
input conductors.
then line
Be
sure
grounding
to an earth
Reinstall side
9
Tools Needed:
panel.
Overcurrent Protection
and
Select type
size
using
Table 3-3. Install into deenergized
line disconnect device (fused dis
connect switch shown).
- 3/8 in
3/8 in
ssba4
Figure
3-7.
Input
1)94
-
ST-094 762-E
Power Connections
Table 3-3. Electrical Service
Requirements*
Input Voltage
220
380
400
415
Input Amperes At Rated Output
102
59
56
54
Recommended Standard Fuse Or Circuit
Breaker Rating In Amperes
150
90
80
80
4(19)
8(8)
8(8)
8(8)
130(140)
172(52)
190(58)
205(62)
6(13)
8(8)
8(8)
8(8)
Input Conductor
Size In AWGJKcmiI2
(MM2)
Input Conductor Length in Feet (Meters)3
Max
Grounding
Conductor Size In AWG/KcmII4
These values
are
(MM2)
calculated from the 1993 edition of the National Electrical Code (NEC).
1 Recommended fuse
allows fuse
2
conductor goes
ground.
or
or circuit breaker size is that closest to 150% of rated input amperage of the
circuit breaker sizing up to 200% of rated input amperage.
Input conductor size is for insulated copper wire with 75C rating with
(Table 31 0-16 of NEC).
3 Maximum
length is to prevent more than
210-19(a) and 21 5-2(b) of NEC).
a
3%
voltage drop
not more than three
welding power source. Article 630-12(a) of NEC
single current-carrying conductors in a cable or raceway
between service entrance and
input terminals
of the
welding power source (Articles
grounding conductor shall be colored or identified as specified in the NEC. Grounding conductor size for copper wire is not required to be larger
input conductor (Article 250-95 of NEC).
Ret. S-0092-G
4 The
than
OM-168 256
Page
8
SECTION 4- OPERATION
WARNING
ELECTRIC SHOCK
Always
wear
Insulate
kill.
can
dry insulating gloves.
yourself from
work and
ARC RAYS can burn eyes and skin;
NOISE can damage hearing.
,~,
~
ground.
Wear
welding
helmet with correct shade of filter.
Wear correct eye, ear, and
Do not touch live electrical parts.
body protection.
-
Keep all panels
and
covers
FUMES AND GASES
to your health.
Keep your
securely
in
place
MOVING PARTS
be hazardous
can
Keep
Keep all doors, panels,
securely in place.
,f
head out of the fumes.
or use
breathing
can cause
Do not weld
near
Do not weld
on
Allow work and
guards closed
or
MAGNETIC FIELDS FROM HIGH CUR
RENTS can affect pacemaker operation.
explosion.
Pacemaker
wearers
keep away.
flammable material.
Watch for fire; keep
Do not locate unit
fire
covers, and
device.
Read Material Safety Data Sheets (MSDS5) and
manufacturers instructions for material used.
WELDING
injury.
and
.
VentilatEl area,
can cause
away from moving parts.
:~r~
extinguisher nearby.
over
Wearers should consult their doctor before
near arc
.~
combustible surfaces.
closed containers.
equipment to cool
before
welding, gouging,
going
spot welding opera
See Safety Precautions at beginning of manual for ba
sic welding safety information.
~wam61 10/91
handling.
1
4
7
iiii~
~
or
tions.
Range
Switch
2
Polarity Switch (Optional)
3
Voltmeter
(Optional)
4
Ammeter
(Optional)
5
Amperage Adjustment Control
6
Power Push Buttons Switch
7
Pilot
8
Output/Contactor Switch
9
Amperage Control Switch
10
Arc Control
Light
Ref. ST.155 048-A
Figure
1
4-1. Controls
2
3
Wear the
/
~
following
while
welding:
1
Dry, Insulating Gloves
2
Safety Glasses With Side
Shields
3
Welding Helmet With Correct
Shade Of Filter (See ANSI
Z49.1)
sb3.1 1/94
Figure
4-2.
Safety Equipment
1
1
Tools Needed:
~==~
Work Clamp
Connect work clamp to
paint-free
as
location
close to weld
a
clean,
workpiece,
as possible.
on
area
Use wire brush or sandpaper to
clean metal at weld joint area. Use
chipping hammer to remove slag
after welding.
s~.1 2/93
Figure
4-3. Work
Clamp
OM-168 256
Page
9
AA
WARNING
ELECTRIC SHOCK
can
kill.
Do not touch live electrical parts.
Do not touch weld output terminals when contactor is
Do not touch electrode and work clamp at the
same
energized.
time
swam7.1 10/91
1
Output/Contactor Switch
Use switch to select way of control
ling unit output.
Weld output terminals are energized
when switch Is On and Power Is On.
For weld
output, place switch
in On
position.
For remote output control, place
switch in Remote 14 position (see
OUTPUT
tTh~.
~ (CONTACTOR)
Section 3-4).
~14~N
1
Ref. ST-168 257
Figure
4-4.
Output/Contactor
Control Switch
1
Arc Force Control
(Dig)
This control is used for SMAW
welding and is used to help start an
arc or make vertical or overhead
welds (control increases amper
age at low arc voltage).
When set at 0, short-circuit amper
age at low arc voltage is the same
as
normal
welding amperage.
When set at 100, short-circuit am
perage at low arc voltage in
creases to
help
arc
starting.
Select setting best suited for appli
cation. Numbers around control
are for reference only.
Set control at 0 for GTAW
Figure
OM-168 256 Page 10
4-5. Arc Control
welding.
RAN~
SWITCH
Range Switch
1
Use switch to choose output range.
Low gives better low amperage ad
iustment (use with Low scale on
Amperage Adjustment control).
2.
High gives better high amperage
adjustment (use High scale).
2
Amperage Adjustment
Control
Use
A
AMPERN3E
control
to
select
weld
amperage.
3
Amperage Control Switch
Use switch to select way of control
ling amperage adjustment.
For front panel control,
switch in the Panel position.
3
Example
Of Cemblnatlcn Remote
Amperage
place
For remote control, place switch in
Remote 14 position (see Section
Control
3-4).
RAN~
swrrc~
HIGH
4
Remote Fingertip Control
5
Remote Hand Dial
6
Remote Foot Control
3l~
~s
A
AMPERS~aE
~c~JO~NEL
G~L~~
(cONTPCTOR)
Set Switches
Set
Amperage
Adjust Remote Control
5T-159 059/ S-0769
Figure
4-6.
Amperage Adjustment Cont!ols
1
Power Push Buttons Switch
Use buttons to turn unit, tan motor,
and pilot light On and Off.
2
Figure
4-7. Power Push Butl:ons Switch And Pilot
Pilot
Light
Light
OM-168 256
Page
11
WARNING
LA
ARCING
can
damage switch
contacts.
Do not change Polarity Switch
Arcing
inside switch
can
position while welding.
damage contacts, causing switch
to fail.
Polarity
1
1
Use switch to select weld
\
~:)/~
Switch
)
I
~
(+)/L
I
ELECTRODE
POSITIVE
-
ELECTRODE
NEGATIVE
SWITCH
polarity.
.---.
DO NOT SWITCH UNDER LOAD
Figure
4-8.
Polarity
Switch
(Optional)
1
Voltmeter
Voltmeter displays voltage at the
weld output terminals, but not nec
essarily the welding arc due to
cable resistance, poor connec
2
tions, etc.
2
Ammeter
Ammeter displays weld amperage
output of unit.
Figure
Install &
Connect
)
Select
Electrode
4-9. Voltmeter And Ammeter
(Optional)
~\
Put On
Personal Safety )
\ \
Equipment
})
})
Equipment
________________
______________
______________
I
Set Controls
______________
Insert
Electrode
Into Holder
)~~we~)__~
Source
y
______________
______________
)
Begin
Welding
ssb7.1 9/92
4-10.
Figure
~\
1
)
Install&
Connect
~\\
Sequence
Install&Conneci\\
) I High-Frequency
Equipment
})
)
Turn On
)
Select
Turn On
I
Shielding Gas
High.Frequenc
)
Unit
________________
(See
Section 7)
Tungsten
Into
Welding (SMAW)
~\
Insert
I Tungsten
JJ
Unit
Of Shielded Metal Arc
I I
Torch~,J~,J
Turn On
Powe
Source
Begin
Welding
PutOn
Personal Safety
Equipme~~,J
Weld~)
________________
ssb8.1 12/92
Figure
OM-168 256
Page
12
4-11.
Sequence Of Gas Tungsten
Arc
Welding (GTAW)
SECTIONI 5
MAINTENANCE & TROUBLESHOOTING
WARNING
ELECTRIC SHOCK
MOVING PARTS
kill.
can
Do not touch live electrical parts.
Turn Ofi
welding power
Keep
.S
can cause severe
Allow cooling
servicing.
period
injury.
moving parts.
before
or
burns.
maintaining
or
Maintenance
persons.
5-1.
can cause
source, and disconnect
input pcwer before inspecting, maintaining,
servicing.
HOT PARTS
away from
to
be
performed only by qualified
swam8.1 2193
Routine Maintenance
Turn Off all power before
maIntainIng.
ST-000 599-H
Figure
5-1. Maintenance Schedule
OM-168 256 Page 13
5-2.
Overload Protection
\~
READ SAFETY BLOCKS at start of
Sectio n 5 befor e proceeding.
minutes
ssblO.1 1194-ST-000 599-H
Figure
5-3.
Start welding.
Let fan run for
15 minutes.
When overheated, thermostat
opens, output stops, and cooling
fan keeps running.
5-2.
Overheating
Troubleshooting
WARNING
4~
ELECTRIC SHOCK
can
Do not touch live electrical
MOVING PARTS
kill.
can cause
injury.
Keep away from moving parts.
parts.
welding power source, and disconnect
input power before inspecting, maintaining, or
Turn Off
servicing.
HOT PARTS
Allow
can cause severe
cooling period
before
burns.
servicing.
Troubleshooting
Table 5-1.
Welding
Trouble
to be
performed only by qualified
persons.
.
Trouble
swamg.1 2/93
-
Section
Remedy
No weld output; unit completely
inoperative.
j.
-~
Place line disconnect switch in the On
position.
-
Check for open line fuse(s), and
and reset circuit breakers.
Check for proper
input
replace
if necessary. Check
connections.
Check for proper jumper link positions.
Thermostat TP1 open. Allow
fifteen minutes.
Check
a
cooling period
push button Power switch
obstructions.
No weld
output; pilot light PLI
on.
-~
Clean and
tighten
linkage
of
approximately
for restrictions
or
all weld connections.
Place Output (Contactor) switch in the On
Remote Contactor Control To RC1.
-~
position
Check remote contactor control switch for proper
ohmmeter, and replace if necessary.
or
connect
operation with
-~
-~
an
Have Factory Authorized Service Station/Service Distributor
check control board PCi.
OM-168 256
Page
14
-~
3-3
Figure
4-4
Low
or
Section
Remedy
Trouble
minimum weld output.
-~
Check for proper lino
voltage.
-~
Check for open line ruse(s), and replace if necessary. Check
and reset circuit breakers.
Clean and tighten all weld connections.
Place
Amperage
control switch in the correct
position.
Have Factory Authoi~zed Service Station/Service Distributor
check Amperage Adjustment control, control board PCI and/or
hall device HD1.
I
Erratic weld output.
Check for proper
H
Excessive line current
opens
or
line
fuse(s)
~
-~
-~
3-3
Figure
4-6
-~
Maximum weld output.
connections.
3-58
-~
Have Factory Authoi~zed Service Station/Service Distributor
check control board PCi and/or hall device HD1.
input
-~
-~
3-58
Use proper size and type electrode.
-~
Check for proper
-~
input connections.
3-5B
I
repeatedly.
_____________
____________________________________________________
Check for proper juniper link positions.
Check for shorted fan motor FM leads, and
Fan motor
inoperative anc/or
-~
repair
if necessary.
1
Check for fan blade obstruction.
over-
3-5A
-~
-~
heating.
_____________
____________________________________________________
Replace fan
Wandering
arc; poor control of arc
motor
FM, if necessary.
-~
Reduce gas flow rate.
-~
Select proper size
-~
7
-~
7
direction.
Properly
i~ngsten electrode oxidizing and not
remaining bright
-~
tungsten.
prepare tungsten.
Shield weld
zone
from drafts.
-~
after conclusion of
weld.
Increase
postflow
Check and
tighten
time.
all gas
-~
fittings
Water in torch. Refer to torch Owners Manual for
ing replacement, and repair torch as necessary.
-~
part(s) requir-
-~
OM-168 256
Page
15
NOTES
OM-168 256
Page
16
SECTION 6- ELECTRICAL DIAGRAMS
U
~
0
.0 ~
w
>
-I
I
(0
0
0~
~
a
().~
C
~2
0
q~
a
~
<U
a
C
a
SC-137 779A
Figure
6-1. CIrcuit
Diagram
For
Welding
Power Source
CM-i 68 256
Page
17
Figure
OM-168 256
Page
16
6-2.
Wiring Diagram
For
Welding
Power Source
z m C~)
In 9
0
0) 0) N) 01 0) -D (0 C
(0
SECTION 7- TUNGSTEN ELECTRODE
moQ2.1 1/94
N OTE
see yourdistributorfora handbookon the Gas Tungsten
Welding (GTAW) process.
Foradditional information,
Arc
Wear clean
.7-1.
Selecting Tungsten
gloves
to
prevent contamination of tungsten electrode.
Electrode
Table 7-1.
Tungsten Size
Amperage Range
DC
Electrode Diameter
.
-
Argon
Electrode
Negatlv&Stralght Polarity
-
Gas
DC
Argon Electrode
Positive/Reverse Polarity
Type,
Polarity
-
AC
Argon Using
High Frequency
AC
Argon
Wave Using
Balanced
High Freq.
Pure Tungsten
(Green Band)
Up
.010
*
to 15
Up
to 15
Up
to 10
.020
5-20
5-20
10-20
.040
15-80
10-60
20-30
1/16
70-150
10-20
50-100
30-80
3/32
125-225
15-30
100-160
60-130
1/8
225.360
25-40
150.210
100-180
5/32
360-450
40-55
200-275
160-240
3/16
450-720
55-80
250-350
190-300
1/4
720-950
80-125
325-450
250-400
Up
Upto
2% ThorIum
Alloyed
Tungsten (Red Band)
.010
Up
.
to 25
.020
15-40
.040
25-85
*
to 20
15
15-35
5-20
20-80
20-60
1/16
50-160
10-20
50-150
60-120
3/32
135-235
15-30
130-250
100-180
1/8
250-400
25-40
225-360
160-250
5/32
400-500
40-55
300-450
200-320
3/16
500-750
55-80
400-500
290-390
1/4
750-1000
80-125
600-800
340-525
*
Upto2O
Uptol5
15-35
5-20
Zirconium Alloyed
Tungsten (Brown Band)
.010
.020
.040
20-80
20-60
1/16
50-150
60-120
*
3/32
1/8
5/32
.
*
130-250
100-1 80
225-360
160-250
300-450
200-320
3/16
400-550
290-390
1/4
600-800
340-525
Typical argon shielding gas flow
rates are 15 to 35 cfh
(cubic feet per hour).
*Not Recommended.
The figures listed
manufacturers.
OM-168 256
Page
are
intended
as a
guide and
are a
composite
of recommendations from American
Welding Society (AWS)
and electrode
S-0009
20
7-2.
Preparing Tungsten
Electrode
1
Tungsten
2
Balled End
.
1
2
Ball end of tungsten before welding
by applying either an ac amperage
slightly higher than what Is recom
~iI~IjE~
1-1/2 Times
Electrode Diameter
mended fora given electrode diam
(see NO TAG), or a do elec
trode positive amperage.
eter
2
Ret. S-0161
-
Figur e
7-i.
Prepa ring Tungsten
For AC Oi DC Electrode Po sitive
AUTION
L~
FLYING SPARKS AND HOT METAL
Shape tungsten electrode only on
~
Keep
(DCEP) Welding
can cause
injury
gnnder with proper guards in
a
and start fires.
safe location
wearing properface, hand, and body protection.
flammables away.
wam2.1 9/91
/2
/
Electrode
1
Tungsten
2
Tapered End
Grind end of tungsten
on
fine
grit,
hard abrasive wheel before weld
~
ing. Do not use wheel for other jobs
tungsten can become contami
nated causing lower weld quality.
or
2-1/2 Times
Electrode Diameter
Ret. S-O1G1
1
1
Stable Arc
2
Flat
Diameter of this flat determines
amperage
3
capacity.
Wheel
3
Grinding
4
Straight Ground
4
Ideal
Tungsten Preparation
Stable Arc
1
2
Ret. S-0162
1
Arc Wander
2
Point
3
Grinding
4
Radial Ground
Wheel
4
Wrong Tungsten Preparation
Figure
7-2.
Preparing Tungsten
Wandering Arc
For DC Electrode
Ref. S.0162
Negative (DCEN) Welding
OM-168 256
Page
21
Cl) rn C)
-I Cl)
0z
Cl) -I
8-3
Fig
10
11
13
14
15
171
16
,
2
I-
23
21
8-5
Fig
I
1 (0 C -I m
0
0)
01 a) -o p3 (a 0 10 1%)
-S
DP
In U) m B 0
C
Item
No.
Dia.
Part
No.
Mkgs.
Description
Figure
006
2
..
STABILIZER
1
..
PANEL,
1
..
..
..2.
006017
..
..3.
..4.
026 627
004 214
..5.
091 164
..6.
Z
035 279
8-.
TEl
8-2
038 138
..9.
C21
..9.
C22,23
..7.
Fig
10
11
PCi
RC1
PLG1
PLG2
.
..
..
..
..
.
..
..
..
137674..
.
..
137 771
..
097 918
..
.
.
..
084 553
..
.
.
.
.
.
.
.
..
..
12
13
*i~4~ 281
058 972
..
..
-
.
048 280
..
058 971
.
035 815
080 509
.
..
..
.
.
..
137 056
.
.
..
.
.
23
.
.
24
-
.
25
.
.
When
039 210
..
8-6
..
Fig
...
SRi
.
.
HAl ,HD1
W
..
..
..
..
.
D10,i1
ordering
.
a
..
140 121
..
1
2
CIRCUIT CARD BOX
BRACKET, mtg rectifier
BASE
18
R6
1
2
.
...
rear
CONNECTOR, rect pin 20-l4ga Amp 350416-1
CONNECTOR, rect 29skt plug Amp 531590-3
GROMMET, scr No. 6/10 panel hole .312sq .375 high
.
19
20
21
22
1
1
1
2
1
..
137 057
.
1
..
17
..
1
2
137055
..
1
BRACKET~ mtg terminal board
CIRCUIT CARD, root pass
CONNECTOR w/SOCKETS, (consisting of)
CONNECTOR, rect skt 20-l4ga Amp 350415-1
CONNECTOR & PINS, (consisting of)
15
..
1
CAPACITOR
CAPACITOR
16
..
2
w/components
TERMINAL ASSEMBLY, triple voltage (Fig 8-3)
090 781
138 378
139785
14
Assembly
PANEL, side
LABEL, warning electric shock can kill etc
COVER, top
GASKET, lifting eye
BUSHING, snap-in nyl 1.625 ID x 2.000mtg hole
FRAME, upright base
PLUG, protective .640sq
016
109 035
134 771
8-1. Main
Quantity
1
3
1
(included w/SR1)
2
1
TRANSFORMER, power main 220/380/400/415
(consisting of)
COIL, pri/sec
COIL, pri/sec
1
RH & center
LH
2
1
RESISTOR, WW fxd :375W 12 ohm
1
PANEL, front w/components
RECTIFIER, SCR (Fig 8-5)
BRACKET, mtg hall
1
1
144 017
..
134 826
..
CIRCUIT CARD, hall booster
1
137 900
..
KIT,
1
082456
..
DIODE ASSEMBLY
1
contactor
component originally displaying
a
precautionary label,
1
the label should also be ordered.
**Included w/PC1.
BE SURE TO PROVIDE MODEL AND SERIAL NUMBER WHEN ORDERING REPLACEMENT PARTS.
OM-168 256
Page
23
Item
No.
Dia.
Part
No.
Mkgs.
Figure
..1...FM..
2
3
4
Quantity
Description
8-2.
Panel, Rear w/Components (Fig 8-1 Item 7)
MOTOR, 1/l2hp 230V 1550rpm
CHAMBER, plenum 14 in
032611
BLADE, fan 14 in 3wg 23deg .375 bore CCW
158289.. PANEL, rear
116 190
1
131 361
1
1
1
4
*br
5
ST-004 988-0
8-2.
Figure
Panel, Rear w/Components
7
6
ST-138 574
Figure
Item
No.
Part
No.
1
.
.
.
.
.
.
601 835
Figure
.
.
.
.
.
.
.
038 058
038 887
.
.
.
010 913
.
.
5..
.
038618
.
.
6.. .601836
.
.
..
3
4
..
Assembly,
Pri
Quantity
Description
038 138
2
8-3. Terminal
.
.
7
.
.
.
010 915
.
.
8
.
.
.
038 888
.
.
8-3. Terminal
Assembly,
Pr!
NUT, brs hex 10-32
TERMINAL BOARD, primary
STUD, pri board brs 10-32 x 1.375
WASHER, flat brs 218 lOx .46000
(Fig
8-1 Item
8)
36
1
18
x
.O3lthk
WASHER,
flat brs .250 ID
x
STUD, pri board brs .250-20
.625 00
x 1.500
x
.O3lthk
BE SURE TO PROVIDE MODEL AND SERIAL NUMBER WHEN ORDERING REPLACEMENT PARTS.
OM-168 256
Page
24
18
6
6
LINK,jumpertermbdpri
NUT, brshex.250-20 jam hvy
6
3
item
No.
Part
No.
Description
Quantity
046 745
Figure
059 885
BUTTON, push reset red
SPRING, cprsn .430 OD x .040 wire x 1 .500stnIs
PUSH BUTTON SET, w/cable & housing
BRACKEt mtg switch PB
SWITCH, urn leaf actg SPDT
2... 018606
3... 045 546
4... 081 008
5... 027 878
8-4. Switch, PB
(Fig
8-6 Item
11)
1
1
1
1
1
-5
1\~~
*9
0
ST-080 2t4-B
Figure
8-4. Switch, PB
5
6
7
B
4
5
6
Figure
Item
No.
1
Dia.
Part
No.
Mkgs.
SRi
140 121
C7-12
Description
Figure
048 420
.
.
2
082 852
.
.
3
048 779
.
.
4
082 694
028516
.
.
.
.
.
.
.
.
.
.
.
.
.
.
.
.
.
5
6..
SCR1-6
.
.
.
7
TP1
8
..
.
.
097 397
045 109
117275
026 701
114530
ST-048 899.K
8-5. Rectifier, SCR
8-5.
Rectifier, SCR (Fig
Quantity
8-1 Item
21)
CAPACITOR, rectifier
BUS BAR, output rectifier
HEAT SINK, rectifier snowflake 1.000
CLAMP, thyristor rectifier 5.500
6
PIN,springCS.125x.250
12
THYRISTOR, SCR 330A 300V
HEAT SINK, rectifier snowflake 1.000
6
2
6
3
3
THERMOSTAT, NC
INSULATION, thermostat
BAR, mtg rectifier
1
1
2
BE SURE TO PRO VIDE MODEL AND SERIAL NUMBER WHEN ORDERING REPLACEMENT PARTS.
OM-165 256
Page
25
C.)
A
/
/
/
/
/
/
/
/
/
-
-p
r~) C.)
-~
(0
\
N
F)
\
I)
0
C)
a cD (I,
3
0
(1~
-n (a C -ICD
CD
-n -I0
I
~
Item
No.
Dia.
Part
No.
Mkgs.
Figure
.
.
1
.
.
2
.
.
.
.
3
4
.
.
.
.
R3
...
009 156
158
.
.
.
.
.
5
.
.
6
...
.
.
6
...
.
.
6
.
.
6
...
.
.
7
...
.
S3
Al
C14
C15
C17
C18
RC1
...
...
...
...
...
...
...
...
..
258
089 085
0134 206
1:30 257
143 935
143 934
143 933
143 936
143 976
079 534
,34 734
134 731
079 739
~.
.
8
...
.
.
9
.
.
.
.
.
.
.
.
.
.
.
.
.
.
S2,4
...
R5
...
011 609
072 462
...
072 590
046 745
...
087 337
10
11
...
PB1
12...
C4,5
.
13...
14...
.
15
.
.
16
.
.
16
.
.
.
.
18
.
.
19
NEG... 039 046
POS... 039 047
601 976
039 045
039 049
601 880
039 044
601 879
.
.
20
+109 449
605 583
134327
048 573
17
.
.
21
.
.
22
.
.
.
-
23...
24
.
-
25
+When
PL1
ordering
...
a
Quantity
Description
.
.
.
.
.
.
.
.
.
.
..
.
..
.
..
.
..
.
.
.
.
.
.
.
.
.
.
.
.
.
..
.
..
.
..
.
..
.
..
.
..
.
.
097 926
.
-
097 922
-
-
LEAD ASSEMBLY, elect
LEAD ASSEMBLY, elect
CONNECTOR w/TEFLMINALS,
1
1
1
(consisting of)
1
1
.
.
1
TERMINAL, pwr output black (consisting of)
TERMINAL, pwr output red (consisting of)
SCREW, cap stl hexhd .500-13 x 1.500
TERMINAL BOARD, black
TERMINAL BOARD, red
NUT, sti hex jam .500-13
BUS BAR, term bd
NUT, stl hex full .500-13
DOOR, access front
CATCH, spr loaded door
LABEL, warning general precautionary
LIGHT, md red lens 28V
KNOB, pointer
KNOB, pointer
..
.
1
LEAD ASSEMBLY, elect
LEAD ASSEMBLY, elect
2
.
.
1
CAPACITOR
.
.
.
1
1
14
.
.
1
CONNECTOR, circ skt push-in 14-1 8ga Amp 66358-6
CONNECTOR, circ 14 pin plug Amp 213571-2
CONNECTOR, circ pin push-in 14-l8ga Amp 213603-1
CONNECTOR, circ damp str rlf Amp 206322-2
SWITCH, tgl SPDT 15A 125 VAC
POTENTIOMETER, w/shaft lock (consisting of)
LOCK, pot .375-32 x .25Odia shaft
SWITCH, PB (Fig 8-4)
.
.
1
CONNECTOR, w/leads (consisting of)
..
.
Panel, Front w/Components (Fig 8-1 Item 20)
NAMEPLATE, (order by model and serial number)
POTENTIOMETER, C sltd sft 1/12W 2.5K ohm
PANEL, front
SWITCH, tgl SPST 20A 1 25VAC
RESISTOR, MF .25W 3.32K ohm
.
.
8-6.
component originally displaying
a
precautionary label,
2
1
1
1
1
1
1
1
1
1
1
1
1
1
1
I
1
the label should also be ordered.
BE SURE TO PROVIDE MODEL AND SERIAL NUMBER WHEN ORDERING REPLACEMENT PARTS.
OM-168 256
Page
27