1
FG_24LConvecOvenmanual
10/11/06
2:26 PM
Page 15
Roasting
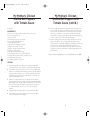
Rotisserie Roasting
The top and bottom heating elements cycle on and off to maintain
the selected temperature. The convection fan remains off during the
Roast cycle.
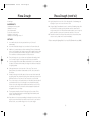
The top heating elements cycle on and off to maintain the maximum
temperature in the oven while the spit continually turns. The convection
fan will remain off during rotisserie roasting.
1
Place the drip/roasting/baking pan on top of the bottom rails in the
oven. Do not insert in the oven rails itself.
2
Place the meat fat side up in the drip/roasting/baking pan (unless
otherwise directed).
Rotisserie roasting is a healthy way to cook meats because the slowturning spit provides natural basting of meats while fats drip away. The
rotisserie can be used to roast meats up to 7 pounds. It is not necessary
to preheat the oven for rotisserie roasting.
3
Preheat the oven to 375° F. (325° when not using the
drip/roasting/baking pan.)
Warning: Never use your Rotisserie without the drip/baking pan in the
bottom rails of the oven.
4
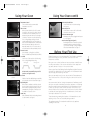
Set the Function Control to Roast/Pizza.
1
5
Set the Time Control to the shortest time. If more than 2 hours, set
to “Stay On” and check after the shortest time.
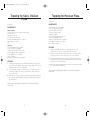
Place one rotisserie fork on the end of the rotisserie spit
opposite the point with the tines facing the center and tighten the
screw slightly.
2
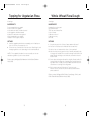
Slide the pointed end of the rotisserie spit through the center of the
food to be cooked.
3
Place the other rotisserie fork on the other end of the rotisserie spit
with the tines facing the roast.
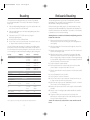
Use the following chart as a guide for roasting. Use a reliable meat
thermometer for the most accurate results. Roasts should stand for
10 to 15 minutes before carving. During this time, they will continue to
cook increasing the meat thermometer reading by about 10 degrees.
Food Type
Weight (lbs)
Time / Lb
Thermometer
4
20 - 22min
23 - 24 min
25 - 27 min
18 - 20min
21 - 23 min
24 - 26 min
20 - 22min
23 - 24 min
25 - 27 min
Rare 120 - 130
Med 140 - 150
Well 160 - 170
Rare 120 - 130
Med 140 - 150
Well 160 - 170
Rare 120 - 130
Med 140 - 150
Well 160 - 170
Adjust the roast so that it is centered on the rotisserie spit. Make
sure the forks secure the roast on the spit and tighten the screws.
When cooking poultry, it may be necessary to secure legs and wings
to the body with string to make the roast as compact as possible for
smooth movement of the rotisserie spit.
5
Season or baste the roast as desired.
6
Put the pointed end of the rotisserie spit into the rotisserie drive
socket located on the right interior wall of the oven.
7
Place the grooved end on the spit support on the left interior wall of
the oven.
8
Set the Temperature Control to “MAX”.
9
Set the Function Control to “Rotisserie”.
Beef
Sirloin Tip/Top Round
3-8
Eye Round
3-6
Standing Rib
3-6
Pork
Loin (bone in)
Loin (boneless)
Fresh Ham
Fully cooked/w bone
Half
Whole
3-6
3-8
4-8
25 min
15 min
25 min
Smoked Ham
6-8
12 - 16
170
170
170
10 Set the Time Control to the shortest time. If more than 2 hours, set
to “Stay On” and check after the shortest time.
15 min
15 -17 min
140
140
11
20 - 23 min
25 min
Med 170
Well 180
12 Remove the rotisserie spit from the oven using the rotisserie handle
included.
20 min
20 min
15 min
20 min
180
180
180
180
Lamb
Leg
6-8
Chicken (unstuffed)
Chicken (stuffed)
Turkey (unstuffed)
Turkey (stuffed)
6-8
6-8
up to 14 lbs
up to 14 lbs
Poultry
These cooking times are an average and should be adjusted to individual preferences.
13
When the roast is done, turn the Temperature Control to “0” and the
Time Control to “Off” and unplug the oven.
13 Place the roast on a cutting board or platter and allow to stand for
10 - 15 minutes.
14 Using a pot holder, loosen the screws on the rotisserie forks
and remove the rotisserie spit from the roast. Carefully remove the
rotisserie forks and carve the roast.
Caution: The rotisserie spit, rotisserie forks, screws and the roast will
be hot.
14