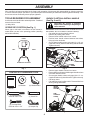
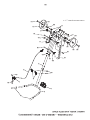
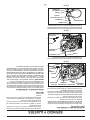
1
MC550 Operator's manual "This machine is approved by the EPA for E10 (10% ethanol) and lower fuel only. Do not use any fuel >E10 in this machine." 532439959 11.04.10 BAD Printed in the U.S.A. SAFETY RULES Safe Operation Practices for Walk-Behind Powered Rotary Tillers TRAINING • • • • • Read the Owner’s Manual carefully. Be thoroughly familiar with the controls and the proper use of the equipment. Know how to stop the unit and disengage the controls quickly. Never allow children to operate the equipment. Never allow adults to operate the equipment without proper instruction. Keep the area of operation clear of all persons, particularly small children, and pets. • • • • • PREPARATION • • • • • • • • • • Thoroughly inspect the area where the equipment is to be used and remove all foreign objects. Disengage all clutches and shift into neutral before starting the engine (motor). Do not operate the equipment without wearing adequate outer garments. Wear footwear that will improve footing on slippery surfaces. Handle fuel with care; it is highly flammable. Use an approved fuel container. Never add fuel to a running engine or hot engine. Fill fuel tank outdoors with extreme care. Never fill fuel tank indoors. Replace gasoline cap securely and clean up spilled fuel before restarting. Use extension cords and receptacles as specified by the manufacturer for all units with electric drive motors or electric starting motors. Never attempt to make any adjustments while the engine (motor) is running (except where specifically recommended by manufacturer). MAINTENANCE AND STORAGE • • • • • • • • • • • • Keep machine, attachments, and accessories in safe working condition. Check shear pins, engine mounting bolts, and other bolts at frequent intervals for proper tightness to ensure the equipment is in safe working condition. Never store the machine with fuel in the fuel tank inside a building where ignition sources are present, such as hot water and space heaters, clothes dryers, and the like. Allow the engine to cool before storing in any enclosure. Always refer to the operator’s guide instructions for important details if the tiller is to be stored for an extended period. - IMPORTANT CAUTIONS, IMPORTANTS, AND NOTES ARE A MEANS OF ATTRACTING ATTENTION TO IMPORTANT OR CRITICAL INFORMATION IN THIS MANUAL. IMPORTANT: USED TO ALERT YOU THAT THERE IS A POSSIBILITY OF DAMAGING THIS EQUIPMENT. OPERATION • • Keep children and pets away. Do not overload the machine capacity by attempting to till too deep at too fast a rate. Never operate the machine at high speeds on slippery surfaces. Look behind and use care when backing. Never allow bystanders near the unit. Use only attachments and accessories approved by the manufacturer of the tiller. Never operate the tiller without good visibility or light. Be careful when tilling in hard ground. The tines may catch in the ground and propel the tiller forward. If this occurs, let go of the handlebars and do not restrain the machine. Do not put hands or feet near or under rotating parts. Exercise extreme caution when operating on or crossing gravel drives, walks, or roads. Stay alert for hidden hazards or traffic. Do not carry passengers. After striking a foreign object, stop the engine (motor), remove the wire from the spark plug, thoroughly inspect the tiller for any damage, and repair the damage before restarting and operating the tiller. Exercise caution to avoid slipping or falling. If the unit should start to vibrate abnormally, stop the engine (motor) and check immediately for the cause. Vibration is generally a warning of trouble. Stop the engine (motor) when leaving the operating position. Take all possible precautions when leaving the machine unattended. Disengage the tines, shift into neutral, and stop the engine. Before cleaning, repairing, or inspecting, shut off the engine and make certain all moving parts have stopped. Disconnect the spark plug wire, and keep the wire away from the plug to prevent accidental starting. Disconnect the cord on electric motors. Do not run the engine indoors; exhaust fumes are dangerous. Never operate the tiller without proper guards, plates, or other safety protective devices in place. NOTE: Gives essential information that will aid you to better understand, incorporate, or execute a particular set of instructions. Look for this symbol to point out important safety precautions. It means CAUTION!!! BECOME ALERT!!! YOUR SAFETY IS INVOLVED. CAUTION: Always disconnect spark plug wire and place wire where it cannot contact spark plug in order to prevent accidental starting when setting up, transporting, adjusting or making repairs. WARNING The engine exhaust from this product contains chemicals known to the State of California to cause cancer, birth defects, or other reproductive harm. 2 PRODUCT SPECIFICATIONS CUSTOMER RESPONSIBILITIES • • Read and observe the safety rules. Follow a regular schedule in maintaining, caring for and using your tiller. Follow instructions under “Maintenance” and “Storage” sections of this Manual. Gasoline Capacity: 0.9 Quarts (0,85 L) Unleaded Regular Oil (API-SG-SL): (Capacity: 20 oz./0.6L) SAE 10w-30(Above 32°F/0°C) SAE 5w-30(Below 32°F/0°C) • Spark Plug: (Gap: .030"/0.76mm) Champion RJ19LM or J19LM IMPORTANT: THIS UNIT IS EQUIPPED WITH AN INTERNAL COMBUSTION ENGINE AND SHOULD NOT BE USED ON OR NEAR ANY UNIMPROVED FOREST-COVERED, BRUSHCOVERED OR GRASS COVERED LAND UNLESS THE ENGINE'S EXHAUST SYSTEM IS EQUIPPED WITH A SPARK ARRESTER MEETING APPLICABLE LOCAL LAWS (IF ANY). IF A SPARK ARRESTER IS USED, IT SHOULD BE MAINTAINED IN EFFECTIVE WORKING ORDER BY THE OPERATOR. IN THE STATE OF CALIFORNIA, A SPARK ARRESTER IS REQUIRED BY LAW (SECTION 4442 OF THE CALIFORNIA PUBLIC RESOURCES CODE). OTHER STATES MAY HAVE SIMILAR LAWS. FEDERAL LAWS APPLY ON FEDERAL LANDS. SEE YOUR AUTHORIZED SERVICE CENTER/DEPARTMENT FOR SPARK ARRESTER. CONGRATULATIONS on your purchase of a new tiller. It has been designed, engineered and manufactured to give you the best possible dependability and performance. Should you experience any problems you cannot easily remedy, please contact your nearest authorized service center. We have competent, well-trained technicians and the proper tools to service or repair this unit. Please read and retain this manual. The instructions will enable you to assemble and maintain your tiller properly. Always observe the “SAFETY RULES”. TABLE OF CONTENTS MAINTENANCE ..................................................... 10-12 SERVICE & ADJUSTMENTS ................................. 13-14 STORAGE .................................................................... 15 TROUBLESHOOTING ................................................. 16 PARTS..................................................................... 17-21 SAFETY RULES ............................................................ 2 PRODUCT SPECIFICATIONS ....................................... 3 CUSTOMER RESPONSIBILITIES................................. 3 ASSEMBLY ................................................................. 4-5 OPERATION ............................................................... 6-9 MAINTENANCE SCHEDULE ...................................... 10 3 ASSEMBLY Your new tiller has been assembled at the factory with exception of those parts left unassembled for shipping purposes. To ensure safe and proper operation of your tiller all parts and hardware you assemble must be tightened securely. Use the correct tools as necessary ensure proper tightness. TOOLS REQUIRED FOR ASSEMBLY UNPACK CARTON & INSTALL HANDLE (See Fig. 2 and 3) A socket wrench set will make assembly easier. Standard wrench sizes are listed. (1) Utility Knife CAUTION: Be careful of exposed staples when handling or disposing of carton material. OPERATOR’S POSITION (See Fig. 1) IMPORTANT: WHEN UNPACKING AND ASSEMBLING TILLER, BE CAREFUL NOT TO STRETCH OR KINK CABLE(S). When right or left hand is mentioned in this manual, it means when you are in the operating position (standing behind tiller handles). • • • • FRONT • LEFT Cut cable ties securing handle column. Remove all packing from carton. Remove lower handle column from carton. Position lower handle column between bent tubes, lining up holes as shown. Secure lower handle column using two (2) 4-1/2" carriage bolts, two (2) washers and two (2) handle knobs. Tighten securely. LOWER HANDLE COLUMN RIGHT KNOBS WASHERS OPERATOR'S POSITION BENT TUBES BOLTS Fig. 1 • • CONTENTS OF HARDWARE PACK • • • (1) Washer (3) Handle Knobs Fig. 2 Remove upper handle column from carton. Route cable(s) as shown and slide upper handle column onto lower handle column. Secure upper handle column using two (2) 2-1/2" carriage bolts and two (2) handle knobs. Tighten securely. Cut away carton. Cut cable ties securing tiller to skid. Remove tiller from skid by pulling backwards. Manual UPPER HANDLE COLUMN (1) Carriage Bolt 5/16”-18 unc x 4-1/2” (1) Clevis Pin TINE CONTROL CABLE (2) Carriage Bolts 5/16”-18 unc x 2-1/2” (1) Hairpin Clip BOLTS KNOBS Fig. 3 4 ASSEMBLY TO INSTALL DEPTH STAKE (See Fig. 4) • • • Remove screw(s) securing depth stake to skid and discard the screw(s). Slide depth stake down into transport arm track, lining up a hole in the depth stake with hole in transport arm. Install clevis pin and hairpin clip. DEPTH STAKE CLEVIS PIN HAIRPIN CLIP Fig. 4 TILLING WIDTH • Tilling width may be adjusted to better handle your tilling conditions (See “TINE ARRANGEMENT” in the Service and Adjustments section of this manual.) TINE OPERATION • Check tine operation before first use. (See “TINE OPERATION CHECK” in the Service and Adjustments section of this manual.) 5 OPERATION KNOW YOUR TILLER READ THIS MANUAL AND SAFETY RULES BEFORE OPERATING YOUR TILLER. Compare the illustrations with your tiller to familiarize yourself with the location of various controls and adjustments. Save this manual for future reference. These symbols may appear on your Tiller or in literature supplied with the product. Learn and understand their meaning. FORWARD TINE CONTROL PRIMER RECOIL STARTER HANDLE THROTTLE CONTROL DEPTH STAKE Fig. 5 MEETS ANSI SAFETY REQUIREMENTS Our tillers conform to the safety standards of the American National Standards Institute. DEPTH STAKE - Controls forward speed and the depth at which the tiller will dig. FORWARD TINE CONTROL - Engages tines in forward direction. RECOIL STARTER HANDLE - Used to start the engine. direction. THROTTLE CONTROL - Controls engine speed. PRIMER - pumps additional fuel from the carburetor to the cylinder for use when starting a cold engine. 6 OPERATION The operation of any tiller can result in foreign objects thrown into the eyes, which can result in severe eye damage. Always wear safety glasses or eye shields before starting your tiller and while tilling. We recommend a wide vision safety mask for over spectacles or standard safety glasses. 00155 HOW TO USE YOUR TILLER TILLING The speed and depth of tilling is regulated by the position of the depth stake. The depth stake should always be below the wheels for digging. It serves as a brake to slow the tiller’s forward motion to enable the tines to penetrate the ground. Also, the more the depth stake is lowered into the ground the deeper the tines will dig. Know how to operate all controls before adding fuel and oil or attempting to start engine. STOPPING (See Fig. 6) TINES 1. Release tine control to stop movement. ENGINE 2. Move throttle control to "STOP" position. DEPTH STAKE (See Fig. 7) Adjust depth stake by removing the hairpin clip and clevis pin. Change depth stake to desired position. Replace the clevis pin and hairpin clip. • For normal tilling, set depth stake at the second or third hole from the top. TINE CONTROL “OFF” (UP) POSITION TINE CONTROL “ON” (DOWN) POSITION DEPTH STAKE HAIRPIN CLIP THROTTLE CONTROL CLEVIS PIN Fig. 7 TO TRANSPORT CAUTION: Before lifting or transporting, allow tiller engine and muffler to cool. Disconnect spark plug wire. Drain gasoline from fuel tank. AROUND THE YARD • Adjust depth stake so clevis pin is in bottom hole. • Push tiller handles down, raising tines off the ground. • Push or pull tiller to desired location. Fig. 6 TINE OPERATION (See Fig. 6) • Squeeze tine control to handle. AROUND TOWN • Disconnect spark plug wire. • Drain fuel tank. • Transport in upright position to prevent oil leakage. 7 OPERATION BEFORE STARTING ENGINE IMPORTANT: WHEN OPERATING IN TEMPERATURES BELOW 32°F(0°C), USE FRESH, CLEAN WINTER GRADE GASOLINE TO HELP ENSURE GOOD COLD WEATHER STARTING. IMPORTANT: BE VERY CAREFUL NOT TO ALLOW DIRT TO ENTER THE ENGINE WHEN CHECKING OR ADDING OIL OR FUEL. USE CLEAN OIL AND FUEL AND STORE IN APPROVED, CLEAN, COVERED CONTAINERS. USE CLEAN FILL FUNNELS. CAUTION: Alcohol blended fuels (called gasohol or using ethanol or methanol) can attract moisture which leads to separation and formation of acids during storage. Acidic gas can damage the fuel system of an engine while in storage. To avoid engine problems, the fuel system should be emptied before storage of 30 days or longer. Drain the gas tank, start the engine and let it run until the fuel lines and carburetor are empty. Use fresh fuel next season. See Storage Instructions for additional information. Never use engine or carburetor cleaner products in the fuel tank or permanent damage may occur. CHECK ENGINE OIL LEVEL (See Fig. 8) 1. Remove hangtag from engine. 2. The engine in your unit has been shipped, from the factory, already filled with SAE 30 summer weight oil. 3. With engine level, remove engine oil filler plug. 4. Engine oil should be at "FULL" line on dipstick. If low, fill to "FULL" line. For approximate capacity, see "PRODUCT SPECIFICATIONS" on page 3 of this manual. 5. Reinstall engine oil filler plug. 6. Check oil before each use. Add oil if needed. TO START ENGINE (See Fig. 9) CAUTION: DO NOT overfill engine with oil, or it will smoke heavily from the muffler on startup. • • CAUTION: KEEP TINE CONTROL IN “OFF” POSITION WHEN STARTING ENGINE. For cold weather operation you should change oil for easier starting (See “OIL VISCOSITY CHART” in the Maintenance section of this manual). To change engine oil, see the Maintenance section of this manual. NOTE: Due to protective coatings on the engine, a small amount of smoke may be present during the initial use of the product and should be considered normal. 1. Make sure spark plug wire is properly connected. 3. Place throttle control in “FAST” position. 4. To start a cold engine, push primer three (3) times before trying to start. Use a firm push. This step is not usually necessary when starting an engine which has already run for a few minutes. 5. Grasp recoil starter handle with one hand and grasp tiller handle with other hand. Pull recoil starter handle quickly. Do not let starter rope snap back. NOTE: In cooler weather it may be necessary to repeat priming steps. In warmer weather over priming may cause flooding and engine will not start. If you do flood engine, wait a few minutes before attempting to start and do not repeat priming steps. OIL FILLER CAP MAXIMUM UPPER LEVEL MINIMUM UPPER LEVEL RECOIL STARTER HANDLE Fig. 8 THROTTLE CONTROL ADD GASOLINE • Fill fuel tank to bottom of filler neck. Do not overfill. Use fresh, clean, regular unleaded gasoline with a minimum of 87 octane. (Use of leaded gasoline will increase carbon and lead oxide deposits and reduce valve life). Do not mix oil with gasoline. Purchase fuel in quantities that can be used within 30 days to assure fuel freshness. CAUTION: Do not fill above 1/2 inch of top of fuel tank to prevent spills and to allow for fuel expansion. If gasoline is accidentally spilled, move machine away from area of spill. Avoid creating any source of ignition until gasoline vapors have disappeared. Wipe off any spilled oil or fuel. Do not store, spill or use gasoline near an open flame. PRIMER SPARK PLUG Fig. 9 8 OPERATION BREAKING IN YOUR TILLER Break-in your belt(s), pulleys and tine control before you actually begin tilling. • Start engine, tip tines off ground by pressing handles down and engage tine control to start tine rotation. Allow tines to rotate for five minutes. TILLING HINTS 3 4 CAUTION: Until you are accustomed to handling your tiller, start actual field use with throttle in slow position. 5 To help tiller move forward, lift up the handles slightly (thus lifting depth stake out of ground). To slow down the tiller, press down on handles. If you are straining or tiller is shaking, the depth stake is not set properly in the soil being tilled. The proper setting of the depth stake is through trial and error and depends upon the soil condition. (The harder or wetter the ground, the slower the engine and tine speed needed. Under these poor conditions, at fast speed the tiller will run and jump over the ground). A properly adjusted tiller will dig with little effort from the operator. • Tilling is digging into, turning over, and breaking up packed soil before planting. Loose, unpacked soil helps root growth. Best tilling depth is 4"-6". A tiller will also clear the soil of unwanted vegetation. The decomposition of this vegetable matter enriches the soil. Depending on the climate (rainfall and wind), it may be advisable to till the soil at the end of the growing season to further condition the soil. • Soil conditions are important for proper tilling. Tines will not readily penetrate dry, hard soil which may contribute to excessive bounce and difficult handling of your tiller. Hard soil should be moistened before tilling; however, extremely wet soil will “ball-up” or clump during tilling. Wait until the soil is less wet in order to achieve the best results. When tilling in the fall, remove vines and long grass to prevent them from wrapping around the tine shaft and slowing your tilling operation. • You will find tilling much easier if you leave a row untilled between passes. Then go back between tilled rows. (See Fig. 10) There are two reasons for doing this. First, wide turns are much easier to negotiate than about-faces. Second, the tiller won’t be pulling itself, and you, toward the row next to it. • Set depth stake for shallow tilling when working extremely hard soil or sod. Then work across the first cuts at normal depth. 2 6 1 7 Fig. 10 CULTIVATING Cultivating is destroying the weeds between rows to prevent them from robbing nourishment and moisture from the plants. At the same time, breaking up the upper layer of soil crust will help retain moisture in the soil. Best digging depth is 1"-3". • You will probably not need to use the depth stake. Begin by tipping the depth stake forward until it is held by the stake spring. • Cultivate up and down the rows at a speed which will allow tines to uproot weeds and leave the ground in rough condition, promoting no further growth of weeds and grass (See Fig. 11). Fig. 11 9 FILL IN DATES AS YOU COMPLETE REGULAR SERVICE BE FO MAINTENANCE SCHEDULE RE EA CH FIR US ST E 5H OU R EV S ER Y8 HO UR EV S ER Y2 5H OU EV RS ER OR Y5 0H AN NU O UR AN AL NU SO LY AL R LY AN NU AL LY MAINTENANCE SERVICE DATES Check Engine Oil Level Change Engine Oil 3 1,2 Oil Pivot Points Inspect Spark Arrester / Muffler Clean Air Cooling System 2 Clean Air Filter 2 Replace Air Filter Clean Area Around Muffler And Controls Replace Spark Plug 1 - Change more often when operating under a heavy load or in high ambient temperatures. 2 - Service more often when operating in dirty or dusty conditions. 3 - Initial oil change should be performed after first five (5) hours of operations. GENERAL RECOMMENDATIONS LUBRICATION CHART The warranty on this tiller does not cover items that have been subjected to operator abuse or negligence. To receive full value from the warranty, the operator must maintain tiller as instructed in this manual. Some adjustments will need to be made periodically to properly maintain your tiller. At least once a season, check to see if you should make any of the adjustments described in the Service and Adjustments section of this manual. • Once a year you should replace the spark plug, clean or replace air filter, and check tines and belts for wear. A new spark plug and clean air filter assure proper airfuel mixture and help your engine run better and last longer. TINE CONTROL ENGINE BEFORE EACH USE • • • Check engine oil level. Check tine operation. Check for loose fasteners. LUBRICATION Keep unit well lubricated (See “LUBRICATION CHART”). SAE 30 OR 10W-30 MOTOR OIL REFER TO MAINTENANCE “ENGINE” SECTION 10 MAINTENANCE Disconnect spark plug wire before performing any maintenance (except carburetor adjustment) to prevent accidental starting of engine. Prevent fires! Keep the engine free of grass, leaves, spilled oil, or fuel. Remove fuel from tank before tipping unit for maintenance. Clean muffler area of all grass, dirt, and debris. Do not touch hot muffler or cylinder fins as contact may cause burns. ENGINE 3. Tip tiller on its side as shown and drain oil into a suitable container. Rock tiller back and forth to remove any oil trapped inside of engine. 4. Wipe off any spilled oil from tiller or side of engine. 5. Slowly pour oil down the oil fill spout, stopping every few ounces to check the oil level with the dipstick. 6. Stop adding oil when you reach the FULL mark on the dipstick. Wait a minute to allow oil to settle. 7. Continue adding small amounts of oil, rechecking the dipstick until oil level settles at FULL. DO NOT overfill, or engine will smoke heavily from the muffler on startup. 8. Always be sure to retighten oil dipstick before starting engine. 9. Reconnect spark plug wire to spark plug. LUBRICATION Use only high quality detergent oil rated with API service classification SG-SL. Select the oil’s SAE viscosity grade according to your expected temperature. 104 40 50 32 14 -4 30 20 10 0 5W-30 68 10W-30 86 SYNTHETIC 5W-30 °C SAE 30 °F -10 AIR FILTER -20 -30 -22 Your engine will not run properly and may be damaged by using a dirty air filter. Clean the element after every 25 hours of operation or every season. Replace the air filter every season. Service air cleaner more often under dusty conditions. TO CLEAN AIR FILTER ELEMENT 1. Remove screw. 2. Remove air cleaner carefully to prevent dirt from entering carburetor. 3. Take air cleaner apart and clean air filter element. 4. Wash filter element in liquid detergent and water. 5. Wrap filter element in cloth and squeeze dry. 6. Lightly coat filter element with clean engine oil. Squeeze in towel to remove excess oil. Do not saturate. 7. Reassemble parts and put back on carburetor. Fig. 12 NOTE: Although multi-viscosity oils (5W-30, 10W-30, etc.) improve starting in cold weather, these multi viscosity oils will result in increased oil consumption when used above 32°F (0°C). Check your engine oil level more frequently to avoid possible engine damage from running low on oil. Change the oil after every 50 hours of operation or at least once a year if the tiller is not used for 50 hours in one year. Check the crankcase oil level before starting the engine and after each eight (8) hours of continuous use. Add SAE 30 motor oil or equivalent. Tighten oil filler plug securely each time you check the oil level. TO CHANGE ENGINE OIL (See Fig. 13) NOTE: Before tipping tiller to drain oil, empty fuel tank by running engine until fuel tank is empty. 1. Disconnect spark plug wire from spark plug and place wire where it cannot come in contact with plug. 2. Remove engine oil cap; lay aside on a clean surface. ASSEMBLE ONE OF THESE LOW POINTS TOWARDS NARROW EDGE OF ELEMENT SCREW CUP LIP ELEMENT ASSEMBLE SO LIP EXTENDS OVER EDGE OF AIR CLEANER BODY LIP WILL FORM PROTECTIVE SEAL WHEN COVER IS ASSEMBLED CONTAINER SPARK PLUG WIRE Fig. 13 11 Fig. 14 BODY MAINTENANCE COOLING SYSTEM (See Fig. 15) SPARK PLUG Your engine is air cooled. For proper engine performance and long life keep your engine clean. • Remove blower housing and clean as necessary. • Keep cylinder fins free of dirt and chaff. TRANSMISSION Replace spark plugs at the beginning of each tilling season. Spark plug type and gap setting are shown in “PRODUCT SPECIFICATIONS” on page 3 of this manual. Your transmission is sealed and will not require lubrication unless serviced. BLOWER HOUSING CLEANING Do not clean your tiller when the engine and transmission are hot. We do not recommend using pressurized water (garden hose, etc.) to clean your unit unless the gasket area around the transmission and the engine muffler, air filter and carburetor are covered to keep water out. Water in engine will shorten the useful life of your tiller. • Clean engine, wheels, finish, etc. of all foreign matter. • Keep finished surfaces and wheels free of all gasoline, oil, etc. • Protect painted surfaces with automotive type wax. COOLING FINS MUFFLER MUFFLER Fig. 15 Do not operate tiller without muffler. Do not tamper with exhaust system. Damaged mufflers or spark arresters could create a fire hazard. Inspect periodically and replace if necessary. If your engine is equipped with a spark arrester screen assembly, remove every 50 hours for cleaning and inspection. Replace if damaged. 12 SERVICE AND ADJUSTMENTS CAUTION: Disconnect spark plug wire from spark plug and place wire where it cannot come into contact with plug. TILLER TO CHECK TINE OPERATION • TINE ARRANGEMENT • • Your outer tines can be assembled in several different ways to suit your tilling or cultivating needs. TO REMOVE CLUTCH HOUSING/ENGINE ASSEMBLY (SEE FIG. 19) CAUTION: Tines are sharp. Wear gloves or other protection when handling tines. • • NORMAL TILLING - 24" PATH (See Fig. 16) • Assemble holes “A” in tine hubs to holes “B” in tine shaft. • OUTER TINE CLEVIS PIN Start engine, tip tines off ground by pressing handles down and engage tine control to start tine rotation. Verify tines spin properly. Allow tines to rotate for five minutes. Drain engine oil and gasoline out of engine. Remove (5) carriage bolts and (5) lock nuts attaching the clutch housing and tine shield to transmission. Remove clutch housing/engine assembly and lay on ground (engine is upside down). A A CARRIAGE BOLTS B B tine_4 HAIRPIN CLIP INNER TINE Fig. 16 MID-WIDTH TILLING - 22" PATH (See Fig. 17) • Assemble holes “A” in tine hubs to holes “C” in tine shaft. A C C A tine_5 Fig. 17 Fig. 19 NARROW TILLING/CULTIVATING - 13" PATH (See Fig. 18) • Remove outer tines. tine_6 INNER TINES ONLY Fig. 18 NOTE: When reassembling outer tines, ensure right tine assembly (marked “R”) and left tine assembly (marked “L”) are mounted to correct side of tine shaft. 13 SERVICE AND ADJUSTMENTS TO REPLACE V-BELT (SEE Fig. 20 - 22) • • • • • • Clutch housing/engine assembly must be removed to service belt. See "TO REMOVE CLUTCH HOUSINGIENGINE ASSEMBLY" in this section of manual. Using pliers, remove cable spring and return spring from pivot bracket. Remove plastic snap-in plug from clutch housing. Using pliers, depress conduit fitting tabs and pull conduit fitting through hole in clutch housing. Pull cable spring and cable through snap-in plug hole in clutch housing. CLUTCH HOUSING BELT GUIDE STUD RETURN SPRING • • ENGINE TO ADJUST CARBURETOR The carburetor has been preset at the factory and adjustment should not be necessary. However, engine performance can be affected by differences in fuel, temperature, altitude or load. If the carburetor does need adjustment, contact your nearest authorized service center/department CABLE SPRING SNAP-IN PLUG IMPORTANT: NEVER TAMPER WITH THE ENGINE GOVERNOR, WHICH IS FACTORY SET FOR PROPER ENGINE SPEED. OVERSPEEDING THE ENGINE ABOVE THE FACTORY HIGH SPEED SETTING CAN BE DANGEROUS. IF YOU THINK THE ENGINE-GOVERNED HIGH SPEED NEEDS ADJUSTING, CONTACT YOUR NEAREST AUTHORIZED SERVICE CENTER/ DEPARTMENT, WHICH HAS THE PROPER EQUIPMENT AND EXPERIENCE TO MAKE ANY NECESSARY ADJUSTMENTS. TABS CONDUIT FITTING CABLE Fig. 20 • Remove bolt, washer, and lock nut attaching idler bracket to clutch housing. WASHER BOLT CLUTCH HOUSING SNAP-IN PLUG LOCK NUT Fig. 21 • Remove bolt, washer, and lock nut attaching idler pulley to idler bracket. Remove bushing from between idler bracket and clutch housing. BOLT IDLER PULLEY Replace belt and reinstall pulley, idler bracket, conduit fitting, springs, and hardware in reverse order. Reinstall clutch housing/engine assembly, making sure belt is inside belt guide stud. Check tine operation. See "To Check Tine Operation" in this section of manual. WASHER IDLER BRACKET BUSHING LOCK NUT Fig. 22 14 STORAGE OTHER Immediately prepare your tiller for storage at the end of the season or if the unit will not be used for 30 days or more. • • WARNING: Never store the tiller with gasoline in the tank inside a building where fumes may reach an open flame or spark. Allow the engine to cool before storing in any enclosure. • • TILLER • • • • • Clean entire tiller (See “CLEANING” in the Maintenance section of this manual). Inspect and replace belts, if necessary (See belt replacement instructions in the Service and Adjustments section of this manual). Lubricate as shown in the Maintenance section of this manual. Ensure that all nuts, bolts and screws are securely fastened. Inspect moving parts for damage, breakage and wear. Replace if necessary. Touch up all rusted or chipped paint surfaces; sand lightly before painting. Do not store gasoline from one season to another. Replace your gasoline can if your can starts to rust. Rust and/or dirt in your gasoline will cause problems. If possible, store your unit indoors and cover it to give protection from dust and dirt. Cover your unit with a suitable protective cover that does not retain moisture. Do not use plastic. Plastic cannot breathe which allows condensation to form and will cause your unit to rust. IMPORTANT: NEVER COVER TILLER WHILE ENGINE AND EXHAUST AREAS ARE STILL WARM. TILLER HANDLE STORAGE OPTIONS The tiller handle assembly can be modified to allow for a variety of storage positions outlined below. CAUTION: Do not start or operate tiller when handle is in any of these positions. STORAGE POSITION: AGAINST ENGINE (See Fig. 23) • ENGINE • FUEL SYSTEM IMPORTANT: IT IS IMPORTANT TO PREVENT GUM DEPOSITS FROM FORMING IN ESSENTIAL FUEL SYSTEM PARTS SUCH AS THE CARBURETOR, FUEL FILTER, FUEL HOSE, OR TANK DURING STORAGE. ALSO, EXPERIENCE INDICATES THAT ALCOHOL BLENDED FUELS (CALLED GASOHOL OR USING ETHANOL OR METHANOL) CAN ATTRACT MOISTURE WHICH LEADS TO SEPARATION AND FORMATION OF ACIDS DURING STORAGE. ACIDIC GAS CAN DAMAGE THE FUEL SYSTEM OF AN ENGINE WHILE IN STORAGE. Empty the fuel tank by starting the engine and let it run until the fuel lines and carburetor are empty. • Never use engine or carburetor cleaner products in the fuel tank or permanent damage may occur. • Use fresh fuel next season. NOTE: Fuel stablizer is an acceptable alternative in minimizing the formation of fuel gum deposits during storage. Add stabilizer to gasoline in fuel tank or storage container. Always follow the mix ratio found on stablizer container. Run engine at least 10 minutes after adding stablizer to allow the stabilizer to reach the carburetor. Do not empty the gas tank and carburetor if using fuel stabilizer. Unscrew top or bottom handle knob and washer, and remove top or bottom carriage bolt. Rotate entire handle assembly about carriage bolt (pivot point) and lay handle against engine shroud. • TOP KNOB TOP CARRIAGE BOLT Fig. 23 STORAGE POSITION: IN TRANSPORT ARM STORAGE FEATURE (See Fig. 24) • • Unscrew (2) handle knobs and remove (2) carriage bolts. Remove top handle assembly and place it in handle storage feature in transport arm. ENGINE OIL Drain oil (with engine warm) and replace with clean oil. (See “ENGINE” in the Maintenance section of this manual.) BOTTOM HANDLE KNOB CYLINDER(S) • • • • Remove spark plug. Pour 1 ounce (29 ml) of oil through spark plug hole into cylinder. Pull starter handle slowly several times to distribute oil. Replace with new spark plug. TOP HANDLE KNOB 15 Fig. 24 TROUBLESHOOTING PROBLEM CAUSE CORRECTION 1. 2. 3. 4. 5. Out of fuel. Engine not “CHOKED” properly. Engine flooded. Dirty air cleaner. Water in fuel. 1. 2. 3. 4. 5. 6. 7. Clogged fuel tank. Loose spark plug wire. 6. 7. 8. 9. Bad spark plug or improper gap. Carburetor out of adjustment. 8. 9. Fill fuel tank. See “TO START ENGINE” in the Operation section. Wait several minutes before attempting to start. Clean or replace air cleaner cartridge. Empty fuel tank and carburetor, and refill tank with fresh gasoline. Remove fuel tank and clean. Ensure spark plug wire is seated properly on plug. Replace spark plug or adjust gap. Make necessary adjustments. Hard to start 1. 2. 3. 4. 5. 6. Throttle control not set properly. Dirty air cleaner. Bad spark plug or improper gap. Stale or dirty fuel. Loose spark plug wire. Carburetor out of adjustment. 1. 2. 3. 4. 5. 6. Place throttle control in “FAST” position. Clean or replace air cleaner cartridge. Replace spark plug or adjust gap. Empty fuel tank and refill with fresh gasoline. Ensure spark plug wire is seated properly on plug. Make necessary adjustments. Loss of power 1. 2. 3. 4. 5. Engine is overloaded. Dirty air cleaner. Low oil level/dirty oil. Faulty spark plug. Oil in fuel. 1. 2. 3. 4. 5. 6. 7. Stale or dirty fuel. Water in fuel. 6. 7. Set depth stake for shallower tilling. Clean or replace air cleaner cartridge. Check oil level/change oil. Clean and regap or change spark plug. Empty and clean fuel tank and refill, and clean carburetor. Empty fuel tank and refill with fresh gasoline. Empty fuel tank and carburetor, and refill tank with fresh gasoline. Remove fuel tank and clean. Connect and tighten spark plug wire. Clean engine air screen. Clean/replace muffler. Make necessary adjustments. Contact an authorized service center/department. Will not start 8. 9. 10. 11. 12. 13. Clogged fuel tank. Spark plug wire loose. Dirty engine air screen. Dirty/clogged muffler. Carburetor out of adjustment. Poor compression. 8. 9. 10. 11. 12. 13. Engine overheats 1. 2. 3. 4. 5. Low oil level/dirty oil. Dirty engine air screen. Dirty engine. Partially plugged muffler. Improper carburetor adjustment. 1. 2. 3. 4. 5. Check oil level/change oil. Clean engine air screen. Clean cylinder fins, air screen, muffler area. Remove and clean muffler. Adjust carburetor to richer position. Excessive bounce/ difficult handling 1. Ground too dry and hard. 1. 2. Depth stake incorrectly adjusted. 2. Moisten ground or wait for more favorable soil conditions. Adjust depth stake. Soil balls up or clumps 1. Ground too wet. 1. Wait for more favorable soil conditions. Engine runs but tiller won’t move 1. 2. Tine control is not engaged. V-belt is off pulley(s). 1. 2. Engage tine control. Inspect V-belt. Engine runs but labors when tilling 1. 2. 3. Tilling too deep. Throttle control not properly adjusted. Carburetor out of adjustment. 1. 2. 3. Set depth stake for shallower tilling. Check throttle control setting. Make necessary adjustments. 16 TILLER - - MODEL NUMBER MC550 (96083000301) DECALS 4 3 1 2 KEY PART NO. NO. DESCRIPTION 1 2 3 4 -- Decal, Tine, Shield Decal, Tine, Shield, Warning Decal, Warning, Rotating Tines Decal, Hand Placement Manual, Owner's (Eng/Span) 532440094 532434458 532141906 532141907 532439959 17 TILLER - - MODEL NUMBER MC550 (96083000301) ENGINE, TRANSMISSION, AND TINES 4 5 2 1 3 2 6 7 9 5 7 10 8 11 12 18 19 13 14 15 20 16 17 21 25 13 23 22 30 30 24 28 5 5 29 27 31 26 29 engine-transmission-tines_1 18 TILLER - - MODEL NUMBER MC550 (96083000301) ENGINE, TRANSMISSION, AND TINES KEY PART NO. NO. 1 -------- 2 3 4 5 6 7 8 9 10 11 12 13 14 15 16 17 18 19 20 21 22 23 24 25 26 27 28 29 30 31 872110608 873900500 532425398 873900600 532435471 817000616 532421335 532421341 532175331 532421373 532421339 874610616 532421379 532421378 819131416 874780620 532133944 874760514 532436281 532421340 532413524 532421336 532421334 532156926 532156924 532156925 532156923 532004929 532124660 532425399 DESCRIPTION Engine B&S Model No. 10T8021390-B1 Bolt Carriage 3/8 - 16 x 1 Nut Lock Flg 5/16 -18 unc Plug Snap In Nut Lock Flg 3/8 - 16 unc Shroud Tiller Clutch Screw 3/8 - 16 x 1-1/2 Sheave Upper Stud Belt Guard Bushing Pivot Spring Return Bracket Idler Bolt Hex 3/8 - 24 x 1 Belt Drive Pulley Idler Washer 13/32 x 7/8 x 16 Ga. Bolt 3/8 - 16 x 1.25 Washer .328 x 1.375 x 0.055 Bolt Fin Hex 5/16-18 unc x 7/8 Shield Tine Seal Foam Washer 13/32 x 1-1/2 x 11 Ga. Sheave Lower Coupling Clutch Tine Outer RH Tine Inner RH Tine Outer LH Tine Inner LH Pin Clevis Retainer Spring Zinc Gearbox Asm. NOTE: All component dimensions given in U.S. inches. 1 inch = 25.4 mm 19 TILLER - - MODEL NUMBER MC550 (96083000301) HANDLE, WHEEL, AND DEPTH STAKE 2 3 1 24 7 5 8 4 6 9 23 13 21 19 5 10 10 14 15 22 18 5 11 23 20 17 12 16 18 17 17 Handles-Wheels-Depth Stake_1_r1.ai 19 22 20 21 20 TILLER - - MODEL NUMBER MC550 (96083000301) HANDLE, WHEEL, AND DEPTH STAKE KEY PART NO. NO. DESCRIPTION 1 2 3 4 5 6 7 8 9 10 11 12 13 14 15 16 17 18 19 20 21 22 23 24 Console Tiller Handle Grip Handle Assembly Handle Column Bolt 5/16 - 18 x 2.50 Knob Wing Cable Asm. Retainer Ring Pin Pivot Handle Lower Plug Snap In Weldment Transport Arm Clip Hairpin Stake Depth Pin Clevis Bolt 3/8 - 16 x 1-1/4 Screw Hex Head 3/8 - 16 x 2.5 Nut Lock Flg 3/8 - 16 unc Bolt 5/16 - 18 x 4.5 Wheel Washer 17/32 x 7/8 x 16 Ga. Bolt Shoulder "A" 2.28 " B" 1.53 Bracket Wheel Washer 11/32 x 3/4 x 16 Ga. Lever Control 532436280 532165787 532431332 872010520 532191938 532425091 812000059 532431762 532424190 532425398 532432521 532124961 532421342 532000326 872110610 874780640 873900600 872140536 532432514 819171416 532121117 532421345 819111216 532434948 NOTE: All component dimensions given in U.S. inches. 1 inch = 25.4 mm 21 LIMITED WARRANTY The Manufacturer warrants to the original consumer purchaser that this product as manufactured is free from defects in materials and workmanship. For a period of one (1) years from date of purchase by the original consumer purchaser, we will repair or replace, at our option, without charge for parts or labor incurred in replacing parts, any part which we find to be defective due to materials or workmanship. This Warranty is subject to the following limitations and exclusions. 1. This warranty does not apply to the engine, transaxle/transmission components, battery (except as noted below) or components parts thereof. Please refer to the applicable manufacturer's warranty on these items. 2. Transportation charges for the movement of any power equipment unit or attachment are the responsibility of the purchaser. Transportation charges for any parts submitted for replacement under this warranty must be paid by the purchaser unless such return is requested by the manufacturer. 3. Battery Warranty: On products equipped with a Battery, we will replace, without charge to you, any battery which we find to be defective in manufacture, during the first ninety (90) days of ownership. After ninety (90) days, we will exchange the Battery, charging you 1/12 of the price of a new Battery for each full month from the date of the original sale. Battery must be maintained in accordance with the instructions furnished. 4. The Warranty period for any products used for rental or commercial purposes is limited to 90 days from the date of original purchase. 5. This Warranty applies only to products which have been properly assembled, adjusted, operated, and maintained in accordance with the instructions furnished. This Warranty does not apply to any product which has been subjected to alteration, misuse, abuse, improper assembly or installation, delivery damage, or to normal wear of the product. 6. Exclusions: Excluded from this Warranty are belts, blades, blade adapters, normal wear, normal adjustments, standard hardware and normal maintenance. 7. In the event you have a claim under this Warranty, you must return the product to an authorized service dealer. Should you have any unanswered questions concerning this Warranty, please contact: In Canada contact: HOP Outdoor Products Customer Service Dept. 9335 Harris Corners Parkway Charlotte, NC 28269 USA HOP 5855 Terry Fox Way Mississauga, Ontario L5V 3E4 giving the model number, serial number and date of purchase of your product and the name and address of the authorized dealer from whom it was purchased. THIS WARRANTY DOES NOT APPLY TO INCIDENTAL OR CONSEQUENTIAL DAMAGES AND ANY IMPLIED WARRANTIES ARE LIMITED TO THE SAME TIME PERIODS STATED HEREIN FOR OUR EXPRESSED WARRANTIES. Some areas do not allow the limitation of consequential damages or limitations of how long an implied Warranty may last, so the above limitations or exclusions may not apply to you. This Warranty gives you specific legal rights, and you may have other rights which vary from locale to locale. This is a limited Warranty within the meaning of that term as defined in the Magnuson-Moss Act of 1975. 22 GARANTÍA LIMITADO El fabricante le garantiza al comprador consumidor original que este producto no tendrá defectos en los materiales ni en la mano de obra. Le repararemos o reemplazaremos, a nuestra opción, cualquier pieza que encontremos defectuosa a causa de los materiales o mano de obra, sin incluir los costos de las piezas o de mano de obra incurridos en el reemplazo de las piezas y durante un período de uno (1) años desde la fecha de compra del comprador consumidor original. Esta garantía está sujeta a las siguientes limitaciones y exclusiones. En caso de tener que hacer un reclamo durante el periodo de vigencia de esta garantía, deberá devolver el producto a un distribuidor de servicio autorizado. 7. Exclusiones: Se excluyen de esta garantía las correas, las cuchillas, los adaptadores de las cuchillas, el desgaste natural, los ajustes normales, los accesorios estándares y el mantenimiento normal. 6. Esta garantía se aplica solo a productos que han sido ensamblados, ajustados, operados y conservados correctamente y de acuerdo con las instrucciones provistas. Esta garantía no se aplica a ningún producto que haya estado sujeto a alteraciones, uso indebido, abuso, ensamblado o instalación incorrectas, daños por envío o al desgaste natural del producto. 5. El período de garantía para cualquier producto utilizado con fines comerciales o de alquiler está limitado a 90 días desde la fecha original de compra. 4. Garantía de la batería: En los productos equipados con baterías, le reemplazaremos, sin costo al comprador, cualquier batería que encontremos defectuosa en su fabricación durante los primeros noventa (90) días de posesión. Después de noventa (90) días, le cambiaremos la batería, con un costo del 1/12 del precio de una batería nueva por cada mes completo desde la venta original. La batería debe ser conservada de acuerdo con las instrucciones provistas. 3. Los costos de transporte ocasionados por el traslado de cualquier unidad o accesorio de equipos motorizados son responsabilidad del comprador. El comprador debe pagar los costos de transporte de cualquiera de las piezas enviadas para su reemplazo en garantía, excepto cuando el reemplazo haya sido solicitado por el fabricante. 2. Esta garantía no se aplica al motor, a los componentes del transeje/transmisión, a la batería (excepto lo que se expresa a continuación) ni partes componentes de estos. Consulte la garantía del fabricante correspondiente a estos artículos. 1. En caso de tener preguntas sobre esta garantía, póngase en contacto con: HOP Outdoor Products Customer Service Dept. 9335 Harris Corners Parkway Charlotte, NC 28269 USA En Canadá: HOP 5855 Terry Fox Way Mississauga, Ontario L5V 3E4 Proporcione el número de modelo, número de serie y fecha de compra del producto, y el nombre y dirección del distribuidor autorizado donde compró el producto. ESTA GARANTÍA NO SE APLICA A DAÑOS INCIDENTALES O CONSECUENTES Y CUALQUIER GARANTÍA IMPLÍCITA ESTÁ LIMITADA A LOS MISMOS PLAZOS AQUÍ ESTABLECIDOS POR NUESTRAS GARANTÍAS EXPRESAS. Algunas jurisdicciones no permiten la limitación de daños consecuentes o limitaciones sobre el periodo de duración de una garantía implícita, por lo que las limitaciones o exclusiones anteriormente detalladas pueden no aplicarse en su caso. Esta garantía le otorga derechos legales específicos y es posible que usted goce de otros derechos que varían de localidad en localidad. Esta es una garantía limitada según se define en la Ley Magnuson-Moss de 1975. 22 CULTIVADORA - - MODELO NO. MC550 (96083000301) HANDLE, WHEEL, AND DEPTH STAKE CÓDIGO PIEZA NO. NO. 1 2 3 4 5 6 7 8 9 10 11 12 13 14 15 16 17 18 19 20 21 22 23 24 532436280 532165787 532431332 872010520 532191938 532425091 812000059 532431762 532424190 532425398 532432521 532124961 532421342 532000326 872110610 874780640 873900600 872140536 532432514 819171416 532121117 532421345 819111216 532434948 DESCRIPCIÓN Consola Pestillo, hule Pestillo Perno 5/16 - 18 x 2.50 Botón Montaje de cable Anillo Clavija Manija Bouchon Soporto grande Abrazadera Ejaca de profondeur Clavija Perno 3/8 - 16 x 1-1/4 Tornillo Hex Head 3/8 - 16 x 2.5 Tuerca 3/8 - 16 unc Perno 5/16 - 18 x 4.5 Ruedas Arandela 17/32 x 7/8 x calibre 16 Perno "A" 2.28 " B" 1.53 Soporto Arandela 11/32 x 3/4 x calibre 16 Bloqueo del control NOTA: Las dimensiones de todos los componentes están expresadas en pulgadas americanas. 1 pulgada = 25,4 mm 21 CULTIVADORA - - MODELO NO. MC550 (96083000301) HANDLE, WHEEL, AND DEPTH STAKE 2 3 1 7 24 5 8 4 6 9 23 13 21 19 10 5 10 14 15 22 18 5 11 23 20 12 16 17 18 17 17 19 22 20 Handles-Wheels-Depth Stake_1_r1.ai 21 20 CULTIVADORA - - MODELO NO. MC550 (96083000301) MOTOR, TRANSMISSIONS, Y BRAZOS CÓDIGO PIEZA NO. NO. 1 2 3 4 5 6 7 8 9 10 11 12 13 14 15 16 17 18 19 20 21 22 23 24 25 26 27 28 29 30 31 -------872110608 873900500 532425398 873900600 532435471 817000616 532421335 532421341 532175331 532421373 532421339 874610616 532421379 532421378 819131416 874780620 532133944 874760514 532436281 532421340 532413524 532421336 532421334 532156926 532156924 532156925 532156923 532004929 532124660 532425399 DESCRIPCIÓN Motor B&S 10T802-1390-B1 Perno 3/8 - 16 x 1 Tuerca 5/16 -18 unc Tapón Tuerca 3/8 - 16 unc Cubierta del embrague Tornillo 3/8 - 16 x 1-1/2 Polea, superior Sujetador Buje Resorto Soporto Perno 3/8 - 24 x 1 Correa Polea Arandela 13/32 x 7/8 x calibre 16 Perno 3/8 - 16 x 1.25 Arandela .328 x 1.375 x 0.055 Perno 5/16-18 unc x 7/8 Protector Sortija de sella Arandela 13/32 x 1-1/2 x calibre 11 Polea, Inferior Coupling Clutch Brazos, Exterior, LD Brazos, Interior, LD Brazos, Exterior, LI Brazos, Interior, LI Pin Clevis Resorto Montaje de la caja de engranajes NOTA: Las dimensiones de todos los componentes están expresadas en pulgadas americanas. 1 pulgada = 25,4 mm 19 CULTIVADORA - - MODELO NO. MC550 (96083000301) MOTOR, TRANSMISSIONS, Y BRAZOS 4 2 1 5 3 2 6 7 9 5 7 10 8 11 18 19 12 13 14 15 20 16 17 21 25 13 23 22 30 30 24 28 5 5 29 27 31 26 29 engine-transmission-tines_1 18 CULTIVADORA - - MODELO NO. MC550 (96083000301) DECALS 4 3 1 2 CÓDIGO PIEZA NO. NO. 1 2 3 4 -- DESCRIPCIÓN 532440094 532434458 532141906 532141907 532439959 Calcomanía Calcomanía, Cuidado Calcomanía, Cuidado, Brazos Calcomanía, Manual del dueños (Inglés/Español) 17 PROBLEMA No arranca Difícil de arrancar Falta de fuerza IDENTIFICACIÓN DE PROBLEMAS CAUSA El motor está sobrecargado. 1. Carburador desajustado. 6. Alambre de la bujía suelto. 5. Control de la aceleración ajustado inadecuadamente. Filtro de aire sucio. Bujía mala o abertura inadecuada. Combustible rancio o sucio. 2. 3. 4. Bujía mala o abertura inadecuada. Carburador desajustado. 8. 9. Estanque de combustible taponado. Alambre de la bujía suelto. 6. 7. Sin combustible. Motor sin la “ESTRANGULACION” (CHOKE) de adecuada. Motor ahogado. Filtro de aire sucio. Agua en el combustible. 3. 4. 5. 1. 2. 1. Agua en el combustible. 7. Combustible rancio o sucio. 6. Aceite en el combustible. 5. Filtro de aire sucio. Nivel de aceite bajo/aceite sucio. Bujía fallada. 2. 3. 4. 8. 9. 10. 11. 12. 13. Estanque de combustible taponado. Alambre de la bujía suelto. Rejilla de aire del motor sucia. Silenciador sucio/taponado. Carburador desajustado. Mala compresión. 1. 2. 3. 4. 5. 6. 7. 8. 9. 1. 2. 3. 4. 5. 6. 1. 2. 3. 4. 5. 6. 7. 8. 9. 10. 11. 12. 13. 1. El motor funciona pero la cultivadora no se mueve 1. El terreno está muy mojado. 1. El suelo se hace bolas o se amontona 2. Estaca de profundidad ajustada de manera incorrecta. 2. El terreno está muy seco y duro. 1. Silenciador parcialmente taponado. Mal ajuste del carburador. 4. 5. Nivel del aceite bajo/aceite sucio. Rejilla de aire del motor sucia. Motor sucio. 1. 2. 3. El motor se calienta demasiado Rebote excesivo/m anejo difícil El motor funciona pero se esfuerza cuando se labra 2. 3. La barra de control de la impulsión no está enganchada. La correa V no está ajustada correctamente. La correa V está fuera de la(s) polea(s). El control de la aceleración no está ajustado en forma adecuada. El carburador está desajustado. 3. Se está labrando muy profundamente. 1. 2. 1. 2. 3. 4. 5. 1. 1. 2. 3. 1. 2. 3. CORRECCIÓN Llene el estanque de combustible. Vea “PARA ARRANCAR EL MOTOR” en la sección Operación. Espere varios minutos antes de tratar de arrancar. Limpie o cambie el cartucho del filtro de aire. Vaciar el estanque de combustible y el carburador, vuelva a llenar el estanque con gasolina nueva. Remueva el estanque de combustible y límpielo. Asegúrese que el alambre de la bujía esté asentado en forma adecuada en ésta. Cambie la bujía o ajuste la abertura. Haga los ajustes necesarios. Ponga el control de la aceleración en la posición de “RÁPIDO” (FAST). Limpie o cambie el cartucho del filtro de aire. Cambie la bujía o ajuste la abertura. Vaciar el estanque de combustible y vuelva a llenarlo con gasolina nueva. Asegúrese que el alambre de la bujía esté asentado en forma adecuada en ésta. Haga los ajustes necesarios. Ajuste la estaca de profundidad y las ruedas para un labrado menos profundo. Limpie o cambie el cartucho del filtro de aire. Revise el nivel del aceite/cambie el aceite. Limpie y vuelva a ajustar la abertura o cambie la bujía. Vaciar y limpie el estanque de combustible y vuelva a llenarlo y limpie el carburador. Vaciar el estanque de combustible y vuelva a llenarlo con gasolina nueva. Vaciar el estanque de combustible y el carburador y vuelva a llenar el estanque con gasolina nueva. Remueva el estanque de combustible y límpielo. Conecte y apriete el alambre de la bujía. Limpie la rejilla de aire del motor. Limpie/cambie el silenciador. Haga los ajustes necesarios. Póngase en contacto con el centro/departamento de servicio autorizado más cercano. Revise el nivel del aceite/cambie el aceite. Limpie la rejilla de aire del motor. Limpie las aletas del cilindro, la rejilla de aire y el área del silenciador. Remueva y limpie el silenciador. Ajuste el carburador para una posición de mezcla más rica. Moje el suelo o espere a que existan condiciones del suelo más favorables. Ajuste la estaca de profundidad. Espere a que existan condiciones del suelo más favorables. Enganche el control de la impulsión. Inspeccione/ajuste la correa V. Inspeccione la correa V. Ajuste la estaca de profundidad para un labrado menos profundo. Revise el ajuste del control de la aceleración. Haga los ajustes necesarios. 16 ALMACENAMIENTO Inmediatamente prepare su cultivadora para el almacenamiento al final de la temporada o si la unidad no se va a usar por 30 días o más. PRECAUCIÓN: Nunca almacene la cultivadora con gasolina en el estanque dentro de un edificio en donde los gases pueden alcanzar una llama expuesta o una chispa. Permita que el motor se enfríe antes de almacenarlo en cualquier recinto privado. CULTIVADORA • • • • • Limpie toda la cultivadora (vea “LIMPIEZA” en la sección de Mantenimiento en este manual). Inspeccione y cambie las correas, si es necesario (vea las instrucciones para el cambio de la correa en la sección de Servicio y Ajustes de este manual). Lubríquela según se muestra en la sección de Mantenimiento en este manual. Asegúrese que todas las tuercas, pernos y tornillos estén apretados en forma segura. Inspeccione las partes movibles para verificar si están dañadas, rotas o desgastadas. Cámbielas si es necesario. Retoque todas las superficies pintadas que estén oxidadas o picadas; use una lija suavemente antes de pintar. MOTOR OTROS • No guarde la gasolina de una temporada a la otra. • Cambie el envase de la gasolina si se empieza a oxidar. La oxidación y/o la mugre en su gasolina producirán problemas. • Si es posible, guarde su unidad en un recinto cerrado y cúbrala para protegerla contra el polvo y la mugre. • Cubra su unidad con un forro protector adecuado que no retenga la humedad. No use plástico. El plástico no puede respirar, lo que permite la formación de condensación, lo que producirá la oxidación de su unidad. IMPORTANTE: NUNCA CUBRA LA CULTIVADORA MIENTRAS EL MOTOR Y LAS AREAS DE ESCAPE TODAVIA ESTAN CALIENTES. OPCIONES DE ALMACENAMIENTO DE LA MANIJA DEL ARADO El conjunto de la manija del arado puede ser modificado para permitir diversas posiciones de almacenamiento que se describen a continuación. PRECAUCIÓN: No haga arrancar o funcionar el arado con la manija en cualquiera de estas posiciones. POSICIÓN DE ALMACENAMIENTO: CONTRA EL MOTOR (Vea La Fig. 23) • SISTEMA DE COMBUSTIBLE IMPORTANTE: ES IMPORTANTE EVITAR QUE SE FORMEN DEPOSITOS DE GOMA EN PARTES FUNDAMENTALES DEL SISTEMA DE COMBUSTIBLE TALES COMO EL CARBURADOR, EL FILTRO DEL COMBUSTIBLE, LA MANGUERA DEL COMBUSTIBLE O EN EL ESTANQUE DURANTE EL ALMACENAMIENTO. LA EXPERIENCIA TAMBIEN INDICA QUE LOS COMBUSTIBLES MEZCLADOS CON ALCOHOL (CONOCIDO COMO GASOHOL O QUE TIENEN ETANOL O METANOL) PUEDEN ATRAER HUMEDAD, LO QUE CONDUCE A LA SEPARACIÓN Y A LA FORMACIÓN DE ÁCIDOS DURANTE EL ALMACENAMIENTO. LA GASOLINA ÁCIDICA PUEDE DAÑAR EL SISTEMA DE COMBUSTIBLE DE UN MOTOR DURANTE EL PERIODO DE ALMACENAMIENTO. • Drene el estanque de combustible. • Haga arrancar el motor y déjelo funcionar hasta que las líneas del combustible y el carburador estén vacíos. • Nunca use los productos para limpieza del carburador o del motor en el estanque de combustible pues se pueden producir daños permanentes. • Use combustible nuevo la próxima temporada. AVISO: El estabilizador de combustible es una alternativa aceptable para reducir a un mínimo la formación de depósitos de goma en el combustible durante el período de almacenamiento. Agregue estabilizador a la gasolina en el estanque de combustible o en el envase para el almacenamiento. Siempre siga la proporción de mezcla que se encuentra en el envase del estabilizador. Haga funcionar el motor por lo menos 10 minutos después de agregar el estabilizador, para permitir que éste llegue al carburador. No drene la gasolina del estanque de gasolina y el carburador si se está usando estabilizador de combustible. • Desatornille la perilla de la manija superior o inferior y retire el perno con cabeza de hongo superior o inferior. Gire todo el conjunto de la manija alrededor del perno con cabeza de hongo (punto pivotante) y apoye la manija contra el recubrimiento del motor. PERNO SUPERIOR PERILLA SUPERIOR Fig. 23 POSICIÓN DE ALMACENAMIENTO: FUNCIÓN DE ALMACENAMIENTO EN EL BRAZO DE TRANSPORTE (Vea La Fig. 24) • • Desatornille (2) perillas de la manija y retire (2) pernos con cabeza de hongo. Retire el conjunto de manija superior y colóquelo en la función de almacenamiento de la manija en el brazo de transporte. ACEITE DEL MOTOR Drene el aceite (con el motor caliente) y cámbielo con aceite de motor limpio. (Vea “MOTOR” en la sección de Mantenimiento de este manual.) PERILLA SUPERIOR PERILLA INFERIOR CILINDRO • • • • Remueva la bujía. Vacíe una onza de aceite a través del agujero de la bujía en el cilindro. Tire el mango del arrancador, lentamente, varias veces para distribuir el aceite. Cambie por una bujía nueva. Fig. 24 15 SERVICIO Y AJUSTES SUSTITUCIÓN DE LA CORREA EN V (Vea la Fig. 20-22) • • • • • Debe retirarse la carcasa del embrague/conjunto del motor para realizar el mantenimiento de la correa. Consulte "RETIRO DE LA CARCASA DEL EMBRAGUE/CONJUNTO DEL MOTOR" en esta sección del manual. Utilice pinzas para retirar el resorte de cable y el resorte de retorno de la escuadra pivotante. Retire el tapón plástico a presión de la carcasa del embrague. Utilice pinzas para presionar las lengüetas de la conexión del conducto y tire de la conexión del conducto a través del agujero en la carcasa del embrague. Tire del resorte de cable y del cable a través del agujero del tapón a presión en la carcasa del embrague. CAJA DEL EMBRAGUE ESPÁRRAGO RESORTE DEL RESORTE PARA RETORNO DEL CABLE CORREA TAPÓN OREJAS CONEXIÓN DEL CONDUCTO • • • Cambie la correa y vuelva a instalar la polea, la escuadra del rodillo, la conexión del conducto, los resortes y la tornillería en el orden inverso. Vuelva a instalar la carcasa del embrague/conjunto del motor, asegurándose de que la correa se encuentre dentro del montante de guía de la correa. Verifique el funcionamiento de los dientes. Consulte "Revisión del funcionamiento de los dientes" en esta sección del manual. MOTOR PARA AJUSTAR EL CARBURADOR El carburador tiene un chorro de alta velocidad y ha sido preajustado en la fábrica y no debería necesitar ajustes. Sin embargo, se pueden necesitar ajustes de menor importancia para compensar por las diferencias en el combustible, temperatura, altura o carga. Si el carburador necesita ajustes, pongase en contacto con su centro/departamento de servicio autorizado más cercano. IMPORTANTE: NUNCA MANIPULE EL REGULADOR DEL MOTOR EL QUE HA SIDO AJUSTA DO EN LA FABRICA PARA LA VELOCIDAD DEL MOTOR ADECUADA PUEDE SER PELIGROSO HACER FUNCIONAR EL MOTOR A UNA VELOCIDAD POR SOBRE ELAJUSTE DE LATA VELOCIDAD DE LA FABRICA. SI CREE QUE LA VELOCIDAD ALTA REGULADA DEL MOTOR NECESITA AJUSTE, PÓNGASE EN CONTACTO CON SU CENTRO DE SERVICIO CUALIFICADO, EL CUAL CUENTA CON EL EQUIPOA DECUADO Y LA EXPERIENCIA PARA HACER LOS AJUSTES NECESARIOS. CABLE Fig. 20 • Retire el perno, la arandela y la tuerca de seguridad que fija la escuadra del rodillo a la carcasa del embrague. ARANDELA PERNO CAJA DEL EMBRAGUE TAPÓN TUERCA DE SEGURIDAD Fig. 21 • Retire el perno, la arandela y la tuerca de seguridad que fija la polea intermedia a la escuadra del rodillo. Retire los bujes de entre la escuadra del rodillo y la carcasa del embrague. PERNO IDLER PULLEY ARANDELA ESCUADRA DEL RODILLO BUJES TUERCA DE SEGURIDAD Fig. 22 14 SERVICIO Y AJUSTES PRECAUCIÓN: Desconecte el alambre de la bujía y póngalo en donde no pueda entrar en contacto con la bujía. CULTIVADORA ARREGLO DE LOS BRAZOS VERIFIQUE EL OPERACIÓN DE LOS BRAZOS • Sus brazos exteriores se pueden montar de varias formas distintas para acomodar sus necesidades de labración o cultivación. PRECAUCIÓN: Los brazos son afilados. Use guantes u otra protección cuando maneje los brazos. LABRADO NORMAL - PASO DE 26" (Vea la Fig. 16) • Monte los agujeros “A” en los cubos de los brazos con los agujeros “B” en el eje de los brazos. LABRADO DE ANCHO MEDIANO - PASO DE 24" (Vea la Fig. 17) • Monte los agujeros “A” en los cubos de los brazos con los agujeros “C” en el eje de los brazos. BROCHE HORQUILLA • • Arrancas el motor, empuje hacia abajo el mango para levantar los brazos fuera del suelo y luego utilizais el control de los brazos rotar los brazos. Vea el brazos rote correctamente. Rote el brazos para cinco (5) minutos. RETIRO DE LA CARCASA DEL EMBRAGUE/ CONJUNTO DEL MOTOR (Vea la Fig. 19) • • • Vacíe el aceite y la gasolina del motor. Retire los (5) pernos con cabeza de hongo y las (5) tuercas de seguridad que fijan la carcasa del embrague y la protección de los dientes a la transmisión. Retire la carcasa del embrague/conjunto del motor y apóyelos en el suelo (el motor está en posición invertida). BRAZO EXTERIOR PERNO A A B B tine_4 ABRAZADERA DE HORQUILLA BRAZO INTERIOR Fig. 16 CULTIVO/LABRADO ESTRECHO - PASO DE 12-3/4" (Vea la Fig. 18) • Remueva los brazos exteriores. A C C A Fig. 19 tine_5 Fig. 17 AVISO: Cuando vuelva a montar los brazos exteriores, asegúrese que el conjunto del brazo derecho (marcado con “R”) y el conjunto del brazo izquierdo (marcado con “L”) estén montados en el lado correcto del eje de los brazos. tine_6 BRAZOS INTERIORES SOLAMENTE Fig. 18 13 MANTENIMIENTO Cambie las bujías al comienzo de cada temporada de cultivo, o después de 50 horas de uso, lo que suceda primero. El tipo de bujía y la abertura aparece en las “ESPECIFICACIONES DEL PRODUCTO” en la página 3 de este manual. Su motor se enfría con aire. Para obtener el rendimiento del motor adecuado y larga duración mantenga su motor limpio. • Remueva la caja del ventilador y límpiela sies necesario. • Mantenga las aletas del cilindro sin mugre o paja. BUJÍA SISTEMA DE ENFRIAMIENTO (Vea la Fig. 15) TRANSMISIÓN CAJA DEL VENTILADOR Su transmisión está sellada y no va a necesitar lubricación. LIMPIEZA ALETAS DEL ENFRIAMIENTO SILENCIADOR No limpie su cultivadora cuando el motor y la transmisión estén calientes. No recomendamos el uso de agua presurizada (manguera del jardín, etc.) para limpiar su unidad a menos que el área de la junta alrededor de la transmisión y del silenciador del motor, del filtro de aire y del carburador se cubran ara protejerlos del agua. El agua en la transmisión y/o el motor acortará la vida de su cultivadora. • Limpie todo material extraño del motor, las ruedas, el pulido, etc. • Mantenga las superficies pulidas y las ruedas sin derrames de gasolina, aceite, etc. Proteja las superficies pintadas con cera tipo automotriz. • Fig. 15 SILENCIADOR No opere la cultivadora sin el silenciador. No manipulee el sistema de escape. Los silenciadores o los amortiguadores de chispas dañados pueden crear un peligro de incendio. Inspecciónelos periódicamente y cámbielos si es necesario. Si su motor viene equipado con un conjunto de rejilla para el amortiguador de chispas, remuévalo cada 50 horas para limpiarlo e inspeccionarlo. Cámbielo si es necesario. 12 MOTOR MANTENIMIENTO Desconecte el alambre de la bujía antes de dar mantenimiento (excepto por el ajuste del carburador) para evitar que el motor arranque por accidente. ¡Evite los incendios! Mantenga el motor sin césped, hojas, aceite o combustible derramado. Remueva el combustible del estanque antes de inclinar la unidad para darle mantenimiento. Limpie el césped, la mugre y la basura del área del silenciador. No toque el silenciador caliente o las aletas del cilindro, pues el contacto puede producir quemaduras. 3. LUBRICACIÓN Use solamente aceite de detergente de alta calidad clasificado con la clasificación SF o SJ de servicio API. Seleccione la calidad de viscosidad SAE según su temperatura de operación esperada. 40 104 °C °F 86 68 SAE 30 50 32 10W-30 14 -4 SINTÉTICO 5W-30 4. 5. 6. 30 20 10 7. 0 5W-30 -10 -20 -30 -22 Fig. 12 AVISO: A pesar de que los aceites de multiviscosidad (5W-30, 10W-30, etc.) mejoran el arranque en clima frío, estos aceites de multiviscosidad van a aumentar el consumo de aceite cuando se usan en temperaturas sobre 32°F (0°C). Revise el nivel del aceite del motor más a menudo, para evitar un posible daño en el motor, debido a que no tiene suficiente aceite. Cambie el aceite después de 50 horas de operación o por lo menos una vez al año si el cultivadora se utiliza menos 50 horas el año. Revise el nivel del aceite del cárter antes de hacer arrancar el motor y después de cada cinco (5) horas de uso continuado. Agregue aceite de motor SAE 30 o su equivalente. Apriete el tapón del depósito de relleno del aceite en forma segura cada vez que revise el nivel del aceite. PARA CAMBIAR EL ACEITE DEL MOTOR (Vea Fig. 13) AVISO: Antes de inclinar la segadora para drenar el aceite, drene el tanque de combustible haciendo correr el motor hasta que el tanque esté vacio. 1. Desconecte el alambre de la bujía y póngalo de modo que no pueda entrar en contacto con ésta. 2. Remueva la tapa del depósito del aceite; déjela a un lado en una superficie limpia. 8. 9. Incline la cortadora de césped por este costado tal como se muestra y purgue el aceite en un recipiente idóneo. Mueva la segadora de atrás para adelante para remover todo el aceite que se haya quedado atrapado dentro del motor. Limpie todo el aceite derramado en la segadora y en el lado del motor. Echar aceite despacio en el conducto del aceite, parándose a intervalos regulares para controlar el nivel del aceite con la varilla. Parar de añadir aceite cuando se alcanza la señal de lleno (FULL) en la varilla. Esperar un minuto para dejar que el aceite se arregle. Continúe agregando cantidades pequeas de aceite y vuelva a inspeccionar la varilla medidora settles del nivel de aciete en lleno (FULL). NO sobrellene el motor con aceite, o fumará pesa demante del silenciador cuando lo valla a arrancar. Asegúrese de apretar la varilla medidora del aceite antes de arrancar el motor. Vuelva a conectar el alambre de la bujía a ésta. FILTRO DE AIRE (Vea Fig. 14) Su motor puede sufrir averías y funcionar de manera incorrecta con un filtro del aire sucio. Limpie el elemento cada 25 horas de operación. Sustituir el papel del cartucho una vez al año o tras 100 horas de funcionamiento, más a menudo si se utiliza en condiciones de suciedad y polvo particulares. PARA LIMPIAR EL FILTRO DE AIRE 1. Remueva el tornillo. 2. Remueva el filtro de aire, cuidadosamente, para evitar que la mugre entre en el carburador. 3. Desarme el filtro de aire y limpie el elemento del filtro de aire. 4. Lave el elemento del filtro en detergente líquido y agua. 5. Envuelva el elemento del filtro en una tela y séquelo apretándolo. 6. Cubra el elemento del filtro con una capa delgada de aceite de motor limpio. Apriételo en una toalla para remover el aceite en exceso. No lo sature. Vuelva a montar las partes y póngalas de vuelta en el carburador. 7. TORNILLO MONTE UNO DE ESTOS PUNTOS BAJOS HACIA EL BORDE ANGOSTO DEL ELEMENTO TAZA LABIO ELEMENTO CUERPO MÓNTELO DE MODO QUE EL LABIO SE EXTIENDA SOBRE EL BORDE DEL CUERPO DEL FILTRO DE AIRE EL LABIO FORMARA UN SELLO PROTECTOR CUANDO SE MONTE LA CUBIERTA CONTENEDOR CABLE DE LA BUJÍA Fig. 13 Fig. 14 11 PROGRAMA DE MANTENIMIENTO LLENE LAS FECHAS DE MEDIDA QUE COMPLETE SU SERVICIO REGULAR MANTENIMIENTO AN T E SD EC A PR D AU IM SO ER O 5H OR CA AS DA 8 HO RA CA S A DA N UA CAD LM A EN 25 CA T E HOR ANDA C AS U AL ADA O ME 5 N 0 AN T E HOR UA AS L ME O NT E FECHAS DE SERVICIO Revisar el nivel del aceite del motor Cambiar el aceite del motor 3 1,2 Aceitar los puntos de pivote Inspeccionar el supresor del silenciador Limpieza del sistema de enfriamiento de aire 2 Limpieza del filtro de aire 2 Reemplazo del filtro de aire Limpieza del área alrededor del silenciador y de los controles Cambiar la bujía 1- Cambiar más menudo cuando se opere bajo carga pesada o en ambientes con altas temperaturas. 2- Dar servicio más a menudo cuando se opere en condiciones sucias o polvorosas 3- El cambio inicial del aceite debería realizarse tras las primeras veinte (5) horas de uso. RECOMENDACIONES GENERALES TABLA DE LUBRICACIÓN La garantía de esta cultivadora no cubre los artículos que han estado sujetos al abuso o a la negligencia del operador. Para recibir todo el valor de la garantía, el operador tiene que mantener la cultivadora según las instrucciones descritas en este manual. Hay algunos ajustes que se tienen que hacer en forma periódica para poder mantener su cultivadora adecuadamente. Al menos una vez cada estación comprobar si es necesario efectuar los adjustes descritos en las secciones de Servicio y Ajustes de este manual. • Una vez al año, cambie la bujía, limpie o cambie el filtro de aire y revise si los brazos y las correas están desgastadas. Una bujía nueva y un filtro de aire limpio aseguran una mezcla de aire-combustible adecuada y le ayuda a que su motor funcione mejor y que dure más. CONTROL DE LOS BRAZOS MOTOR ANTES DE CADA USO • • • Revise el nivel del aceite del motor. Revise la operación de los brazos. Revise si hay sujetadores sueltos. LUBRICACIÓN Mantenga la unidad bien lubricada (vea la “TABLA DE LUBRICACIÓN”). ACEITE DE MOTOR SAE 30 O 5W-30 REFIÉRASE A LA SECCIÓN DEL MOTOR, “MANTENIMIENTO” 10 OPERACIÓN 2. Coloque el control del acelerador en la posición “FAST” (Rápido). 3. Para hacer arrancar un motor frío, presione el cebador tres (3) veces antes de intentar arrancar. Utilice una presión firme. Este paso no suele ser necesario cuando se hace arrancar un motor que ya ha estado funcionando durante algunos minutos. 4. Aferre la manija del arrancador retraíble con una mano y la manija del arado con la otra. Tire de la manija del arrancador retraíble con rapidez. No permita que la cuerda del arrancador se vuelva y pegue. NOTA: En climas más fríos, puede ser necesario repetir los pasos del cebado. En climas más cálidos, el exceso de cebado puede causar ahogamiento y que el motor no arranque. Si se ahoga el motor, espere algunos minutos antes de intentar hacerlo arrancar y no repita los pasos del cebado. • • Va a descrubrir que el labrado se facilita si deja una fila sin labrar entre las pasadas. Entonces vuelva de nuevo entre las filas de cultivo(Vea la Fig. 10). Hay dos razones para hacer ésto. Primero, las vueltas amplias se pueden realizar con más facilidad que las cerradas. Segundo, la cultivadora no estará empujándose a sí misma y a usted hacia la próxima hilera. Ajuste la estaca de profundidad y la altura de la rueda para labrado poco profundo cuando esté trabajando en suelo o terreno herboso demásiado duro. Luego atraviese los primeros cortes a la profundidad normal. RODAJE DE SU CULTIVADORA Use su(s) correa(s), las poleas y el control de los brazos antes de empezar a labrar. • Haga arrancar el motor, saque los brazos fuera del suelo presionando los mangos hacia abajo y enganche el control de los brazos para hacer arrancar la rotación de los brazos. Permita que los brazos roten por cinco minutos. • Revise la operación de los brazos y ajústelos, si es necesario. Vea “REVISIÓN DE LA OPERACIÓN DE LOS BRAZOS” en la sección de Servicio y Ajustes de este manual. 4 3 2 6 5 1 7 Fig. 10 CONSEJOS PARA LABRAR PRECAUCIÓN: Antes de acostumbrarse a manejar su cultivadora, empiece el uso de ésta en el terreno con la aceleración en la posición de “lento” (SLOW). Para ayudarle a la cultivadora a moverse hacia adelante, levante los mangos un poco (levantando en esta forma la estaca de profundidad fuera del suelo). Para hacer que la cultivadora ande más lento presione los mangos hacia abajo. Si se requiere demasiado esfuerzo o si el arado se sacude, la estaca de profundidad no está correctamente colocada en el suelo que se está arando. La colocación correcta de la estaca de profundidad se logra mediante prueba y error y depende de las condiciones del suelo. (Cuanto más duro o más mojado esté el suelo, más lenta será la velocidad requerida del motor y de los dientes. Bajo estas condiciones deficientes, a velocidad rápida el arado correrá saltando sobre el suelo.) Si la cultivadora está bien ajustada, excavará con poco esfuerzo por parte del operador. • El labrar quiere decir el excavar, dar vuelta y romper el suelo duro antes de plantar. El suelo suelto y blando permite el desarrollo de las raíces. La mejor profundidad de labrar es 4" a 6". La cultivadora también puede despejar el suelo de la mala hierba indeseables. La descomposición de esta mala hierba enriquece el suelo. Dependiendo del clima (lluvia o viento), puede ser recomendable labrar el suelo a fines de la temporada de cultivo para acondicionar el suelo aún más. • Las condiciones del suelo son importantes si se desea obtener un labrado adecuado. Los brazos no van a penetrar fácilmente en el suelo seco y duro, lo que puede contribuir a un rebote excesivo y a dificultades en el manejo de su cultivadora. El terreno duro tiene que ser humedecido antes de labrarlo, sin embargo, si el suelo está demasiado mojado se convertirá en bolas o se amontonará durante el labrado. Espere a que el suelo esté menos mojado para poder obtener los mejores resultados. Cuando se hagan labrados en el otoño, remueva las vides y el césped alto para evitar que se envuelvan alrededor del eje de los brazos y retarden su operación para el labrado. CULTIVO El cultivo quiere decir la destrucción de la mala hierba entre las filas para evitar que éstas le roben la nutrición y la humedad a las plantas. Al mismo tiempo, si se rompe la capa superior de la costra del suelo, éste puede retener la humedad. La mejor profundidad de excavación es de 1" a 3". • Probablemente no va a necesitar usar la estaca de profundidad. Empiece por inclinar la estaca de profundidad hacia adelante, hasta que quede sujeta en el resorte de la estaca. • Cultive hacia arriba y hacia abajo las filas a una velocidad que le permita a los brazos sacar las raíces de la mala hierba y dejar el suelo en condiciones ásperas, para impedir el desarrollo de la mala hierba y el césped (Vea la Fig. 11). Fig. 11 9 OPERACIÓN ANTES DEL ARRANQUE DEL MOTOR IMPORTANTE: TENGA MUCHO CUIDADO DE QUE NO INGRESE SUCIEDAD AL MOTOR CUANDO SE REVISA O SE AGREGA EL ACEITE O EL COMBUSTIBLE. UTILICE ACEITE Y COMBUSTIBLE LIMPIOS Y ALMACÉNELOS EN RECIPIENTES APROBADOS, LIMPIOS Y TAPADOS. UTILICE TUBOS DE LLENADO LIMPIOS. REVISIÓN DEL NIVEL DE ACEITE DEL MOTOR (Vea Fig. 8) 1. Retire la etiqueta colgante del motor. 2. El motor de su unidad se envía de fábrica ya lleno con aceite de peso para verano SAE 30. 3. Con el nivel del motor, retire el tapón de llenado de aceite del motor. 4. El aceite del motor debe estar en la línea "FULL" (Lleno) de la varilla. Si está bajo, llénelo hasta la línea "FULL". Para conocer la capacidad aproximada, consulte "ESPECIFICACIONES DEL PRODUCTO" en la página 3 de este manual. Vuelva a instalar el tapón de llenado de aceite del motor. Revise el aceite antes de cada uso. Agregue aceite si es necesario. 5. 6. PRECAUCIÓN: NO llene en exceso el motor con aceite; de lo contrario, despedirá mucho humo por el silenciador durante el arranque. • • Para el funcionamiento en climas fríos, debe cambiar el aceite para facilitar el arranque (vea la “TABLA DE VISCOSIDAD DEL ACEITE” en la sección Mantenimiento de este manual). Para cambiar el aceite del motor, consulte la sección Mantenimiento de este manual. TAPA DE ACEITE PRECAUCIÓN: No llene por encima de 1/2 pulgada (1,27 cm) de la parte superior del depósito de combustible para evitar derrames y para permitir la expansión del combustible. Si hay un derrame accidental de gasolina, aleje la máquina de la zona del derrame. Evite crear cualquier fuente de ignición hasta que los vapores de la gasolina hayan desaparecido. No lo llene demasiado. Limpie el aceite o el combustible derramado. No guarde, derrame o use la gasolina cerca de una llama expuesta. IMPORTANTE: CUANDO SE OPERE EN TEMPERATURAS POR DEBAJO DE 32°F (0°C) USE GASOLINA DE CALIDAD DE INVIERNO, LIMPIA Y NUEVA PARA AYUDAR A ASEGURAR UN BUEN ARRANQUE EN CLIMA FRÍO. PRECAUCIÓN: Combustibles mezclados con alcohol (conocidos como gasohol, o el uso de etanol o metanol) pueden atraer la humedad, la que conduce a la separación y formación de ácidos durante el almacenamiento. La gasolina acídica puede dañar el sistema del combustible de un motor durante el almacenamiento. Para evitar los problemas con el motor, se debe vaciar el sistema de combustible antes de guardarlo por un período de 30 días o más. Vacíe el estanque de combustible, haga arrancar el motor y hágalo funcionar hasta que las líneas del combustible y el carburador queden vacíos. La próxima temporada use combustible nuevo. Vea las Instrucciones para el Almacenamiento para más información. Nunca use productos de limpieza para el motor o para el carburador en el estanque del combustible pues se pueden producir daños permanentes. PARA HACER ARRANCAR EL MOTOR (Vea Fig. 9) PRECAUCIÓN: MANTENGA EL CONTROL DE LOS DIENTES EN LA POSICIÓN “OFF” (APAGADO) CUANDO HACE ARRANCAR EL MOTOR. NOTA: Debido a los revestimientos protectores que hay en el motor, puede haber un poco de humo durante el uso inicial del producto; esto debe considerarse normal. 1. Asegúrese de que el cable de la bujía esté correctamente conectado. MANGO DEL ARRANCADOR DE CULATEO MÁX. NIVEL SUPERIOR MÍN. NIVEL INFERIOR CONTROL DE LA ACELERACIÓN Fig. 8 AGREGUE GASOLINA • Llene el estanque de combustible. Llene hasta la parte inferior del cuello de relleno del estanque de gasolina. No lo llene demasiado. Use gasolina regular, sin plomo, nueva y limpia con el mínimo de 87 octanos. (El uso de gasolina con plomo aumentará los depósitos de óxido de plomo y carbono y se reducirá la duración de la válvula). No mezcle el aceite con la gasolina. Para asegurar que la gasolina utilizada sea fresca compre estanques los cuales puedan ser utilizados durante los primeros 30 días. CEBADOR BUJÍA Fig. 9 8 USE SUS ANTEOJOS DE SEGURIDAD LA PRUDENCIA VALE MAS QUE LA FALTA DE VISION OPERACIÓN La operación de cualquier cultivadora puede hacer que salten objetos extraños dentro de sus ojos, lo que puede producir daños graves en éstos. Siempre use anteojos de seguridad o protecciones para los ojos antes de hacer arrancar su cultivadora o mientras esté labrando con élla. Recomendamos el uso de la máscara de seguridad de visión amplia, para uso sobre los espejuelos o anteojos de seguridad estándar. La velocidad y la profundidad del labrado son reguladas por medio de la posición de la estaca de profundidad y por la altura de la rueda. La estaca de profundidad siempre tiene que estar por debajo de las ruedas para excavar. Sirve de freno para retardar el movimiento de marcha hacia adelante de la cultivadora, para permitir que los brazos penetren en el suelo. También, mientras más se baje la estaca de profundidad dentro del suelo, más profunda será la excavación realizada con los brazos. ESTACA DE PROFUNDIDAD (VEA LA FIG. 7) Ajuste la estaca de profundidad removiendo la abrazadera de horquilla y la broche horquilla. Cambie la estaca de profundidad a la posición deseada. Vuelva a colocar la broche horquilla y la abrazadera de horquilla. • Para el labrado normal, ajuste la estaca de profundidad en el segundo o tercer agujero a partir de la parte superior. Sepa cómo operar todos los controles antes de agregar combustible y aceite o antes de tratar de hacer arrancar el motor. LABRADO COMO USAR SU CULTIVADORA PARADA (Vea la Fig. 6) BRAZOS 1. Suelte el control de los brazos para parar el movimiento. MOTOR 2. Lleve el control del acelerador hasta la posición de “STOP” (Parada). CONTROL DE LOS BRAZOS EN LA POSICIÓN DE “APAGADO” (ARRIBA) CONTROL DE LOS BRAZOS EN LA POSICIÓN DE “ENCENDIDO” (ABAJO) ESTACA DE PROFUNDIDAD CHAVETA CONTROL DE LA ACELERACIÓN BROCHE HORQUILLA Fig. 7 PARA EL TRANSPORTE PRECAUCIÓN: Antes de levantarla o transportarla, permita que el motor de la cultivadora y el silenciador se enfríen. Desconecte el alambre de la bujía. Drene la gasolina del estanque de combustible. Fig. 6 OPERACIÓN DE LOS BRAZOS (Vea la Fig. 6) • Apriete el control de los brazos contra el mango. EN EL JARDÍN • Ajuste la estaca de profundidad de modo que el pasador de chaveta se encuentre en el agujero inferior. • Empuje los mangos de la cultivadora hacia abajo, levantando los brazos por encima del suelo. • Tire o empuje la cultivadora a la ubicación deseada. EN LA CIUDAD • Desonecte el alambre de la bujía. • Drene el estanque de combustible. • Transpórtela en la posición derecha hacia arriba para evitar la fuga del aceite. 7 OPERACIÓN CONOZCA SU CULTIVADORA LEA ESTE MANUAL DEL DUEÑO Y LAS REGLAS DE SEGURIDAD ANTES DE OPERAR SU CULTIVADORA Compare las ilustraciones con su cultivadora para familiarizarse con la ubicación de los diversos controles y ajustes. Guarde este manual para futura referencia. Estos símbolos pueden apareser sobre su cultivadora en la literatura proporcionada con el producto. Aprenda y comprenda sus significados. CONTROL DE LOS BRAZOS MARCHA HACIA ADELANTE CEBADOR MANGO DEL ARRANCADOR DE CULATEO CONTROL DE LA ACELERACIÓN ESTACA DE PROFUNDIDAD Fig. 5 REÚNAN LOS REQUISITOS POR ESTÁNDARES DE SEGURIDAD POR 'ANSI' Nuestras cultivadoras cumplen con los estándares de seguridad del American National Standards Institute. MANGO DEL ARRANCADOR DE CULATEO - Se usa para hacer arrancar el motor. CEBADOR - bombea combustible adicional del carburador al cilindro para que se utilice cuando se hace arrancar un motor frío. CONTROL DE LA ACELERACIÓN - Controla la velocidad del motor. CONTROL DE LOS BRAZOS MARCHA HACIA ADELANTE Engancha los brazos en la dirección de marcha hacia adelante. ESTACA DE PROFUNDIDAD - Controla la velocidad de la marcha hacia adelante y la profundidad a la cual excavará la cultivadora. 6 MONTAJE INSTALACIÓN DE LA ESTACA DE PROFUNDIDAD (Vea Fig. 4) • • • Retire los tornillo(s) que aseguran la estaca de profundidad al patín y deséchelos. Deslice la estaca de profundidad hacia abajo dentro de la guía del brazo de transporte, alineando un agujero de la estaca de profundidad con el agujero del brazo de transporte. Instale el pasador de chaveta y el broche horquilla. ESTACA DE PROFUNDIDAD BROCHE HORQUILLA CHAVETA Fig. 4 ANCHO DEL LABRADO • Se puede ajustar el ancho del labrado para manejar mejor sus condiciónes de labración (vea “ARREGLO DE LOS BRAZOS” en la sección de Servicio y Ajustes de este manual). OPERACIÓN DE LOS BRAZOS • Revise la operación de los brazos antes del primer uso (vea “REVISIÓN DE LA OPERACIÓN DE LOS BRAZOS” en la sección de Servicio y Ajustes de este manual). 5 MONTAJE Su cultivadora nueva ha sido montada en la fábrica, con la excepción de aquellas partes que se dejaron sin montar por razones de envío. Para asegurarse que la cultivadora operará en forma segura y adecuada, todas las partes y los artículos de ferretería que monte tienen que estar apretados en forma segura. Use las herramientas correctas, según sea necesario, para asegurarse de que queden apretadas en forma segura. HERRAMIENTAS NECESARIAS PARA EL MONTAJE DESEMBALAJE DE LA CAJA E INSTALACIÓN DE LA MANIJA (Vea Fig. 2 y 3) Se le facilitará el montaje si cuenta con un juego de llaves de tubo. Se han enumerado los tamaños estándar de las llaves. (1) Cuchillo para todo uso POSICIÓN DEL OPERADOR (Vea la Fig. 1) Cuando en este manual se mencionan los términos “lado derecho” o “lado izquierdo” se refiere a cuando usted se encuentra en la posición de operación (parado/a detrás de los mangos de la cultivadora). PARTE DELANTERA LADO IZQUIERDO PRECAUCIÓN: Tenga cuidado con las grapas expuestas al manipular o desechar el material de las cajas. IMPORTANTE: CUANDO DESEMBALA Y ARMA EL ARADO, TENGA CUIDADO DE NO ESTIRAR O ENREDAR LOS CABLES. • Corte las sujeciones de cable que aseguran la columna de la manija. • Retire todo el embalaje de la caja. • Retire la columna inferior de la manija de la caja. • Ubique la columna inferior de la manija entre los tubos doblados, alineando los agujeros como se ilustra. • Asegure la columna inferior de la manija mediante dos (2) pernos con cabeza de hongo de 4 1/2", dos (2) arandelas, y dos (2) perillas de la manija. Apriete con firmeza. COLUMNA INFERIOR DE LA MANIJA LADO DERECHO PERILLA ARANDELA POSICIÓN DEL OPERADOR PERNO Fig. 1 TUBOS DOBLADOS Fig. 2 CONTENIDO DEL CONJUNTO DE FERRETERÍA • • • • • (1) Arandela (3) Perilla Retire la columna superior de la manija de la caja. Dirija los cables como se ilustra y deslice la columna superior de la manija sobre la columna inferior de la manija. Asegure la columna superior de la manija mediante dos (2) pernos con cabeza de hongo de 2 1/2" y dos (2) perillas de la manija. Apriete con firmeza. Retire la caja. Corte las sujeciones de cable que aseguran el arado al patín. Retire el arado del patín tirando hacia atrás. COLUMNA SUPERIOR DE LA MANIJA Manual (1) Chaveta (2) Perno 5/16”-18 unc x 2-1/2” (1) Broche Horquilla (1) Perno 5/16”-18 unc x 4-1/2” CABLE DE CONTROL DE LOS BRAZOS PERNO PERILLA Fig. 3 4 ESPECIFICACIONES DEL PRODUCTO Champion RJ19LM o J18LM (Abertura: 0,030") Bujía: SAE 10W30 (Sobre 32°F/0°C) SAE 5W-30 (Debajo 32°F/0°C) Aceite: (Capacidad: 20 Oz./0,6L) 0,9 Cuartos (0,85 L) Sin Plomo, Regular Capacidad De Gasolina: FELICITACIONES por la compra de su cultivadora. Ha sido diseñada, planificada y fabricada para darle la mejor confiabilidad y el mejor rendimiento posible. En el caso de que se encuentre con cualquier problema que no pueda solucionar fácilmente, haga el favor de ponerse en contacto con tu centro autorizado. Tenemos cuenta con técnicos bien capacitados y competentes con herramientas adecuadas para darle servicio o para reparar su unidad. Haga el favor de leer y de guardar este manual. Estas instrucciones le permitirán montar y mantener su cultivadora en forma adecuada. Siempre observe las “REGLAS DE SEGURIDAD.” ACUERDO DE MANTENIMIENTO Este producto incluye un Acuerdo de Mantenimiento. Póngase en contacto con su tienda más cercana para informarse sobre los detalles. RESPONSABILIDADES DEL CLIENTE • • • Lea y observe las reglas de seguridad. Siga un programa regular de mantenimiento, cuidado y uso de su cultivadora. Siga las instrucciones descritas en las secciones “Mantenimiento” y “Almacenamiento” de este Manual del Dueño. IMPORTANT: ESTA UNIDAD VIENE EQUIPADA CON UN MOTOR DE COMBUSTIÓN INTERNO Y NO SE DEBE USAR SOBRE, O CERCA, DE UN TERRENO NO DESARROLLADO CUBIERTO DE BOSQUES, DE ARBUSTOS O DE CÉSPED, A MENOS QUE EL SISTEMA DE ESCAPE DEL MOTOR VENGA EQUIPADO CON UN AMORTIGUADOR DE CHISPAS QUE CUMPLA CON LAS LEYES LOCALES O ESTATALES (SI EXISTEN). SI SE USA UN AMORTIGUADOR DE CHISPAS, EL OPERADOR DEBE MANTENERLO EN CONDICIONES DE TRABAJO EFICIENTES. EN EL ESTADO DE CALIFORNIA, LA LEY EXIGE LO ANTERIOR (SECCIÓN 4442 DEL “CALIFORNIA PUBLIC RESOURCES CODE” [DECRETO DE RECURSOS PÚBLICOS DE CALIFORNIA]). OTROS ESTADOS PUEDEN CONTAR CON OTRAS LEYES PARECIDAS. LAS LEYES FEDERALES SE APLICAN EN LAS TIERRAS FEDERALES. VEA A TU CENTRO AUTORIZADO PARA LOS AMORTIGUADORES DE CHISPAS. REFIÉRASE A LA SECCIÓN DE PARTES DE REPUESTO EN EL MANUAL INGLÉS DEL DUEÑO PARA EL NÚMERO DE LA PARTE. TABLA DE CONTENIDOS REGLAS DE SEGURIDAD ...................................................... 2 RESPONSABILIDADES DEL CLIENTE ................................. 3 ESPECIFICACIONES DEL PRODUCTO ................................ 3 MONTAJE ............................................................................. 4-5 OPERACIÓN ......................................................................... 6-9 PROGRAMA DE MANTENIMIENTO ..................................... 10 MANTENIMIENTO ............................................................ 10-12 SERVICIO Y AJUSTES .................................................... 13-14 ALMACENAMIENTO ............................................................. 15 IDENTIFICACIÓN DE PROBLEMAS .................................... 16 GARANTÍA............................................................................. 22 3 REGLAS DE SEGURIDAD Prácticas de Operación Seguras para las Cultivadoras Rotatorias Empujables a Motor ENTRENAMIENTO • • • • Lea el Manual del Dueño cuidadosamente. Familiarícese completamente con los controles y con el uso adecuado del equipo. Sepa cómo parar la unidad y desenganchar los controles rápidamente. Nunca permita que los niños operen el equipo. Nunca permita que los adultos operen el equipo sin los conocimientos adecuados. Mantenga el área de operación despejada de personas, especialmente niños pequeños y animales domésticos. • • • • • PREPARACIÓN • • • • • • • • • • Inspeccione cuidadosamente el área en donde se va usar el equipo y remueva los objetos extraños. Desenganche todos los embragues y cambie a neutro antes de hacer arrancar el motor. No opere el equipo sin usar ropa exterior adecuada. Use zapatos que mejoren el equilibrio en superficies resbalosas. Maneje el combustible con cuidado pues es muy inflamable. Use un envase de combustible aprobado. Nunca añada combustible a un motor en funcionamiento o caliente. Llene el estanque de combustible afuera con mucho cuidado. Nunca llene el estanque de combustible en un recinto cerrado. Vuelva a colocar la tapa del depósito de gasolina en forma segura y limpie el combustible derramado antes de volver a arrancar. Use cordones de extensión y receptáculos, según las especificaciones del fabricante, para todas las unidades con motores de impulsión o con motores de arranque eléctrico. Nunca trate de hacer ningún ajuste mientras que el motor esté funcionando (excepto en los casos específicamente recomendados por el fabricante). OPERACIÓN • • • • • • • • • • • No ponga ni las manos ni los pies cerca o debajo de las piezas rotatorias. Tenga mucho cuidado cuando opere o cruce entradas para automóviles de ripio, senderos o caminos. Esté alerta en lo que se refiere a los peligros escondidos o al tráfico. No lleve pasajeros. Después de pegarle a un objeto extraño, pare el motor, remueva el alambre de la bujía, inspeccione la cultivadora cuidadosamente, para verificar si hay daños, y repare el daño antes de volver a arrancar y operar la cultivadora. Tenga cuidado para evitar resbalarse o caerse. Si la unidad empieza a vibrar anormalmente, pare el motor y revísela inmediatamente para verificar la causa. La vibración normalmente es un aviso de problemas. Pare el motor cuando abandone la posición de operación. Tome todas las precauciones posibles cuando deje la máquina desatendida. Desenganche los brazos, cambie a neutro y pare el motor. Antes de limpiar, reparar e inspeccionar, apague el motor y asegúrese que todas las partes en movimiento se han detenido. Desconecte el alambre de la bujía, y manténgalo alejado de ésta para evitar el arranque por accidente. Desconecte el cordón en los motores eléctricos. No haga funcionar el motor en recintos cerrados; los gases de escape son peligrosos. Nunca opere la cultivadora sin las protecciones, y las planchas adecuadas y sin los demás dispositivos de seguridad en su lugar. Mantenga a los niños y a los animales domésticos alejados. No sobrecargue la capacidad de la máquina, tratando de cultivar a mucha profundidad, muy rápido. Nunca opere la máquina a altas velocidades en superficies resbalosas. Mire hacia atrás y tenga cuidado cuando retroceda. Nunca permita la presencia de espectadores cerca de la unidad. Use solamente accesorios y aditamentos para la cultivadora aprobados por el fabricante. Nunca opere la cultivadora sin buena visibilidad o luz. Tenga cuidado al cultivar en terreno duro. Los brazos pueden quedarse agarrados en el suelo e impulsar a la cultivadora hacia adelante. Si esto sucede, suelte los mangos y no restrinja la máquina. MANTENIMIENTO Y ALMACENAMIENTO • • • • Mantenga los accesorios y aditamentos de la máquina en buenas condiciones para el funcionamiento. Revise las clavijas de seguro, los pernos de montaje del motor y otros pernos, a intervalos frecuentes, para verificar si están apretados en forma segura y asegurarse que el equipo esté en buenas condiciones de funcionamiento. Nunca guarde la máquina con combustible en el estanque de combustible dentro de un edificio en donde hay fuentes de ignición presentes, tales como calentadores de agua o del ambiente, secadoras de ropa u otros artefactos parecidos. Permita que se enfríe el motor antes de guardarlo en algún lugar cerrado. Siempre refiérase a las instrucciones en la guía del operador para ver los detalles de importancia si la cultivadora va a ser guardada por un período de tiempo largo. - IMPORTANTE LOS PARRAFOS DONDE APARECEN LAS PALABRAS PRECAUCIÓN, IMPORTANTE Y AVISO SIRVEN COMO UN MEDIO PARA ATRAER LA ATENCIÓN A INFORMACIÓN IMPORTANTE O CRITICA EN ESTE MANUAL. IMPORTANTE: SE USA PARA SEÑALARLE QUE EXISTE LA POSIBILIDAD DE DAÑAR ESTE EQUIPO. AVISO: Entrega información esencial que le ayudará a comprender mejor, incorporar o llevar a cabo un conjunto de instrucciones en particular. Busque este símbolo que señala las precauciones de seguridad de impor-tancia. Quiere decir - ¡¡¡ATENCIÓN!!! ¡¡¡ESTE ALERTO!!! SU SEGURIDAD ESTA COMPROMETIDA. PRECAUCIÓN: Siempre desconecte el alambre de la bujía y póngalo donde no pueda entrar en contacto con la bujía, para evitar el arranque por accidente, durante la preparación, el transporte, el ajuste o cuando se hacen reparaciones. PRECAUCIÓN Es conocido por el Estado de California que los gases de escape del motor de este productor contienen químicos los cuales a ciertos niveles, pueden ocasionar, cáncer, defectos de nacimiento, y otros daños al sistema reproductivo. 2 MC550 Manual de Dueños 11.04.10 BAD Printed in the U.S.A. 5324339959