1
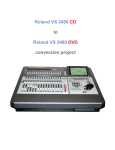
Exporting Roland VS Files to Your PC
(This tutorial is based on posts by the developers, FunkyBeat and others found in the VS-Planet
forum.)
Contents
1. Exporting Using the Reaper Plug-In
• Applications Needed
• System Requirements
• Roland Machines and Files Supported
• Getting Your VS Files on Your PC: Using the Cd2Roland ripper program
• Creating a Batch file for Cd2Roland
• Using the Reaper Plug-in
• Trouble Shooting
2. Exporting Using VSWaveExport
• Usage (Hard disk/VirDis/Ripped files)
• Walkthrough
• Trouble Shooting
Hello to all dedicated Roland VS users!
This year has brought about a major breakthrough for us in terms of connectivity to the outside
world. No longer is it a hassle for us to quickly connect to other platforms. No longer is our only
viable method for transferring our VS tracks to a computer a "real time 2 track only" process or
in the case of the 2480 a slow Track Export to CD-R. We now have the ability to stick a VS
backup CD into a PC or connect any hard disk containing VS Songs to the PC and quickly
convert all the VS tracks directly into mp3s, 16-bit wavs or 24-bit wavs all at once.
This has all been made possible through the diligent and tireless efforts of VS Planeteers
Randygo, Danielo and Bear. The VS Planet is located at:
http://www.vsplanet.com/cgi-bin/ubb/ultimatebb.cgi
Two Methods
1. Import files into Reaper and render in the desired format or use Reaper
2. Convert VS files directly to .wav files using VSWaveExport
For either method you need to first get your VS files onto your PC. This is explained in each
section.
Exporting Roland VS Files to Your PC
Page 1 – 1/2/07:Rev. 2
Exporting Using the Reaper Plug-In
Applications Needed
Cd2Roland tool - VS Backup Ripper tool available at http://w13.easy-share.com/1209451.html
reaper_vs.dll – Reaper VS Plug-in available at http://www.integrand.com/vs/reaper_vs.zip
Reaper – Shareware audio editor program available at http://www.reaper.fm/download.php
System Requirements
Windows XP
Windows 2000
Win2000 Pro
Does not work with ??? OS.
These applications work with PCs only. No Mac support is available. You can try it using Boot
Camp on your Mac.
Roland Machines Supported
VS-2480, VS-1824, VS-1880, VS-1680, VS-880, VS-880EX, VS-890, VS-840, VS-840EX, VS840GX
Roland Files Supported
MTP, MT1, MT2, M16, M24, VSR, CDR
Getting Your VS Files on Your PC
Using the CD Ripper tool Cd2Roland
This method requires that you get your VS back disk data to your PC. Use Bear’s VS Backup
Ripper tool Cd2Roland to do this.
1. Create a directory (for our example we will use “C:\test”) and place Cd2Roland in it.
If you don't know how to do that, click on My Computer from the Start menu. Double click
on Local Disk C: Then select File > New > Folder so you can create a folder on the C: drive
called "test." (Note: It doesn't have to be named "test." Name it whatever you want, but keep
it simple and don't forget it.)
2. After the folder is created, copy the file Cd2Roland into it.
3. Insert a Roland VS Backup CD into your PC’s CD drive.
Exporting Roland VS Files to Your PC
Page 2 – 1/2/07:Rev. 2
4. Open a DOS Command prompt.
In Windows, there is usually one under Start > All Programs > Accessories > Command
Prompt. If you don't see one there, another way to get a dos command prompt is to go Start >
Run > type CMD and press ENTER. For those of you familiar with DOS, these steps will be
easy.
5. Change the directory to our “test” folder.
When you open the DOS command prompt, it will likely be open to Documents and Settings.
We need to get it to display "C:\test>". The way to do that is by typing "cd\" and press
ENTER. You will see C:\> That is called your "C" prompt. At the C prompt, type "cd
test" or whatever name you used to create your new folder and then press ENTER.
It should now say "C:\test>"
6. Run the Cd2Roland ripper program.
Do this by typing the name of the program followed by the drive letter of your PC CD drive.
For example, if your PC CD drive is letter E, then here you would type:
Cd2Roland e
and then press ENTER.
NOTE: For more advanced DOS users, you can specify a different output directory during
the ripping process. So, following this example, if you wanted to have the ripper put the files
in a directory other than "C:\test", you could specify:
Cd2Roland e c:\VSRipper\Files
At this point, you will see a bunch of text start scrolling in your DOS window. Your PC is now
extracting the Roland VS files from the backup CD and placing them in the "test" folder. When it
is done, you will get some kind of "finished" or "completed" message on the screen.
See Creating a Batch File for a way to automate this process.
Using the Reaper VS Plug-In
1. Download and install Reaper.
Reaper is a multi-track audio editor. It is a Shareware program, but the owner does ask for a
$40 payment after 30 days.
2. Download and install the Reaper VS Plug-in.
All you have to do is open the Reaper VS Plug-in zip file you downloaded and then copy the
"reaper_vs.dll" file to:
Exporting Roland VS Files to Your PC
Page 3 – 1/2/07:Rev. 2
C:\Program Files\Reaper\Plugins
Reaper should not be running while you do this.
3. Open Reaper and choose "Open Project..." from the File menu and select your song file. It
will be located in your "C:\test" folder. The song file will look something like "SONG.VR5."
The song will then be rendered into Reaper as a number of tracks each populated with the
appropriate events. You should be able to play the encoded media directly in Reaper.
4. You are almost done. At this point, to render your track(s) to .wavs, just select File > Render
and then select the options you want. For example:
Use MONO if you will be rendering individual mono tracks. Use STEREO if you will be
rendering a 2 track stereo mix.
Resample mode: Use the one that best fits what you need. I will always use HIGH
QUALITY... but that's just me.
Render Entire Project: Use that when you want the tracks to be rendered from the START
of the song to the END.
Render Custom: Use that for a specified track length.
Output file: This is where your file(s) will be stored when the conversion is done. You can
change that to whatever location you desire.
Render Master Mix: This is for rendering a complete 2 track stereo master of your mix.
Render stems: This is for rendering individual tracks separately.
Add items to new tracks in project when finished: This will take your newly rendered
tracks and insert them into your existing project for further editing if you want.
Output format: Use this feature to select the desired rendered format. You can set it to
mp3s, wavs, etc...
WAV bit depth: You can set this to 16 bit, 24 bit or 32 bit floating.
After you make your desired selections, press ENTER or RENDER. The tracks will now be
rendered to wavs or whatever you set it to. When done, go to the output file to see your
newly converted tracks.
Now wasn't that easy? It really is easy after you get everything initially setup. Once everything is
downloaded and set up, it's a piece of cake to render your files.
Exporting Roland VS Files to Your PC
Page 4 – 1/2/07:Rev. 2
Creating a Batch File for Cd2Roland
Creating a PC batch file automates the ripping steps for you once you have everything installed.
1. Open your text editor. Start > All Programs > Accessories > NotePad.
2. Type in “cd2roland <drive letter>” where <drive letter> is your PC's CD drive
letter: For example, if the drive letter is E, type “Cd2Roland e”
3. Click File > Save As... then type “rip.bat” and press ENTER. (You just created a .bat file.
Now the following is what to do with it.)
4. Copy the Cd2Roland file into the "test" folder you made earlier.
5. Place your newly created .bat file in the same "test" folder with the Cd2Roland file. Close the
folder.
6. Right click on your desktop and select New > Shortcut. Click "Browse" and navigate your
way to the "test" folder and select the "rip.bat" file and press ENTER. Rename the desktop
shortcut whatever you like such as, "VS Tracks Ripper."
You have now created a .bat file and a shortcut to it on your desktop. Put a Roland backup CD in
your CD drive and double click on the "VS Tracks Ripper" icon on your desktop and watch the
magic begin.
I had started to make a much more complicated one to automatically make subdirectories for
each backup set based on the PC clock time, but realized that would not work with multiple CD
backups. - Bear
Just remember to move the song directories to somewhere before ripping another backup set, or
the songs from the two backup sets may get jumbled.... there may be a SONG2 on two different
backup sets for instance...
Run all the CDs for one complete backup set, then cut and paste all the SONG directories to
another location, then do the second backup set.
Trouble Shooting
I can open files in Reaper and convert them with no problems, but if I try to play projects
in Reaper, I get static over the audio.
Look in Reaper at Options/Preferences/Audio/Device to see what driver is being used. Change it
to the input and output device setting of your soundcard driver.
Exporting Roland VS Files to Your PC
Page 5 – 1/2/07:Rev. 2
I get the following error messages using Cd2Roland:
Sending SPC1 Test Unit CDB6 command..failed.
DeviceIOControl returned with failed status.
Drive is not ready!
Aborting process.
Input .iso or .hex File Not Found
Install the software program Alcohol found at http://www.alcohol-software.com/
Then uninstall Alcohol. It will ask if you want to "undo" what Alcohol had done to your registry.
Click no. The program will uninstall.
If Alcohol won't run on your machine, I have little hope that the raw sector read will work.
If the low level sector read does not work on your machine you can use the Cd2Roland to extract
Roland files from a .iso image created in another program such as...
Ultaiso at http://www.ezbsystems.com/ultraiso/
or Magiciso at http://www.magiciso.com/tutorials/miso-magicdisc-overview.htm
Just invoke program as:
cd2roland (filename.iso)
This method will work under Windows 98 also.
Exporting Roland VS Files to Your PC
Page 6 – 1/2/07:Rev. 2
Exporting Using VSWaveExport
VSWaveExport tool (available at http://www.thegoodlibrary.com/VSWaveExport.html) Note:
Link may change as newer Versions will be available. Check the VS Planet for new activity.
This application works with PCs only. No Mac support is available. You can try using Boot
Camp with your Mac.
You do not need Reaper if you are using this software.
Features:
• supports MT2/MTP/M16/M24 formats
• supports 2480, 2400, 1880, 1680 and 880EX
• supports direct hard disk access
• supports VirDis: simply drag .bin or .hdd files into the list
• supports CD-R ripped files (like the Reaper plug in): drag SONG files into the list
I recommend to not use your main recording HD without having the data backed up. - Danielo
Usage:
There are three ways to get your VS Projects to the PC:
1. connect a VS formatted media like a SCSI hard disk, a Song Vault HD or the VS
internal HD to the computer or;
2. use VirDis or;
3. burn backup CDs and rip their content into files
Using a Harddisk:
To operate VSWaveExport on hard disks it is required that a VS formatted media with the
projects in playable format is connected to the PC. This could be the main VS hard disk, an
external SCSI device or a Song Vault disk. It will not work with projects copied in backup
mode or backup CD-Rs! It might work with 100MB ZIP disks (FAT 12 formatted), due to
lack of an SCSI ZIP drive it has not yet been tested.
If the tool reports that there is no VS disk, please check that your bios has identified the disk
correctly (maybe you have to adjust master/slave jumpers) and that Windows shows the first
4 partitions (note that the tool can access all 12 partitions). If everything looks correct, you
can force the tool to look at a specific partition by dragging the Disk icon (the one you find in
the 'My Computer' view of the Windows Explorer) onto the list of Found Roland Drives.
Using VirDis:
To operate on VirDis Files, drag the *.bin or *.hdd file into the list of Found Roland Drives.
After storing a file via the VS onto the VirDis, hit F5 in the Wave Export App to refresh the
content.
Exporting Roland VS Files to Your PC
Page 7 – 1/2/07:Rev. 2
Using ripped files:
To extract the files from your backup CDs, use the Cd2Roland utility as described in the
Reaper section above. After you get your files, drag the SONG file into the list of Found
Roland Drives.
The output will be 24-bit waves in case of MTP/M24 - if you have problems opening these,
please make sure that your audio software can handle 24-bit waves.
Converting the VS Files
Once downloaded and extracted from the zip, there will be a folder with two files:
It does not matter in which directory you un-zipped the files. Double click VS Wave Export.exe.
If you do not have a VS hard disk connected to your PC you’ll get:
Just click OK.
Next, you will see:
Exporting Roland VS Files to Your PC
Page 8 – 1/2/07:Rev. 2
Now open another Windows Explorer window and navigate to where your extracted SONG file
or your VirDis File is stored. Drag the file (left-click, hold left and move mouse) onto the white
box underneath the “Found Roland Drives:” and release the left button.
You will get something like this (does not apply if you work on SONGS):
Exporting Roland VS Files to Your PC
Page 9 – 1/2/07:Rev. 2
Unfold the Partition by clicking the plus sign (this does not apply if you work on SONGS):
Exporting Roland VS Files to Your PC
Page 10 – 1/2/07:Rev. 2
Click on a song (this does apply if you work on SONGS):
The tracks will now be displayed. Now you can set up your destination directory where you want
to put the wav files via the
button. You can select Tracks by clicking on the green boxes
(used Tracks), or select all by clicking on the ‘All’ button:
Exporting Roland VS Files to Your PC
Page 11 – 1/2/07:Rev. 2
Usually the export starts at the start of the first, and ends at the end of the last, event of the
selected tracks. However, by selecting ‘start at:’ / ‘end at:’ you can define a start/end time as
shown above.
Now click the ‘Export’ button to start conversion:
Exporting Roland VS Files to Your PC
Page 12 – 1/2/07:Rev. 2
Your files will be converted. You’re done!
Trouble Shooting
In Windows 2000, when I try to run the program I get a message 'The file mscomctl.ocx is
either missing or incorrectly installed'
1. Download MSCOMCTL.OCX or find it on someone’s PC and copy it.
2. Back up your current copy of MSCOMCTL.OCX (If you have it?) and copy the new version
to the same file location. This file should be located in the WINDOWS\SYSTEM directory
on your C: drive (for Windows NT and 2000: \WINNT\system32).
3. Using your mouse, click on the "Start" button and then click on "Run".
4. According to your Operating System, type the following command to register this library
file:
Windows 95, 98, or Me:
regsvr32 \windows\system\MSCOMCTL.OCX
Windows NT or 2000:
regsvr32 \WINNT\system32\MSCOMCTL.OCX
Exporting Roland VS Files to Your PC
Page 13 – 1/2/07:Rev. 2
Windows XP:
regsvr32 \windows\system32\MSCOMCTL.OCX
5. You should see a message saying "DllRegisterServer ... succeeded"
If you are getting an error telling you that the file is missing, then you are not typing the
command in correctly. You will need to type it in exactly as shown above for your operating
system.
* Please note that there is a SPACE after "regsvr32" and before the rest of the command.
(Thanks to Paul Miller for the detailed description)
An external SCSI hard disk is connected to the PC, the drive shows up in windows
correctly, drive letters like E: F: are displayed, but the tool reports "No Roland Device
found!"
For some reasons SCSI devices might not be accessible as physical drives. In this case, try
dragging one of the drive letters into the white box underneath 'Found Roland drives:'. The tool
should now display the content of the VS formatted drive.
A window named ‘Output:’ appears with strange messages
In this case, some entries in the EVENTLST are not as they usually are. The EVENTLST format
is not 100% understood, I would be interested to look into these messages. - Danielo
Exporting Roland VS Files to Your PC
Page 14 – 1/2/07:Rev. 2