1
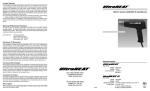
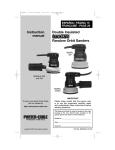
ROBINAIR
○ ○ ○ ○ ○ ○ ○ ○ ○ ○ ○ ○ ○ ○ ○ ○ ○ ○ ○ ○ ○ ○ ○ ○ ○ ○ ○ ○ ○ ○ ○ ○ ○ ○ ○ ○ ○ ○ ○ ○ ○ ○ ○ ○ ○ ○ ○ ○ ○ ○ ○ ○ ○ ○ ○ ○ ○ ○ ○ ○ ○ ○ ○
Operating
Manual
MODEL 14450
Heat Gun
14450 Heat Gun
WARNING.
•
This tool emits high temperature heat at the nozzle. Keep hands and body out
of the heated air stream and never grasp the heat gun by the nozzle. Wearing
protective gloves and safety glasses is recommended.
•
Never let the heat gun operate while unattended and unplug when not in use or
before servicing.
•
Do not use the heat gun near combustible materials, fumes or vapors. Good
ventilation is always advised.
•
Do not heat chemicals. Avoid the hazards of ignition or the release of harmful
vapors.
•
Heat guns are equipped with a circular safety stand that should be used when
setting the tool down while operating or during the cool-down period. Never
store while hot.
•
Do not use adaptors or modify the heat gun plug.
•
Replace damaged cords immediately.
•
Although the housing and handle of the heat gun are constructed of nonconducting material, do not use in wet or damp areas. Never immerse gun in
water nor stand in water or wet areas while using gun.
•
It is recommended to use the heat gun indoors only. Carefully check the flammability of the material under the surface as well as the surrounding materials.
After use, make sure that the gun has not caused combustion/fire to start.
•
Keep heat gun out of childrens reach and caution others of it’s extreme heat
capabilities.
•
Check your electrical line and receptacle to make certain they are correct for
the voltage and amperage indicated on your heat gun. If an extension cord is
necessary, a minimum 14 gauge three-prong grounding type cord rated for
outdoor use should be used to prevent excessive voltage drop, loss of power or
overheating.
Table of Contents
UL Safety Precautions ....................................................................... 2
Introduction ........................................................................................ 4
Operating Instructions ........................................................................ 5
Replacement of Heating Element ...................................................... 6
Maintenance....................................................................................... 7
Accessories ........................................................................................ 7
Replacement Parts............................................................................. 8
Specifications ..................................................................................... 8
Warranty ............................................................................................. 9
14450 Heat Gun
1
UL Safety Precautions
Underwriting Laboratories, Inc., in the Eleventh Edition for Electrical Heating
Appliances, UL 499 revised May 1990, issues the following instructions:
Hidden areas such as behind walls, ceilings, floors, soffit boards and other panels
may contain flammable materials that could be ignited by the heat gun when
working in these locations. The ignition of these materials may not be readily
apparent and could result in property damage and injury to persons.
When working in these locations, keep the gun moving in a back-and-forth motion.
Lingering or pausing in one spot could ignite the panel or the material behind it.
WARNING
Extreme care should be taken when stripping paint. The peelings, residue and vapors of paint may contain lead, which is
poisonous. Any pre-1977 paint may contain lead and paint
applied to homes prior to 1950 is likely to contain lead.
Once deposited on surfaces, hand to mouth contact can result in
the ingestion of lead. Exposure to even low levels of lead can
cause irreversible brain and nervous system damage; young
and unborn children are particularly vulnerable.
Before beginning any paint removal process, you should determine whether the paint you are removing contains lead. This
can be done by your local health department or by a professional who uses a paint analyzer to check the lead content of
the paint to be removed. LEAD BASED PAINT SHOULD ONLY BE
REMOVED BY A PROFESSIONAL AND SHOULD NOT BE REMOVED USING A HEAT GUN.
2
©2000 Robinair, SPX Corporation
UL Safety Precautions
Follow these guidelines when removing paint:
• Move the workplace outdoors. If this is not possible, keep the work area well
ventilated. Open the windows and put an exhaust fan in one of them. Be sure the
fan is moving the air from inside to outside.
• Remove or cover any carpets, rugs, furniture, clothing, cooking utensils and air
ducts.
• Place drop cloths in the work area to catch any paint chips or peelings. Wear
protective clothing such as extra work shirts, overalls and hats.
• Work in one room at a time. Furnishings should be removed or placed in the
center of the room and covered. Work areas should be sealed off from the rest of
the dwelling by sealing doorways with drop cloths.
• Children, pregnant or potentially pregnant women and nursing mothers should be
present in the work area until the work is done and all cleanup is completed.
• Wear a dust respirator mask or a dual filter (dust and fume) respirator mask which
has been approved by the Occupational Safety and Health Administration
(OSHA), the National Institute of Safety and Health (NIOSH), or the United
States Bureau of Mines. These masks and replaceable filters are readily available
at major hardware stores. Be sure the mask fits. Beards and facial hair may keep
the masks from sealing properly. Change filters often. DISPOSABLE PAPER
MASKS ARE NOT ADEQUATE.
• Use caution when operating the heat gun. Keep the heat gun moving as excessive
heat will generate fumes which can be inhaled by the operator.
• Keep food and drink out of the work area. Wash hands, arms, and face and rinse
mouth before eating or drinking. Do not smoke or chew gum or tobacco in the
work area.
• Clean up all removed paint and dust by wet-mopping the floors. Use a wet cloth to
clean all walls, sills and any other surfaces where paint or dust is clinging. DO
NOT SWEEP DRY DUST OR VACUUM. Use a high phosphate detergent or
trisodium phosphate (TSP) to wash and mop areas.
• At the end of each work session, put the paint chips and debris in a double plastic
bag, close it with tape or twist ties, and dispose of properly.
14450 Heat Gun
3
Introduction
INTRODUCTION
The 14450 Heat Gun is a lightweight source of directed heat offering 500° and 750° settings and also has a “cold” setting. The gun is
shock-proof and cool-running, with a tough Lexan® housing. The
unit weighs just 2 1/2 lbs. and is American made. The 14450 is
ideal for many applications, including:
•
•
•
•
•
•
4
Fast heating/drying of materials
Quick curing/drying of epoxies
Applying shrink tubing
Softening tubing for bending
Speed-drying of touch-up paint to eliminate “haze”
Drying out condensation in motors, clutches, controls, etc.
©2000 Robinair, SPX Corporation
Operating Instructions
OPERATION
CAUTION: This heat gun is capable of producing up to 750° F
heat. EXTREME CAUTION should be exercised in its use and
operating environment. Read and understand the Operator’s
Manual completely before use.
The 14450 heat gun has a three position toggle switch marked OFF–
COLD–HOT.
In COLD position—only the fan operates.
In HOT position—both the heating element and the fan operate.
Before turning the gun OFF, switch to COLD and allow fan to run for
one minute. This procedure extends the life of the heating element and
prevents possible damage to the heat gun.
1. Adjust heat by turning the air regulator assembly on the heat gun
housing. Your gun’s rated temperature range is based upon the
amount of air passing through the air regulator. Turning the regulator as indicated will increase or decrease the temperature.
2. To prevent backpressure and premature heating element burn-out,
keep nozzle at least 1” from surface being heated. Keep nozzle
moving—do not hold stationary on flammable materials.
3. Make certain that all ventilation areas are kept clean and free of
foreign matter. The heat gun is cleaned best with compressed dry
air. Do not insert objects through openings.
4. Care in handling is recommended to avoid breakage of the ceramic
heating element core.
14450 Heat Gun
5
Element Replacement
QUICK CHANGE ELEMENT REPLACEMENT
1. UNPLUGtheheatgun.
2. Turnoutershieldcounterclockwiseandpullawayfromhousing.
3. Loosen bolt (but do not remove) and nut on the inner shield and
rotate clockwise until the locking knob on the housing is visible.
4. Remove the three (3) screws from the cover.
5. Lift back of cover and gently slide away from inner shield.
NOTE: Wiggle the cover gently back and forth to help in removing.
6. Disconnect the two female terminal connectors from the old
element and pull the element out of the inner shield.
7. Take the bolt and porcelain tubes out of the old element.
8. Remove old mica from the inner shield.
9. Reassemble the bolt through the new element using one spacer on
each side and also on the nut, but do not tighten.
10. Using the new piece of mica, wrap it around the new element.
NOTE: Start wrapping mica below the porcelain tubes.
6
©2000 Robinair, SPX Corporation
Maintenance
1. The brushes in your heat gun should be checked for wear at approximately 400 hours of operation. Replace in sets when they
reach a length of ˘” or less. Brush springs should be replaced at
the same time.
Remove brushes by unscrewing retainer caps on sides of motor
housing. If old brushes are reinstalled, replace as removed to
ensure same commutator match.
2. Bearings are factory lubricated and sealed for the life of the bearing
and no further lubrication is required.
3. If the heat gun is used under extremely dusty conditions, dust
inside the housing can be removed without disassembly with a
blast of compressed dry air through openings in the housing.
4. If housing exterior requires cleaning, any household liquid detergent may be used. Be careful not to allow liquid of any kind to
reach the gun’s operating parts. Avoid using MEK or strong alkaline solutions.
5. Inspect the cord and plug occasionally to ensure protective insulation is not damaged.
6. In the event of heating element burn-out, the complete “Quick
Change” assembly can be ordered with installation instructions.
ACCESSORIES
Safety Stand
This stand is a sturdy, circular safety stand of LEXAN 940 that can be
easily adjusted to any angle in horizontal or vertical position. Easily
attached and removed.
14450 Heat Gun
7
Replacement Parts
Component
Part Number
Heating element, 115V
44993
Carbon brushes, springs and caps
44996
Switch assembly, 20 amps
44997
SPECIFICATIONS
Voltage .......................................... 115
Amperage ....................................... 12
Approximate Temperature ... 500-750° F
8
©2000 Robinair, SPX Corporation
Warranty
GENERAL WARRANTY
This product is warranted to be free from defects in material and
workmanship under normal use and service for a period of one year
after the sale of the product. Exceptions to this policy will be individually identified. Sole obligation under this Warrantly shall be to repair
or replace any defective product or parts thereof, which are returned to
Seller’s factory, transportation charges prepaid within the period
mentioned above, and which upon examination are provided to Seller’s
satisfaction to be defective.
The warranty shall not apply to any product or part which has been
subject to misuse, negligence or accident. The Seller shall not be
responsible for any special or consequential damages and the Warranty
as set forth is in lieu of all other warranties either expressed or implied.
However, Seller makes no warranty of merchantability in respect to
any products for any particular purpose other than that stated in this
literature and any applicable manufacturer’s shop or service manuals
referred to therein, including any subsequent service bulletins.
FACTORY SERVICE
If your heat gun needs factory service, send the complete unit prepaid
to Robinair with a request for repair and a description of the problem.
For “In-Warranty” repairs, you must send a proof of purchase. Heat
guns repaired under warranty will be returned prepaid.
“Out-of-Warranty” repairs will be billed to you along with return
shipping; you may request an estimate of necessary repairs before any
work is done. Send the heat gun to SPX Robinair, Attn: Service
Repair, 1224 Robinair Way, Montpelier, OH 43543.
14450 Heat Gun
9
%
Visit our web site
at
www.robinair.com
or
call our Toll-Free
Technical Support Line at
800-822-5561
in the continental U.S. or Canada.
In all other locations, contact your local distributor. To help
us serve you better, please be prepared to provide the
model number, serial number, and date of purchase.
To validate your warranty, you must complete the warranty
card attached to your unit and return it within ten days from
date of purchase.
NATIONWIDE NETWORK OF AUTHORIZED
SERVICE CENTERS
If your unit needs repairs or replacement parts, you should
contact the service center in your area. For help in locating
a service center, call the toll free technical support line.
Due to ongoing product improvements,
we reserve the right to change design,
specifications and materials without notice.
122437 (01/00)
SPX
ROBINAIR
SPX Corporation
1224 Robinair Way
Montpelier, OH 43543-1952 USA
Phone 419-485-5561
Fax 419-485-8300
Web site: www.robinair.com
14450 Heat Gun
Printed in U.S.A.