1
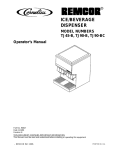
ICE/BEVERAGE DISPENSER
MODELS: DB90S-BC (4V)
DB90S-BC (5V)
Operator’s Manual
Part No. 91772
Revised: August, 1995
THIS DOCUMENT CONTAINS IMPORTANT INFORMATION
This Manual must be read and understood before installing or operating this equipment
â REMCOR INC 1994
PRINTED IN U.S.A
TABLE OF CONTENTS
Page
SAFETY PRECAUTIONS . . . . . . . . . . . . . . . . . . . . . . . . . . . . . . . . . . . . . . . . . . . . . . . . . . .
1
GENERAL DESCRIPTION . . . . . . . . . . . . . . . . . . . . . . . . . . . . . . . . . . . . . . . . . . . . . . . . . .
2
INSTALLATION INSTRUCTIONS . . . . . . . . . . . . . . . . . . . . . . . . . . . . . . . . . . . . . . . . . . . .
3
KIT 03324 INSTALLATION INSTRUCTIONS . . . . . . . . . . . . . . . . . . . . . . . . . . . . . . . . . .
4
GATE RESTRICTOR PLATE . . . . . . . . . . . . . . . . . . . . . . . . . . . . . . . . . . . . . . . . . . . .
ADJUSTMENT . . . . . . . . . . . . . . . . . . . . . . . . . . . . . . . . . . . . . . . . . . . . . . . . . . . . . . . .
MAINTENANCE . . . . . . . . . . . . . . . . . . . . . . . . . . . . . . . . . . . . . . . . . . . . . . . . . . . . . . . . . . .
5
5
13
DAILY OR AS REQUIRED . . . . . . . . . . . . . . . . . . . . . . . . . . . . . . . . . . . . . . . . . . . . . .
WEEKLY OR AS REQUIRED . . . . . . . . . . . . . . . . . . . . . . . . . . . . . . . . . . . . . . . . . . . .
13
13
MONTHLY . . . . . . . . . . . . . . . . . . . . . . . . . . . . . . . . . . . . . . . . . . . . . . . . . . . . . . . . . . . .
START-UP AND OPERATING INSTRUCTIONS . . . . . . . . . . . . . . . . . . . . . . . . . . .
CLEANING INSTRUCTIONS . . . . . . . . . . . . . . . . . . . . . . . . . . . . . . . . . . . . . . . . . . . . . . . .
13
13
14
DISPENSER . . . . . . . . . . . . . . . . . . . . . . . . . . . . . . . . . . . . . . . . . . . . . . . . . . . . . . . . . .
BEVERAGE SYSTEM . . . . . . . . . . . . . . . . . . . . . . . . . . . . . . . . . . . . . . . . . . . . . . . . . .
TROUBLESHOOTING GUIDE . . . . . . . . . . . . . . . . . . . . . . . . . . . . . . . . . . . . . . . . . . . . . . .
14
14
16
BLOWN FUSE OR CIRCUIT BREAKER . . . . . . . . . . . . . . . . . . . . . . . . . . . . . . . . . .
GATE DOES NOT OPEN. . . . . . . . . . . . . . . . . . . . . . . . . . . . . . . . . . . . . . . . . . . . . . . .
GATE DOES NOT OPEN OR IS SLUGGISH. AGITATOR TURNS. . . . . . . . . . . .
GATE OPENS. AGITATOR DOES NOT TURN. . . . . . . . . . . . . . . . . . . . . . . . . . . . .
ICE DISPENSES CONTINUOUSLY. . . . . . . . . . . . . . . . . . . . . . . . . . . . . . . . . . . . . . .
SLUSHY ICE. WATER IN HOPPER. . . . . . . . . . . . . . . . . . . . . . . . . . . . . . . . . . . . . . .
BEVERAGES DO NOT DISPENSE . . . . . . . . . . . . . . . . . . . . . . . . . . . . . . . . . . . . . .
16
16
16
16
16
16
16
BEVERAGES TOO SWEET. . . . . . . . . . . . . . . . . . . . . . . . . . . . . . . . . . . . . . . . . . . . .
BEVERAGES NOT SWEET ENOUGH. . . . . . . . . . . . . . . . . . . . . . . . . . . . . . . . . . . .
BEVERAGES NOT COLD (UNITS WITH BUILT-IN COLD PLATE) . . . . . . . . . . .
WARRANTY . . . . . . . . . . . . . . . . . . . . . . . . . . . . . . . . . . . . . . . . . . . . . . . . . . . . . . . . . . . . . .
16
16
16
25
i
91772
TABLE OF CONTENTS (cont’d)
Page
LIST OF FIGURES
FIGURE 1. ICE DIVERTER . . . . . . . . . . . . . . . . . . . . . . . . . . . . . . . . . . . . . . . . . . . . .
4
FIGURE 2. GATE RESTRICTOR PLATE . . . . . . . . . . . . . . . . . . . . . . . . . . . . . . . . . .
FIGURE 3. MOUNTING TEMPLATE DB90S--B STANDARD . . . . . . . . . . . . . . . . .
FIGURE 4. MOUNTING TEMPLATE DB90S-B & --BZ . . . . . . . . . . . . . . . . . . . . . .
FIGURE 5. MOUNTING TEMPLATE DB90S--BC . . . . . . . . . . . . . . . . . . . . . . . . . . .
FIGURE 6. MOUNTING TEMPLATE DB90-BCZ . . . . . . . . . . . . . . . . . . . . . . . . . . .
FIGURE 7. BEVERAGE SYSTEM SCHEMATIC “--B”AND “--BZ”UNITS . . . . . .
FIGURE 8. BEVERAGE SYSTEM SCHEMATIC --BC MODEL ( 4 VALVE) . . . . .
5
6
7
8
9
10
11
FIGURE 9. BEVERAGE SYSTEM SCHEMATIC --BC MODEL ( 5 VALVE) . . . . .
FIGURE 10. WIRING DIAGRAM DB 90 DISPENSER . . . . . . . . . . . . . . . . . . . . . . .
FIGURE 11. SOLENOID ASSEMBLY - EXPLODED VIEW & PARTS LIST . . . . .
FIGURE 12. EXPLODED VIEW & PART LIST DB90-B . . . . . . . . . . . . . . . . . . . . . .
FIGURE 13. EXPLODED VIEW & PART LIST DB90-BZ (NO SINK) . . . . . . . . . .
FIGURE 14. EXPLODED VIEW & PARTS LIST DB90-BC
MERCHANDISER SECTION . . . . . . . . . . . . . . . . . . . . . . . . . . . . . . . . . .
FIGURE 15. EXPLODED VIEW & PART LIST DB90-BC CABINET . . . . . . . . . . .
FIGURE 16. EXPLODED VIEW & PARTS LIST DB90-BC
COLD PLATE SECTION . . . . . . . . . . . . . . . . . . . . . . . . . . . . . . . . . . . . . .
FIGURE 17. EXPLODED VIEW & PARTS LIST DB90-BC ELECTRIC
BOX ASSEMBLY . . . . . . . . . . . . . . . . . . . . . . . . . . . . . . . . . . . . . . . . . . . .
12
17
18
19
20
21
22
23
24
LIST OF TABLES
TABLE 1. SPECIFICATIONS . . . . . . . . . . . . . . . . . . . . . . . . . . . . . . . . . . . . . . . . . . . .
2
Manufactured Under One or More of the following Patent Numbers: 3,211,336, 3,274,792, 3,393,839,3,517,860,
3,739,842, 4,215,803,4,227,377, 4,300,359, 4,346,824
Canadian Patent Numbers: 912,514 (10/72), 936,855 (11/73), 4,429,543, 4,921,149
Other Patents Pending
91772
ii
SAFETY PRECAUTIONS
Always disconnect power to the dispenser before servicing or cleaning.
Never place hands inside of hopper or gate area without disconnecting power to the dispenser. Agitator rotation
occurs automatically when the dispenser is energized!
This ice dispenser has been specifically designed to provide protection against personal injury and eliminates
contamination of ice. To insure continued protection and sanitation, observe the following
ALWAYS be sure the removable lid is properly installed to prevent unauthorized access to the hopper interior and possible contamination of ice.
ALWAYS be sure the upper and lower front panels are securely fastened.
ALWAYS keep area around the dispenser clean of ice cubes.
CAUTION: Dispenser cannot be used with crushed or flaked ice.
Use of bagged ice which has frozen into large chunks can void warranty. The dispenser
agitator is not designed to be an ice crusher. Use of large chunks of ice which “jam up”
inside the hopper will cause failure of the agitator motor and damage to the hopper. If bagged ice
is used, it must be carefully and completely broken into small, cube-sized pieces before filling into
the dispenser hopper.
1
91772
GENERAL DESCRIPTION
The Remcor “DB”series of ice dispensers will solve ice and beverage service needs in the sanitary, space saving, economical way. Designed to be manually filled with ice from any remote ice making source, these dispensers will dispense cubes (up 1-1/4”in size), cubelets, hard-chipped or cracked ice and Scotsman MH750 pellet
ice; and in addition, several flavors of post-mix beverages. “B”models contain beverage faucets only and must
be supplied with cold product from any remote cold plate or refrigerated soda factory. “-BC”models include beverage faucets and a cold plate and are designed to be supplied directly from the syrup tanks and carbonator,
with no additional cooling required.
IMPORTANT: For dispensing Scotsman “pellet” style ice (Model MH750 icemakers), REMCOR Kit
#02234 Ice Diverter must be installed on the dispenser. (See INSTALLATION INSTRUCTIONS)
Table 1. Specifications
Model:
Ice Storage:
Maximum Number of Faucets Available:
Built-in Cold Plate:
Electrical:
DB90S-BZ
90 lbs.
4
No
120/1/60 3A Cord Connected; 15A, 125V
Plug
16”W x 29-3/4”D x 32”H
Dimensions:
Model:
Ice Storage:
Maximum Number of Faucets Available:
Built-in Cold Plate:
Electrical:
DB90S-B
90 lbs.
4
No
120/1/60 3A Cord Connected; 15A, 125V
Plug
16”W x 29-3/4”D x 32”H
Dimensions:
Model:
Ice Storage:
Maximum Number of Faucets Available:
Built-in Cold Plate:
Electrical:
DB90S-BC
90 lbs.
5
Yes
120/1/60 3A Cord Connected; 15A, 125V
Plug
16”W x 29-3/4”D x 32”H
Dimensions:
LEGEND
Z
BC
S
B
91772
No sink option
Beverage/Cold Plate System
All Stainless Steel
Beverage System
2
INSTALLATION INSTRUCTIONS
1. Locate the dispenser indoors on a level counter top.
COUNTER MOUNTING
The ice dispenser must be sealed to the counter. The template drawing indicates openings which must be
cut in the counter. Locate the desired position for the dispenser, then mark the outline dimensions on the
counter using the template drawings. Cut openings in the counter.
Apply a continuous bead of NSF International (NSF) listed silastic sealant (Dow 732 or equal) approximately 1/4”inside of the unit outline dimensions and around all openings. Then position the unit on the counter
within the outline dimensions. All excess sealant must be wiped away immediately.
2. The beverage tubes, drain line and power cord are routed through the large opening in the bottom of the
unit. See the MOUNTING TEMPLATE, for locating the required clearance hole in the counter for these utility lines.
3. SINK DRAIN ASSEMBLY: Connect the drain tube to an open drain. Additional drain tubing is provided with
the unit. The drain line must continuously pitch downward away from the unit and contain no “traps”or improper drainage will result.
A.
Use tube, clamp and insulation provided to assemble drain.
B.
To assure proper drainage, do not allow “trap”to form in drain line. Be sure drain line runs flat with
bottom of dispenser.
4. Connect the beverage system product lines as indicated in Figure 2 (and in Figure 3 for cold plate units).
This work should be done by a qualified service person. Note that the hoses are marked with numbers ( 1
through 4 or 5) for syrup connections On 5 valve “-BC”units, the plain water is marked “NON CARB
WATER”.
5. Clean the hopper interior (see CLEANING INSTRUCTIONS).
6. Connect the power cord to a 120 volt, 60 cycle, 3-wire grounded receptacle.
NOTE:
Water pipe connections and fixtures directly connected to a potable water supply shall be
sized, installed and maintained according to Federal, State and Local Laws/
DRAIN LINE
STAINLESS STEEL ELBOW
DRAIN TUBING PROVIDED
WITH DISPENSER
DISPENSER BOTTOM
3
91772
KIT 03324 INSTALLATION INSTRUCTIONS
NOTE:
For dispensing Scotsman NM 650 “nugget” style and MH 750 “pellet” style ice and Wilshire
MCC500 and MCC700 compressed ice cubes.
1. Disconnect power to dispenser.
2. Remove upper front panel from dispenser.
3. Remove ice chute and discard Gate Restrictor.
4. Reinstall front panel and energize unit.
STORAGE HOPPER
GATE MOUNTING PLATE
ICE DIVERTER
P/N 27065
GASKET
FLANGE EXTENDS INTO
STORAGE HOPPER
THROUGH GATE OPENING
ICE CHUTE
FLAT WASHER
APPLY RTV TO THIS SURFACE
TO SEAL TO HOPPER GATE
MOUNTING PLATE
10-32 NUT
91772
FIGURE 1. ICE DIVERTER
4
GATE RESTRICTOR PLATE
CAUTION: Disconnect power to dispenser before installing, removing or adjusting
restrictor
INSTALL PLATE
ON
STUDS AS
SHOWN
FIGURE 2. GATE RESTRICTOR PLATE
ADJUSTMENT
This dispenser is provided with a gate restrictor plate, installed in its highest position. This plate adjusts the rate
of ice flow from the dispenser. In applications using buckets, carafes or other large containers, the plate may be
removed entirely for maximum ice flow. For glasses and cups, the plate may be adjusted downward to reduce
the flow of ice. The best position depends on the type of ice being used and the size container and must be
found by trial and error. Adjustment is made by loosening the upper two ice chute retaining nuts, sliding the restrictor plate to the desired position and re-tightening the nuts.
If the dispenser fails to dispense the ice when operated, check that the hopper has ice in it and that power is
being supplied to the unit. If the problem persists, refer to the troubleshooting guide (page 16).
5
91772
1 1/32-IN.
11 1/4-IN.
2 19/64-IN.
1 7/64-IN.
4 1/2-IN.
REAR OPENING FOR
BEVERAGE AND UTILITIES
24 5/16-IN.
29 3/4-IN.
OUTLINE
OF UNIT
3/8 DIA.
13 3/4-IN.
15 27/32-IN.
NOTE:
91772
1) Shaded areas indicate openings in
cabinet bottom needed for utilities
and beverage tubing.
FIGURE 3. MOUNTING TEMPLATE DB90S--B STANDARD
6
1 3/64-IN.
OUTLINE
OF UNIT
15 1/16-IN.
21 1/16-IN.
REAR OPENING FOR
BEVERAGE AND UTILITIES
4 1/2-IN.
4-IN.
8-IN.
16-IN.
NOTE:
1) Shaded areas indicate openings in
cabinet bottom needed for utilities
and beverage tubing.
FIGURE 4. MOUNTING TEMPLATE DB90S-B & --BZ
7
91772
10-IN.
2 57/64-IN.
2 1/2-IN.
REAR OPENING FOR
BEVERAGE AND UTILITIES
OUTLINE
OF UNIT
24 5/16-IN.
29 3/4-IN.
3/8 DIA.
13 1/2-IN.
15 27/32-IN.
NOTE:
91772
1) Shaded areas indicate openings in
cabinet bottom needed for utilities
and beverage tubing.
FIGURE 5. MOUNTING TEMPLATE DB90S--BC
8
1 3/64-IN.
3/8” (4
PLCS.)
FIGURE 6. MOUNTING TEMPLATE DB90-BCZ
9
91772
91772
10
FIGURE 7. BEVERAGE SYSTEM SCHEMATIC “--B” AND “--BZ” UNITS
11
91772
FIGURE 8. BEVERAGE SYSTEM SCHEMATIC --BC MODEL ( 4 VALVE)
91772
12
FIGURE 9. BEVERAGE SYSTEM SCHEMATIC --BC MODEL ( 5 VALVE)
MAINTENANCE
The following dispenser maintenance should be performed at the intervals indicated:
DAILY or as required
Remove foreign material from the vending area sink to prevent drain blockage.
WEEKLY or as required
Clean vending area. Check for proper water drainage from the vending area sink.
MONTHLY
Clean and sanitize the hopper interior (see CLEANING INSTRUCTIONS).
START-UP AND OPERATING INSTRUCTIONS
Fill the hopper with ice. For “--BC”models with a built-in cold plate, dispense several large cups of ice (approximately 20 to 30 seconds total dispensing time) to allow ice to fill the cold plate. Add ice to the hopper as necessary to refill and replace the lid. Allow 10 to 15 minutes for the cold plate to cool down. Repeat this procedure
whenever the dispenser has been standing overnight or other long periods without ice use. On “--B”and “--BC”
models, start up the beverage system and adjust faucets to the proper brix. Contact your local syrup distributor
for complete information on the beverage system.
In normal operation, pushing the ice dispenser lever will cause ice to flow from the ice chute. Ice flow will continue until the lever is released. Pushing the lever on any faucet will provide beverage of the appropriate flavor.
CAUTION: Use caution to avoid spilling ice when filling dispenser. Immediately clean up
any spilled ice from filling or operating the unit. To prevent contamination of ice, the lid
must be installed on the unit at all times.
13
91772
CLEANING INSTRUCTIONS
WARNING: DISCONNECT POWER BEFORE CLEANING! Do not use metal scrapers, sharp
objects or abrasives on the ice storage hopper, top cover and the agitator disk, as damage
may result. Do not use solvents or other cleaning agents, as they may attack the plastic
material.
DISPENSER
1. Clean the ice storage hopper at least once a month.
2. Lift off the agitator and the agitator disk. Wash with a mild detergent solution and rinse them thoroughly to
remove all traces of detergent.
3. Wash down the inside of the hopper and top cover with a mild detergent solution and rinse thoroughly to
remove all traces of detergent.
4. Replace the agitator.
5. Sanitize the inside of the hopper and agitator with a solution of 1 ounce of household bleach in 2 gallons of
water. (200 PPM)
6. Replace the agitator disk. Sanitize as described in Step 5.
7. Remove Ice Chute cover as follows:
A.
Flex sides outward to disengage lower pins.
B.
Lift Ice Chute cover to disengage upper pins.
C.
Lower Ice Chute cover down out of unit. Note: it may be helpful to twist cover slightly.
8. Clean the inside of the ice chute and ice chute cover with a mild detergent solution and rinse thoroughly to
remove all traces of detergent.
9. Reverse steps above to reassemble ice chute.
10. Sanitize as described in Step 5.
BEVERAGE SYSTEM
1. Remove faucet spouts, wash in mild detergent, rinse and replace.
2. Disconnect electrical power to the carbonator. Shut off the water supply and close the CO2 regulator to the
carbonator.
3. Disconnect the syrup tanks from the system.
4. Energize the beverage faucets to purge the remaining soda in the system.
5. Use a clean 5 gallon tank for each of the following.
A.
Cleaning tank - fill with hot (120° - 140° ) potable water.
B.
Sanitation Tank - Fill with a chlorine sanitizing solution in the strength of 1 ounce of household bleach
(sodium hypochlorite) to 2 gallons of cold (ambient) potable water (200 PPM).
6. Repeat the following procedure on each of the units’syrup product lines:
14
91772
A.
Connect the cleaning tank to the syrup line to be sanitized and to the CO2 system.
B.
Energize the beverage faucet until the liquid dispensed is free of any syrup.
C.
Disconnect the cleaning tank and hook-up the sanitizing tank to the syrup line and CO2 system.
D.
Energize the beverage faucet until the chlorine sanitizing solution is dispensed through the faucet.
Flush at least 2 cups of liquid to insure that the sanitizing solution has filled the entire length of the
syrup lines.
E.
Disconnect the sanitizing tank. Hook-up the product tank to the syrup line and to the CO2 system.
F.
Energize the faucet to flush the sanitizing solution from the syrup line and faucet. Continue to draw on
the faucet until only syrup is dispensed.
7. Repeat Step 2 in reverse order to turn on the carbonator. Dispense at lease 1 cup of beverage from each
faucet. Check taste. Continue to flush if needed, to obtain a satisfactory tasting drink.
15
91772
TROUBLESHOOTING GUIDE
Should your unit fail to operate properly, check that there is power to the unit and that the hopper contains ice. If
the unit does not dispense, check the following chart under the appropriate symptoms to aid in locating the defect.
Trouble
BLOWN FUSE OR CIRCUIT BREAKER
A.
Probable Cause
Short circuit in wiring.
B.
Defective gate solenoid.
C.
A.
Defective agitator motor.
No power.
B.
Defective dispensing switch.
C.
A.
Blown/defective fuse or jammed gate solenoid.
Defective gate solenoid.
B.
Weak gate spring.
C.
A.
Excessive pressure against gate slide.
Ice solidified in hopper.
B.
Defective agitator motor.
C.
A.
Defective capacitor.
Stuck or bent push button (does not release switch).
B.
Defective dispensing switch.
C.
A.
Improper switch installation.
Blocked drain.
B.
Unit not level.
C.
Poor ice quality due to water quality or icemaker
problems
BEVERAGES DO NOT DISPENSE
D.
A.
Improper use of flaked ice.
No 24 volt power to faucets.
BEVERAGES TOO SWEET.
B.
A.
No CO2 pressure.
Carbonator not working.
B.
No CO2 pressure in carbonator.
C.
A.
Faucet brix requires adjusting.
Empty syrup tank.
B.
A.
Faucet brix requires adjusting.
Unit standing with no ice in hopper, no ice in cold plate
cabinet.
GATE DOES NOT OPEN.
GATE DOES NOT OPEN OR IS SLUGGISH.
AGITATOR TURNS.
GATE OPENS. AGITATOR DOES NOT TURN.
ICE DISPENSES CONTINUOUSLY.
SLUSHY ICE. WATER IN HOPPER.
BEVERAGES NOT SWEET ENOUGH.
BEVERAGES NOT COLD
(UNITS WITH BUILT-IN COLD PLATE)
Contact your local syrup or beverage equipment distributor for additional information and troubleshooting of your
beverage system.
91772
16
WHEN REPLACING SOLENOID, ADJUST
TO 7/8-INCH AS SHOWN BEFORE TIGHTENING MOUNTING SCREWS.
FIGURE 10. WIRING DIAGRAM DB 90 DISPENSER
17
91772
FIGURE 11. SOLENOID ASSEMBLY - EXPLODED VIEW & PARTS LIST
Index
No.
1
Part No.
Quantity
21493
1
Description
Solenoid Mounting Plate
2#
31551
1
Solenoid Service Kit
3
70171
2
8--32 x 3/8 Phil Tr HD Screw
4
70121
2
No. 8 Lockwasher
5
50752
3
Isolator
6*
50789
2
Bumper Assembly
7*
70423
1
Cotter Pin
8*
10080
1
Gate Lift Rod
9
10081
1
Gate Lift Rod Bushing
10
50754
1
Gate Arm Bearing
11
21492
1
Gate lift Arm
Flatwasher
12
70043
1
13*
70422
1
Spring
14
70263
1
1/4-20 x 3/4 Hex Hd Screw
15
70048
1
1/4 Lockwasher
16
70066
1
1/4 Flatwasher
17
10077
1
Pivot Bearing
18
30227
1
1/4 Quick Connect Tab
19
50305
----
Lubricant
20*
21592
1
Solenoid Linkage Pin
21*
70433
2
Retainer Ring
22
51088
----
Loctite
----*
70438
----
Rebuilding Kit
NOTE: * Parts supplied with rebuilding kit.
# 31551 solenoid supplied with items 20 & 21.
91772
18
FIGURE 12. EXPLODED VIEW & PART LIST DB90-B
Item
No.
Part No.
1
25734
Name
Gate Slide
2
52072
Agitator Disk
3
32763
Ice Dispenser Switch
4
91511
Switch Label
5
31091
Transformer (-B models)
6
32745
Agitator Motor
7
50454
Motor Shaft Seal
8
52054
Lid
9
50751
Ice chute
10
51891
Gate Gasket
11
30997
Capacitor, Agitator Motor
12
31093
Gate Solenoid Assembly (See page 18 )
13
31551
Gate Solenoid Kit
14
70438
Rebuilding Kit (Gate Solenoid)
15
31406
Fuse. Gate Solenoid
16
51860
Motor, Gasket
17
27597
Agitator
PARTS FOR SINK MODEL ONLY
18
50750
Sink, Foamed
19
70426
Sink, Grill
20
27621
Sink, Ext. Weldment
19
91772
FIGURE 13. EXPLODED VIEW & PART LIST DB90-BZ (NO SINK)
Item
No.
Part No.
1
27534
Gate slide
2
52072
Agitator Disk
3
32763
Ice dispenser switch
4
91511
Switch Label
Name
5
31091
Transformer (-B Models)
6
32745
Agitator Motor
7
50454
Motor Shaft Seal
8
52054
Lid
9
53015
Ice Chute back section
53016
Ice Chute Cover
10
51891
Gate Gasket
Capacitor, Agitator Motor
11
30997
12
31093
Gate Solenoid Assembly (See Page 18)
13
31551
Gate Solenoid Kit
14
70438
Rebuilding Kit (Gate Solenoid)
15
31406
Fuse, Gate Solenoid
16
51860
Motor, Gasket
17
27597
Agitator
91772
20
FIGURE 14. EXPLODED VIEW & PARTS LIST DB90-BC MERCHANDISER SECTION
Item
No.
Part No.
1
52068
Name
Merchandiser Panel, Plexiglass
2
27685
Bracket, Upper Merchandiser
3
28326
Merchandiser
4
32763
Ice Dispenser Switch
5
91511
Switch Label
6
32322
Cord, Lighted Merchandiser
7
27684
Bracket, Lower Merchandiser
21
91772
FIGURE 15. EXPLODED VIEW & PART LIST DB90-BC CABINET
Item
No.
Part No.
1
52054
Name
Ice Storage Bin Ltd
2
70180
10-32 Thumbscrew
3
52072
Agitator Disk
4
27597
Agitator
5
52048
Ice Storage Bin
6
28410
Cabinet Wrapper
7
27534
Gate Slide
8
31093
Gate Solenoid Assembly
9
22081
Gate Restrictor
10
28328
Lower SS Panel
11
51891
Gate Gasket
12
52053
Ice Chute Conduit
13
53015
Ice Chute Back Section
53016
Ice Chute Cover
14
50454
Agitator Motor Shaft Seal
15
51860
Agitator Motor Gasket
16
32745
Agitator Motor
17
32748
Electric Box Assembly
18
27510
Cover, Electric Box
19
32747
Fluorescent Lamp
91772
22
FIGURE 16. EXPLODED VIEW & PARTS LIST DB90-BC COLD PLATE SECTION
Item
No.
Part No.
1
70426
Name
Sink Grill
2
52789
Sink, Foamed
3
52099
Drain Assembly, Sink
4
27621
Sink Extension
5
51801
Gasket, Cold Plate Drain Tube
6
51775
90° PVC Fitting
7
70350
Clamp, Hose
8
28411
Base, Cabinet
9
28840
Beverage Panel
10
52225
Cold Plate Cover
11
33035
Cord, Power Supply
12
28405
Cold Plate Access Panel
23
91772
FIGURE 17. EXPLODED VIEW & PARTS LIST DB90-BC ELECTRIC BOX ASSEMBLY
Item
No.
Part No.
1
31621
Ballast
2
31620
Starter
3
30997
Capacitor
4
31363
Transformer Assembly
91772
Name
24
REMCOR PRODUCT COMPANY
500 Regency Drive
Glendale Heights, IL 60139-2268
Telephone (708) 980-- 6900
Facsimile (708) 980-- 8511
WARRANTY
REMCOR warrants that all equipment and parts are free from defects in material and workmanship under normal use and service. For a copy of the warranty applicable to your REMCOR product, in your country, please
write, fax or telephone the IMI Cornelius office nearest you. Please provide the equipment model number and
the date of purchase.
IMI Cornelius Offices
AUSTRALIA D P.O. 210, D RIVERWOOD, D NSW 2210, AUSTRALIA D (61) 2 533 3122 D FAX (61) 2 534 2166
AUSTRIA D AM LANGEN FELDE 32 D A-1222 D VIENNA, AUSTRIA D (43) 1 233 520 D FAX (43) 1-2335-2930
BELGIUM D BOSKAPELLEI 122 D B-2930 BRAASCHAAT, BELGIUM D (32) 3 664 0552 D FAX (32) 3 665 2307
BRAZIL D RUA ITAOCARA 97 D TOMAS COELHO D RIO DE JANEIRO, BRAZIL D (55) 21 591 7150 D FAX (55) 21 593 1829
ENGLAND D TYTHING ROAD ALCESTER D WARWICKSHIRE, B49 6 EU, ENGLAND D (44) 789 763 101 D FAX (44) 789 763 644
FRANCE D 71 ROUTE DE ST. DENIS D F-95170 DEUIL LA BARRE D PARIS, FRANCE D (33) 1 34 28 6200 D FAX (33) 1 34 28 6201
GERMANY D CARL LEVERKUS STRASSE 15 D D-4018 LANGENFELD, GERMANY D (49) 2173 7930 D FAX (49) 2173 77 438
GREECE D 488 MESSOGION AVENUE D AGIA PARASKEVI D 153 42 D ATHENS, GREECE D (30) 1 600 1073 D FAX (30) 1 601 2491
HONG KONG D 1104 TAIKOTSUI CENTRE D 11-15 KOK CHEUNG ST D TAIKOKTSUE, HONG KONG D (852) 789 9882 D FAX (852) 391 6222
ITALY D VIA PELLIZZARI 11 D 1-20059 D VIMARCATE, ITALY D (39) 39 608 0817 D FAX (39) 39 608 0814
NEW ZEALAND D 20 LANSFORD CRES. D P.O. BOX 19-044 AVONDALE D AUCKLAND 7, NEW ZEALAND D (64) 9 8200 357 D FAX (64) 9 8200 361
SINGAPORE D 16 TUAS STREET D SINGAPORE 2263 D (65) 862 5542 D FAX (65) 862 5604
SPAIN D POLIGONO INDUSTRAIL D RIERA DEL FONOLLAR D E-08830 SANT BOI DE LLOBREGAT D BARCELONA, SPAIN D (34) 3 640 2839 D FAX (34) 3 654 3379
USA D ONE CORNELIUS PLACE D ANOKA, MINNESOTA D (612) 421-6120 D FAX (612) 422-3255
SD 99-2
25
91772
CORPORATE HEADQUARTERS:
Remcor Incorporated
500 Regency Drive
Glendale Heights, IL 60139
708. 980.6900