1
Operation/Maintenance
Washer-Extractors
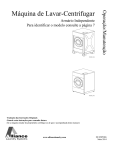
Cabinet Freestanding
Refer to Page 2 for Model Identification
H
H
CFD14C
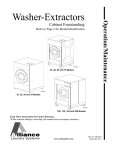
18 AND 30 MODELS
CFD14C
CFD16C
33 AND 40 MODELS
Keep These Instructions for Future Reference.
(If this machine changes ownership, this manual must accompany machine.)
Part No. 9001910R4
www.comlaundry.com
December 2009
Table of
Contents
Introduction.........................................................................................
Model Identification .............................................................................
Nameplate Location..............................................................................
Replacement Parts ................................................................................
Customer Service..................................................................................
2
2
3
3
3
Safety Information..............................................................................
Explanation of Safety Messages...........................................................
Important Safety Instructions ...............................................................
Safety Decals ........................................................................................
Operator Safety.....................................................................................
5
5
5
7
8
Preliminary Information....................................................................
About the Control .................................................................................
Power Failure Recovery .......................................................................
9
9
9
Operation.............................................................................................
Control Panel ........................................................................................
Summary of Major Features .................................................................
Operating Instructions ..........................................................................
10
10
10
11
Maintenance ........................................................................................
Daily .....................................................................................................
Weekly..................................................................................................
Monthly.................................................................................................
Yearly ...................................................................................................
Daily Preventive Maintenance Checklist..............................................
Weekly Preventive Maintenance Checklist ..........................................
Monthly Preventive Maintenance Checklist.........................................
Yearly Preventive Maintenance Checklist............................................
13
13
13
14
14
15
16
17
18
© Copyright 2009, Alliance Laundry Systems LLC
All rights reserved. No part of the contents of this book may be reproduced or transmitted in any form or by any
means without the expressed written consent of the publisher.
9001910
© Copyright, Alliance Laundry Systems LLC – DO NOT COPY or TRANSMIT
1
Introduction
Model Identification
Information in this manual is applicable to these
models:
2
18
NX18BVPA6
NX18BVPA7
NX18BVQA6
NX18BVQA7
NX18BVXA6
NX18BVXA7
NX18BVXM6
NX18BVXM7
SX18BVPA7
SX18BVQA7
SX18BVXA7
SX18BVXM7
30
NX30BVPA6
NX30BVPA7
NX30BVQA6
NX30BVQA7
NX30BVXA6
NX30BVXA7
NX30BVXM6
NX30BVXM7
SX30BVPA7
SX30BVQA7
SX30BVXA7
SX30BVXM7
33
SX33BVPA7
SX33BVQA7
SX33BVXA7
SX33BVXM7
40
SX40BVPA7
SX40BVQA7
SX40BVXA7
SX40BVXM7
© Copyright, Alliance Laundry Systems LLC – DO NOT COPY or TRANSMIT
9001910
Introduction
Nameplate Location
The nameplate is located at the rear of the machine.
Always provide the machine’s serial number and
model number when ordering parts or when seeking
technical assistance.
1
1
H
H
CFD14C
CFD16C
CFD14C
18 AND 30 MODELS
1
33 AND 40 MODELS
CFD16C
Nameplate
Figure 1
Replacement Parts
If literature or replacement parts are required, contact
the source from which the machine was purchased or
contact Alliance Laundry Systems at (920) 748-3950
for the name and address of the nearest authorized
parts distributor.
Customer Service
For technical assistance, call (920) 748-3121.
9001910
© Copyright, Alliance Laundry Systems LLC – DO NOT COPY or TRANSMIT
3
Introduction
Model Number Familiarization Guide
Sample Model Number: *X18BVXM60001
*X
Model Number Prefix
18
Washer-Extractor Capacity (pounds dry weight of laundry)
B
Type of Electrical Control
V
Washer-Extractor Speed Capability (V = Variable-Speed)
X
Voltage Code
M7
0001
Design Series (M=Domestic, A=International)
Option Identification (varies from machine to machine)
*X18BVXM70001
6
15
2/3+PE
50 60
18
1
1000
8
EXAMPLE OF NAMEPLATE
CFD532N
CFD532N
Figure 2
4
© Copyright, Alliance Laundry Systems LLC – DO NOT COPY or TRANSMIT
9001910
Safety Information
Explanation of Safety Messages
Precautionary statements (“DANGER,” “WARNING,”
and “CAUTION”), followed by specific instructions,
are found in this manual and on machine decals. These
precautions are intended for the personal safety of the
operator, user, servicer, and those maintaining the
machine.
Important Safety Instructions
WARNING
To reduce the risk of fire, electric shock,
serious injury or death to persons when
using your washer, follow these basic
precautions:
W023
DANGER
DANGER indicates the presence of a
hazard that will cause severe personal
injury, death, or substantial property
damage if the danger is ignored.
WARNING
WARNING indicates the presence of a
hazard that can cause severe personal
injury, death, or substantial property
damage if the warning is ignored.
CAUTION
CAUTION indicates the presence of a
hazard that will or can cause minor
personal injury or property damage if the
caution is ignored.
Additional precautionary statements (“IMPORTANT”
and “NOTE”) are followed by specific instructions.
IMPORTANT: The word “IMPORTANT” is used
to inform the reader of specific procedures where
minor machine damage will occur if the procedure
is not followed.
NOTE: The word “NOTE” is used to communicate
installation, operation, maintenance or servicing
information that is important but not hazard
related.
1. Read all instructions before using the washer.
2. Refer to the GROUNDING INSTRUCTIONS in
the INSTALLATION manual for the proper
grounding of the washer.
3. Do not wash textiles that have been previously
cleaned in, washed in, soaked in, or spotted with
gasoline, kerosene, waxes, cooking oils, drycleaning solvents, or other flammable or
explosive substances as they give off vapors that
could ignite or explode.
4. Do not add gasoline, dry-cleaning solvents, or
other flammable or explosive substances to the
wash water. These substances give off vapors that
could ignite or explode.
5. Under certain conditions, hydrogen gas may be
produced in a hot water system that has not been
used for two weeks or more. HYDROGEN GAS
IS EXPLOSIVE. If the hot water system has not
been used for such a period, before using a
washing machine or combination washer-dryer,
turn on all hot water faucets and let the water
flow from each for several minutes. This will
release any accumulated hydrogen gas. The gas
is flammable, do not smoke or use an open flame
during this time.
6. Do not allow children to play on or in the washer.
Close supervision of children is necessary when
the washer is used near children. This is a safety
rule for all appliances.
7. Before the washer is removed from service or
discarded, remove the door to the washing
compartment.
8. Do not reach into the washer if the wash drum is
moving.
9001910
© Copyright, Alliance Laundry Systems LLC – DO NOT COPY or TRANSMIT
5
Safety Information
9. Do not install or store the washer where it will be
exposed to water and/or weather.
10. Do not tamper with the controls.
11. Do not repair or replace any part of the washer, or
attempt any servicing unless specifically
recommended in the user-maintenance
instructions or in published user-repair
instructions that the user understands and has the
skills to carry out.
12. To reduce the risk of an electric shock or fire, DO
NOT use an extension cord or an adapter to
connect the washer to the electrical power
source.
13. Use washer only for its intended purpose,
washing textiles.
14. Never wash machine parts or automotive parts in
the machine. This could result in serious damage
to the basket.
15. ALWAYS disconnect the washer from electrical
supply before attempting any service. Disconnect
the power cord by grasping the plug, not the cord.
16. Install the washer according to the
INSTALLATION INSTRUCTIONS. All
connections for water, drain, electrical power and
grounding must comply with local codes and be
made by licensed personnel when required.
20. If the supply cord is damaged, it must be replaced
by a special cord or assembly available from the
manufacturer or its service agent.
21. Be sure water connections have a shut-off valve
and that fill hose connections are tight. CLOSE
the shut-off valves at the end of each wash day.
22. Loading door MUST BE CLOSED any time the
washer is to fill, tumble or spin. DO NOT bypass
the loading door switch by permitting the washer
to operate with the loading door open.
23. Always read and follow manufacturer’s
instructions on packages of laundry and cleaning
aids. Heed all warnings or precautions. To reduce
the risk of poisoning or chemical burns, keep
them out of the reach of children at all times
(preferably in a locked cabinet).
24. Always follow the fabric care instructions
supplied by the textile manufacturer.
25. Never operate the washer with any guards and/or
panels removed.
26. DO NOT operate the washer with missing or
broken parts.
27. DO NOT bypass any safety devices.
28. Failure to install, maintain, and/or operate this
washer according to the manufacturer’s
instructions may result in conditions which can
produce bodily injury and/or property damage.
17. To reduce the risk of fire, textiles which have
traces of any flammable substances such as
vegetable oil, cooking oil, machine oil,
flammable chemicals, thinner, etc., or anything
containing wax or chemicals such as in mops and
cleaning cloths, must not be put into the washer.
These flammable substances may cause the
fabric to catch on fire by itself.
NOTE: The WARNINGS and IMPORTANT
SAFETY INSTRUCTIONS appearing in this
manual are not meant to cover all possible
conditions and situations that may occur. Common
sense, caution and care must be exercised when
installing, maintaining, or operating the washer.
18. Do not use fabric softeners or products to
eliminate static unless recommended by the
manufacturer of the fabric softener or product.
Any problems or conditions not understood should be
reported to the dealer, distributor, service agent or the
manufacturer.
19. Keep washer in good condition. Bumping or
dropping the washer can damage safety features.
If this occurs, have washer checked by a
qualified service person.
6
© Copyright, Alliance Laundry Systems LLC – DO NOT COPY or TRANSMIT
9001910
Safety Information
WARNING
CAUTION
This machine must be installed, adjusted,
and serviced by qualified electrical
maintenance personnel familiar with the
construction and operation of this type of
machinery. They must also be familiar
with the potential hazards involved.
Failure to observe this warning may result
in personal injury and/or equipment
damage, and may void the warranty.
SW004
IMPORTANT: Ensure that the recommended
clearances for inspection and maintenance
are provided. Never allow the inspection and
maintenance space to be blocked.
Be careful around the open door,
particularly when loading from a level
below the door. Impact with door edges
can cause personal injury.
SW025
WARNING
Never touch internal or external steam
pipes, connections, or components.
These surfaces can be extremely hot and
will cause severe burns. The steam must
be turned off and the pipe, connections,
and components allowed to cool before
the pipe can be touched.
SW014
WARNING
Install the machine on a level floor of
sufficient strength. Failure to do so may
result in conditions which can produce
serious injury, death and/or property
damage.
W703
Safety Decals
Safety decals appear at crucial locations on the
machine. Failure to maintain legible safety decals
could result in injury to the operator or service
technician.
To provide personal safety and keep the machine in
proper working order, follow all maintenance and
safety procedures presented in this manual. If
questions regarding safety arise, contact the
manufacturer immediately.
Use manufacturer-authorized spare parts to avoid
safety hazards.
9001910
© Copyright, Alliance Laundry Systems LLC – DO NOT COPY or TRANSMIT
7
Safety Information
Operator Safety
Do not bypass any safety devices in the machine.
WARNING
WARNING
NEVER insert hands or objects into
basket until it has completely stopped.
Doing so could result in serious injury.
SW012
To ensure the safety of machine operators, the
following maintenance checks must be performed
daily:
Never operate the machine with a
bypassed or disconnected balance
system. Operating the machine with
severe out-of-balance loads could result
in personal injury and serious equipment
damage.
SW039
1. Prior to operating the machine, verify that all
warning signs are present and legible. Missing or
illegible signs must be replaced immediately.
Make certain that spares are available.
2. Check door interlock before starting operation of
the machine:
a. Attempt to start the machine with the door
open. The machine should not start with the
door open.
b. Close the door without locking it and attempt
to start the machine. The machine should not
start with the door unlocked.
c. Close and lock the door and start a cycle.
Attempt to open the door while the cycle is in
progress. The door should not open.
If the door lock and interlock are not functioning
properly, call a service technician.
3. Do not attempt to operate the machine if any of
the following conditions are present:
a. The door does not remain securely locked
during the entire cycle.
b. Excessively high water level is evident.
c. Machine is not connected to a properly
grounded circuit.
8
© Copyright, Alliance Laundry Systems LLC – DO NOT COPY or TRANSMIT
9001910
Preliminary Information
About the Control
Power Failure Recovery
WE-8 B-control on the washer-extractor is an
advanced, programmable computer that allows the
owner to create wash programs.
If a cycle in process and the power fails, the user has
one minute to press START (enter) to continue the
cycle. If START (enter) is not pressed within the
minute, program will drain water and basket will not
rotate (safe mode). Control will test speed sensor by
steering the wash speed for a brief time. When no
speed is detected, control will proceed as if the speed
detector failed and the machine cannot be opened until
the three minute power failure wait period is done.
The control is factory set-up with 8 pre-programmed
cycles and is ready for operation. Refer to
Pre-Programmed Cycles section in the Programming
manual.
WE-8 B-control allows the owner to program custom
cycles on the machine or with a PC and the Alliance
planner software.
IMPORTANT: In the event of a power failure, WE8 B-control will not have to be reprogrammed. It is
designed with a memory system that will remember
how it was programmed until the electrical power
is restored.
9001910
© Copyright, Alliance Laundry Systems LLC – DO NOT COPY or TRANSMIT
9
Operation
Control Panel
12
2
12
1
2
1
5
WASH
ADD
BLEACH
RINSE
SPIN
NORMAL
PERM PRESS
HOT
WARM
NORMAL
PERM PRESS
WARM
COLD
QUICK WASH
QUICK WASH
6
95C
95C
6
7
60C
60C
7
40C
40C
START
DOOR
HOT
COLD
10
30C
9
9
11
3
10CHM488R
4
INTERNATIONAL MODELS
CHM482R
CHM482R
1
2
3
4
5
6
8
<
HOT
<
DELICATE
11 3
4
DOMESTIC MODELS
8
WARM
HEAVY SOIL
5
Cycle 1
Cycle 2
Cycle 3
Cycle 4
Cycle 5
Cycle 6
CHM488R
7
8
9
10
11
12
Cycle 7
Cycle 8
Down Edit/Change keypad
Up Edit/Change keypad
Start keypad
Display
Figure 3
Summary of Major Features
LED for Machine Functions
Main LED display
Cycle selection keypads
START keypad
Payment Methods
Fill Temperatures
Supplies
Agitation Types
Drain Options
Automatic Unlock after Power
Failure During Cycle
LED lights inform operator which machine function is active. DOOR LED lights to
inform operator that the door can be opened or should be closed. The circle LED is
unavailable.
4 digit LED display counts down vend amount and cycle time.
Eight (8) cycle select keypads with LED indicator to show selected cycle. LED lights
will flash to prompt user to press a keypad.
Press to start a cycle after payment is made. LED light will flash to prompt user to press
keypad.
Coin – Single denomination coin drop meter, prepped for after market coin drop
Cold, Hot, Warm
Three (3) – Supply 1 (Compartment A), 2 (Compartment B), and 3 (Compartment C)
Normal or Gentle
Normally open gravity drain
Standard
Table 1
10
© Copyright, Alliance Laundry Systems LLC – DO NOT COPY or TRANSMIT
9001910
Operation
Operating Instructions
1. Turn on main power source (circuit breaker).
NORMAL
WASH
2. Pull the door handle towards you to open the
door. Some models may have a door handle with
a button that must be pressed.
3. Load to capacity whenever possible. DO NOT
OVERLOAD. Refer to Figure 4.
NOTE: Underloading can cause out-of-balance
conditions that can shorten machine life.
ADD
BLEACH
RINSE
SPIN
DOOR
PERM PRESS
HOT
WARM
NORMAL
PERM PRESS
WARM
COLD
QUICK WASH
QUICK WASH
START
HOT
WARM
HEAVY SOIL
DELICATE
HOT
COLD
DOMESTIC MODELS
CHM482R
CHM482R
95C
95C
60C
60C
40C
40C
30C
<
<
INTERNATIONAL MODELS
CHM488R
CHM488R
CFD53N
CFD53N
Figure 5
Figure 4
4. Close door by pushing door handle towards
machine.
6. If desired, select a different cycle at this point or
after satisfying vend. The LED indicator for that
cycle will light.
5. The default wash cycle will display.
NOTE: Perm Press Cold is the default cycle for
coin models if none is selected.
9001910
© Copyright, Alliance Laundry Systems LLC – DO NOT COPY or TRANSMIT
11
Operation
7. Add liquid and/or powder supplies to supply
dispenser. Refer to Figure 6.
a. Add detergent to compartment 1.
8. Add coins to machine. As each coin is added, the
vend counts down to the amount remaining.
Refer to Figure 6.
9. When applicable, add bleach to compartment 2
when the ADD BLEACH LED is lit.
b. Add softener to compartment 3.
10. Press the desired wash cycle keypad.
11. Press the START keypad and the active cycle
remains the chosen wash cycle.
C
12. When cycle is complete, display shows “donE”.
A
B
B157R
B157R
A
B
C
Detergent
Bleach
Softener
Figure 6
12
© Copyright, Alliance Laundry Systems LLC – DO NOT COPY or TRANSMIT
9001910
Maintenance
Routine maintenance maximizes operating efficiency
and minimizes downtime. The maintenance
procedures described below will prolong the life of the
machine and help prevent accidents.
CAUTION
End of day
1. Clean the fan of the AC drive box.
2. Clean the entire cabinet of the machine regularly
and remove all traces of soap, etc.
3. Remove all detergent residue in the soap
dispenser with hot water.
Replace all panels that are removed to
perform service and maintenance
procedures. Do not operate the machine
with missing guards or with broken or
missing parts. Do not bypass any safety
devices.
SW019
Daily, weekly, monthly, and yearly checklists are
provided at the end of this section. Laminate the
checklists to preserve them for repeated copying.
Operators and technicians are encouraged to add
checks specific to their machine’s particular
application. When possible, space is provided on the
checklists for this purpose.
The following maintenance procedures must be
performed regularly at the required intervals.
Daily
4. Clean the door gasket and remove all detergents
and other products.
5. Shut off the main water, steam and power
connections at the end of each day. Do not
change the setting of the water inlet taps on boiler
fed machines once these have been installed.
6. It is recommended to leave the door and the soap
dispenser open after use, to ventilate the
machine.
NOTE: Unload the machine promptly after each
completed cycle to prevent moisture buildup. Leave
loading door open at the end of each completed
cycle to allow moisture to evaporate.
Weekly
1. Check the machine for leaks.
a. Start an unloaded cycle to fill the machine.
Beginning of the day
1. Inspect water inlet valve hose connections on the
back of the machine for leaks.
2. Inspect steam hose connections for leaks, where
applicable.
3. Check door interlock before starting operation:
b. Verify that door and door gasket do not leak.
c. Verify that the drain valve is operating. If
water does not leak out during the prewash
segment, drain valve is closed and functioning
properly.
a. Attempt to start the washer with the door
open. The washer should not start with the
door open.
b. Close the door and start the machine. Attempt
to open the door while the cycle is in progress.
The door should not open.
IMPORTANT: If the door lock and interlock are
not functioning properly, take machine out of
service. Call a service technician to correct.
9001910
© Copyright, Alliance Laundry Systems LLC – DO NOT COPY or TRANSMIT
13
Maintenance
Monthly
5. Remove back panel and check overflow hose and
drain hose for leaks.
NOTE: Disconnect power to the machine at its
source before performing the monthly maintenance
procedures.
6. Clean inlet hose filter screen:
1. Clean the AC drive Box.
a. Turn water off and allow valve to cool, if
necessary.
b. Unscrew inlet hose and remove filter screen.
a. Remove the AC drive box cover.
b. Blow the fins clean using compressed air at a
pressure of 60-90 psi or by using canned
compressed air. Use care to avoid damaging
cooling fan or other components.
2. Belts.
c. Clean with soapy water, rinse and reinstall.
Replace if worn or damaged.
7. Check the supply dispenser hoses for leaks.
8. Use compressed air to clean lint from motor.
9. Clean interior of machine, both basket and shell,
by wiping with a water-soaked sponge or cloth.
a. Check belts for uneven wear and frayed
edges.
b. Verify that belts are properly aligned by
checking pulley alignment. Place a
straightedge across both pulley faces. The
straightedge should make contact with the
pulleys in four places.
3. If a machine frequently skips the final spin,
check whether the probe of the out of balance
switch is still in the appropriate position, that is
horizontally centered and vertically 1/3 from the
bottom inside the window (when the drum is
empty). (See electronic repetition system.)
10. Use compressed air to ensure that all electrical
components are free of moisture and dust.
11. Verify that insulation is intact on all external
wiring and that all connections are secure. If bare
wire is evident, call a Service Technician.
Yearly
Check if the machine is working properly. If you see
or hear any abnormal function on the machine call a
service technician.
4. Clean drain pipe.
The water still being in the drain needs to be
drained using drain (A) before cleaning the drain
pipe or replacing the exhaust valve. Refer to
Figure 7.
A
CFD27N
A
Drain
Figure 7
14
© Copyright, Alliance Laundry Systems LLC – DO NOT COPY or TRANSMIT
9001910
Maintenance
Daily Preventive Maintenance
Checklist
Machine ____________________________
Operator
Week of: ________________
Days
___________________________
Checks
1
2
3
4
5
6
7
Beginning of Day
1. Inspect water inlet valve hose connections on the back of the
machine for leaks.
2. Inspect steam hose connections for leaks, where applicable.
3. Inspect door lock and interlock before starting operation:
a. Attempt to start the machine with door open.
b. Close the door and start the machine. Attempt to open the door
while the cycle is in progress.
4.
End of Day
1. Clean the fan of the AC drive box.
2. Clean the entire cabinet of the machine.
3. Remove all detergent residue in the soap dispenser with hot water.
4. Clean the door gasket and remove all detergents and other products.
5. Shut off the main water, steam and power.
6. Leave loading door open at the end of each day to ventilate the
machine.
7.
NOTE: Unload the machine promptly after each completed cycle to prevent moisture buildup.
NOTE: Leave loading door open after each completed cycle to allow moisture to evaporate.
9001910
© Copyright, Alliance Laundry Systems LLC – DO NOT COPY or TRANSMIT
15
Maintenance
Weekly Preventive Maintenance
Checklist
Machine ____________________________
Operator
Month __________
Week Ending:
___________________________
Checks
/
/
/
/
/
1. Check the machine for leaks:
a. Start an unloaded cycle to fill the machine.
b. Verify that door and door gasket do not leak.
c. Verify that the drain valve is operating.
2.
3.
4.
5.
6.
7.
16
© Copyright, Alliance Laundry Systems LLC – DO NOT COPY or TRANSMIT
9001910
Maintenance
Monthly Preventive Maintenance
Checklist
Machine ____________________________
Operator
Month
___________________________
Checks
Observe All Safety Warnings!
Disconnect power to the machine before performing the monthly maintenance procedures.
1. Clean the AC drive box.
2. Belts
a. Check belts for uneven wear and frayed edges.
b. Verify that belts are properly aligned by checking pulley alignment.
3. Check out-of-balance switch probe’s position.
4. Clean drain pipe.
5. Remove back panel and check overflow hose and drain hose for leaks.
6. Clean inlet hose filter screen.
7. Check the supply dispenser hoses for leaks.
8. Use compressed air to clean lint from motor.
9. Clean interior of machine, both basket and shell, by wiping with a water-soaked
sponge or cloth.
10. Use compressed air to ensure that all electrical components are free of moisture and
dust.
11. Verify that insulation is intact on all external wiring and that all connections are
secure. If bare wire is evident, call a Service Technician.
9001910
© Copyright, Alliance Laundry Systems LLC – DO NOT COPY or TRANSMIT
17
Maintenance
Yearly Preventive Maintenance
Checklist
Machine ____________________________
Operator
Year
___________________________
Checks
Observe All Safety Warnings!
Disconnect power to the machine before performing the quarterly maintenance procedures.
1. Check if the machine is working properly. If you see or hear any abnormal function
on the machine call a service technician.
2.
3.
4.
5.
6.
7.
8.
9.
18
© Copyright, Alliance Laundry Systems LLC – DO NOT COPY or TRANSMIT
9001910