1
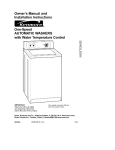
Owner's Manual and
Installation Instructions
One-Speed
AUTOMATIC WASHERS
IMPORTANT:
Read and follow all safety
and operating instructions
before first use of this product.
Sears, Roebuck and Co., Hoffman Estates, IL 60179 U.S.A.
Sears Canada Inc., Toronto, Ontario, Canada M5B 2B8
3955142
PRINTED IN U.S.A.
www.sears.com
www,sears,ca
10/00
BEFORE USING YOUR NEW WASHER ....
2
KENMORE AUTOMATIC WASHER WARRANTY
3
WASHER SAFETY
4
INSTALLATION
.....
INSTRUCTIONS
.....
OPERATING YOUR WASHER
LAUNDRY TIPS
6
.....
21
...........
27
CARING FOR YOUR WASHER
TROUBLESHOOTING
_
_
........
SEARS MAINTENANCE
_
29
30
AGREEMENT
Please read this manual. It will help
you install and operate your new
Kenmore washer in the most
economical way.
For more information about the care
and operation of Kenmore appliances,
call your nearest Sears store, You will
need the complete model and serial
numbers when requesting information.
Your washer's model and serial numbers
are located on the Model and Serial
Number Plate.
}
ModelandSerial
NumberPlato
36
Use the space below to record the model
number and serial number of your new
Kenmore washer.
Model No. _
_
Serial No.
Date of Purchase
Keep this book and your Sears
Salescheck (receipt) in a safe place for
futu re reference.
Limited Lifetime Warranty on
White Porcelain Basket
For the lifetime of the washer from the
date of purchase, Sears will replace the
white porcelain wash basket if it chips
or rusts due to defective material or
workmanship. After the first year, you
will be charged for labor.
Limited 10-Year Warranty on
Plastic Tub*
For the second through tenth year from
the date of purchase, Sears will replace
the plastic tub if it is defective in
material or workmanship. After the first
year, you will be charged for labor.
Limited 5-Year Warranty
Gearcase Parts*
on
For the second through fifth year from
the date of purchase, Sears will replace
any gearcase parts that are defective in
material or workmanship. After the first
year, you will be charged for labor.
Full 1-Year Warranty on
"Spreckle"
Porcelain Basket
For one year from the date of
purchase, when this washer is installed
and operated according to the instructions that come with it, Sears will
replace the "spreckle" (speckled surface) porcelain wash basket if it chips
or rusts due to defective material or
workmanship.
Full 1-Year Warranty
on
Mechanical
and Electrical parts
For one year from the date of purchase, if this washer is installed and
operated according to the instructions
that come with it, Sears will repair or
replace any of its mechanical or
electrical parts if they are defective in
material or workmanship.
Warranty Restriction
If this washer is operated for any purpose other than private family use, all
warranty coverage is restricted to 90
days from the date of purchase.
Warranty Service
Warranty service is available by
contacting your nearest Sears Service
Center in the United States or Canada.
This warranty applies only while this
washer is used in the United States or
Canada.
This warranty gives you specific legal
rights and you may also have other
rights that vary from state to state or
province to province.
Sears, Roebuck and Co.,
Dept 817WA,
Hoffman Estates, IL 60179
Sears Canada Inc.,
Toronto, Ontario, Canada
M5B 2B8
*In Canada, a different warranty may apply.
In the U.S. for Sears warranty information or
to contact a Sears Service Center', call
1-8004-MY-HOME _'_(1-800-4694663).
In Canada, calI 1-877-533-6937.
3
Your
safety
and the safety
We have provided
on your appliance.
of others
are very important.
many important safety messages in this manual and
Always read and obey all safety messages.
This is the safety alerL symbol. This symbol alerts you to
potential hazards that can kill or hurt you and others.
All safety messages will follow the safety alert symbol
and either the word "DANGER" or "WARNING."
These words mean:
You can be killed or seriously
injured if you don't immediately
follow instructions.
You can be killed or seriously
injured if you don't follow
instructions.
All safety messages will tell you what the potential hazard is, tell you how
to reduce the chance of injury, and tell you what can happen if the
instructions are not followed.
IMPORTANT
SAFETY
INSTRUCTIONS
WARNING:
To reduce the risk of fire_ electric shock, or injury to persons
when using your washer, follow basic precautions, including the following:
• Read all instructions before using
the washer.
• Do not wash articles that have been
previously cleaned in, washed in,
soaked in, or spotted with gasoline,
dry-cleaning solvents, other
flammable or explosive substances
as they give off vapors that could
ignite or explode.
• Do not add gasoline, dry-cleaning
solvents, or other flammable or
explosive substances to the wash
water. These substances give off
vapors that could ignite or explode.
• Under certain conditions, hydrogen
gas may be produced in a hot water
system that has not been used for 2
weeks or more. HYDROGEN GAS IS
EXPLOSIVE. If the hot water system
has not been used for such a period,
before using a washing machine, turn
on all hot water faucets and let the
water flow from each for several
minutes. This will release any
accumulated hydrogen gas. As the
gas is flammable, do not smoke or
use an open flame during this time.
• Do not allow children to play on or in
the washer Close supervision of children is necessary when the washer is
used near children.
• Before the washer is removed from
service or discarded, remove the door
or lid.
• Do not reach into the washer if the
drum, tub or agitator is moving.
• Do not install or store this washer where
it will be exposed to the weather.
• Do not tamper with controls.
• Do not repair or replace any part of the
washer or attempt any servicing unless
specifically recommended in the
Owner's Manual or in published userrepair instructions that you understand
and have the skills to carry out.
• See the "INSTALLATION
INSTRUCTIONS" section for grounding
requirements.
SAVE THESE INSTRUCTIONS
5
INSTALLATION
OVERVIEW
For a complete list of tools and parts
needed, see pages 7-9.
A. SELECT LOCATION
FOR YOUR WASHER (pgs. 11-13)
Recessed Area/
Closet Installation Instructions (p. 11)
Laundry Tub Drain System (p. 12)
(99 cm)
Standpipe Drain System (p. 13)
39 in
199 cm)
Floor Drain System (p. 13)
B.REMOVE
SHIPPING
STRAP
(p,14)
ToolsNeeded:
Scissors
Flashlight (optional
depending on installation)
C. CONNECT DRAIN HOSE (pgs. 15-16)
AWuNsDHI
ST
Tools Needed:
Parts Supplied:
Pliers that open
to 1%6in (3.95 cm)
1 _bleFlashlight (optional
depending on installation)
1 yellow, single-wire
hose clamp (top of
drain hose)
wire hose clamp
(bottom of drain
hose)
7
D. CONNECT INLET HOSES TO WASHER (pgs. 16-17)
Tools Needed:
Parts Supplied:
2 water inlet hoses
to 1_6 in (3.95 _..i
_
Flashlight (optional
depending on installation)
4 flat water inlet hose washers
E. CONNECT INLET HOSES TO WATER FAUCETS (p, 17)
Tools Needed:
Parts Supplied:
2 water inlet hoses
Pliers that open to
1_6 in (3.95 cm)
Bucket
_
(optional
depending on
installation)
Flashlight (optional
depending on installation)
F. SECURE DRAIN HOSE (p. 18)
Tools Needed:
Parts Supplied:
Flashlight (optional
depending on installation)
Shipping strap with fastener
G, LEVEL WASHER (p, 19)
Tools Needed:
Parts Supplied:
Y_-in (f.43 cm)
open-end wrench
Flashlight (optional
depending on installation)
2 front leveling legs with nuts
Wood block
9
ELECTRICAL
REQUIREMENTS
120-Volt, 60-Hz. AC-only, 15- or
20-ampere fused electrical supply is
required. (Time-delay fuse or circuit
breaker is recommended.) Connect
to an individual branch circuit.
Electrical
Shock Hazard
Plug into a grounded 3 prong outlet.
Do not remove ground prong.
Do not use an adapter.
Do not use an extension cord.
Failure to follow these instructions
can result in death, fire, or
electrical shock.
This washer is equipped with a power
supply cord having a 3-prong grounding
plug. To minimize possible shock hazard,
you must plug the power supply cord into
a mating 3-prong grounding-type wall
receptacle, grounded in accordance with
National Electrical Code, ANSl/NFPA 70latest edition and all local codes and
ordinances.
• For a grounded, cordconnected washer:
GROUNDING
This washer must be grounded. In the
event of malfunction or breakdown,
grounding will reduce the risk of electrical shock by providing a path of least
resistance for electric current. This
washer is equipped with a cord having
an equipment-grounding conductor and
a grounding plug. The plug must be
plugged into an appropriate outlet that
is properly installed and grounded in
accordance with all local codes and
ordinances.
WARNING:
Improper connection
of the equipment grounding conductor
can result in a risk of electric shock.
Check with a qualified electrician or
serviceman if you are in doubt as to
whether the appliance is properly
grounded.
Do not modify
the appliance
outlet, have a
by a qualified
the plug provided with
- if it will not fit the
proper outlet installed
electrician.
• For a permanently
washer:
GROUNDING
3 prong
grounding*type
wall receptacle
ng
Power supply
cord
10
connected
INSTRUCTIONS
This washer must be connected to
a grounded metal, permanent wiring
system, or an equipment grounding
conductor must be run with the circuit
conductors and connected to the
equipment-grounding terminal or lead
on the appliance.
3 prong
grounding
plug
Grounding
INSTRUCTIONS
\
im
//
A. SELECT LOCATION
FOR YOUR WASHER
Selecting the proper location for your
washer will improve its performance
and minimize concerns like washer
walk or noise.
RECESSED AREAl
CLOSET INSTALLATION
INSTRUCTIONS
This washer may be installed in a recessed area or closet.
oo
14in rna_
•
48 in 2
(310 crn 2)
minimum
ventilation
area
19 in
24 in 2
[_
*0 in
27 in
t55 cm2 _,'
minimum
ventilation
area
"8 in
1 in
(2,5 cm)
FrontView
(DoorNotShown)
25 ½ in
_3in
4 in
(10.2 cm)
SideView
(DoorShown)
FrontView
(DoorWithVent)
* Additional clearance for wall, door and floor moldings may be required.
To _educe lhe lransler ol washe_ sounds, a clearance of I in (2.5 cm) on lhe sides ol lhe washer is su[Igested.
• The installation spacing is in inches
(centimeters) and is the minimum
allowable.
• Allow additional space if other
appliances are to be installed in
the area.
• If closet door is installed, the
minimum air openings in top and
bottom are required. Louvered doors
with equivalent air openings in top and
bottom are acceptable.
11
LAUNDRY
TUB DRAIN
SYSTEM
Check location where washer will be
installed. This washer can be installed
using one of three systems:
Do not store or operate washer at or
below 32°F (O°C) (some water may
remain in washer). See page 29 for
winterizing information.
• Laundry tub drain system (below)
• Standpipe drain system (p. 13)
• Floor drain system (p. 13)
Proper installation is your responsibility,
Make sure you have everything necessary for correct installation, including the
following points:
Grounded receptacle: Must
be within 4 ft (1.2 m) of where
the power cord is attached to
the back of the washer.
J
Hot and cold water faucets:
Must provide water pressure
between 5-100 psi and be
within 4 ft (1.2 m) of the hot
and cold water fill valves
attached to the back of the
washer.
j
S _
Laundry tub drain system:
Needs a minimum 20 gal (76 L)
j
\
Support: Floor must be sturdy
enough to support a total weight of
315 Ibs (143 kg) (including washer,
water, and load weight).
12
Level floor: Maximum allowable slope under entire
washer - 1 in (2.5 cm).
Top of tub must be at
least 39 in (99 cm) above
floor and no higher than
96 in (2.4 m) from
bottom of washer.
ALTERNATE LOCATIONS STANDPIPE AND FLOOR DRAIN SYSTEMS
Siphon break: Must be purchased separately. See chart below.
38 in
(99 cm)
J
/
Standpipe drain system: Needs a 2 in (5 cm)
minimum diameter standpipe with minimum
carry-away capacity of 17 gal (64 L) per
minute. Top of standpipe must be at least
39 in (99 cm) above floor and no higher than
96 in (2.4 m) from bottom of washer.
Floor drain system: Requires a siphon
break, see chart below. A minimum carryaway capacity of 17 gal (64 L) per minute is
required.
If you have:
You will need to buy:
Laundry tub or standpipe
taller than 96 in (2.4 m)
Sump pump system
(if not already available)
1 in (2.5 cm) diameter standpipe
2 in (5 cm) diameter to 1 in (2.5 cm)
diameter standpipe adapter,
Part No. 3363920
Overhead sewer
Standard 20 gal (99 cm), 39 in (99 cm)
tall drain tub or utility sink and sump
pump (available from local plumbing
suppliers)
Floor drain
Siphon break, Part No. 285320;
additional drain hose, Part No. 3357090:
and Connector Kit, Part No. 285442
Parts listed are available from your local Sears store or Sears Service Center. In the United
States, call 1-800-366-PART (1-800-366-7278). In Canada, call 1-877-533-6937.
13
B. REMOVE SHIPPING STRAP
STEP 2. Pull firmly to remove the end
of the shipping strap that remains
pinned to the back of the washer, This
will release the rear self-leveling legs.
Removing the shipping strap is
necessary for smooth operation.
If the shipping strap is not removed,
the washer will make excessive noise.
Pin
To prevent floor damage, set washer
onto cardboard before moving across
floor. Move washer close to its final
location.
STEP 1. Do not cut yellow strap. Pull
yellow strap firmly, until completely
removed from washer. Depending on
your model, there should be either two
or three cotter pins on the end of the
shipping strap when it is pulled out of
the washen The electrical plug is
attached to this shipping strap.
Electricalplug
Shippingstrap
©
0
PULL
Pin
14
STEP 3. Cut the shipping strap about
16 in (40 cm) from plug end. Look for
the words "CUT HERE." Discard end
with the cotter pins, Slide remainder
of shipping strap from the electrical
plug, You will use this to secure the
drain hose.
C. CONNECT DRAIN HOSE
Proper connection of the drain hose
will protect your floors from damage
due to water leakage.
STEP 1. To prevent the drain hose from
coming off or leaking, it must be installed
per the following instructions:
IMPORTANT: To ensure proper installation, this procedure must be followed
exactly,
)
a. Wet the inside of the straight end of the
drain hose with tap water. DO NOT
USE ANY OTHER LUBRICANT.
r TWIST
AND
PUSH
b. Squeeze ears of silver, double-wire
clamp with pliers to open. Place clamp
over the straight end of the drain hose
in (6 mm) from the end.
d. Place clamp over area marked
"CLAMR" Release clamp.
1]4in
(6ram)
c. Open clamp. Twist hose back and
forth while pushing down onto drain
connector at the bottom of the washer.
Continue until hose contacts the
ribbed stop on the cabinet.
OrainHose
•
Ribbed Stop
Cabinet
If you have:
Drain hose that is too short
You will need to buy:
Drain hose, Part No. 388423 and
hose kit, Part No. 285442
Drain hose that is too long
Hose kit, Part No, 285442
A problem with lint clogging your drain
Drain protector, Part No. 367031
14in
(6 ram)
Parts listed are available from your local Sears store or Sears Service Center. In the United
States, call 1-800-366-PART (1-800-366-7278). In Canada, call 1-877-533-6937.
15
For standpipe or laundry tub drain
systems:
STEP 2. Open yellow, single-wire clamp
with pliers and slide over hooked end
of drain hose to secure the rubber and
corrugated sections together.
DrainHose
XookedEnd
D. CONNECT INLET HOSES
TO WASHER
Proper connection of your inlet hoses
will allow hot and cold water to enter
your washer properly. It also helps
prevent water damage due to leaks.
NOTE: Replace inlet hoses after five
years of use to reduce the risk of hose
failure, Periodically inspect and replace
inlet hoses if bulges, kinks, cuts, wear,
or leaks are found. When replacing
your inlet hoses, mark the date of
replacement on the label with a
permanent marker.
STEP 1. Insert one new, flat washer
(from the parts bag) into each end of
the inlet hoses, Check that washers
are firmly seated in couplings.
STEP 3. Put hooked end of drain hose
into laundry tub or standpipe. Check
for proper length of drain hose. Rotate
hook to eliminate kinks.
0
To prevent drain water from going back
into the washer:
• Do not straighten hooked end of drain
hose and force excess drain hose into
standpipe.
• Do not lay excess drain hose in bottom
of laundry tub.
i
,
1R
,
I
COUPLING
WASHER
STEP 2. Attach the hose with the red coupling to the hot water (bottom) inlet valve.
Attaching the red coupling first makes it
easier to tighten connection with pliers.
Screw on coupling by hand, Make an additional two4hirds turn with pliers to tighten
coupling. DO NOT OVERTIGHTEN; this
could damage the valves.
E. CONNECT INLET HOSES
TO WATER FAUCETS
STEP 1, Make sure washer basket is
empty. Run water through both faucets
into a bucket or laundry tub to get rid of
particles in the water lines that might clog
hoses, Determine which faucet is hot and
which is cold. Mark the hot water faucet.
ColdWater
InletValve
J
Hot
Water
Inlet
Valve
STEP 2. Attach the hose with the red
coupling to the hot water faucet. Screw
on coupling by hand. Make an additional
two4hirds turn with pliers to tighten
coupling. DO NOT OVERTIGHTEN;
this could damage the coupling.
STEP 3. Attach the hose with the blue
coupling to the cold water (top) inlet valve.
Screw on coupling by hand. Make an additional two4hirds turn with pliers to tighten
coupling, DO NOT OVERTIGHTEN; this
could damage valves.
STEP 3. Attach the hose with the blue
coupling to the cold water faucet. Screw
on coupling by hand, Make an additional
two-thirds turn with pliers to tighten
coupling. DO NOT OVERTIGHTEN; this
could damage the coupling.
STEP 4. Turn on water faucets and check
for leaks. A small amount of water may
enter the washer. You will drain this later.
If you have:
You will need to buy:
Water faucets beyond the
reach of water fill hoses
2 longer water fill hoses:
6 ft (1.8 cm) hoses, Part No. 76314 or
10 ft (3.0 cm) hoses, Part No. 350008
Parts listed are available from your local Sears store or Sears Service Center. In the United
States, call 1-800-366-PART (1-800-366-7278). In Canada, call 1-877-533-6937.
17
F. SECURE DRAIN HOSE
Securing the drain hose properly will
protect your floors from damage due
to water leakage.
STEP 1. Move washer to its final
location.
/
STEP 2. Locate the remaining piece
of shipping strap (not the end with
the cotter pins) from STEP 3 of
"REMOVE SHIPPING STRAP." Use
it to wrap the drain hose together with
the laundry tub or standpipe. Push
fastener into the nearest hole in the
shipping strap.
Fastener
18
If the water faucets and drain standpipe
are recessed, put hooked end of drain
hose in standpipe. Tightly wrap the
shipping strap around the drain hose
and water inlet hoses (not the handles
or stems). Push fastener into the
nearest hole in the shipping strap.
G. LEVEL WASHER
Leveling your washer properly prevents excessive noise and vibration,
To install front legs:
STEP 1. Prop front of washer up (about
4 in [10.2 cm]). Use a wood block or
another object that will support the weight
of the washer. If washer was placed
against a wall, move the washer out
slightly before tipping it up.
STEP 5. Move washer to its final
location.
STEP 6. Tilt washer forward until rear
of washer is at least 3 in (7,6 cm) off floor.
You may hear the self-adjusting rear
legs click into place. Lower washer to
floor. Check levelness of the washer
by placing a level on top of the washer:
first side-to-side, then front-to-back,
STEP 2. With one of the legs in hand,
screw lock nut onto leg _ in (9 mm) from
top of leg base. This is the recommended
initial setting.
318 in
STEP 3. Screw leg into washer base
by hand until nut reaches washer base.
Repeat for other leg.
STEP 7. If washer is not level, prop
up the front of the washer and adjust
the legs up or down as necessary, Lower
washer and reset self-adjusting rear legs
(as in Step 6). Repeat Step 7 until the
washer is level.
STEP 8. When washer is in its final
location and level, use a Y_ in (1,43 cm)
open-end wrench to turn nuts on front
legs tightly against washer cabinet. If nuts
are not tight against washer cabinet, the
washer may vibrate.
STEP 4. Tilt washer backward until
front of washer is off the wood block.
Remove wood block. Gently lower
washer to floor.
19
REVIEW INSTALLATION
Take a few minutes to complete
this checklist. It will help assure you
that you have a proper installation
and increase your satisfaction with
your Kenmore washer,
[
[
Check electrical requirements.
Be sure you have correct electrical
supply and recommended grounding
method.
Check that you have:
[
Check that:
• The washer is level.
• The nuts on the front legs are tight.
[
Check that the water faucets are
turned on.
[
Take a few minutes and read the
"OPERATING YOUR WASHER"
section to fully understand your new
washer. Then, start the washer and
allow it to complete the REGULAR
Cycle.
• All the tools you started with.
• Removed all packaging materials.
• Removed shipping strap with
cotter pins.
• Installed all parts listed on pages
7-9.
FINAL STEPS
I
Plug into a grounded 3 prong outlet.
V Remove the blue protective film on the
console and any tape remaining on
washer.
2O
To get the maximum cleaning and
fabric care from your washer, please
read and follow these instructions.
NOTE: The drawings in this section show
the basic features of all models covered
by this manual. Refer to the supplied
"Feature Sheet" for your washer's particular features.
Fire Hazard
Never place items in the washer
that are dampened with gasoline
or other flammable fluids.
No washer can completely
remove oil.
Do not dry anything that has ever
had any type of oil on it (including
cooking oils).
Doing so can result in death,
explosion, or fire.
LID INSTRUCTIONS
These instructions are found under the
lid of your washer.
Add measured detergent to the washer basket.
1. SELECT & ADJUST.
Make the selections for these washer controls:
• WATER LEVEL
Adjust to load size.
• WASH I RINSE TEMP ....... Selection is based on type of fabric and soil.
2. SELECT CYCLE
Choose more time for heavily soiled loads and less
time for lightly soiled loads.
3. PULL TIMER TO START ...... Lid must be closed to complete cycle.
PUSH TIMER TO STOP
21
Antiperspirants, Deodorants
Treat with a paste of ammonia and color_
safe bleach. Let stand for 30 minutes.
Wash in hottest water safe for fabric.
Grass
Use an enzyme presoak or rub enzyme
detergent on the stain. Launder with deter*
gent and bleach appropriate for the fabric.
Blood
Rinse immediately or soak in cold water
with detergent for 30 minutes. Rinse. Rub
detergent into any remaining stains. Rinse
thoroughly. Wash.
Ketchup, Tomato Products
Sponge immediately or apply a prewash
soil and stain remover. Rinse. Wash. If
stain remains, apply a liquid detergent to
stain or soak in warm water with detergent.
Rewash.
Milk, Ice Cream
Sponge immediately or apply a prewash
soil and stain remover. Rinse. Wash.
Repeat if necessary. If stain remains, apply
a few drops of liquid detergent. Rinse. If
stain remains, soak. Wash.
STARTING YOUR WASHER
STEP 1, Add measured detergent
directly into washer basket. Then place
a load of sorted clothes in the washer.
STEP 2. Close washer lid.
Mud
Brush off the dry mud. Rinse under cold
water. Pretreat with a paste of detergent
and water. Launder using detergent and
bleach safe for the fabric.
STOPPING/RESTARTING
YOUR WASHER
• To stop the washer at any time, push
the Cycle Selector Control (Timer)
knob _) in.
• Pull the knob out to restart.
STEP 3. Set WATER LEVEL Control (_
based on the size of your wash load
(details on page 23).
STEP 4. Push the Cycle Selector Control
(Timer) knob _) in and turn to the right.
Set cycle and time according to the type
of fabric in the load (details on page 24).
STEP 5. Pull the Cycle Selector Control
(Timer) knob _) out, The dial will rotate as
the cycle progresses. The knob will
not rotate.
WATER LEVEL
WATER TEMPERATURE
WASH_I_S_
HEAVY DUTY
HOT/COLt_
REGU_R
WAItM / eOLt_
SHORT
SUPER
COLt_/
COLt_
..
22
O
1
SET WATER LEVEL CONTROL
WASH/RINSE
WATER
TEMPERATURE
Your wash/rinse water temperature control
is part of the Cycle Selector Control
(Timer) knob (see page 24). All rinses are
cold to save energy.
• For a HOT water wash, select SUPER.
• For a WARM water wash, select
REGULAR.
• For a COLD water wash, select SHORT.
This control gives you the flexibility to
save water when washing small loads.
Your washer lets you select a water
setting based on the size of your
wash load.
• For normal loads, start with a medium
load. Adjust up or down depending on
your load, Clothes should move freely
and roll toward the agitator,
• To change to a higher water level
setting after the washer has started to
agitate, turn the knob to the desired new
setting.
To select a different wash temperature
and cycle (time):
STEP 1. Push in the Cycle Selector
Control (Timer) knob and turn clockwise to
the desired water temperature.
STEP 2. Pull out the Timer knob and
allow the washer to fill.
LOAD
LOAD
SMALL@
LARGE
STEP 3. When the washer has filled,
push in the Timer knob and turn to the
desired cycle (time).
STEP 4. Pull out the Timer knob.
SELECTING WATER TEMPERATURES
Wash Water
Temperature
Suggested Fabrics
Comments
HOT
111°F (44°C)
or above
• Work clothes
• Sturdy whites/
colorfast pastels
• Diapers
• Best cleaning for heaviIy soiled items
• Removes oils, perspiration, greasy soils
and stains
• Prevents graying or yellowing
WARM
90°-I 10°F
(32°-43°C)
• Dark/non-colorfast colors
• Permanent press items
• Nylon, polyester, acrylics,
silks, woolens
• Knits/delicate fabrics
•
•
•
•
COLD*
70°-90°F
• Extra-sensitive colors
• Non-colorfast items
• Best for very lightly soiled items
• Saves hot water
(21°-32°C)
• Hand washables
Best for moderately soiled to lightly soiled items
Safe for most fabric finishes
Less fading and dye bleeding
Reduces wrinkling
*in wash water temperatures colder than 70°F (21°C), detergents do not dissolve well. Also,
soils may be difficult to remove and some fabrics may retain wear wrinkles and have
increased pilling - the formation of small lint-like balls on the surface of garments. Pilling is
the natural result of wearing and washing of garments.
23
SETTING
YOUR
CYCLE
PERMANENT
SELECTOR
(TIMER) CONTROL
• For sturdy or heavily soiled loads, use
SUPER.
• For moderately soiled loads, use
REGULAR.
• For delicate or lightly soiled loads, use
SHORT.
HEAVY DUTY
Use this cycle to get up to 14 minutes of
wash time. Wash combines fast speed
agitation and fast spin speeds.
PRESS
The PERMANENT PRESS cycle includes
a load cooling process that reduces
wrinkling compared to other cycles.
Use this cycle to get up to 10 minutes of
wash time. Wash combines fast speed
agitation and fast spin speeds.
NOTE: When the timer reaches PAUSE,
the washer will drain and pause for no
more than two minutes while some of
the wash water is replaced with rinse
water.
COLD/COLD
SHORF
SE
REGULAR
HEAVY DUTY
WARM/COLD
SUPER
NOT/COLD
12
I_
14
OFF
t =="
RINSE
SHORT
COLD/COLO
_u_E
cool _w_
RINSE AND SPIN
SPIN ONLY
When using extra detergent for heavily
soiled clothes, or washing special-care
items, you may find an extra rinse and
spin is needed.
STEP 1. Set WATER LEVEL Control.
A drain and spin may help shorten drying
times for some heavy fabrics or specialcare items by removing excess water,
STEP 2. Set the Cycle Selector Control
(Timer) knob to the RINSE setting.
STEP 2. Pull the Cycle Selector Control
(Timer) knob out to start washer.
STEP 3. Pull Cycle Selector Control
(Timer) knob out to start washer.
24
STEP 1. Set the Cycle Selector Control
(Timer) knob to the SPIN setting,
UNDERSTANDING WHAT HAPPENS
DURING THE WASHER CYCLE
HEAVY DUTY
PERMANENT
PRESS
selected level
Fill to
selected level
Fill to
Wash
selected time
Wash
selected time
no spin
Drain -
Partial
Drain
Spin
Pause
selected level
Fill to
cool down
Fill for
Rinse
Wash
no spin
Drain -
no spin
Drain -
Spin
Spin
Off
selected level
Fill to
Rinse
no spin
Drain Spin
Off
25
DUAL ACTION ®AGITATOR
Kenmore's DUAL ACTION ® Agitator
gives you flexible fabric care for even
your largest loads,
The best cleaning
action in your
washer takes
place at the bottom where the
agitator vanes
move back and
forth to flex the
fabric, loosening
the soil. To get all
your clothes down
to the bottom of
the washer, the
upper portion of
the agitator has
uniquely designed, spiral vanes to help
push the clothes that are on top down to
the bottom. This spiraling action displaces the clothes that are on the bottom with a "roll-over" motion.
SELF-CLEANING
LINT FILTER
Lint is filtered from the load
automatically
- there's no messy
cleanup,
Your washer features a self-cleaning
filter that traps lint from the water while
the washer is washing and deep rinsing
the laundry. The trapped lint is flushed
down the drain automatically. You don't
have to clean the filter.
26
UNDERSTANDING
WASHERSOUNDS
NORMAL
Your new washer may make sounds
that your old one didn't. Because the
sounds are unfamiliar, you may be
concerned about them.
The following describes some of the
normal sounds you may hear and what
causes them.
During Drain
The rate that water is drained from your
washer depends on your installation. If
water is drained quickly from the washer,
you may hear air being pulled through the
pump. This happens during the end of
draining.
After Drain and Before Spin
When the cycle changes from draining
to spinning, you may hear a noise as the
gearcase shifts.
PREPARING CLOTHES
FOR WASHING
Follow these recommendations
to help you prolong the life of
your garments.
• Close zippers, snaps, and hooks to
avoid snagging other items. Remove
pins, buckles, and other hard objects
to avoid scratching the washer interior.
Remove non-washable trim and
ornaments.
SORTING
• Separate heavily soiled items from
lightly soiled ones, even if they
would normally be washed together.
Separate lint givers (towels, chenille)
from lint takers (corduroy, synthetics,
permanent press). When possible,
turn lint givers inside out.
• Separate dark colors from light colors,
colorfast items from non-colorfast items.
• Sort by fabric and construction
(sturdy cottons, knits, delicate items).
• Empty pockets and turn them
inside out.
• Turn down cuffs, brush away lint
and dirt.
• Turn synthetic knits inside out to
avoid pilling.
• Tie strings and sashes so they will
not tangle.
• Mend tears, loose hems, and seams.
• Treat spots and stains.
• Stained or wet garments should be
washed promptly for best results.
27
LOADING
• Reduce wash time by using a lower
water level setting, Loads with only a
few small items need less wash time.
Proper loading of your washer contributes to proper cleaning and fabric
care and reduces machine noise,
• Drop items into washer loosely. Fill
to the top of the basket (top row of
holes). Do not wrap items around the
agitator. Items should move easily
through wash water for best cleaning
and wrinkle-free results. Items should
sink and reappear later.
• Load washer properly and select correct
water level setting. Overloading or
packing the machine, and selecting a
setting too small for the wash load can:
cause poor cleaning
increase wrinkling
create excessive lint
wear out items faster
(because of pilling)
• Load by the amount of space items
take up, not by their weight.
• Mix large and small items in each load.
Load evenly to maintain washer balance.
An off-balance load can make the washer
vibrate during spin.
• Use a higher water level setting to
reduce wrinkling with permanent press
clothes and some synthetic knits. These
items should have more room to move in
the water than heavy items (towels, jeans).
28
LOADING
SUGGESTIONS
For these suggested full-sized loads,
set the WATER LEVEL selector to the
highest water level setting.
EXTRA LARGE CAPACITY PLUS
WASHERS
Heavy Work
Clothes
Towels
Mixed Load
3 jeans
7 bath towels
3 workpants
2 workshgts
8 hand towels
2 sheets
(1 king, 1 twin)
9 wash cloths
2 pillowcases
1 sweatshirt
1 sweatpants
2 shirts
2 blouses
6 T-shirts
5 shorts
6 handkerchiefs
CLEANING YOUR WASHER
Exterior
Wipe up detergent, bleach, and other spills
with a soft, damp cloth or sponge as they
occur. Occasionally wipe the outside of the
washer to keep it looking like new.
WINTER STORAGE
OR MOVING CARE
Install and store your washer where
it will not freeze, Because some water
may stay in the hoses, freezing can
damage your washer, If storing or
moving your washer during freezing
weather, winterize it,
Do not put sharp or metal objects in your
washer. They can damage the finish.
To winterize washer:
Check all pockets for pins, clips, money,
bolts, nuts, etc, Do not lay these objects on 1. Shut off both water faucets.
your washer after emptying pockets.
2. Disconnect and drain water inlet hoses.
Interior
3. Put 1 qt (1 L) of R.V.-type antifreeze
in the basket,
Clean interior with 1 cup (250 mL)
of chlorine bleach mixed with 2 cups
4. Run washer on a SPIN setting for
(500 mL) of detergent. Run washer
about 30 seconds to mix the antifreeze
through a complete cycle using hot water.
and water. Some of the mixture will
Repeat process if necessary,
pump out while the washer spins.
NOTE: Remove hard water deposits using 5. Unplug washer or disconnect power.
only cleaners labeled as washer safe.
To use washer again:
1. Flush water pipes and hoses,
WATER INLET HOSES
2. Reconnect water inlet hoses.
Replace inlet hoses after five years
3. Turn on both water faucets,
of use to reduce the risk of hose
failure. Periodically inspect and
4. Plug in washer or reconnect power,
replace inlet hoses if bulges, kinks,
5. Run the washer through a complete
cuts, wear, or leaks are found, When
cycle with 1 cup (250 mL) of detergent
replacing your inlet hoses, mark the
to clean out antifreeze.
date of replacement on the label with
a permanent marker.
NON-USE OR VACATION CARE
Operate your washer only when you are
at home, If you will be on vacation or
not using your washer for an extended
period of time, you should:
• Unplug washer or disconnect power.
• Turn off the water supply to the washen
This helps avoid accidental flooding
(due to a water pressure surge) while
you are away.
29
Most laundering problems are easily solved if you understand the cause. Check
these lists for common laundry and washer problems. If you need further assistance, see service and assistance information on back cover.
Problem
Possible Cause
Solution
Washer Leaks
Household plumbing is leaking.
Repair plumbing.
Inlet hoses not tight.
Tighten hoses (see "Installation
Instructions," Sections D & E).
Inlet hose washers not
properly seated.
Reseat washers (see "Installation
Instructions," Section D).
Drain hose not propedy
clamped or is off.
Clamp drain hose (see "Installation
Instructions," Section C).
Drain is clogged.
Remove drain clogs. Sink, standpipe,
or floor drain must be able to handle
17 gaI (64 L) of water per minute.
Tub moved forward during
unloading, causing water
to deflect off tub ring.
Ensure tub is centered before
starting washer.
Unit not level causing water
to deflect off tub ring.
Ensure front feet are installed and
nuts are tightened. Level washer.
Reset rear legs (see "Installation
Instructions," Section G).
Load is unbalanced. Spray
rinses are deflecting off load.
Redistribute the load.
Washer is overloaded. Fills
or spray rinses are deflecting
off load.
Reduce load size.
Drain hose is kinked or
clogged.
Straighten or unplug hose (see
"Installation Instructions," Section C).
Correct operation of
neutral drain,
After a wash or rinse, the washer will
drain without spinning. After draining,
the spinning begins.
Lid is open.
Close the lid.
Drain hose is more than
96 in (2.4 m) above the floor.
Lower drain hose (see "installation
Instructions," Section C).
Too much detergent excessive sudsing.
Use less detergent.
Low voltage or using an
extension cord.
Check electrical source or call
electrician. Do not use extension
cords.
Cold rinses.
Cold rinses leave loads wetter than
warm rinses. This is normal.
Won't Drain/
Won't Spin/
Wet Loads
3O
Problem
Possible Cause
Solution
Continues
to Fill/
Continues
to Drain/
Cycle Stuck
Drain hose is less than
39 in (99 cm) above floor.
Raise the drain hose (see
"Installation instructions," Section C).
Drain hose fits tightly into
standpipe.
Adjust drain hose for loose fit (see
"Installation instructions," Section C).
Drain hose taped into
standpipe.
Do not seal off drain hose with tape.
The drain hose needs an air gap.
Load is unbalanced.
Redistribute load.
Washer is not level.
Rear leveling legs not set.
Level washer. Reset rear legs (see
"Installation Instructions," Section G).
Nuts on front feet not tight.
Tighten nuts (see "installation
Instructions," Section G).
Yellow shipping strap with
cotter pins not completely
removed.
Remove strap with cotter pins
(see "Installation Instructions,"
Section B).
Floor not strong enough
to support washer.
Relocate washer (see "Installation
Instructions," Section A).
Gears engaging after drain
and before spin.
This is normal.
Upper part of agitator clicks
during wash.
This is normal.
Water inlet valve
screens are plugged.
Clean screens.
Water is turned off.
Hot and cold hoses are
reversed.
Turn on water.
Reverse hoses (see "installation
Instructions," Sections D & E).
Inlet hose is kinked.
Straighten hoses.
Timer diaI is not lined up.
Turn timer knob to the right slightly
and pull to start.
Power cord not plugged in.
Plug into a grounded 3 prong outlet.
Washer Makes
Noise
Won't
Fill/Won't
Rinse/Won't
Agitate/
Wrong
Temperature
31
Problem
Possible Cause
Solution
Machine
Stops
Power cord not plugged in.
Plug into a grounded 3 prong outlet.
No power at plug.
Check electrical source or call
eIectrician.
Fuse blown or circuit
breaker open.
Replace fuse or reset circuit breaker.
If problem continues, calI eIectrician.
Using an extension cord.
Do not use extension cords.
Timer is not lined up.
Turn timer to the right slightly
and pull to start.
Timer knob not pulled out.
Set and pull out knob.
Machine is overloaded.
Wash smaller Ioads.
The top of the agitator moves
only in one direction.
This is normal.
The top of the agitator is loose.
This is normal.
Water Level
Too Low/Not
Completely
Filling
The top of the agitator is much
higher than the highest water
level. This creates a perception
of the washer not being fuIl.
This is normal.
Tub is
Crooked
Tub pulled forward when
unloading,
Ensure tub is centered before
starting washer.
Tub moves.
This is normal,
Unit not level,
Ensure front feet are installed and
nuts are tightened. Level washer.
Reset rear legs (see "Installation
Instructions," Section G).
Improper sorting.
Sort lint givers from lint takers
and by color.
OverIoading.
Lint can be trapped in load if
overIoaded. Wash smaller loads.
Paper or tissue in pockets.
CIean out pockets before washing.
Not enough detergent.
Use enough detergent to
hold lint in water.
Detergent not dissolving.
Water temperature lower than
70°F (21°C).
Use wash water warmer than
70°F (21°C).
Agitator Not
Working
Lint on Load
32
Problem
Possible Cause
Solution
Tearing
Overloading. improper
use of washer,
Loads should move freely during
wash. Wash smaller loads.
Improper use of chlorine
bIeach. Undiluted bleach
will damage fabrics.
Do not pour chlorine bleach directly
on load. Wipe up bleach spills.
Sharp items not removed
from pockets; fasteners
not fastened.
Clean out pockets before washing.
Zip zippers before washing.
Items damaged before
washing,
Mend rips and broken threads in
seams before washing.
Improper use of fabric
softener in washer or dryer,
Dilute fabric softener and add to
deep rinse only.
Iron in water (rust).
InstaII an iron filter.
Under use of detergent causing
soiI to be redeposited,
Use enough detergent to remove
soil and hold it in suspension.
Dye transfer due to not
sorting Ioads properly,
Sort dark clothing from whites
and lights.
Dye transfer due to not
unloading washer promptly,
Unload the washer as soon as
it stops.
Not removing load promptly.
Unload the washer as soon as it stops.
Overloading.
Loads should move freely during
wash. Wash smaller loads.
Hoses reversed.
Reverse hoses (see "installation
Instructions," Sections D & E).
Overloading.
Loads should move freely during
wash. Wash smaller loads.
Clothes wrapped around
agitator,
Do not wrap items around agitator
when loading the washer.
Stains on
Load
Load is
Wrinkled
Load is
Tangled/
Twisted
33
KENMORE
WASHERS
"We Service What We Sell" is our assurance you can depend on Sears for service.
Your Kenmore appliance has added value when you consider that Sears has service
units nationwide, staffed with professional technicians trained on all appliances Sears
sells. They have the knowledge and skills, tools, parts and equipment to ensure our
pledge to you that "We Service What We Sell."
Maintain the value of your purchase with a Sears Maintenance Agreement. Kenmere
appliances are designed, manufactured and tested for years of dependable operation.
Yet any major appliance may require service from time to time. The Sears Maintenance
Agreement offers you an outstanding service program for your product.
The Sears Maintenance Agreement
• Is your way to buy tomorrow's service at today's prices.
• Eliminates repair bills resulting from normal use.
• Allows for as many service calls as required,
• Provides an annual Preventive Maintenance Check at your request to keep your
Kenmore appliance in proper running condition.
For more information, call
1-800-827-6655 (USA) or
1-877-533-6937 (Canada)
34
Forrepairof majorbrandappliancesin your own hmne...
no matterwho madeit, no matterwho soldit!
1-8004-MY-HOME
sM_,l_rn_davor
n_t
To bringin productssuchasvacuums,lawnequipment and electronics
for repair,callfor the locationofyournearestSears _
& Repair
!-800488-1222
An_me_
dayornight
IMfqP_/m
Forthereplacementparts,accessories
andowner'smanuals
thatyou needto do-it-yourself,
call.Semrs
PallslDirect_!
1"800"366"PART6_.-llp.m.CST.
(I -il00-366-7278)
7daysaweek
wa_._u,_mn/mrzs_.e:z
To purchaseor inquireabouta SearsServiceAgreement:
1-800-827-6655
7 a.m. - 5 p.nl. (_-r, Man. -SaL
Fara pedir servido de reperad6n a darnidlio,
yp_a_nar
plezas
conerllxega
a damidlio:
| "mM_'sUHOc_IR_
(1-888-784-6427)
Au Canada paur sevice en fi'an_s:
1.877.1.FFOY1_.
(I -877-533-6937)