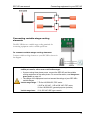
1
User manual and installation guide Copyright Phason Inc. All rights reserved. Printed in Canada 31048004 About the manual The manual describes the features of your SEC-HD and how to use them; it does not describe ventilation strategies. All buttons and menu commands are bolded. For example, "Press Program until the LED for Alarm is lit." All LED display examples are in an LED font. For example, "Press Up or Down until a 2 0 displays and then press Select." This is a hint or tip. It contains helpful information that might make it easier for you to set up or use your SEC-HD. This is a note. It contains information that may help you better understand your SEC-HD. This is a caution. It contains important information that you must follow when installing or servicing your SEC-HD. Failure to follow this information can lead to damaged controls or equipment. This is a warning. It contains important safety information that you must follow when installing or servicing your SEC-HD. Failure to follow this information can lead to damaged controls or equipment, electrical shocks, or severe injury. Table of contents Chapter 1: Introducing the SEC-HD ..................................................................................5 Introducing the SEC-HD ............................................................................................................................ 5 Common applications ........................................................................................................................... 5 Features ................................................................................................................................................. 6 Becoming familiar with the SEC-HD .......................................................................................................... 7 Menu layout ........................................................................................................................................... 8 Chapter 2: Installing your SEC-HD ....................................................................................9 What you need to know before installing your SEC-HD ........................................................................... 9 Understanding power surges and surge suppression .......................................................................... 9 Reducing electrical noise using filters ................................................................................................. 10 Electrical ratings .................................................................................................................................. 11 Using power contactors to increase the capacity of relays................................................................. 11 SEC-HD layout ..................................................................................................................................... 12 Mounting your SEC-HD ....................................................................................................................... 13 Connecting equipment to your SEC-HD ................................................................................................. 13 Connecting the power source ............................................................................................................. 13 Connecting temperature probes ......................................................................................................... 14 Connecting variable-stage cooling elements ...................................................................................... 15 Using three-phase power .................................................................................................................... 16 Connecting single-stage heating or cooling elements ........................................................................ 16 Connecting an alarm system ............................................................................................................... 17 Finishing the installation .......................................................................................................................... 18 Chapter 3: Configuring your SEC-HD .............................................................................20 What you need to know before configuring your SEC-HD ..................................................................... 20 Configuring the main control functions ................................................................................................... 21 Selecting the temperature units, parameter 17 ................................................................................... 21 Selecting the operating frequency, parameter 18 ............................................................................... 21 Configuring hysteresis, parameter 24 ................................................................................................. 22 Configuring the stages ............................................................................................................................ 23 Configuring variable stages, parameters 19 and 20 ........................................................................... 23 Configuring relay stages, parameters 21 to 23 ................................................................................... 24 Testing the configuration ......................................................................................................................... 25 Chapter 4: Programming your SEC-HD ..........................................................................26 What you need to know before programming ........................................................................................ 26 Understanding how the SEC-HD operates.......................................................................................... 26 Programming the parameters ................................................................................................................. 29 Programming the group set point, parameter 1 .................................................................................. 29 Programming variable stages, parameters 2 to 9 ............................................................................... 30 Programming relay stages, parameters 10 to 14 ................................................................................ 31 Programming alarm settings, parameters 15 and 16 .......................................................................... 35 Chapter 5: Monitoring and maintaining your SEC-HD ....................................................38 Monitoring your SEC-HD ......................................................................................................................... 38 Displaying the minimum and maximum temperatures ....................................................................... 38 Selecting the operating program......................................................................................................... 39 iii Acknowledging alarms ........................................................................................................................ 39 Testing settings and equipment .............................................................................................................. 40 Using Stage override mode ................................................................................................................. 40 Using temperature override mode....................................................................................................... 41 Servicing and maintaining your SEC-HD ................................................................................................ 42 Enabling and disabling ventilation....................................................................................................... 42 Restoring the factory defaults, parameter 27 ...................................................................................... 43 Saving and restoring settings .............................................................................................................. 44 Displaying the firmware version, parameter 29 ................................................................................... 45 Updating the firmware, parameter 28 .................................................................................................. 45 Replacement kits and optional accessories ........................................................................................ 47 Appendixes ...................................................................................................................... 49 Appendix A: Glossary .............................................................................................................................. 49 Appendix B: Troubleshooting .................................................................................................................. 50 Alarm and error messages .................................................................................................................. 51 Troubleshooting................................................................................................................................... 52 Appendix C: Factory defaults .................................................................................................................. 54 Appendix D: Installation worksheet ......................................................................................................... 55 Appendix E: Configuration worksheets ................................................................................................... 56 Main control function worksheet ......................................................................................................... 56 Variable stage configuration worksheet .............................................................................................. 56 Relay configuration worksheet ............................................................................................................ 57 Appendix F: Settings worksheets ............................................................................................................ 57 Variable stage settings worksheet ....................................................................................................... 57 Relay stages worksheet ....................................................................................................................... 58 Alarm settings worksheet .................................................................................................................... 58 Appendix G: Motor curves ....................................................................................................................... 59 Index ................................................................................................................................ 61 iv Chapter 1: Introducing the SEC-HD Chapter 1 introduces you to the Staged Environment Control (SEC-HD). Read chapter 1 before reading the rest of the manual. Topics in chapter 1 include: Introducing the SEC-HD below Becoming familiar with the SEC-HD on page 7 Introducing the SEC-HD The SEC-HD automatically controls the temperature in a room by operating two variable speed fans and up to three single-speed fans or heaters. To control the temperature, the SEC-HD operates the connected ventilation and/or heating equipment according to program settings. Easy to use and program The SEC-HD comes with seven factory-configured operating programs you can easily reconfigure for your ideal situation. The easy-to-use keypad and menu system make the SEC-HD one of the easiest controls to program. The SEC-HD's advanced and powerful features are never more than a few keystrokes away. Versatility and peace of mind The SEC-HD has a 30-foot temperature probe that monitors temperatures and a single zone. For more versatility, you can connect four temperature probes together and use four-zone averaging. Temperature probes are available in 1, 6, 30, 75, or 150-foot lengths; you can extend them up to 500 feet using extension cable. The SEC-HD displays alert conditions such as high and low temperatures, power failure, and low line voltage, and can also connect to an alarm siren, alarm panel, or auto-dialer. Customizable alarm settings allow you to choose which alarm conditions you want to be notified about. Common applications Livestock applications Livestock applications include buildings housing calves, rabbits, goats, hogs, poultry, and turkey. In these applications, the SEC-HD often controls ventilation in a single 20 x 40-foot or smaller room. However, the SEC-HD is not restricted to small rooms; some customers use it to control ventilation in sow breeding rooms that are 200 feet long. 5 Chapter 1: Introducing the SEC-HD Phason Greenhouse applications Greenhouse applications include controlling ceiling louvers, variable and single-speed fans, and heaters. Some operations use the proportional feature for misting or ground heat (water pipes). Business and light-industrial applications Business and light-industrial applications include machine shops, garages, and utility sheds where customers use the SEC-HD to control fans and inlets. The SEC-HD exhausts heat from the room made by equipment and/or regulates the temperature as service bays open and close. Features Automatic temperature-based control, -13 to 125°F (-25 to 51.7°C) temperature range Seven configurable operating programs Two variable cooling stages for controlling fans Three general-purpose relays (heat or cool) One alarm relay (for external alarm system or siren) Four-character LED display and individual stage LEDs Minimum and maximum temperature logging Error code display Ventilation disable option Manual override/test mode Selectable motor curves Three-second full-power-turn-on for minimizing fan ice-up Power-failure settings protection One temperature probe input Thirty-foot temperature probe, extendable to 500 feet Easy System compatible—edit and store configuration and settings on a computer. For more information, visit www.phason.ca. Rugged enclosure (corrosion resistant, water resistant, and fire retardant) CSA approval Limited warranty (two years) 6 SEC-HD user manual Becoming familiar with the SEC-HD Becoming familiar with the SEC-HD The four-character LED display shows temperatures, alarm messages, and programming information. If there is a dot in the top left corner of the display, you are in an editable menu. This means you can adjust the parameter. If you leave the SEC-HD in a menu or display other than the main display, the control returns to the main display after five minutes without any key presses. The only exceptions are stage override mode and temperature override mode; the control remains in these modes until you manually exit them. 7 Chapter 1: Introducing the SEC-HD Menu layout 8 Phason Chapter 2: Installing your SEC-HD Chapter 2 explains how to mount, install, and connect equipment to your SEC-HD. Topics in chapter 2 include: What you need to know before installing your SEC-HD below Connecting equipment to your SEC-HD on page 13 Finishing the installation on page 18 What you need to know before installing your SEC-HD Before installing your SEC-HD, you need to do some initial preparation: 1. Read Understanding power surges and surge suppression below. If you do not install external surge suppression devices, you risk damage to the electronics inside your SEC-HD, which may cause your SEC-HD to fail. Because it is not possible to completely protect this product internally from the effects of power surges and other transients, we highly recommend that you install external surge suppression devices. For specific recommendations, see your electrical contractor. If you do not take these precautions, you acknowledge your willingness to accept the risk of loss or injury. 2. Using Appendix D: Installation worksheet on page 55, list all the equipment you want to control using this SEC-HD. Install the equipment and make your electrical connections according to the sheet. 3. Using Appendix E: Configuration worksheets on page 56, decide which relays and variable stages you want to use for each piece of equipment, and how you want the equipment configured. You can connect more than one piece of equipment to a single relay or stage as long as the total current draw does not exceed the relay or stage’s limit. For more information, read Electrical ratings on page 11. Understanding power surges and surge suppression Power surges can be caused by external influences (for example, lightning or utility distribution problems) or they can be caused internally (for example, starting and stopping inductive loads such as motors). 9 Chapter 2: Installing your SEC-HD Phason One of the most common causes of power surges is lightning. When lightning strikes the ground, it produces an enormously powerful electromagnetic field. This field affects nearby power lines, which transmit a surge to any device connected to it, such as lights, computers, or environmental controls like your SEC-HD. Lightning does not have to strike a power line to transmit a surge. Surge suppression devices offer some protection from power surges. Because it is not possible to internally protect this product completely from the effects of power surges and other transients, Phason highly recommend that you install external surge suppression devices. For specific recommendations, see your electrical contractor. If you do not take these precautions, you acknowledge your willingness to accept the risk of loss or injury. Reducing electrical noise using filters Electrical noise is caused by high voltage transients created when inductive loads, such as power contactors, are switched on or off. The strength of the transients can be over 1000 volts and can vary with the type of equipment and wiring, as well as several other factors. “Visible” symptoms of electrical noise include erratic control operation, cycling inlets, communication problems, and more. However, the effects of electrical noise are not always visible. Over time, electrical noise can cause electronic circuits, relay contacts, and power contactors to deteriorate. Installing filters helps extend the life of equipment Filters help prevent electrical noise problems by absorbing the transient energy. Even if you do not have visible symptoms of electrical noise, filters help keep controls operating reliably and can extend the life of the controls and equipment connected to them. Phason’s snubber filters (part number 127-0) are for use with solenoids, timer relays, DC motors, furnaces, and other equipment connected to the control’s relays. You can also use the filters with loads connected to power contactors. Install a filter in parallel with the load, as shown in the following example. 10 SEC-HD user manual What you need to know before installing your SEC-HD Do not use Snubber filters with variable stages. Some power contactors include snubber filters. For more information, read Using power contactors to increase the capacity of relays below. For more information about snubber filters or other Phason accessories, see your dealer or visit www.phason.ca. Electrical ratings Input power Variable stages (VAR 1, VAR 2) 120/230 VAC, 50/60 Hz 7 FLA at 120/230 VAC, PSC motor 1/2 HP at 120 VAC, 1 HP at 230 VAC, PSC motor 10 A at 120/230 VAC, general-purpose (resistive) Fuses (F2 and F3) 15 A, 250 VAC ABC-type ceramic Relay stages 6 A at 120/230 VAC, general-purpose (resistive) (STAGE 3, STAGE 4, STAGE 5) 1/3 HP at 120 VAC, 1/2 HP at 230 VAC 360 W tungsten at 120 VAC Fuses (F1, F4, and F5) 12 A, 250 VAC ABC-type ceramic Alarm relay 0.4 A at 125 VAC; 2 A at 30 VDC, resistive load 0.2 A at 125 VAC; 1 A at 30 VDC, inductive load You can connect more than one piece of equipment to a variable stage or relay as long as they are the same type (for example, two fans) and the total current draw does not exceed the stage’s limit. The FLA (full load ampere) rating accounts for the increase in motor current draw when the motor operates at less than full speed. Make sure the motor/equipment connected to the variable stage does not draw more than 7 FLA. Using power contactors to increase the capacity of relays Phason’s 240-volt power contactors are heavy-duty relays that allow you to increase the load handling capability of control relays. Power contactors are ideal for secondary ventilation fans and electric heaters. Phason’s power contactor relays have the following electrical ratings. Coil: 10.2 mA at 240 VAC Contact: 25 A at 240 VAC; resistive 2 HP at 240 VAC, 1 HP at 120 VAC; motor, power factor 0.4 1300 W at 120 VAC; tungsten Phason offers three power contactor options. For more information, read Replacement kits and optional accessories on page 47 11 Chapter 2: Installing your SEC-HD Phason SEC-HD layout 8 7 9 1 2 3 4 5 5 6 1 Voltage selection switch: set this switch to the correct voltage before installing your SEC-HD. 2 Incoming power terminal: connect the incoming power (120/230 VAC, 50/60 Hz) to this terminal. 3 Temperature probe terminal: connect the temperature probe to this terminal. 4 Alarm relay terminal: connect an external alarm system or alarm siren to this terminal. 5 General-purpose relay terminals (STAGE 3 to STAGE 5): connect single stage (on/off) equipment to these terminals. You can configure these relays as heat or cool. 6 Variable stage terminals (VAR 1, VAR 2): connect variable speed fans to these terminals. 7 Variable stage fuses (F3 for VAR 2, F2 for VAR 1): 15 A, 250 VAC ABC-type ceramic. 8 Relay fuses (F1 for STAGE 3, F4 for STAGE 4, and F5 for STAGE 5): 12 A, 250 VAC ABC-type ceramic. 9 Display cable: make sure the ribbon cable from the display is properly connected to the socket. 12 SEC-HD user manual Connecting equipment to your SEC-HD Mounting your SEC-HD 1. Select a location for your SEC-HD. Make sure you have enough cable and wire to reach all the equipment (fans, heaters, actuators, and so on) that you want to control. 2. Remove the screws from the front cover and then gently lift it off. 3. Mount the enclosure to a wall using the four screws provided with the control. Insert the screws into the large holes in each corner of the box and tighten. Connecting equipment to your SEC-HD Follow all instructions when installing your SEC-HD and connecting equipment to it. Use the electrical knockouts for bringing wires or cables into or out of your control’s enclosure. Do not make additional holes in the enclosure; this can damage the watertight seal or control components and void the warranty. Your control’s test modes are useful for testing your equipment after installing and configuring it. For more information, read Testing settings and equipment on page 40. Refer to Appendix D: Installation worksheet on page 55 and Appendix E: Configuration worksheets on page 56 when installing equipment. Connecting the power source Before connecting the incoming power, switch OFF the power at the source. Do not switch ON the power until you have finished all wiring and verified all equipment is properly connected and free of obstructions. Before connecting the power, set the voltage selection switch to the correct voltage. If you are using three-phase power, make sure the control power and the variable speed fans are connected to the same phase. For more information, read Using three-phase power on page 16. 13 Chapter 2: Installing your SEC-HD Phason You can connect your SEC-HD to 120 or 230 VAC, 50 or 60 Hz power. To connect the incoming power source 1. Set the voltage select switch to the correct voltage setting. 2. Connect the incoming power source as shown in the following diagram. Connecting temperature probes Replace damaged probes as soon as possible. If there is no probe present or working properly, the SEC-HD shuts off stages 3, 4, and 5 and operates variable stages 1 and 2 at idle speed. When routing the temperature probe cables, do not run them in or along the same conduit as AC-power lines. For more information, read the Control Fundamentals guide that came with your control. You can extend probe cables up to 500 feet. For more information, read the Control Fundamentals guide that came with your control. To connect a single temperature probe Do not run the probe cable in the same conduit as AC power cables Do not run the sensor cable beside AC power cables or near electrical equipment. When crossing other cables or power lines, cross them at a 90-degree angle. To use four-zone averaging The SEC-HD can monitor the temperature in four different zones using four-zone averaging. The control takes an average of the temperatures measured by the four probes and then operates according to the average temperature. You must use four probes for averaging. Using two, three, or more than four probes measures the temperature incorrectly. 14 SEC-HD user manual Connecting equipment to your SEC-HD Connecting variable-stage cooling elements The SEC-HD has two variable-stage cooling terminals for connecting equipment such as variable-speed fans. To connect variable-stage cooling elements Connect variable cooling elements to your SEC-HD as shown in the diagram. Only permanent split capacitor motors appropriate for variable speed control, or shaded pole motors, can be used on the variable stages. If you are using three-phase power, connect the SEC-HD and the variable cooling equipment to the same phase. For more information, read Using threephase power on page 16. The ratings of the equipment must not exceed the ratings of your SEC-HD's variable stages. Variable stage ratings: 7 FLA at 120/230 VAC, PSC motor 1/2 HP at 120 VAC, 1 HP at 230 VAC, PSC motor 10 A at 120/230 VAC, general-purpose (resistive) Variable stage fuses: 15 A, 250 VAC ABC-type ceramic 15 Chapter 2: Installing your SEC-HD Phason Using three-phase power If you are connecting your SEC-HD to a three-phase system, connect the control power and the variable cooling equipment to the same phase. Your SEC-HD must be powered from the same phases that supply the equipment. If your SEC-HD power and the variable stages are wired to different phases, the equipment will operate erratically. Connect the control power and variable cooling equipment as shown in the following example. Correct three-phase wiring Incorrect three-phase wiring Connecting single-stage heating or cooling elements Heating or cooling elements include electric heaters, furnaces, and single-speed fans. The ratings of the equipment must not exceed the ratings of your SEC-HD's relays. Relay ratings: 6 A at 120/230 VAC, general-purpose (resistive) 1/3 HP at 120 VAC, 1/2 HP at 230 VAC 360 W tungsten at 120 VAC Relay fuses: 12 A, 250 VAC ABC-type ceramic Gas furnaces using hot-surface ignition or glow plugs can draw more current than indicated on their nameplate and require power contactors. For more information, read your furnace dealer. 16 SEC-HD user manual Connecting equipment to your SEC-HD To connect single-stage heating or cooling elements Connect single-speed heating or cooling elements to your SEC-HD as shown in the following diagrams. Gas-fired furnace or brooder All other single-speed elements Connecting an alarm system You can connect an alarm system to your SEC-HD's alarm terminal. An alarm system can be a siren, alarm panel, or auto-dialer. Read your system’s installation guide for installation instructions and information about the type of system: normally open or normally closed. Below are the descriptions for the alarm terminal. COM: common connection N/O: normally open; closes during alarm conditions N/C: normally closed; opens during alarm conditions For the alarm system to sound (or dial out) during an alarm condition, you must enable the alarms. For more information, read Programming alarm settings on page 35. The ratings of the alarm system must not exceed the ratings of the relay. Alarm relay ratings: 0.4 A at 125 VAC; 2 A at 30 VDC, resistive load 0.2 A at 125 VAC; 1 A at 30 VDC, inductive load 17 Chapter 2: Installing your SEC-HD Phason To connect an alarm system If you are connecting the alarm system to a network of controls and your system uses a normally open connection (closes on alarm), connect the system as shown in the normally open diagram. Join all the COM connections together and all the N/O connections together. Your SEC-HD alarm relays must be in parallel with each other so any SEC-HD can trigger the alarm system when an alarm condition occurs. If you are connecting the alarm system to a network of controls and your system uses a normally closed connection (opens on alarm), connect the system as shown in the normally closed diagram. Join the alarm relays in a continuous loop. Your SEC-HD alarm relays must be in series with each other so any SEC-HD can trigger the alarm system when an alarm condition occurs. Normally open system (closed on alarm) Normally closed system (open on alarm) Finishing the installation After installing and connecting equipment to your SEC-HD, you are ready to finish the installation. Before you start configuring your SEC-HD, you need to verify the connections and close the SECHD. Make sure the configuration worksheets in Appendix E correspond to how the equipment is connected to your SEC-HD. It is very important that the connections and the worksheets are the same, because the next step after closing the cover is to tell your SEC-HD which equipment is connected to each terminal. 18 SEC-HD user manual Finishing the installation After you have finished connecting all equipment, wiring, and cables to your SEC-HD, it is time to verify the wires are connected properly and the close the cover. 1. Make sure all the wires are properly connected to the correct terminals. 2. Make sure the voltage selection switch is in the correct setting. 3. Make sure the display cable is properly connected. For more information, read SEC-HD layout on page 12. 4. Place the cover on the control. 5. Switch on the power to your SEC-HD. When you switch on the power to your SEC-HD, the display should show - - - - , followed by the temperature. If the power fail alarm is enabled, it will show the message P F . If the SEC-HD display does not come on, go back to step 1. If the display shows an alarm message and/or the LED for Alarm is lit, read Programming alarm settings, parameters 15 and on page 35. 6. Insert the four screws into the cover and then tighten them. Do not over tighten the screws. Avoid using power screwdrivers or drills. 19 Chapter 3: Configuring your SEC-HD Chapter 3 explains how to configure your SEC-HD. Configuring your SEC-HD includes telling it which equipment is connected to each terminal. Topics in chapter 3 include: What you need to know before configuring your SEC-HD below Configuring the main control functions on page 21 Configuring the stages on page 23 Testing the configuration on page 25 What you need to know before configuring your SEC-HD Configuring your SEC-HD means telling it what equipment it will be controlling and how it will be controlling that equipment. For example, your SEC-HD has three relay stages. You need to tell the stages if they will be controlling heating or cooling elements. Before you begin configuring your SEC-HD, make sure: It has power All equipment has been properly connected to the correct terminals. You know which equipment is connected to which relays and variable stages This chapter does not explain set points, idle speeds, or other settings. For information about those settings, read Chapter 4: Programming your SEC-HD on page 26. We recommend configuring all your control elements before programming the settings (temperature set points, idle speeds, and so on). Use the Appendix E: Configuration worksheets on page 56 to help you keep track of which equipment is connected to which relays and variable stages. If you receive an error message during configuration, look it up in Appendix B: Troubleshooting on page 50 and then follow the instructions for correcting the problem. Your SEC-HD's built-in diagnostic tests are useful for testing your equipment after installing and configuring it. For more information, read Testing settings and equipment on page 40. 20 SEC-HD user manual Configuring the main control functions Configuring the main control functions Before configuring the variable and relay stages, configure the main control functions. Main control functions include: Temperature units Frequency Hysteresis Selecting the temperature units, parameter 17 Your SEC-HD can display temperatures in either degrees Fahrenheit (°F) or degrees Celsius (°C), but not both at the same time. Default: Fahrenheit To select the temperature unit 1. Press Program until ( 0 Nf displays and then press Select. The display shows 1 7 , the first item in the Configuration menu. 2. Press Select. The display shows the current temperature unit. 3. Press Up or Down to toggle between °F and °C and then press Select. The control returns to the Configuration menu. 4. To return to the Main menu, press Back once. To return to the Main display, press Back twice. CONF * °f Selecting the operating frequency, parameter 18 In North America, utility companies supply power at 60 Hz. In some areas of the world, such as Europe, power is supplied 50 Hz. Default: 60 Hz 21 Chapter 3: Configuring your SEC-HD Phason To select the operating frequency 1. Press Program until ( 0 Nf displays and then press Select. The display shows 1 7 , the first item in the Configuration menu. 2. Press Up until 1 8 displays and then press Select. The display shows the current frequency. 3. Press Up or Down to toggle between 50 and 60 and then press Select. The control returns to the Configuration menu. 4. To return to the Main menu, press Back once. To return to the Main display, press Back twice. (0Nf * 60 Configuring hysteresis, parameter 24 Hysteresis helps prevent damage to the relays, variable stages, and the equipment connected to them by preventing the stages from switching on and off rapidly when the temperature is hovering close to the set point. Hysteresis is the number of degrees above the set point that a heating stage or relay switches off, and the number of degrees below the set point that a cooling stage or relay switches off. For example, a household thermostat might switch on a furnace at 68 °F when the house is cooling down, but switch it off at 70 °F when the house is warming up. The difference between these two values is the hysteresis. Default: 0.5°F (0.3°C) Range: 0.3 to 5.0°F (0.2 to 2.8°C) To configure the hysteresis 1. Press Program until ( 0 Nf displays and then press Select. The display shows 1 7 , the first item in the Configuration menu. 2. Press Up or Down until 2 4 displays and then press Select. The display shows the current configuration. 3. Press Up or Down to adjust the value and then press Select. The control returns to the Configuration menu. 4. To return to the Main menu, press Back once. To return to the Main display, press Back twice. 22 (0Nf # ‚5 SEC-HD user manual Configuring the stages Configuring the stages Your SEC-HD has three types of stages: two variable stages, three relay (ON/OFF) stages, and one inlet actuator stage. Configuring variable stages, parameters 19 and 20 Variable stages 1 and 2 control elements that operate with gradually changing voltage, such as variable speed fans. There are three configuration options. Off (0 f f ) – the variable stage is always off. Cooling 1 (( L 1 ) – the stage controls a variable speed fan using motor curve 1. Use motor curve 1 for most fans. Cooling 2 to Cooling 4 ((L 2 , and so on) – the stage controls a variable speed fan using selected motor curve. Use one of motor curves 2 to 4 only if one of the following problems occur when using manual override to test. The fan changes speed only within a small portion of the 0 to 100% range The fan runs at full speed regardless of the 0 to 100% range Default: stage 1 and 2 cool For more information about motor curves, including a table cross-referencing fan motors with recommended curves, read Appendix G: Motor curves on page 59. Use the Variable stage configuration worksheet on page 56 when configuring variable stages. For more information about how variable stages work, read Programming variable stages on page 30. To configure variable stages 1. Press Program until ( 0 Nf displays and then press Select. The display shows 1 7 , the first item in the Configuration menu. 2. Press Up until 1 9 displays for variable 1 (or 2 0 for variable 2) and then press Select. The display shows the current configuration. 3. Press Up or Down until the configuration you want is displayed and then press Select. The control returns to the Configuration menu. (0Nf “L 1 4. To return to the Main menu, press Back once. To return to the Main display, press Back twice. 23 Chapter 3: Configuring your SEC-HD Phason Configuring relay stages, parameters 21 to 23 The SEC-HD has three relay stages you can configure as one of the following options. Off: the relay is always open (OFF). On: the relay is always closed (ON). You can use this configuration as an override. Cool: the relay controls a cooling element and is on when the temperature is above the set point. Heat: the relay controls a heating element and is on when the temperature is below the set point. Proportional cool (stage 5 only): the relay controls a water pump or sprinkler solenoid and operates as a proportional cycle timer. The relay switches on for a portion of the cycle/interval and off for the remainder. The duration the relay is on depends on the temperature. Proportional control provides better control of temperature and more efficient operation. Typical use for proportional cooling is soaking or direct evaporative cooling, which is often used in hog and dairy operations. Proportional heat (stage 5 only): the relay controls a pump or valve and operates as a proportional cycle timer. Typical use for proportional heating is in-floor heating using water pipes, which is often in livestock buildings. Defaults: stage 3 and 4 COOL, stage 5 HEAT If you need to connect more cooling elements than you have relays available, and you are not using both variable stages, you can use an available variable stage as an ON/OFF stage (for 120/230 VAC-powered equipment only). For more information, read Programming variable stages, parameters 2 to 9 on page 30. Use the Relay stages worksheet on page 58 when configuring relays. To configure relay stages 1. Press Program until ( 0 Nf displays and then press Select. The display shows 1 7 , the first item in the Configuration menu. 2. Press Up until 2 1 displays for stage 3 (2 2 for stage 4, or 2 3 for stage 5) and then press Select. The display shows the current configuration. 3. Press Up or Down until you reach the option you want and then press Select. The control returns to the Configuration menu. 4. To return to the Main menu, press Back once. To return to the Main display, press Back twice. 24 (0Nf *0ff SEC-HD user manual Testing the configuration Testing the configuration After configuring all the control elements (variable stages, relays, and so on), test your SEC-HD to make sure the configuration is correct. In other words, make sure what you think is connected to a particular relay or stage is actually connected to that relay or stage. You can test the configuration using the SEC-HD's stage override mode. Stage override mode allows you to operate the equipment, regardless of temperature or time. As you operate each piece of equipment, visually check to see if that equipment is doing what you tell it. For example, when you switch on stage 3 at the SEC-HD, does the equipment you think is connected to that relay switch on? For more information about stage override mode, read Testing settings and equipment on page 40. 25 Chapter 4: Programming your SEC-HD Phason Chapter 4: Programming your SEC-HD What you need to know before programming Programming the SEC-HD basically means telling the control what you want it to do with the equipment and when you want it done. For example, for a single-speed fan set for cooling, you might say "Switch ON when the temperature reaches 80°F." Before you begin programming your SEC-HD, make sure: The control has power You know which equipment is connected to which stages You have properly connected all equipment to the correct terminals. You have properly configured and tested all equipment connected to the variable and relay stages. For more information, read Chapter 3: Configuring your SEC-HD on page 20. Use Appendix F: Settings worksheets on page 57 when programming your SEC-HD. Understanding how the SEC-HD operates Understanding how the SEC-HD operates can help you configure and program your control more efficiently, and control your environment more effectively. The configuration and settings for the following example are the factory defaults for program A. 1 Group set point is the target temperature for the room. 2 Stage 1 idle speed is the speed, in percentage of full power, at which the stage 1 fan operates for minimum ventilation. 3 Stage 1 idle range is the temperature below which the stage 1 fan is off and the inlet is closed. When the temperature is between the Stage 1 idle range and Stage 1 set point, the fan operates at Stage 1 idle speed. 4 Stage 1 set point is the temperature above which the stage 1 fan speed increases toward its maximum. You should set the Stage 1 set point to the same temperature as the Group set point. 5 6 Stage 1 differential is the temperature at which the stage 1 fan reaches full speed. Stage 2 idle speed is the speed at which the stage 2 fan operates when the temperature is at the Stage 2 idle range (parameter 7). 26 SEC-HD user manual What you need to know before programming 27 Chapter 4: Programming your SEC-HD Phason 7 Stage 2 idle range is the temperature above which the stage 2 fan operates at Stage 2 idle speed. 8 Stage 2 set point is the temperature above which the stage 2 fan speed increases toward its maximum. 9 Stage 2 differential is the temperature at which the stage 2 fan reaches full speed. 10 Stage 3 set point is the temperature above which the stage 3 fan is on. 11 Stage 4 set point is the temperature above which the stage 4 fan is on. 12 Stage 5 set point is the temperature below which the stage 5 heater is on. 15 High temperature alarm is the temperature equal to or above which the SEC-HD signals a high temperature alarm. 16 Low temperature alarm is the temperature equal to or below which the SEC-HD signals a low temperature alarm. 19 Stage 1 configuration in the example and factory defaults, stage 1 is configured as CL 1. 20 Stage 3 configuration in the example and factory defaults, stage 3 is configured as COOL. 22 Stage 4 configuration in the example and factory defaults, stage 4 is configured as COOL. 23 Stage 5 configuration in the example and factory defaults, stage 5 is configured as HEAT. 30 High temperature enable in the example and factory defaults, the high temperature alarm is enabled. 31 Low temperature enable in the example and factory defaults, the low temperature alarm is enabled. 28 1 2 3 4 5 6 7 8 9 10 11 12 Group set point (°F) Stage 1 idle speed (%) Stage 1 idle range (°F) Stage 1 set point (°F) Stage 1 differential (°F) Stage 2 idle speed (%) Stage 2 idle range (°F) Stage 2 set point (°F) Stage 2 differential (°F) Stage 3 set point (°F) Stage 4 set point (°F) Stage 5 set point (°F) Program A setting 85.0 20 80.0 85.0 86.5 20 87.0 87.0 88.5 89.0 91.0 84.0 13 and 14 are not used in the example. 15 High temperature alarm (°F) 16 Low temperature alarm (°F) 95.0 80.0 17 and 18 are not relevant in the example. Stage 2 configuration in the example and factory defaults, stage 2 is configured as CL 1. 21 Parameter 19 20 21 22 23 Variable 1 configuration Variable 2 configuration Stage 3 configuration Stage 4 configuration Stage 5 configuration CL 1 CL 1 COOL COOL HEAT 24 to 29 are not relevant in the example. 30 High temperature enable 31 Low temperature enable YES YES SEC-HD user manual Programming the parameters Programming the parameters Programming the parameters explains parameters 1 to 23 and how to program them. For information about parameter 0, read Selecting the operating program on page 39. Programming the group set point, parameter 1 The group set point is the target or desired temperature for the zone. It is also the temperature tracked by the individual stages. The individual set points for each variable and relay stage will be adjusted relative to the group set point for that zone. For example, if you lower the group set point by 5 degrees, the set points for the variable and relay stages will also be lowered by 5 degrees. Make sure you set the group set point before setting the individual set points. For a more-detailed description of how all settings work together, read Understanding how the SECHD operates on page 26. Use temperature override to test your high and low temperature alarms instead of adjusting the group set point. In temperature override mode, the alarm relay and status LEDs both operate as if they were in a real alarm situation. For more information, read Using temperature override mode on page 41. The examples in the procedure below use program A, which displays as a p r . Program B displays as b p r , C displays as C p r , and so on. To program the group set point 1. Press Program until the program you want to adjust displays, for example A p r for program A. 2. Press Select. The display shows Œ 0 , the first item in the Program menu. 3. Press Up until Œ 1 displays and then press Select. The display shows the current setting. 4. Press Up or Down to adjust the setting and then press Select. The control returns to the Program menu. 5. To return to the Main menu, press Back once. To return to the Main display, press Back twice. A pr Œ 1 ‘8‡0 29 Chapter 4: Programming your SEC-HD Phason Programming variable stages, parameters 2 to 9 There are four settings to program for each variable stage. The following diagram explains how the settings work together. For a more-detailed description of how all settings work together, read Understanding how the SEC-HD operates on page 26. When the temperature is below the Idle range, the fan is off. When the temperature reaches the Idle range, the fan runs at full speed for three seconds and then runs at the Idle speed. The fan continues to run at the Idle speed until the temperature rises to the Set point. When the temperature is between the Set point and Differential, fan speed increases or decreases proportionally with the temperature. When the temperature is at or above the Differential, the fan runs at full speed. The fan runs at full speed. Temperature Differential temperature Fan speed increases as the temperature rises, or decreases as the temperature falls. The fan runs at Idle speed. The temperature band between the Idle range temperature and the Set point is sometimes called the “idle band”. The fan is off when the temperature is below the temperature. Set point temperature Idle range temperature Idle speed Fan speed Use the Variable stage settings worksheet on page 57 when programming variable stages. 30 SEC-HD user manual Programming the parameters If you need to connect more cooling elements than you have relays available, and you are not using both variable stages, you can use an available variable stage as an ON/OFF stage (for 120/230 VAC-powered equipment only). Set the Idle speed to 100% and Idle range to the temperature at which you want the stage to switch on/off. You no longer have “variable” speed or power; instead, you have either "full on" or "full off", the same as a regular cooling stage. The Set point and Differential settings have no effect when you use a variable stage this way. The Set point and Differential settings must be greater than the idle range. To program variable stage settings The examples in the following procedure use program A and variable stage 1. Program A displays as a p r , program B displays as b p r , program C displays as C p r , and so on. Variable stage 1 uses Program settings menu items 2, 3, 4, and 5. For variable stage 2, use menu items 6, 7, 8, and 9. 1. Press Program until the program you want to adjust displays, for example A p r for program A. 2. Press Select. The display shows Œ 0 , the first item in the Program menu. 3. Press Up until the setting you want to adjust displays, for example Œ 2 for Stage 1 idle speed and then press Select. The display shows the current setting. 4. Press Up or Down to adjust the setting and then press Select. The control returns to the Program menu. 5. Repeat steps 3 to 4 for each setting you want to adjust. 6. To return to the Main menu, press Back once. To return to the Main display, press Back twice. A pr Œ 2 * 20 Programming relay stages, parameters 10 to 14 There are two types of heating and cooling stage setups: normal and proportional. Normal is available for stages 3 to 5. Proportional is available only for stage 5. For a detailed description of how normal settings work together with all others, read Understanding how the SEC-HD operates on page 26. 31 Chapter 4: Programming your SEC-HD Phason How proportional control works (stage 5 only) Proportional heating When configured for proportional heating, the relay controls a pump or valve and operates as a proportional cycle timer. Typical use for proportional heating is in-floor heating using water pipes, which is often in livestock buildings. The following example uses the default settings for Program A. Parameter 12, Stage 5 set point = 84.0°F Parameter 13, Stage 5 P-band temperature = 2.0°F Parameter 14, Stage 5 P-band interval = 10 minutes 10 minutes ÷ 2.0 = 5 minutes change per degree, therefore: At 84.0: 0.5 min on (this is the minimum time regardless of interval parameter), 9.5 min off At 83.5: 2.5 min on, 7.5 min off At 83.0: 5 min on, 5 min off At 82.5: 7.5 min on, 2.5 min off At 82.0: 10 min on, 0 min off (always on) The minimum relay ON duration is 0.5 minutes. When the temperature is above the set point (12) the water pump is off. 84.0°F When the temperature is between the set point (12) and the proportional band temperature, the water pump is on for a duration, and then off for a duration. 82.0°F When the temperature is below the set point (12), minus the proportional band setting (13), the water pump is always on. 32 SEC-HD user manual Programming the parameters Proportional cooling When configured for proportional cooling, the relay controls a water pump or sprinkler solenoid and operates as a proportional cycle timer. The relay switches on for a portion of the cycle/interval and off for the remainder. The duration the relay is on depends on the temperature. Proportional cooling allows you to control temperatures more effectively and efficiently. Typical use for proportional cooling is soaking or direct evaporative cooling, which is often used in hog and dairy operations. The following example uses the default settings for Program A. Parameter 12, Stage 5 set point = 84.0°F Parameter 13, Stage 5 P-band temperature = 2.0°F Parameter 14, Stage 5 P-band interval = 10 minutes 10 minutes ÷ 2.0 = 5 minutes change per degree, therefore: At 84.0: 0.5 min on (this is the minimum time regardless of interval parameter), 9.5 min off At 84.5: 2.5 min on, 7.5 min off At 85.0: 5 min on, 5 min off At 85.5: 7.5 min on, 2.5 min off At 86.0: 10 min on, 0 min off (always on) When the temperature is above the set point (12), plus the proportional band setting (13), the water pump is always on. Temperature 86.0°F When the temperature is between the set point (12) and the proportional band temperature, the water pump is on for a duration, and then off for a duration. 84.0°F When the temperature is below the set point (12) the water pump is off. The minimum relay ON duration is 0.5 minutes. 33 Chapter 4: Programming your SEC-HD Phason To program proportional band settings The examples in the following procedure use program A. Program A displays as a p r , program B displays as b p r , program C displays as C p r , and so on. 1. Press Program until the program you want to adjust displays, for example A p r for program A. 2. Press Select. The display shows Œ 0 , the first item in the Program menu. 3. Press Up or Down until the setting you want to adjust displays, for example Œ 1 2 for Stage 5 set point and then press Select. The display shows the current setting. 4. Press Up or Down to adjust the setting and then press Select. The control returns to the Program menu. 5. Repeat steps 3 to 4 for each setting you want to adjust. 6. To return to the Main menu, press Back once. To return to the Main display, press Back twice. A pr Œ 12 *8†0 To program stage settings (no proportional band) The examples in the following procedure use program A and stage 3. Program A displays as a p r , program B displays as b p r , program C displays as C p r , and so on. Stage 3 uses Program settings menu item 10. For stage 4, use menu item 11. For stage 5, use menu item 12. 1. Press Program until the program you want to adjust displays, for example A p r for program A. 2. Press Select. The display shows Œ 0 , the first item in the Program menu. 3. Press Up or Down until the setting you want to adjust displays, for example Œ 1 0 for Stage 3 set point and then press Select. The display shows the current setting. 4. Press Up or Down to adjust the setting and then press Select. The control returns to the Program menu. 5. Repeat steps 3 to 4 for each setting you want to adjust. 6. To return to the Main menu, press Back once. To return to the Main display, press Back twice. 34 A pr Œ 10 *8‹0 SEC-HD user manual Programming the parameters Programming alarm settings, parameters 15 and 16 There are four alarms. For a more-detailed description of how all settings work together, read Understanding how the SEC-HD operates on page 26. High temperature Low temperature Probe damage Power fail The alarm settings for your SEC-HD determine which alarm conditions are enabled, which are disabled, and their settings. All these work together to determine how and when the alarm relay activates (in other words, signals an alarm condition). The alarm relay activates if an enabled alarm condition is present for longer than the minimum duration of one minute. The one-minute minimum duration prevents alarms from occurring when the temperature rises or drops for just a few seconds. For example, the high temperature alarm setting is 85.0°F. If the temperature rises to 86 degrees, but drops below 85 degrees 30 seconds later, the alarm relay does not activate. If the temperature rises to 86 degrees and stays there for more than 1 minute, the alarm relay activates. The alarm relay remains activated until the temperature drops below the alarm setting. The exception to the one-minute minimum is the power fail alarm. The power fail alarm automatically triggers the relay on a loss of power. When an alarm occurs, the Alarm LED switches on and the alarm message displays. For more information about acknowledging and responding to alarms, read Acknowledging alarms on page 39. Use temperature override to test your high and low temperature alarms instead of adjusting the group set point. In temperature override mode, the alarm relay and status LEDs both operate as if they were in a real alarm situation. For more information, read Using temperature override mode on page 41. Use the Alarm settings worksheet on page 58 when programming alarms. To program high and low temperature alarm settings The examples in the following procedure use program A. Program A displays as a p r , program B displays as b p r , program C displays as C p r , and program D displays as d p r . 35 Chapter 4: Programming your SEC-HD 1. Press Program until the program you want to adjust displays, for example A p r for program A. 2. Press Select. The display shows Œ 0 , the first item in the Program menu. 3. Press Down until the setting you want to adjust displays, for example Œ 1 5 for High temperature alarm, and then press Select. The display shows the current setting. 4. Press Up or Down to adjust the setting and then press Select. The control returns to the Program menu. 5. Repeat steps 3 to 4 for each setting you want to adjust. 6. To return to the Main menu, press Back once. To return to the Main display, press Back twice. Phason A pr Œ 15 *9‡0 To enable or disable alarms When you enable or disable an alarm, you do it for all programs and stages. 1. Press Program until A L en displays and then press Select. The display shows 3 0 , the first item in the Alarm enable menu. 2. To enable or disable the High temperature alarm, press Select. The display shows the current configuration. Press Up or Down to toggle between n o (not enabled) and y e s (enabled), and then press Select. The control returns to the Alarm enable menu. 3. To enable or disable the Low temperature alarm, press Up or Down until 3 1 displays and then press Select. The display shows the current configuration. Press Up or Down to toggle between n o and y es , and then press Select. The control returns to the Alarm enable menu. 4. To enable or disable the Probe damage alarm, press Up or Down until 3 2 displays and then press Select. The display shows the current configuration. Press Up or Down to toggle between n o and y es , and then press Select. The control returns to the Alarm enable menu. 36 ALen 30 * no SEC-HD user manual Programming the parameters 5. To enable or disable the Power fail alarm, press Up or Down until 3 3 displays and then press Select. The display shows the current configuration. Press Up or Down to toggle between n o and y es , and then press Select. The control returns to the Alarm enable menu. 6. To return to the Main menu, press Back once. To return to the Main display, press Back twice. 37 Chapter 5: Monitoring and maintaining your SEC-HD Chapter 5 explains how to monitor the SEC-HD after you have installed, configured, and programmed it. Topics in chapter 5 include: Monitoring your SEC-HD below Testing settings and equipment on page 40 Servicing and maintaining your SEC-HD on page 42 Monitoring your SEC-HD Your SEC-HD displays temperature, alarm, and status information. Monitoring the control regularly gives you a better idea of what is going on in your facility. When in normal operation, the display shows the ambient temperature. Displaying the minimum and maximum temperatures The SEC-HD logs minimum and maximum temperatures. You can view and reset the temperatures. To view the minimum temperature At the main display, press Down. The display shows the lowest temperature since being reset. To view the maximum temperature At the main display, press Up. The display shows the highest temperature since being reset. L6‡0 H8‡6 To reset the minimum and maximum temperatures At the main display, press Program and Down. The control resets the minimum and maximum temperatures. 38 SEC-HD user manual Monitoring your SEC-HD Selecting the operating program The SEC-HD has four configurable programs, A, B, C, D, E, F, and G if you are running a livestock or poultry operation, you might use different programs for different stages of development. Another option is to use different programs for different seasons. The default operating program is program A. Any of the seven programs can be the operating program. For a list of the factory defaults for the programs, see the table starting on page 54. To select the operating program 1. Press Program until one of the seven Program settings menus displays, for example A p r for program A. At this point, it does not matter which program menu you select. 2. Press Select. The display shows Œ 0 , the first item in the Program menu. 3. Press Select. The display shows the current operating program. 4. Press Up or Down to change the operating program and then press Select. The control returns to the Program menu. 5. To return to the Main menu, press Back once. To return to the Main display, press Back twice. A pr Œ 0 ’roa Acknowledging alarms The alarm relay activates if an enabled alarm condition is present for longer than the minimum duration of one minute. The one-minute minimum duration prevents alarms from occurring when the temperature rises or drops for just a few seconds. The exception to the one-minute minimum is the power fail alarm. The power fail alarm automatically triggers the relay on a loss of power. When an alarm occurs, the alarm relay activates, the LED for ALARM switches on, and the alarm message displays. If there is more than one message, after acknowledging the first alarm, the next one displays. For example, if you have a high temperature and probe damage alarm, the display shows X - A L . After acknowledging the high temperature alarm, the display shows p b a d . When all alarms have been acknowledged, the display shows the temperature. 39 Chapter 5: Monitoring and maintaining your SEC-HD Phason To acknowledge alarms Press Select. If there was only one alarm message, the SEC-HD clears the message and returns to the main display. If there are additional alarm messages, the SEC-HD displays the next message. Acknowledging alarms clears the alarm message; it does not deactivate the alarm relay or LED. To deactivate the alarm relay, resolve the problem causing the alarm condition. If you acknowledge the alarm, but do not resolve the problem causing the alarm condition, the alarm message displays again after five minutes without any key presses. If the condition causing the alarm returns to normal (for example, the temperature drops below the high alarm setting), the alarm relay and LED deactivate, but the alarm message remains. For a list of alarm messages, their descriptions, and possible resolutions, read Alarm and error messages on page 51. Testing settings and equipment The SEC-HD has two test utilities: Stage override mode and Temperature override mode. Using Stage override mode Stage override mode is for individually testing the installation and equipment connected to the SECHD. When you enter stage override mode, all stages switch off. You can then change the output of the stages: 0 to 100% for variable stages, OFF or ON for relay stages and the alarm relay. All equipment remains at the state you set it until you leave stage override mode, then it returns to normal, programmed operation. For example, if stage 3 is a cooling stage and you switch it ON, it remains on until you leave stage override mode. 40 When the SEC-HD is in stage override mode, it does not operate the equipment according to the measured temperature. The SEC-HD does not exit test mode on its own. When you are finished testing, press Back until the control exits test mode. SEC-HD user manual Testing settings and equipment To use stage override mode 1. Press Program until t e st displays and then press Select. The display shows 3 4 , the first item in the Test menu. 2. Press Select. The display shows s t 9 1 , the first item in the Stage override submenu. 3. Press Up or Down until the stage you want to test displays, for example A L A for the alarm relay and then press Select. The display shows the current setting. 4. Press Up or Down to adjust the setting and then press Select. The control returns to the Stage override menu. 5. Repeat steps 3 to 4 for each stage you want to test. test 34 34 St91 6. To return to the Main menu, press Back twice. To return to the Main display, press Back three times. Using temperature override mode Temperature override mode is for testing the SEC-HD configuration and settings. It allows you to test the settings by simulating the temperature. Instead of adjusting the output of a variable stage or state of a relay, you adjust the “test temperature”. As you increase or decrease the test temperature, all stages and relays operate according to their programmed settings and the test temperature, giving you an idea of how your system performs over a full range of temperatures. When the SEC-HD is in temperature override mode, it operates according to the test temperature, not according to the temperature measured by the probe. The SEC-HD does not exit test mode automatically. When you are finished testing, press Back until the control exits test mode. 41 Chapter 5: Monitoring and maintaining your SEC-HD Phason To use temperature override mode 1. Press Program until t e st displays and then press Select. The display shows 3 4 , the first item in the Test menu. 2. Press Up or Down until 3 5 displays and then press Select. The display shows the current temperature, which is now the test temperature. 3. Press Up or Down to adjust the test temperature The control responds to the changes in the test temperature. 4. To return to the Main menu, press Back twice. To return to the Main display, press Back three times. test 35 *7‡3 Servicing and maintaining your SEC-HD Topics in this section include: Enabling and disabling ventilation (below) Restoring the factory defaults, parameter 27 (on page 43) Saving and restoring settings (on page 44) Displaying the firmware version, parameter 29 (on page 45) Updating the firmware, parameter 28 (on page 45) Replacement kits and optional accessories (on page 47) Enabling and disabling ventilation Normally, ventilation is enabled and the variable and relay stages function according to the program settings. This is the default setting and we refer to it as normal operation. Occasionally, you might want to disable the ventilation. For example, if a room is vacant, you might want to disable ventilation to conserve energy. When ventilation is disabled: Variable stages are off Cooling stages (relay) are off Heating stages function normally The display alternates between the current temperature and U o f f Alarms do not display 42 SEC-HD user manual Servicing and maintaining your SEC-HD DO NOT use the disable ventilation function to shut down fans while working on wiring. When working on any wiring, switch OFF the power at the source. To enable or disable ventilation 1. Press Program until U E Nt displays and then press Select. The display shows the current setting. 2. Press Up or Down to toggle between 0 F F and ON and then press Select. The control returns to the Main menu. 3. To return to the Main display, press Back. UENt * 0N Restoring the factory defaults, parameter 27 When your SEC-HD leaves the factory, it comes with default settings and configuration. When you program your SEC-HD, you change its configuration and settings. Resetting your SEC-HD erases all the configuration and settings you programmed and restores them to what they were when the control left the factory. For a list of the factory defaults, read Appendix C: Factory defaults on page 54. Restore the factory defaults only as a last resort. It erases ALL your configuration and settings and you will have to reconfigure the control. If you restore your SEC-HD to its factory defaults, disconnect the power to all loads and then reconfigure the control before restoring power to the loads. To restore the factory defaults 1. Press Program until ( 0 Nf displays and then press Select. The display shows 1 7 , the first item in the Configuration menu. 2. Press Down until 2 7 displays and then press Select. 3. Press Up or Down to change the n o to y e s and then press Select. The control restores the factory defaults. When complete, the display shows d o ne . 4. To return to the Configuration menu, press Back once. To return to the Main menu, press Back twice. To return to the Main display, press Back three times. (0Nf 27 * no 43 Chapter 5: Monitoring and maintaining your SEC-HD Phason Saving and restoring settings The SEC-HD Saver is an innovative and easy-to-use product that allows you to store your SEC-HD configuration and settings. The SEC-HD Saver stores a complete copy of all a SEC-HD's configuration and settings. You can restore the configuration and settings any time, or even use them to set up new SEC-HDs in seconds! To save your settings 1. Loosen the four screws in the SEC-HD enclosure and then gently remove the cover. Make sure not to disconnect the ribbon cable. 2. Insert the SEC-HD Saver into the connector marked SAVER on the inside top-left of the cover. 3. Press Program until ( 0 Nf displays and then press Select. The display shows 1 7 , the first item in the Configuration menu. 4. Press Down until 2 5 displays and then press Select. 5. Press Up or Down to change the n o to y e s and then press Select. The control saves the information to the SEC-HD Saver. When complete, the display shows d o n e . (0Nf 25 * no 6. To return to the Configuration menu, press Back once. To return to the Main menu, press Back twice. To return to the Main display, press Back three times. 7. Remove the SEC-HD Saver. 8. Replace the cover and then tighten the four screws. To restore your settings 1. Loosen the four screws in the SEC-HD enclosure and then gently remove the cover. Make sure not to disconnect the ribbon cable. 2. Insert the SEC-HD Saver into the connector marked SAVER on the inside top-left of the cover. 3. Press Program until ( 0 Nf displays and then press Select. The display shows 1 7 , the first item in the Configuration menu. 4. Press Down until 2 6 displays and then press Select. 5. Press Up or Down to change the n o to y e s and then press Select. The control reads the information from the SEC-HD Saver. When complete, the display shows d o n e . 44 (0Nf 26 * no SEC-HD user manual Servicing and maintaining your SEC-HD 6. To return to the Configuration menu, press Back once. To return to the Main menu, press Back twice. To return to the Main display, press Back three times. 7. Remove the SEC-HD Saver. 8. Replace the cover and then tighten the four screws. Displaying the firmware version, parameter 29 Firmware is similar to operating system software for a computer. Firmware contains instructions that tell the SEC-HD how it operates. Just like computer operating systems (such as Windows™ 7) have version numbers, the firmware has a version number. The SEC-HD displays the firmware version as a number in the format #.##. If you need to contact Phason Customer Support about your SEC-HD, you might need to provide them with the firmware version of your control. For more information about technical support, see the back of the manual. To display the firmware version 1. Press Program until ( 0 N f displays and then press Select. The display shows 2 4 , the first item in the Configuration menu. 2. Press Down until 2 9 displays and then press Select. The display shows the firmware version. 3. To return to the Configuration menu, press Back once. To return to the Main menu, press Back twice. To return to the Main display, press Back three times. (0Nf 29 ƒ00 Updating the firmware, parameter 28 The optional SEC-HD Updater is an innovative and easy-to-use product that allows you to upgrade your SEC-HD's firmware. Phason constantly improves and adds new features to their products. With the SEC-HD Updater, you can upgrade the firmware in your SEC-HD as these features become available. The SEC-HD Updater takes only seconds to use and can upgrade all the SEC-HD controls at your site. There are two methods for updating the SEC-HD firmware: Power on: the power on method allows you to update the SEC-HD firmware using the menu system, without having to switch the incoming power off and then on. If the power on method fails, use the power off method. Power off: the power off method allows you to update the SEC-HD firmware by switching the incoming power off and then on. 45 Chapter 5: Monitoring and maintaining your SEC-HD Phason The inside of the SEC-HD cover is where you connect the SEC-HD Updater. The cover label must face the right when you plug the updater into the socket. To update the firmware using the “power on” method 1. Loosen the four screws in the SEC-HD enclosure and then gently remove the cover. Make sure not to disconnect the ribbon cable. 2. Insert the SEC-HD Updater into the connector marked SAVER on the inside top-left of the cover. 3. Press Program until ( 0 Nf displays and then press Select. The display shows 1 7 , the first item in the Configuration menu. 4. Press Down until 2 8 displays and then press Select. 5. Press Up or Down to change the n o to y e s and then press Select. The SEC-HD updates its firmware. During the update, the display is blank and the control beeps. When the update is complete, the display shows - - - - for a couple seconds and then shows the ambient temperature. 6. Remove the SEC-HD Updater. 7. Verify that the control functions properly. 8. Replace the cover and then tighten the four screws. (0Nf 28 * no To update the firmware using the “power off” method 1. Loosen the four screws in the SEC-HD enclosure and then gently remove the cover. Make sure not to disconnect the ribbon cable. 2. Insert the SEC-HD Updater into the connector marked SAVER on the inside top-left of the cover. 3. Switch off the power to the SEC-HD for at least five seconds. 4. Switch on the power to the SEC-HD. The SEC-HD updates its firmware. During the update, the display is blank and the control beeps. When the update is complete, the display shows - - - - for a couple seconds and then shows the ambient temperature. 5. Remove the SEC-HD Updater. 6. Verify that the control functions properly. 7. Replace the cover and then tighten the four screws. 46 SEC-HD user manual Servicing and maintaining your SEC-HD Replacement kits and optional accessories Parts and kits Display kit, model K310056 Should the display of your SEC-HD control fail, you can replace it with a kit. After replacing the display, you will need to reconfigure and program control. Control kits, K102206-RS Should the bottom circuit board of your SEC-HD control fail, you can replace it with a kit. This model of control kit comes with socketed, pluggable relays Replacement relays, model PKG-R 52 If you have the bottom circuit board that has socketed relays, you can buy packs of relays and replace them individually. SEC-HD Saver The SEC-HD Saver is an innovative and easy-to-use product that stores a complete copy of a SECHD's configuration and settings. You can restore the configuration and settings any time, or even use them to set up new SEC-HDs in seconds! Features Quick and easy to use Portable, reliable, and safe storage of configuration and settings Transferable to any SEC-HD that has the same firmware version Compact design that fits in a pocket Limited warranty (90 days) SEC-HD Updater The optional SEC-HD Updater is an innovative and easy-to-use product that updates a SEC-HD's firmware. Phason constantly improves and adds new features to their products. With the SEC-HD Updater, you can update the firmware in your SEC-HD as these features become available. The SEC-HD Updater takes only seconds to use and can upgrade all the SEC-HD controls at your site. Features Quick and easy to use Compact design that fits in a pocket Limited warranty (90 days) 47 Chapter 5: Monitoring and maintaining your SEC-HD Phason Power contactors Phason’s 240-volt power contactors are heavy-duty relays that increase the load handling capability of control relays. Power contactors are ideal for secondary ventilation fans and electric heaters. Power contactor relay (PC-240): includes power contactor relay and mounting hardware for easy mounting in an enclosure. Power contactor kit (122-1): includes power contactor relay, on-off- auto switch and label, snubber filter (reduces electrical noise), and mounting hardware for easy mounting in an enclosure. Power contactor unit (129-0): includes two power contactor relays, two on-off-auto switches, and two snubber filters, mounted in a large enclosure. The enclosure has room for two additional contactor relays or kits. Temperature probes and extension cable Temperature probes monitor temperatures ranging from –49 to 122°F (-45 to 50°C). The probes are available in 1, 6, 30, 75, or 150-foot cable lengths and can extended up to 500 feet using extension cable. Extension cable is available in 500-foot lengths. Features Easy installation Rugged and durable design Weather and UV-resistant cable Limited warranty (90 days) 48 Appendixes This section contains reference information that is useful when installing, configuring, setting up, or troubleshooting your SEC-HD. Appendix A: Glossary below Appendix B: Troubleshooting on page 50 Appendix C: Factory defaults on page 54 Appendix D: Installation worksheet on page 55 Appendix E: Configuration worksheets on page 56 Appendix F: Settings worksheets on page 57 Appendix G: Motor curves on page 59 Appendix A: Glossary control elements Devices connected to your SEC-HD, such as fans, heaters, actuators, and so on. differential The temperature setting above which a variable stage's fan runs at full speed. For more information, read Programming variable stages, parameters 2 to 9 on page 30. firmware The internal program instructions of your SEC-HD. You can update the firmware version of your SEC-HD to the latest version using a SEC-HD Updater. For more information, read Updating the firmware on page 45. group set point The desired temperature for the room. hysteresis The number of degrees above the set point that a heating stage or relay switches off, and the number of degrees below the set point that a cooling stage or relay switches off. For more information, read Programming the group set point, parameter 1 on page 29. For example, a household thermostat might switch on a furnace at 68 °F when the house is cooling down, but switch it off at 72 °F when the house is warming up. The difference between these two values is the hysteresis. For more information, read Configuring hysteresis, parameter on page 22. 49 Appendixes idle range Phason The temperature setting below which a variable stage's fan is off and the inlet is closed. When the temperature is between the idle range and set point, the fan operates at idle speed and the inlet is open the corresponding amount. For more information, read Programming variable stages, parameters 2 to 9 on page 30. idle speed The percentage of full power at which a variable speed fan operates for minimum ventilation. For more information, read Programming variable stages, parameters 2 to 9 on page 30. minimum duration The minimum amount of time an alarm condition must be present before the SEC-HD signals an alarm. The minimum duration (one minute) prevents alarms from activating when the temperature rises or drops for just a few seconds. For more information, read Programming alarm settings, parameters 15 and on page 35. set point For variable stages, the temperature above which fan speed increases toward its maximum and the inlet opens proportionally. For more information, read Programming variable stages, parameters 2 to 9 on page 30. For relay stages, the temperature at which the stage switches between the OFF and ON state. For more information, read Programming relay stages, parameters 10 to 14 on page 24. spikes Short-term deviations or changes from a desired voltage level or signal. These deviations can cause damage to electronic devices, or cause them to malfunction. Spikes are often caused by sudden excess power, also known as ‘power surges’, or by drops in power, knows as ‘brown outs’. For more information, read Understanding power surges and surge suppression on page 9. terminal block The part of your SEC-HD where you connect the wires for incoming power, control elements, and so on. For more information, read SEC-HD layout on page 12. Appendix B: Troubleshooting If you see an alarm message and are not sure what it means, look it up in the Alarm and error messages table on page 51 and then follow the instructions for resolving the alarm condition. If you are having a problem using your SEC-HD, see if the problem is described in the Troubleshooting table on page 52 and then follow the directions for correcting the problem. 50 SEC-HD user manual Appendix B: Troubleshooting Alarm and error messages The following table lists the alarm and error messages, the possible causes, and their possible solutions. If you see a message and are not sure what it means, look it up in the table and then follow the instructions for resolving the condition. Alarm message K-AL Possible cause Possible solution The temperature has gone above the high temperature alarm point. High temperature alarm L-AL The temperature has gone below the low temperature alarm point. Low temperature alarm pbad PF Err1 A temperature probe is damaged or disconnected. Probe damage alarm Try to lower the temperature by turning heaters down or off, or by increasing or turning on cooling elements (such as fans or misters), or by a combination of both. Check the temperature probes. Check to see if a fan has failed. Check the alarm settings. For more information, read Programming alarm settings on page 35. Try to raise the temperature by turning heaters up or on, or by decreasing or turning off cooling elements (such as fans or misters), or by a combination of both. Check the temperature probes. Check to see if a heater has failed. Check the alarm settings. For more information, read Programming alarm settings on page 35. Check the wire between the control and the probe. Any wire damage can cause the alarm. Replace or reconnect the temperature probe. The control should recover automatically. There has been a power failure. Check to see why the power failed and then fix the problem. The SEC-HD Saver is not in place when trying to save or restore settings. The Saver inserted is not an SEC-HD Saver. The Saver inserted has invalid settings on it. Make sure the SEC-HD Saver is inserted correctly and then try again. Remove the Saver and then insert an SEC-HD Saver. Resave the settings from the SEC-HD to the SEC-HD Saver. Power fail alarm Error 1 - SAVER error 51 Appendixes Phason Troubleshooting The following table lists some problems, possible causes, and possible solutions. If you are having a problem using your SEC-HD, see if the problem is described in the Troubleshooting table and then follow the directions for correcting the problem. Problem Possible cause Possible solution Power supply components blown out Power surge, brownout, or power outage Avoid the problem in future by providing proper voltage and protection for the control. A circuit breaker at service panel is off or tripped. Incorrect incoming power wiring The display board connect cable is not plugged into the control board properly. The 115/230 VAC switch is in the wrong position Reset the circuit breaker. Burn marks on boards and components Motors and fans slow down or stop No power and/or display Temperature does not change The control is in temperature override mode. Display showing unusually high or low temperature The probe is not a Phason probe. Variable fan runs at maximum The extension cable connected to the temperature probe is providing a poor connection Damaged probe Incorrect wiring The idle speed is too high. The differential setting is the same as the set point. Incorrect motor curve 52 Correct the wiring. Plug in the display board cable. For more information, read SEC-HD layout on page 12. Switch off the power, set the switch to the correct setting, and then switch on the power. For more information, read SEC-HD layout on page 12. Exit test mode. For more information, see Using temperature override mode on page 41. Remove the probe and then install a Phason probe. Check the extension cable connection and resolder it if necessary. Replace the temperature probe. Correct the wiring. For more information, read Connecting variable-stage cooling elements on page 15. Decrease the idle speed setting. For more information, read Programming variable stages on page 30. Adjust the set point to the desired temperature. For more information, read Programming variable stages on page 30. Configure the stage to use the other motor curve. For more information, read Configuring the stages on page 23. SEC-HD user manual Variable fan not running Appendix B: Troubleshooting Incorrect wiring Correct the wiring. For more information, read Connecting variable-stage cooling elements on page 15. The fuse is open or blown. Check why the fuse was blown and repair any problems. Replace the fuse. The variable stage is configured as Configure the variable stage for cooling. For more information, read Configuring the OFF stages on page 23. The idle speed setting is too low. Increase the idle speed setting. For more information, read Programming variable stages on page 30. The idle range temperature setting Decrease the idle range temperature is too high. setting. For more information, read Programming variable stages on page 30. The temperature set point is Adjust the set point to the desired above room temperature. temperature. For more information, read Programming variable stages on page 30. There is no power to the fan. Switch on the power. Faulty fan/heater Replace the equipment. Circuit breaker open Reset the breaker. Variable speed fan responds to Incorrect motor curve Configure the stage to use the other motor only a small portion of the 0 to curve. For more information, read Configuring the stages on page 23. 100% range Variable speed fan comes on, The hysteresis is not high enough. Adjust the hysteresis setting. runs at full speed, and then The outside temperature is rising turns off, keeps cycling. and falling quickly. This happens most often in the spring and fall. Relay does not switch ON the Incorrect wiring Correct the wiring. load The stage is configured as OFF, as Configure the relay properly. For more information, read Configuring relay stages, cool for a heater, or as heat for a parameters 21 to 23 on page 24. fan. The set point is incorrect Adjust the setting. For more information, read the appropriate programming section. No power to the load Switch on the power. Faulty equipment Replace the equipment. Circuit breaker open Reset the breaker. Blown relay Solve the problem that caused the relay to blow, and then replace the relay or circuit board. Relay does not switch OFF the The stage is configured as ON. Configure the relay properly. For more information, read Configuring relay stages, load parameters on page 24. Alarm relay not operating Incorrect wiring Correct the wiring. For more information, read Connecting an alarm system on page 17. alarm system Staged element cycles on and The set points are too close Adjust the hysteresis setting. off together with variable speed fans. Move the probe closer to the heater. Widen the set points. The heater is too large for the room. Replace the heater with a smaller output unit. The stage is set up as proportional Change the configuration from proportional control. control. 53 Appendixes Phason Appendix C: Factory defaults When your SEC-HD leaves the factory, it comes with default settings and configuration. Configuring and programming your SEC-HD changes the factory defaults. Resetting your SEC-HD erases all the configuration and settings you programmed and then restores the factory defaults. For more information, read Restoring the factory defaults, parameter 27 on page 43. Parameter 1 2 3 4 5 6 7 8 9 10 11 12 13 14 15 16 17 18 19 20 21 22 23 24 30 31 32 33 54 Group set point (°F/°C) Stage 1 idle speed (%) Stage 1 idle range (°F/°C) Stage 1 set point (°F/°C) Stage 1 differential (°F/°C) Stage 2 idle speed (%) Stage 2 idle range (°F/°C) Stage 2 set point (°F/°C) Stage 2 differential (°F/°C) Stage 3 set point (°F/°C) Stage 4 set point (°F/°C) Stage 5 set point (°F/°C) Stage 5 P-band temperature (°F/°C) Stage 5 P-band interval (minutes) High temperature alarm (°F/°C) Low temperature alarm (°F/°C) Temperature unit Frequency Stage 1 configuration Stage 2 configuration Stage 3 configuration Stage 4 configuration Stage 5 configuration Hysteresis (°F/°C) High temperature enable Low temperature enable Probe damage enable Actuator jam enable Default Range/options A B C D E, F, G 85.0 20 80.0 85.0 86.5 20 87.0 87.0 88.5 89.0 91.0 84.0 2.0 10 95.0 80.0 80.0 20 75.0 80.0 82.0 20 82.0 82.0 84.0 85.0 87.0 79.0 2.0 10 90.0 75.0 75.0 30 70.0 75.0 77.0 30 77.5 77.5 79.5 80.0 82.0 74.0 2.0 10 90.0 70.0 °F 60 CL 1 CL 1 COOL COOL HEAT 0.5 YES YES YES YES 70.0 30 65.0 70.0 73.0 30 73.0 73.0 76.0 77.0 79.0 69.0 2.0 10 85.0 65.0 65.0 20 60.0 65.0 68.0 20 68.0 68.0 71.0 72.0 74.0 64.0 2 10 85.0 65.0 -13.0 to 125 °F (-25 to 51.7°C) 0 to 100 % -13.0 to 125 °F (-25 to 51.7°C) -13.0 to 125 °F (-25 to 51.7°C) -13.0 to 125 °F (-25 to 51.7°C) 0 to 100 % -13.0 to 125 °F (-25 to 51.7°C) -13.0 to 125 °F (-25 to 51.7°C) -13.0 to 125 °F (-25 to 51.7°C) -13.0 to 125 °F (-25 to 51.7°C) -13.0 to 125 °F (-25 to 51.7°C) -13.0 to 125 °F (-25 to 51.7°C) 1 to 16.0°F (0.6 to 8.9°C) 5 to 25 minutes -13.0 to 125 °F (-25 to 51.7°C) -13.0 to 125 °F (-25 to 51.7°C) °F/°C 50/60 Hz OFF/CL 1 to CL 4 OFF/CL 1 to CL 4 OFF/ON/COOL/ HEAT OFF/ON/COOL/ HEAT OFF/ON/COOL/HEAT/P-COOL/P-HEAT 0.3 to 5.0°F (0.2 to 2.8°C) NO/YES NO/YES NO/YES NO/YES SEC-HD user manual Appendix D: Installation worksheet Appendix D: Installation worksheet Use the following worksheet to list all the equipment (fans, heaters, and so on that you want your SEC-HD to control. We recommend you make a copy of the worksheet before filling it in because you need more than one sheet or you make a mistake. Use the Installation worksheet when you fill in the Configuration worksheets (starting on page 56). Stage Equipment to connect and notes Example: VAR 1 36-inch variable speed fan, 2.5 FLA, 3/4 HP VAR 1 VAR 2 STAGE 3 STAGE 4 STAGE 5 ALARM 55 Appendixes Phason Appendix E: Configuration worksheets Use the Installation Worksheet on page 55 when completing the configuration worksheets. Main control function worksheet For each item, circle or write in the configuration. Item Description Configuration Units The unit of measure for temperature. °C Frequency The line frequency of the incoming power. 50 Hz Hysteresis The number of degrees above the set point that a heating stage or relay switches off, and the number of degrees below the set point that a cooling stage or relay switches off. °F 60 Hz _______ degrees Range: 0.3 to 5.0°F (0.2 to 2.8°C) Variable stage configuration worksheet For each variable stage, enter a description (for reference only) and put a check mark in the appropriate column. The first two lines are an example. Stage Description Off 1 2 Stage 1 fan Unused 1 2 56 Cool 1 Cool 2 SEC-HD user manual Appendix F: Settings worksheets Relay configuration worksheet 3 4 5 Proportional cool Proportional heat Cool Heat Description Off Stage On For each stage, enter a description (for reference only) and put a check mark in the appropriate column. The first table is an example. 36-inch fan 24-inch fans Gas furnace 3 4 5 Appendix F: Settings worksheets Appendix F contains worksheets for you to use when programming your SEC-HD settings. Each worksheet contains a brief explanation of the information required. For more information about programming your SEC-HD, see Chapter 4: Programming your SEC-HD on page 26. Variable stage settings worksheet Parameter Stage 1 Stage 2 Range/options Group set point -13.0 to 125 °F (-25 to 51.7°C) Stage # idle speed 0 to 100 % Stage # idle range -13.0 to 125 °F (-25 to 51.7°C) Stage # set point -13.0 to 125 °F (-25 to 51.7°C) Stage # differential -13.0 to 125 °F (-25 to 51.7°C) Recommend these be set to the same value. 57 Appendixes Phason Relay stages worksheet Parameter Setting Range/options Stage 3 set point -13.0 to 125 °F (-25 to 51.7°C) Stage 4 set point -13.0 to 125 °F (-25 to 51.7°C) Stage 5 set point -13.0 to 125 °F (-25 to 51.7°C) Stage 5 P-band temperature 1 to 16.0°F (0.6 to 8.9°C) Stage 5 P-band interval 5 to 25 minutes Required only if stage 5 is configured as proportional heat or proportional cool. Alarm settings worksheet The alarm settings for your SEC-HD determine which alarm conditions are enabled, which are disabled, and their settings. All these work together to determine how and when the alarm relay activates (in other words, signals an alarm condition). The alarm relay activates if an enabled alarm condition is present for longer than the minimum duration of one minute. The minimum duration prevents alarms from occurring when the temperature rises or drops for just a few seconds. The exception to the one-minute minimum is the power fail alarm. The power fail alarm automatically triggers the relay on a loss of power. For more information, read Programming alarm settings on page 35. Alarm Configuration Setting Description High temperature K-AL ON OFF Low temperature L-AL ON OFF Probe damage PbAd ON OFF Damaged or disconnected temperature probe Power fail PF ON OFF Incoming power interruption The highest temperature to which you can safely allow your facility to rise; this cannot be lower than low temperature alarm. The lowest temperature to which you can safely allow your facility to fall; this cannot be higher than high temperature alarm. Temperature in °F/°C, range: -13 to 125°F (-25 to 51.7°C) 58 SEC-HD user manual Appendix G: Motor curves Appendix G: Motor curves Motor curves provide a way to proportionally increase or decrease speed, regardless of motor manufacturer. For example, a Multifan motor might require 130 VAC to run at 50% RPM, while a Marathon motor might need 100 VAC to run at 50% RPM. Without a motor curve, the Multifan motor would run at a slower RPM than the Marathon motor at the same settings. Selecting the correct motor curve allows you to set, for example, 50 on the control, and get much closer to 50% RPM on the motor then you would otherwise. Use manual override or test mode to test and evaluate the operation and performance of your fan motors. For more information, read Testing settings and equipment on page 40. If your fan motors are not running at approximately the correct RPM for the control settings, find your fan in the following table, and then select the motor curve for your fan manufacturer and model/specification. If your fan motor is not listed, use the default motor curve (curve 1). If the default motor curve does not operate your fan motor correctly, test the motor using manual override or test mode while selecting the different curves. Manufacturer Aerotech Airstream Baldor Canarm Choretime (GE) Emerson Exafan Diameter (inches) 09 36 12 36 14 18 24 09 12 14 16 18 12 12 10 14 16 18 20 Model Specifications AT09Z2 AT36Z1 APP12F APP36 3350 RPM PLF9 PLF12 PLF14 PLF16 Recommended curve 1/3 HP, 1140 RPM 1/6 HP, 3400 RPM 1/4 HP, 1700 RPM 1/4 HP, 1700 RPM 1/3 HP, 1700 RPM 2 4 3 4 4 4 4 4 2 2 2 2 1 2 2 2 2 1/3 HP, 1700 RPM 0.53 HP, 1700 RPM 2 2 1/4 HP, 1765 RPM 1/4 HP, 1700 RPM 1/3 HP, 1700 RPM 1/3 HP, 1140 RPM 1/5 HP 1/4 HP 59 Appendixes Manufacturer Franklin Leeson Magnetek Marathon Multifan 60 Phason Diameter (inches) 24 10 14 18 24 24 36 12 12 36 12 24 18 20 Model 4E45 4E50 Specifications Recommended curve 0.63 HP, 1700 RPM 1/6 HP, 3450 RPM 1/4 HP, 1625 RPM 2 2 2 1/3 HP, 1625 RPM 1/3 HP, 1140 RPM 1/2 HP, 1625 RPM 3/4 HP, 1625 RPM 1/6 HP, 3300 RPM 1/6 HP, 1725 RPM 1/2 HP, 840 RPM 1/4 HP, 1625 RPM 1/2 HP, 1625 RPM 1600 RPM 2 2 2 2 2 2 4 2 2 4 4 SEC-HD user manual Index A acknowledging alarms ............................. 35–36 active program................................................ 35 actuator jam alarm .......................................... 31 alarm settings ........................................... 31–33 alarm systems.................................... 1, 8, 13–14 averaging temperature probes ................. 10–11 B buttons .............................................................. 3 E electrical noise .................................................. 6 electrical ratings ................................................ 7 enabling alarms ......................................... 32–33 enabling ventilation ................................... 38–39 F factory defaults ................................................ 39 Fahrenheit display ........................................... 17 features.............................................................. 2 C filters .................................................................. 6 Celsius display................................................ 17 firmware ......................................... 41–42, 41–42 clearing alarms ......................................... 35–36 four-zone averaging .................................. 10–11 configuring frequency .................................................. 17–18 alarm settings ....................................... 31–33 hysteresis ................................................... 18 relays .......................................................... 20 temperature units ....................................... 17 variable stages ........................................... 19 connecting fuses .................................................................. 8 alarm systems ...................................... 13–14 incoming power ..................................... 9–10 single-stage elements .......................... 12–13 temperature probes ................................... 10 variable-stage elements ............................. 11 contactors ............................ See power contactors hysteresis ........................................................ 18 D LEDs .................................................................. 3 defaults ............................... See factory defaults degrees ............................ See temperature units disabling alarms ....................................... 32–33 disabling ventilation .................................. 38–39 display .............................................................. 3 display cable..................................................... 8 displaying minimum/maximum temperatures 34 G group set point ................................................ 25 H I incoming power... 8, 9–10, See also three-phase power L M main display ...................................................... 3 menu ................................................................. 4 minimum/maximum temperatures .................. 34 motor curve ..................................................... 19 mounting ........................................................... 9 O operating frequency .................................. 17–18 61 Index operating program.......................................... 35 P parameters.......... 22–24, See also programming or configuration power ........ See incoming power or three-phase power power contactors ........................................ 7, 44 power surges ................................................ 5–6 Phason selecting frequency .............................................. 17–18 temperature units ....................................... 17 settings saver ....................... See SEC-HD Saver stage override mode ................................. 36–37 stages .................................... See relay or variable status LEDs ...................................................... 3 surge suppression......................................... 5–6 probes.......................... See temperature probes T programming temperature override ........................... 25, 37–38 alarm settings ....................................... 31–33 group set point ........................................... 25 relay stages .......................................... 27–30 variable stages ..................................... 26–27 proportional control ............................ 20, 28–30 temperature probes..................................... 8, 44 R U relay stages .............................................. 27–30 units ................................ See temperature, units relay terminals .................................................. 8 updating firmware ..................................... 41–42 responding to alarms................................ 35–36 restoring factory defaults ................................ 39 restoring settings ...................................... 40–41 ribbon cable ...................................................... 8 S saving settings .......................................... 40–41 SEC-HD Saver .................................... 40–41, 43 SEC-HD Updater ................................ 41–42, 43 62 temperature units ........................................... 17 testing ........................................................ 36–38 three-phase power ......................................... 12 V variable stage terminals ................................... 8 variable stages configuring ................................................. 19 connecting ................................................. 11 programming ........................................ 26–27 ventilation off/on ........................................ 38–39 version ........................................... See firmware voltage selection switch ................................... 8 Limited warranty This warranty applies only to the Phason Staged Environment Control (SEC-HD). If you need warranty service, return the product and original proof of purchase to your dealer. Phason Inc. (Phason) warrants the SEC-HD subject to the following terms and conditions. This warranty is valid only to the original purchaser of the product, for two years from the manufacturing date. The manufacturing date is stated in the first eight digits of the serial number in the form year-month-day. Phason hereby warrants that should the SEC-HD fail because of improper workmanship, Phason will repair the unit, effecting all necessary parts replacements without charge for either parts or labor. Conditions Installation must be done according to our enclosed installation instructions. The product must not have been previously altered, modified, or repaired by anyone other than Phason. The product must not have been involved in an accident, misused, abused, or operated or installed contrary to the instructions in our user and/or installation manuals. Phason's opinion about these items is final. The person requesting warranty service must be the original purchaser of the unit, and provide proof of purchase upon request. All transportation charges for products submitted for warranty must be paid by the purchaser. Except to the extent prohibited by applicable law, no other warranties, whether expressed or implied, including warranties of merchantability and fitness for a particular purpose, shall apply to the SEC-HD. Any implied warranties are excluded. Phason is not liable for consequential damages caused by the SEC-HD. Phason does not assume or authorize any representatives, or other people, to assume any obligations or liabilities, other than those specifically stated in this warranty. Phason reserves the right to improve or alter the SEC-HD without notice. Service and technical support Phason will be happy to answer all technical questions that will help you use your SEC-HD. Before contacting Phason, check the following: Read this manual for information about the feature with which you are having trouble. If you see an alarm message and are not sure what it means, look it up in the Alarm and error messages table on page 51 and then follow the instructions for resolving the alarm condition. If you are having a problem using your SEC-HD, look in the Troubleshooting table on page 52 and then follow the directions for correcting the problem. If you still have a problem with your SEC-HD, collect the following information: The serial number Any messages displayed by your SEC-HD A description of the problem A description of what you were doing before the problem occurred Phason controls are designed and manufactured to provide reliable performance, but they are not guaranteed to be 100 percent free of defects. Even reliable products can experience occasional failures and the user should recognize this possibility. If Phason products are used in a life-support ventilation system where failure could result in loss or injury, the user should provide adequate back up ventilation, supplementary natural ventilation, or an independent failure-alarm system. The user’s lack of such precautions acknowledges their willingness to accept the risk of such loss or injury. Phason Inc. 2 Terracon Place Winnipeg, Manitoba, Canada R2J 4G7 Phone: Fax: 204-233-1400 204-233-3252 E-mail: Web site: [email protected] www.phason.ca