1
Project no. IST-033576
XtreemOS
Integrated Project
B UILDING AND P ROMOTING A L INUX - BASED O PERATING S YSTEM TO S UPPORT V IRTUAL
O RGANIZATIONS FOR N EXT G ENERATION G RIDS
Prototype of the basic version of Linux-XOS
D2.1.4
Due date of deliverable: November 30th , 2007
Actual submission date: December 10th ,2007
Start date of project: June 1st 2006
Type: Deliverable
WP number: WP2.1
Task number: T2.1.3/T2.1.4
Responsible institution: INRIA
Editor & and editor’s address: Yvon Jégou
IRISA/INRIA,
Campus de Beaulieu
35042 RENNES Cedex
France
Version 1.0 / Last edited by INRIA / Dec 10th , 2007
Project co-funded by the European Commission within the Sixth Framework Programme
Dissemination Level
√
PU Public
PP Restricted to other programme participants (including the Commission Services)
RE Restricted to a group specified by the consortium (including the Commission Services)
CO Confidential, only for members of the consortium (including the Commission Services)
Revision history:
Version
Date
0.1
03/10/07
0.2
31/10/07
0.3
31/10/07
0.4
05/11/07
0.5
06/11/07
0.6
07/11/07
0.7
08/11/07
Authors
Yvon Jégou
Pascal Le Métayer
Yvon Jégou
Yvon Jégou
Yvon Jégou
Haiyan Yu
Pascal Le Métayer
Institution
INRIA
INRIA
INRIA
INRIA
INRIA
ICT
INRIA
0.8
0.9
13/11/07
27/11/07
Yvon Jégou
Pascal Le Métayer
INRIA
INRIA
1.0
10/12/07
Yvon Jégou
INRIA
Section affected, comments
Initial draft
Added checkpointing section
Updated experiment results after PAM module debug
Updated the PAM-NSS section
added ssh section
Added draft of wrap-up sections
Updated introduction/conclusion with checkpointing
part
Revision of experimentation traces
Take comments from Brian Matthews and Bernd
Scheuermann into account
Final version
Reviewers:
Brian Matthews (STFC), Bernd Scheuermann (SAP)
Tasks related to this deliverable:
Task No.
Task description
T2.1.3
Design and implementation of basic user and resource management mechanisms in Linux
T2.1.4
Design and implementation of basic application unit checkpoint/restart mechanisms
◦
∗
Partners involved◦
INRIA, STFC, CNR, SAP, ICT∗ , TID
INRIA∗ , NEC
This task list may not be equivalent to the list of partners contributing as authors to the deliverable
Task leader
D2.1.4
IST-033576
Executive Summary
This document presents a prototype of the basic version of Linux-XOS, the XtreemOS flavor for a single PC. This prototype is a first implementation of system
services described in deliverables D2.1.2 [1] and D2.1.3 [2]. Procedures to get,
install, configure, and experiment with each component of the prototype are described. Links to documentation for users and developers are also provided.
The current prototype consists of two separate parts: kernel checkpointing/restarting mechanisms and node-level VO support mechanisms.
Checkpoint/restart
In the context of XtreemOS, applications are composed of application units running on different grid nodes. An application unit is then defined as a collection
of processes under the control of one operating system instance (i.e. a grid node),
either Linux-SSI or Linux-XOS. These processes could be multithreaded.
Due to the dynamic nature of virtual organizations, an application unit running
on a grid node may need to be moved to another node during its execution. In
the same way, an application may need to restart one of its application units that
has experienced the failure of the node it was running on. Therefore Linux-XOS
should implement methods and interfaces to checkpoint and restart applications.
Current prototype of checkpoint/restart presents low level functionalities of
checkpoint/restart for a single node; this prototype is based on BLCR [3]. The next
implementation will implement the interface described in [2], and will present a
first implementation of upper layers of checkpoint/restart, i.e. grid checkpoint
layer and system checkpointer layer as described in [2].
Node-level VO support
The node-level VO support part includes a Pluggable Authentication Module (PAM)
extension, a Name Switch Service (NSS) extension, and auxiliary services/utilities. With these components, VO users are dynamically mapped into local user
accounts provided that their credentials (i.e. XOS-cert) are validated. The mapping procedure is done in standard PAM conversations with the help of an Account
Mapping Service (AMS), which is in charge of the management of runtime mapping rules. The mapping information could then be fetched via standard naming
lookup APIs (e.g. getpw*,getgr*) that are hooked by the NSS extension.
Based on these PAM/NSS extensions, the most widely used shell tool, OpenSSH,
is extended to authenticate VO users with their XOS-cert credentials.
The current prototype of node-level VO support is a proof-of-concept of extending standard Linux to treat VO users as transparently as dealing with local ac1/49
XtreemOS–Integrated Project
IST-033576
D2.1.4
counts. The next implementation will focus on the enforcement of local policies
against VO users, by incorporating new isolation and virtualization mechanisms
in Linux.
XtreemOS–Integrated Project
2/49
D2.1.4
IST-033576
Contents
1
Introduction
5
2
Kernel Checkpointer
2.1 Prerequisites . . . . . . . . . . . . .
2.2 Installation . . . . . . . . . . . . .
2.3 Tutorial/Command line tools . . . .
2.4 Checkpoint/restart API . . . . . . .
2.4.1 Initialization . . . . . . . .
2.4.2 Checkpoint parameters . . .
2.4.3 Checkpoint calls and control
2.4.4 Callback . . . . . . . . . .
2.4.5 Critical section . . . . . . .
3
Node-level VO support
11
3.1 Introduction . . . . . . . . . . . . . . . . . . . . . . . . . . . . . 11
3.2 Installation . . . . . . . . . . . . . . . . . . . . . . . . . . . . . 11
3.2.1 Prerequisites . . . . . . . . . . . . . . . . . . . . . . . . 12
3.2.2 Platform configuration . . . . . . . . . . . . . . . . . . . 12
3.2.3 Compilation and installation . . . . . . . . . . . . . . . . 12
3.3 Certificate configuration . . . . . . . . . . . . . . . . . . . . . . 14
3.3.1 Certificate authority Certificate generation . . . . . . . . . 14
3.3.2 User certificate generation . . . . . . . . . . . . . . . . . 17
3.4 PAM configuration . . . . . . . . . . . . . . . . . . . . . . . . . 20
3.4.1 Checking the pam_xos.so PAM plugin using pam_app_conv 20
3.4.2 Successfull run of pam_app_conv . . . . . . . . . . . . 21
3.5 Troubleshooting . . . . . . . . . . . . . . . . . . . . . . . . . . . 24
3.6 XOS-ssh . . . . . . . . . . . . . . . . . . . . . . . . . . . . . . . 26
3.6.1 Installation . . . . . . . . . . . . . . . . . . . . . . . . . 26
3.6.2 Configuration . . . . . . . . . . . . . . . . . . . . . . . . 27
3.6.3 Running ssh-xos . . . . . . . . . . . . . . . . . . . . . 28
4
Conclusion and Future Work
.
.
.
.
.
.
.
.
.
.
.
.
.
.
.
.
.
.
.
.
.
.
.
.
.
.
.
.
.
.
.
.
.
.
.
.
.
.
.
.
.
.
.
.
.
.
.
.
.
.
.
.
.
.
.
.
.
.
.
.
.
.
.
.
.
.
.
.
.
.
.
.
.
.
.
.
.
.
.
.
.
.
.
.
.
.
.
.
.
.
.
.
.
.
.
.
.
.
.
.
.
.
.
.
.
.
.
.
.
.
.
.
.
.
.
.
.
.
.
.
.
.
.
.
.
.
.
.
.
.
.
.
.
.
.
.
.
.
.
.
.
.
.
.
30
A Berkeley Lab Checkpoint/Restart (BLCR) Administrator’s Guide
A.1 Installing/Configuring BLCR . . . . . . . . . . . . . . . . . . . .
A.1.1 Configuring BLCR . . . . . . . . . . . . . . . . . . . . .
A.1.2 Choosing an installation directory . . . . . . . . . . . . .
A.1.3 Building against a kernel other than the one that’s running
A.1.4 Building 32-bit application support on a 64-bit platform .
3/49
5
6
6
6
7
7
7
8
10
11
32
32
32
33
33
34
XtreemOS–Integrated Project
IST-033576
A.1.5 Compiling BLCR . . . . . . . . . . . . . . . .
A.1.6 Testing your build (optional, but recommended)
A.1.7 Installing BLCR . . . . . . . . . . . . . . . .
A.1.8 Loading the Kernel Modules . . . . . . . . . .
A.1.9 Updating ld.so.cache . . . . . . . . . . . . . .
A.1.10 Configuring Users’ environments . . . . . . .
A.2 Uninstalling BLCR . . . . . . . . . . . . . . . . . . .
A.3 Making RPMs from the BLCR sources . . . . . . . . .
A.3.1 Building binary RPMs from the source tarball .
A.3.2 Building a binary RPM from source RPMS . .
A.4 For more information . . . . . . . . . . . . . . . . . .
D2.1.4
.
.
.
.
.
.
.
.
.
.
.
34
34
35
35
36
36
37
37
37
37
38
B Berkeley Lab Checkpoint/Restart (BLCR) User’s Guide
B.1 About Berkeley Lab Checkpoint/Restart . . . . . . . . . . . . . .
B.2 Checkpoint/restarting within a BLCR-aware batch control system
B.3 Checkpointing Jobs with the BLCR command-line tools . . . . .
B.3.1 Make sure BLCR is installed and loaded . . . . . . . . . .
B.3.2 Make sure your environment is set up correctly . . . . . .
B.3.3 Setting up your environment with ’modules’ . . . . . . .
B.3.4 Manually setting up your environment . . . . . . . . . . .
B.4 Checkpointing/restarting applications on a single machine . . . .
B.4.1 Types of applications supported . . . . . . . . . . . . . .
B.4.2 Making an application checkpointable . . . . . . . . . . .
B.4.3 Checkpointing the process . . . . . . . . . . . . . . . . .
B.4.4 Restarting the process . . . . . . . . . . . . . . . . . . .
B.5 Checkpointing/restarting an MPI application . . . . . . . . . . . .
B.5.1 Checkpoint/restart with LAM/MPI . . . . . . . . . . . . .
B.6 For more information . . . . . . . . . . . . . . . . . . . . . . . .
39
39
39
40
40
40
41
41
42
42
43
44
45
47
47
48
XtreemOS–Integrated Project
.
.
.
.
.
.
.
.
.
.
.
.
.
.
.
.
.
.
.
.
.
.
.
.
.
.
.
.
.
.
.
.
.
.
.
.
.
.
.
.
.
.
.
.
.
.
.
.
.
.
.
.
.
.
.
4/49
D2.1.4
1
IST-033576
Introduction
The current prototype of Linux-XOS consists of two major components: the kernel checkpoint/restart mechanisms and the node-level VO-support mechanisms.
Checkpointing in Linux-XOS is conceptually seperated in three layers: grid
checkpointer, system checkpointer and kernel checkpointer. This document mainly
describes the lower layer, the kernel checkpointer, as functionality for the system and grid checkpointer. System and grid checkpointer are being implemented
in the framework defined by the Application Execution Management work of
WP3.3. The current document presents guidelines to install and use the kernel
checkpointer functionalites. It also present the BLCR checkpoint/restart API.
The node-level VO support component described in section 3 consists of the
following modules: a PAM extension (a dynamic library pam_xos.so), a NSS
extension (a dynamic library libnss_xos.so), an Account Mapping Service
(AMS, a daemon program xos_amsd), and several utilities for testing. The
PAM extension is used to dynamically map VO user credentials into local user
accounts. The NSS extension is used for extracting user/group mapping information via standard naming lookup APIs. AMS plays a role of managing runtime
mappings which serves as the backend for PAM/NSS extensions. Based on these
components, the widely used login tool, OpenSSH, is modified to allow VO users
to interactively access a remote XtreemOS node. Section 3 details a step-by-step
procedure of installation, configuration and testing of all relevant components on
a fresh Linux environment.
2 Kernel Checkpointer
The kernel checkpoint/restart component consists of three kernel modules, an
API/library and three binaries. The library is used to implement user callbacks for
the checkpointing (as described in [2]). The binaries are the following: cr_run,
cr_checkpoint and cr_restart. They are respectively used to preload libcr and
libpthread if the application has not been linked against BLCR library, checkpoint
a tree of processes, and restart a previously checkpointed tree of processes. The
kernel modules implement the checkpointing logic: blcr.ko implements coordination between callbacks and the checkpoint of each process/thread, blcr_vmadump.ko
is used to do the underlying dump, and blcr_imports.ko is used to export unexported kernel symbols.
5/49
XtreemOS–Integrated Project
IST-033576
2.1
D2.1.4
Prerequisites
BLCR consists of three kernel modules, some user-level libraries, and several
command-line executables. No kernel patching is required.
BLCR has been engineered to work with a wide range of Linux kernels:
• Many major vendor distributions of Linux. Those tested historically have
include RedHat 7.2 through 9, SuSE 9.x and 10.0, CentOS 3.1, and Fedora
Core 2 through 4.
• Many “vanilla” Linux 2.4.x and 2.6.x kernels (from kernel.org) have also
been tested with several glibc versions (2.1.x through 2.4.x). According
to BLCR documentation, vanilla versions 2.4.0 though 2.4.34 and 2.6.0
through 2.6.22 all work (though 2.4.x support is only available for the x86
architecture).
• BLCR uses a set of autoconf-based feature tests to probe the kernels it builds
against. It is thus likely that a custom kernel based on one of the above
kernel sources will work with BLCR, provided that patches applied to the
kernel don’t invalidate assumptions BLCR has made.
BLCR uses assembly code to save some program state (most notably the CPU
registers). This means that the BLCR kernel modules are not portable across CPU
architectures "out of the box". Currently only x86 and x86_64 systems are fully
tested with BLCR. The 0.6.0 release is the first to include experimental support
for PowerPC64 and for ARM. The PowerPC port works for both 32- and 64-bit
application, but requires a 64-bit kernel at this time.
2.2
Installation
A fully documented html (BLCR_Admin_Guide.html) page is provided in the doc
directory of the BLCR tarball, and in appendix A.
2.3
Tutorial/Command line tools
A fully documented html (BLCR_User_Guide.html) page is provided in the doc
directory of the BLCR tarball and in appendix B. A description of all available
options for checkpoint/restart is available via the man pages once BLCR is installed.
XtreemOS–Integrated Project
6/49
D2.1.4
IST-033576
2.4 Checkpoint/restart API
The API described in D2.1.3 will become available with the next release. Therefore, checkpoint/restart API available is the BLCR API. The main functions of
this API are described below, see header file libcr.h for a complete description of
this API.
However, BLCR functionalities have already been enhanced with the possibility to save libraries and executable during the checkpoint. Therefore, a previously
checkpointed program can restart even if the executable and the librairies are not
available. The use of this functionality is described in 2.4.2.
2.4.1
Initialization
To begin, each thread that will make any call to the libcr must first call the following function. The only exception is for the callback threads, which run in a thread
created by libcr, and don’t need to do this call.
extern c r _ c l i e n t _ i d _ t c r _ i n i t ( void ) ;
This function returns a positive thread-scope identifier on success, and a negative value if failure.
2.4.2
Checkpoint parameters
Checkpoints can be parameterised using the following structure:
typedef struct cr_checkpoint_args {
cr_version_t cr_version ;
cr_scope_t
cr_scope ;
pid_t
cr_target ;
int
cr_fd ;
int
cr_signal ;
unsigned i n t c r _ t i m e o u t ;
u n s i g n e d i n t vmadump_flags ;
unsigned i n t c r _ f l a g s ;
} cr_checkpoint_args_t ;
Before being filled by user values, this structure must be initialized via a call
to the following function :
void c r i _ i n i t i a l i z e _ c h e c k p o i n t _ a r g s _ t (
cr_checkpoint_args_t ∗ value ) ;
7/49
XtreemOS–Integrated Project
IST-033576
D2.1.4
Once done, user can specify values for the following fields of this structure in
order to tailor the checkpoint to his need :
• cr_scope: CR_SCOPE_PROC to checkpoint a process, CR_SCOPE_TREE
for a process tree, CR_SCOPE_PGRP for a process group (as defined by
POSIX, which typically means a command pipeline launched by a shell)
and CR_SCOPE_SESS for a session (which typically means a login shell
and all its descendants or a batch job).
• cr_target: Pid of the process that we want to checkpoint.
• cr_fd: An open file descriptor where the generated checkpoint file will be
written.
• cr_signal: Signal that will be sent to the checkpointed process at the end of
the checkpoint.
• cr_timeout: Maximum time allocated to process the checkpoint.
• vmadump_flags: VMAD_DUMP_EXEC to save executables, VMA_DUMP_PRIVATE
to save private mappings, VMAD_DUMP_SHARED to save shared mappings and VMAD_DUMP_ALL to do a full dump. VMAD_DUMP_EXEC
should be used to save the executable in the context file, and VMA_DUMP_PRIVATE
& VMAD_DUMP_SHARED for the libraries.
• cr_flags: Unused in this version.
2.4.3
Checkpoint calls and control
Once the cr_checkpoint_args_t is initialized, a call to the following function should
be done to trigger a checkpoint :
int c r _ r e q u e s t _ c h e c k p o i n t ( c r _ c h e c k p o i n t _ a r g s _ t ∗ args ,
cr_checkpoint_handle_t ∗ handle ) ;
args is here the previous described checkpoint structure option, and handle is
an opaque output argument that is used by the cr_poll_checkpoint function described below.
Return value :
• 0: The checkpoint has been successfully requested.
• <0: an error occurred, typical error can be:
XtreemOS–Integrated Project
8/49
D2.1.4
IST-033576
• EPERM: One or more of the target processes are not checkpointable
by the current user
• EBADF : The destination (args->cr_fd) is not a valid.
• EINVAL: Some field of the args argument is invalid.
• ...
Check errno-base.h for more details.
As the cr_request_checkpoint system call is not a blocking call, a cr_poll_checkpoint
is provided to allow user to check or block for completion.
i n t c r _ p o l l _ c h e c k p o i n t ( c r _ c h e c k p o i n t _ h a n d l e _ t ∗ handle ,
struct timeval ∗ timeout ) ;
Return values of this function are the following :
• >0: checkpoint complete
• 0: it’s not done yet and the timeout (if any) has expired
• <0: an error occurred. Returned values are:
• CR_POLL_CHKPT_ERR_PRE: An error was encountered prior to
completion of the poll/wait operation. Most likely errno values in this
case are:
• EINVAL: No checkpoint request associagted with the given handle. This is the EXPECTED value if the caller is included in the
scope of the checkpoint request and is restarting.
• EINTR: Call was interrupted by a signal.
• CR_POLL_CHKPT_ERR_POST: The negative return value CR_POLL_CHKPT_ERR_POST
indicates that the checkpoint request is completed, but has failed. Most
likely errno values in this case are:
• CR_ENOSUPPORT: One or more of the target processes are not
linked (or LD_PRELOADed) with libcr.
• CR_ETEMPFAIL: One or more of the target processes indicated
a temporary inability to perform the requested checkpoint.
• CR_EPERMFAIL: One or more of the target processes indicated
a permanent inability to perform the requested checkpoint.
• ESRCH: All target processes indicated that they should be omitted from the checkpoint.
9/49
XtreemOS–Integrated Project
IST-033576
D2.1.4
• EIO: Problem writing the checkpoint output.
• ENOSPC: Out of space on filesystem while writing the checkpoint
2.4.4
Callback
If the user wants some specific logic to be executed before the dump, BLCR provides a way to register user-level callback function triggered whenever a checkpoint is about to occur, and which continue when a restart is initiated. Callbacks
are designed to be written in the following style :
void my_callback ( void ∗ d a t a _ p t r )
{
s t r u c t my_data ∗ p d a t a = ( s t r u c t my_data ∗ )
data_ptr ;
/ / do c h e c k p o i n t −t i m e s h u t d o w n l o g i c
/ / t e l l s y s t e m t o do t h e c h e c k p o i n t
did_restart =cr_checkpoint () ;
if ( did_restart )
/ / we ’ v e b e e n r e s t a r t e d f r o m a
checkpoint
else
/ / we ’ r e c o n t i n u i n g a f t e r t h e
checkpoint
}
Following function must be used to register a callback :
c r _ r e g i s t e r _ c a l l b a c k ( c r _ c a l l b a c k _ t func , void ∗ arg ,
int flags ) ;
Arguments are the following :
• func: pointer to a function taking a void* as its argument and returning an
int (it’s the callback function)
• arg: pointer which will be passed as argument to the callback when it will
be invoked
XtreemOS–Integrated Project
10/49
D2.1.4
IST-033576
• flags: used to specify whether the callback should be executed in a thread
context (CR_THREAD_CONTEXT) or in a signal context (CR_SIGNAL_CONTEXT).
All thread-based callbacks are runned before signal-based callbacks
2.4.5
Critical section
BLCR provides user-level code with “critical sections” in order to allow groups
of instructions to be performed atomically with respect to checkpoints.
cr_enter_cs ( c r _ c l i e n t _ i d _ t id ) ;
cr_leave_cs ( c r _ c l i e n t _ i d _ t id ) ;
BLCR designed critical sections mechanisms so that a function can enter a
critical section and return without freeing it, so long as a matching cr_leave_cs
function is called later.
There are two cases where critical sections can be used :
• In the application context: in this case, this function ensures that if a checkpoint occurred during the execution of the critical section, the checkpoint
will be deferred. If a checkpoint is already in progress, this call may block.
Before using the critical sections mechanisms, each concerned thread must
have made a call to the cr_init function.
• In a callback context: a same function could be used in a thread callback
context and in the application. Nevertheless, there is no sense to do a critical section in a callback context. Therefore, in this case the ’id’ must be
the value CR_ID_CALLBACK, and in this case, this routine will returns
immediately.
3
Node-level VO support
3.1 Introduction
The XtreemOS D2.1.4 prototype was validated on two platforms: a laptop and a
PC. The laptop is a Dell D620 laptop running an OpenVZ virtual machine (container). This virtual machine runs a Debian Etch Linux distribution. The PC is a
Pentium III running Debian GNU/Linux 4.0 (Etch).
3.2 Installation
The current release of the XtreemOS NSS/PAM modules is version 0.04, packaged in file xtreemos-nss-pam-0.04.tar.gz of xos-nss-pam-0.0411/49
XtreemOS–Integrated Project
IST-033576
D2.1.4
.tar.gz, which can be downloaded from https://gforge.inria.fr/frs/download.php/3648/xos-nss-pam-0.04.tar.gz.
3.2.1
Prerequisites
The following Linux package must be present in order to install the XtreemOS
NSS/PAM modules:
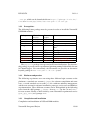
Package
automake
autoconf
libtool
doxygen
Minimal
version
>= 1.9
>= 2.59
>= 1.5.6
libc6-dev
libpam
libdb headers >= 4.3
keyutils
>= 1.1
libkeyutils-dev
libssl-dev
Current
version
1.10
2.61
1.5.22
1.5.1-1
2.3.6
0.79-4
4.4.20
1.2-3
1.2-3
0.9.8c-4
Comments
to generate documentation
files
development headers
development headers
development headers
SSL development libraries
The keyutils package is not present in all Linux distributions. For instance,
this package is present on our experimental platform running Debian Etch, but not
in Ubuntu Dapper. For conveniently, the XtreemOS svn provides an alternative
keyutils package in xos-nss-pam-0.04.tar.gz,too.
3.2.2
Platform configuration
The following experiments were run using three different login accounts on the
platforms: a standard user account (yjegou) for software compilation and some
tests, a second standard user account (ca) for certificate authority management,
and the root account for software installation, prototype service runs and PAM test
experimentations. These different accounts can be distinguished in the following
traces from the shell prompts: yjegou: for user, ca: for the CA and root:
for root account. Finally, a shell started by some XtreemOS experimental service
(pam_app_conv) uses prompt XXX:
3.2.3
Compilation and installation
Compilation and installation of NSS and PAM modules.
XtreemOS–Integrated Project
12/49
D2.1.4
IST-033576
yjegou: tar xzvf xtreemos-nss-pam-0.04.tar.gz
yjegou: ls -F
xtreemos-nss-pam-0.04/
xtreemos-nss-pam-0.04.tar.gz
yjegou: cd xtreemos-nss-pam-0.04/
yjegou: ./configure
...
yjegou: make
...
yjegou: sudo make install
...
The install step stores NSS modules in /lib/libnss_xos.so, PAM
modules in /usr/local/lib/pam_xos.so and some configuration files in
/etc/xos. The binaries are installed in directory /usr/local/bin.
Compilation and installation of test programs.
yjegou: cd src/test
yjegou: pwd
/home/yjegou/xtreemos-nss-pam-0.04/src/test
yjegou: make
...
To enable the translation of XtreemOS identities, the NSS switch module must
be configured: the passwd and group items of file /etc/nsswitch.conf
must contain a reference to the xos module:
root: cat /etc/nsswitch.conf
# /etc/nsswitch.conf
passwd:
compat xos
group:
compat xos
shadow:
compat
hosts:
networks:
files dns
files
protocols:
services:
ethers:
rpc:
db
db
db
db
netgroup:
root:
nis
files
files
files
files
The PAM configuration file of each PAM-aware code must be updated in order
to enable the XtreemOS authentication and session management. For instance, a
13/49
XtreemOS–Integrated Project
IST-033576
D2.1.4
reference to the pam_xos module can be added to the /etc/pam.d/su configuration file of su in order to add xos authentication capability to the su command:
root: cat /etc/pam.d/su
#%PAM-1.0
...
auth
sufficient
...
root:
/usr/local/lib/pam_xos.so
For this validation, only the two experimental codes delivered with this prototype, pam_app_conv and ssh-xos, will be configured to use XtreemOS.
The behaviour of this first prototype can also be configured in the /etc/xos
directory:
pam_xos.conf - to configure the PAM module
nss_xos.conf - to configure the NSS modules
amappedfile
gmappedfile
policy
- to define the mapping rules of account mapping
- to define the mapping rules of group mapping
- to define the default policy
3.3 Certificate configuration
In order to test the NSS and PAM modules, we need a valid user proxy generated
from a valid user certificate. The XtreemOS svn provides sample globus-based
certificates (in user_cert.tar.gz and ca_cert.tar.gz). The following
steps show how to create a valid local certification authority, how the user generates a certificate request, how the local certification authority signs this certificate
and, finally, the creation of a proxy with the necessary attributes.
3.3.1
Certificate authority Certificate generation
Self-signed certificate generation for XtreemOS-Yvon certificate authority:
ca: openssl req -new -x509 -days 1095
-keyout security/private/XtreemOS-ca.key
-out security/XtreemOS-ca.crt
Generating a 1024 bit RSA private key
..............................++++++
......................................................++++++
writing new private key to
’security/private/XtreemOS-ca.key’
Enter PEM pass phrase:
Verifying - Enter PEM pass phrase:
XtreemOS–Integrated Project
14/49
D2.1.4
IST-033576
----You are about to be asked to enter information that will be
incorporated into your certificate request.
What you are about to enter is what is called a Distinguished
Name or a DN.
There are quite a few fields but you can leave some blank
For some fields there will be a default value,
If you enter ’.’, the field will be left blank.
----Country Name (2 letter code) [AU]:EU
State or Province Name (full name) [Some-State]:France
Locality Name (eg, city) []:Rennes
Organization Name (eg, company) [Internet Widgits Pty Ltd]:INRIA
Organizational Unit Name (eg, section) []:IRISA
Common Name (eg, YOUR name) []:XtreemOS-test-CA
Email Address []:[email protected]
ca:
These steps generate a key pair for XtreemOS-test-CA certificate authority.
The public key is stored in local file security/XtreemOS-ca.crt and the
private key in file security/private/XtreemOS-ca.key.
Check CA public key:
ca: openssl x509 -text -in security/XtreemOS-ca.crt -noout
Certificate:
Data:
Version: 3 (0x2)
Serial Number:
96:87:93:b3:bf:7c:49:49
Signature Algorithm: sha1WithRSAEncryption
Issuer: C=EU, ST=France, L=Rennes, O=INRIA, OU=IRISA, CN
=XtreemOS-test-CA/[email protected]
Validity
Not Before: Nov 12 14:24:45 2007 GMT
Not After : Nov 11 14:24:45 2010 GMT
Subject: C=EU, ST=France, L=Rennes, O=INRIA, OU=IRISA, C
N=XtreemOS-test-CA/[email protected]
Subject Public Key Info:
Public Key Algorithm: rsaEncryption
RSA Public Key: (1024 bit)
Modulus (1024 bit):
00:b2:50:8b:28:5f:08:e3:ab:7e:ef:08:f8:72:a8:
...
f3:c5:dd:23:a1:06:a7:78:39
Exponent: 65537 (0x10001)
X509v3 extensions:
X509v3 Subject Key Identifier:
15/49
XtreemOS–Integrated Project
IST-033576
D2.1.4
4E:7B:C5:84:07:26:B3:2E:51:06:5C:2A:CE:DC:53:11:
FB:20:A1:62
X509v3 Authority Key Identifier:
keyid:4E:7B:C5:84:07:26:B3:2E:51:06:5C:2A:CE:DC:
53:11:FB:20:A1:62
DirName:/C=EU/ST=France/L=Rennes/O=INRIA/OU=IRIS
A/CN=XtreemOS-test-CA/[email protected]
serial:96:87:93:B3:BF:7C:49:49
X509v3 Basic Constraints:
CA:TRUE
Signature Algorithm: sha1WithRSAEncryption
2d:c6:ad:97:1d:22:c0:8e:3c:f1:97:6a:a4:7a:64:34:f4:0e:
...
This CA certificate is valid for 3 years, until Nov 11 14:24:45 2010.
Public key hash generation: When the SSL library checks the signature of
some certificate, it must locate the public key of the Certificate Authority who
signed the certificate. In order to locate this public key, the SSL library first compute a hash of the CA DN stored in the user certificate and uses this hash code
to browse the CA public key directory. The default CA public key directory in
XtreemOS is /etc/xos/certificates/. The CA public key hash can be
installed in the following way:
root: openssl x509 -in ~ca/security/XtreemOS-ca.crt
-noout -hash
076bb57f
root: cp ~ca/security/XtreemOS-ca.crt
/etc/xos/certificates/076bb57f.0
root:
Note the .0 suffix which must be added to the hash. A different suffix can be
used if a different certificate with the same hash is present.
The CA public key directory must contain files corresponding to the hash of
all DN of the CA chain containing the corresponding CA public keys:
root: ls -al /etc/xos/certificates
....
-rw-r--r-- 1 root root 1302 2007-11-12 15:34 076bb57f.0
....
root:
In this example, file 076bb57f.0 contains the XtreemOS-test-CA public
key.
XtreemOS–Integrated Project
16/49
D2.1.4
3.3.2
IST-033576
User certificate generation
Generate a user certificate request:
yjegou: openssl req -new -days 365
-keyout security/private/XtreemOS-Yvon-key.pem
-out security/XtreemOS-Yvon-req.pem
Generating a 1024 bit RSA private key
.....................................++++++
.....++++++
writing new private key to ’security/private/XtreemOS-Yvon-key.p
em’
Enter PEM pass phrase:
Verifying - Enter PEM pass phrase:
----You are about to be asked to enter information that will be
incorporated into your certificate request.
What you are about to enter is what is called a Distinguished
Name or a DN.
There are quite a few fields but you can leave some blank
For some fields there will be a default value,
If you enter ’.’, the field will be left blank.
----Country Name (2 letter code) [AU]:FR
State or Province Name (full name) [Some-State]:Bretagne
Locality Name (eg, city) []:Rennes
Organization Name (eg, company) [Internet Widgits Pty Ltd]:INRIA
Organizational Unit Name (eg, section) []:IRISA
Common Name (eg, YOUR name) []:Yvon Jegou
Email Address []:Yvon.Jegou-at-irisa.fr
Please enter the following ’extra’ attributes
to be sent with your certificate request
A challenge password []:XtreemOS
An optional company name []:
yjegou:
This openssl request generates a certificate request for user Yvon Jegou1 .
Sign the certificate public key using the CA private key:
ca: openssl x509 -req
-in ~yjegou/security/XtreemOS-Yvon-req.pem
-out /tmp/XtreemOS-Yvon-cert.pem
-CA security/XtreemOS-ca.crt
1
Note: due to a bug in this release of xtreemos-nss-pam-0.04 the certificate DN section
should not contain any @ character, especially in the Email Address field.
17/49
XtreemOS–Integrated Project
IST-033576
D2.1.4
-CAkey security/private/XtreemOS-ca.key
-CAcreateserial -days 365
Signature ok
subject=/C=FR/ST=Bretagne/L=Rennes/O=INRIA/OU=IRISA/CN=Yvon Jego
u/emailAddress=Yvon.Jegou-at-irisa.fr
Getting CA Private Key
Enter pass phrase for security/XtreemOS-ca/private/XtreemOS-Yvon
.key:
ca:
Note 1: for these experiments, the user account and the CA account are located
on the same computer: the CA can read the user certificate directly in the user
home directory and leave the signed certificate in the /tmp directory where the
user can retrieve it. In a real setting, some trusted procedure must be used for
user/CA communications.
The Certificate authority returns the signed certificate to the user: The user
copies the certificate stored in file /tmp/XtreemOS-Yvon-cert.pem to his
home directory.
yjegou: cp /tmp/XtreemOS-Yvon-cert.pem
security/XtreemOS-Yvon-cert.pem
yjegou:
The resulting certificate is valid for one year (365 days).
User certificate:
yjegou: openssl x509 -text
-in security/XtreemOS-Yvon-cert.pem -noout
Certificate:
Data:
Version: 1 (0x0)
Serial Number:
f8:42:20:2b:e7:1d:00:88
Signature Algorithm: sha1WithRSAEncryption
Issuer: C=EU, ST=France, L=Rennes, O=INRIA, OU=IRISA, CN
=XtreemOS-test-CA/[email protected]
Validity
Not Before: Nov 12 15:16:04 2007 GMT
Not After : Nov 11 15:16:04 2008 GMT
Subject: C=FR, ST=Bretagne, L=Rennes, O=INRIA, OU=IRISA,
CN=Yvon Jegou/emailAddress=Yvon.Jegou-at-irisa.fr
Subject Public Key Info:
Public Key Algorithm: rsaEncryption
RSA Public Key: (1024 bit)
XtreemOS–Integrated Project
18/49
D2.1.4
IST-033576
Modulus (1024 bit):
00:c7:12:4a:60:2d:62:bb:a2:0c:1a:f9:52:30:d6:
31:78:52:df:fe:15:4c:4f:55:5d:81:d8:fa:c3:41:
f9:14:e2:51:e9:33:80:d1:e4:c2:60:d6:4d:37:6d:
4b:a3:6f:fb:35:77:bf:11:de:ea:b8:bf:b6:96:1e:
ca:ae:38:11:17:01:e9:da:99:01:aa:51:65:af:e0:
01:60:85:20:a5:05:d9:54:a8:2d:91:99:72:69:a8:
e5:ae:f8:e6:38:64:b2:9f:6f:97:a4:4d:5f:df:eb:
76:df:de:2e:6c:8f:9e:dc:b9:cd:3e:50:70:ba:b2:
88:8a:47:b5:ce:9b:ce:cd:db
Exponent: 65537 (0x10001)
Signature Algorithm: sha1WithRSAEncryption
93:12:cf:ac:53:0f:a4:6d:01:af:63:a2:4c:0f:45:fc:80:1a:
0f:64:71:eb:38:0f:68:42:4a:5d:3f:b6:96:cb:f7:a1:6d:d9:
0b:f6:f9:1a:73:68:c9:ba:aa:1e:30:51:45:8e:0a:ae:b6:2c:
b4:1d:a6:5b:30:30:ce:7a:05:61:ee:75:ca:e3:a2:ef:4b:f0:
ca:5c:19:71:64:63:bf:ae:8b:15:87:1f:a1:30:d8:0b:a7:ca:
51:a8:29:af:7f:c1:38:6e:b2:c1:54:68:29:4f:18:03:b0:b0:
df:80:92:a7:dd:b7:59:61:31:68:1f:69:fc:d3:02:12:bf:74:
9d:c6
yjegou:
Generate proxy certificate and add attributes: In this first prototype, XtreemOS does not directly use the user certificate. For security issues mainly, the user
must first generate a proxy certificate with a short time-to-live (one day in our
experiment) and without password protection (so that the user needs not type a
password each time the proxy is checked). The test_cert utility provided in
this package can be used for proxy operations in XtreemOS.
yjegou: ./xtreemos-nss-pam-0.04/src/test/test_cert
1.create proxy
2.delegate proxy
3.Set attributes in proxy
4.Fetch attributes from proxy
5.Get expire time
cmd --> 1
---- 1. create proxy ----Input cert: security/XtreemOS-Yvon-cert.pem
Input key: security/XtreemOS-Yvon-key.pem
Input proxy: .xos/firstproxy.pem
SUBJECT=/C=FR/ST=Bretagne/L=Rennes/O=INRIA/OU=IRISA/CN=Yvon Jego
u/emailAddress=Yvon.Jegou-at-irisa.fr
Generating a 1024 bit RSA private key
.......................................++++++
............................++++++
writing new private key to ’security/XtreemOS-Yvon-cert.pem.key’
-----
19/49
XtreemOS–Integrated Project
IST-033576
D2.1.4
Signature ok
subject=/C=FR/ST=Bretagne/L=Rennes/O=INRIA/OU=IRISA/CN=Yvon Jego
u/emailAddress=Yvon.Jegou-at-irisa.fr/CN=28216
Getting CA Private Key
Enter pass phrase for security/XtreemOS-Yvon/Yvon-key.pem:
success in creating proxy
cmd --> 3
---- 3. Set attributes in proxy ----Input proxy: .xos/firstproxy.pem
Input attributes: /VO=xtreemos/ROLE=admin
Generating RSA private key, 512 bit long modulus
..........++++++++++++
.++++++++++++
success to set proxy
cmd --> 0
yjegou:
In this prototype, the user adds attributes to his proxy certificate. This procedure is insecure as these attributes can be used as credentials when evaluating
policies. In the final version, attributes will be managed by the certificate distribution authority (CDA), and the certificate validation process should check that no
extra attribute can be added.
3.4
3.4.1
PAM configuration
Checking the pam_xos.so PAM plugin using pam_app_conv
The pam_app_conv utility, when run as root, logs a user in an XtreemOS box
using his proxy certificate.
pam_app_conv configuration file: The pam_app_conv configuration file
located in the /etc/pam.d/ should contain the following references to the
pam_xos plugin.
root: cat /etc/pam.d/pam_app_conv
auth
sufficient
/usr/local/lib/pam_xos.so -d
account sufficient
/usr/local/lib/pam_xos.so -d
session sufficient
/usr/local/lib/pam_xos.so -d
root:
The “-d” option to pam_xos.so enables tracing of the plugin during the
tests.
XtreemOS–Integrated Project
20/49
D2.1.4
IST-033576
pam_xos.conf configuration file: The certificate verification chain for pam_xos.so PAM plugin is configured in file /etc/xos/pam_xos.conf, item
VOCAPublicKeyfile. By default, this item defines /etc/xos/certificates/ as the CA public key directory.
root: cat /etc/xos/pam_xos.conf
...
#VOACConf
/etc/xos/mapdata/quota.conf
VOCAPublicKeyfile
/etc/xos/certificates/
#NodePrivateKeyfile
/tmp/userkey.pem
root:
Starting amsd: The amsd service of XtreemOS is in charge of managing the
translation between local numeric user/group IDs and global identities.
root: ./xtreemos-nss-pam-0.04/src/test/xos_amsd -d
xos_amsd starting ...
OK
root:
The xos_amsd service must be run as root in this prototype.
3.4.2
Successfull run of pam_app_conv
Once everything is configured correctly, running the pam_app_conv test program as root should produce the following result:
root: xtreemos-nss-pam-0.04/src/test/pam_app_conv
-pem ~yjegou/.xos/firstproxy.pem
vo = [xtreemos], role = [admin]
pam_xos.c:96: PAM:xos_paraparse: Debug mode
pam_xos.c:119: PAM: configure file is: /etc/xos/pam_xos.conf
=============== PAM configure data ===============
work mode:
Use external AMS
-- External AMS server:
localhost
-- External AMS port:
8000
VO CA dir: /home/yjegou/security/XtreemOS-ca
==================================================
pam_xos.c:329: PAM:current uid is: 0
Verifying certificates ... OK
pam_xos.c:382: PAM:DN = [/C=FR/ST=Bretagne/L=Rennes/O=INRIA/OU=I
RISA/CN=Yvon Jegou/emailAddress=Yvon.Jegou-at-irisa.fr/CN=28216/
CN=10098738018704381327]
pam_xos.c:397: PAM: Get Attrs = [/VO=xtreemos/ROLE=admin]
pam_xos.c:96: PAM:xos_paraparse: Debug mode
21/49
XtreemOS–Integrated Project
IST-033576
D2.1.4
pam_xos.c:119: PAM: configure file is: /etc/xos/pam_xos.conf
=============== PAM configure data ===============
work mode:
Use external AMS
-- External AMS server:
localhost
-- External AMS port:
8000
VO CA dir: /etc/xos/certificates/
==================================================
pam_xos.c:594: PAM:Get information,dn->[/C=FR/ST=Bretagne/L=Renn
es/O=INRIA/OU=IRISA/CN=Yvon Jegou/emailAddress=Yvon.Jegou-at-iri
sa.fr/CN=28216/CN=10098738018704381327],attrs->[/VO=xtreemos/ROL
E=admin]
pam_xos.c:606: PAM: parse attributes,vo = [xtreemos], role = [ad
min]
pam_xos.c:618: PAM:finish mapping ....
pam_xos.c:646: PAM:finish policy setup ...
pam_xos.c:96: PAM:xos_paraparse: Debug mode
pam_xos.c:119: PAM: configure file is: /etc/xos/pam_xos.conf
=============== PAM configure data ===============
work mode:
Use external AMS
-- External AMS server:
localhost
-- External AMS port:
8000
VO CA dir: /etc/xos/certificates/
==================================================
pam_xos.c:718: PAM:enforced user is: [xosuser_u56648]
xos_plymgt.c:190: PAM:xospm_quotalimit: processing hard cpu 1000
for USER
xos_plymgt.c:190: PAM:xospm_quotalimit: processing hard mem 1024
for USER
xos_plymgt.c:190: PAM:xospm_quotalimit: processing hard disk 102
4 for USER
xos_plymgt.c:242: PAM:No support limit item ’disk’ currently
XXX:
Now, the user should be logged in with a global user identity:
XXX: whoami
/C=FR/ST=Bretagne/L=Rennes/O=INRIA/OU=IRISA/CN=Yvon Jegou/emailA
ddress=Yvon.Jegou-at-irisa.fr/CN=28216/CN=10098738018704381327
XXX: pwd
/tmp
XXX: ls -a
. .. .ICE-unix .X11-unix
XXX: touch afile
XXX: ls -al
total 16
XtreemOS–Integrated Project
22/49
D2.1.4
IST-033576
drwxrwxrwt 4 root root
4096 Oct 31 09:31 .
drwxr-xr-x 20 root root
4096 Oct 31 08:24 ..
drwxrwxrwt 2 root root
4096 Oct 31 08:24 .ICE-unix
drwxrwxrwt 2 root root
4096 Oct 31 08:24 .X11-unix
-rw-r--r-- 1 /C=FR/ST=Bretagne/L=Rennes/O=INRIA/OU=IRISA/CN=Yvo
n Jegou/emailAddress=Yvon.Jegou-at-irisa.fr/CN=28216/CN=10098738
018704381327 xos_admin
0 Oct 31 09:31 afile
XXX: env
TERM=xterm
SHELL=/bin/bash
SSH_CLIENT=131.254.13.110 53236 22
SSH_TTY=/dev/pts/1
USER=root
LS_COLORS=no=00:fi=00:di=01;34:ln=01;36:pi=40;33:so=01;...
MAIL=/var/mail/root
PATH=/usr/local/sbin:/usr/local/bin:/usr/sbin:/usr/bin:/sbin:/bi
n:/usr/bin/X11
PWD=/tmp
LANG=en_US.UTF-8
PS1=
h:
w
$
HISTCONTROL=ignoredups
SHLVL=3
HOME=/root
XOS_ENV=/C=FR/ST=Bretagne/L=Rennes/O=INRIA/OU=IRISA/CN=Yvon Jego
u/emailAddress=Yvon.Jegou-at-irisa.fr/CN=28216/CN=10098738018704
381327@xtreemos@admin
LOGNAME=root
SSH_CONNECTION=131.254.13.110 53236 131.254.154.30 22
LESSOPEN=| /usr/bin/lesspipe %s
DISPLAY=localhost:11.0
LESSCLOSE=/usr/bin/lesspipe %s %s
_=/usr/bin/env
XXX:
Note: the current implementation of pam_xos extracts the DN field of the user
proxy certificate and uses this string as user name. However, using the DN as user
name may introduce some problems with legacy codes: it is in general too long
(user names are in general limited to 32 characters in typical Linux distributions,
strict POSIX conformance limits user and group names to 8 characters), a DN
contains non alphanumerical characters (/ for instance) which can conflict with
other usages. It is possible to modify this behaviour of pam_xos in the future.
Now, exit from this login:
XXX: exit
exit
pam_xos.c:96: PAM:xos_paraparse: Debug mode
23/49
XtreemOS–Integrated Project
IST-033576
D2.1.4
pam_xos.c:119: PAM: configure file is: /etc/xos/pam_xos.conf
=============== PAM configure data ===============
work mode:
Use external AMS
-- External AMS server:
localhost
-- External AMS port:
8000
VO CA dir: /home/yjegou/security/XtreemOS-ca
==================================================
pam_xos.c:784: PAM:Get attrs->[/VO=xtreemos/ROLE=admin]
pam_xos.c:791: PAM:role = [admin]
pam_xos.c:809: PAM:finish policy clear ...
root:
3.5
Troubleshooting
error while loading shared libraries: libxos_common.s
o.0: cannot open shared object file: No such file or
directory XtreemOS client codes use the libxos_common.so dynamic
library. If you get this error when running xtreemos-nss-pam-0.04/src/test/test_cert, the directory containing libxos_common.so must either be added to environment variable LD_LIBRARY_PATH or to the configuration file of ldconfig (see ldconfig man page).
yjegou: ./xtreemos-nss-pam-0.04/src/test/test_cert
./xtreemos-nss-pam-0.04/src/test/test_cert: error while loading
shared libraries: libxos_common.so.0: cannot open shared object
file: No such file or directory
yjegou: LD_LIBRARY_PATH=/usr/local/lib/; export LD_LIBRARY_PATH
yjegou: ./xtreemos-nss-pam-0.04/src/test/test_cert
1.create proxy
2.delegate proxy
3.Set attributes in proxy
4.Fetch attributes from proxy
5.Get expire time
cmd --> 0
yjegou:
ERROR: Verifying certificate chain: unable to get lo
cal issuer certificate The certificate verification chain must be configured correctly in order for the XtreemOS software to check the validity of certificate against the root certificate authority. If you get the following error when
running the pam_app_conv test application, the certificate verification chain is
broken.
XtreemOS–Integrated Project
24/49
D2.1.4
IST-033576
root: ./xtreemos-nss-pam-0.04/src/test/pam_app_conv
-pem ~yjegou/.xos/firstproxy.pem
vo = [xtreemos], role = [admin]
pam_xos.c:239: PAM:pam_sm_authenticate: uid = 0, user = [root]
ERROR: Verifying certificate chain: unable to get local issuer
certificate
xos_keyring_revoke: No content in keyring
pam_xos.c:488: PAM: ...: Can not revoke the key
Oops: Permission denied
root:
When SSL checks the signature of some certificate, it first extracts the DN
of the CA who signed the certificate, computes a hash of this DN and then locates the CA certificate in the CA public key directory using this hash. The
certificate verification chain for pam_xos.so PAM plugin is configured in file
/etc/xos/pam_xos.conf, item VOCAPublicKeyfile. By default, this
item defines /etc/xos/certificates/ as the CA public key directory. If
the CA certificates (named using their hash) have been stored in some other directory, the VOCAPublicKeyfile of /etc/xos/pam_xos.conf must be
updated.
root: cat /etc/xos/pam_xos.conf
...
#VOACConf
/etc/xos/mapdata/quota.conf
VOCAPublicKeyfile
/etc/xos/certificates/
#NodePrivateKeyfile
/tmp/userkey.pem
Each file of the CA public key directory must be named from its DN hash.
root: ls -al /etc/xos/certificates/
....
-rw-r--r-- 1 root root 1302 2007-11-12 15:34 076bb57f.0
....
yjegou:
In this example, the file named by hash 076bb57f.0 contains the public key of CA Subject: C=EU, ST=France, L=Rennes, O=INRIA,
OU=IRISA, CN=XtreemOS-test-CA/[email protected].
25/49
XtreemOS–Integrated Project
IST-033576
D2.1.4
pam_xos.c:613: PAM:fail in mapping connect Oops: Per
mission denied If the pam_app_conv test program produces this error,
the amsd service is not running (as root) or is mis-configured.
root: ./xtreemos-nss-pam-0.04/src/test/pam_app_conv
-pem ~yjegou/.xos/firstproxy.pem
vo = [xtreemos], role = [admin]
pam_xos.c:239: PAM:pam_sm_authenticate: uid = 0, user = [root]
Verifying certificates ... OK
pam_xos.c:568: PAM:pam_sm_acct_mgmt: uid = 0, user = [root]
pam_xos.c:613: PAM:fail in mapping connect
Oops: Permission denied
root:
root: ./xtreemos-nss-pam-0.04/src/test/xos_amsd -d
xos_amsd starting ...
OK
root:
3.6
XOS-ssh
XOS-ssh integrates XtreemOS-based authentication to standard ssh. XOS-ssh
extends the list of authentication methods of ssh. Also XOS-ssh and standard
ssh remain compatible, the current installation of XOS-ssh prototype is completely independent from standard ssh installation: XOS-ssh uses different configuration files, different PAM configuration and a different port for the servers.
The latest version of XOS-ssh tested in this deliverable is xos-openssh-0.04.tar.gz, downloading from https://gforge.inria.fr/frs/download.php/3649/xos-openssh-0.04.tar.gz.
3.6.1
Installation
First, get the latest version of xos-openssh from the XtreemOS svn.
yjegou:
yjegou:
yjegou:
yjegou:
yjegou:
yjegou:
tar xzvf xos-openssh-0.04.tar.gz
cd xos-openssh
./configure --with-pam
make
sudo make install
Two new execuables, ssh-xos and sshd-xos, will be created and installed
in /usr/local/bin/ and /usr/local/sbin/. They adopt 2222 as port
and /usr/local/etc/ssh(d)_config-xos as their configuration file.
XtreemOS–Integrated Project
26/49
D2.1.4
3.6.2
IST-033576
Configuration
PAM: XOS-ssh is a PAM-aware operating system service. This service reads
its PAM configuration from file /etc/pam.d/sshd-xos. This file must contain the following items:
root: cat /etc/pam.d/sshd-xos
...
auth
sufficient
/usr/local/lib/pam_xos.so
account sufficient
/usr/local/lib/pam_xos.so
session sufficient
/usr/local/lib/pam_xos.so
...
root:
Ssh-xos: The default configuration file for ssh-xos is /usr/local/etc/ssh_config-xos. This file must contain the following items in order to allow
XtreemOS-based authentication and to define the default user proxy pathname:
root: cat /usr/local/etc/ssh_config-xos
...
XosAuthentication yes
XosProxyFile
~/.xos/userproxy.pem
...
A user can redefine the proxy location if it does not correspond to the default
location (field XosProxyFile of file /usr/local/etc/ssh_config-xos). For instance:
yjegou: cat .ssh/config
...
XosProxyFile
/home/yjegou/.xos/firstproxy.pem
...
yjegou:
xos-ssh uses the same user configuration directory (˜/.ssh)and user configuration file (˜/.ssh/config) as standard ssh.
Xos-sshd: The default configuration file for the daemon xos-sshd is /usr/local/etc/sshd_config-xos. This file must contain the following items
in order to allow PAM-based authentication in xos-sshd:
root: cat /usr/local/etc/sshd_config-xos
...
UsePAM
yes
...
27/49
XtreemOS–Integrated Project
IST-033576
3.6.3
D2.1.4
Running ssh-xos
Start sshd-xos service:
root: /usr/local/sbin/sshd-xos -d -f /usr/local/etc/sshd_configxos
debug1: sshd version XOS-OpenSSH_4.5p1
debug1: private host key: #0 type 0 RSA1
debug1: read PEM private key done: type RSA
debug1: private host key: #1 type 1 RSA
debug1: read PEM private key done: type DSA
debug1: private host key: #2 type 2 DSA
debug1: rexec_argv[0]=’/usr/local/sbin/sshd-xos’
debug1: rexec_argv[1]=’-d’
debug1: rexec_argv[2]=’-f’
debug1: rexec_argv[3]=’/usr/local/etc/sshd_config-xos’
debug1: Bind to port 2222 on ::.
Server listening on :: port 2222.
debug1: Bind to port 2222 on 0.0.0.0.
Bind to port 2222 on 0.0.0.0 failed: Address already in use.
Generating 768 bit RSA key.
RSA key generation complete.
debug1: Server will not fork when running in debugging mode.
debug1: rexec start in 4 out 4 newsock 4 pipe -1 sock 7
debug1: inetd sockets after dupping: 3, 3
Note: sshd-xos must be run as root.
Start xos_amsd service:
root: ./xtreemos-nss-pam-0.04/src/test/xos_amsd -d
xos_amsd starting ...
OK
Note: xos_amsd must also be run as root.
Test ssh-xos:
yjegou: ssh-xos paraski30
xos_plymgt.c:242: PAM:No support limit item ’disk’ currently
debug1: PAM: reinitializing credentials
pam_xos.c:502: PAM:pam_sm_setcred: Get proxy [4382] :
-----BEGIN CERTIFICATE----MIIC7jCCAlegAwIBAgIJAIwl7Lj8m1WPMA0GCSqGSIb3DQEBBQUAMIGdMQswCQYD
...
gQBh/ERbF5EwHNm6mLTvgBb9Cjs/JatcOisQMW4aTS5tWB0FwsHTAA+ZDrIW9lsz
+9O50K6YjIQvrzHahEjUJe3uBmHzcMiU9J7ej2+sPIBb
XtreemOS–Integrated Project
28/49
D2.1.4
IST-033576
xos_buffer_to_keyring: xos_buffer_to_keyring:keyctl_updatepam_xo
s.c:510: PAM:Can not store proxy in keyring !
debug1: PAM: establishing credentials
xos_buffer_to_keyring: xos_buffer_to_keyring:keyctl_updatepam_xo
s.c:537: PAM:Can not store proxy in keyring !
debug1: permanently_set_uid: 55285/50376
debug1: PAM: reinitializing credentials
pam_xos.c:502: PAM:pam_sm_setcred: Get proxy [4382] : /n-----BEG
IN CERTIFICATE----MIIC7jCCAlegAwIBAgIJAIwl7Lj8m1WPMA0GCSqGSIb3DQEBBQUAMIGdMQswCQYD
...
gQBh/ERbF5EwHNm6mLTvgBb9Cjs/JatcOisQMW4aTS5tWB0FwsHTAA+ZDrIW9lsz
+9O50K6YjIQvrzHahEjUJe3uBmHzcMiU9J7ej2+sPIBb
Environment:
USER=xosuser_u55285
LOGNAME=xosuser_u55285
HOME=/tmp
PATH=/usr/bin:/bin:/usr/sbin:/sbin:/usr/local/bin
MAIL=/var/mail/xosuser_u55285
SHELL=/bin/bash
SSH_CLIENT=127.0.1.1 49161 2222
SSH_CONNECTION=127.0.1.1 49161 127.0.1.1 2222
SSH_TTY=/dev/pts/5
TERM=xterm
XOS_ENV=/C=FR/ST=Bretagne/L=Rennes/O=INRIA/OU=IRISA/CN=Yvon Je
gou/emailAddress=Yvon.Jegou-at-irisa.fr/CN=28216/CN=100987380187
04381327@xtreemos@admin
/C=FR/ST=Bretagne/L=Rennes/O=INRIA/OU=IRISA/CN=Yvon Jegou/emailA
ddress=Yvon.Jegou-at-irisa.fr/CN=28216/CN=10098738018704381327:
Now, the user is logged in with an XtreemOS identity:
/C=FR/ST=Bretagne/L=Rennes/O=INRIA/OU=IRISA/CN=Yvon Jegou/emailA
ddress=Yvon.Jegou-at-irisa.fr/CN=28216/CN=10098738018704381327:
whoami
/C=FR/ST=Bretagne/L=Rennes/O=INRIA/OU=IRISA/CN=Yvon Jegou/emailA
ddress=Yvon.Jegou-at-irisa.fr/CN=28216/CN=10098738018704381327
/C=FR/ST=Bretagne/L=Rennes/O=INRIA/OU=IRISA/CN=Yvon Jegou/emailA
ddress=Yvon.Jegou-at-irisa.fr/CN=28216/CN=10098738018704381327:
Legacy commands behave as usual:
/C=FR/ST=Bretagne/L=Rennes/O=INRIA/OU=IRISA/CN=Yvon Jegou/emailA
ddress=Yvon.Jegou-at-irisa.fr/CN=28216/CN=10098738018704381327:
ps -aef
UID
PID PPID C STIME TTY
TIME CMD
...
29/49
XtreemOS–Integrated Project
IST-033576
root
root
root
yjegou
55285
55285
root
D2.1.4
25731
25748
25906
25907
25914
25924
25925
25730
25731
14038
13968
25906
25914
25748
0
0
0
0
0
0
0
17:05
17:05
17:29
17:29
17:29
17:35
17:35
pts/2
pts/2
pts/7
pts/8
pts/5
pts/5
pts/2
00:00:00
00:00:00
00:00:00
00:00:00
00:00:00
00:00:00
00:00:00
bash
./xos_amsd -d
sshd-xos: xosuse
ssh-xos paraski3
-bash
ps -aef
./xos_amsd -d
/C=FR/ST=Bretagne/L=Rennes/O=INRIA/OU=IRISA/CN=Yvon Jegou/emailA
ddress=Yvon.Jegou-at-irisa.fr/CN=28216/CN=10098738018704381327:
pwd
/tmp
/C=FR/ST=Bretagne/L=Rennes/O=INRIA/OU=IRISA/CN=Yvon Jegou/emailA
ddress=Yvon.Jegou-at-irisa.fr/CN=28216/CN=10098738018704381327@p
aradeux101:~$ touch myfile
/C=FR/ST=Bretagne/L=Rennes/O=INRIA/OU=IRISA/CN=Yvon Jegou/emailA
ddress=Yvon.Jegou-at-irisa.fr/CN=28216/CN=10098738018704381327:
ls -al
total 20
drwxrwxrwt 4 root root
4096 Nov 6 11:08 .
drwxr-xr-x 20 root root
4096 Nov 6 10:36 ..
drwxrwxrwt 2 root root
4096 Nov 6 10:36 .ICE-unix
drwxrwxrwt 2 root root
4096 Nov 6 10:36 .X11-unix
-rw------- 1 53557 xos_admin
46 Nov 6 11:01 .bash_history
-rw-r--r-- 1 /C=FR/ST=Bretagne/L=Rennes/O=INRIA/OU=IRISA/CN=Yvo
n Jegou/emailAddress=Yvon.Jegou-at-irisa.fr/CN=28216/CN=10098738
018704381327 xos_admin 0 Nov 12 17:13 myfile
/C=FR/ST=Bretagne/L=Rennes/O=INRIA/OU=IRISA/CN=Yvon Jegou/emailA
ddress=Yvon.Jegou-at-irisa.fr/CN=28216/CN=10098738018704381327:
exit
logout
Connection to paraski30 closed.
yjegou:
4 Conclusion and Future Work
The current prototype of checkpoint/restart offers low level functionalities for
checkpoint/restart mechanisms in Linux-XOS. The API described here is directly
inherited from BLCR and will evolve as presented in [2] in order to present a
POSIX-like flavour.
Current prototype of node-level VO support has leveraged existing Linux extensions such as PAM and NSS, to deal with local user account management for
XtreemOS–Integrated Project
30/49
D2.1.4
IST-033576
VOs. It is a proof-of-concept of extending standard Linux to treat VO users as
local accounts in a transparent and application-independent way.
The current prototype has limited support for local policies of access control
and resource usage constraints for VO users. In next steps, the enforcement of
local policies against VO users will be the focus. To support strong isolation and
effective resource partition among VO users, new virtualization mechanisms in
Linux are to be explored for use.
The current prototype has limited support for complex applications: a single
account is created from XOS-Cert by the PAM module, mixing multiple VO credentials is not possible, etc. New requirements have been added to XtreemOS
which request for the creation of multiple user accounts (with different privileges)
for the execution of different phases of the same application. The current prototype will be enhanced in order to support these new requirements according
to a new set of specifications for VO support. During the second phase of the
XtreemOS project, the support of very dynamic VO will be evaluated (VO duration limited to an application or workflow execution). These very dynamic VOs
will probably necessitate the exploitation of extra credentials in order to fetch initial data and to store final results in XtreemFS. PAM module will be extended to
support the presence of multiple XOS-Cert.
31/49
XtreemOS–Integrated Project
IST-033576
A
D2.1.4
Berkeley Lab Checkpoint/Restart (BLCR) Administrator’s Guide
This guide (extract from the doc directory of the BLCR tarball) describes how
to install, configure, and maintain Berkeley Lab Checkpoint/Restart (BLCR) for
Linux.
A.1
Installing/Configuring BLCR
To build checkpoint/restart, you need the following files:
• The source code for the configured kernel you are building against.
• linux/version.h (a generated file from the kernel sources).
• either the System.map or the vmlinux file for the kernel you are building
against.
• A copy of the BLCR source (blcr-X.Y.Z.tar.gz: see http://ftg.lbl.gov/checkpoint
for a link to the latest version).
If you run into trouble when following the instructions below, make sure to
check both our FAQ (especially the "Build/Install Questions" section), and our
bug database, located at http://mantis.lbl.gov/bugzilla/. Your install problem may
have already been solved!
A.1.1
Configuring BLCR
BLCR builds and installs much like any other autotools-based distribution:
%
%
%
%
%
%
%
t a r z x f b l c r −<VERSION> . t a r . gz
cd b l c r −<VERSION>
mkdir b u i l d d i r
cd b u i l d d i r
. . / configure [ options ]
make
make i n s t a l l
Depending on which kernel you are building against, and where you wish to
put the BLCR libraries, there are a number of options to configure that you need
to consider.
XtreemOS–Integrated Project
32/49
D2.1.4
IST-033576
We strongly recommend that you configure and build BLCR in a directory
other than the one containing the BLCR source code (use of some options to configure actually require this). In the example above the build is conducted in a subdirectory, named builddir, of the source directory. Any writable location is fine,
but you will need to invoke configure by the correct path in place of ../configure
used in the example.
Check the FAQ if you run into issues building BLCR on your system.
A.1.2
Choosing an installation directory
By default BLCR will install into /usr/local. To choose a different directory tree
to install into, pass the –prefix flag to configure:
• –prefix=[the directory you wish to install into]
However, be aware that using a location other than /usr/local or /usr may require additions to the PATH, MANPATH and LD_LIBRARY_PATH environment
variables of users (more details below).
A.1.3 Building against a kernel other than the one that’s running
By default, BLCR builds against the kernel that is running on the system at configure time, and looks in a number of standard locations (/usr/src/linux, etc.) for
the above files that correspond to it. If you’re building for a kernel other than
the kernel that is running at the time of the build (or if the source for the running
kernel are in non-standard locations), you’ll need to pass configure the following
option:
• –with-linux=[path to the sources for the kernel you are building for]
Unless System.map or vmlinux exists in the directory given to –with-linux
you’ll also need to pass one of the following two options:
• –with-system-map=[path to the System.map file] (usually /boot/System.map,
or the System.map file in the root of the kernel build tree)
• –with-vmlinux=[path to the kernel executable] (usually /boot/vmlinux, or
the vmlinux file at the root of the kernel build tree)
33/49
XtreemOS–Integrated Project
IST-033576
A.1.4
D2.1.4
Building 32-bit application support on a 64-bit platform
BLCR’s build logic is capable of building both 64-bit and 32-bit libraries at the
same time on most 64-bit platforms it supports. However, because this feature
is new and does not work well with certain setups, it is disabled by default. To
enable it you’ll want to pass configure the following option:
• –enable-multilib If configuration fails with this option specified, you can
still configure without it to get only application 64-bit support.
A.1.5
Compiling BLCR
Just type make:
% make
A.1.6
Testing your build (optional, but recommended)
As with many autotools-based packages, BLCR includes a check make target.
However, it cannot run the tests until the kernel modules are loaded (and will
tell you so if you forget). Since the not-yet-installed kernel modules are located
throughout the BLCR build directory, an ’insmod’ make target is provided to automate this task. If you are not running as root, make insmod will try to use the
sudo utility to perform the insmod operations as root. However, it is not necessary
(or recommended) to run the tests themselves as root. So, we recommend run the
following as a non-root user if sudo is installed and configured to allow your user:
% make insmod c h e c k
Which may prompt for a password, depending on how sudo is configured. If
the sudo utility is not installed (or not configured for your user), the following
steps are equivalent:
% su
Password : [ type r o o t password here ]
# make insmod
# exit
% make c h e c k
If the modules fail to load, then your kernel is not supported and you’ll need
to report this as a bug to the BLCR team, after first checking the bug database to
ensure the problem isn’t already known (or even fixed). Similarly, if one or more
tests fail, we’ll want to know that too. However, if the only failures are one or two
XtreemOS–Integrated Project
34/49
D2.1.4
IST-033576
tests that say "restart/timeout" then you should first try increasing the timeout as
follows (assuming the kernel modules have already been loaded):
% make c h e c k CRUT_TIMEOUT=120
The CRUT_TIMEOUT is a value in seconds, with a default of 60 (CRUT is
an acronym for Checkpoint/Restart Unit Test).
Tests marked SKIP are neither a PASS, nor a FAIL - instead they indicate a
test that was not actually run. So don’t be alarmed if you see one or more tests
marked SKIP. This happens when a given test is not applicable to your system (for
instance the hugetlbfs test is skipped when no writable mountpoint for hugetlbfs
is found).
We do not advise continuing to install BLCR if any tests FAIL (other than
timeouts correctable by raising CRUT_TIMEOUT sufficiently).
A.1.7
Installing BLCR
Use the standard install make target to install the BLCR utilities and libraries, and
to place the kernel modules in the standard location for your kernel:
% make i n s t a l l
or, if you prefer stripped binaries:
% make i n s t a l l − s t r i p
A.1.8 Loading the Kernel Modules
Before you can checkpoint/restart applications, the kernel modules need to be
loaded into your kernel. The kernel modules are placed into a subdirectory of the
lib/blcr (or lib64/blcr) branch of the installation directory. In this example, we’ll
assume the installation prefix was the default /usr/local and that your kernel is
version 2.6.12-1.234 for an x86. Thus, for this example the kernel modules are in
the directory /usr/local/lib/blcr/2.6.12-1.234/. There are three kernel modules in
this directory which must be loaded (in the correct order) for BLCR to function.
As root, load the kernel modules in this order:
# / s b i n / insmod / u s r / l o c a l / l i b / b l c r / 2 . 6 . 1 2 − 1 . 2 3 4 /
b l c r _ i m p o r t s . ko
# / s b i n / insmod / u s r / l o c a l / l i b / b l c r / 2 . 6 . 1 2 − 1 . 2 3 4 /
blcr_vmadump . ko
# / s b i n / insmod / u s r / l o c a l / l i b / b l c r / 2 . 6 . 1 2 − 1 . 2 3 4 / b l c r .
ko
35/49
XtreemOS–Integrated Project
IST-033576
D2.1.4
You may wish to set up your system to load these modules by default at boot
time. The exact mechanism for doing so differs between Linux distributions, and
thus requires an experienced system administrator. However, a template init script
is provided as etc/blcr.rc in the BLCR source directory.
A.1.9
Updating ld.so.cache
Nearly all Linux distributions use a caching mechanism for resolving dynamic
library dependencies. If you have installed BLCR’s shared library in a directory
that is cached by the mechanism, then you will need to update this cache. To do
so, run the ldconfig command as root; no command-line arguments are needed.
It should always be safe to run the ldconfig command, even if BLCR did not
install its library in a directory managed in the cache. However, if you wish to
avoid this step when unneccessary, you can known that BLCR’s shared library
is in a cached directory if you configured with –prefix= or –libdir= options that
cause BLCR’s shared library (libcr.so) to be installed in:
• /lib or /usr/lib
• any directory listed in /etc/ld.so.conf
• any directory listed in a file under /etc/ld.so.conf.d/
Note that if you passed no –prefix= or –libdir= options to BLCR’s configure script, then you should check /etc/ld.so.conf and /etc/ld.so.conf.d/ for /usr/local/lib (the default location) to determine if you actually need to run the ldconfig
command.
A.1.10 Configuring Users’ environments
Finally, you may wish to add the appropriate BLCR directories to the default
PATH, LD_LIBRARY_PATH, and MANPATH environment variables for your
users. You may either modify the /etc/profile and/or /etc/cshrc files, or you may
provide modules that accomplish the same thing). You should replace PREFIX by
the installation prefix (such as /usr/local) in the following examples:
For Bourne-style shells:
$
$
$
$
PATH=$PATH : PREFIX / b i n
MANPATH=$MANPATH: PREFIX / man
LD_LIBRARY_PATH=$LD_LIBRARY_PATH : PREFIX / l i b
e x p o r t PATH MANPATH LD_LIBRARY_PATH
For csh-style shells:
XtreemOS–Integrated Project
36/49
D2.1.4
IST-033576
% s e t e n v PATH $ {PATH } : PREFIX / b i n
% s e t e n v MANPATH $ {MANPATH} : PREFIX / man
% s e t e n v LD_LIBRARY_PATH $ {LD_LIBRARY_PATH } : PREFIX / l i b
A.2
Uninstalling BLCR
If you preserve the BLCR build tree, then there is a standard uninstall make target
available to remove the files copied by the install target.
A.3 Making RPMs from the BLCR sources
An alternate way to install BLCR is to build a binary RPM for your system, which
you can then install. This has certain advantages (such as making upgrading easier, especially if you maintain BLCR on multiple systems).
A.3.1
Building binary RPMs from the source tarball
Once you’ve configured BLCR with any options your system requires, the simplest method for building RPMs is to just
% make rpms
If successful, the new RPM packages will be in the rpm/RPMS subdirectory of
the build tree. The resulting packages will be for whatever kernel you configured
for.
A.3.2 Building a binary RPM from source RPMS
You may also with start from a source RPM (with a .src.rpm suffix) rather than
the .tar.gz version of the BLCR distribution. Source RPMs are available on our
website. These source RPMs are configured to build for the running kernel, with
–prefix=/usr and to configure with –enable-multilib on 64-bit platforms. Alternatively, the make rpms step above will create a source RPM in the rpm/SRPMS
subdirectory of the build tree, valid for the configured kernel.
If building as root, built RPMs will be placed in a subdirectory of /usr/src/redhat/RPMS. However, if you are not root, you may need to see this page at IBM
for information on configuring an output location before proceeding. Personally,
we prefer not to build as root.
To build binary RPMs from the source RPM, use
37/49
XtreemOS–Integrated Project
IST-033576
D2.1.4
% r p m b u i l d −−r e b u i l d b l c r −X . Y . Z−N . s r c . rpm −− t a r g e t
ARCH
replacing blcr-X.Y.Z-N.src.rpm with the correct filename, and ARCH with a
specific target CPU. If you don’t know your target, try uname -p to determine it.
If you don’t specify a –target, the default will depend on the version of rpmbuild
and may be i386 (which will be rejected). See the documentation for rpmbuild for
more information on building binary RPMs from source RPMs.
The RPMs should build without error. However, if not building for the running
kernel, you may see a warning about this. You will see the location of the binary
RPMs in the last few lines of output from rpmbuild - something like this:
/
/
/
/
u s r / s r c / r e d h a t / RPMS / i 6 8 6 /
u s r / s r c / r e d h a t / RPMS / i 6 8 6 /
u s r / s r c / r e d h a t / RPMS / i 6 8 6 /
u s r / s r c / r e d h a t / RPMS / i 6 8 6 /
. 2 3 4 − 0 . 6 . 1 − 1 . i 6 8 6 . rpm
/ u s r / s r c / r e d h a t / RPMS / i 6 8 6 /
rpm
b l c r −0. 6. 1 −1. i 6 8 6 . rpm
b l c r −l i b s −0. 6. 1 −1. i 6 8 6 . rpm
b l c r −d e v e l −0 .6. 1 −1. i 6 8 6 . rpm
b l c r −m o d u l e s \ _2 . 6 . 1 2 \ _1
b l c r − t e s t s u i t e −0. 6. 1 −1. i 6 8 6 .
You should note that the kernel version 2.6.12-1.234 has become 2.6.12_1.234
in the name of the blcr-modules package (a change of a hyphen to an underscore).
In most cases, you will want to install the blcr, blcr-libs and blcr-modules
binary RPMS. The blcr-devel is only required on machines on which you will
compiling/linking source code against BLCR’s libraries. So, for a cluster you
may want to install blcr-devel only on the front-end node(s).
The blcr-testsuite RPM is optional. You may install and run the testsuite
(/usr/libexec/blcr-testsuite/RUN_ME) if you wish to verify correct operation of
BLCR. You may be asked to do this if you report bugs to us.
A.4
For more information
For more information on Berkeley Lab Checkpoint/Restart for Linux, visit the
project home page: http://ftg.lbl.gov/checkpoint To report bugs (or look for bug
fixes prior to reporting new ones), visit http://mantis.lbl.gov/bugzilla
XtreemOS–Integrated Project
38/49
D2.1.4
B
IST-033576
Berkeley Lab Checkpoint/Restart (BLCR) User’s
Guide
B.1
About Berkeley Lab Checkpoint/Restart
Checkpoint/Restart allows you to save one or more processes to a file and later
restart them from that file. There are three main uses for this:
• Scheduling: Checkpointing a program allows a program to be safely stopped
at any point in its execution, so that some other program can run in its place.
The original program can then be run again later.
• Process Migration: If a compute node appears to be likely to crash, or
there is some other reason for shutting it down (routine maintenance, hardware upgrade, etc.), checkpoint/restart allows any processes running on it
to be moved to a different node (or saved until the original node is available
again).
• Failure recovery: A long running program can be checkpointed periodically,
so that if it crashes due to hardware, system software, or some other nondeterministic cause, it can be restarted from a point in its execution more
recent that starting from the beginning.
Berkeley Lab Checkpoint/Restart (BLCR) provides checkpoint/restart on Linux
systems. BLCR can be used either with a processes on a single computer, or on
parallel jobs (such as MPI applications) which may be running across multiple
machines on a cluster of Linux nodes.
Note: Checkpointing parallel jobs requires a library which has integrated
BLCR support. At the present time, the only MPI implementations which support
checkpoint/restart with BLCR are LAM/MPI (version 7.x), MVAPICH2 (version
0.9.8 or newer), and MPICH-V (version 1.0.0 or newer). The development branch
of OpenMPI also includes support, intended for inclusion their 1.3 release. However, work is underway to add support to other MPI implementations, so consult
your MPI’s documentation for the latest information.
B.2
Checkpoint/restarting within a BLCR-aware batch control system
One way to use BLCR is with a batch scheduler system (a.k.a. "job controller",
"queue manager", etc.) that knows how to use the BLCR tools to checkpoint and
restart the jobs under its control. You can simply tell such a system to "suspend"
or "checkpoint" a job, and then later to "resume" or "restart" it.
39/49
XtreemOS–Integrated Project
IST-033576
D2.1.4
Unfortunately BLCR has not yet been integrated with many batch systems.
Support for serial jobs is available through SGE. See this report for more information.
As with MPI implementations, efforts are under way to integrate BLCR with
additional batch systems, so check your batch system’s documentation for the
latest info.
The rest of this document assumes that your batch scheduler does not have
built-in support for BLCR. In this case you will manually run the BLCR commands needed to checkpoint/restart your jobs.
Note: this does not mean that you cannot checkpoint/restart your applications
if you use a batch system without built-in support for BLCR. It simply means that
you have to do your checkpoints/restarts manually as described in the remainder
of this document. To the batch system, a job that is checkpointed and terminated
manually simply looks like a job that has "completed". A restart of an application
looks like a "new" job.
B.3
Checkpointing Jobs with the BLCR command-line tools
B.3.1
Make sure BLCR is installed and loaded
This guide assumes that BLCR has already been successfully built, installed, and
configured on your system (presumably by you or your system administrator).
One easy way to test this is to use the lsmod command to see if the BLCR kernel
module is loaded on the node(s) that your program will run on:
% / s b i n / lsmod
Module
blcr
blcr_vmadump
blcr_imports
iptable_filter
ip_tables
Size
47508
24744
7808
2412
15864
Used by
Not t a i n t e d
0
1 blcr
2 b l c r , blcr_vmadump
0 ( a u t o c l e a n ) ( unused )
1 [ iptable_filter ]
If you don’t see the three modules that begin with ’blcr’ in the output of lsmod,
than BLCR is not yet running on your system. Consult the BLCR Administrators
Guide for instructions on building and installing BLCR.
B.3.2
Make sure your environment is set up correctly
You must ensure that the BLCR commands, libraries and manual pages can be
found in your shell.
Try running
XtreemOS–Integrated Project
40/49
D2.1.4
IST-033576
% c r \ _ c h e c k p o i n t −−h e l p
If cr_checkpoint cannot be found, you need to modify your PATH to include
the directory where cr_checkpoint lives. You will probably also want to modify
your LD_LIBRARY_PATH variable to contain the directory where libcr.so lives,
and add the BLCR man directory to your MANPATH.
B.3.3
Setting up your environment with ’modules’
If your system uses the Environment Modules system to manage software packages, you may be able to get all of your needed environment settings simply by
entering something like
%module add b l c r
However, there is no requirement that ’blcr’ is the name of the module you’ll
need; your administrator may have given it a different name (’checkpoint’, etc.).
Or s/he may have neglected to add BLCR to the set of packages managed by
modules, in which case you’ll need to use the ’manual’ technique below.
B.3.4
Manually setting up your environment
To manually set up your environment for BLCR, the first thing you need to know
is where it has been installed. By default, BLCR installs into the /usr/local directory tree, but your system administrator may have put it elsewhere by passing –
prefix=PREFIX when BLCR was built (where PREFIX can be any arbitrary directory). See your system documents, or try commands such as locate cr_checkpoint
or find.
Once you have determined where BLCR is installed, enter the following commands (depending on which type of shell you are using), replacing PREFIX with
the value specified for the –prefix option used when configuring BLCR.
To configure a bourne-type shell (such as ’bash’ or ’ksh’):
$
$
$
$
PATH=$PATH : PREFIX / b i n
MANPATH=$MANPATH: PREFIX / man
LD_LIBRARY_PATH=$LD_LIBRARY_PATH : PREFIX / l i b
e x p o r t PATH MANPATH LD \ _LIBRARY \ _PATH
To configure a csh-type shell (such as ’csh’ or ’tcsh’):
% s e t e n v PATH $ {PATH } : PREFIX / b i n
% s e t e n v MANPATH $ {MANPATH} : PREFIX / man
% s e t e n v LD_LIBRARY_PATH $ {LD_LIBRARY_PATH } : PREFIX / l i b
41/49
XtreemOS–Integrated Project
IST-033576
D2.1.4
The above examples set the PATH, MANPATH and LD_LIBRARY_PATH
variables in your current shell only. It is strongly recommended that you make
these settings permanent, to make these settings affect future sessions or windows.
To do this, you must add the example commands to your shell’s start up files. For a
single user of BLCR, you should add the appropriate set of commands to the shell
startup files in your home directory (.bashrc for bash, .profile for other bournetype shells, or .cshrc for csh-type shells). For a system-wide installation, add the
bourne shell commands to /etc/bashrc and /etc/profile and the csh commands to
/etc/cshrc.
B.4 Checkpointing/restarting applications on a single machine
B.4.1 Types of applications supported
BLCR currently supports:
• Single threaded applications
• Multithreaded applications using either LinuxThreads or NPTL (the old and
new Linux pthreads implementations, respectively)
• Process trees, meaning a process and all its "reachable" descendants (excluding those who’s parent has exited)
• Process groups (as defined by POSIX), which typically means a command
pipeline launched by a shell (e.g. cat foo bar | sort)
• POSIX sessions, which typically means a login shell and all its descendants
or a batch job
However, certain applications are not supported because they use resources
not restored by BLCR:
• Applications which use sockets (regardless of address family). If a checkpoint is taken of a process with open sockets, they will not be restored when
the process is restarted. Applications or libraries may register a checkpoint
callback to manage socket connections to re-open them at restart time (this
is how MPI libraries typically work with BLCR), but the core BLCR checkpointer does not directly support restoring sockets. NEW: This behavior is
a change from releases prior to 0.5.0 which would fail at checkpoint time if
sockets were open.
• Applications which use SystemV IPC mechanisms including shared memory, semaphores and message queues. As with sockets, code that is BLCRaware may choose to take its own measures to deal with these resources.
XtreemOS–Integrated Project
42/49
D2.1.4
IST-033576
• Others - this list is not exhaustive. If you have questions about specific
resources, see the section "For more information" for contact information.
B.4.2
Making an application checkpointable
To be checkpointed successfully with BLCR, an application must contain some
library code that BLCR provides. There are several ways of ensuring this:
1. Start your executable via the with the cr_run command:
% cr_run your_executable [ arguments ]
cr_run loads the BLCR library into your application at startup time. You
do not need to modify an application to have it work with cr_run. However, cr_run is limited to dynamically linked executables; statically linked
executables will need to use one of the approaches listed below.
2. Link your application with BLCR’s libcr. For instance, you could make a
simple ’hello world’ C program checkpointable via:
% g c c −o h e l l o h e l l o . c −LPREFIX / l i b − l c r
where PREFIX is the root of your BLCR install. Your application will now
look for the BLCR library whenever it starts up, but note that this does
not mean it will automatically be found: you will also need to set your
LD_LIBRARY_PATH environment variable to PREFIX/lib if libcr is not
installed into a standard system library directory (or read the ld man page
for information on -rpath).
3. Link your application with some library which uses BLCR. For instance,
if your MPI library has been made BLCR-aware, it will cause libcr to be
loaded, and so simply linking with the MPI library is enough to make your
application checkpointable.
4. Use run-time loading to dynamically link libcr (see the dlopen man page).
This mechanism can be used for building applications or libraries that must
work both with and without BLCR present on a system.
5. Force the libcr.so dynamic library to do loaded at startup by adding it’s
full pathname to the LD_PRELOAD environment variable (or just the filename if the directory is listed in LD_LIBRARY_PATH). In most cases, the
pthread library will also be required. We do not recommend setting this in
your environment in general (via export or setenv), since certain programs
may interact poorly with the BLCR library logic. Instead, we recommend
that you use a command like:
43/49
XtreemOS–Integrated Project
IST-033576
D2.1.4
% env LD_PRELOAD=PREFIX / l i b / l i b c r . s o . 0 : l i b p t h r e a d .
so . 0 y o u r _ e x e c u t a b l e [ arguments ]
This is essentially how cr_run works.
If you your application does not link in BLCR’s library via one of the mechanisms listed above, then any attempt to checkpoint it will fail gracefully NEW:
This behavior is a change BLCR releases prior to 0.5.0 in which this situation
would cause the program to die unless you handled BLCR’s real-time signal explicitly.
B.4.3
Checkpointing the process
To checkpoint a process, simply run:
% c r _ c h e c k p o i n t PID
where PID is the application’s process ID.
By default, cr_checkpoint saves a checkpoint, and then lets your application
continue running, which is useful for saving the state of a process in case it later
fails. However, you may terminate the process after it has been checkpointed by
passing the –term flag:
% c r _ c h e c k p o i n t −−t e r m PID
This causes a SIGTERM signal to be sent to the process at the end of the checkpoint. To send a different signal to your process at the end of the checkpoint, you
can pass any arbitrary signal number using the –signal=N flag.
By default BLCR interprets the final argument (PID in the examples above) as
the process id of a (potentially multi-theaded) process to checkpoint, along with
all of its children (and their children, etc.). However, there are options to request
a checkpoint of a different scope for the checkpoint:
%
%
%
%
cr_checkpoint
cr_checkpoint
cr_checkpoint
cr_checkpoint
−−p g i d PGID
−−s i d SID
−− t r e e PID
−−p i d PID
These four examples request, respectively, checkpoints over the scope of a process
group, a session, a process tree (the default), and a single process. The PGID is
a process group identifier and SID is a session identifier. Here we take the terms
"process group" and "session" to mean the set of processes having the given pgid
or sid. In most cases the pgid or sid is just the pid of the process group leader
XtreemOS–Integrated Project
44/49
D2.1.4
IST-033576
or session leader. When in doubt, try using the ’-j’ option to ’ps’ to show PGID
and SID columns. The –tree flag to cr_checkpoint requests a checkpoint of the
process with the given pid, and all its descendants (excluding those who’s parent
has exited and thus become children of the init process). This is the same as the
grouping shown by the output of the pstree command. NEW: The behavior in
0.6.0 is a change from previous BLCR releases in which the –pid option (below)
was the default.
When checkpointing multiple processes using one of the scope arguments
other then –pid, all the pipes among the processes are saved and restored. Pipes
to/from processes not within the checkpoint scope are not saved (these will be
replaced at restart time by the stdin or stdout of the cr_restart process). While
cr_checkpoint will accept a process group or session identifier as a scope argument, BLCR does not currently restore the pgid or sid of restarted processes. Instead restored processes inherit the pgid and sid of the cr_restart process. This
is considered a sane default because an unmodified parent (such as a shell) of
cr_restart would lose job control over the processes if these identifiers are restored. A future BLCR release will include the ability to request restore of these
identifiers.
Files that contain checkpoints are called context files. By default, they are
named context.ID, where ID is the pid, pgid or sid that was checkpointed, and are
stored in the current working directory of the cr_checkpoint process. You may
specify an alternate name and location of the context file via the -f option.
There are a number of other options that cr_checkpoint provides. See the man
page (or cr_checkpoint –help) for details.
B.4.4
Restarting the process
To successfully restart from a context file, certain conditions must be met:
• The PIDs of processes in the context file must NOT be in use.
• The original executable must still exist, and its contents must be unchanged,
except if –save-private and –save-shared option have been set at checkpoint.
• All shared libraries used by the executable must exist, and their contents
must be unchanged, except if –save-all option has been used for the checkpoint.
• Because BLCR saves and restore most open files "by reference" (storing
pathnames rather than file contents), the following should be true of files
that were open when the checkpoint was taken, though certain applications
may be more tolerant than these rules imply:
45/49
XtreemOS–Integrated Project
IST-033576
D2.1.4
• Files must exist at their original paths and have permissions that permit them to be opened for the original access modes. It is permissible
to use a copy of the original file (for instance when performing migration).
• Files open for reading should not be modified relative to their contents
when the checkpoint was taken in any way observable by the application.
• Files that are open for writing which are written in an append-only
manner (regardless of the O_APPEND flag) may have data appended
after the checkpoint was taken. Such data will be truncated away when
the application is restarted.
• Files that are open for both reading and writing should be restored to
exactly their state at the time of the checkpoint.
• An exception to the open files rules above exists for files already unlinked
(deleted) at the time the checkpoint is taken. When BLCR encounters such
a file, its entire contents is saved in the checkpoint context file and is later
restored as a new (also unlinked) file.
Of these requirements, BLCR is only able to verify the availability of the PIDs
and the existence and permissions of the executable, libraries and open files. Failure to satisfy those constraints will lead to an explicit failure from BLCR. Violation of the rules against modification to any files will not be detected by BLCR
and the resulting effects on the restarted application are unpredictable.
You may restart a program on a different machine than the one it was checkpointed on if all of these conditions are met (they often are on cluster systems,
especially if you are using a shared network filesystem), and the kernels are the
same. The restriction on executables and their shared libraries being the same can
be a problem for systems using prelinking; see the BLCR FAQ for information on
dealing with systems that prelink.
You can restart a process by using cr_restart on its context file:
% c r _ r e s t a r t context .15005
The original process will be restored, and resume running in the exact state
it was in at checkpoint time. Note that this includes restoring its process ID, so
you cannot restart a program unless the original copy of it has exited (otherwise
cr_restart will fail with a message that the PID is already in use). You may restart
a process from a particular context file as many times as you wish. The context
file is not automatically removed at any point, so you should delete it if/when it is
no longer useful to you.
XtreemOS–Integrated Project
46/49
D2.1.4
B.5
IST-033576
Checkpointing/restarting an MPI application
The best source of information on dealing with any BLCR-aware MPI implementation is the documentation provided with the MPI. However, here are some hints
that may be helpful.
B.5.1
Checkpoint/restart with LAM/MPI
• See the the LAM/MPI documentation for the most detailed info on using
LAM/MPI with BLCR.
• When building your own LAM/MPI, do NOT configure LAM to debug
mode, i.e. do not pass –with-debug to LAM’s configure script.
• To start a checkpointable LAM/MPI application, simply run it with the regular LAM mpirun launcher:
% mpirun C h e l l o _ m p i
Note: you may need to start up the LAM environment first by running lamboot before starting your application.
• To checkpoint the entire MPI application (across all nodes and processes),
simply run
% l a m c h e c k p o i n t 12305
Where ’12305’ is the process ID of the mpirun command. Do not pass the
pid of your MPI executable: when mpirun is checkpointed, it automatically
takes care of transitively checkpointing all of the processes involved in the
MPI job.
• To restart your MPI job, simply run the following against the mpirun process’s context file:
% l a m r e s t a r t context .12305
All processes in the MPI job will be restarted as they were at checkpoint
time.
• By default, LAM will place the checkpoint files for the MPI application
processes in your $HOME directory. If you want them to be placed elsewhere, override the default location in the filesystem where LAM stores
checkpoints.
47/49
XtreemOS–Integrated Project
IST-033576
D2.1.4
B.6 For more information
For more information on Berkeley Lab Checkpoint/Restart for Linux, visit the
project home page: http://ftg.lbl.gov/checkpoint To report bugs (or look for bug
fixes prior to reporting new ones), visit http://mantis.lbl.gov/bugzilla
XtreemOS–Integrated Project
48/49
D2.1.4
IST-033576
References
[1] XtreemOS Deliverables - D2.1.2: Design and Implementation of Node-level
VO Support.
[2] XtreemOS Deliverables - D2.1.3: Design and Implementation of basic checkpoint/restart mechanisms in Linux.
[3] Jason Duell. The design and implementation of berkeley lab’s linux checkpoint/restart.
49/49
XtreemOS–Integrated Project