Download HP 425t Owner`s manual
Transcript
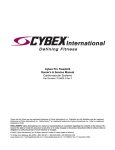
Cybex LCX-425T Treadmill
Owner’s Manual
Cardiovascular Systems
Part Number LT-19341-4 Rev D
www.cybexinternational.com
Cybex LCX-425T Treadmill
Owner’s Manual
Cardiovascular Systems
Part Number LT-19341-4 Rev D
Cybex® and the Cybex logo are registered trademarks of Cybex International, Inc. Polar® is a registered trademark of
Polar Electro Inc.
DISCLAIMER: Cybex International, Inc. makes no representations or warranties regarding the contents of this manual. We reserve
the right to revise this document at any time or to make changes to the product described within it without notice or obligation to
notify any person of such revisions or changes.
© 2005 - 2007, Cybex International, Inc. All rights reserved. Printed in United States of America.
10 Trotter Drive Medway, MA 02053 • 888-462-9239 • 508-533-4300 • FAX 508-533-5183
www.cybexinternational.com • [email protected] • [email protected] • LT-19341-4 • Rev D • January 2007
Cybex 425T Treadmill Owner’s Manual
About This Manual
An Owner’s Manual is shipped with each unit. To purchase additional copies of this manual or
any other Cybex manual, please do one of the following:
•
•
•
•
order online at www.cybexinternational.com
fax your order to 508-533-5183
contact Cybex Customer Service at 888-462-9239
or contact Cybex Customer Service at 508-533-4300
NOTE: Refer to www.cybexinternational.com for changes and updates to this manual.
To contact Cybex with comments about this manual you may send email to techpubs@
cybexintl.com.
FCC Compliance Information
! WARNING: Changes or modifications to this unit not expressly approved by the party
responsible for compliance could void the user’s authority to operate
the equipment.
This equipment has been tested and found to comply with the limits for a Class B digital
device, pursuant to Part 15 of the FCC Rules. These limits are designed to provide reasonable
protection against harmful interference in a residential installation. This equipment generates,
uses and can radiate radio frequency energy and, if not installed and used in accordance with
the instructions, may cause harmful interference to radio communications. However, there
is no guarantee that interference will not occur in a particular installation. If this equipment
does cause harmful interference to radio or television reception (which can be determined by
turning the equipment off and on) the user is encouraged to try to correct the interference by
one or more of the following measures:
• Reorient or relocate the receiving antenna.
• Increase the separation between the equipment and receiver.
• Connect the equipment into an outlet on a circuit different from that to which the
receiver is connected.
• Consult the dealer or an experienced radio TV technician for help.
Page i
Cybex 425T Treadmill Owner’s Manual
DECLARATION OF CONFORMITY
This Declaration of Conformity is suitable to the European Standard EN 45014, “General criteria for
supplier’s declaration of conformity.”
We,
Manufacturer:
Cybex International, Inc.
10 Trotter Drive
Medway, MA 02053
USA
(508) 533-4300
EU Representative: Cybex International UK
Oaktree House
Atherstone Road
Measham
Swadlincote, Derbyshire DE12 7EL
United Kingdom
+44 (0)845 60 60 228
declare under our sole responsibility that the product(s):
Cybex 425T Treadmill
to which this declaration relates is in conformity with the EEC directives listed herein below
(including any and all relevant modifications):
73/23/EEC
Low Voltage Directive
89/336/EEC Electromagnetic Compatibility
2002/95/EC
Restriction of Hazardous Substances (RoHS) Directive
Ed Kurzontkowski
Senior Vice President - Manufacturing Operations and Customer Service
Cybex International, Inc.
10 Trotter Drive
Medway, MA 02053
507-455-0217 x 250
Page ii
Worldwide Headquarters 10 Trotter Drive + Medway, MA 02053, USA + t 508.533.4300 + f 508.533.5500
151 24th Avenue NW + Owatonna, MN 55060, USA + t 507.455.0217 + f 507.455.3446
Cybex 425T Treadmill Owner’s Manual
As a result of test reports and their evaluation by accredited laboratories, we are in possession of the
following certificates for products which carry this marking:
Canada, USA
CAN/CSA-C22.2 No.68-92/99,
UL Std. No. 1647, FCC Part 15
Subpart B Class B
European Union
73/23/EEC, 89/336/EEC
References of harmonized standards on which this declaration of conformity is based:
EN 61000-6-1:2001 Electromagnetic Compatibility (EMC) Generic Immunity: Residential, Commercial
and Light Industrial
EN 61000-4-2 Electromagnetic compatibility (EMC) - Part 4-2: Testing and measurement techniques Electrostatic discharge immunity test
EN 61000-4-3 Electromagnetic compatibility (EMC) - Part 4-3: Testing and measurement techniques Radiated, radio frequency, and electromagnetic field immunity test
EN 61000-4-4 Electromagnetic compatibility (EMC) - Part 4: Testing and measurement techniques Section 4: Electrical fast transient/burst immunity test
EN 61000-4-5 Electromagnetic compatibility (EMC)- Part 4-5: Testing and measurement techniques Surge immunity test
EN 61000-4-6 Electromagnetic compatibility (EMC) - Part 4-6: Testing and measurement techniques Immunity to conducted disturbances, induced by radio-frequency fields
EN 61000-4-11 Electromagnetic compatibility (EMC) - Part 4-11: Testing and measurement techniques Voltage dips, short interruptions and voltage variations immunity tests
Worldwide Headquarters 10 Trotter Drive + Medway, MA 02053, USA + t 508.533.4300 + f 508.533.5500
151 24th Avenue NW + Owatonna, MN 55060, USA + t 507.455.0217 + f 507.455.3446
Page iii
Cybex 425T Treadmill Owner’s Manual
EN 61000-3-2 Electromagnetic compatibility (EMC) - Part 3-2: Limits - Limits for harmonic current emissions (equipment input current <= 16A per phase)
EN 61000-3-3 Electromagnetic compatibility (EMC) - Part 3-3: Limits - Limitation of voltage changes,
voltage fluctuations and flicker in public low-voltage supply systems, for equipment with rated current <=
16 A per phase and not subject to conditional connection
EN 60335-1:2002 +A11:2004 +A1:2004 “Safety of Household and Similar Electrical Appliances”
EN 55022: 1998 (CISPR 22:1997), Class B Limits and Methods of Measurement of Radio Interference
Characteristics of Information Technology Equipment.
EN 957-6: Stationary training equipment: Treadmills, additional specific safety requirements and test
methods
ASTM F 2115: Standard for Motorized Treadmills
FCC Part 15, Subpart B - Class B Radiated and Conducted Emissions
CAN/CSA-C22.2 No. 68-92 (Reaffirmed 1999) “Motor-Operated Appliances (Household and
Commercial)”
ANSI / UL-1647 3rd Edition, March 28, 1997 Rev. May 9, 2006 Motor Operated Massage and Exercise
Machines
Page iv
Worldwide Headquarters 10 Trotter Drive + Medway, MA 02053, USA + t 508.533.4300 + f 508.533.5500
151 24th Avenue NW + Owatonna, MN 55060, USA + t 507.455.0217 + f 507.455.3446
Cybex 425T Treadmill Owner’s Manual
Table of Contents
Front Pages
About this Manual . . . . . . . . . . . . . . . . . .
FCC Compliance Information. . . . . . . . . .
Declaration of Conformity . . . . . . . . . . . .
Table of Contents . . . . . . . . . . . . . . . . . . .
4 Preventive Maintenance
i
i
ii
v
1 Safety
Important Voltage Information . . . . . . .
Grounding Instructions. . . . . . . . . . . . .
Important Safety Instructions . . . . . . . .
Warning Decals . . . . . . . . . . . . . . . . . .
Caution Decals . . . . . . . . . . . . . . . . . . .
Emergency Stop Key (e-stop) . . . . . . .
1-1
1-1
1-2
1-4
1-7
1-7
2 Technical Specifications
Specifications . . . . . . . . . . . . . . . . . . . . 2-1
3 Operation
Terms and Symbols Used . . . . . . . . . . 3-1
Quick Operation Guide. . . . . . . . . . . . . 3-2
Detailed Operation Guide. . . . . . . . . . . 3-2
Stopping the Treadmill . . . . . . . . . . . . . 3-4
Immobilization Method . . . . . . . . . . 3-5
Emergency Dismount . . . . . . . . . . . 3-5
Emergency Stop . . . . . . . . . . . . . . . 3-5
Control During Operation . . . . . . . . . . . 3-5
Data Readouts . . . . . . . . . . . . . . . . . . . 3-6
Displaying Heart Rate. . . . . . . . . . . . . . 3-7
Heart Rate Zone . . . . . . . . . . . . . . . . . . 3-8
Meaning of % Grade . . . . . . . . . . . . . . 3-8
Use of Programs . . . . . . . . . . . . . . . . . 3-9
Manual . . . . . . . . . . . . . . . . . . . . . . . . . 3-9
Speed Interval 1 (P-1). . . . . . . . . . . . . 3-10
Speed Interval 2 (P-2). . . . . . . . . . . . . 3-12
Hill Interval (P-3) . . . . . . . . . . . . . . . . . 3-14
Pikes Peak (P-4) . . . . . . . . . . . . . . . . . 3-16
Rolling Hills (P-5) . . . . . . . . . . . . . . . . 3-18
Hills (P-6) . . . . . . . . . . . . . . . . . . . . . . 3-20
Weight Loss (P-7) . . . . . . . . . . . . . . . . 3-22
Cardio (P-8) . . . . . . . . . . . . . . . . . . . . 3-24
Warnings/Cautions . . . . . . . . . . . . . . . .
Regular Maintenance Activities . . . . . .
Cleaning Your Treadmill . . . . . . . . . . . .
Running Belt Maintenance . . . . . . . . . .
Other Preventive Maintenance . . . . . . .
Service Schedule . . . . . . . . . . . . . . . . .
4-1
4-1
4-1
4-3
4-5
4-6
5 Setup and Assembly
Warnings/Cautions . . . . . . . . . . . . . . . . 5-1
Choosing and Preparing a Site . . . . . . 5-1
Electrical Power Requirements . . . . . . 5-2
Assembling the Treadmill . . . . . . . . . . . 5-2
Testing the Treadmill Operation . . . . . 5-10
Setting Operation Options . . . . . . . . . 5-11
6 Customer Service
Contacting Service . . . . . . . . . . . . . . . .
Serial Number and Voltage . . . . . . . . .
Return Material Authorization (RMA) . .
Damaged Parts. . . . . . . . . . . . . . . . . . .
Ordering Parts . . . . . . . . . . . . . . . . . . .
Parts List. . . . . . . . . . . . . . . . . . . . . . . .
Exploded View . . . . . . . . . . . . . . . . . . .
Schematic. . . . . . . . . . . . . . . . . . . . . . .
6-1
6-1
6-2
6-2
6-3
6-4
6-7
6-8
Page v
Cybex 425T Treadmill Owner’s Manual
This page intentionally left blank
Page vi
Cybex 425T Treadmill Owner’s Manual
1 - Safety
IMPORTANT: Read all instructions and warnings before using the treadmill.
Important Voltage Information
Before plugging the power cord into an electrical outlet, verify that the voltage requirements
for your area match the voltage of the treadmill that you have received. The power
requirements for the Cybex 425T treadmill include a grounded, dedicated circuit, rated for
one of the following: 115 VAC ±5%, 60 Hz and 15 amps; 208/220 VAC, 60 Hz and 10 amps
or 230 VAC ±5%, 50 Hz and 10 amps. See the serial number decal for the exact voltage
requirements of your treadmill.
! WARNING: Do not attempt to use this unit with a voltage adapter. Do not attempt to
use this unit with an extension cord.
! WARNING: Do not plug more than one unit into a single circuit.
Grounding Instructions
This treadmill must be grounded. If it should malfunction or break down, grounding provides
a path of least resistance for electric current to reduce the risk of electric shock. This product
is equipped with a cord having an equipment-grounding conductor and a grounding plug.
The plug must be plugged into an appropriate outlet that is properly installed and grounded in
accordance with all local codes and ordinances.
! DANGER:
Improper connection of the equipment-grounding conductor can result in a risk of
electric shock. Check with a qualified electrician or service provider if you are in doubt
as to whether the treadmill is properly grounded. Seek a qualified electrician to perform
any modifications to the cord or plug. Cybex is not responsible for injuries or damages
as a result of cord or plug modification.
This treadmill is for use on a nominal 115
VAC ±5%, 60 Hz and 15 amps, 208/220
VAC; 60 Hz, 10 amps or 230 VAC ±5%, 50
Hz and 10 amps and a grounded, dedicated
circuit. Make sure that the treadmill is
connected to an outlet having the same
configuration as the plug. Do not use a
ground plug adapter to adapt the power
cord to a non-grounded outlet.
115V
Euro Plug
NEMA 5-15 CEE 7/7
208/220V
NEMA 6-15
UK
230VAC
Safety
Page 1-1
Cybex 425T Treadmill Owner’s Manual
Important Safety Instructions
(Save These Instructions)
! DANGER: To reduce the risk of electric shock, always unplug this treadmill from the
electrical outlet immediately after using it and before cleaning it.
! WARNING: Serious injury could occur if these precautions are not observed. To reduce
the risk of burns, fires, electric shock, or injury:
User Safety Precautions
• DO NOT wear loose or dangling clothing while using.
• Use the treadmill handrails for support and to maintain balance.
• Stop exercising if you feel faint, dizzy, or experience pain at any time and consult your
physician.
• Obtain a medical exam before beginning any exercise program.
• Read and understand emergency stop procedures.
• Replace any warning labels if damaged, worn or illegible.
• Report any malfunctions, damage or repairs to the facility.
• Place your feet on the two top steps when starting or stopping the treadmill.
• Stop and place the treadmill at 0 degrees incline (level) after each use.
• Keep children away from the treadmill. Teenagers and disabled persons must be
supervised.
• Obtain instruction before using.
• Keep all body parts, towels, and the like free and clear of moving parts.
• Read and understand the Owner’s Manual and all warnings posted on the unit before using.
• DO NOT use the unit if you exceed 350 lbs. (158 kg). This is the rated maximum user weight.
• Disconnect power before servicing.
Facility Safety Precautions
• Instruct all users on how to clip the e-stop clip onto their clothing and carefully test it prior
to using the treadmill.
• Instruct all users to use caution when mounting and dismounting the treadmill.
Safety
Page 1-2
Cybex 425T Treadmill Owner’s Manual
• Use a dedicated line when operating the treadmill. NOTE: A dedicated line requires one
circuit breaker per unit.
• Connect the treadmill to a properly grounded outlet only.
• DO NOT operate electrically powered treadmills in damp or wet locations.
• Keep the running belt clean and dry at all times.
• DO NOT leave the treadmill unattended when plugged in and running. NOTE: Before
leaving the treadmill unattended, always wait until the treadmill comes to a complete
stop and is level. Then remove the plug from the outlet. Remove the e-stop key from the
treadmill.
• Immobilize the treadmill (when not in use) by removing the e-stop key.
• Inspect the treadmill for worn or loose components before each use. Do not use until worn
or damaged parts are replaced.
• Maintain and replace worn parts regularly. Refer to “Preventive Maintenance” section of
Owner’s Manual.
• DO NOT operate the treadmill if: (1) the cord is damaged; (2) the treadmill is not working
properly or (3) if the treadmill has been dropped or damaged. Seek service from a qualified
technician.
• DO NOT place the cord near heated surfaces or sharp edges.
• DO NOT use the treadmill outdoors.
• DO NOT operate the treadmill around or where aerosol (spray) or where oxygen products
are being used.
• Read and understand the Owner’s Manual completely before using the treadmill.
• Ensure all users wear proper footwear on or around all Cybex equipment.
• Set up and operate the treadmill on a solid, level surface. Do not operate in recessed areas
or on plush carpet.
• Provide the following clearances: 19.7 inches (0.5 m) at each side, 79 inches (2.0 m) at the
back and enough room for safe access and passage at the front of the treadmill. Be sure
your treadmill is clear of walls, equipment and other hard surfaces.
• DO NOT attempt repairs, electrical or mechanical. Seek qualified repair personnel when
servicing. If you live in the USA, contact Cybex Customer Service at 888-462-9239. If you
live outside the USA, contact Cybex Customer Service at 508-533-4300.
• Use Cybex factory parts when replacing parts on the treadmill.
• DO NOT modify the treadmill in any way.
• DO NOT use attachments unless recommended for the treadmill by Cybex.
• Ensure all User and Facility safety precautions are observed.
Safety
Page 1-3
Cybex 425T Treadmill Owner’s Manual
• Carefully read and understand the following before using the 425T treadmill:
• Warning Decals
• Caution Decals
To replace any worn or damaged decals do one of the following: Visit www.
cybexinternational.com to shop for parts online, fax your order to 508-533-5183 or contact
Cybex Customer Service at 888-462-9239. If you live outside of the USA, call
508-533-4300. For location or part number of labels, see the parts list and exploded-view
diagram. This information can be found in the Service chapter in this manual or on Cybex web
site at www.cybexinternational.com.
Warning Decals
Warning decals indicate a potentially hazardous situation, which, if not avoided, could result in
death or serious injury. The warning decals used on the Cybex 425T are shown below.
WARNING
SERIOUS INJURY COULD OCCUR IF
THESE PRECAUTIONS ARE NOT OBSERVED
1. Obtain a medical exam before beginning any exercise program.
2. Stop exercising if you feel faint, dizzy, or experience pain and consult your physician.
3. Obtain instruction before using. Lisez les instructions avant l'utilisation.
4. Read and understand the Owner’s Manual and all warnings posted on the unit before using.
5. Read and understand emergency stop procedures.
6. DO NOT wear loose or dangling clothing while using the treadmill.
7. Keep all body parts, hair, towels, water bottles and the like free and clear of moving parts.
8. Place your feet on the two top steps when starting or stopping the treadmill.
9. Use the treadmill handrails for support and to maintain balance.
10. Keep children away from the treadmill. Teenagers and disabled persons must be supervised
while using. Tenez les enfants éloignés. Les adolescents et les handicapés doivent être surveilles.
11. DO NOT use the unit if you exceed 350 lbs. (158 kg). This is the rated maximum user weight.
12. Report any malfunctions, damage or repairs to the facility.
13. Replace any warning labels if damaged, worn or illegible.
14. Stop and place the treadmill at 0 degrees incline (level) after each use.
DE-19189-4
DE-19189-4
Warning
Safety
Page 1-4
DE-19238
Cybex 425T Treadmill Owner’s Manual
DE-19238
Warning
Motor Cover
Safety
Page 1-5
Cybex 425T Treadmill Owner’s Manual
DE-16928
Warning
Motor Cover
Safety
Page 1-6
Cybex 425T Treadmill Owner’s Manual
Caution Decals
Caution decals indicate a potentially hazardous situation, which, if not avoided, may result in
minor or moderate injury. There are no caution decals used on this unit. However, there are
caution statements listed in Chapters 5 and 6 of this manual. See Chapters 5 and 6.
Emergency Stop Key (e-stop)
The e-stop key functions as the emergency stop. In an emergency situation, remove the
e-stop key and the treadmill will come to a stop. Before using the treadmill, clip the e-stop
key as described below.
1. Clip the e-stop key to your clothing. NOTE: Be sure the string is free of knots and has
enough slack for you to run comfortably with the e-stop key in place.
2. Without falling off the treadmill, carefully step backward until the e-stop falls off the
treadmill. NOTE: If the e-stop clip falls off your clothing then the test has failed. Reclip the
e-stop clip to your clothing and repeat this step.
3. Replace e-stop after successfully testing the e-stop key. See the illustration shown below.
4. The treadmill is now ready to be used.
5. After use, remove the e-stop key from the treadmill.
NOTE: The e-stop key shall be removed to help prevent unauthorized use. Refer to the
Stopping the Treadmill section in the Operation chapter for more information about
the e-stop key.
Safety
Page 1-7
Cybex 425T Treadmill Owner’s Manual
This page intentionally left blank
Safety
Page 1-8
Cybex 425T Treadmill Owner’s Manual
2 - Technical Specifications
Specifications
Length:
72” (183 cm)
Width:
32” (82 cm)
Running Area:
20” x 60” (51 cm x 152 cm)
Weight of Product:
320 lbs. (145 kg)
Shipping Weight
350 lbs. (159 kg)
Speed Range:
0.5 to 11.0 mph (0.8 to 17.6 kph) in 0.1 mph or 0.1 kph increments
Incline Range:
0 to 15% grade
Manual Mode:
Yes
Programs:
Quick Start plus Manual, HR Control, Speed Interval 1,
Speed Interval 2, Hill Interval, Pikes Peak, Rolling Hills, Hills,
Weight Loss and Cardio
Standard Features:
Contact Heart Rate, Polar® wireless heart rate (chest strap not
included), CSAFE, frame color choices include white texture, black
texture, silver vein, black chrome and platinum sparkle
Optional Features:
Unlimited custom colors available
Power Requirement: Grounded, dedicated circuit and one of the following:
• 115 VAC ±5, 60 Hz and 15 amps
• 208/220 VAC, 60 Hz 10 amps
• 230 VAC ±5, 50 Hz and 10 amps
Motor:
3.0 hp, DC. continuous duty
Emergency Stop:
Pull the emergency stop key (lanyard)
Maximum User Weight: 350 lbs. (158 kg)
32”
(82 cm)
72” (183 cm)
Specifications
Page 2-1
Cybex 425T Treadmill Owner’s Manual
This page intentionally left blank
Specifications
Page 2-2
Cybex 425T Treadmill Owner’s Manual
3 - Operation
Read and understand all instructions and warnings prior to using the treadmill. See all of the
safety related information located in chapter 1.
Terms and Symbols Used
This section lists some of the common terms and symbols used in this chapter. Other terms
and symbols are listed in this chapter as appropriate.
Dormant Mode — This occurs when the treadmill is plugged in and not in use. The control
panel LEDs will flash when the treadmill is in Dormant Mode.
Program Setup Mode — This begins after pressing any program key. Upon entering a
program the LEDs flash, prompting the user to adjust the appropriate settings.
Active Mode — Active Mode is when the running belt is moving. The beginning of Active
Mode is marked by the three second countdown and running belt acceleration. Active Mode
continues until you reach the preset time limit, disengage the e-stop key or press the Pause/
Stop key.
Quick Start — This begins by pressing the Quick Start key. Quick Start skips the Program
Setup Mode and begins immediately in Manual Mode.
Manual Mode — In this active mode you control all aspects of your workout; the running
speed, the incline and the workout duration. As a program choice, Manual will prompt for time
and user weight and after the 3-2-1 countdown will start the belt at the minimum speed. As
Quick Start the time will count up, allowing you to quickly get moving before entering your
weight by pressing the Weight key.
Workout Review — This begins after pressing the Pause/Stop key once or at the end of a
program. The workout statistics accumulated during the previous workout session will display
for preset pause time or until Pause/Stop is pressed again.
Pause Mode — Press the Pause/Stop key to pause your workout. While in Workout Review
you can press the Quick Start key to resume your workout. All statistics are remembered and
added to.
Cool Down — This begins immediately after pressing the Cool Down key. The countdown
timer is set to two minutes, elevation returns to 0% and speed is reduced to 50% of the MET
level or 2.5 MPH (4 Km/H) whichever is lower. Repeated presses of the Cool Down key will
restart the clock at two minutes indefinitely.
— These keys adjust Level or Weight up or down.
— These keys adjust Incline higher or lower.
+ — — These keys adjust Speed up (+) or down (—).
Operation
Page 3-1
Cybex 425T Treadmill Owner’s Manual
Quick Operation Guide
NOTE: Maximum user weight is 350 lbs. (159 kg).
The following is a quick overview of the operation of the treadmill. For more information
read Detailed Operation Guide in this chapter.
1. Place your feet on the two top steps located on each side of the running belt.
! WARNING: Do not stand on the running belt when starting the treadmill. Always
place your feet on the two top steps when beginning a workout.
2. Clip the e-stop clip onto your clothing and test it as described under Emergency Stop
in the Safety chapter.
3. Press any program key or press Quick Start to skip the settings and begin Manual
Mode immediately.
4. If you pressed a program key to select a program, you will now be prompted for
workout Time, Level and Weight as appropriate. Adjust these settings with the
arrows and press Enter to proceed.
5. The treadmill begins a countdown, “3...2...1,” after which it accelerates the belt to
0.5 mph (0.8 kph) (for Manual Mode) or the speed of the program that you selected.
6. Hold the handrails while you step onto the running belt and begin walking.
7. Press the Speed + — keys to change the belt speed at any time. The right display will
show the current speed.
8. Press the Incline
keys to change the incline at any time. The left display will
show the current incline on the first press of the key.
9. Press the Pause/Stop key at any time to stop the running belt. Press again to exit to
Dormant Mode and return the incline to 0%.
Detailed Operation Guide
NOTE: Maximum user weight is 350 lbs. (158 kg).
NOTE: The unit does not have an on/off switch. Plugging the treadmill into a power outlet
will supply power to the treadmill and will illuminate the control panel.
1. Plug the treadmill power cord into a power outlet from a grounded, dedicated circuit,
rated for one of the following: 115 VAC ±5%, 60 Hz and 15 amps; 208/220 VAC, 60 Hz,
10 amps or 230 VAC ±5%, 50 Hz and 10 amps.
Operation
Page 3-2
Cybex 425T Treadmill Owner’s Manual
! WARNING: Do not stand on the running belt when starting the treadmill. Always place
your feet on the two top steps when beginning a workout.
2. Place your feet on the two top steps located on each side of the running belt.
3. Clip the e-stop clip onto your clothing and carefully test the e-stop key to ensure it will
activate in case of an emergency. See Emergency Stop Key (e-stop) in Chapter 1 for
properly testing the e-stop key. Also, see Stopping the Treadmill in this chapter for further
information about the e-stop key. NOTE: Be sure the string is free of knots and has
enough slack for you to run comfortably with the e-stop key in place.
4. You now have the option to select a program or enter Manual Mode.
To select a program, press the Programs key and follow the prompts. Press the
Programs key multiple times to cycle through the eight programs, or use the center
keys. Press Enter to select.
Upon entering a program the LEDs flash, prompting you to adjust the appropriate settings.
This is referred to as Program Setup Mode. If the Quick Start key is pressed now, all
defaults for that program will be accepted. After 10 seconds, if no key has been pressed,
the first default will be accepted. After another 10 seconds the second default will be
accepted and so on until the last default. The program will not enter Active Mode until
you press the Enter or Quick Start key. If no key has been pressed for 60 seconds after
displaying the last default, then the treadmill will return to the Dormant Mode.
If you choose to enter Manual Mode instead of choosing a program, press the Quick
Start or the Manual key. NOTE: No prompts will occur when you press Quick Start.
While in Manual Mode, customize your workout Speed, Incline and enter your Weight by
pressing those keys.
NOTE: For the most accurate calorie count, you must set your correct weight before
beginning your workout (including clothing).
NOTE: When selecting a program you must press Enter after each adjustment of Time,
Level and Weight.
5. The treadmill begins a countdown, “3...2...1” and sounds a tone for each count. When
it reaches one (1) the treadmill gives a longer tone and then starts accelerating the belt.
In Manual Mode the belt will begin accelerating to 0.5 mph (0.8 kph) and the incline will
remain at zero percent. In a program the belt will begin accelerating and the incline will
change to the corresponding speed and incline of the program and level you selected.
6. Hold the handrails while you step onto the running belt and begin walking.
7. Observe the three display windows. The top center window will scan (every three
seconds) through Distance, Calories, Calories per hour, Mets, Pace and Heart Rate.
Press the Scan key to toggle this feature on or off. NOTE: Heart Rate is scanned only
when you are holding the contact heart rate grips or wearing a Polar® compatible chest
strap. The left window will display the time. NOTE: During your workout the time will show
in the format of minutes:seconds (after 99:59 the display will only show minutes). The right
window will display the current speed. See Figure 1.
Operation
Page 3-3
Cybex 425T Treadmill Owner’s Manual
8. Press the Speed + — keys to change the belt speed at any time. The right display will
show the set speed.
9. Press the Incline
keys to change the incline at any time. The left display will show
the current incline only when incline keys are used, then revert to time.
manual
programs
HR
control
Cybex International, Inc. Medway, MA USA (508) 533-4300 www.CybexInternational.com
CHANNEL
Wireless HR Receiver Inside
VOLUME
Figure 1
10. Press the Pause/Stop key at any time to stop your workout. Press Pause/Stop once to
end your workout and begin your Workout Review. As you press Pause/Stop once, the
treadmill belt will stop. Press Pause/Stop a second time to clear the Workout Review,
return to Dormant Mode and return incline to 0%.
11. If the e-stop key is removed during a workout, the drive motor power shuts off
immediately, causing the belt to stop. The right window changes to “OFF” and the left
window shows a flashing pattern of “o” and “o”. Replacement of the e-stop key causes
Workout Review to begin. Pressing Quick Start will resume your workout.
12. When you complete a program the treadmill begins a countdown, “3...2...1,” and sounds
a tone for each count. The belt slows to a stop and Workout Review displays in the center
window for the preset time or until you press the Pause/Stop key.
13. The treadmill returns to Dormant Mode and the incline returns to 0%
Stopping the Treadmill
Operation
Page 3-4
Press Pause/Stop once to pause your workout for up to 20 seconds (or time set for idle) and
to enter the Workout Review. The belt will stop and workout data will remain in memory for
the duration of pause. Press the Quick Start key within 20 seconds to continue your workout
and add to the time you already accumulated. If the Quick Start key has not been pressed
during the duration of pause, workout data will be cleared and the display will change to
Dormant Mode.
Cybex 425T Treadmill Owner’s Manual
Press Pause/Stop a second time to interrupt workout data from cycling and to change the
display to Dormant Mode.
The function of the immobilization method: The purpose
of immobilizing the treadmill is to prevent unauthorized use.
This can be accomplished by removing the e-stop key from
the console, unclipping it from the cord and putting it in a
non-accessible place. See Figure 2.
The emergency dismount: Follow the steps listed below
if you experience pain, feel faint or need to stop your
treadmill in an emergency situation:
Figure 2
1. Grip handrails for support.
2. Step onto the top steps.
3. Pull the e-stop key off the console.
The function of the emergency stop: The e-stop key
functions as the emergency stop. In an emergency
situation, remove the e-stop key from the console and
the treadmill will come to a stop. See Figure 3.
Figure 3
Control During Operation
Control keys on the display are usable during operation and may be pressed at any time to
make adjustments in speed, elevation or data readouts.
Changing Speed — Press the Speed + — keys to change the speed in increments of 0.1
mph or 0.10 kph. Minimum to maximum speed is from 0.5 - 11.0 mph (0.8 - 17.6 kph).
Changing Incline — Press the Incline
keys to change the elevation in increments of
1%. Elevation ranges from 0 to 15%. Press either arrow key once to see the current incline
setting, press multiple times to change incline setting. NOTE: Elevation is defined as the ratio
of rise or fall over run of the treadmill deck.
Workout Time — You can workout up to the maximum time by pressing Quick Start.
Changing Data Readouts — Default setting is for scan to start automatically. Press Scan to
stop and display a set of data. Press Scan once again and it will continually review each set
of data. The display shows each set of data for 3 seconds before switching to the next set.
Operation
Page 3-5
Cybex 425T Treadmill Owner’s Manual
Data Readouts
As you exercise, the treadmill keeps track of the following data:
dist
cal
cal/hr
mets
min
mi/km
Distance — The total accumulated distance, in miles or kilometers,
during your workout. NOTE: Depending on the defaults you’ve chosen this
measurement will show in English or Metric.
Calories — The total accumulated calories burned during your workout.
Your weight must be correctly set before beginning your workout for this
measurement to be most accurate.
Calories Per Hour - Calculation of present workload’s energy exertion in
Calories per Hour.
Metabolic Equivalent — Relates to the user’s energy expenditure. A MET is
a basic unit of measurement that is used to compare relative work between
individuals and activities. ‘One MET’ is the amount of oxygen consumed at
rest. For example two METs would be twice that amount. If an individual were
working at four METs he/she would be consuming oxygen at a rate equal to
four times their resting consumption. METs can be used to compare walking
on a grade with running or even to cycling and other activities.
Pace — At your current speed, how long it would take to cover a mile (or
kilometer), displayed in minutes:seconds.
Heart Rate — Your current heart rate. Heart rate will appear when a signal
is introduced. Use the handgrips for Contact Heart Rate or wear a Polar®
compatible heart rate chest strap.
Operation
Page 3-6
Cybex 425T Treadmill Owner’s Manual
Data displayed during a program: The top center display will continually review each set
of data. Each set of data is displayed for 3 seconds before the next set is displayed. The
corresponding LED lights as the data is displayed.
To review accumulated data after a program: The display automatically cycles through
your accumulated workout data during the Workout Review for up to 20 seconds or the
preset idle time.
Displaying Heart Rate
In order for the Cybex 425T to display your heart rate, hold the handgrips to use Contact
Heart Rate or wear a Polar® compatible heart rate chest strap.
Contact Heart Rate — Hold the handgrips on the console handrail until a heart rate is
displayed, typically less than thirty seconds. For best results, hold the handgrips lightly and
ensure that your hands contact both the front and back sensors of each grip. NOTE: Hold
your hands as steady as possible as movement can cause interference on the contacts.
Factors that can interfere with the heart rate signal include:
• excessive movement
• body composition
• hydration
• too loose grip
• too tight grip
• running
• excessive dirt, powder or oil
• leaning or resting on grips
NOTE: Cybex does not recommend continuous holding onto the contact heart rate grips
during exercise.
Contaminants, such as hand lotions, oils or body powder, may come off on the contact
heart rate grips. These can reduce sensitivity and interfere with the heart rate signal. It is
recommended that the user have clean hands when using the contact heart rate.
Operation
Page 3-7
Cybex 425T Treadmill Owner’s Manual
Heart Rate Zone
Heart Rate is described by the number of times your heart beats in a minute. At rest, the
average adult will have a heart rate of about 72 beats per minute (bpm). As one begins to
exercise, heart rate increases and continues to increase as exercise intensity or difficulty
increases.
Monitoring your heart rate is an effective way to control the intensity of your workout and
subsequently the results it will have. Whether you are a new participant or one with a great
deal of experience, weight loss and other performance goals can be achieved by controlling
the intensity of your workout.
The American College of Sports Medicine
recommends that healthy adults exercise
between 55 and 85% of their heart
rate max. Your heart rate max can be
estimated by subtracting your age from
220. Multiply that estimated heart rate
max by .55 to estimate the lower end
of your heart rate training zone. Then
multiply your estimated heart rate max
by .85 to estimate the higher end of your
training zone. This heart rate training
zone gives you a range of intensities at
which to exercise.
This decal shows heart rate based on
percentage and age.
Heart Rate Zone
Beats
Per
Minute
Ma
x
200
85
%
180
65
%
160
140
120
100
80
60
NOTE: A label is located on the console
to remind you what the heart
rate zone is while you are
working out.
See Figure 4.
Meaning of % Grade
Age 20
30
40
50
60
70
220 - Age = Max Heart Rate
DE-18556-4
Figure 4
A 1% grade is not the same as a 1
degree incline. The % grade is the
relationship of the measurement of rise over the measurement of run (also called slope).
For example, a 1 foot (meter) rise in height over a length of 100 feet (meters) is a 1% grade.
Expressed as a mathematical formula, the grade is calculated as follows:
1 ft. (m) / 100 ft. (m) = 0.01 = 1%
With respect to treadmills, the percent grade is roughly equal to the increase in height (rise) of
the treadmill divided by the length (run) of the treadmill.
Operation
Page 3-8
Cybex 425T Treadmill Owner’s Manual
The degree of incline can be related to % grade by taking the Arctangent of the grade. For
instance, 15% grade is equal to 8.53 Degrees (ArcTan(.15)=8.53º). The opposite is true to
determine % Grade from Degree of incline (Tan (8.53º)=.15).
Use of Programs
! WARNING: Obtain a medical exam before beginning any exercise program. Begin
comfortably with a lower level and progress with higher levels as you
become acclimated.
With the 425T, you may choose from eight different programs as well as Manual and HR
Control. The program choices are summarized as follows:
Quick Start
Manual Mode
Speed Interval 1 (P1)
Speed Interval 2 (P2)
Hill Interval (P3)
Pikes Peak (P4)
Rolling Hills (P5)
Hills (P6)
Weight Loss (P7)
Cardio (P8)
HR Control
manual
You control speed, elevation. Adjust time and weight.
Enter time and weight. You control speed, elevation.
10 Levels Select time, level and weight.
10 Levels Select time, level and weight.
10 Levels Select time, level and weight.
10 Levels Select time, level and weight.
10 Levels Select time, level and weight.
10 Levels Select time, level and weight.
10 Levels Select time, level and weight.
10 Levels Select time, level and weight.
Select time, target heart rate and weight.
programs
HR
control
Manual
Program Overview
Manual Mode is available both through Quick Start and through the Manual program where
you are prompted to enter Time and Weight. NOTE: There is no diagram because incline and
speed are user-controlled.
Manual Mode allows you to choose settings as you workout. You may choose your settings
according to how you feel or your endurance level. Since you remain in control, Manual Mode
may be the best choice for beginners or for those who have not worked out in a long time.
NOTE: Manual Mode is not a preprogrammed workout.
Press the Quick Start key to workout in Manual Mode. You can also begin Manual Mode by
pressing the Manual program key. To increase or decrease the speed while in Manual Mode
use the Speed + — keys. To increase or decrease the incline while in Manual Mode use
the
arrows.
Operation
Page 3-9
Cybex 425T Treadmill Owner’s Manual
Speed Interval 1 (P-1)
Program Overview
This program is designed to introduce an individual to incorporating running into their training.
The program uses exclusively 0% incline with a repeating 1:2 work to rest ratio. Each work
segment lasts 30 seconds and each rest segment lasts 60 seconds. The speeds during the
rest segments are at a walking pace while the speeds in the work segments are approximately
double the rest speed. Figure 5.
Base Speed / Base Elevation
mph
% grade
Level 1
2
3
4
5
6
7
8
9
10
Operation
Page 3-10
3.2
3.4
3.6
4.8
4.0
4.2
4.4
4.6
4.8
5.0
0%
0%
0%
0%
0%
0%
0%
0%
0%
0%
Peak Speed
mph
6.5
7.0
7.5
8.0
8.5
9.0
9.5
10.0
10.5
11.0
/ Peak Elevation
% grade
0%
0%
0%
0%
0%
0%
0%
0%
0%
0%
Cybex 425T Treadmill Owner’s Manual
Speed Interval 1
Profiles Show Level 10 at 10 Minutes
MPH
11.0
Speed
—
—
—
—
—
—
—
—
—
10.0
—
—
—
—
—
—
—
—
— 9.0
—
—
—
—
—
—
—
—
— 8.0
—
—
—
—
—
—
—
—
— 7.0
—
—
—
—
—
—
—
—
—
— 6.0
—
—
—
—
—
—
—
—
5.0
—
—
—
—
—
—
—
—
—
— 4.0
—
—
—
—
—
—
—
—
3.0
—
—
—
—
—
—
—
—
—
— 2.0
—
—
—
—
—
—
—
—
—
— 1.0
—
—
—
2EPEATINGSEGMENT
KPH
—
—
—
—
—
—
—
— 17.0
—
—
—
—
—
—
—
—
— 16.0
—
—
—
—
—
—
—
— 15.0
—
—
—
—
—
—
—
—
— 14.0
—
—
—
—
—
—
—
—
—
— 13.0
—
—
—
—
—
—
—
— 12.0
—
—
—
—
—
—
—
—
—
11.0
—
—
—
—
—
—
—
—
—
— 10.0
—
—
—
—
—
—
—
— 9.0
—
—
—
—
—
—
—
—
—
— 8.0
—
—
—
—
—
—
—
—
— 7.0
—
—
—
—
—
—
—
— 6.0
—
—
—
—
—
—
—
—
—
— 5.0
—
—
—
—
—
—
—
—
— 4.0
—
—
—
—
—
—
—
— 3.0
—
—
—
—
—
—
—
—
—
— 2.0
—
—
—
—
—
—
—
—
— 1.0
Warm Up
Elevation %
Program Segments in Minutes
Cool Down
15
14
13
12
11
10
9
8
7
6
5
4
3
2
1
0
Warm Up
Program Segments in Minutes
Cool Down
Figure 5
Operation
Page 3-11
Cybex 425T Treadmill Owner’s Manual
Speed Interval 2 (P-2)
Program Overview
This program is designed for those wishing to introduce speed into their training. The program
uses exclusively 0% incline with a repeating 1:3 work to rest ratio. Each work segment lasts
15 seconds and each rest segment lasts 45 seconds. The speeds during the rest segments
are at a walking pace while the speeds in the work segments are approximately triple the rest
speed. See table below and Figure 6.
Base Speed / Base Elevation
mph
% grade
Level 1
2
3
4
5
6
7
8
9
10
Operation
Page 3-12
2.2
2.4
2.6
2.8
3.0
3.2
3.4
3.6
3.8
4.0
0%
0%
0%
0%
0%
0%
0%
0%
0%
0%
Peak Speed
mph
6.5
7.0
7.5
8.0
8.5
9.0
9.5
10.0
10.5
11.0
/ Peak Elevation
% grade
0%
0%
0%
0%
0%
0%
0%
0%
0%
0%
Cybex 425T Treadmill Owner’s Manual
Speed Interval 2
Profiles Show Level 10 at 10 Minutes
MPH
11.0
Speed
—
—
—
—
—
—
—
—
—10.0
—
—
—
—
—
—
—
—
— 9.0
—
—
—
—
—
—
—
—
— 8.0
—
—
—
—
—
—
—
—
— 7.0
—
—
—
—
—
—
—
—
—
— 6.0
—
—
—
—
—
—
—
—
5.0
—
—
—
—
—
—
—
—
—
4.0
—
—
—
—
—
—
—
—
—
3.0
—
—
—
—
—
—
—
—
—
2.0
—
—
—
—
—
—
—
—
—
—
— 1.0
—
—
—
2EPEATINGSEGMENT
KPH
—
—
—
—
—
—
—
— 17.0
—
—
—
—
—
—
—
—
— 16.0
—
—
—
—
—
—
—
— 15.0
—
—
—
—
—
—
—
—
—
— 14.0
—
—
—
—
—
—
—
—
— 13.0
—
—
—
—
—
—
—
— 12.0
—
—
—
—
—
—
—
—
—
— 11.0
—
—
—
—
—
—
—
—
— 10.0
—
—
—
—
—
—
—
— 9.0
—
—
—
—
—
—
—
—
—
— 8.0
—
—
—
—
—
—
—
—
— 7.0
—
—
—
—
—
—
—
— 6.0
—
—
—
—
—
—
—
—
—
— 5.0
—
—
—
—
—
—
—
—
— 4.0
—
—
—
—
—
—
—
— 3.0
—
—
—
—
—
—
—
—
—
— 2.0
—
—
—
—
—
—
—
— 1.0
—
Warm Up
Elevation %
Program Segments in Minutes
Cool Down
15
14
13
12
11
10
9
8
7
6
5
4
3
2
1
0
Warm Up
Program Segments in Minutes
Cool Down
Figure 6
Operation
Page 3-13
Cybex 425T Treadmill Owner’s Manual
Hill Interval (P-3)
Program Overview
This program is designed to introduce some variability into the program while maintaining a
constant walking pace. The Hill Interval program varies the incline between two levels every
60 seconds. This provides for moderate variation that that elicits an improved result over
steady state walking up an incline. See table below and Figure 7.
Base Speed / Base Elevation
mph
% grade
Level 1
2
3
4
5
6
7
8
9
10
Operation
Page 3-14
1.7
2.0
2.3
2.6
2.9
3.2
3.5
3.8
4.1
4.4
1%
2%
3%
3%
4%
5%
5%
6%
7%
6%
Peak Speed
mph
/ Peak Elevation
% grade
1.7
2.0
2.3
2.6
2.9
3.2
3.5
3.8
4.1
4.4
6%
7%
8%
9%
10%
11%
12%
13%
14%
15%
Cybex 425T Treadmill Owner’s Manual
Hill Interval
Profiles Show Level 10 at 10 Minutes
MPH
11.0
Speed
—
—
—
—
—
—
—
—
—
10.0
—
—
—
—
—
—
—
—
— 9.0
—
—
—
—
—
—
—
—
— 8.0
—
—
—
—
—
—
—
—
— 7.0
—
—
—
—
—
—
—
—
—
— 6.0
—
—
—
—
—
—
—
—
5.0
—
—
—
—
—
—
—
—
—
4.0
—
—
—
—
—
—
—
—
—
3.0
—
—
—
—
—
—
—
—
—
2.0
—
—
—
—
—
—
—
—
—
—
— 1.0
—
—
—
Elevation %
2EPEATINGSEGMENT
KPH
—
—
—
—
—
—
—
— 17.0
—
—
—
—
—
—
—
—
— 16.0
—
—
—
—
—
—
—
— 15.0
—
—
—
—
—
—
—
—
— 14.0
—
—
—
—
—
—
—
—
—
— 13.0
—
—
—
—
—
—
—
— 12.0
—
—
—
—
—
—
—
—
—
— 11.0
—
—
—
—
—
—
—
— 10.0
—
—
—
—
—
—
—
—
— 9.0
—
—
—
—
—
—
—
—
—
— 8.0
—
—
—
—
—
—
—
— 7.0
—
—
—
—
—
—
—
—
—
— 6.0
—
—
—
—
—
—
—
— 5.0
—
—
—
—
—
—
—
—
— 4.0
—
—
—
—
—
—
—
—
—
— 3.0
—
—
—
—
—
—
—
—
— 2.0
—
—
—
—
—
—
—
—
— 1.0
Warm Up
Program Segments
in Minutes
Cool Down
Warm Up
Program Segments
in Minutes
Cool Down
15
14
13
12
11
10
9
8
7
6
5
4
3
2
1
0
Figure 7
Operation
Page 3-15
Cybex 425T Treadmill Owner’s Manual
Pikes Peak (P-4)
Program Overview
Pikes Peak uses a nine-minute core where the incline increases every minute for the first five
minutes. As the incline increases, speed is slightly reduced in the same fashion as it would if
one where hiking up an ever steeper hill. After the fifth minute of the core program, the incline
is reduced each minute and the speed increases. All speeds in this program are at a walking
pace. See table below and Figure 8.
Base Speed / Base Elevation
mph
% grade
Level 1
2
3
4
5
6
7
8
9
10
Operation
Page 3-16
2.2
2.4
2.6
2.8
3.0
3.2
3.4
3.6
3.8
4.0
1%
2%
3%
3%
4%
5%
5%
6%
7%
8%
Peak Speed
mph
/ Peak Elevation
% grade
3.0
3.2
3.4
3.6
3.8
4.0
4.2
4.4
4.6
4.8
6%
7%
8%
9%
10%
11%
12%
13%
14%
15%
Cybex 425T Treadmill Owner’s Manual
Pikes Peak
Profiles Show Level 10 at 13 Minutes
MPH
11.0
Speed
—
—
—
—
—
—
—
—
—
10.0
—
—
—
—
—
—
—
—
— 9.0
—
—
—
—
—
—
—
—
— 8.0
—
—
—
—
—
—
—
—
— 7.0
—
—
—
—
—
—
—
—
—
— 6.0
—
—
—
—
—
—
—
—
5.0
—
—
—
—
—
—
—
—
—
4.0
—
—
—
—
—
—
—
—
—
3.0
—
—
—
—
—
—
—
—
—
2.0
—
—
—
—
—
—
—
—
—
—
— 1.0
—
—
—
2EPEATINGSEGMENT
KPH
—
—
—
—
—
—
—
— 17.0
—
—
—
—
—
—
—
—
— 16.0
—
—
—
—
—
—
—
— 15.0
—
—
—
—
—
—
—
—
— 14.0
—
—
—
—
—
—
—
—
—
— 13.0
—
—
—
—
—
—
—
— 12.0
—
—
—
—
—
—
—
—
—
— 11.0
—
—
—
—
—
—
—
— 10.0
—
—
—
—
—
—
—
—
— 9.0
—
—
—
—
—
—
—
—
—
— 8.0
—
—
—
—
—
—
—
— 7.0
—
—
—
—
—
—
—
—
—
— 6.0
—
—
—
—
—
—
—
— 5.0
—
—
—
—
—
—
—
—
— 4.0
—
—
—
—
—
—
—
—
—
— 3.0
—
—
—
—
—
—
—
—
— 2.0
—
—
—
—
—
—
—
—
— 1.0
Warm Up
Elevation %
Program Segments in Minutes
Cool Down
15
14
13
12
11
10
9
8
7
6
5
4
3
2
1
0
Warm Up
Program Segments in Minutes
Cool Down
Figure 8
Operation
Page 3-17
Cybex 425T Treadmill Owner’s Manual
Rolling Hills (P5)
Program Overview
The Rolling Hills program uses a four-minute core. In the core program each minute
represents a segment. Segments two and four are the “rest” intervals and use the same
speed. The first and third segments also use higher speeds than the rest intervals with the
first segment having the least incline and the third having the greatest. This provides for the
following relative work pattern: work – rest – work harder - rest - and then repeat. See table
below and Figure 9.
Base Speed / Base Elevation
mph
% grade
Level 1
2
3
4
5
6
7
8
9
10
Operation
Page 3-18
1.5
2.0
2.5
3.0
3.5
4.0
4.5
5.0
5.5
6.0
0%
0%
0%
1%
1%
2%
2%
3%
3%
4%
Peak Speed
mph
/ Peak Elevation
% grade
3.5
4.0
4.5
5.0
5.5
6.0
6.5
7.0
7.5
8.0
5%
6%
6%
6%
7%
7%
7%
8%
8%
8%
Cybex 425T Treadmill Owner’s Manual
Rolling Hills
Profiles Show Level 10 at 10 Minutes
MPH
11.0
Speed
—
—
—
—
—
—
—
—
—10.0
—
—
—
—
—
—
—
—
— 9.0
—
—
—
—
—
—
—
—
— 8.0
—
—
—
—
—
—
—
—
— 7.0
—
—
—
—
—
—
—
—
—
— 6.0
—
—
—
—
—
—
—
—
— 5.0
—
—
—
—
—
—
—
—
4.0
—
—
—
—
—
—
—
—
—
3.0
—
—
—
—
—
—
—
—
—
2.0
—
—
—
—
—
—
—
—
—
—
— 1.0
—
—
—
Elevation %
2EPEATINGSEGMENT
KPH
—
—
—
—
—
—
—
— 17.0
—
—
—
—
—
—
—
— 16.0
—
—
—
—
—
—
—
—
—
— 15.0
—
—
—
—
—
—
—
— 14.0
—
—
—
—
—
—
—
—
— 13.0
—
—
—
—
—
—
—
—
—
— 12.0
—
—
—
—
—
—
—
— 11.0
—
—
—
—
—
—
—
—
— 10.0
—
—
—
—
—
—
—
—
—
— 9.0
—
—
—
—
—
—
—
— 8.0
—
—
—
—
—
—
—
—
— 7.0
—
—
—
—
—
—
—
—
—
— 6.0
—
—
—
—
—
—
—
— 5.0
—
—
—
—
—
—
—
—
— 4.0
—
—
—
—
—
—
—
—
— 3.0
—
—
—
—
—
—
—
—
— 2.0
—
—
—
—
—
—
—
—
— 1.0
—
Warm Up
Program Segments
in Minutes
Cool Down
Warm Up
Program Segments
in Minutes
Cool Down
15
14
13
12
11
10
9
8
7
6
5
4
3
2
1
0
Figure 9
Operation
Page 3-19
Cybex 425T Treadmill Owner’s Manual
Hills (P-6)
Program Overview
The Hills program is a constant speed walking program that introduces incline that varies
each minute to for a series of relative peaks and valleys. See table below and Figure 10.
Base Speed / Base Elevation
mph
% grade
Level 1
2
3
4
5
6
7
8
9
10
Operation
Page 3-20
2.2
2.4
2.6
2.8
3.0
3.2
3.4
3.6
3.8
4.0
0%
0%
1%
2%
3%
4%
5%
6%
7%
8%
Peak Speed
mph
/ Peak Elevation
% grade
2.2
2.4
2.6
2.8
3.0
3.2
3.4
3.6
3.8
4.0
6%
7%
8%
9%
10%
11%
12%
13%
14%
15%
Cybex 425T Treadmill Owner’s Manual
Hills
Profiles Show Level 10 at 10 Minutes
MPH
11.0
Speed
—
—
—
—
—
—
—
—
—10.0
—
—
—
—
—
—
—
—
— 9.0
—
—
—
—
—
—
—
—
— 8.0
—
—
—
—
—
—
—
—
— 7.0
—
—
—
—
—
—
—
—
—
— 6.0
—
—
—
—
—
—
—
—
5.0
—
—
—
—
—
—
—
—
—
4.0
—
—
—
—
—
—
—
—
—
3.0
—
—
—
—
—
—
—
—
—
2.0
—
—
—
—
—
—
—
—
—
—
— 1.0
—
—
—
Elevation %
2EPEATINGSEGMENT
KPH
—
—
—
—
—
—
—
— 17.0
—
—
—
—
—
—
—
—
— 16.0
—
—
—
—
—
—
—
— 15.0
—
—
—
—
—
—
—
—
—
— 14.0
—
—
—
—
—
—
—
—
— 13.0
—
—
—
—
—
—
—
— 12.0
—
—
—
—
—
—
—
—
—
— 11.0
—
—
—
—
—
—
—
—
— 10.0
—
—
—
—
—
—
—
— 9.0
—
—
—
—
—
—
—
—
—
— 8.0
—
—
—
—
—
—
—
—
— 7.0
—
—
—
—
—
—
—
— 6.0
—
—
—
—
—
—
—
—
—
— 5.0
—
—
—
—
—
—
—
—
— 4.0
—
—
—
—
—
—
—
— 3.0
—
—
—
—
—
—
—
—
—
— 2.0
—
—
—
—
—
—
—
— 1.0
—
Warm Up
Program Segments
in Minutes
Cool Down
Warm Up
Program Segments
in Minutes
Cool Down
15
14
13
12
11
10
9
8
7
6
5
4
3
2
1
0
Figure 10
Operation
Page 3-21
Cybex 425T Treadmill Owner’s Manual
Weight Loss (P-7)
Program Overview
This program was designed to help individuals of all fitness levels achieve their weight loss
goals through a protocol that incorporates both low and moderate intensity activity. Because
walking has become a popular mode of exercise for those looking to lose weight, all levels of
this program are performed at walking speeds.
The core of the program is made up of five one-minute segments. The first segment
represents the baseline of the program and may also be considered to be a “rest” segment
later. In minutes two and three, elevation will be increased. In minute four, the program returns
to the first segment baseline or rest level. In the fifth minute, the speed will increase. The total
number of segments used is dictated by the time selected by the user.
Higher levels of the Weight Loss program incorporate jogging speeds in short segments. This
allows the advanced walker to alternate walking and jogging.
• At levels 1-6 walkers maintain walking speeds only.
• At levels 7-10, experienced walkers can jog intermittently.
By mixing the use of speed and elevation separately, the user receives the benefits of added
intensity intervals but the variety does not allow for either speed or elevation to dominate and
therefore overtax the user. See table below and Figure 11.
Level
1
2
3
4
5
6
7
8
9
10
Operation
Page 3-22
Base Speed
mph
3.4
3.4
3.7
3.7
3.8
3.8
4.0
4.0
4.2
4.2
WALK
Uphill Elevation
% Grade
2%
3%
4%
6%
4%
6%
6%
8%
8%
10%
Increased Speed
mph
3.5
3.5
3.8
3.8
4.0
4.0
4.5
5.0
5.5
6.0
WALK
WALK-JOG
Cybex 425T Treadmill Owner’s Manual
Weight Loss
Profiles Show Level 10 at 10 Minutes
MPH
11.0
Speed
—
—
—
—
—
—
—
—
—10.0
—
—
—
—
—
—
—
—
— 9.0
—
—
—
—
—
—
—
—
— 8.0
—
—
—
—
—
—
—
—
— 7.0
—
—
—
—
—
—
—
—
—
6.0
—
—
—
—
—
—
—
—
—
— 5.0
—
—
—
—
—
—
—
—
4.0
—
—
—
—
—
—
—
—
—
3.0
—
—
—
—
—
—
—
—
—
2.0
—
—
—
—
—
—
—
—
—
—
— 1.0
—
—
—
Elevation %
2EPEATINGSEGMENT
KPH
—
—
—
—
—
—
—
— 17.0
—
—
—
—
—
—
—
— 16.0
—
—
—
—
—
—
—
—
— 15.0
—
—
—
—
—
—
—
—
—
— 14.0
—
—
—
—
—
—
—
— 13.0
—
—
—
—
—
—
—
—
— 12.0
—
—
—
—
—
—
—
—
—
— 11.0
—
—
—
—
—
—
—
— 10.0
—
—
—
—
—
—
—
—
—
9.0
—
—
—
—
—
—
—
—
—
— 8.0
—
—
—
—
—
—
—
— 7.0
—
—
—
—
—
—
—
—
—
— 6.0
—
—
—
—
—
—
—
—
— 5.0
—
—
—
—
—
—
—
— 4.0
—
—
—
—
—
—
—
—
—
— 3.0
—
—
—
—
—
—
—
—
— 2.0
—
—
—
—
—
—
—
— 1.0
—
Warm Up
Program Segments
in Minutes
Cool Down
Warm Up
Program Segments
in Minutes
Cool Down
15
14
13
12
11
10
9
8
7
6
5
4
3
2
1
0
Figure 11
Operation
Page 3-23
Cybex 425T Treadmill Owner’s Manual
Cardio (P-8)
Program Overview
This program was designed for the exercise participant who wants to improve the overall
efficiency of their cardio-respiratory system. Unlike some of the other treadmill programs that
incorporate low and moderate intensity segments, the Cardio program contains overall higher
intensity levels with more moderate recovery segments.
The speed range of the program includes walking speeds at the lower levels up through a
moderate jog in the higher levels.
Elevation is used to emphasize the high intensity portion of this program while decreased
elevation and a small increase in speed mark the recovery segment. High intensity and
recovery segments are always in a one-to-one time based ratio and make up the core eight
minutes of the program. See table below and Figure 12.
Base Speed / Peak Elevation
mph
% grade
Level 1
2
3
4
5
6
7
8
9
10
Operation
Page 3-24
3.2
3.5
3.8
4.0
4.2
5.0
5.5
6.0
6.2
6.5
2%
3%
4%
5%
5%
5%
5%
6%
6%
6%
Base Speed
mph
/ Peak Elevation
% grade
3.5
3.8
4.0
4.2
5.0
5.5
5.8
6.2
6.5
6.8
0%
0%
0%
0%
2%
2%
2%
2%
2%
2%
Cybex 425T Treadmill Owner’s Manual
Cardio
Profiles Show Level 10 at 12 Minutes
MPH
11.0
Speed
—
—
—
—
—
—
—
—
—10.0
—
—
—
—
—
—
—
—
— 9.0
—
—
—
—
—
—
—
—
— 8.0
—
—
—
—
—
—
—
—
— 7.0
—
—
—
—
—
—
—
—
—
6.0
—
—
—
—
—
—
—
—
—
— 5.0
—
—
—
—
—
—
—
—
4.0
—
—
—
—
—
—
—
—
—
3.0
—
—
—
—
—
—
—
—
—
2.0
—
—
—
—
—
—
—
—
—
—
— 1.0
—
—
—
Elevation %
KPH
2EPEATINGSEGMENT
—
—
—
—
—
—
—
— 17.0
—
—
—
—
—
—
—
— 16.0
—
—
—
—
—
—
—
—
— 15.0
—
—
—
—
—
—
—
—
—
— 14.0
—
—
—
—
—
—
—
— 13.0
—
—
—
—
—
—
—
—
— 12.0
—
—
—
—
—
—
—
—
—
— 11.0
—
—
—
—
—
—
—
— 10.0
—
—
—
—
—
—
—
—
—
9.0
—
—
—
—
—
—
—
—
—
— 8.0
—
—
—
—
—
—
—
— 7.0
—
—
—
—
—
—
—
—
—
— 6.0
—
—
—
—
—
—
—
—
— 5.0
—
—
—
—
—
—
—
— 4.0
—
—
—
—
—
—
—
—
—
— 3.0
—
—
—
—
—
—
—
—
— 2.0
—
—
—
—
—
—
—
— 1.0
—
Warm Up
Program Segments in Minutes
Cool Down
Warm Up
Program Segments in Minutes
Cool Down
15
14
13
12
11
10
9
8
7
6
5
4
3
2
1
0
Figure 12
Operation
Page 3-25
Cybex 425T Treadmill Owner’s Manual
This page intentionally left blank
Operation
Page 3-26
Cybex 425T Treadmill Owner’s Manual
4 - Preventive Maintenance
Warnings/Cautions
All warnings and cautions listed in this chapter are as follows:
! WARNING: All maintenance activities shall be performed by qualified personnel.
Failure to do so could result in serious injury.
! WARNING: To prevent electrical shock, be sure that the treadmill is unplugged
from the electrical outlet before performing any cleaning or maintenance
procedures.
! WARNING: Keep wet items away from inside parts of the treadmill. Electrical shock
could occur even if the treadmill is unplugged. Do not touch components
on the lower board. A charge can remain after unplugging the power cord
and turning off the treadmill.
Regular Maintenance Activities
! WARNING: All maintenance activities shall be performed by qualified personnel.
Failure to do so could result in serious injury.
Preventive maintenance activities must be performed to maintain normal operation of your
treadmill. Keeping a log sheet of all maintenance actions will assist you in staying current with
all preventive maintenance activities. See Service Schedule located at the end of this chapter.
NOTE: Worn or damaged components shall be replaced immediately or the treadmill removed
from service until the repair is made.
NOTE: Cybex is not responsible for performing regular inspection and maintenance actions
for your treadmill. Instruct all personnel in equipment inspection and maintenance
actions and also in accident reporting/recording. Contact Cybex Customer Service at
888-462-9239 or 508-533-4300 for any preventive maintenance or service concerns.
Cleaning Your Treadmill
When cleaning your treadmill spray a mild cleaning agent, such as a water and dishsoap
solution, on a clean cloth first and then wipe the treadmill with the damp cloth.
Preventive
Maintenance
Page 4-1
Cybex 425T Treadmill Owner’s Manual
NOTE: Do not spray cleaning solution directly on the treadmill. Direct spraying could cause
damage to the electronics and may void the warranty.
! WARNING: To prevent electrical shock, be sure that the treadmill is unplugged
from the electrical outlet before performing any cleaning or maintenance
procedures.
After Each Use — Wipe up any liquid spills immediately. After each workout, use a cloth to
wipe up any remaining perspiration from the handrails and painted surfaces.
Be careful not to spill or get excessive moisture between the edge of the display panel and
the console, as this might create an electrical hazard or cause failure of the electronics.
As Needed — Vacuum any dust or dirt that might accumulate under or around the treadmill.
Motors are especially susceptible to dust and dirt, and restricted airflow can prevent adequate
cooling that could shorten motor life. Cleaning this area should be done as often as indicated
in the Service Schedule.
! WARNING: Keep wet items away from inside parts of the treadmill. Electrical shock
could occur even if the treadmill is unplugged. Do not touch components
on the lower board. A charge can remain after unplugging the power cord.
To clean the motor components, you must raise the elevation to 15% elevation. Unplug the
treadmill and carefully lift the rear of the treadmill. Lift the treadmill until it rests on the top
of the console. Use a vacuum attachment or hand vacuum to clean the exposed elevation
assembly, drive motor, lower electronics and the surrounding areas. Wipe clean the underside
of the treadmill to prevent dirt and dust build-up.
Also use a dry cloth for the areas that you can’t reach with the vacuum cleaner. If the machine
has not been used for some time or is excessively dirty, use a dry cloth to wipe all exposed
areas.
Carefully lower the rear of the treadmill and roll it back from its present position to vacuum the
floor area underneath the unit. When finished, return the treadmill to its normal position.
Contact Heart Rate Grips — Contaminants, such as hand lotions, oils or body powder, may
come off on the contact heart rate grips. These can reduce sensitivity and interfere with the
heart rate signal. It is recommended that the user have clean hands when using the contact
heart rate. Clean the grips using a cloth dampened with a cleaning solution containing rubbing
alcohol. The grips are the only part of the treadmill you should use a cleaning solution containing
rubbing alcohol.
Preventive
Maintenance
Page 4-2
Cybex 425T Treadmill Owner’s Manual
Running Belt Maintenance
Belt and Deck — Wipe the belt surface and the deck area with a clean dry towel to minimize
the effect of friction between the deck and the running belt. This should be done often to
prevent premature wear of the deck, running belt, and the drive motor system. See the
Service Schedule at the end of this chapter.
The running belt may become loose and slip on the drive roller with each foot plant. If it does,
follow the Tensioning and Centering the Belt procedure below. See the Service Schedule in
this chapter for a minimum schedule for checking the belt tension.
Tension and Center the Belt — If the belt is slipping under each step perform this
procedure:
Tools Required
• 3/4” Socket wrench
1. Tension the belt.
A. Use a 3/4” socket wrench to turn each bolt 1/2 turn clockwise. See Figure 1.
NOTE: Be sure to adjust each bolt equally on each side.
Figure 1
B. Press the Quick Start key.
C. Press the Speed + to bring the speed up to 3.5-4 mph (5.6-6.4 kph). Allow the
treadmill to run for a minute.
D. Observe the belt to be sure it stays centered. If it is not centered follow step 2.
E. Walk on the belt to see if it still slips. If it does restart this procedure at step 1 A. If you
have to do this procedure three times and it still slips call Cybex Customer Service.
Follow the next step to be sure the belt is centered.
NOTE: Be careful not to over tighten the belt. Over tightening the belt can cause the belt to
stretch and require replacement.
Preventive
Maintenance
Page 4-3
Cybex 425T Treadmill Owner’s Manual
2. Center the belt.
NOTE: While centering the belt choose one bolt to adjust. Do not adjust both bolts.
A. With the treadmill running at 5 mph (8 kph) observe the running belt. If the belt tracks
off center to the right or left the deck will become exposed. Use a 3/4” socket wrench
to tighten the rear roller bolt on the side of the treadmill toward which the belt is
moving. For example: If the belt moves to the right and the deck becomes exposed
on the left, tighten the bolt on the right side of the frame, tighten about 1/2 of a turn
(clockwise) and wait 30 seconds. If the belt does not move back to the center of the
treadmill, make another adjustment to the same bolt. Once the running belt has been
adjusted closer to the center of the treadmill use about 1/4 of a turn until the belt has
been stabilized.
B. After the belt has been centered, check the belt tension again. Make sure the running belt
tension is tight enough so that the belt does not slip or hesitate when stepped on. Walk
on the treadmill at 3.5-4 mph (5.6-6.4 kph) and every 4th to 5th step throw your weight
into your step to feel if the belt is slipping. If the belt does slip, use a wrench to equally
tighten both rear roller adjustment bolts 1/2 of a turn (clockwise). Adjust the belt until no
further slipping is felt.
Checking the Belt and Deck Surfaces — The running belt and deck should be checked
periodically for any excessive wear. In an effort to make sure that the running belt operates
properly, visually inspect the belt often to make sure that there are no tears or fraying in the
belt material. The running belt, deck, deck bushings and motor brushes should be replaced
every 9,000 miles (14,500 km). A service prompt will appear at this interval and the parts will
need to be replaced.
Inspect the edges of the belt as described below.
Tools Required
• None
1. Disconnect the external power source.
A. Unplug the treadmill from the power outlet.
2. Check the belt and deck condition.
A. Look at the edges of the belt while you roll it by hand. If the belt has any rips or looks
excessively worn the belt needs to be replaced.
B. Run your hand under the belt on the top of the deck surface. If you feel excessive
ridges or cracks, or if any wood is exposed under the black surface, the deck should
be replaced. In time, a worn belt and deck can cause high current draw and ultimately,
motor failure.
NOTE: If the running belt and deck need replacement refer to a qualified service technician.
Preventive
Maintenance
Page 4-4
Cybex 425T Treadmill Owner’s Manual
Other Preventive Maintenance
Other preventive maintenance activities must be completed by a qualified service technician
at the recommended intervals listed in the Service Schedule at the end of this chapter. These
activities include:
• Measure the motor brushes and replace worn motor brushes
• Replace the running deck and bushings
• Replace the running belt
Elevation Motor Lubrication — In time the elevation motor pivot points may develop a
squeak. Lubricate the upper and lower bolts and the spacers with a small amount of lithium
grease. NOTE: You can buy lithium grease at an auto parts store.
Static Electricity — Depending upon where you live, you may experience dry air, causing a
common experience of static electricity. This may be especially true in the winter time. You
may notice a static build-up just by walking across a carpet and then touching a metal object.
The same can hold true while working out on your treadmill. You may experience a shock due
to the build-up of static electricity on your body and the discharge path of the treadmill. If you
experience this type of situation, you may want to increase the humidity to a comfortable level
through the use of a humidifier.
Preventive
Maintenance
Page 4-5
Cybex 425T Treadmill Owner’s Manual
Service Schedule
All maintenance activities shall be performed by qualified personnel. Failure to do so could
result in serious injury.
NOTE: This is the minimum recommended service.
1. Determine mileage.
A. While in Dormant Mode enter Test Mode by pressing and holding the Heart Rate and
Level keys simultaneously for five seconds.
B. Press the Dist key. DIST appears on the display. Record Mileage. NOTE: Once the
unit exceeds 999 miles or kilometers the odometer will use both screens. Example:
12,805 miles or km would be displayed as 12 805 .
NOTE: To exit Test Mode, press the Pause/Stop key .
First 500 miles (800 km).
• Check running belt tension and tracking.
Every 5,000 miles (8,000 km).
• Check running belt tension and tracking.
• Move treadmill and vacuum underneath.
• Raise elevation to 15%, Carefully tip treadmill up on the console to clean underneath
with a dry cloth and vacuum. Return to normal position when done.
Every 9,000 miles (14,500 km).
• Replace running belt and deck.
• Replace deck bumpers.
• Replace drive motor brushes.
• Check elevation assembly and replace worn parts.
• Lubricate elevation pivot points.
NOTE: Every 9,000 miles (14,500 km) the unit will show “SVC” on the display. The unit will
then emit a short beep every 2 minutes. This will continue until the service is performed
and the service odometer is reset.
Preventive
Maintenance
Page 4-6
Cybex 425T Treadmill Owner’s Manual
2. Resetting the service odometer.
A. While in Dormant Mode enter Test Mode by pressing and holding the Heart Rate and
Level keys simultaneously for five seconds.
B. Press the Cool Down key to display “SVC” and miles or kilometers on service
odometer.
C. Press the
or
key to display “RST”.
D. Press the Enter key to reset the service odometer to zero.
NOTE: Service may be performed before the 9,000 miles (14,500 km) service prompt appears.
Perform the service on the unit and follow the above procedure to reset the service
odometer to zero.
Preventive
Maintenance
Page 4-7
Cybex 425T Treadmill Owner’s Manual
This page intentionally left blank
Preventive
Maintenance
Page 4-8
Cybex 425T Treadmill Owner’s Manual
5 - Setup and Assembly
Warnings/Cautions
All warnings and cautions listed in this chapter are as follows:
! WARNING: Use extreme caution when assembling the treadmill. Failure to do so could
result in injury.
! WARNING: During this procedure STAY OFF THE RUNNING BELT! Stand with your
feet on the two steps.
! CAUTION: A minimum of two people are required to lift, move and assemble this
treadmill. Always use proper lifting methods when moving heavy items.
Choosing and Preparing a Site
Before assembling the treadmill you must select a suitable site and have the proper
electrical outlet power available for optimum operation and safety. See the Electrical Power
Requirements section (located on the next page) for direction in locating your treadmill’s
voltage requirements.
The area you select for the treadmill should be well lit and well ventilated. Locate the treadmill
on a structurally sound and level surface (do not place in recessed areas or on plush carpet) a
few feet away from walls and other equipment. Each side of the treadmill should have a 19.7”
(0.5 m) minimum space. Behind the treadmill should be 79” (2.0 m) minimum of space. Allow
enough clearance for safe access and passage during use of the machine. If the treadmill is
to be located above the first floor, place it near or above major support beams. If the area has
a heavy, plush carpet, the airflow around the base of the machine may be restricted or the
carpeting may interfere with the moving parts. To protect the carpeting and the machinery,
place a 3/4” (1.9 cm) thick wood base under the treadmill.
Do not install the treadmill in an area of high humidity, such as in the vicinity of a steam room,
sauna, indoor pool, or outdoors. Exposure to extensive water vapor, chlorine, and/or bromine
could adversely affect the electronics as well as other parts of the machine.
Setup
and
Assembly
Page 5-1
Cybex 425T Treadmill Owner’s Manual
Electrical Power Requirements
The power requirements for this treadmill are a grounded, dedicated circuit, rated for one of
the following: 115 VAC ±5%, 60 Hz and 15 amps; 208/220 VAC, 60 Hz, 100 amps or 230 VAC
±5%, 50 Hz and 10 amps. Contact your electrician to ensure the power supply complies with
local building codes.
Do not use a ground plug adapter to adapt the 3-prong power cord plug to a non-grounded
electrical outlet. Do not use an extension cord.
Assembling the Treadmill
! WARNING: Use extreme caution when assembling the treadmill. Failure to do so could
result in injury.
! CAUTION: A minimum of two people are required to assemble this treadmill.
Tools Required
• 9/16” Socket wrench with a 4” extension
• Phillips head screwdriver
NOTE: The words “left” and “right” denote the treadmill user’s orientation.
1. Read and understand all instructions thoroughly before assembling the treadmill.
NOTE: Each step number in the assembly instructions tells you what you will be doing. The
lettered steps following each step number describe the procedure required. Do not
continue with step 2 until you have carefully read all of the assembly instructions.
2. Verify you have received the correct package.
A. Read the sticker on the outside of the box and verify that the model number, color
and voltage are what you ordered. NOTE: During step 3 and 5 you will verify that the
contents of the box match the sticker.
3. Unpack and verify the contents of the boxes.
A. Lift up and remove the cardboard sleeve that surrounds the treadmill.
B. Check to be sure that the following items are present. Check off ( ) each item as you
find it. See Figure 1. If any of the parts are missing contact Cybex Customer Service.
Setup
and
Assembly
Page 5-2
Cybex 425T Treadmill Owner’s Manual
Item Qty
1
1
2
1
3
1
4
1
5
1
6
1
7
1
8
1
9
1
10
1
11
1
12
1
17
1
Part Number
Varies
Varies
AX-18546
AX-19027
PL-19061
AX-19239
PL-18991
PL-18992
AX-19354
LT-19341-4
LT-19340
LT-19339
AX-19150
#9
Description
Base assembly
Console assembly
Upright assembly
Console back
Cover, console back
Motor cover, center
Motor cover, right (in box)
Motor cover, left (in box)
Hardware pack (in box)
Owner’s manual (in box)
Assembly poster
Warranty sheet
Assembly, E-Stop Lanyard
#10
#11
#12
#5
#2
#4
#6
#3
#17
#7
#8
#1
Figure 1
Setup
and
Assembly
Page 5-3
Cybex 425T Treadmill Owner’s Manual
C. Check off (
Item Qty
13
14
14
9
15
6
16
4
) each item in the hardware pack as you find it. See Figure 2.
Part Number
HS-11977
HS-15706
HS-16929
HS-16939
Description
Screw, SEMS, 8-32 x .38”, PNHD PHIL
Screw, 8-16 x .50”, PNHD, STL, BLK
Bolt, Whiz Lock, 3/8-16 x .625”, HXHD
Screw, SEMS, 10-32 x .75”, PNHD, BLK
Hardware
#13
#14
#15
#16
#4
#5
#2
#14
#13
#13
#3
#17
#6
#15
#7
#16
#8
#1
#16
Figure 2
Setup
and
Assembly
Page 5-4
Cybex 425T Treadmill Owner’s Manual
! CAUTION: A minimum of two people are required to lift, move and assemble this
treadmill. Always use proper lifting methods when moving heavy items.
4. Lift and move the treadmill.
A. At least two people should lift and move the treadmill to a level location where you
intend to leave it. Use proper lifting methods.
5. Verify the model and voltage.
A. Verify that you have the correct model and voltage by looking at the serial number
label located at the rear of the unit..
6. Install the upright assembly.
A. Locate the upright assembly (#3) and six bolts, 3/8-16 x .625” (#15).
NOTE: Do not pinch or
damage display cable
when installing upright
assembly.
B. Carefully place the upright
assembly (#3) on the base
assembly (#1) as shown. See
Figure 3.
#3
Display
Cable
C. Plug the display cable,
located at the bottom of the
upright assembly (#3) into
the base assembly (#1). See
Figure 3.
#1
D. Carefully lift the upright
Figure 3
assembly (#3) into the proper
location. See Figure 4.
E. Using a 9/16” socket
wrench, secure the upright
assembly (#3) to the base
assembly (#1) with six bolts,
3/8-16 x .625” (#15). See
Figure 4.
#3
#15
#15
#15
#1
Figure 4
Setup
and
Assembly
Page 5-5
Cybex 425T Treadmill Owner’s Manual
7. Install the console back to the upright assembly.
A. Locate the console back (#4) and twelve screws, 8-32 x .38” (#13).
B. Place the console back (#4) in the correct position on the upright assembly (#3). See
Figure 5.
#4
#13
#13
#3
Figure 5
C. Using a Philips head screwdriver install two screws 8-32 x .38” (#13) to hold the
console back (#4) in place. Do not fully tighten at this time. See Figure 5.
D. Using a Philips head screwdriver secure the console back (#4) to the upright assembly
(#3) using ten screws 8-32 x .38” (#13). Fully tighten the two screws installed in step
7C. See Figure 6.
#4
#3
Figure 6
Setup
and
Assembly
Page 5-6
#13
Cybex 425T Treadmill Owner’s Manual
Note: If installing the A/V option, refer to the 425T A/V bracket installation instructions
(supplied with the A/V bracket).
8.
Install the console assembly to the console back.
A. Locate the console assembly (#2), two screws, 8-32 x .38” (#13) and nine screws 8-16
x .50” (#14).
B. Place the console assembly (#2) in position on the console back (#4). See Figure 7.
#2
#4
Figure 7
C. Connect these cables into the display board: the display cable (2 connectors), the
contact heart rate cable and the ground wire. See Figure 8.
Display
Cable
(2 Connectors)
Ground
Wire
Contact
Heart Rate
Cable
Figure 8
Setup
and
Assembly
Page 5-7
Cybex 425T Treadmill Owner’s Manual
D. Check to see that all of the cables
are connected firmly in their proper
place. See Figure 8.
E. While being sure not to pinch
any cables, use a Philips head
screwdriver to secure the seven
screws 8-16 x .50” (#14) that hold
the console assembly (#2) to the
console back (#4). See Figure 9.
F. Using a Philips head screwdriver
secure the two screws (#13)
securing the console assembly (#2)
to the upright assembly (#3). See
Figure 9.
G. Using a Philips head screwdriver
secure the two screws (#14)
securing the console back cover
(#5) to the console front (#4). See
Figure 10.
Console
Assembly
Back
Cover
Screws
Figure 9
Console
Assembly
Console
Back
9. Attach the motor cover (three
pieces).
A. Using a Phillips head screwdriver,
partially tighten each motor cover
side (left and right) with four
screws, 10-32 x .75” (#16). See
Figure 10.
Screws
Upright
Assembly
Machine Screw
B. Place the motor cover center (#6)
Figure 10
into position. See Figure 11.
C. Using a Phillips head screwdriver, finish tightening all four screws. Be sure the screws
are securing the motor cover’s tabs.
#6
#16
#8
#7
#16
Setup
and
Assembly
Page 5-8
Figure 11
Cybex 425T Treadmill Owner’s Manual
10. Level your treadmill.
A. Confirm that your treadmill is on a level surface.
11. Attach emergency stop key.
A. Confirm that the emergency stop key is in place over the e-stop button. See Figure 12.
NOTE: The treadmill will not run without the key (or other metal) in place.
Emergency
Stop Button
Emergency
Stop Key
Figure 12
12. Visually inspect the treadmill.
A. Carefully examine the treadmill to ensure that the assembly is correct
and complete.
Setup
and
Assembly
Page 5-9
Cybex 425T Treadmill Owner’s Manual
! WARNING: Be sure that all electrical requirements are met as indicated in the
specifications at the front of the manual and at the beginning of this
chapter prior to proceeding.
Testing the Treadmill Operation
Use the following instructions to test the full speed and incline range of the treadmill and to
check the belt for proper operation.
! CAUTION: During this procedure STAY OFF THE RUNNING BELT! Stand with your
feet on the two steps.
1. Without anyone on the treadmill, plug the power cord into a power outlet from a
grounded, dedicated circuit as described under Electrical Requirements in this chapter.
2. The control panel will light up and be in the Dormant Mode.
NOTE: Cybex recommends that the treadmill be unplugged when it is not in use.
3. Press the Quick Start key. The treadmill begins a countdown “3...2...1” and sounds a tone
for each count. After it reaches one (1), the treadmill gives a longer tone and then begins
accelerating the belt to reach 0.5 mph (0.8 kph).
4. The bottom left display will flash the time and the right display will show the actual speed.
5. Press and hold down the Speed + key until the treadmill reaches a speed of
approximately 4 mph (6.4 kph), as indicated on the display.
6. Observe the belt to see that it is running properly; it should stay centered
in the middle of the deck. If you have problems with the running belt operation, see
Running Belt Adjustments in the Preventive Maintenance chapter.
7. Run the treadmill through its full speed range. First press the Speed + key until the
treadmill reaches its highest speed, 11.0 mph (17.6 kph). Then press the Speed - key
until the treadmill is back to 0.5 mph (0.8 kph).
8. As you press the Incline
actual incline or speed.
or Speed + - keys, the respective displays will show the
9. When the treadmill reaches the set incline and speed, the displays will remain steadily
illuminated to indicate that the desired settings have
been reached.
Setup
and
Assembly
Page 5-10
Cybex 425T Treadmill Owner’s Manual
11. Run the treadmill through its full % grade range. Press the Incline
treadmill reaches its highest grade (15%). Then press the Incline
is back to 0% grade.
key until the
key until the treadmill
12. Press Stop twice to stop the running belt, end the workout review, and return the display
to Dormant Mode.
Setting Operation Options
1. While in Dormant Mode enter Test Mode by holding down the Heart Rate and Level keys
simultaneously for five seconds. NOTE: To exit Test Mode, press the Pause/Stop key.
NOTE: After changing any value, you must press Enter to save that value. When you press
enter the display will read “updt” (updated) to confirm your selection.
2. Press the Time key to set options, change values with
and
keys and press Enter
to save your selection. Each time you press Time the next set of data is displayed in the
following order:
Unit — Choices are “Eng” or “Euro” measurements. English is the default.
Line — This is the frequency of the power line that supplies power to your treadmill. The
default setting is 50 Hz for metric consoles and 60 Hz for English consoles. NOTE: If
you have an English console and a 50 Hz power line frequency, then you must change the
default setting from 60 Hz to 50 Hz for the proper elevation frequency.
Scan — This turns on or off the data readout scan (unless a specific data key is pressed
during a workout). Default is on.
Def — This is the default time for time based programs if a user doesn’t re-set Time.
For example, if you press Time you can decrease or increase the set workout time up to
the amount that the Max time is set. Choices are between 20 minutes and 60 minutes.
Default is 60.
Max — This is the maximum amount of time the treadmill can run per use. You can limit
the users time or choose “none” for unlimited time. Choices are between none and 120
minutes; default is 60. NOTE: If the Max time is limited too much it may be difficult for the
user to reach their goals. For example, a user may not be able to burn 300 calories if you
limit their Max time to 20 minutes.
Idle (or Workout Review/Pause Time): — This is how long the treadmill retains and
displays your current workout data during a pause in the workout or after a workout.
Choices include: 20 seconds; 30 seconds, 40 seconds; 1 minute and 5 minutes; default is
20 seconds.
SPD — This is the maximum speed the treadmill will run. Choices are between 1 and 11
MPH (1.6 to 17.6 kph).
Setup
and
Assembly
Page 5-11
Cybex 425T Treadmill Owner’s Manual
ELV — This is the maximum elevation the treadmill will incline. Choices are between 0
and 15 percent grade.
Remember: You must press Enter after changing a value for that value to be stored.
3. To exit Test Mode press the Pause/Stop key once.
Your treadmill is now ready for use. Follow the instructions in the Operation chapter to learn how
to operate the treadmill. You should begin with walking speeds first, to be sure everything is
functioning properly.
Setup
and
Assembly
Page 5-12
Cybex 425T Treadmill Owner’s Manual
6 - Customer Service
Contacting Service
Hours of phone service are Monday through Friday from 8:30 a.m. to 6:00 p.m. Eastern Standard Time.
For Cybex customers living in the USA, contact Cybex Customer Service at 888-462-9239.
For Cybex customers living outside the USA, contact Cybex Customer Service at 508-533-4300 or fax
508-533-5183.
Order parts and find information on the web at www.cybexinternational.com or by e-mail at techhelp@
cybexintl.com.
Serial Number and Voltage
Your serial number and voltage can be found on the rear of your treadmill. See Figure 1. For
your convenience record your serial number and voltage below so that you will have it ready if
you call Cybex Customer Service.
Serial Number
Voltage
Serial
Number
Figure 1
Customer
Service
Page 6-1
Cybex 425T Treadmill Owner’s Manual
Return Material Authorization (RMA)
The Return Material Authorization (RMA) system outlines the procedures to follow when
returning material for replacement, repair, or credit. The system assures that returned
materials are properly handled and analyzed. Follow the following procedures carefully.
Contact your authorized Cybex dealer on all warranty-related matters. Your local Cybex dealer
will request an RMA from Cybex, if applicable. Under no circumstances will defective parts
or equipment be accepted by Cybex without proper RMA and an Automated Return Service
(ARS) label.
1. Call the Customer Service Hotline listed above for the return of any item that is
defective.
2. Provide the technician with a detailed description of the problem you are having or the
defect in the item you wish to return.
3. Provide the model and serial number of your treadmill. The serial number is located on
the front panel of your treadmill. The serial number begins with a letter, for example:
R09-101331100.
4. At Cybex’s discretion, the technician may request that you return the problem part(s)
to Cybex for evaluation and repair or replacement. The technician will assign you an
RMA number and will send you an ARS label. The ARS label and RMA number must be
clearly displayed on the outside of the package that contains the item(s) to be returned.
Include a description of the problem, the serial number of the treadmill and the name
and address of the owner in the package along with the part(s).
5. Forward the package through UPS to Cybex.
Attn: Customer Service Department
Cybex International, Inc.,
10 Trotter Drive
Medway, MA 02053
NOTE: Merchandise returned without an RMA number on the outside of the package or
shipments sent C.O.D. will not be accepted by the Cybex receiving department.
Damaged Parts
Materials damaged in shipment should not be returned for credit. Shipping damages are the
responsibility of the carrier (UPS, Federal Express, trucking companies, etc.)
Apparent Damage — Upon receipt of your shipment, check all boxes carefully. Any damage
seen with a visual check must be noted on the freight bill and signed by the carrier’s agent.
Failure to do so will result in the carrier’s refusal to honor your damage claim. The carrier will
provide you with the required forms for filing such claims.
Customer
Service
Page 6-2
Cybex 425T Treadmill Owner’s Manual
Concealed Damage — Damage not seen with a visual check upon receipt of a shipment
but noticed later must be reported to the carrier as soon as possible. Upon discovery of the
damage, a written or phone request to the carrier asking them to perform an inspection of the
materials must be made within ten days of the date of delivery. Keep all shipping containers
and packing materials: they will be needed as part of the inspection process. The carrier will
provide you with an inspection report and the necessary forms for filing a concealed damage
claim. Concealed damage is the carrier’s responsibility.
Ordering Parts
Visit www.cybexinternational.com to shop for parts online or fax your order to 508-533-5183.
To speak with a customer service representative, call 888-462-9239 (for customers living
within the USA) or 508-533-4300 (for customers outside the USA).
Customer
Service
Page 6-3
Cybex 425T Treadmill Owner’s Manual
Parts List
ITEM QTY. PART NO.
NO.
1
1
AF-18899
2
1
AL-18596
3
1
AL-18597
6
1
AX-17578
7
1
AF-18394
8
1
AX-18729
9
1
AX-19150
10
1
AX-19239
11
1
BD-18763
12
1
BD-18917
15
2
DE-19360
15
2
DE-19353
17
1
DK-18401
18
1
EC-18573
19
1
EH-00986
20
1
EH-10291
21
1
FM-18405
22
4
FS-16511
23
1
FS-19213
24
1
FT-16825
25
1
FT-16826
26
2
HB-16367
27
2
HN-10029
28
2
HN-17935
29
2
HS-00156
30
2
HS-00261
31
6
HS-15706
32
10 HS-16509
33
10 HS-16628
34
6
HS-16929
35
8
HS-16939
36
1
HS-17936
37
1
HS-17937
38
4
HS-19108
39
1
HS-41006
40
2
HS-41107
41
2
HW-00165
42
8
HW-00180
43
2
HW-00590
44
12 HW-18123
45
2
HX-13771
46
2
HX-15678
47
1
HX-17711
48
4
HX-17788
49
2
HX-18133
50
2
HX-18901
51
1
HX-19052
52
2
HX-19102
53
1
HX-19384
56
1
PL-18773
57
1
PL-18929
58
1
PL-18930
59
1
PL-18932
60
1
PL-18933
61
1
PL-18990
62
1
PL-18991
63
1
PL-18992
64
1
PL-19061
65
1
PL-19093
66
1
PL-19094
68
1
SW-18535
70
8
HS-11977
74
2
CW-16712
Customer
Service
Page 6-4
DESCRIPTION
Weldment, Console Back Plate
Front Roller, 2.75 O.D.
Rear Roller, 2.75 O.D.
Assembly, Contact Grip, Pair
Weldment, Elevation
Assembly, Idler
Assembly, E-Stop Lanyard
Assembly, Motor Cover
Belt, Running
Belt, Poly-V,320J8
Decal, Side Labels, Black
Decal, Side Labels, Silver
Deck, Running
Sensor, Speed
Wire Tie, 9”
Base, Wire Tie
Shaft, Elevation
Plate, Rear Rubber Foot Mounting
Cable, Connector Plate, 425T
Sleeve, Elevation Mounting, Top
Sleeve, Elevation Mounting, Bottom
Bushing, .50 I.D. x .62 O.D. x .31 LG, Flanged
Nut, 1/2 - 13 HEX STL ZINC
Nut Locking, 3/8 - 24, GRD C, STL, ZN
Screw, 4-40 x .62, PNHD PHIL
Bolt, 1/2 - 13 x 5.5, HXHD
Screw, 8-16 x .50, PNHD, STL, BLK ZN CLR, TYP WB
Screw, SLFTP, 10 x .5, PNHD, PLT, TYP B, PT-S
Bolt, 1/4 - 20 x 1.5, HXHD, G8
Bolt, Whiz Lock, 3/8 - 16 x .625, HXHD, G5
Screw, SEMS,10/32 x .75, PNHD, BLK ZN, EXT
Bolt, 3/8 - 24 x 2.0, HXHD CAP, G8, YEL ZN
Bolt, 3/8 - 24 x 2.75, HXHD CAP, G8, YEL ZN
Screw 5/16-18 x 3/4, HXHD, Whiz-Lock
Screw, SLFTP, 10/24 x 1.38, PNHD PHIL, SST, BLK, TT
Bolt, 5/16 - 18 x 1.5, BTHD, SST, BLK
Washer, Split Lock, 5/16, ZINC
Washer, Split Lock, 1/4, SST, BLK
Bushing, Nylon, 1/2
Washer, .344 I.D. x .75 O.D. x .125 Thick, Black Zinc
Ring, Retaining, 5/8 x .579 FR. I.D.
Bushing, Deck, 5/16 - 18
Plug, Plastic, 7/16, BLACK
Tape, Double Sided, .032 Thick
E-Ring, Retaining, 5133-37
Grips, 425 Upright Handrail
Idler Spring
Rubber Foot, Rear
Coupling, Shaft, DBL Split 5/8
Plunger, E-Stop
Cover, Rear, Outer Right
Cover, Rear, Inner Right
Cover, Rear, Outer Left
Cover, Rear, Inner Left
Cover, Motor, Front, 425T
Cover, Motor, Right ,425T
Cover, Motor Left,425T
Cover, Console, Back Trim, 425T
Cover, Handle Lower
Accessory Tray, 425T Console
Switch, Limit
Screw, SEMS, 8/32 x .38, PNHD
Wheel, 3 Dia. x 1.25 W, Plain Bearing
Cybex 425T Treadmill Owner’s Manual
ITEM QTY. PART NO.
NO.
75
4
HB-18768
76
2
HS-60022
77
2
HN-60064
78
1
AF-18481
79
1
AF-18769
80
2
HB-18768
81
1
AD-18213
81
1
AD-18217
82
2
EC-18538
82
2
EC-18539
83
1
EC-18896
84
4
HN-11136
85
8
HS-19111
86
8
EH-00986
87
2
HN-11925
88
1
HW-10856
89
2
HS-15732
90
1
EH-12260
91
1
FS-19355
92
1
DE-16928
93
1
DE-19238
94
1
DE-19198
95
1
AF-18728
96
1
HB-19135
97
2
HB-18056
98
1
HS-19338
102
1
MR-18402
102
1
MR-18403
103
1
MR-18214
103
1
MR-18215
111
1
AF-19194
120
1
EH-19416
121
1
EC-15004
200
1
AX-18765
201
1
AX-18764
202
1
AF-18486
203
1
AF-18461
204
1
DE-18766
205
8
HS-15706
206
1
PL-18931
207
1
PL-19120
208
1
PL-18928
209
1
PL-19118
210
1
DE-19441
210
1
DE-19442
211
1
HX-18287
300
1
AX-18545
301
1
AX-19356
304
1
AD-18207
305
1
AF-19187
306
1
AF-19188
308
1
DE-18556-4
309
1
DE-18557-4
310
1
EC-17877
311
4
HS-15706
312
7
HS-41187
313
1
HX-17788
314
2
PL-17686
315
1
PL-18548
316
1
SW-18520-4
317
1
SW-18523-4
318
1
DE-19189-4
402
1
AX-19193-4
403
1
FS-19190
404
1
HS-19369
405
1
HW-00180
DESCRIPTION
Bearing, LF-1011-12
Bolt, 3/8 x 2.25, HXHD CAP, Black Zinc, G5
Nut, Jam 3/8 - 16, Black Zinc
Weldment, Motor Base
Bracket, Heat Sink
Bearing, LF-1011-12
PCA, Control Board,115 VAC
PCA, Control Board, 230 VAC
Circuit Breaker, 15 Amp, 115 VAC
Circuit Breaker, 10 Amp, 250 VAC
Filter, 16 Amp
KEPS, 5/16 - 18, HEX STL ZINC
Screw, SEMS, 8/32 x .38, PNHD EXT Black Zinc
Wire Tie, Nylon, 9
KEPS, 10-32, HEX STL ZN
Washer, Lock External, No. 10 ZC
Screw, SEMS, 8-32 UNC x .62, PNHD PHIL, ZN
Wire Tie, Nylon, 18
Plate, Circuit Breaker Mount
Label, Disconnect Power, Multilingual
Decal, Warning, Motor Plate
Decal, Cybex logo
Bracket, Idler
Idler Wheel, 1.88 x 1.0
Bushing, Flange, .375 x .469 x .25
Screw, 3/8 - 16 x 1.75, SCHD BTN, BLK, ZN
Motor, Elevation, 115 VAC
Motor, Elevation, 230 VAC
Motor, Drive, 115 VAC
Motor, Drive, 230 VAC
Weldment, Monitor Bracket, 425T
Heat Sink, Silpad
Ferrite, Clamp-on, .40 I.D.
Assembly, Top Platform, Right
Assembly, Top Platform, Left
Weldment, Upright
Weldment, Frame, 425T
Decal, Safety Walk
Screw, 8-16 x .50, PNHD, STL, BLK ZN CLR, TYP WB
Cover, Rear, Top Left
Cover, Rear, Bottom Left
Cover, Rear, Top Right
Cover, Rear, Bottom Right
Decal, 425T, Black
Decal, 425T, Silver 877
Plug, Hole, Plastic, 1”, Black
Assembly, 425T Console
Assembly, Cover, Top CHR
PCA, Display, 425T
Bracket, Console Anchor, Right
Bracket, Console Anchor, Left
Decal, Warning, Right
Decal, Warning, Left
Sensor, Polar Wireless Remote Mount
Screw, 8-16 x .50, PNHD, STL, BLK ZN CLR, TYP WB
Screw, SLFTP, 8-16 x .3125, Plastite
Tape, Double Sided, .032 Thick
Tab, Book Holder
Console, Plastic, 425T
Membrane, 425T, Top, English
Membrane, 425T, Bottom, English
Label, Warning
Assembly, TV Support
Controller Mount
Screw, 1/4-20 x 1.25”, PHL, PAN, BLK ZINC
Washer, Split Lock 1/4”
Customer
Service
Page 6-5
Cybex 425T Treadmill Owner’s Manual
ITEM
NO.
406
407
NS
NS
NS
NS
NS
NS
NS
NS
NS
NS
NS
NS
NS
NS
NS
NS
NS
NS
NS
NS
NS
NS
NS
NS
NS
NS
NS
NS
NS
NS
NS
NS
NS
NS
NS
NS
NOTE:
Customer
Service
Page 6-6
QTY. PART NO.
DESCRIPTION
1
1
1
1
1
1
1
1
1
1
1
1
1
1
1
1
1
1
1
1
1
1
1
4
1
1
1
1
4
2
1
1
1
1
1
1
1
2
NS =
Screw, 10-24 x 1/2”, RECESS, PAN HD, TT, SS
Screw, SEMS, 8-32 x .38”, PNHD PHIL, EXT, STL, BLK ZN
Bracket, Power Factor
Cable, A/V Option
Cable, Harness, Console
Cable, Polar Jumper
Cable, Harness, Frame
Cable, Filter to Board, Hot, Black
Cable, Filter to Board, Neutral, White
Power Cord, 115 VAC
Power Cord, 230 VAC
Power Cord, 230 VAC, 50 Hz
Power Cord, 230 VAC, UK
Cable, Circuit Breaker to Filter, Hot, Black
Cable, Circuit Breaker to Filter, Neutral, White
Cable, Speed Signal
Cable, Elevation Motor
Cable, Contact Heart Rate Grip and Ground
Cable, Control Board, Ground
Controller Mount
Kit, Install Hardware
Decal, ETL
Adapter, 1/4 Plug to 1/8 Jack
Wire Tie, Base
Jacket, Corrugated Tubing, 27 Long
Clamp, Headphone Adapter
Controller Mount
Cover, Lower, Motor Controller
Screw, 5/16-18 x 3/4, LG HXHD, Whiz Lock, GR5
Screw, 1/4 - 20 x 1.25, PNHD PHIL, Black Zinc
Plug, Tube End, 1.5 O.D.
Sign Facility Safety
Warranty Sheet, 425T
Poster, Installation
Owner’s Manual, 425T
Kit Brush, McMillan 3.0HP 110V
Kit Brush, McMillan 3.0HP 220V
Choke
HS-41006
HS-11977
AF-19068
AW-19117
AW-18216
AW-18256
AW-18528
AW-18530
AW-18531
AW-18532
AW-18533
AW-18534
AW-19525
AW-18540
AW-18541
AW-18574
AW-18972
AW-19221
AW-19235
AX-19193
AX-19354
DE-18413
CN-17687
EH-10291
EH-19220
FS-17698
FS-19190
FS-18771
HS-19108
HS-19369
HX-19059
LT-03051
LT-19339
LT-19340
LT-19431-4
SK-18553
SK-18554
TR-19201
Not Shown
Console
Assembly
Optional
Monitor
Bracket
315
304
Console
Assembly 300
402
312
316
317
312
1
404
310
405
9
70
403
314
313
311
309
305
407
308
306
406
211
70
64
70
11
40
41
44
31
Idler Pulley
Assembly
Upright
Assembly
Upright
Assembly
33
97
95
42
42
56
33
66
35
47
65
10
61
17
34
34
35
62
34
96
301
48
35
31
23
18
49
63
46
46
205
12
43
210
43
203
6
200
34
35
50
29
68
39
45
205
8
51
3
Serial
Number
50
202
209
45
27
27
204
210
Drive Motor
Assembly
120
86
26
103
30
15
89
70
121
90
81
201
15
28
205
102
Not Shown
Wire Tie and Base
19
74
36
24
77
25
76
22
32
52
38
53
75
21
84
70
70
83
82
86
28
59
28
38
32
32
205
20
32
22
207
37
79
52
206
Cybex 425T Treadmill Owner’s Manual
98
34
2
94
35
31
208
35
39
318
97
204
60
32
28
58
91
57
80
93
78
Drive Motor
Assembly
80
86
88
87
87 70
92
38
7
Page 6-7
GND
3
3
RED
UP
GND
THERMAL
ELV-MOTOR
ZERO
POSITION
SWITCH
NORMALLY CLOSED
OPEN <=10.24"
1
3
TR-19201
2
8
2
AC1 HOT
EC-18896
FILTER, 15A LINE
AW-18540
WIRE, CB TO FILTER, HOT
LINE
FILTER
NON-CE JUMPER ONLY
BLACK
WHITE
AC2 NEUTRAL
EC-18538
CIRCUIT BREAKER, 15A/115V
EC-18539
CIRCUIT BREAKER, 10A / 250V
AW-18532
POWER CORD, 115V
AW-18533
POWER CORD, 220V
N
AW-18531
WIRE, FILTER TO BOARD, NEUTRAL
AW-18541
WIRE, CB TO FILTER, NEUT
DSC1000-4-10-4.7
AW-18534
POWER CORD, 230V
AW-19525
POWER CORD, UK 13A/230V 50HZ
GND
P3
1
RED
3
2
2
RED
3
6
GREEN
5
5
4
4
BLUE
YELLOW
ORANGE
BLUE
6
GRAY
7
7
GRAY
4
BROWN
8
8
BROWN
6
BLACK
9
9
4
PWM
BLACK
RED
SW-18535
SWITCH, 425T MICRO, NO
SW1
SW3
DT15 VAC
VIOLET
YELLOW
10
3
RPM
10
ILT2
3
-15V
YELLOW
N/C
2
DT6 PWM
1
DT9 MOTOR
5
N/C
2
GND
ARM VOLT
1
DT5 +9V
DT16 SPEED
6
DT13 DOWN
5
N/C
MR-18214
MOTOR, 3.0Hp PMDC,110V
MR-18215
MOTOR, 3.0Hp PMDC,220V
WHITE
P4
DIAGNOSTIC LEDS
DT1 UP
GREEN
4
4
GND
3
(-)
3
GND
YELLOW
ORANGE
2
2
BELT RELAY
RED
1
ELEV DOWN
1
(+)
8
ELEV ZERO SW
EC-15004
FERRITE, CLAMP-ON
8
A2
P1
7
7
BLK
6
6
+9V UNREG
J1
WHITE
1
A1
5
ELEV UP
5
RED
CHASSIS
GND
N/C
B+
TXD
RXD
N/C
N/C
BLACK
1
1
1
ZERO SW
AW-18530
WIRE, FILTER TO BOARD, HOT
AD-18213
CONTROLLER, 425T 110V
AD-18217
CONTROLLER, 425T 230V
5
9
200-250VAC 50Hz PFC CHOKE
BLACK
2
1
DWN
2
2
3
GND
HX-18537
MAGNET, ROLLER SHEAVE
AW-18574
CABLE, SPEED EXT
4
8
1 CD CARRIER DETECT
2 RD RECEIVE DATA
3 TD TRANSMIT DATA
4 DTR DATA TERMINAL READY
5 GND
6 DSR DATA SET READY
7 RTS REQUEST TO SEND
8 CTS CLEAR TO SEND
9 RI RING DETECT
COM
RED
BLACK
P1
ELEV COMMON
ELEV UP
1
ELEV DOWN
GROUND
GROUND
P2
2
7
WHITE
BLACK
RED
GREEN
EC-18573
SENSOR, 425T SPEED
N
3
2
6
AW-19235
WIRE, CONTROLLER GROUND
S
1
J102
GRAY
BROWN
YELLOW
GREEN
RED
BLACK
ORANGE
BLUE
7
6
6
6
BLACK
ADAPTER, SERVICE PROGRAMMING
CN-16924
TOP SAFETY SW
NORMALLY CLOSED
OPEN >= 15.65"
5
2
4
5
2
3
5
WHITE
2
1
1
1
GREEN
AW-18972
CABLE, ELEVATION MOTOR, 425T
MR-18402
GEARMOTOR, 110V
MR-18403
GEARMOTOR, 220V
4
RED
CSAFE CONNECTOR
4
BLACK
VIOLET
AW-18256
CABLE, EMBEDDED POLAR
3
BLACK
AW-18216
CABLE, 425T CONSOLE HARNESS
AW-18528
CABLE, 425T FRAME HARNESS
A/V MONITOR
CP-19879
RED
2
AW-19117
CABLE, 610ARC A-V I-O
AW-20111 CABLE,
5E BONDED-PAIR RJ45
4
2
LEFT
P6
1
J6
1
3
8
6
5
10
7
4
2
9
3
1
6
5
2
P7
1
J10
1
3
RIGHT
RED
2
3
SIG
5
BELT RELAY
6
3
ZERO SWITCH
ELEV UP
ELEV DOWN
1
VCC
4
2
9
GND
10
7
6
AW-17694
CABLE, AUDIO 1/4"
8
6
5
GND
GND
3
RELAY PWR
4
2
RPM
RIGHT REAR SIGNAL
PWM
AD-18207
PCA, 425T 4-LAYER DISPLAY BOARD
EC-18208
CODE, 425T SOFTWARE
BROWN
GND
BLACK
LEFT REAR SIGNAL
+9V UNREG
RIGHT FRONT SIGNAL
LEFT FRONT SIGNAL
+9V UNREG
ORANGE
CN-17687
ADAPTER, 1/4"-1/8"
SIG
EC-17877
SENSOR, EMBEDDED POLAR
TO J6 ON AD-18207
PCA, 425T
WR-14012 (Ger. Sp. Swe.)
CABLE, POWER CORD, 230V,
10A, CEE 7-7,2M
AW-20192
POWER CORD, JAPAN,
2.4M IEC-320
AW-20193
POWER CORD, 250VAC,
3A, 2.5M IEC-320, UK
GND
VCC
GREEN
1
AC POWER
CONVERTER
SW-18520
MEMBRANE, 425T TOP
SW-18522
MEMBRANE, 425T BOTTOM W/AV
SW-18523
MEMBRANE, 425T BOTTOM W/O AV
POLAR
J1
RED
J6
J3
5
3
2
1
3
1
J3
J4
STD CSAFE
EXTERNAL ACCESS
Page 6-8
2
4
6
7
LEFT
RIGHT
GND
CHASSIS
GND
N/C
B+
TXD
RXD
RIGHT
LEFT
8
2ND GRIP
BROWN
J4
1
TO J9 ON AD-18207
PCA, 425T
J8
J9
3
AW-19221
CABLE,425T GRIP & GND
2
1
1
HA-20175
HEADPHONES
LEFT SIGNAL
J2
LEFT SIGNAL
LEFT COMMON
LEFT COMMON
SHIELD
RIGHT COMMON
RIGHT SIGNAL
SHIELD
SHIELD
J1
+5
SIG
SHIELD
RIGHT COMMON
RIGHT SIGNAL
3
2
GND
CHASSIS
ORANGE
4
3
2
5
BLACK
AUDIO
JACK
Cybex 425T Treadmill Owner’s Manual


