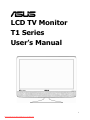
1
LCD TV Monitor
T1 Series
User’s Manual
E
Downloaded from ManualMonitor.com Manuals
E4532
First Edition
February 2009
Copyright © 2009 ASUSTeK COMPUTER INC. All Rights Reserved.
No part of this manual, including the products and software described in it, may be reproduced,
transmitted, transcribed, stored in a retrieval system, or translated into any language in any form or by
any means, except documentation kept by the purchaser for backup purposes, without the express
written permission of ASUSTeK COMPUTER INC. (“ASUS”).
Product warranty or service will not be extended if: (1) the product is repaired, modified or altered,
unless such repair, modification of alteration is authorized in writing by ASUS; or (2) the serial number
of the product is defaced or missing.
ASUS PROVIDES THIS MANUAL “AS IS” WITHOUT WARRANTY OF ANY KIND, EITHER EXPRESS
OR IMPLIED, INCLUDING BUT NOT LIMITED TO THE IMPLIED WARRANTIES OR CONDITIONS
OF MERCHANTABILITY OR FITNESS FOR A PARTICULAR PURPOSE. IN NO EVENT SHALL ASUS,
ITS DIRECTORS, OFFICERS, EMPLOYEES OR AGENTS BE LIABLE FOR ANY INDIRECT,
SPECIAL, INCIDENTAL, OR CONSEQUENTIAL DAMAGES (INCLUDING DAMAGES FOR LOSS OF
PROFITS, LOSS OF BUSINESS, LOSS OF USE OR DATA, INTERRUPTION OF BUSINESS AND
THE LIKE), EVEN IF ASUS HAS BEEN ADVISED OF THE POSSIBILITY OF SUCH DAMAGES
ARISING FROM ANY DEFECT OR ERROR IN THIS MANUAL OR PRODUCT.
SPECIFICATIONS AND INFORMATION CONTAINED IN THIS MANUAL ARE FURNISHED FOR
INFORMATIONAL USE ONLY, AND ARE SUBJECT TO CHANGE AT ANY TIME WITHOUT NOTICE,
AND SHOULD NOT BE CONSTRUED AS A COMMITMENT BY ASUS. ASUS ASSUMES NO
RESPONSIBILITY OR LIABILITY FOR ANY ERRORS OR INACCURACIES THAT MAY APPEAR IN
THIS MANUAL, INCLUDING THE PRODUCTS AND SOFTWARE DESCRIBED IN IT.
Products and corporate names appearing in this manual may or may not be registered trademarks or
copyrights of their respective companies, and are used only for identification or explanation and to the
owners’ benefit, without intent to infringe.
ii
Downloaded from ManualMonitor.com Manuals
ASUS LCD TV Monitor T1 Series
Contents
Contents................................................................................................................... iii
Notices ..................................................................................................................... iv
Safety Information.................................................................................................... v
Care and Cleaning................................................................................................... vi
Recycling Place ..................................................................................................... viii
1.1
Welcome!....................................................................................................... 1
1.2
Package Contents ........................................................................................ 1
1.3
Display Introduction ................................................................................... 2
1.3.1 Front view............................................................................................ 2
1.3.2 Top view .............................................................................................. 3
1.3.3 Rear view ............................................................................................. 5
1.4
Remote Controller Introduction................................................................ 7
2.1
Assembling the Display............................................................................... 9
2.2
Adjusting the Posture of the Display........................................................ 9
2.3
Connecting the Display ............................................................................. 10
2.4
Turning the Display On ............................................................................. 10
2.5
Setting the Monitor ................................................................................... 11
2.6
Setting the Television ............................................................................... 12
2.7
Using Teletext ............................................................................................ 13
2.8
Electronic Programme Guide (EPG)........................................................ 14
2.9
Programme List .......................................................................................... 14
3.1
On-Screen Display (OSD) Menu .............................................................. 15
3.1.1 How to reconfigure ........................................................................... 15
3.1.2 OSD menu introduction.................................................................... 16
3.2
Specifications Summary ........................................................................... 21
3.3
Troubleshooting (FAQ) ............................................................................. 23
ASUS LCD TV Monitor T1 Series
Downloaded from ManualMonitor.com Manuals
iii
Notices
Federal Communications Commission Statement
This device complies with Part 15 of the FCC Rules. Operation is subject to the
following two conditions:
▪
This device may not cause harmful interference, and
▪
This device must accept any interference received including interference that
may cause undesired operation.
This equipment has been tested and found to comply with the limits for a Class B
digital device, pursuant to Part 15 of the FCC Rules. These limits are designed to
provide reasonable protection against harmful interference in a residential installation.
This equipment generates, uses and can radiate radio frequency energy and, if not
installed and used in accordance with manufacturer’ s instructions, may cause
harmful interference to radio communications. However, there is no guarantee that
interference will not occur in a particular installation. If this equipment does cause
harmful interference to radio or television reception, which can be determined by
turning the equipment off and on, the user is encouraged to try to correct the
interference by one or more of the following measures:
▪
Reorient or relocate the receiving antenna.
▪
Increase the separation between the equipment and receiver.
▪
Connect the equipment to an outlet on a circuit different from that to which the
receiver is connected.
▪
Consult the dealer or an experienced radio/TV technician for help.
The use of shielding cables for connection of the display to the graphics
card is required to assure compliance with FCC regulations. Changes or
modifications to this unit not expressly approved by the party responsible for
compliance could void the user’s authority to operate this equipment.
As an Energy Star® Partner, our company has determined that this product meets
the Energy Star® guidelines for energy efficiency.
Canadian Department of Communications Statement
This digital apparatus does not exceed the Class B limits for radio noise emissions
from digital apparatus set out in the Radio Interference Regulations of the Canadian
Department of Communications.
This class B digital apparatus complies with Canadian ICES-003.
iv
Downloaded from ManualMonitor.com Manuals
ASUS LCD TV Monitor T1 Series
Safety Information
▪
Before setting up the display, carefully read all the documentation that came with
the package.
▪
To prevent fire or shock hazard, never expose the display to rain or moisture.
▪
Never try to open the display cabinet. The dangerous high voltages inside the
display may result in serious physical injury.
▪
If the power supply is broken, do not try to fix it by yourself. Contact a qualified
service technician or your retailer.
▪
Before using the product, make sure all cables are correctly connected and the
power cables are not damaged. If you detect any damage, contact your dealer
immediately.
▪
Slots and openings on the back or top of the cabinet are provided for ventilation.
Do not block these slots. Never place this product near or over a radiator or heat
source unless proper ventilation is provided.
▪
The display should be operated only from the type of power source indicated on
the label. If you are not sure of the type of power supply to your home, consult
your dealer or local power company.
▪
Use the appropriate power plug which complies with your local power standard.
▪
Do not overload power strips and extension cords. Overloading can result in fire
or electric shock.
▪
Avoid dust, humidity, and temperature extremes. Do not place the display in any
area where it may become wet. Place the display on a stable surface.
▪
Unplug the unit during a lightning storm or if it will not be used for a long period of
time. This will protect the display from damage due to power surges.
▪
Never push objects or spill liquid of any kind into the slots on the display cabinet.
▪
To ensure satisfactory operation, use the display only with UL listed computers
which have appropriate configured receptacles marked between 100-240V AC.
▪
If you encounter technical problems with the display, contact a qualified service
technician or your retailer.
This symbol of the crossed out wheeled bin indicates that the product
(electrical, electronic equipment, and mercury-containing button cell battery)
should not be placed in municipal waste. Please check regulations for
disposal of electronic products.
ASUS LCD TV Monitor T1 Series
Downloaded from ManualMonitor.com Manuals
v
Care and Cleaning
▪
Before you lift or reposition your display, it is better to disconnect the cables and
power cord. Follow the correct lifting techniques when positioning the display.
When lifting or carrying the display, grasp the edges of the display.
Do not lift the display by the stand or the cord.
▪
Cleaning. Turn your display off and unplug the power cord. Clean the display
surface with a lint-free, non-abrasive cloth. Stubborn stains may be removed with
a cloth dampened with mild cleaner.
▪
Avoid using a cleaner containing alcohol or acetone. Use a cleaner intended for
use with the LCD. Never spray cleaner directly on the screen, as it may drip
inside the display and cause an electric shock.
The following symptoms are normal with the display:
▪
The screen may flicker during the initial use due to the nature of the fluorescent
light. Turn off the Power Switch and turn it on again to make sure that the flicker
disappears.
▪
You may find slightly uneven brightness on the screen depending on the desktop
pattern you use.
▪
When the same image is displayed for hours, an afterimage of the previous
screen may remain after switching the image. The screen will recover slowly or
you can turn off the Power Switch for hours.
▪
When the screen becomes black or flashes, or cannot work anymore, contact
your dealer or service centre to fix it. Do not repair the screen by yourself!
Conventions used in this guide
WARNING: Information to prevent injury to yourself when trying to
complete a task.
CAUTION: Information to prevent damage to the components when trying
to complete a task.
IMPORTANT: Information that you MUST follow to complete a task.
NOTE: Tips and additional information to aid in completing a task.
vi
Downloaded from ManualMonitor.com Manuals
ASUS LCD TV Monitor T1 Series
Where to find more information
Refer to the following sources for additional information and for product and software
updates.
1.
ASUS websites
The ASUS websites worldwide provide updated information on ASUS hardware
and software products. Refer to http://www.asus.com
2.
Optional documentation
Your product package may include optional documentation that may have been
added by your dealer. These documents are not part of the standard package.
ASUS LCD TV Monitor T1 Series
Downloaded from ManualMonitor.com Manuals
vii
Recycling Place
EUROPE
When disposing of ASUS products in Europe, please contact one of the following
locations to make arrangements for recycling.
▪
ASUS France S.A.R.L.
10 allee bienvenue, 93160, noisy le grand, France
Tel:
+33 1 49 32 96 50
▪
ASUS COMPUTER GmbH (Germany)
Harkortstr. 21 – 23, 40880 Ratingen, Deutschland
Hotline: +49 01805 / 010920 ( Mo – Fr / 9 – 17h)
Fax: +49 2102 9599-11 (24h)
▪
ASUSTeK Italy srl
Via Piero Gobetti 2/B Centro direzionale Villa Fiorita 20063 Cernusco sul
Naviglio (MI), Italy
Tel:
+39 199400089
Fax:
+39 02 20240555
▪
ASUSTek UK Ltd.
1st Floor, Focus 31, West Wing, Mark Road, Hemel Hempstead, HP2 7BW, UK
Tel:
+44 1442 202 700
Fax:
+44 1442 245 882
▪
ASUS IBERICA S.L.
C/ Plomo 5-7, 08038 Barcelona, Spain
Tel:
+34 902 889688
▪
ASUS Nordic AB
Finlandsgatan 16, 4 Tr., 16474 Kista, Sweden
Tel:
+46 8 5889 8900
Fax:
+46 8 5889 8999
▪
ASUS Computer Benelux B.V.
Fultonbaan 12 3439 NE Nieuwegein The Netherlands
Tel:
+31.30.60.22.452
Hotline: +31 (0)591-668190
Fax:
+31 (0)591-666853
▪
ASUS Computer Czech Republic S.R.O.
V Olsinach 2300/75, 10000 Prague, Czech Republic
Tel:
+420 274 774 872
Fax:
+420 274 774 889
▪
ASUS Polska SP. Z.O.O.
Al. Jerozolimskie 200, 02-222 Warsaw 4 floor, Poland
Tel:
+48 22 571 80 00
Fax:
+48 22 571 80 01
▪
ASUS Hungary Kft.
Tel:
+36 1 505 45 61
Fax:
+36 1 505 45 63
viii
Downloaded from ManualMonitor.com Manuals
ASUS LCD TV Monitor T1 Series
NORTH AMERICA
When disposing of ASUS products in North America, please contact the following
locations to make arrangements for recycling.
ASUS COMPUTER INTERNATIONAL (America)
▪
US Headquarters:
800 Corporate Way, Fremont, CA 94539, USA
Tel:
+1 510-739-3777
Fax:
+1 510-608-4555
▪
Canada Branch Office:
802 Cochrane Dr., Unit 2, Markham ON, L3R 8C9, Canada
Tel:
(905) 370-2787
Fax:
(905) 489-2718
ASIA PACIFIC
When disposing of ASUS products in Asia Pacific, please contact the following
location to make arrangements for recycling.
▪
ASUSTeK COMPUTER INC.
No. 15, Li-Te Rd., Peitou, Taipei, Taiwan
Tel:
+886-2-2894-3447
Hotline: +886-(0)800-093-456
Fax:
+886-2-2895-9254
“THIS DISPLAY UNIT IS AN ELECTRIC DEVICE WHICH MAY CONTAIN HAZARDOUS MATERIALS
AND COMPONENTS, AND WHICH MUST BE DISPOSED OF AT END OF LIFE ACCORDING TO
THE PROPER PROCEDURE”
ASUS LCD TV Monitor T1 Series
Downloaded from ManualMonitor.com Manuals
ix
________________________________________________________________________________
________________________________________________________________________________
________________________________________________________________________________
________________________________________________________________________________
________________________________________________________________________________
________________________________________________________________________________
________________________________________________________________________________
________________________________________________________________________________
________________________________________________________________________________
________________________________________________________________________________
________________________________________________________________________________
________________________________________________________________________________
________________________________________________________________________________
________________________________________________________________________________
________________________________________________________________________________
________________________________________________________________________________
________________________________________________________________________________
________________________________________________________________________________
________________________________________________________________________________
________________________________________________________________________________
________________________________________________________________________________
________________________________________________________________________________
________________________________________________________________________________
x
Downloaded from ManualMonitor.com Manuals
ASUS LCD TV Monitor T1 Series
1.1
Welcome!
Thank you for purchasing the ASUS® TV Monitor T1 Series LCD display!
The latest LCD display from ASUS provides a host of features that enhance your
viewing experience. It integrates a number of various media input interfaces and a
built-in TV tuner to meet your needs on a display for working as well as entertainment.
With these features, you can enjoy the convenience and delightful visual experience
that the TV Monitor T1 Series is to bring to you!
1.2
Package Contents
Check the package of your TV Monitor T1 LCD display for the following items:
▪
LCD display
▪
Display base and screw
▪
Warranty card
▪
Quick start guide
▪
User’s manual CD
▪
Power cord
▪
VGA cable
▪
Remote controller and batteries
▪
Audio cable
If any of the above items is damaged or missing, contact your retailer
immediately.
ASUS LCD TV Monitor T1 Series
Downloaded from ManualMonitor.com Manuals
1
1.3
Display Introduction
1.3.1
Front view
1.
Power button and power indicator
▪
Press this button to turn the display on, off, or stand-by.
▪
The colour of the power indicator is as the below table.
Status
2.
Description
Blue
On
Red
Stand-by
Remote receiver
▪
The display receives the signal from the remote controller here.
2
Downloaded from ManualMonitor.com Manuals
ASUS LCD TV Monitor T1 Series
1.3.2
1.
/
4.
/
Splendid / Auto Adjust / Enter button
▪
To switch among preset Standard, Theatre, Game, and Scenery video mode
of Splendid™ Video Enhancement Technology
▪
Automatically adjust the image from VGA input to its optimized parameters
by pressing this button for 2 – 3 seconds
▪
To enter/select the icon (function) highlighted while the OSD is activated
2.
3.
Top view
Menu / Return /Exit button
▪
To activate the OSD menu
▪
To return to the top menu list when the OSD is activated
▪
To exit from input source selection
W
Previous Programme / Left button
▪
To switch to the previous programme
▪
To choose the left item of the OSD menu
▪
To choose the previous mode in Splendid™ mode selection or the previous
source in Input source selection
X
Next Programme / Right button
▪
To switch to the next programme
▪
To choose the right item of the OSD menu
▪
To choose the next mode in Splendid™ mode selection or the next source in
Input source selection
ASUS LCD TV Monitor T1 Series
Downloaded from ManualMonitor.com Manuals
3
5.
6.
T
Volume Down / Down button
▪
To decrease the sound volume
▪
To choose the lower item of the OSD menu
▪
To choose the next mode in Splendid™ mode selection or the next source in
Input source selection
S
Volume Up / Up button
▪
To increase the sound volume
▪
To choose the upper item of the OSD menu
▪
To choose the previous mode in Splendid™ mode selection or the previous
source in Input source selection
7.
Source button
▪
To switch among the input signal sources of ATV, DTV, SCART, Component,
VGA, HDMI, Video, and S-Video
▪
To exit from OSD menu or from Splendid mode selection
4
Downloaded from ManualMonitor.com Manuals
ASUS LCD TV Monitor T1 Series
1.3.3
Rear view
T 22T1E & 24T1E
ASUS LCD TV Monitor T1 Series
Downloaded from ManualMonitor.com Manuals
5
1.
Power socket and switch to connect power cord and to switch the display on
and off
2.
HDMI connection for High-Definition Multimedia Interface (HDMI) signal
connection
3.
VGA connection for PC VGA analogue signal connection
4.
Audio-in for HDMI (if no sound from HDMI) for audio signal input from the
HDMI device without transmitting audio signal over the HDMI cable
5.
Audio-in for PC stereo sound to connect PC audio source
6.
SCART connection to connect AV devices
7.
Component connection to connect Component (YPbPr) video signal source
8.
S-Video connection to connect S-Video signal source
9.
Video-in connection to connect CVBS video signal source
10. Audio-in connection to input audio signal through RCA cable
11. Audio-out connection to output analogue audio signal over RCA cable
12. Optical S/PDIF audio-out to output digital audio signal over optical S/PDIF
cable
13. TV signal connection to connect TV signal source from antenna or cable
14. CI card slot for CI (Common Interface) card from your CAM (Conditional Access
Module, generally used for Pay per View services) provider
15. Headphone jack to output audio signal to headphone
16. Service port for manufacturer use ONLY
17. Kensington Lock
6
Downloaded from ManualMonitor.com Manuals
ASUS LCD TV Monitor T1 Series
1.4
Remote Controller Introduction
Installing the batteries
1.
Open the battery compartment cover on the
back side.
2.
Insert two AAA type batteries in correct
polarity (+ to +, - to -).
3.
Close the cover.
DO NOT mix old or used batteries with new ones.
ASUS LCD TV Monitor T1 Series
Downloaded from ManualMonitor.com Manuals
▪
Use the remote controller in front of
the remote receiver with a distance
shorter than 7 meters and within 30
degree to the left and to the right.
▪
Dispose of used batteries in a
recycle bin to prevent from
environment pollution.
7
1.
Power on or stand-by
2.
Set sleep timer
3.
Select input signal source
4.
Number keys for direct channel
access
5.
Back to the last channel
6.
Display the programme list
7.
Previous and next programme; also
Teletext page up and down
8.
List favourite programmes
9.
Volume up, volume down, and mute
10. Menu, exit, W, S, X, T and enter
11. Splendid mode selection; also red
button
12. Change sound mode; also green
button
13. Adjust brightness; also yellow button
14. Auto adjust screen for VGA; also blue
button
15. Display Teletext
16. Picture freeze; also Teletext hold
17. Wide or square picture format; also
Teletext size
18. Electronic Program Guide; also
Teletext reveal
19. Broadcast information; also Teletext
index
20. Display or hide the time; also Teletext
sub-page
21. Stereo sound mode; also Teletext
cancel
22. Display digital subtitle
8
Downloaded from ManualMonitor.com Manuals
ASUS LCD TV Monitor T1 Series
2.1
Assembling the Display
To assemble the monitor base:
1.
Have the front of the display face down on a table.
2.
Align the base on the arm to fit it into the arm groove.
3.
Fix the base to the arm by fastening the bundled screw.
We recommend that you cover the table surface with soft cloth to prevent
damage to the display.
2.2
Adjusting the Posture of the Display
▪
For optimal viewing, we recommend that you
look at the full face of the display, and then
adjust the display to the angle that is most
comfortable for you.
▪
Hold the stand to prevent the monitor from falling
when you change its angle.
▪
You can adjust the display’s angle from -5˚ – 15˚.
-5˚ – 15˚
It is normal that the monitor slightly shakes while you adjust the viewing
angle.
ASUS LCD TV Monitor T1 Series
Downloaded from ManualMonitor.com Manuals
9
2.3
Connecting the Display
For 22T1E & 24T1E
PC
Set-Top-Box,
DVD Player,
VCR, etc
SCART,
S-Video,
Composite, &
Component
D-Sub, HDMI,
& Audio-in
HDMI &
Audio-in
RCA L+R
& S/PDIF
AC Power
TV Signal
(Antenna,
Cable, etc)
External
Stereo
Speakers
DVD Player, etc
To connect the power cord: connect one end of the power cord securely to the
display’s AC input port, the other end to a power outlet.
Before you connect the cables, ensure that the connected devices are
switched off or the power cord is unplugged from the electricity supply.
▪
To connect the signal cables: connect one end of the signal cable(s) to the
display, the other end to your computer or any other video devices.
When more than one signal sources are simultaneously connected, you can
key on the key pad of the display
switch the input source by using the
or on the remote controller.
▪
To connect the audio cable: connect the audio cable from the display’s
audio-in port to the computer’s and/or video devices’ audio-out port.
▪
To connect to external speakers: Connect an audio-out cable from the
audio-out port of the display to the audio-in port of external speakers.
2.4
Turning the Display On
Press the power button. See section 1.3 Display Introduction for the location of the
power button. The power indicator lights up in blue to show that the monitor is ON.
10
Downloaded from ManualMonitor.com Manuals
ASUS LCD TV Monitor T1 Series
2.5
Setting the Monitor
Set the PC signal to the optimal resolution and frequency for the best picture quality.
Resolution
Vertical
frequency
Horizontal
frequency
Pixel
frequency
720 x 400
70Hz
31.47KHz
28.32MHz
640 x 480
60Hz
31.47KHz
25.17MHz
640 x 480
72Hz
37.86KHz
31.50MHz
640 x 480
75Hz
37.50KHz
31.50MHz
800 x 600
56Hz
35.16KHz
36.00MHz
800 x 600
60Hz
37.88KHz
40.00MHz
800 x 600
72Hz
48.08KHz
50.00MHz
800 x 600
75Hz
46.88KHz
49.50MHz
848 x 480
60Hz
31.02KHz
33.75MHz
1024 x 768
60Hz
48.36KHz
65.00MHz
1024 x 768
70Hz
56.48KHz
75.00MHz
1024 x 768
75Hz
60.02KHz
78.75MHz
1152 x 864
75Hz
67.50KHz
108.00MHz
1280 x 720
60Hz
44.77KHz
74.51MHz
1280 x 768
60Hz
47.78KHz
79.50MHz
1280 x 768
75Hz
60.29KHz
102.25MHz
1280 x 800
60Hz
49.70KHz
83.50MHz
1280 x 960
60Hz
60.00KHz
108.00MHz
1280 x 1024
60Hz
63.98KHz
108.00MHz
1280 x 1024
75Hz
79.98KHz
134.99MHz
1360 x 768
60Hz
47.71KHz
85.49MHz
1366 x 768
60Hz
47.10KHz
72.43MHz
1600 x 900
60Hz
55.70KHz
118.60MHz
1400 x 1050
60Hz
65.32KHz
121.75MHz
1680 x 1050
60Hz
65.29KHz
146.24MHz
1920 x 1080
60Hz
67.50kHz
148.50MHz
1920 x 1200
60Hz
74.04kHz
154.00MHz
▪
Modes not listed in the table may possibly not be supported.
▪
Press
button for 2 – 3 seconds if noise, trembling, or picture offset appears
on the screen while VGA input in use.
ASUS LCD TV Monitor T1 Series
Downloaded from ManualMonitor.com Manuals
11
2.6
Setting the Television
1.
Press
MENU button either on the key pad of the display or on the remote
buttons to select “Programme”.
controller and useW, S, X, T, and
2.
Select “Auto Programme” and choose the country of the broadcasting system.
3.
Select “Start” to scan all the available channels and store them in the memory.
▪
For further information of setting the TV, please read the chapter 3.1.2.
12
Downloaded from ManualMonitor.com Manuals
ASUS LCD TV Monitor T1 Series
2.7
Using Teletext
You can control Teletext functions only by
remote controller. The key pad on the
display set does not provide with such
functions.
Press TTX
button to display Teletext.
Press it again or
EXIT button to switch off
Teletext.
1.
2.
3.
SIMPLE Text
▪
Enter the three-digit page number
with the number buttons to display
your desired page.
▪
Press
or
to display the
preceding or the following page.
TOP Text
▪
Press the blue button to select the
desired block
▪
Press the yellow button to select
the next group.
▪
Press the green button to display
button can
the next page. The
also do the same.
▪
Press the red button to display the
preceding page. The
button
can also do the same.
▪
Like SIMPLE Text, you can enter
the three-digit page number with
the number buttons to display your desired page.
Teletext functions
▪
Teletext Hold to hold and to continue the automatic page change when
the Teletext page has more than one sub-page.
▪
Teletext Size to double the text size of the upper or the lower half of the
page, and to switch back to ordinary text size.
▪
Teletext Reveal to reveal and to hide the concealed information, such
as answer of riddles.
▪
Teletext Sub-Page to select a sub-page in Teletext and to exit from this
function.
▪
Teletext Cancel to display the broadcast while searching for a certain
Teletext page.
ASUS LCD TV Monitor T1 Series
Downloaded from ManualMonitor.com Manuals
13
2.8
Electronic Programme Guide (EPG)
This EPG information is transmitted by the broadcaster and may not be available in
some countries or regions.
You can control EPG functions only by remote controller. The key pad on the display
set does not provide with such functions.
Press EPG button to display Electronic Programme Guide. The programme
information along the time axis will be displayed. You can scroll the time axis forward
and backward to see more information. Press EPG button again or
EXIT button to
switch off EPG.
Use
or
to display the preceding or the following page. Use S, X, T, W, and
ENTER
to select and display the desired programme if it is playing. Press
to
display the information of the selected programme.
EPG can remind you when your desired programme is to play. Press the blue button
to enter the reminder function. There you can specify the programme and the time
that should be reminded to you. You can also decide whether the programme should
be reminded only once or periodically.
Press the green button to display the schedule list. It can tell you the schedule of the
programmes set to remind you.
2.9
1.
Programme List
Programme List
The programme list will be displayed by pressing
button on the remote
controller. You can control the programme list only by remote controller. The key
pad on the display set does not provide with such functions.
You may use the S T buttons to move the highlighted item. Press ENTER
to
icon for a locked programme
enter the highlighted programme. You can see a
and a
icon for a favourite programme. The following icons indicate the type of
a programme.
Digital television programme
Analogue television programme
Radio channel
2.
Favourite Programme List
The favourite programme list will be displayed by pressing
button on the
remote controller. You can control the favourite programme list only by remote
controller. The key pad on the display set does not provide with such functions.
Please read chapter 3.1.2 Programme Edit for specifying your favourite
programmes.
14
Downloaded from ManualMonitor.com Manuals
ASUS LCD TV Monitor T1 Series
3.1
3.1.1
On-Screen Display (OSD) Menu
How to reconfigure
1.
Press
MENU button either on the key pad of the display or on the remote
controller to activate the OSD menu.
2.
Use W, X, S, and T to navigate through the functions. The chosen function will
be highlighted. To activate the chosen function, press ENTER
button. If the
selected function has a sub-menu, still use W, X, S, and T to navigate through
the sub-menu functions. Again, the chosen function will be highlighted and you
may activate it by pressing ENTER
button.
3.
Use W, X, S, or T to change the settings of the activated function.
4.
You can go back to the top level of the OSD menu list whenever you press the
MENU button. Repeat step 2 and 3 to adjust any other function.
5.
key on the key pad of the display set
To exit from the OSD menu, press the
or
EXIT button on the remote controller.
ASUS LCD TV Monitor T1 Series
Downloaded from ManualMonitor.com Manuals
15
3.1.2
1.
OSD menu introduction
System
▪
Menu Language: to select the language of the display messages among
English, German, French, Italian, Spanish, Polish, Dutch, Greek, Czech,
Portuguese, Hungarian, Slovak, Danish, Swedish, Finnish, Russian,
Estonian, Latvian, Lithuanian, Norwegian, Romanian, Bulgarian, Serbian,
Croatian, and Turkish.
▪
Audio Languages: to select your preferred language for audio. You can
also select audio language with the I / II button on the remote controller when
more than one audio language is broadcasted.
You will see the
icon if the broadcast has the assistance function for
visual impaired people.
▪
Subtitle Languages: to select your preferred language when more than
one subtitle language is broadcasted. You can also select Subtitle language
button on the remote controller.
with the SUB.T
Hearing Impaired: to turn on the hearing impaired subtitle if it is transmitted
by the broadcaster.
You will see the
icon if the broadcast has the assistance function for
hearing impaired people.
▪
Lock System: to set the system password and to turn on or off the lock to
prohibit from accessing to some functions. Password is required to access
this function.
▪
Remote Control Only: to disable the control function of the key pad on the
display set to avoid undesired operation from the set.
This function can be disabled by pressing
case of malfunction of remote controller.
▪
and W together in
Set Password: to set your four-digit password for Lock System. You have to
confirm your input to validate it. The default password is “0000”.
The password “7788” will ALWAYS be accepted in case you forget
your password.
▪
Parental Control: to prohibit unauthorized users, such as children, from
watching specific programmes. Password is required to access this function.
When you enable this function, you may block programmes that are listed in
the programme list. Once a programme is locked, you can see a
icon on
the Lock Programme list and also on the general Programme List.
▪
OSD Time Out: to specify the idle time of displaying the OSD menu before it
is deactivated.
▪
Reset All: to restore all the settings back to the factory default. Password is
required if “Lock System” is on.
16
Downloaded from ManualMonitor.com Manuals
ASUS LCD TV Monitor T1 Series
2.
Programme – This function is to set the TV channels and programmes.
▪
Auto Programme: Choose the country of the broadcasting system and than
select “Start” to scan all the available channels and store them in the
memory. Password is required if “Lock System” is on.
▪
DTV Manual Programme: To manually set the programme list of digital
broadcasts. You need to specify the channel number of UHF or VHF band
and then let the system search the signal. Password is required if “Lock
System” is on.
▪
ATV Manual Programme: To manually set the programme list of analogue
broadcasts. You need to specify the broadcasting system and the channel
number then let the system search it. You are provided with the option of
fine tuning the signal. Password is required if “Lock System” is on.
BG: PAL B/G or SECAM B/G (usually in Europe, Asia, Middle
East, Australia, New Zealand, and Africa)
DK: PAL D/K or SECAM D/K (usually in East Europe, China,
Africa, and CIS countries)
I:
PAL I/II (usually in UK, Ireland, Hong Kong, and South Africa)
L:
SECAM L/L’ (usually in France)
▪
Programme Edit: To edit the programme list. You can lock or skip certain
channels or list some to the table of favourite programmes. Password is
required if “Lock System” is on.
You may use the S T buttons to move the highlighted item. If you would like
to list the highlighted programme to the favourite programme list, please
press
button on the remote controller. Press the button again to remove
it from the favourite programme list. You may press the blue button to skip
the channel. The function will be deactivated by pressing the same button
again. The red button is to delete the channel from the programme list. The
display will ask for your confirmation for selecting this function.
This is a favourite programme.
This channel is to be skipped.
This channel is to be deleted.
▪
CI Information: To display the information of your CAM, Conditional Access
Module, in the CI card slot.
CAM is not an accessory of this product. It is generally provided by
your Pay-TV services provider.
ASUS LCD TV Monitor T1 Series
Downloaded from ManualMonitor.com Manuals
17
3.
Picture
▪
Splendid: to switch among Standard, Theatre, Game, and Scenery video
mode of Splendid™ Video Enhancement Technology.
-
Theatre Mode: best choice for watching films with Splendid™ Video
Intelligence Technology.
-
Scenery Mode: best choice for scenery photo display with Splendid™
Video Intelligence Technology.
-
Game Mode: best choice for game playing with Splendid™ Video
Intelligence Technology.
-
Standard Mode: best choice for document editing with Splendid™
Video Intelligence Technology.
In this mode, you may adjust Sharpness, Colour, and Tint to define your
preferred picture effect.
▪
Sharpness: to adjust the sharpness of the displayed picture; this function is
active only in Standard Splendid™ mode.
▪
Colour: to adjust the colour of the displayed picture deeper or paler; this
function is active only in Standard Splendid™ mode and VGA input not in
use.
▪
Tint: to make the displayed picture more red or green; this function is active
only when input is NTSC by Video port.
You may NOT adjust Colour, or Tint for VGA input.
▪
Brightness: to adjust the luminance of the display.
▪
Contrast: to adjust the contrast of the displayed picture.
▪
Colour Temperature: to select the colour temperature among warm,
ordinary, cool, and user’s mode. In user’s mode, you may adjust the level of
the red, green, and blue to define your preferred white colour.
▪
ASCR: to switch on and off the ASUS Smart Contrast Ratio function.
▪
Noise Reduction: to specify the intense of noise reduction function among
high, moderate, low, and off.
▪
Reset Picture: to reset all the picture parameters.
18
Downloaded from ManualMonitor.com Manuals
ASUS LCD TV Monitor T1 Series
4.
Sound
▪
▪
Sound Mode: to switch among Vocal, Rock, Soft, Boom, and Standard
sound mode.
-
Vocal: to emphasize the human voice for news report or speech
-
Rock: to emphasize bass the treble for rock music
-
Soft: to slightly increase bass and treble for soft music
-
Boom: to emphasize low tone for fighting games
-
Standard: to adjust the equalizer to define your preferred sound effect.
Equalizer: to set the level of each frequency band varying from low to high
pitch
Equalizer is active ONLY in Standard sound mode.
▪
Balance: to adjust the sound balance of the speakers to your preferred
levels
▪
Auto Volume: to automatically keep the volume level equal even if
changing programmes
▪
Surround Sound: to turn on and off the simulated surround sound system
ASUS LCD TV Monitor T1 Series
Downloaded from ManualMonitor.com Manuals
19
5.
Display
▪
▪
Aspect Ratio: to change the aspect ratio of the displaying image among
Wide, Square, Zoom1, Zoom2, Panorama, and Auto
-
Wide: to fit pictures to 16:9 wide full screen
-
Square: to leave the left and right sides of the screen blank to display
4:3 format pictures
-
Panorama: to fit the 4:3 signal into the 16:9 wide screen by keeping the
centre of the picture in the same aspect ratio and stretching the both
sides more
-
Zoom1: to stretch the centre of 2.35:1 pictures to the top and bottom of
the screen and leave the left and right sides of the picture outside the
screen being un-displayed
-
Zoom2: to stretch the centre of 1.85:1 pictures to the top and bottom of
the screen and leave the left and right sides of the picture outside the
screen being un-displayed
-
Auto: to automatically select the screen aspect ratio according to the
broadcasting signal
Auto Configuration: to automatically adjust the display parameters for VGA
signal. This function is active only for VGA input.
This function can be activated also by pressing
the display set when VGA input in use.
▪
6.
key on the key pad of
Manual Configuration: to specify the display position, clock, and phase of
the display for VGA signal. This function is active only when VGA input
source is selected.
Time
▪
Clock: to set the current time. This function is inactive when “Sync Time” is
on.
▪
Off Time: to specify the time when the display automatically turns off. The
off-time can be set one-time or repeated.
▪
On Time: to specify the time when the display automatically turns on. You
can also specify the signal source and volume when it is turned on. The
on-time can be set one-time or repeated.
▪
Auto Off: to switch the display off when no signal from the input source is
detected for 10 minutes.
▪
Time Zone: to specify your time zone.
▪
Sync Time: to automatically get time information from broadcasting signal
▪
Sleep Timer: to set a countdown of 15, 30, 60, 90, 120, 180, 240 minutes till
the display automatically switches off.
20
Downloaded from ManualMonitor.com Manuals
ASUS LCD TV Monitor T1 Series
3.2
1.
Specifications Summary
22T1E
Power Requirement
Power Consumption
Dimensions (W x H x D)
Gross Weight
Net Weight
Wall-Mount
Environmental
Conditions
Panel Type
Viewing Area
Pixel Pitch
Physical Resolution
Luminance
Contrast Ratio
Number of Colours
Colour Gamut
Synchronization
Frequency
Max. Pixel Frequency
Signal Connectors
Speakers
TV System
Colour System
Channel Coverage
*
100 – 240V AC, 50 / 60 Hz
Maximum: less than 70 W
Stand-by: less than 2 W
Power off: less than 1 W
540.6 mm x 438.5 mm x 78.4 mm
8.0 kg (with packing & accessories)
6.3 kg
Not applicable
Operating temperature between 0°C and 40°C
Operating humidity between 10% and 70%
Storage temperature between -20°C and 60°C
Storage humidity between 10% and 70%
Thin-Film-Transistor Liquid-Crystal Display (TFT-LCD)
475mm (H) x 267mm (V)
54.6cm (21.5”) wide diagonal
0.248mm (H) x 0.248mm (V)
1920 (H) x 1080 (V)
Maximum 300 cd/m2
Maximum 20,000:1 (when ASCR on)
16.7 million colours
72% NTSC
Horizontal 30 – 82 kHz
Vertical 50 – 76 Hz
162 MHz
19-pin HDMI x 2, 15-pin D-Sub, RCA R+L audio-in,
3.5mm mini-jack audio-in, 3.5mm mini jack
headphone-out, SCART x 2, Component, Composite,
S-Video, RCA R+L audio-out, S/PDIF optical audio-out,
IEC 169-2 RF connector
7W (RMS) x 2 (stereo)
Analogue B/G, D/K, L, I
Digital DVB-T
PAL, SECAM
NTSC 3.58, 4.43 (video-in only)
Analogue 48.25 – 855.25 MHz
Digital VHF Band III (177.5 – 226.5 MHz)
UHF E21 – E69 (474 – 858 MHz)
Specifications are subject to change without prior notice.
ASUS LCD TV Monitor T1 Series
Downloaded from ManualMonitor.com Manuals
21
2.
24T1E
Power Requirement
Power Consumption
Dimensions (W x H x D)
Gross Weight
Net Weight
Wall-Mount
Environmental
Conditions
Panel Type
Viewing Area
Pixel Pitch
Physical Resolution
Luminance
Contrast Ratio
Number of Colours
Colour Gamut
Synchronization
Frequency
Max. Pixel Frequency
Signal Connectors
Speakers
TV System
Colour System
Channel Coverage
*
100 – 240V AC, 50 / 60 Hz
Maximum: less than 75 W
Stand-by: less than 2 W
Power off: less than 1 W
589.6 mm x 465.2 mm x 191.2 mm
8.5 kg (with packing & accessories)
7 kg
Not applicable
Operating temperature between 0°C and 40°C
Operating humidity between 10% and 70%
Storage temperature between -20°C and 60°C
Storage humidity between 10% and 70%
Thin-Film-Transistor Liquid-Crystal Display (TFT-LCD)
531mm (H) x 299mm (V)
61.0cm (24.0”) wide diagonal
0.277mm (H) x 0.277mm (V)
1920 (H) x 1080 (V)
Maximum 300 cd/m2
Maximum 20,000:1 (when ASCR on)
16.7 million colours
72% NTSC
Horizontal 30 – 82 kHz
Vertical 50 – 76 Hz
162 MHz
19-pin HDMI x 2, 15-pin D-Sub, RCA R+L audio-in,
3.5mm mini-jack audio-in, 3.5mm mini jack
headphone-out, SCART x 2, Component, Composite,
S-Video, RCA R+L audio-out, S/PDIF optical audio-out,
IEC 169-2 RF connector
7W (RMS) x 2 (stereo)
Analogue B/G, D/K, L, I
Digital DVB-T
PAL, SECAM
NTSC 3.58, 4.43 (video-in only)
Analogue 48.25 – 855.25 MHz
Digital VHF Band III (177.5 – 226.5 MHz)
UHF E21 – E69 (474 – 858 MHz)
Specifications are subject to change without prior notice.
22
Downloaded from ManualMonitor.com Manuals
ASUS LCD TV Monitor T1 Series
3.3
Troubleshooting (FAQ)
Phenomenon
Power indicator off
▪
▪
Red power indicator and
blank screen
▪
▪
▪
▪
▪
▪
Remote controller
malfunctions
▪
▪
Screen too bright, too
dark, or colour error
Screen image bouncing,
rolling, or with
water-flowing pattern
Screen image blurry or
fuzzy
No sound or low sound
level
▪
▪
▪
▪
▪
▪
▪
▪
▪
▪
TV screen double image,
snowing, or ghosting
PC screen image not
centred or sized properly
▪
▪
▪
▪
▪
Recommended Actions
Press the power button again and check whether
the power is on.
Check whether the power switch on the back side
of the display is on.
Check whether the power cord is well connected
Check whether both the display and the selected
video device, or the computer, are on.
Check whether the signal cable is well connected.
Check whether the signal cable is undamaged
When computer is in use, check whether the
computer is waken by clicking any key on the
keyboard or moving the mouse
Check whether the video device, or the computer,
is working well by connecting it to another display,
if available
Ensure no obstruction between the display and the
remote controller
Check whether the batteries are installed correctly
to the correspondent .polarities
Install new batteries
Check whether the signal cable is undamaged
Use “Reset” function in the Picture item of the
OSD menu
Check whether the signal cable is well connected
Move away electrical devices that may cause
electromagnetic interference.
Check whether the video signal cable is well
connected
Use “Auto Adjust” function for VGA input.
Check whether the audio cable is well connected.
For some video devices and computers, the audio
signal is NOT transmitted over the HDMI interface.
Audio cable MUST be connected in this case.
Adjust the volume level.
For PC sound, check whether the sound card and
its driver are properly installed and activated.
Check whether the TV signal cable is well
connected
Check the antenna is undamaged
Check the location and direction of the antenna
Ensure the antenna not too old.
Use “Auto Adjust” function
ASUS LCD TV Monitor T1 Series
Downloaded from ManualMonitor.com Manuals
23
________________________________________________________________________________
________________________________________________________________________________
________________________________________________________________________________
________________________________________________________________________________
________________________________________________________________________________
________________________________________________________________________________
________________________________________________________________________________
________________________________________________________________________________
________________________________________________________________________________
________________________________________________________________________________
________________________________________________________________________________
________________________________________________________________________________
________________________________________________________________________________
________________________________________________________________________________
________________________________________________________________________________
________________________________________________________________________________
________________________________________________________________________________
________________________________________________________________________________
________________________________________________________________________________
________________________________________________________________________________
________________________________________________________________________________
________________________________________________________________________________
________________________________________________________________________________
24
Downloaded from ManualMonitor.com Manuals
ASUS LCD TV Monitor T1 Series