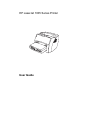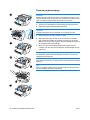
1
use
hp LaserJet 1005 series
blank.fm Page 2 Thursday, October 10, 2002 9:27 AM
HP LaserJet 1005 Series Printer
User Guide
© Copyright Hewlett-Packard Company 2003
Warranty
Trademark Credits
All Rights Reserved. Reproduction,
adaptation, or translation without prior written
permission is prohibited, except as allowed
under the copyright laws.
The information contained in this document is
subject to change without notice.
Microsoft®, MS Windows, Windows®, and
MS-DOS® are U.S. registered trademarks of
Microsoft Corporation.
A user of the Hewlett-Packard printer
associated with this user guide is granted a
license to: a) print hard copies of this user
guide for PERSONAL, INTERNAL or
COMPANY use subject to the restriction not to
sell, re-sell or otherwise distribute the hard
copies; and b) place an electronic copy of this
user guide on a network server, provided
access to the electronic copy is limited to
PERSONAL, INTERNAL users of the
Hewlett-Packard printer associated with this
user guide.
Publication number: Q2676-90906
Edition 1, 1/2003
Hewlett-Packard Company
11311 Chinden Boulevard
Boise, Idaho 83714 U.S.A.
Hewlett-Packard makes no warranty of any
kind with respect to this information.
HEWLETT-PACKARD SPECIFICALLY
DISCLAIMS THE IMPLIED WARRANTY OF
MERCHANTABILITY AND FITNESS FOR A
PARTICULAR PURPOSE.
Hewlett-Packard shall not be liable for any
direct, indirect, incidental, consequential, or
other damage alleged in connection with the
furnishing or use of this information.
ENERGY STAR® is a U.S. registered mark of
the United States Environmental Protection
Agency.
Netscape is a U.S. trademark of Netscape
Communications Corporation.
Zenographics is a U.S. trademark of
Zenographics, Incorporated.
All other products mentioned herein may be
trademarks of their respective companies.
Content
1 Getting started
Review the package contents . . . . . . . . . . . . . . . . . . . . . . . . . . . . . . . . . . . . . . . . . . . . . . . . . 8
Prepare the location . . . . . . . . . . . . . . . . . . . . . . . . . . . . . . . . . . . . . . . . . . . . . . . . . . . . . . . . 8
Regulate the environment . . . . . . . . . . . . . . . . . . . . . . . . . . . . . . . . . . . . . . . . . . . . . . . . . . . . 9
Install the printer software . . . . . . . . . . . . . . . . . . . . . . . . . . . . . . . . . . . . . . . . . . . . . . . . . . . . 9
Open the print cartridge door. . . . . . . . . . . . . . . . . . . . . . . . . . . . . . . . . . . . . . . . . . . . . . . . . 10
Remove the left cover . . . . . . . . . . . . . . . . . . . . . . . . . . . . . . . . . . . . . . . . . . . . . . . . . . . . . . 10
Connect the printer cable . . . . . . . . . . . . . . . . . . . . . . . . . . . . . . . . . . . . . . . . . . . . . . . . . . . 10
Prepare the print cartridge. . . . . . . . . . . . . . . . . . . . . . . . . . . . . . . . . . . . . . . . . . . . . . . . . . . 11
Install the print cartridge . . . . . . . . . . . . . . . . . . . . . . . . . . . . . . . . . . . . . . . . . . . . . . . . . . . . 11
Load the paper input tray. . . . . . . . . . . . . . . . . . . . . . . . . . . . . . . . . . . . . . . . . . . . . . . . . . . . 12
Connect the power cord . . . . . . . . . . . . . . . . . . . . . . . . . . . . . . . . . . . . . . . . . . . . . . . . . . . . 12
Troubleshooting the printer . . . . . . . . . . . . . . . . . . . . . . . . . . . . . . . . . . . . . . . . . . . . . . . . . . 13
Installation is complete . . . . . . . . . . . . . . . . . . . . . . . . . . . . . . . . . . . . . . . . . . . . . . . . . . . . . 13
2 Getting to know the printer
Identifying the printer’s components . . . . . . . . . . . . . . . . . . . . . . . . . . . . . . . . . . . . . . . . . . .
Status lights . . . . . . . . . . . . . . . . . . . . . . . . . . . . . . . . . . . . . . . . . . . . . . . . . . . . . . . . . .
Printer paper input tray . . . . . . . . . . . . . . . . . . . . . . . . . . . . . . . . . . . . . . . . . . . . . . . . . .
Printer media guides . . . . . . . . . . . . . . . . . . . . . . . . . . . . . . . . . . . . . . . . . . . . . . . . . . . .
Printer output paths. . . . . . . . . . . . . . . . . . . . . . . . . . . . . . . . . . . . . . . . . . . . . . . . . . . . .
Print cartridge door . . . . . . . . . . . . . . . . . . . . . . . . . . . . . . . . . . . . . . . . . . . . . . . . . . . . .
Turning the power off. . . . . . . . . . . . . . . . . . . . . . . . . . . . . . . . . . . . . . . . . . . . . . . . . . . . . . .
Understanding voltage conversions . . . . . . . . . . . . . . . . . . . . . . . . . . . . . . . . . . . . . . . . . . .
16
17
17
18
18
19
20
20
3 Media
Choosing paper and other media . . . . . . . . . . . . . . . . . . . . . . . . . . . . . . . . . . . . . . . . . . . . .
Optimizing print quality for media types. . . . . . . . . . . . . . . . . . . . . . . . . . . . . . . . . . . . . . . . .
Loading media into the paper input tray . . . . . . . . . . . . . . . . . . . . . . . . . . . . . . . . . . . . . . . .
Specific types of media . . . . . . . . . . . . . . . . . . . . . . . . . . . . . . . . . . . . . . . . . . . . . . . . . .
Printing transparencies and labels . . . . . . . . . . . . . . . . . . . . . . . . . . . . . . . . . . . . . . . . . . . .
Printing envelopes . . . . . . . . . . . . . . . . . . . . . . . . . . . . . . . . . . . . . . . . . . . . . . . . . . . . . . . . .
Printing letterhead and preprinted forms . . . . . . . . . . . . . . . . . . . . . . . . . . . . . . . . . . . . . . . .
Printing custom-sized media and card stock . . . . . . . . . . . . . . . . . . . . . . . . . . . . . . . . . . . . .
22
22
23
23
24
25
26
27
4 Printing tasks
Accessing the printer properties (driver) and help. . . . . . . . . . . . . . . . . . . . . . . . . . . . . . . . .
Printer properties (driver) . . . . . . . . . . . . . . . . . . . . . . . . . . . . . . . . . . . . . . . . . . . . . . . .
Printer properties online help . . . . . . . . . . . . . . . . . . . . . . . . . . . . . . . . . . . . . . . . . . . . .
Printing watermarks. . . . . . . . . . . . . . . . . . . . . . . . . . . . . . . . . . . . . . . . . . . . . . . . . . . . . . . .
Printing multiple pages on a single sheet of media (N-up printing) . . . . . . . . . . . . . . . . . . . .
Canceling a print job . . . . . . . . . . . . . . . . . . . . . . . . . . . . . . . . . . . . . . . . . . . . . . . . . . . . . . .
Understanding print quality settings . . . . . . . . . . . . . . . . . . . . . . . . . . . . . . . . . . . . . . . . . . .
Using EconoMode (Save Toner) . . . . . . . . . . . . . . . . . . . . . . . . . . . . . . . . . . . . . . . . . . . . . .
ENWW
30
30
30
31
31
32
32
32
Content 3
5 Managing the print cartridge
Using HP print cartridges. . . . . . . . . . . . . . . . . . . . . . . . . . . . . . . . . . . . . . . . . . . . . . . . . . . .
HP policy on non-HP print cartridges . . . . . . . . . . . . . . . . . . . . . . . . . . . . . . . . . . . . . . .
Storing print cartridges . . . . . . . . . . . . . . . . . . . . . . . . . . . . . . . . . . . . . . . . . . . . . . . . . . . . .
Print cartridge life expectancy . . . . . . . . . . . . . . . . . . . . . . . . . . . . . . . . . . . . . . . . . . . . . . . .
Recycling print cartridges . . . . . . . . . . . . . . . . . . . . . . . . . . . . . . . . . . . . . . . . . . . . . . . . . . .
Saving toner . . . . . . . . . . . . . . . . . . . . . . . . . . . . . . . . . . . . . . . . . . . . . . . . . . . . . . . . . . . . .
Redistributing toner . . . . . . . . . . . . . . . . . . . . . . . . . . . . . . . . . . . . . . . . . . . . . . . . . . . . . . . .
Changing the print cartridge . . . . . . . . . . . . . . . . . . . . . . . . . . . . . . . . . . . . . . . . . . . . . . . . .
34
34
34
34
34
34
35
36
6 Troubleshooting the printer
Finding the solution . . . . . . . . . . . . . . . . . . . . . . . . . . . . . . . . . . . . . . . . . . . . . . . . . . . . . . . .
Pages did not print . . . . . . . . . . . . . . . . . . . . . . . . . . . . . . . . . . . . . . . . . . . . . . . . . . . . .
Pages printed, but there was a problem . . . . . . . . . . . . . . . . . . . . . . . . . . . . . . . . . . . . .
Software is installed, but pages did not print. . . . . . . . . . . . . . . . . . . . . . . . . . . . . . . . . .
Status light patterns . . . . . . . . . . . . . . . . . . . . . . . . . . . . . . . . . . . . . . . . . . . . . . . . . . . .
Error messages on the screen . . . . . . . . . . . . . . . . . . . . . . . . . . . . . . . . . . . . . . . . . . . .
Media handling problems . . . . . . . . . . . . . . . . . . . . . . . . . . . . . . . . . . . . . . . . . . . . . . . .
Printed page is different than what appeared on screen. . . . . . . . . . . . . . . . . . . . . . . . .
Printer software problems . . . . . . . . . . . . . . . . . . . . . . . . . . . . . . . . . . . . . . . . . . . . . . . .
Improving print quality . . . . . . . . . . . . . . . . . . . . . . . . . . . . . . . . . . . . . . . . . . . . . . . . . . . . . .
Cleaning the printer . . . . . . . . . . . . . . . . . . . . . . . . . . . . . . . . . . . . . . . . . . . . . . . . . . . . . . . .
Cleaning the printer media path . . . . . . . . . . . . . . . . . . . . . . . . . . . . . . . . . . . . . . . . . . .
Clearing printer media jams. . . . . . . . . . . . . . . . . . . . . . . . . . . . . . . . . . . . . . . . . . . . . . . . . .
Changing the pickup roller. . . . . . . . . . . . . . . . . . . . . . . . . . . . . . . . . . . . . . . . . . . . . . . . . . .
Cleaning the pickup roller . . . . . . . . . . . . . . . . . . . . . . . . . . . . . . . . . . . . . . . . . . . . . . . . . . .
Changing the printer separation pad . . . . . . . . . . . . . . . . . . . . . . . . . . . . . . . . . . . . . . . . . . .
38
38
38
38
39
41
42
43
44
45
48
50
51
53
55
56
7 Service and support
Availability . . . . . . . . . . . . . . . . . . . . . . . . . . . . . . . . . . . . . . . . . . . . . . . . . . . . . . . . . . . . . . .
Hardware service. . . . . . . . . . . . . . . . . . . . . . . . . . . . . . . . . . . . . . . . . . . . . . . . . . . . . . . . . .
Extended warranty. . . . . . . . . . . . . . . . . . . . . . . . . . . . . . . . . . . . . . . . . . . . . . . . . . . . . . . . .
Guidelines for repacking the printer. . . . . . . . . . . . . . . . . . . . . . . . . . . . . . . . . . . . . . . . . . . .
Service information form . . . . . . . . . . . . . . . . . . . . . . . . . . . . . . . . . . . . . . . . . . . . . . . . . . . .
Hewlett-Packard Support. . . . . . . . . . . . . . . . . . . . . . . . . . . . . . . . . . . . . . . . . . . . . . . . . . . .
European Customer Support Center. . . . . . . . . . . . . . . . . . . . . . . . . . . . . . . . . . . . . . . .
Online services . . . . . . . . . . . . . . . . . . . . . . . . . . . . . . . . . . . . . . . . . . . . . . . . . . . . . . . .
Obtaining software utilities and electronic information . . . . . . . . . . . . . . . . . . . . . . . . . .
HP SupportPack . . . . . . . . . . . . . . . . . . . . . . . . . . . . . . . . . . . . . . . . . . . . . . . . . . . . . . .
Worldwide sales and service offices . . . . . . . . . . . . . . . . . . . . . . . . . . . . . . . . . . . . . . . . . . .
60
60
60
60
61
62
62
62
63
63
64
Appendix A Printer specifications
Specifications . . . . . . . . . . . . . . . . . . . . . . . . . . . . . . . . . . . . . . . . . . . . . . . . . . . . . . . . . . . .
FCC compliance . . . . . . . . . . . . . . . . . . . . . . . . . . . . . . . . . . . . . . . . . . . . . . . . . . . . . . . . . .
Environmental Product Stewardship Program. . . . . . . . . . . . . . . . . . . . . . . . . . . . . . . . . . . .
Protecting the environment . . . . . . . . . . . . . . . . . . . . . . . . . . . . . . . . . . . . . . . . . . . . . . .
Material Safety Data Sheet . . . . . . . . . . . . . . . . . . . . . . . . . . . . . . . . . . . . . . . . . . . . . . . . . .
Regulatory statements. . . . . . . . . . . . . . . . . . . . . . . . . . . . . . . . . . . . . . . . . . . . . . . . . . . . . .
Laser safety statement . . . . . . . . . . . . . . . . . . . . . . . . . . . . . . . . . . . . . . . . . . . . . . . . . .
Declaration of Conformity . . . . . . . . . . . . . . . . . . . . . . . . . . . . . . . . . . . . . . . . . . . . . . . .
Laser statement for Finland . . . . . . . . . . . . . . . . . . . . . . . . . . . . . . . . . . . . . . . . . . . . . .
4
Content
66
68
69
69
70
71
71
71
72
ENWW
Appendix B Media specifications
Printer media specifications. . . . . . . . . . . . . . . . . . . . . . . . . . . . . . . . . . . . . . . . . . . . . . . . . .
Supported media sizes (printer) . . . . . . . . . . . . . . . . . . . . . . . . . . . . . . . . . . . . . . . . . . . . . .
Guidelines for using media . . . . . . . . . . . . . . . . . . . . . . . . . . . . . . . . . . . . . . . . . . . . . . . . . .
Paper. . . . . . . . . . . . . . . . . . . . . . . . . . . . . . . . . . . . . . . . . . . . . . . . . . . . . . . . . . . . . . . .
Labels . . . . . . . . . . . . . . . . . . . . . . . . . . . . . . . . . . . . . . . . . . . . . . . . . . . . . . . . . . . . . . .
Transparencies . . . . . . . . . . . . . . . . . . . . . . . . . . . . . . . . . . . . . . . . . . . . . . . . . . . . . . . .
Envelopes . . . . . . . . . . . . . . . . . . . . . . . . . . . . . . . . . . . . . . . . . . . . . . . . . . . . . . . . . . . .
Card stock and heavy media. . . . . . . . . . . . . . . . . . . . . . . . . . . . . . . . . . . . . . . . . . . . . .
74
74
75
75
76
76
76
77
Appendix C Warranty and licensing
Hewlett-Packard software license agreement . . . . . . . . . . . . . . . . . . . . . . . . . . . . . . . . . . . . 80
Hewlett-Packard limited warranty statement . . . . . . . . . . . . . . . . . . . . . . . . . . . . . . . . . . . . . 81
Limited warranty for print cartridge life . . . . . . . . . . . . . . . . . . . . . . . . . . . . . . . . . . . . . . . . . 83
Appendix D Accessories and ordering information
Appendix E Installing shared printers
Index
ENWW
Content 5
6
Content
ENWW
1
Getting started
This chapter provides the following instructions for installing the software and setting up
the printer:
ENWW
●
Review the package contents
●
Prepare the location
●
Regulate the environment
●
Install the printer software
●
Open the print cartridge door
●
Remove the left cover
●
Connect the printer cable
●
Prepare the print cartridge
●
Install the print cartridge
●
Load the paper input tray
●
Connect the power cord
●
Troubleshooting the printer
●
Installation is complete
7
Review the package contents
2
1
3
4
6
5
Make sure that all of the parts are included.
1
Printer
2
Print cartridge (in protective bag)
3
Getting Started Guide
4
Software and electronic user guide (on one CD-ROM)
5
Power cord
6
Paper input tray
253 mm (10.0 in.)
Prepare the location
486 mm (19.1 in.)
Place the printer on a sturdy, level surface. Allow space for ventilation. Allow space behind the
printer for output from the straight-through output door.
8 Chapter 1 Getting started
ENWW
Regulate the environment
Do not place the printer in direct sunlight. Make sure that the environment is free from abrupt
temperature or humidity changes.
●
Temperature – 50° to 91° F (10° to 32.5° C)
●
Relative humidity – 20% to 80%
Install the printer software
To install the printer software from the CD
ENWW
1
Select Install from the autorun screen. If autorun does not occur, in the Windows system
tray, click Start, click Run, type x:\setup (where x is the letter of the CD-ROM drive),
and click OK.
2
Follow the instructions on the screen.
Regulate the environment 9
Open the print cartridge door
Firmly grasp the left and right sides, and pull the print cartridge door toward you.
Remove the left cover
Pull out on the rear of the cover, and rotate it away from the printer.
Connect the printer cable
Plug the printer cable into the printer (A). Plug the printer cable into the PC (B).
10 Chapter 1 Getting started
ENWW
Prepare the print cartridge
Remove the print cartridge from the plastic bag. To remove the mylar tape, break the tab on the
left, and pull the tape completely out.
Install the print cartridge
Insert the print cartridge into the printer, making sure that the print cartridge is in position.
ENWW
Install the print cartridge 11
Load the paper input tray
3
1
2
4
1
Slide the paper input tray in and down at an angle until it fits securely in the printer.
2
Slide the media guides out and back to accommodate the media.
3
Place the media in the paper input tray. Slide the media guides until they are flush with the
media.
4
Install the paper input tray cover.
Connect the power cord
Plug the power cord into the printer (A). Plug the power cord into the power receptacle (B).
12 Chapter 1 Getting started
ENWW
Troubleshooting the printer
If the top status light is on, the printer is ready to print.
If no status lights are on, check the power cord and the printer cable connections.
CAUTION
Before you connect the cable to the printer, always unplug the printer. Otherwise, the printer might
be damaged.
Installation is complete
Congratulations! Your HP LaserJet 1005 Series Printer is ready to use. If you had any problems,
see Troubleshooting the printer or go to HP’s support Web site at
http://www.hp.com/support/lj1005.
ENWW
Troubleshooting the printer 13
14 Chapter 1 Getting started
ENWW
2
Getting to know the printer
This chapter provides information on the following topics:
ENWW
●
Identifying the printer’s components
●
Turning the power off
●
Understanding voltage conversions
15
Identifying the printer’s components
7
1. Status lights
2. Paper input tray
3. Long media support for the paper input tray
4. Side media guides for the paper input tray
5. Print cartridge door
6. Output bin
7. Long media extension (output bin)
1
2
6
3
5
4
8
8. Media jam release levers
9. Straight-through output door
10. Power switch
11. Power receptacle
12. USB port
13. Parallel port
14. Left cover
9
10
11
12
16 Chapter 2 Getting to know the printer
13
14
ENWW
Status lights
The status lights produce patterns that identify the printer’s status.
Ready light (green)
Attention light (amber)
Note
●
Ready light: Indicates that the printer is ready to print or the printer is processing data.
●
Attention light: Indicates that the paper input tray is empty, the print cartridge door is open,
the print cartridge is missing, or another type of error occurred.
See Status light patterns for a description of the light patterns.
Printer paper input tray
The enclosed paper input tray, located in front of the printer, holds up to 250 sheets of 20 lb
(75 g/m2) paper, multiple envelopes, or other media.
See Media specifications for more information about media types.
ENWW
Identifying the printer’s components 17
Printer media guides
The paper input tray has a long media support and side media guides. Media guides ensure that
the media is correctly fed into the printer and that the print is not skewed (crooked on the media).
When loading media, adjust the media guides to match the width and length of the media that
you are using.
Printer output paths
Output bin
The output bin is located on the top of the printer. Printed media is collected here in the correct
sequence when the straight-through output door is closed. Use the output bin when printing
normal and large, collated documents.
18 Chapter 2 Getting to know the printer
ENWW
Straight-through output path
The straight-through output path is useful when you are printing envelopes, transparencies, heavy
media, or any media that tends to curl when printed. Printed media exits in reverse order when the
straight-through output door is open.
Note
Printed media does not stack when you use the straight-through output path. The media drops to the
surface below unless you remove each sheet as it exits the printer.
Print cartridge door
The print cartridge door is located on the front of the printer. You must open the print cartridge
door to access the print cartridge, clear jams, and clean the printer. To open the print cartridge
door, firmly grasp the left and right sides, and pull the print cartridge door toward you.
Note
ENWW
You will feel some resistance when you open the print cartridge door. Opening the print cartridge door
conveniently lifts the print cartridge for easy removal.
Identifying the printer’s components 19
Turning the power off
You must unplug the printer to turn the power off.
WARNING!
To ensure your safety when working inside the printer for any reason, unplug the printer.
Understanding voltage conversions
Because of the different specifications, Hewlett-Packard does not offer a voltage conversion or
support the voltage conversion of the U.S. version of the HP LaserJet family of printers for foreign
use. If you plan on using the equipment outside of the United States, Hewlett-Packard advises you
to purchase the products in the country/region where you will use them.
CAUTION
Check your printer’s voltage requirement before you plug it in. If you plug a printer that requires 110-127
volts of power into a 220-240 voltage outlet, it will damage the printer.
20 Chapter 2 Getting to know the printer
ENWW
3
Media
This chapter provides information on the following topics:
ENWW
●
Choosing paper and other media
●
Optimizing print quality for media types
●
Loading media into the paper input tray
●
Printing transparencies and labels
●
Printing envelopes
●
Printing letterhead and preprinted forms
●
Printing custom-sized media and card stock
21
Choosing paper and other media
HP LaserJet printers produce excellent print quality documents. You can print on a variety of
media, such as paper (including up to 100% recycled fiber content paper), envelopes, labels,
transparencies, and custom-sized media. The following are the supported media sizes:
●
Minimum: 76 by 127 mm (3 by 5 in.)
●
Maximum: 216 by 356 mm (8.5 by 14 in.)
Properties such as weight, grain, and moisture content are important factors that affect printer
performance and quality. To achieve the best possible print quality, only use high-quality media
designed for laser printers. See Printer media specifications for detailed paper and media
specifications.
Note
Always test a sample of the media before you purchase large quantities. The media supplier should
understand the requirements specified in the Guidelines for Paper and Other Print Media (HP part
number 5963-7863). See Printer media specifications for more information.
Optimizing print quality for media types
The temperature of the printer’s engine fuser affects the quality of your printed documents.
Different types of media require different engine fuser temperatures to optimize the print quality.
You can specify the type of media that you are using to print in the printer driver. This changes
the engine fuser to the temperature that is appropriate for that media.
To change the media type in the printer driver
Note
1
Access the printer properties. See Printer properties (driver) for instructions.
2
Click the Paper tab.
3
Select the media type from the Optimize for drop-down list.
4
Click OK.
Printing speeds are automatically reduced when printing special-sized media.
22 Chapter 3 Media
ENWW
Loading media into the paper input tray
The paper input tray holds up to 250 pages of 20 lb (75 g/m2) paper or fewer pages of heavier
media (25 mm or less stack). Load media with the top forward and the side to be printed facing up.
To prevent jams and skewing, always adjust the side media guides and long media support.
CAUTION
If you try to print on media that is wrinkled, folded, or damaged in any way, a jam might occur. See Printer
media specifications for more information.
Note
When you add new media, make sure that you remove all of the media from the paper input tray and
straighten the stack of new media. This helps prevent multiple sheets of media from feeding through the
printer at one time, reducing media jams.
Specific types of media
ENWW
●
Transparencies and labels: Load transparencies and labels with the top forward and the
side to be printed facing up. See Printing transparencies and labels for more information.
●
Envelopes: Load envelopes with the narrow, stamp side forward and the side to be printed
facing up. See Printing envelopes for more information.
●
Letterhead and preprinted forms: Load letterhead and preprinted forms with the top forward
and the side to be printed facing up. See Printing letterhead and preprinted forms for more
information.
●
Custom-sized media and card stock: Load custom-sized media and card stock with the
narrow side forward and the side to be printed facing up. See Printing custom-sized media and
card stock for more information.
Loading media into the paper input tray 23
Printing transparencies and labels
Only use transparencies and labels that are recommended for laser printers, such as
HP transparency film and HP LaserJet labels. See Printer media specifications for more
information.
CAUTION
Inspect the media to make sure that it is not wrinkled or curled and that it does not have any torn edges
or missing labels.
CAUTION
Do not use labels that have exposed backing. Labels can peel off of sheets that have spaces between
the labels, causing serious jams.
To print transparencies or labels
24 Chapter 3 Media
1
Open the straight-through output door.
2
Load the media in the paper input tray. Make sure that the top of the media is forward and the
side to be printed (rough side) is facing up.
3
Adjust the media guides.
4
Access the printer properties. See Printer properties (driver) for instructions. Click the Paper
tab, select Transparency or Labels from the Optimize for drop-down list, and click OK.
5
Print the document. To prevent the media from sticking together, remove the media from the
back of the printer as it prints, and place the printed pages on a flat surface.
ENWW
Printing envelopes
1
Only use envelopes that are recommended for laser printers. See Printer
media specifications for more information.
1
To prevent the envelopes from curling as they print, open the
straight-through output door.
2
Before loading the envelopes, slide the media guides outward so that
they are slightly wider than the envelopes.
3
Place the envelopes with the stamp end forward and the side to be
printed facing up.
2
Note
If the envelopes have a flap on the short edge, feed that edge into the
printer first.
4
3
Adjust the media guides to the length and width of the envelopes.
Access the printer properties. See Printer properties (driver) for
instructions. Click the Paper tab, select Envelope from the Optimize
for drop-down list, and click OK.
4
ENWW
Printing envelopes 25
Printing letterhead and preprinted forms
To print letterhead or preprinted forms
Note
1
Load the media with the top forward and the side to be printed facing up. Adjust the media
guides to fit the width of the media.
2
Access the printer properties. See Printer properties (driver) for instructions. Click the
Paper tab, select the appropriate media from the Optimize for drop-down list, and click OK.
3
Print the document.
To print a single-page cover letter on letterhead followed by a multiple-page document, load the standard
media in the paper input tray. Place a sheet of letterhead on top of the standard media. The printer
automatically prints the letterhead first.
26 Chapter 3 Media
ENWW
Printing custom-sized media and card stock
The HP LaserJet 1005 Series Printer can print on custom-sized media or card stock between
76 by 127 mm (3 by 5 in.) and 216 by 356 mm (8.5 by 14 in.).
CAUTION
Make sure that the media is not stuck together before you load it.
To print on custom-sized media or card stock
ENWW
1
Open the straight-through output door.
2
Load the media with the narrow side forward and the side to be printed facing up.
Adjust the media guides to fit the media.
3
Select the correct media size in the printer settings. (Software settings can override printer
properties.)
4
Access the printer properties. See Printer properties (driver) for instructions. Click the Paper
tab, select the appropriate media from the Optimize for drop-down list, and click OK.
5
Print the document.
Printing custom-sized media and card stock 27
28 Chapter 3 Media
ENWW
4
Printing tasks
This chapter provides information on the following topics:
ENWW
●
Accessing the printer properties (driver) and help
●
Printing watermarks
●
Printing multiple pages on a single sheet of media (N-up printing)
●
Canceling a print job
●
Understanding print quality settings
●
Using EconoMode (Save Toner)
29
Accessing the printer properties (driver) and help
This section provides information on the following topics:
●
Printer properties (driver)
●
Printer properties online help
Printer properties (driver)
Printer properties control the printer. You can change the default settings, such as media size
and type, printing multiple pages on a single sheet of media (N-up printing), resolution,
and watermarks. You can access the printer properties in the following ways:
Note
●
Through the software application that you are using to print. This only changes the settings
for the current software application.
●
Through the Windows® operating system. This changes the default settings for all future
print jobs.
Because many software applications use a different method of accessing the printer properties, the
following section describes the most common methods used in Windows 9x, 2000, Millennium, NT 4.0,
and Windows XP.
Windows 9x, 2000, Millennium, and NT 4.0
●
Change the settings only for the current software application: From within the software
application, on the File menu, click Print, and click Properties. (Although the steps can vary
between software applications, this is the most common method.)
●
Change the default settings for all future print jobs: In the Windows system tray, click
Start, select Settings, and click Printers. Right-click the printer icon that you want to change,
and click Properties. (Many of the features in Windows NT 4.0 are also in the Document
Defaults menu.)
Windows XP
To change the default settings for all future print jobs, perform the following steps:
1
In the Windows system tray, click Start, and click Control Panel.
2
Double-click Printers and Other Hardware.
3
Click Printers and Faxes.
4
Right-click the HP LaserJet 1005 Series Printer icon.
5
Click Properties.
6
Change the settings, and click OK.
Printer properties online help
The printer properties (driver) online help includes specific information about the functions in the
printer properties. This online help guides you through the process of changing your printer’s
default settings.
To access the printer properties help system, open the printer driver, click the Printer Properties
tab, and click Help.
30 Chapter 4 Printing tasks
ENWW
Printing watermarks
You can use the watermark option to print text “underneath” (in the background) the text of an
existing document. For example, you might want to have Draft or Confidential printed in large gray
letters diagonally across the first page or all of the pages of a document.
To access the watermark feature
1
From the software application, access the printer properties. See Printer properties (driver) for
instructions.
2
Click the Effects tab, and specify the type of watermark that you want to print on your
document.
3
Click OK.
Printing multiple pages on a single sheet of media (N-up printing)
You can select the number of pages that you want to print on a single sheet of media. If you
choose to print more than one page per sheet, the pages appear smaller and are arranged on
the sheet in the order that they would otherwise be printed. You can specify up to 9 pages per
sheet of media.
To access the multiple pages per sheet feature
ENWW
1
From the software application, access the printer properties. See Printer properties (driver) for
instructions.
2
Click the Finishing tab.
3
Type the number of pages per sheet in the Pages per Sheet box.
4
To print borders around each page, select Print Page Borders.
5
To specify the order that you want the pages printed on the page, select the appropriate option
from the Page Order drop-down list.
6
Click OK.
Printing watermarks 31
Canceling a print job
You can cancel a print job from a software application or a print queue.
To stop the printer immediately, remove the remaining media from the printer. After the printer
stops, use one of the following options:
●
Software application: Typically, a dialog box appears briefly on your screen, allowing you to
cancel the print job.
●
Windows print queue: If a print job is waiting in a print queue (computer memory) or print
spooler, you can delete the job from the Printer screen.
If the status lights continue to blink after you cancel a print job, the computer is still sending the
job to the printer. Either delete the job from the print queue or wait until the computer finishes
sending data. The printer will return to the Ready state.
Understanding print quality settings
Print quality settings affect how light or dark the print is on the page and the style that the graphics
are printed. You can also use the print quality settings to optimize the print quality for a specific
media type. See Optimizing print quality for media types for more information.
You can change the settings in the printer properties to accommodate the types of jobs you are
printing. The following are the print quality options:
●
Best Quality: This option prints at 600 dpi and provides the best print quality. This is the
default setting.
●
300 dpi: This option prints at a slightly reduced resolution so that the job can print faster.
●
Custom: You can use this option to specify your own custom print quality settings.
●
EconoMode (Save Toner): This option prints using less toner. This option is useful when you
are printing drafts.
To change the print quality settings
1
Access the printer properties. See Printer properties (driver) for instructions.
2
Click the Finishing tab.
3
Select the Print Quality option.
4
To view and change the output and graphic settings for the option that you selected, click
Details.
Using EconoMode (Save Toner)
EconoMode is an excellent way to extend the life of your print cartridge. EconoMode uses
substantially less toner than normal printing. The printed image is much lighter, but it is adequate
for printing drafts or proofs.
To enable EconoMode, access the printer properties. See Printer properties (driver) for
instructions. Click the Finishing tab, select EconoMode (Save Toner), and click OK.
32 Chapter 4 Printing tasks
ENWW
5
Managing the print cartridge
This chapter provides information on the following topics:
ENWW
●
Using HP print cartridges
●
Storing print cartridges
●
Print cartridge life expectancy
●
Recycling print cartridges
●
Saving toner
●
Redistributing toner
●
Changing the print cartridge
33
Using HP print cartridges
HP policy on non-HP print cartridges
Hewlett-Packard Company cannot recommend the use of non-HP print cartridges, either new,
refilled, or remanufactured. Since they are not HP products, Hewlett-Packard cannot influence
their design or control their quality. Service or repair that is required as a result of using non-HP
print cartridges will not be covered under the printer warranty.
Note
The warranty does not apply to defects resulting from software, interfacing, or parts not supplied by
Hewlett-Packard.
Storing print cartridges
Do not remove the print cartridge from its package until you are ready to use it. The shelf life of
a print cartridge in an unopened package is approximately 2.5 years. The shelf life of a print
cartridge in an opened package is approximately 6 months.
CAUTION
To prevent damage to the print cartridge, do not expose it to light.
Print cartridge life expectancy
The life of the print cartridge depends on the amount of toner that your print jobs require.
When printing text at 5% coverage, the standard print cartridge (C7115A) lasts an average of
2,500 pages. This assumes that you set the print density to 3 and disable EconoMode. (These are
the default settings.)
Recycling print cartridges
To reduce landfill waste, Hewlett-Packard has adopted a recycling program for empty print
cartridges. A postage-paid shipping label is inside the new HP LaserJet print cartridge box.
Since 1990, the HP Printing Supplies Environmental Program has collected more than 48 million
used HP LaserJet print cartridges that otherwise might have been discarded in the world’s
landfills. To join this recycling effort, follow the instructions provided in the new print cartridge box.
To install a new HP print cartridge, see Changing the print cartridge or follow the instructions
included in the print cartridge box. See the recycling information on the print cartridge box and the
HP Printing Supplies Environmental Program included in the print cartridge box.
Saving toner
While in EconoMode, the printer uses less toner on each page. Selecting this option will extend
the life of the print cartridge and reduce your cost per page, but it will reduce print quality. See
Using EconoMode (Save Toner) for more information.
34 Chapter 5 Managing the print cartridge
ENWW
Redistributing toner
1
2
When toner is low, faded or light areas appear on the printed page. You
might be able to temporarily improve print quality by redistributing the
toner, which means that you might be able to finish the current print job
before replacing the print cartridge.
Note
You will feel some resistance when you open the print cartridge door.
Opening the print cartridge door conveniently lifts the print cartridge for
removal.
1
Open the print cartridge door, and remove the print cartridge from the
printer.
CAUTION
To prevent damage, do not expose the print cartridge to light. Cover it with
a sheet of media.
3
2
To redistribute the toner, gently shake the print cartridge from
side to side.
CAUTION
If toner gets on your clothing, wipe the toner off with a dry cloth, and wash
the clothing in cold water. Hot water will permanently set the toner into
the fabric.
3
Reinsert the print cartridge into the printer, and close the print
cartridge door.
If the print is still light, install a new print cartridge. See Changing the print
cartridge for instructions.
ENWW
Redistributing toner 35
Changing the print cartridge
1
Note
You will feel some resistance when you open the print cartridge door.
Opening the print cartridge door conveniently lifts the print cartridge for
removal.
1
Open the print cartridge door, and remove the old print cartridge.
See Recycling print cartridges or the recycling information inside
the print cartridge box.
2
CAUTION
To prevent damage, do not expose the print cartridge to light. Cover it with
a piece of media.
3
4
2
Remove the new print cartridge from the packaging, and gently shake
it from side to side to distribute the toner evenly inside the cartridge.
3
Bend the tab on the left side of the cartridge to break it loose.
4
Pull the tab until all of the tape is removed from the cartridge. Put the
tab in the print cartridge box to return for recycling.
5
Insert the print cartridge in the printer, making sure that the print
cartridge is in position. Close the print cartridge door.
CAUTION
If toner gets on your clothing, wipe the toner off with a dry cloth, and wash
the clothing in cold water. Hot water will permanently set the toner into
the fabric.
5
36 Chapter 5 Managing the print cartridge
ENWW
6
Troubleshooting the printer
This chapter provides information on the following topics:
Note
ENWW
●
Finding the solution
●
Improving print quality
●
Cleaning the printer
●
Clearing printer media jams
●
Changing the pickup roller
●
Cleaning the pickup roller
●
Changing the printer separation pad
See Hewlett-Packard’s Web site for software and printer driver updates, frequently asked questions, and
additional troubleshooting information. See Online services for the appropriate Web address.
37
Finding the solution
You can use this section to find the solution to common printer problems.
Pages did not print
●
Status light patterns: What status light pattern is displayed on the printer? See Status light
patterns for more information.
●
Error messages on screen: Is there a message on the screen? See Error messages on the
screen for more information.
●
Media handling: Is media being pulled into the printer incorrectly? Are there media jams?
See Media handling problems for more information.
Pages printed, but there was a problem
●
The print quality was poor: See Improving print quality for more information.
●
The printed pages do not always appear the same as on the screen (print preview):
See Printed page is different than what appeared on screen for more information.
●
The printer settings were inappropriate for the media: See Media handling problems for
more information.
Software is installed, but pages did not print
Is the printer driver icon available? Is the printer in Ready mode? Can you select the printer in the
Print dialog? See Printer software problems for more information.
38 Chapter 6 Troubleshooting the printer
ENWW
Status light patterns
Status light legend
Symbol for “light off”
Symbol for “light on”
Symbol for “light blinking”
Status light patterns
Status lights
Condition of the printer
Action
Ready
The printer is ready to print.
No action is necessary.
Processing
The printer is receiving or processing
data.
Wait for the job to print.
Cleaning Mode/Engine test
A cleaning page or engine test page is
printing.
●
●
ENWW
Wait until the cleaning page is finished
printing and the printer is in Ready mode.
This could take up to 2 minutes.
Wait until the engine test page is finished
printing and the printer is in Ready mode.
Out of memory
The printer is out of memory.
The page you are printing might be too complex
for the printer’s memory capacity. Try lowering
the resolution. See Understanding print quality
settings for more information.
Door open, media out, no print
cartridge, media jam, or media jam
levers are down
The printer is in an error state that
requires operator intervention or help.
Check the following:
● The print cartridge door is completely
closed.
● Media is loaded. See Loading media into
the paper input tray for instructions.
● The print cartridge is correctly installed in
the printer. See Changing the print cartridge
for instructions.
● There is no media jam. See Clearing printer
media jams for instructions.
● The media jam levers are in the upright
position.
Finding the solution 39
Status light patterns (continued)
Status lights
Condition of the printer
Action
Printer initialization
A printer initialization is taking place.
No action is necessary.
Fatal error
Both lights are on.
●
●
Printer cable is not connected or there
is no power
Both lights are off.
40 Chapter 6 Troubleshooting the printer
Unplug the printer for 5 minutes, and then
plug it back in.
If the printer still has an error, contact
HP Support. See Service and support.
●
Make sure that there is power.
● Unplug both ends of the power cord, and
plug them back in.
● Unplug the power cord, disconnect both
ends of the printer cable, reconnect both
ends of the printer cable, and plug the
power cord back in.
CAUTION
Before you connect the cable to the printer,
always unplug the printer. Otherwise, the printer
might be damaged.
ENWW
Error messages on the screen
Error messages on the screen
Error message
Printer not responding
Solution
Check the following:
The Ready light is on.
● The power cord and printer cable are correctly connected.
CAUTION
Before you connect the cable to the printer, always unplug the printer.
Otherwise, the printer might be damaged.
●
Cannot access port (in use by
another application)
●
Try the following:
Reboot the computer.
● Make sure that you are only running one software application at a time.
Illegal operation/General
protection fault/Spool 32 error
A problem with your computer system resources (memory or hard disk)
occurred in Windows. To clear this error, restart the computer.
To help prevent this error from occurring in the future, use some or all of the
following recommendations:
● Run fewer applications at the same time. Close applications that you
are not using instead of minimizing them. Programs such as screen
savers, virus checkers, status software, fax/answering software, and
menu programs use the resources that the computer might need to
print.
● Avoid memory-intensive tasks such as sending a fax or running a video
clip while printing.
● Delete all temp (file_name.tmp) files from the Temp subdirectories,
such as C:\Windows\Temp.
● Print at a lower resolution.
ENWW
Finding the solution 41
Media handling problems
Media handling problems
Problem
Solution
Media jam
●
●
●
●
●
Print is skewed (crooked)
●
●
More than one sheet of media
feeds through the printer at
one time
●
●
●
See Clearing printer media jams for more information.
Make sure that you are printing with media that meets specifications.
See Printer media specifications for more information.
Make sure that you are printing with media that is not wrinkled, folded,
or damaged.
Make sure that the printer is clean. See Cleaning the printer media path
for more information.
If you are printing to the straight-through output path, close and open
the door again to make sure that the media jam release levers are
closed.
See Page skew for more information.
Adjust the media guides to the width and length of the media that you
are using and try reprinting. See Printer media guides or Loading media
into the paper input tray for more information.
The paper input tray might be too full. See Loading media into the paper
input tray for more information.
Make sure that the media is not wrinkled, folded, or damaged.
The printer separation pad might be worn. See Changing the printer
separation pad for more information.
Printer does not pull media
from the paper input tray
The pickup roller might be dirty or damaged. See Cleaning the pickup roller
or Changing the pickup roller for instructions.
Printer curled the media
●
●
See Curl or wave for more information.
Open the straight-through output door to print straight through.
See Printer output paths or Media for more information.
The printed media does not exit Open or close the straight-through output door to reflect the output path that
to the correct path
you want to use. See Printer output paths for more information.
Print job is extremely slow
42 Chapter 6 Troubleshooting the printer
The maximum speed of the printer is 14 pages per minute. The print job
might be very complex. Try the following:
● Reduce the complexity of the document (for example, reduce the
number of multiple graphics).
● Access the printer properties in the printer driver. See Printer properties
(driver) for instructions. Click the Paper tab, select Plain Paper from the
Optimize for drop-down list, and click OK.
Note
This may cause toner to fuse improperly if you are using heavy media.
● Narrow media or heavy media will slow printing. Use normal media.
● Print speed is based on the PC processor speed, the amount of
memory, and the amount of hard disk space available on the PC. Try
increasing these components.
ENWW
Printed page is different than what appeared on screen
Printed page problems
Problem
Solution
Garbled, incorrect, or incomplete text The printer cable might be loose or defective. Try the following:
● Try printing a job that you know works.
● If possible, attach the printer cable and printer to another
computer, and try printing a job that you know works.
● Unplug the power cord, disconnect the printer cable at both ends,
reconnect the printer cable at both ends, and plug the power cord
back in.
CAUTION
Before you connect the cable to the printer, always unplug the printer.
Otherwise, the printer might be damaged.
The wrong printer driver might have been selected when the software
was installed. Make sure that HP LaserJet 1005 Series Printer is
selected in the printer properties.
There might be a problem with the software application. Try printing
from another software application.
Missing graphics or text,
or blank pages
●
●
●
ENWW
Make sure that the file does not contain blank pages.
The sealing tape might still be in the print cartridge. Remove the
print cartridge, and pull out the sealing tape. Reinstall the print
cartridge. See Changing the print cartridge for instructions.
The graphic settings in the printer properties might not be correct
for the type of job that you are printing. Try a different graphic
setting in the printer properties. See Printer properties (driver) for
more information.
Page format is different than on
another printer
If you used an older or different printer driver (printer software) to
create the document or the printer properties settings in the software
are different, the page format might change when you try to print
using the new printer driver or settings. To help eliminate this problem,
change the resolution, media size, font settings, and other settings.
See Printer properties (driver) for more information.
Graphics quality
The graphic settings might be unsuitable for the print job. Check the
graphic settings, such as resolution, in the printer properties and
adjust them as necessary. See Printer properties (driver) for more
information.
Finding the solution 43
Printer software problems
Printer software problems
Problem
Solution
A printer driver for the HP LaserJet
●
1005 Series Printer is not visible in the
Printer folder.
●
●
An error message was displayed
during the software installation
●
●
●
The printer is in Ready mode, but
nothing prints
●
●
44 Chapter 6 Troubleshooting the printer
Reinstall the printer software. In the Windows system tray, click
Start, select Programs, select HP LaserJet 1005 Series
Printer, and click Uninstall. Unplug the power cord from the
printer. Install the printer software from the CD-ROM. Plug the
power cord back into the printer.
Note
Close any applications that are running. To close an application
that has an icon in the system tray, right-click the icon, and
select Close or Disable.
Try plugging the printer cable into a different port on the PC.
If you are trying to print to a shared printer, in the Windows
system tray, click Start, select Settings, and click Printers.
Double-click the Add Printer icon. Follow the instructions in the
Add Printer Wizard. See Installing shared printers for more
information.
Reinstall the printer software. In the Windows system tray, click
Start, select Programs, select HP LaserJet 1005 Series
Printer, and click Uninstall. Unplug the power cord from the
printer. Install the printer software from the CD-ROM. Plug the
power cord back into the printer.
Note
Close any applications that are running. To close an application
that has an icon in the system tray, right-click the icon, and
select Close or Disable.
Check the amount of free space on the drive where you are
installing the printer software. If necessary, free up as much
space as you can, and reinstall the printer software.
If necessary, run the Disk Defragmenter, and reinstall the printer
software.
Reinstall the printer software. In the Windows system tray, click
Start, select Programs, select HP LaserJet 1005 Series
Printer, and click Uninstall. Unplug the power cord from the
printer. Install the printer software from the CD-ROM. Plug the
power cord back into the printer.
Note
Close any applications that are running. To close an application
that has an icon in the system tray, right-click the icon, and
select Close or Disable.
Print an engine test page.
ENWW
Improving print quality
This section provides information about identifying and correcting print defects.
Light print or fade
●
The toner supply is low. See Managing the print cartridge for more information.
●
The media might not meet Hewlett-Packard’s media specifications (for example, the media is
too moist or too rough). See Printer media specifications for more information.
●
If the whole page is light, the print density adjustment is too light or EconoMode might be
turned on. Access the printer properties. See Printer properties (driver) for instructions. Click
the Configure tab, and adjust the Print Density setting. Click the Finishing tab, and clear the
EconoMode (Save Toner) check box. See Saving toner for more information.
Toner specks
●
The media might not meet Hewlett-Packard’s media specifications (for example, the media is
too moist or too rough). See Printer media specifications for more information.
●
The printer might need to be cleaned. See Cleaning the printer or Cleaning the printer media
path for instructions.
Dropouts
●
A single sheet of media might be defective. Try reprinting the job.
●
The media’s moisture content is uneven or the media has moist spots on the surface.
Try printing with new media. See Printer media specifications for more information.
●
The media lot is bad. The manufacturing processes can cause some areas to reject toner.
Try a different type or brand of media.
●
The print cartridge might be defective. See Managing the print cartridge for more information.
Vertical lines
●
Make sure that the paper input tray cover is in place.
●
The photosensitive drum inside the print cartridge has probably been scratched. Install a new
HP print cartridge. See Changing the print cartridge for instructions.
Gray background
ENWW
●
Make sure that the paper input tray cover is in place.
●
Access the printer properties. See Printer properties (driver) for instructions. Click the
Configure tab, and decrease the Print Density setting. This decreases the amount of
background shading.
●
Change the media to a lighter basis weight. See Printer media specifications for more
information.
●
Check the printer’s environment. Very dry (low humidity) conditions can increase the amount
of background shading.
●
Install a new HP print cartridge. See Changing the print cartridge for instructions.
Improving print quality 45
Toner smear
●
If toner smears appear on the leading edge of the media, the media guides might be dirty.
Wipe the media guides with a dry, lint-free cloth. See Identifying the printer’s components or
Cleaning the printer for more information.
●
Check the media type and quality.
●
Try installing a new HP print cartridge. See Changing the print cartridge for instructions.
●
The fuser temperature might be too low. Access the printer properties. See Printer properties
(driver) for instructions. Click the Paper tab, and make sure that you have selected the
appropriate media from the Optimize for drop-down list.
Loose toner
●
Clean the inside of the printer. See Cleaning the printer for instructions.
●
Check the media type and quality. See Printer media specifications for more information.
●
Try installing a new HP print cartridge. See Changing the print cartridge for instructions.
●
Access the printer properties. See Printer properties (driver) for instructions. Click the Paper
tab, and make sure that you have selected the appropriate media from the Optimize for
drop-down list.
●
Plug the printer directly into an AC outlet instead of into a power strip.
Vertical repetitive defects
●
The print cartridge might be damaged. If a repetitive mark occurs at the same spot on the
page, install a new HP print cartridge. See Changing the print cartridge for instructions.
●
The internal parts might have toner on them. See Cleaning the printer for more information.
If the defects occur on the back of the page, the problem will probably correct itself after a few
more printed pages.
●
Access the printer properties. See Printer properties (driver) for instructions. Click the Paper
tab, and make sure that you have selected the appropriate media from the Optimize for
drop-down list.
Improperly formed characters
●
If characters are improperly formed, producing hollow images, the media stock might be too
slick. Try a different media. See Printer media specifications for more information.
●
If characters are improperly formed, producing a wavy effect, the printer might need service.
Print the Windows test page. If the characters are improperly formed, contact an
HP-authorized dealer or service representative. See Service and support for more
information.
Page skew
●
Make sure that the media is loaded correctly and the media guides are not too tight or too
loose against the media stack. See Loading media into the paper input tray for more
information.
●
The paper input tray might be too full. See Loading media into the paper input tray for more
information.
●
Check the media type and quality. See Printer media specifications for more information.
46 Chapter 6 Troubleshooting the printer
ENWW
Curl or wave
●
Check the media type and quality. Both high temperature and humidity cause media to curl.
See Printer media specifications for more information.
●
The media might have been in the paper input tray too long. Turn over the stack of media in
the tray. Also, try rotating the media 180° in the paper input tray.
●
Open the straight-through output door, and try printing straight through. See Printer output
paths for more information.
●
The fuser temperature might be too high. Access the printer properties. See Printer properties
(driver) for instructions. Click the Paper tab, and make sure that you have selected the
appropriate media from the Optimize for drop-down list.
Wrinkles or creases
●
Make sure that the media is loaded properly. See Loading media into the paper input tray for
more information.
●
Check the media type and quality. See Printer media specifications for more information.
●
Open the straight-through output door, and try printing straight through. See Printer output
paths for more information.
●
Turn over the stack of media in the tray. Also, try rotating the media 180° in the paper input
tray.
Toner scatter outline
ENWW
●
Access the printer properties. See Printer properties (driver) for instructions. Click the
Configure tab, and select On in Transfer Setting.
●
If large amounts of toner have scattered around the characters, the media might be resisting
the toner. (A small amount of toner scatter is normal for laser printing.) Try a different media
type. See Printer media specifications for more information.
●
Turn over the stack of media in the tray.
●
Use media designed for laser printers. See Printer media specifications for more information.
Improving print quality 47
Cleaning the printer
During the printing process, media, toner, and dust particles can accumulate inside the printer.
Over time, this buildup can cause print quality problems, such as toner specks or smearing. To
correct and prevent these types of problems, you can clean the print cartridge area and the printer
media path. See the following sections for more information:
●
Cleaning the print cartridge area
●
Cleaning the printer media path
48 Chapter 6 Troubleshooting the printer
ENWW
Cleaning the print cartridge area
1
2
You do not need to clean the print cartridge area often. However, cleaning
this area can improve the quality of your printed sheets.
1
Unplug the power cord, and wait for the printer to cool.
2
Open the print cartridge door, and remove the print cartridge.
CAUTION
To prevent damage, do not expose the print cartridge to light. Cover the
print cartridge if necessary. Also, do not touch the black sponge transfer
roller inside the printer. By doing so, you can damage the printer.
3
With a dry, lint-free cloth, wipe any residue from the media path area
and the print cartridge cavity.
4
Replace the print cartridge, and close the print cartridge door.
5
Plug the power cord back into the printer.
3
4
5
ENWW
Cleaning the printer 49
Cleaning the printer media path
If you are experiencing toner specks or dots on the printouts, you can use the HP LaserJet
cleaning utility to remove excess media and toner particles that can accumulate on the fuser
assembly and rollers. Cleaning the media path might extend the life of the printer.
Note
For best results use a sheet of transparency. If you do not have any transparencies, you can use copier
grade media (18 to 24 lb. or 70 to 90 g/m2) with a smooth surface.
1
Make sure that the printer is idle and the Ready light is on.
2
Load the media in the paper input tray.
3
Access the printer properties. See Printer properties (driver) for instructions. Click the
Configure tab, and click Start in Cleaning Page.
The cleaning process takes approximately 2 minutes.
50 Chapter 6 Troubleshooting the printer
ENWW
Clearing printer media jams
Occasionally, media becomes jammed during a print job. Some of the causes include the
following:
Note
●
The paper input tray is loaded improperly or it is too full. See Loading media into the paper
input tray for more information.
●
The media does not meet HP specifications. See Printer media specifications for more
information.
When you add new media, always remove all of the media from the paper input tray and straighten the
stack of new media. This helps prevent multiple sheets of media from feeding through the printer at one
time, reducing media jams.
You are notified of a media jam by an error in the software and the printer status lights. See Status
light patterns for more information.
Typical media jam locations
Note
ENWW
●
Print cartridge area: See Removing a jammed page for instructions.
●
Paper input tray areas: If the page is still sticking out of the paper input tray, gently try to
remove it from the paper input tray without tearing the page. If you feel resistance, see
Removing a jammed page for instructions.
●
Output paths: If the page is sticking out of the output bin, gently try to remove it without
tearing the page. If you feel resistance, see Removing a jammed page for instructions.
There might be loose toner in the printer after a media jam. This toner clears up after a few sheets print.
Clearing printer media jams 51
Removing a jammed page
1
CAUTION
Media jams might result in loose toner on the page. If toner gets on your
clothing, wipe the toner off with a dry cloth, and wash the clothing in cold
water. Hot water will permanently set the toner into the fabric.
1
Open the print cartridge door and the straight-through output door.
2
Rotate the media jam release levers downward.
2
CAUTION
To prevent damage to the print cartridge, do not expose it to light.
3
Remove the print cartridge, and place it aside.
4
With both hands, grasp the side of the media that is most visible
(this includes the middle), and carefully pull it free from the printer.
Make sure that you check for jams in the print cartridge area (A) and
the straight-through output path (B).
5
When you have removed the jammed media, replace the print
cartridge, and close the print cartridge door and the straight-through
output door.
3
Note
The media jam release levers automatically close when you close the
straight-through output door.
4
After clearing a media jam, you might need to unplug the printer, and plug
it back in.
A
Note
When you add new media, remove all of the media from the paper input
tray, and straighten the stack of new media.
B
5
52 Chapter 6 Troubleshooting the printer
ENWW
Changing the pickup roller
1
If the printer regularly mispicks (no media feeds through or more than one
sheet feeds through), you might need to change or clean the pickup roller.
See Accessories and ordering information to order a new pickup roller.
CAUTION
Failure to complete this procedure might damage the printer.
2
3
1
Unplug the power cord from the printer, and allow the printer to cool.
2
Open the print cartridge door, and remove the print cartridge.
3
Find the pickup roller.
4
Release the small, white tabs on either side of the pickup roller, and
rotate the pickup roller toward the front.
5
Gently pull the pickup roller up and out.
6
Position the new or cleaned part in the slot of the previous pickup
roller. See Cleaning the pickup roller for instructions.
Note
Circular and rectangular pegs on each side prevent you from incorrectly
positioning the pickup roller.
Continued on next page.
4
5
6
ENWW
Changing the pickup roller 53
7
7
Rotate the top of the new pickup roller away from you until both sides
snap into place.
8
Reinstall the print cartridge, and close the print cartridge door.
9
Plug the printer in to turn it back on.
8
9
54 Chapter 6 Troubleshooting the printer
ENWW
Cleaning the pickup roller
1
You can clean the pickup roller rather than replace it.
Remove the pickup roller as described in steps 1 through 5 of Changing
the pickup roller.
1
1
2
Dab a lint-free cloth in isopropyl alcohol, and scrub the roller.
WARNING!
Alcohol is flammable. Keep the alcohol and cloth away from an open
flame. Before you close the printer and plug in the power cord, allow the
alcohol to dry completely.
2
Using a dry, lint-free cloth, wipe the pickup roller to remove loosened
dirt.
3
Allow the pickup roller to dry completely before you reinstall it in the
printer (see steps 6 through 9 of Changing the pickup roller).
3
ENWW
Cleaning the pickup roller 55
Changing the printer separation pad
1
Note
Before you change the separation pad, clean the pickup roller.
See Cleaning the pickup roller for instructions.
2
3
4
If the paper input tray feeds more than one page at a time, you might need
to change the printer separation pad. Recurring feed problems indicate
that the printer separation pad is worn. See Accessories and ordering
information to order a new printer separation pad.
1
Unplug the power cord from the printer, and allow the printer to cool.
2
Remove the paper input tray.
3
Find the blue separation pad.
4
To pry the separation pad up from the spring-loaded base, insert a
flat-edged screwdriver in the slot under the separation pad, and twist
until the tabs are free.
5
With one hand, reach in through the opening, and push the
spring-loaded base down (A). With the other hand, pull the separation
pad up (B).
6
With one hand, position the new separation pad in the slot of the
previous separation pad (A). With the other hand, reach through the
paper input tray opening, and push the spring-loaded base down (B).
Note
The tab on the right is larger to help you position it correctly.
Continued on next page.
5
6
56 Chapter 6 Troubleshooting the printer
ENWW
7
7
Snap both sides of the separation pad firmly into place.
CAUTION
Make sure that the separation pad is straight and that there is no space
between the separation pad and the spring-loaded base. If the separation
pad is not straight or you see space on one side, remove the separation
pad, make sure that the larger tab is on the right, reinsert the separation
pad, and snap both sides into place.
8
ENWW
8
Reinsert the pickup roller, print cartridge, and paper input tray. Plug
the printer in to turn it back on.
Changing the printer separation pad 57
58 Chapter 6 Troubleshooting the printer
ENWW
7
Service and support
This chapter provides information on the following topics:
ENWW
●
Availability
●
Hardware service
●
Extended warranty
●
Guidelines for repacking the printer
●
Service information form
●
Hewlett-Packard Support
●
Worldwide sales and service offices
59
Availability
Hewlett-Packard provides a variety of service and support options around the world.
The availability of these programs varies depending on your location.
Hardware service
The warranty for the HP LaserJet 1005 Series Printer varies depending on the date and
country/region of purchase.
For products that require service under the warranty, customers should call the customer support
center in their country/region. See Hewlett-Packard Support for more information.
Hewlett-Packard will choose one of the following methods to fulfill the warranty:
●
Repair the product.
●
Provide customer-replaceable parts for the customer to repair the unit.
●
Replace the product with a remanufactured unit.
●
Replace the product with a new or remanufactured product of equal or greater functionality.
●
Refund the purchase price.
●
Require that the customer return the unit to an authorized service provider.
Extended warranty
HP SupportPack provides coverage for the HP product and all HP-supplied internal components.
HP SupportPack can provide Express Exchange or onsite service. The customer must purchase
HP SupportPack within 90 days of the HP product purchase. For more support information, go to
the following HP Web site: http://www.hp.com/support/lj1005
or contact the Customer Care Service and Support group; see Hewlett-Packard Support for the
appropriate phone numbers and information.
Guidelines for repacking the printer
Use the following guidelines when repacking the printer:
CAUTION
●
If possible, include print samples and 5 to 10 sheets of paper or other media that did not print
correctly.
●
Remove and keep any cables, trays, and optional accessories installed in the printer.
●
Remove and keep the print cartridge.
To prevent damage to the print cartridge, store the print cartridge in its original packing material or store
it so that it is not exposed to light.
●
If possible, use the original shipping container and packing material. Shipping damage as a
result of inadequate packing is your responsibility. If you have already disposed of the printer’s
packing material, contact a local mailing service for information on repacking the printer.
●
Include a completed copy of the service information form. See Service information form.
●
Hewlett-Packard recommends that you insure the equipment for shipment.
60 Chapter 7 Service and support
ENWW
Service information form
Service information form
Who is returning the equipment?
Date:
Person to contact:
Phone:
Alternate contact:
Phone:
Return shipping address:
Special shipping instructions:
What is being sent?
Model number:
Serial number:
Please attach any relevant printouts when returning equipment. Do not ship accessories that are not
required to complete the repair (for example, media trays, manuals, and cleaning supplies)
What needs to be done?
1. Describe the conditions of the failure (What was the failure? What were you doing when the failure
occurred? What software were you running? Can you make the failure reoccur?)
2. If the failure is intermittent, how much time elapses between failures?
3. Is the unit connected to any of the following? (Please provide manufacturer and model numbers.)
Personal Computer:
Modem:
Network:
4. Additional comments:
ENWW
Service information form 61
Hewlett-Packard Support
Thank you for your purchase. Along with your product, you receive a variety of support services
from Hewlett-Packard and our support partners that are designed to give you the results you need,
quickly and professionally.
Please have the model number, serial number, date of purchase, and description of the problem
ready for the HP Support representative.
The following support information is available:
●
European Customer Support Center
●
Online services
●
Obtaining software utilities and electronic information
●
HP SupportPack
European Customer Support Center
language and in-country/region options available
Open Monday through Friday 8:30-18:00 Central European Time (CET)
In many European countries/regions, HP provides toll-free telephone support service during the
warranty period. However, some of the phone numbers listed below may not be toll-free. Please
refer to Support Web Page http://www.hp.com/cpso-support/guide/psd/cscemea.html for any
associated fees. By calling a telephone number listed on the Support Web Page, you will be
connected to a responsive team waiting to help you. If you require support after the warranty has
expired, you can receive support for a fee through the same telephone number. The fee is charged
on a per-incident basis. When calling Hewlett-Packard, have the following information ready:
product name and serial number, date of purchase, and description of the problem.
Online services
For 24-hour access to information over your modem, we suggest the following services.
World Wide Web URL
You can obtain printer drivers, updated HP printer software, and product and support information
from the following sites:
in the U.S.
http://www.hp.com/support/lj1005_software
in Europe
http://www.hp.com
You can obtain printer drivers from the following sites:
in Korea
http://www.hp.co.kr
in Taiwan
http://www.hp.com.tw
or the local driver Web site
http://www.dds.com.tw
62 Chapter 7 Service and support
ENWW
America Online
America Online/Bertelsmann is available in the U.S., France, Germany, and U.K. Printer drivers,
updated HP printer software, and support documentation to help answer your questions about
which HP products are available. Use Keyword HP to start the tour or call 1-800-827-6364 and use
preferred customer #1118 to subscribe. In Europe, call the following numbers:
Austria
France
Germany
Switzerland
United Kingdom
0222 58 58 485
++353 1 704 90 00
0180 531 31 64
0848 80 10 11
0800 279 1234
CompuServetm
Printer drivers, updated HP printer software, and interactive sharing of technical information
with other members are available on CompuServe’s “HP User’s forums” (GO HP), or call
1-800-524-3388 and ask for representative #51 to subscribe. (CompuServe is also available
in the U.K., France, Belgium, Switzerland, Germany, and Austria.)
Obtaining software utilities and electronic information
You can obtain printer drivers from the following locations.
U.S. and Canada
Phone:
(805) 257-5565
Mail:
Hewlett-Packard Co.
P.O. Box 1754
Greeley, CO 80632
U.S.A.
Fax:
(805) 257-6866
Australia, New Zealand, and India
For Australia and New Zealand, call (61) (2) 565-6099. For India, call (91) (11) 682-6035.
Europe
In the U.K., call (44) (142) 986-5511. For Ireland and outside of the U.K., call (44) (142) 986-5511.
HP SupportPack
Contact your authorized dealer, or use the following Web site:
http://www.hpexpress-services.com/shop/application
ENWW
Hewlett-Packard Support 63
Worldwide sales and service offices
Before calling a Hewlett-Packard Sales and Service office, make sure that you contact the
appropriate Customer Support Center number listed in Hewlett-Packard Support. Do not return
products to Hewlett-Packard Sales and Service offices.
To find the phone number for the Sales and Service office in your country/region, go to
http://www.hp.com. From the main Web page, select your country/region, and follow the links to
Contact HP and Office Locations.
64 Chapter 7 Service and support
ENWW
A
Printer specifications
This chapter provides information on the following topics:
ENWW
●
Specifications
●
FCC compliance
●
Environmental Product Stewardship Program
●
Material Safety Data Sheet
●
Regulatory statements
65
Specifications
Environmental specifications
Operating environment
Storage environment
Printer plugged into an AC outlet:
● Temperature: 10° C to 32.5° C (50° F to 90.5° F)
● Humidity: 20% to 80% (no condensation)
Install in a well-ventilated area.
Printer unplugged from an AC outlet:
Temperature: 0° C to 40° C (32° F to 104° F)
● Humidity: 10% to 80% (no condensation)
●
Acoustics
Noise level
During printing: 6.1 Bels (A) sound power level (per ISO 9296)
(HP LaserJet 1005 Series Printer tested at 14 ppm)
● Sound pressure level (bystander position): 48 dB
● Sound pressure level (operator position): 56 dB
During standby (power save): silent
Electrical specifications
Power requirements
●
110-127Vac (+/-10%), 50/60 Hz (+/-2)
or
Power consumption
●
220-240Vac (+/-10%), 50/60 Hz (+/-2)
●
During printing: 285 watts (average)
During standby (power save): less than 10 watts
●
Physical specifications
Dimensions
●
●
●
Weight (cartridge installed)
66 Appendix A Printer specifications
Width: 415 mm (16.3 in.)
Depth: 486 mm (19.1 in.)
Height: 253 mm (10.0 in.)
7.3 kg (16.1 lb)
ENWW
Printer capacities and ratings
Print speed
●
●
14 pages per minute
First page out in less than 10 seconds
Paper input tray capacity
250 sheets of regular weight 20 lb (75 g/m2) paper or up to 30 envelopes
Output bin capacity
125 sheets of regular weight 20 lb (75 g/m2) paper
Minimum media size
76 x 127 mm (3 x 5 in.)
Maximum media size
216 x 356 mm (8.5 x 14 in.)
Media weight
●
●
Output bin – 60 to 105 g/m2 (16 to 28 lbs)
Straight through media path – 60 to 163 g/m2 (16 to 43 lbs)
Base memory
1 MB of RAM
Print resolution
600 dots per inch (dpi)
Duty cycle
7,000 single-sided pages per month
PCL
Level 5e via DOS applications running in a Windows DOS shell
Port availability
ENWW
USB
Compatible with the USB 2.0 specification
Parallel
1284
Specifications 67
FCC compliance
This equipment has been tested and found to comply with the limits for a Class B digital device,
pursuant to Part 15 of the FCC rules. These limits are designed to provide reasonable protection
against harmful interference in a residential installation. This equipment generates, uses, and can
radiate radio frequency energy. If it is not installed and used in accordance with the instructions, it
may cause harmful interference to radio communications. However, there is no guarantee that
interference will not occur in a particular installation. If this equipment does cause harmful
interference to radio or television reception, which can be determined by turning the equipment off
and on, the user is encouraged to try to correct the interference by one or more of the following
measures:
Note
●
Reorient or relocate the receiving antenna.
●
Increase separation between equipment and receiver.
●
Connect equipment to an outlet on a circuit different from that to which the receiver is located.
●
Consult your dealer or an experienced radio/TV technician.
Any changes or modifications to the printer that are not expressly approved by Hewlett-Packard could
void the user’s authority to operate this equipment.
Use of a shielded interface cable is required to comply with the Class B limits of Part 15 of FCC rules.
68 Appendix A Printer specifications
ENWW
Environmental Product Stewardship Program
Protecting the environment
Hewlett-Packard Company is committed to providing quality products in an environmentally sound
manner. This product has been designed with several attributes to minimize the impact on our
environment.
Ozone production
This product generates no appreciable ozone gas (O3).
Energy consumption
Energy usage drops significantly while in PowerSave mode, which saves money without affecting
the high performance of this product. This product qualifies for ENERGY STAR®, which is a
voluntary program to encourage the development of energy-efficient office products.
ENERGY STAR® is a U.S. registered mark of the United States Environmental Protection Agency.
As an ENERGY STAR® partner, Hewlett-Packard Company has determined that this product meets
ENERGY STAR® Guidelines for energy efficiency. For more information, see
http://www.energystar.gov/.
Toner consumption
EconoMode uses significantly less toner, which might extend the life of the print cartridge.
Media use
This product’s N-up printing (multiple pages printed on one page) feature can reduce media usage
and the resulting demands on natural resources.
Plastics
Plastic parts over 25 grams are marked according to international standards that enhance the
ability to identify plastics for recycling purposes at the end of the product’s life.
HP LaserJet printing supplies
In many countries/regions, this product’s printing supplies (such as print cartridge, drum, and
fuser) can be returned to Hewlett-Packard through the HP Printing Supplies Environmental
Program. This easy-to-use, free take-back program is available in over 25 countries/regions.
Multi-lingual program information and instructions are included in every new HP Print Cartridge
and Consumables box.
ENWW
Environmental Product Stewardship Program 69
HP Printing Supplies Environmental Program
Since 1990, the HP Printing Supplies Environmental Program has collected more than 48 million
used print cartridges that otherwise might have been discarded in the world’s landfills. The
HP LaserJet print cartridges go to a collection center and are shipped in bulk to our resource and
recovery partners who disassemble the print cartridge. Remaining materials are separated and
converted into raw materials for use by other industries to make a variety of useful products.
U.S. returns
For a more environmentally responsible return of used print cartridges and consumables,
Hewlett-Packard encourages you to use bulk returns. Simply bundle two or more print cartridges
together and use the single, prepaid, pre-addressed UPS label that is supplied in the package. For
more information in the U.S., call 1-800-340-2445 or visit the HP LaserJet Supplies Web site at
http://www.hp.com/sbso/product/supplies/whybuy_recyc.html.
Non-U.S. recycling returns
Non-U.S. customers should call the local HP Sales and Service Office or visit the following Web
site for more information regarding availability of the HP Printing Supplies Environmental Program.
http://www.hp.com/sbso/product/supplies/whybuy_recyc.html
Media
This printer is suited for the use of recycled media when the media meets the guidelines in the
Guideline for Paper and Other Print Media. See Accessories and ordering information for ordering
information. This product is suitable for the use of recycled media according to DIN 19 309.
Material Safety Data Sheet
You can obtain Material Safety Data Sheets (MSDS) by contacting the HP LaserJet Supplies Web
site at http://www.hp.com/go/msds.
70 Appendix A Printer specifications
ENWW
Regulatory statements
Declaration of Conformity
according to ISO/IEC Guide 22 and EN 45014
Manufacturer’s Name:
Hewlett-Packard Company
Manufacturer’s Address:
11311 Chinden Boulevard
Boise, Idaho 83714-1021, USA
declares that the product
Product Name:
HP LaserJet 1005 Series Printer
Model Number:
Q2676A
Product Options:
ALL
conforms to the following Product Specifications:
Safety:
IEC 60950:1991+A1+A2+A3+A4 / EN 60950:1992+A1+A2+A3+A4+A11
GB4943-1995
IEC 60825-1:1993 +A1/ EN 60825-1:1994+A11 Class 1 Laser/LED Product
EMC:
CISPR 22:1997 / EN 55022:1998 Class B1
EN 61000-3-2:1995
EN 61000-3-3:1995
EN 55024:1998
FCC Title 47 CFR, Part 15 Class B2 / ICES-002, Issue 2 / GB9254-88
Supplementary Information:
The product herewith complies with the requirements of the EMC Directive 89/336/EEC and the Low Voltage
Directive 73/23/EEC, and carries the CE-Marking accordingly.
1) The product was tested in a typical configuration with Hewlett-Packard Personal Computer Systems.
2) This Device complies with Part 15 of the FCC Rules. Operation is subject to the following two conditions:
(1) this device may not cause harmful interference, and (2) this device must accept any interference received,
including interference that may cause undesired operation.
Boise, Idaho USA
January 1, 2003
For Regulatory Topics ONLY, contact:
European Contact:
Your Local Hewlett-Packard Sales and Service Office or
Hewlett-Packard GmbH, Department HQ-TRE / Standards
Europe, Herrenberger Straße 110-140, D-71034 Böblingen
(FAX: +49-7031-14-3143)
USA Contact:
Product Regulations Manager, Hewlett-Packard Company,
PO Box 15, Mail Stop 160, Boise, Idaho 83707-0015
(Phone: 208-396-6000)
Laser safety statement
The Center for Devices and Radiological Health (CDRH) of the U.S. Food and Drug Administration
has implemented regulations for laser products manufactured since August 1, 1976. Compliance
is mandatory for products marketed in the United States. The printer is certified as a “Class 1”
laser product under the U.S. Department of Health and Human Services (DHHS) Radiation
Performance Standard according to the Radiation Control for Health and Safety Act of 1968.
Since radiation emitted inside the printer is completely confined within protective housings and
external covers, the laser beam cannot escape during any phase of normal user operation.
WARNING!
ENWW
Using controls, making adjustments, or performing procedures other than those specified in this user
guide could result in exposure to hazardous radiation.
Regulatory statements 71
Laser statement for Finland
LASERTURVALLISUUS
LUOKAN 1 LASERLAITE
KLASS 1 LASER APPARAT
HP LaserJet 1005 -laserkirjoitin on käyttäjän kannalta turvallinen luokan 1 laserlaite. Normaalissa
käytössä kirjoittimen suojakotelointi estää lasersäteen pääsyn laitteen ulkopuolelle.
Laitteen turvallisuusluokka on määritetty standardin EN 60825-1 (1993) mukaisesti.
VAROITUS!
Laitteen käyttäminen muulla kuin käyttöohjeessa mainitulla tavalla saattaa altistaa käyttäjän
turvallisuusluokan 1 ylittävälle näkymättömälle lasersäteilylle.
VARNING!
Om apparaten används på annat sätt än i bruksanvisning specificerats, kan användaren utsättas
för osynlig laserstrålning, som överskrider gränsen för laserklass 1.
HUOLTO
HP LaserJet 1005 -kirjoittimen sisällä ei ole käyttäjän huollettavissa olevia kohteita. Laitteen saa
avata ja huoltaa ainoastaan sen huoltamiseen koulutettu henkilö. Tällaiseksi huoltotoimenpiteeksi
ei katsota väriainekasetin vaihtamista, paperiradan puhdistusta tai muita käyttäjän käsikirjassa
lueteltuja, käyttäjän tehtäväksi tarkoitettuja ylläpitotoimia, jotka voidaan suorittaa ilman
erikoistyökaluja.
VARO!
Mikäli kirjoittimen suojakotelo avataan, olet alttiina näkymättömälle lasersäteilylle laitteen ollessa
toiminnassa. Älä katso säteeseen.
VARNING!
Om laserprinterns skyddshölje öppnas då apparaten är i funktion, utsättas användaren för osynlig
laserstrålning. Betrakta ej strålen.
Tiedot laitteessa käytettävän laserdiodin säteilyominaisuuksista:
Aallonpituus 770-795 nm
Teho 5 mW
Luokan 3B laser
72 Appendix A Printer specifications
ENWW
B
Media specifications
This chapter provides information on the following topics:
ENWW
●
Printer media specifications
●
Supported media sizes (printer)
●
Guidelines for using media
73
Printer media specifications
HP LaserJet printers produce excellent print quality. The printer accepts a variety of media, such
as cut-sheet paper (including recycled paper), envelopes, labels, transparencies, vellum, and
custom-sized media. Properties such as weight, grain, and moisture content are important factors
affecting printer performance and output quality.
The printer can use a variety of paper and other print media in accordance with the guidelines in
this user guide. Media that does not meet these guidelines might cause the following problems:
●
Poor print quality
●
Increased media jams
●
Premature wear on the printer, requiring repair
For best results, use only HP brand paper and print media. Hewlett-Packard Company cannot
recommend the use of other brands. Because they are not HP products, Hewlett-Packard cannot
influence or control their quality.
It is possible for media to meet all of the guidelines in this user guide and still not produce
satisfactory results. This might be the result of improper handling, unacceptable temperature and
humidity levels, or other variables over which Hewlett-Packard has no control.
Before you purchase a large quantity of media, make sure that it meets the requirements specified
in this user guide and in Guidelines for Paper and Other Print Media. (See Accessories and
ordering information for more information about ordering the guidelines.) Always test media before
you purchase a large quantity.
CAUTION
Using media that does not meet Hewlett-Packard’s specifications might cause problems for the printer,
requiring repair. This repair is not covered by the Hewlett-Packard warranty or service agreements.
Supported media sizes (printer)
The following are the supported media sizes:
●
Minimum: 76 x 127 mm (3 x 5 in.)
●
Maximum: 216 x 356 mm (8.5 x 14 in.)
74 Appendix B Media specifications
ENWW
Guidelines for using media
Paper
For best results, use conventional 20 lb (75 g/m2) paper. Make sure that the paper is of good
quality and free of cuts, nicks, tears, spots, loose particles, dust, wrinkles, voids, and curled or
bent edges.
If you are unsure about what type of paper you are loading (such as bond or recycled), check the
label on the package of paper.
Some paper causes print quality problems, jamming, or damage to the printer.
Paper usage
Note
Symptom
Problem with paper
Solution
Poor print quality or toner
adhesion.
Problems with feeding.
Too moist, too rough, too smooth,
or embossed.
Faulty paper lot.
Try another kind of paper: between
100-250 Sheffield and 4 to 6%
moisture content.
Dropouts, jamming, or curling.
Stored improperly.
Store paper flat in its
moisture-proof wrapping.
Increased gray background
shading.
Might be too heavy.
Use a lighter weight paper.
Excessive curling.
Problems with feeding.
Too moist, wrong grain direction, or Use long-grain paper.
short-grain construction.
Print using the straight-through
output path.
Jamming or damage to the printer. Cutouts or perforations.
Do not use paper with cutouts or
perforations.
Problems with feeding.
Use good quality paper.
Ragged edges.
Do not use letterhead that is printed with low-temperature inks, such as those used in some types of
thermography.
Do not use raised letterhead.
The printer uses heat and pressure to fuse toner to the paper. Make sure that any colored paper or
preprinted forms use inks that are compatible with the printer temperature (200° C or 392° F for
0.1 second).
ENWW
Guidelines for using media 75
Labels
When selecting labels, consider the quality of the following components:
●
Adhesives: The adhesive material should be stable at 200° C (392° F), the printer’s
maximum temperature.
●
Arrangement: Only use labels that do not have exposed backing between them. Labels can
peel off of sheets that have spaces between the labels, causing serious jams.
●
Curl: Prior to printing, labels must lie flat with no more than 13 mm (0.5 in.) of curl in any
direction.
●
Condition: Do not use labels with wrinkles, bubbles, or other indications of separation.
Transparencies
Transparencies must be able to withstand 200° C (392° F), the printer’s maximum temperature.
Envelopes
Envelope construction
Envelope construction is critical. Envelope fold lines can vary considerably, not only between
manufacturers, but also within a box from the same manufacturer. Successful printing on
envelopes depends on the quality of the envelopes. When selecting envelopes, consider the
following components:
●
Weight: The weight of the envelope paper should not exceed 28 lb (105 g/m2), or jamming
might result.
●
Construction: Prior to printing, envelopes should lie flat with less than 6 mm (0.25 in.) curl
and should not contain air. Envelopes that trap air may cause problems.
●
Condition: Make sure that the envelopes are not wrinkled, nicked, or otherwise damaged.
●
Sizes: From 90 x 160 mm (3.5 x 6.3 in.) to 178 x 254 mm (7 x 10 in.).
Envelopes with double-side seams
An envelope with double-side-seam construction has vertical seams at both ends of the envelope
rather than diagonal seams. This style might be more likely to wrinkle. Make sure that the seam
extends all the way to the corner of the envelope as shown in the following illustration:
Acceptable
Unacceptable
76 Appendix B Media specifications
ENWW
Envelopes with adhesive strips or flaps
Envelopes with a peel-off adhesive strip or with more than one flap that folds over to seal must use
adhesives compatible with the heat and pressure in the printer: 200° C (392° F). The extra flaps
and strips might cause wrinkling, creasing, or jams.
Envelope storage
Proper storage of envelopes contributes to good print quality. You should store envelopes flat. If air
is trapped in an envelope, creating an air bubble, the envelope might wrinkle during printing.
Card stock and heavy media
You can print many types of card stock from the paper input tray, including index cards and
postcards. Some card stock performs better than others because its construction is better suited
for feeding through a laser printer.
For optimum printer performance, do not use media that is heavier than 42 lb (157 g/m2).
Media that is too heavy might cause misfeeds, stacking problems, media jams, poor toner fusing,
poor print quality, or excessive mechanical wear.
Note
You might be able to print on heavier media if you do not fill the paper input tray to capacity and if you
use media with a smoothness rating of 100-180 Sheffield.
Card stock construction
●
Smoothness: 36 to 42 lb (135 to 157 g/m2) card stock should have a smoothness rating of
100-180 Sheffield. 16 to 36 lb (60 to 135 g/m2) card stock should have a smoothness rating of
100-250 Sheffield.
●
Construction: Card stock should lie flat with less than 5 mm (0.2 in.) of curl.
●
Condition: Make sure that the card stock is not wrinkled, nicked, or otherwise damaged.
●
Sizes: Only use card stock within the following size ranges:
• Minimum: 76 x 127 mm (3 x 5 in.)
• Maximum: 216 x 356 mm (8.5 x 14.0 in.)
Card stock guidelines
ENWW
●
If the card stock curls or jams, print using the straight-through output path.
●
Set margins at least 2 mm (0.08 in.) away from the edges.
Guidelines for using media 77
78 Appendix B Media specifications
ENWW
C
Warranty and licensing
This chapter provides information on the following topics:
ENWW
●
Hewlett-Packard software license agreement
●
Hewlett-Packard limited warranty statement
●
Limited warranty for print cartridge life
79
Hewlett-Packard software license agreement
ATTENTION: USE OF THE SOFTWARE IS SUBJECT TO THE HP SOFTWARE LICENSE
TERMS SET FORTH BELOW. USING THE SOFTWARE INDICATES YOUR ACCEPTANCE OF
THESE LICENSE TERMS.
HP SOFTWARE LICENSE TERMS
The following License Terms govern your use of the accompanying Software unless you have a
separate signed agreement with Hewlett-Packard.
License Grant. Hewlett-Packard grants you a license to use one copy of the Software. “Use”
means storing, loading, installing, executing, or displaying the Software. You may not modify the
Software or disable any licensing or control features of the Software. If the Software is licensed for
“concurrent use,” you may not allow more than the maximum number of authorized users to Use
the Software concurrently.
Ownership. The Software is owned and copyrighted by Hewlett-Packard or its third-party
suppliers. Your license confers no title to, or ownership in, the Software and is not a sale of any
rights in the Software. Hewlett-Packard’s third-party suppliers may protect their rights in the event
of any violation of these License Terms.
Copies and Adaptations. You may only make copies or adaptations of the Software for archival
purposes or when copying or adaptation is an essential step in the authorized Use of the
Software. You must reproduce all copyright notices in the original Software on all copies or
adaptations. You may not copy the Software onto any public network.
No Disassembly or Decryption. You may not disassemble or decompile the Software unless HP’s
prior written consent is obtained. In some jurisdictions, HP’s consent may not be required for
limited disassembly or decompilation. Upon request, you will provide HP with reasonably detailed
information regarding any disassembly or decompilation. You may not decrypt the Software unless
decryption is a necessary part of the operation of the Software.
Transfer. Your license will automatically terminate upon any transfer of the Software. Upon
transfer, you must deliver the Software, including any copies and related documentation, to the
transferee. The transferee must accept these License Terms as a condition to the transfer.
Termination. HP may terminate your license upon notice for failure to comply with any of these
License Terms. Upon termination, you must immediately destroy the Software, together with all
copies, adaptations, and merged portions in any form.
Export Requirements. You may not export or re-export the Software or any copy or adaptation in
violation of any applicable laws or regulations.
U.S. Government Restricted Rights. The Software and any accompanying documentation have
been developed entirely at private expense. They are delivered and licensed as “commercial
computer software” as defined in DFARS 252.227-7013 (Oct 1988), DFARS 252.211-7015 (May
1991), or DFARS 252.227-7014 (Jun 1995), as a “commercial item” as defined in FAR 2.101(a)
(Jun 1987), or as “Restricted computer software” as defined in FAR 52.227-19 (Jun 1987) (or any
equivalent agency regulation or contract clause), whichever is applicable. You have only those
rights provided for such Software and any accompanying documentation by the applicable DFARs
or FAR clause or the HP standard software agreement for the product involved.
80 Appendix C Warranty and licensing
ENWW
Hewlett-Packard limited warranty statement
DURATION OF WARRANTY:
One year from date of purchase.
The warranty for the HP LaserJet 1005 Series Printer varies depending on the date and
country/region of purchase.
For products that require service under the warranty, customers should call the customer support
center in their country/region. See Hewlett-Packard Support for more information. Hewlett-packard
will choose one of the following methods to fulfill the warranty:
●
Repair the product.
●
Provide customer-replaceable parts for the customer to repair the unit.
●
Replace the product with a remanufactured unit.
●
Replace the product with a new or remanufactured product of equal or greater functionality.
●
Refund the purchase price.
●
Require that the customer return the unit to an authorized service provider.
1. HP warrants to you, the end-user customer, that HP hardware, accessories, and supplies, will be free from defects
in materials and workmanship after the date of purchase, for the period specified above. The customer is
responsible for maintaining proof of date of purchase. If HP receives notice of such defects during the warranty
period, HP will, at its option, either repair or replace products which prove to be defective. Any replacement
products may be either new or like-new, provided that it has functionality at least equal to that of the product being
replaced.
2. HP warrants to you that HP software will not fail to execute its programming instructions after the date of purchase,
for the period specified above, due to defects in material and workmanship when properly installed and used.
If HP receives notice of such defects during the warranty period, HP will replace software media which does not
execute its programming instructions due to such defects.
3. HP does not warrant that the operation of HP products will be uninterrupted or error free. If HP is unable, within a
reasonable time, to repair or replace any product to a condition as warranted, you will be entitled to a refund of the
purchase price upon prompt return of the product.
4. HP products may contain remanufactured parts equivalent to a new in performance or may have been subject to
incidental use.
5. Warranty does not apply to defects resulting from (a) improper or inadequate maintenance or calibration,
(b) software, interfacing, parts or supplies not supplied by HP, (c) unauthorized modification or misuse, (d)
operation outside of the published environmental specifications for the product, or (d) improper site preparation or
maintenance.
6. HP MAKES NO OTHER EXPRESS WARRANTY OR CONDITION WHETHER WRITTEN OR ORAL. TO THE
EXTENT ALLOWED BY LOCAL LAW, ANY IMPLIED WARRANTY OR CONDITION OR MERCHANTABILITY,
SATISFACTORY QUALITY, OR FITNESS FOR A PARTICULAR PURPOSE IS LIMITED TO THE DURATION OF
THE EXPRESS WARRANTY SET FORTH ABOVE. Some countries/regions, states or provinces do not allow
limitations on the duration of an implied warranty, so the above limitation or exclusion might not apply to you. This
warranty gives you specific legal rights and you might also have other rights that vary from country/region to
country/region, state to state, or province to province.
ENWW
Hewlett-Packard limited warranty statement 81
7. TO THE EXTENT ALLOWED BY LOCAL LAW, THE REMEDIES IN THIS WARRANTY STATEMENT ARE YOUR
SOLE AND EXCLUSIVE REMEDIES. EXCEPT AS INDICATED ABOVE, IN NO EVENT WILL HP OR ITS
SUPPLIERS BE LIABLE FOR LOSS OF DATA OR FOR DIRECT, SPECIAL, INCIDENTAL, CONSEQUENTIAL
(INCLUDING LOST PROFIT OR DATA), OR OTHER DAMAGE, WHETHER BASED IN CONTRACT, TORT,
OR OTHERWISE. Some countries/regions, states or provinces do not allow the exclusion or limitation of incidental
or consequential damages, so the above limitation or exclusion may not apply to you.
FOR CONSUMER TRANSACTIONS IN AUSTRALIA AND NEW ZEALAND; THE WARRANTY TERMS
CONTAINED IN THIS STATEMENT, EXCEPT TO THE EXTENT LAWFULLY PERMITTED, DO NOT EXCLUDE,
RESTRICT OR MODIFY AND ARE IN ADDITION TO THE MANDATORY STATUTORY RIGHTS APPLICABLE TO
THE SALE OF THIS PRODUCT TO YOU.
82 Appendix C Warranty and licensing
ENWW
Limited warranty for print cartridge life
Note
The following warranty applies to the print cartridge that came with this printer.
HP print cartridges are warranted to be free from defects in materials and workmanship until the
HP toner is depleted. The warranty covers any defects or malfunctions in a new HP print cartridge.
How long does the coverage last?
The coverage lasts until the HP toner is depleted, at which time the warranty expires.
How do I know when the HP toner is running out?
The HP toner is depleted when faded or light type appears on the printed page.
What will Hewlett-Packard do?
Hewlett-Packard will, at its option, either replace products that prove to be defective or refund the
purchase price. If possible, please attach a printout sample illustrating what the defective print
cartridge is printing.
What does this warranty not cover?
The warranty does not cover print cartridges that have been refilled or are emptied, abused,
misused, or tampered with in any way.
How do I return the faulty print cartridge?
In the event that the print cartridge proves to be defective, complete the Service Information Form
and attach a print sample illustrating the defect. Return the form and print cartridge to the place of
purchase, where the print cartridge will be replaced.
How does State, Province, or Country/Region Law apply?
This limited warranty gives you specific legal rights, and you may also have other rights which vary
from state to state, province to province, or country/region to country/region. This limited warranty
is the sole warranty on the HP print cartridge and supersedes any other warranty relating to this
product.
IN NO EVENT SHALL HEWLETT-PACKARD COMPANY BE LIABLE FOR ANY INCIDENTAL,
CONSEQUENTIAL, SPECIAL, INDIRECT, PUNITIVE, OR EXEMPLARY DAMAGES OR LOST
PROFITS FROM ANY BREACH OF THIS WARRANTY OR OTHERWISE.
FOR CONSUMER TRANSACTIONS IN AUSTRALIA AND NEW ZEALAND; THE WARRANTY
TERMS CONTAINED IN THIS STATEMENT, EXCEPT TO THE EXTENT LAWFULLY
PERMITTED, DO NOT EXCLUDE, RESTRICT OR MODIFY AND ARE IN ADDITION TO
THE MANDATORY STATUTORY RIGHTS APPLICABLE TO THE SALE OF THIS PRODUCT
TO YOU.
ENWW
Limited warranty for print cartridge life 83
84 Appendix C Warranty and licensing
ENWW
D
Accessories and ordering
information
You can increase the printer’s capabilities with optional accessories and supplies.
Use accessories and supplies specifically designed for the HP LaserJet 1005 Series Printer
to ensure optimum performance.
Ordering information
Item
Printing supplies
Print cartridges
Description or use
HP Multipurpose paper HP brand paper for a variety of uses
HPM1120
(1 box of 10 reams, 500 sheets each).
To order a sample, in the U.S.,
call 1-800-471-4701.
HP LaserJet paper
Premium HP brand paper for use with HPJ1124
HP LaserJet printers (1 box of
10 reams, 500 sheets each). To order
a sample, in the U.S., call
1-800-471-4701.
HP LaserJet
transparency film
HP brand transparency film for use
with HP LaserJet monochrome
printers.
UltraPrecise print
cartridges
Replacement print cartridges for the
HP LaserJet 1005 Series Printer.
2,500 page cartridge
Supplementary
documentation
ENWW
Order number
Guidelines for Paper
and Other Print Media
92296T (letter)
92296U (A4)
C7115A
A guide to using paper and other print 5963-7863
media with HP LaserJet printers.
85
Ordering information (continued)
Replacement parts
Item
Description or use
Media pickup roller
Used to pick the media from the paper RF0-1008CN
input tray and advance it through the
printer.
Paper input tray
Used to hold media for the printer.
RG0-1013-000CN
Paper input tray cover
Used to cover the media in the paper
input tray.
RG0-1014-000CN
Separation pad for the
printer
Used to keep multiple sheets from
feeding through the printer path.
RF0-1007CN
86 Appendix D Accessories and ordering information
Order number
ENWW
E
Installing shared printers
Windows sharing allows other network users to print to the HP LaserJet 1005 Series Printer. To
enable Windows sharing, see the operating system’s documentation. Once the printer is shared,
you must install the printer drivers on all of the computers that will print to the printer.
Note
You can perform the following procedure on Windows 9x, 2000, Millennium, XP, or NT 4.0. You might
need the HP LaserJet 1005 Series Printer software CD-ROM to complete this procedure.
To install the printer drivers on a network computer, perform the following steps:
ENWW
1
In the Windows system tray, click Start, select Settings, and click Printers.
2
Double-click the Add Printer icon.
3
In the Add Printer Wizard, click Next.
4
Follow the instructions on the screen.
5
When asked if the printer is a local or network printer, select Network Printer.
6
To find the printer, click Browse, find the HP LaserJet 1005 Series Printer on the network, and
click OK.
7
When prompted, print a test page to ensure that the printer driver is installed properly.
87
88 Appendix E Installing shared printers
ENWW
Index
A
I
Accessories
ordering information 85
Acoustics 66
America Online
accessing support services 63
Image defects
creases 47
curled media 47
dropouts 45
faded print 45
gray background 45
improperly formed characters 46
light print 45
loose toner 46
page skew 46
toner scatter outline 47
toner smear 46
toner specks 45
vertical lines 45
vertical repetitive defects 46
wavy text 47
wrinkles 47
Installing
shared printers 87
software 7
C
Canceling print jobs 32
Card stock
guidelines for using 77
printing 27
Cleaning
media path 50
pickup roller 55
printer 48
Clearing media jams 51
Components, printer 16
CompuServe
accessing support services 63
Custom-sized media
printing 27
J
D
Declaration of Conformity 71
Default settings
print quality 32
printer properties (driver) 30
E
EconoMode 32
Electrical specifications 66
ENERGY STAR rating 69
Envelopes
guidelines for using 76
printing 25
Environmental Product Stewardship Program 69
Environmental specifications 66
Error messages
on screen 41
status light patterns 39
European Customer Support Center 62
Extended warranty 60
F
FCC compliance 68
Finland, laser statement 72
H
Hardware
extended warranty 60
setting up 7
warranty 60
Heavy media
guidelines for using 77
Help, online 30
HP Printing Supplies Environmental Program 70
HP SupportPack 60, 63
ENWW
Jams
clearing 51
L
Labels
guidelines for using 76
printing 24
Laser safety statement 71
Laser statement for Finland 72
Letterhead
printing 26
License agreement, software 80
Limited warranty statement 81
M
Material safety data sheet 70
Media
card stock, printing 27
choosing 22
custom-sized, printing 27
envelopes, printing 25
guidelines for using 75
labels, printing 24
letterhead, printing 26
loading 23
optimizing print quality 22
preprinted forms, printing 26
specifications 73
supported sizes and types 22
transparencies, printing 24
Media guides 18
Media handling problems 42
Media jams
clearing 51
Media path
cleaning 50
Index 89
Multiple pages per sheet
printing 31
N
N-up printing 31
O
Online help
printer properties (driver) 30
Online support services 62
Ordering information 85
Output paths 18
P
Paper
choosing 22
guidelines for using 75
loading 23
optimizing print quality 22
specifications 73
supported sizes and types 22
Paper handling problems 42
Paper input tray 17
Part numbers 85
Physical specifications 66
Pickup roller
changing 53
cleaning 55
Port availability 67
Power
turning off 20
voltage conversions 20
Preprinted forms
printing 26
Print cartridge
changing 36
life expectancy 34
limited warranty statement 83
non-HP print cartridges 34
recycling 34
storing 34
Print cartridge area
cleaning 49
Print cartridge door 19
Print quality
optimizing 22
settings 32
troubleshooting 45
Printed page problems 43
Printer
capacities and ratings 67
cleaning 48
components 16
hardware set up 7
loading media 23
media guides 18
output paths 18
paper input tray 17
print cartridge door 19
software installation 7
specifications 66
status light patterns 39
status lights 17
troubleshooting 37
turning power off 20
voltage conversions 20
Printer drivers
obtaining 63
90
Index
Printer properties (driver)
accessing 30
multiple pages per sheet 31
N-up printing 31
online help 30
print quality settings 32
watermarks 31
Printers, shared
installing 87
Printing
card stock 27
custom-sized media 27
envelopes 25
labels 24
letterhead 26
preprinted forms 26
transparencies 24
Printing tasks
canceling print jobs 32
multiple pages per sheet 31
N-up printing 31
watermarks 31
R
Recycling print cartridges 34
Regulatory statements 71
S
Sales office locations 64
Saving toner 32
Screen messages 41
Separation pad
changing 56
Service
availability 60
extended warranty 60
guidelines for repacking printer 60
hardware 60
information form 61
office locations 64
Settings
print quality 32
printer properties (driver) 30
Shared printers
installing 87
Software
installing 7
license agreement 80
troubleshooting 44
Software utilities
obtaining 63
Specifications
media 73
printer 66
Status light patterns 39
Status lights 17
Supplies
ordering information 85
Support
America Online 63
availability 60
CompuServe 63
European Customer Support Center 62
HP SupportPack 60, 63
obtaining printer drivers 63
online services 62
Web 62
ENWW
T
Toner
EconoMode 32
redistributing 35
Transparencies
guidelines for using 76
printing 24
Troubleshooting
error messages on screen 41
finding solutions 38
image defects 45
media handling 42
media jams 51
print quality 45
printed page problems 43
printer 37
software 44
status light patterns 39
U
Utilities
obtaining 63
V
Voltage conversions 20
W
Warranty
extended 60
hardware service 60
limited 81
print cartridge 83
Watermarks 31
Web
accessing support services 62
ENWW
Index 91
92
Index
ENWW
blank.fm Page 2 Thursday, October 10, 2002 9:27 AM
copyright © 2003
Hewlett-Packard Company
www.hp.com
*Q2676-90906*
*Q2676-90906*
Q2676-90906