1
User Manual
SAFETY WARNINGS
What the icons and signs in this user manual mean;
Means that there is a potential risk of death or serious injury.
WARNING
CAUTION
product.
CAUTION
To reduce the risk of fire, explosion, electric shock, or personal injury when
using your camcorder, follow these basic safety precautions.
Means hints or referential pages that may be heipfui when operating the
camcorder.
These warning signs are here to prevent injury to you and others.
Please follow them explicitly. After reading this section, keep it in a safe place for future
reference.
Warning!
• When Using theA© Power adapte r with Your _amcerdeg ConneCt the adapteE to an 0utle t
with protective gE0unding:
_Do
not expose the camcorder battery to direct sunlight, heaters, radiators, fire, or any other /
source of excessive heat.
Only
plug the adaptor p!ug into a socket that is easily accessible. I_ any problem occurs with
th p!od_c _fom_!t _ ht_!_ o o heso
€ke od!s_o_t_t!h po!_f_:
co_!t!t
MPORTANT iNFORMATiON ON USE
Before using this camcorder
• This camcorder records video in H.264
(MPEG4 partl0/AVC)
format and in High
Definition Video (HD-VIDEO) or Standard
Definition Video(SD-VIDEO).
• Please note that this camcorder is not
compatible
formats.
with other digital video
• Before recording important video, make
a trial recording.
Play back your trial recording to make sure
the video and audio have been recorded
properly.
• We can not compensate you for damage
to or loss of your recorded contents:
- Samsung cannot compensate you for
any damage caused when a recording
cannot be played back because of a
defect in the camcorder or memory card.
Samsung cannot be responsible for your
recorded video and audio.
Recorded contents may be lost due to a
mistake when handling this camcorder
or memory card, etc. Samsung shall
not be responsible for compensation for
damages due to the loss of recorded
contents.
• Make a backup of important recorded
data.
Protect your important recorded data
by copying the files to a PC. We also
recommend you to copy it from your PC
to other recording media for storage.
Refer to the software installation and USB
connection guide.
• Copyrights:
camcorder
only.
Please note that this
is intended for individual
use
Data recorded on the storage media in this
camcorder using other digital/analog media
or devices is protected by the copyright
act and cannot be used without permission
of the owner of the copyright, except for
personal enjoyment. Even if you record
an event such as a show, performance
or exhibition for personal enjoyment, it is
strongly recommended that you obtain
permission beforehand.
About this user manual
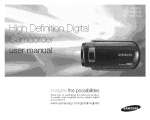
Thank you for purchasing this Samsung
Camcorder. Please read this user manual
carefully before you use the camcorder and
keep it handy for future reference. Should
your camcorder fail to operate correctly, refer
to Troubleshooting.
This User Manual covers
HMX-M20BN models.
HMX-M20SN,
• The HMX-M20SN, HMX-M20BN do not
have built-in flash memory and use memory
cards. Although some features of HMXM20SN, HMX-M20BN models are different,
they operate in the same way.
• Illustrations of model HMX-M20SN are
used in this user manual.
The displays in this user manual may not be
exactly the same as those you see on the
LCD screen.
Designs and specifications of the
camcorder and other accessories are
subject to change without any notice.
3
Thefollowing
terms
areused
inthismanuak Notes regardin{_ trademarks
* 'Scene'
refers
tothepoint
where
youpress
Record
Start/Stop
button
tostart
recording• All the trade names and registered
until
youpress
again
topause
therecording. trademarks mentioned in this manual or other
provided with your Samsung
o Theterms
'photo'
and'stillimage'
areused documentation
are trademarks or registered
interchangeably
withthesame
meaning. product
of their respective holders.
* ForOpen
Source
licenses
information, • trademarks
The SD logo is a trademark. The SDHC
refer
tothe"Opensource
M20.pdf"
inthe
logo is a trademark.
provided
CD-ROM.
• Microsoft @, Windows @, Windows Vista@ and
DirectX@ are either registered trademarks or
trademarks of the Microsoft Corporation in
the United States and/or other countries.
• Intel@, CoreTM and Pentium @ are the
registered trademarks or trademarks of the
Intel Corporation in the United States and
other countries.
• Macintosh, Mac OS are either registered
trademarks or trademarks of Apple Inc. in
the United States and/or other countries.
• YouTube is a trademark of Google Inc.
• FlickrTMis a trademark of Yahoo.
• Facebook is a trademark of Facebook Inc.
• HDMI, the HDMI logo and High-Definition
Multimedia Interface are trademarks or
registered trademarks of HDMI Licensing LLC.
• Adobe, the Adobe logo, and Adobe
Acrobat are either registered trademarks or
trademarks of Adobe Systems Incorporated
in the United States and/or other countries.
• All the other product names mentioned
here in may be the trademark or registered
trademarks of their respect companies.
Furthermore, "TM" and "@" are not
mentioned in each case in this manual.
rT1
This symbol indicates that dangerous voltage
consisting a risk of electric shock is present
within this unit.
OAUTION: TO REDUOE THE RISKOF ELEOTRIOSHOOK,
This symbol indicates that there are important
operating and maintenance instructions in the
literature accompanying this unit.
DO NOTREMOVEOOVER (OR BAOK).
NOUSER-SERVIOEABLEPARTS INSIDE
REFERSERVIOINGTO QUALIFIEDSERVIOE PERSONNEL.
Warning
To reduce the risk of fire or electric shock, do not expose this apparatus to rain or moisture.
Caution
Apparatus shall not be exposed to dripping or splashing and no objects filled with liquids, such
as vases, shall be placed on the apparatus.
To disconnect the apparatus from the mains, the plug must be pulled out from the mains
socket, therefore the mains plug shall be readily operable.
1. Read these instructions.
1 O. Protect the power cord Irom being walked on
or pinched particularly at plugs, conversience
receptacles, and the point where they exit from
the apparatus.
2. Keep these instructions.
3. Heed allwamings.
4. Follow all instructions.
5. Do not use this apparatus
near water.
6. Clean only with dry cloth.
7. Do not block any ventilation openings. Install in
accordance with the manulacturer's instructions.
8. Do not install near any heat sources such
as radiators, heat registers, stoves, or other
apparatus (including amplifiers) that produce
heat.
9. Do not defeat the safety purpose of the polarized
or grounding--type plug. A polarized plug has
two blades with one wider than the other. A
grounding type plug has two blades and a
third grounding prong. The wide blade or the
third prong are provided for your safety. II the
provided plug does not fit into your outlet,
consult an ebctrician for replacement of the
obsolete outlet.
11. Only use attachment/accessories
the manufacturer.
specified by
12. Use only with the cart, stand, tripod,
bracket, or table specified by the
manulacturer, or sold with the
apparatus. When a cart is used, use
caution when moving the cart/
apparatus combination to avoid injury from tipover,
13. Unplug this apparatus during lightning storms or
when unused for long periods of time.
14. Refer all servicing to qualilied service personnel.
Servicing is required when the apparatus has
been damaged in any way, such as powersupply cord or plug is damaged, liquid has beers
spilled or objects have Iallen into the apparatus,
the apparatus has been exposed to rain or
moisture, does not operate normally, or has
been dropped.
i
ANTENNA
GROUNDING:
15.Apparatus
shall
notbeexposed
todripping
or 20.OUTDOOR
splashing
and
noobjects
filled
with
liquids,
such CAMCORDER,
be
sure
theantenna
orcable
asvases,
shall
beplaced
ontheapparatus. system
isgrounded
toprovide
some
protectiors
16.VENTII..ATION:
against
voltage
surges
and
built-up
static
Slots
and
openings
inthecabinet
areprovided charges,
Section
810
oftheNational
Electrical
forventilation
toensure
reliable
operation
Code,
ANSI/NFPA
No.70--1984,
provides
oftheCAMCORDER
and
toprotect
itfrom
information
with
respect
toproper
grounding
of
overheating.
These
openings
must
not
themaeI
and
supporting
structure,
grounding
beblocked
orcovered.
Never
place
your
ofthelead--in
wire
and
supporting
structure,
CAMCORDER
onabed,
sofa,
rug,
orother
grounding
ofthemast
and
supporting
structure,
sk_lilar
surface:
onornear
aradiaIor
orheat
grounding
ofthelead--in
wire
toanantenna
register.
This
CAMCORDER
should
notbe
discharge
unit,
size
ofgrounding
toconductors,
placed
inabuilt--in
installation
such
asa
location
ofantenna-discharge
unit,
connection
bookcase
orrack
unless
proper
ventilation
is
togrounding
electrodes
and
requirements
for
provided
orthemanufacturer's
instructions
haw_ thegrounding
electrode.
See
figure
below.
been
adhered
to.
21.LIGHTNING:
17.POWER
SOURCES:
For
added
protectiors
ofthis
CAMCORDER
The
CAMCORDER
should
beoperated
only
from during
a
thetype
ofpower
source
indicated
ors
thelabel. or
lightning
storm
when
itis
Ifyou
arenotsure
ofthetype
ofpower
supply
leftunattended
atyour
home,
consult
your
appliance
dealer
and
unused
for
orlocal
power
company.
ACAMCORDER
is
intended
tobeoperated
from
battery
power,
or
long
periods
of
other
sources,
ref_)r
totheoperating
instructions.time,
unplug
it
from
thewall
.................
18.GROUNDING
ORPOL/_RIZATION:
outlet
and
This
CAMCORDER
may
beequipped
with
disconnect
theantenna
orcable
system.
This
either
apolarized
2--wire
ACline
plug
(aplug
willprevent
damage
totheCAMCORDER
due
to
having
one
blade
wider
than
theother)
ora
and
powerline
surges.
3wire
grounding
type
plug,
aplug
having
athird lightning
LINES:
(grounding)
pin.
IIyou
areunable
toinsert
the 22.POWER
plug
fully
into
theoutlet,
tryreversing
theplug.
Anoutside
antenna
system
should
notbe
IItheplug
still
fails
toIit,contact
your
electrician located
inthevicinity
ofoverhead
power
lines
toreplace
your
outlet.
Donotdefeat
thesafety orother
electric
light
orpower
circuits
where
it
purpose
ofthepolarized
plug.
can
fallinto
such
power
lines
orcircuits.
When
installing
anoutside
antenna
system,
exlreme
19.POWER-CORD
PROTECTION:
care
should
betakers
tokeep
from
touching
Power-supply
cords
should
berouted
sothat
power
lines
orcircuits
ascontact
with
they
are
notlikely
tobewalked
ors
orpinched such
might
befatal.
byitems
placed
upon
oragainst
them,
paying them
particular
attention
tocords
orplugs,
convenient
receptacles,
and
thepoint
where
they
exit
from
theunit.
23.OVERLOADING:
27. REPLACEMENT PARTS:
Donotoverload
wall
outlets
and
extension
replacement parts are required, be sure
cords
asthis
canresult
inarisk
ofireorelectric When
the service technician has used replacement
shock.
parts specified by the manufacturer and having
the same characterislics as the original part.
24.OBJECTS
AND
LIQUIDS:
Unauthorized substitutions may result in fire,
Never
push
objects
ofany
kind
into
this
electric shock or other hazards.
CAMCORDER
through
openings
asthey
may
28. SAFETrY CHECK:
touch
dangerous
vokage
points
orshort
out
apart
that
could
result
inafireorelectric
Upon corrlpletion of any service or repairs to
this CAMCORDER, ask the service technician
shock.
Never
spill
liquids
ofany
kind
onto
the
CAMCORDER.
Should
spillage
occur,
unplug
to perform safety checks to determine that the
unit
and
have
itchecked
byatechnician
before CAMCORDER is in saf_ operating order.
use,
25. SERVICING:
Do not attempt to service this CAMCORDER
yourself. Opening or removing covers may
expose you to dangerous voltage or other
hazards. Ref_r all servicing to qualified service
personnel.
26. DAMAGE REQUIRING SERVICE:
Unplug this CAMCORDER from the wall outlet
and refer servicing to qualified service personnel
under the following conditions:
a. When the power-supply cord or plug is
damaged.
b. II any liquid has been spilled onto, or objects
have fallen into the CAMCORDER.
c. If the CAMCORDER has beers exposed to
rain or water.
d. If the CAMCORDER does not operate
normally by Iollowing the operating
instructions, adjust only those controls that
are covered by the operating instructions.
Improper adjustment of other controls may
result in damage and will often require
exlensive work by a qualified technician
to restore the CAMCORDER to its normal
operation.
e. II the CAMCORDER has beers dropped or
the cabinet has beers damaged.
f. When the CAMCORDER exhibits a distinct
change in performance, this indicates a need
for service.
29. To prevent damage which may result in fire or
shock hazard, do not expose this appliance to
rain or moisture.
30. If this power supply is used at 240V ac, a
suitable plug adaptor should be used.
31. This product is covered by one or more of the
following U.S. patents:
5,060,220 5,457,669 5,561,649 5,705,762
5,987,4176,043,912 6,222,983 6,272,096 6,377,524
6,377,5316,385,587 6,389,570 6,408,408 6,466,532
6,473,7366,477,501 6,480,829 6,556,520 6,556,521
6,556,5226,578,163 6,594,208 6,631,110 6,658,588
6,674,6976,674,957 6,687,455 6,697,307 6,707,985
6,721,2436,721,493 6,728,474 6,741,535 6,744,713
6,744,9726,765,853 6,765,853 6,771,890 6,771,891
6,775,4656,778,755 6,788,629 6,788,630 6,795,637
6,810,2016,862,256 6,868,054 6,894,963 6,937,552
iii
rY1
USER INSTALLER
CAUTION:
Your authority to operate this FCC certified
equipment could be voided if you make changes or
modifications not expressly approved by this party
responsible for compliance to part 15 FCC rules.
NOTE:
LAMP(S) INSIDE THIS PRODUCT CONTAIN
MERCURY AND MUST BE RECYCLED OR
DISPOSED OF ACCORDING TO LOCAL,
SIATE OR FEDERAL LAWS. For details
see lamprecycle.org, eiae.org, or call
1-800--Samsung (7267864)
CALIFORNIA
USA ONLY
This Perchlorate warning applies only to
primary OR (Manganese Dioxide) Lithium coin
cells in the product sold or distributed
ONLY
in California USA
" Perchlorate
Material - special handling may
apply, See www.dtsc.ca.gov/hazardouewaste/
perchlorate."
NOTE:
This equipment has been tested and found to
comply with the limits for a Class B digital device,
pursuant to part 15 of the FCC Rules.
These limits are designed to provide reasonable
protection against harmful interference in a
residential installation.
This equipment generates, uses and can radiate
radio frequency energy and, if not installed
and used in accordance with the instructions,
may cause harmful interference to radio
communications. However, there is no guarantee
that interference will not occur in a particular
installation.
II this equipment does cause harmful interference
to radio or television reception, which can be
determined by turning the equipment off and
on, the user is encouraged to try to correct the
interference by one or more of the following
measures:
Reorient or relocate the receiving antenna.
Increase the separation between the
equipment and receiver.
Connect the equipment into an outlet on a
circuit different from that to which the receiver
is connected.
Consult the dealer or an experienced radio/
TV technician Ior help and for additional
suggestions. The user may find the
following booklet prepared by the Federal
Communications Cemmission helpful: "How
to Identify and Resolw_ Radio--TV Interference
Problems." This Booklet is available from the
U.S. Government Printing Office, Washington,
D.C. 20402, Stock No. 004-060--00345-4.
:CO Warning
The user is cautioned that changes or
modifications not expressly approved by the
manulacturer could void the user's authority to
operate the equipment.
This device complies with Part 15 of FCC Rules.
Operation is subject to the following two
conditions;
(1) This device may not cause harmful
interference, and
(2) This device must accept any interference
received, including interference that may
cause undesired operation.
The safety precautions illustrated below are to prevent personal injury or material damages.
Follow all instructions carefully.
_
ARNING
Means that there is a potential
risk of serious personal injury.
_
CAU'FION
Means that there is a potential
risk of personal injury or
damage to the product
Q
Do not overload outlets or
extension cords as th_s maj result
in abnormal heat or fire.
_
Prohibited action.
Do not touch the product.
This precaution
kept.
_
must be
nplug from the power
supply.
Q
®
Using the camcorder ai
[emperatares over 60°01"140°F)
may result in fire. Keeping the
battery at a high temperature may
cause an explosion.
Do not allow water or metal and
inflammable matter to enter the
camcorder or AC power adap[or.
Doing so may pose a fire hazard.
No oil! Oil entering the camcordeor AC power adaptor could cause
electric shock, malfunctions or
defects.
Do not aim the camcorder directly
into the sun. Doing so could cause
eye injuries, as well as lead to
malfunctioning of internal parts of
LheproaucL
Q
No sand or dust! Fine sand or
dust en[enng the camcorder or
AC power adaptor could cause
malfunctions or defects.
©
Do not bend the pov.ercord or
oamage the AC power adaptor by
pressing on it with a heavy objeci.
There maj be a risk of fire or
electdc shock.
o
Do not disconnect the AC adaptor
by pulling on its power-cora, as
this could damage the power-cora.
Do not use the AC aaaptor if it has
damaged, spl_tor broken cords or
wires. Doing so may cause fire or
electric shock
5
!_:_:_/_
:_i'_'_'_::__
,____ _ _:_'_'__:_
___ _ eve_se_,0o
:_/_:_
_ :_:_
_ _:_
onetc0 nectt eAcadapter
unless the plug can be fully inse[ted
with no part of the blades exposed,
Do not dispose of battery pack in a
fire as it may explode,
Chemicals to clean the camcorder.
Do not SpraY cleaners direct!y on
the camcerder.
water when using it near the beach
or PC01or when it rains, There is
a risk of malfunction or electric
shock:
of children, If the lithium battery
or memory card i s swallowed
by children, consu!t physician
immediately,
Do not fire _he flash directly
in front someone's eyes
(especially infants): Doing so
may cause impaired vision:
_
6
_i
_/ii
_i _ ii
DO not plug 0i Unplug the power
cord with wet hands. There is a
risk of electric shock,
KeeP the powerLc0rd Unplugged
when not in use or during lightning
storms: There is a risk of fire:
:ii i i ii
ii I
ii :_i
When cleaning the AC adaptor,
unplug the power-cord, There is
a risk of malfunction or electric
shock:
soundo_smell,or smokes, Unplugthe
p0werrc0rdimmediatelyand request
servicefroma Samsungservicecenter,
Thereis a risk of fire or personalinjury,
immediately detach the AC
adaptor or batterY from the
camcorder.
There iS a risk 0f fire 0r injUry
DO not attempt to disassemble;
repair, or modify the camcorder or
the AC adaptor to avoid a risk of
fire or electric shock.
(_) CAUTION
_F__ _
@
_
DO not press the SUrfaCe Of
DOnot dro# or expose the
the LCD with force, or hit it
with a sharp object. If you
push the LCD surface, d!splay
unevenness may occur:
camcerder, battery pack, AC adaptor
or other accessories to severe
vibratio0s or impact. This may cause
a malfunction or injury,
Do not use the camcorder on a
tripo d (not supplied) in a place
where it is subject to severe
vibrations or impact.
Do not use the camcorder in direct
sunlight or near heating equipment,
This may cause a malfunction or
injury,
Do net leave the camcorder in
a closed vehicle for a long time,
where the temperature is verY
high.
Do not expose the camcarder to
soot or steam: Thick soot or steam
could damage the camcorder case
Orcause a malfunctien.
Do not use the camcordernear dense
exhaust gas generated by gasoline
or diesel engines, or corrosiye gas
such as hydrogen sulphide. Doingso
may corrode the externat or internat
terminals, disabling normatoperation,
DOn0t expose the camcorderto
insecticide,Insecticideenteringthe
camc0rdercould cause the product
to operateabnormally,Turn the
Camcorderoff and coverit witha vinyt
sheet, etc, beforeusing insecticide,
Do not exposethe camcorderto
suddenchangesintemperatureor a
humid place,Thereis a!so a risk of
defect or etectricshockwhen using
outdoorsduringlightningstorms,
7
nforrn t on
J
Q
Q
Do not place the camcorder
with the open LCD screen
down.
Do not wipe the camcorder body
with benzene or thinner, The
exterior coating could peel off or
the case surface could deteriorate,
Do not leave [he LCD screen open
when not using the camcorder.
Q
(S)
O
Do not hold the camcorder by the
LCD monitor when lifting it. The
LCD screen could detach and the
camcorder may fall.
O
Use Samsung-approvec
accessories
only. Using products from other
manufacturers may cause
overnea[ing, fire, explosion, electric
shock o[ personal Injuries caused by
abnormal operation.
Onlyplug th_ aaap_r plug _ntoa socKei
that is easilyaccessible.If anyproblerr
occurswltntne product,you mustpu_
[he plugout of thesocketto d sconnec[
the powercompletely.Turningoff the
Dowerput[onon [ne productdoes not
completely
Do not use the camcorder near
a TV or radio: This could cause
no_se on the TV screen or to radio
broadcasts,
30 not use the camcorder near
sources of strong raaio waves or
magnetism such as speakers or targe
motors. Noise from these sources
couIddistort [he video or audio you
are recording.
O
O
Place the camcorder on a stable
surface that is well ventilated
4eep impor_am aa[a separate v.
Samsung is not responsible for
data loss
content
PREPARATION
2
5
9
Before reading this user manual
Safety information
Contents
13
13
Quick start guide
You can record videos or photos on
a memory card
What's included with your camcorder
Getting to know the camcorder
Location of controls
Identifying the screen displays
Getting started
Using the battery pack
Checking the battery state
Basic operation of the camcorder
Turning your camcorder on/off
Switching to the power saving mode
Setting the operation modes
Using the display(IEiV_CHEOK)button
Using the touch panel
First time settings
Setting the time zone and date/
time for the first time
Selecting a languages
Getting ready to start recording
Inserting and removing a memory card
(not supplied)
Selecting a suitable memory card
Using the hand strap
Adjusting the LCD screen
Basic camcorder positioning
17
18
18
20
24
24
26
29
29
30
31
31
32
33
qq
oo
34
35
35
36
39
39
40
BASIC OPERATION
ii
i¸
41
41
43
44
Basic Recording
Recording videos
Capturing photos in video record
mode (Still shot)
Recording photos
9
content
45
48
49
49
50
52
53
54
Recording with ease for beginners
(SMART AUTO mode)
Capturing photos while playing back
videos
Zooming
Basic Playback
Changing the playback mode
Playing back videos
Viewing photos
Viewing a slide show
Zooming during playback
55
55
56
59
60
61
62
62
63
64
65
65
66
66
67
67
68
68
69
70
71
75
76
76
77
78
79
79
Advanced Recording
Handling menus and Q.MENUS
Menu items
Q.MENU items
/SCENE
Resolution
Quality
Slow Motion
Sharpness
White Balance
ISO
Aperture
Shutter
EV
3D-NR
Super C.Nite
Back Light
Dynamic Range
Flash
Focus
Face Detection
Magic Touch
Metering
Anti-Shake(HDIS)
Digital Effect
Fader
Tele Macro
Wind Cut
47
ADVANCED OPERATION
f ...............
i,
10
i
ADVANCED OPERATION
f ...............
i,
i
80
80
81
82
82
83
85
86
MIC Level
Digital Zoom
Cont. Shot
Bracket Shot
Self Timer
Time Lapse REC
Quick view
Guideline
86
86
87
88
89
89
Advance playback
Play Option
Story-Board Print
Using/VIEW
Highlight
Share Mark
90
90
Cont. Capture
File Info
91
91
91
92
92
93
94
94
95
System setting
Date/Time Display
Date Type
Time Type
File No.
Time Zone
LCD Control
LCD Enhancer
Auto LCD Off
95
96
97
Booting Mode
Quick On STBY
PC Software
97
98
Storage Info
Format
99
99
100
Beep Sound
Shutter Sound
Auto Power Off
100
101
101
Rec Lamp
USB Connect
TV Connect Guide
102
102
103
103
104
TV Display
TV Type
Analog TV Out
Default Set
Demo
104
Anynet+ (HDMI-CEC)
11
content
EDITING VIDEO
105
105
106
107
108
108
109
110
111
112
112
113
114
114
115
Editing video clips
Deleting a section of a video
Dividing a video
Combining videos
Editing the playlist
Playlist
Creating the playlist
Arranging videos in the playlist
Deleting videos from the playlist
File management
Protection from accidental erasure
Deleting files
Printing photos
DPOF printing settings
Direct printing with a PictBridge
printer
EXTERNAL CONNECTIONS
117
117
119
121
122
122
Connecting to a TV
To connect to a high definition TV
Connecting to a standard definition TV
Viewing on a TV screen
Dubbing videos
Dubbing to VCRor DVD/HDDrecorders
USING A COMPUTER
123
123
124
125
129
Using with a Windows computer
Checking your computer type
What you can do with a Windows
computer
Using the Intelli-studio program
Using as a removable storage device
131
134
138
138
139
Warning indicators and messages
Troubleshooting
Maintenance & additional information
Maintenance
Additional information
140
141
Using your camcorder abroad
Specifications
OTHER INFORMATION
12
WHAT'S
NCLUDED
WiTH YOUR CAMCORDER
Before using the camcorder, make sure none of the kems listed below are missing from your box.
The contents or the shape of the accessories may vary depending on the sales region.
Checking
your accessories
HMX--M20SN
Silver
,
HMX--M20BN
O
Black
Color/
Touch panel
8x(Optical),
12x(Intelli)
,, The shape is tile same for all modeb. Only the color is different.
J
,, The exact appearance of each item may vary by model.
• The contents may vary depending on the sales region.
• Parts and accessories carl be purchased after consulting with your local Samsung dealer.
SAMSUNG is not responsibb for reduced battery life time or malfunctions caused by any
unauthorised use of accessories such as AC adaptor or the batteries.
,, Your camcorder includes the user manual CD and quick start guide (printed). For more detailed
instructions, refer to the user manual (PDF) on the provided CD.
,, A memory card is not provided. Buy a memory card that is compatible with this camcorder.
17
LOCATION
OF CONTROLS
Front/Left/Right
@@ @
!
Built-in flash
2
Lens
!0 Display (IrlI/iCHECK)
9 Power(y})
button
3
4
5
Recording indicator button
Internal microphone
Q.MENU button
! ! Smart Auto/iVIEW
!2 Share button
!3 PHOTO button
_;_ Zoom (W/T) button
!4 Zoom(W/T)lever
7
8
!5 Built-in speaker
!_;_Hand strap hook
Recording start/stop button
LCD screen (Touch screen)
Dunng a recording, be careful not to block the internal microphone
button
button
and lens.
Rear/Bottom
!
MODE button/Mode
2
(Video( _ )/Photo(_)
Charging (CHG)lamp
3
4
5
Recording start/Stop
HDMI jack
Jack cover
indicator
mode)
button
6 DO IN jack
7 _ (USB,Oomponent/AV)jack
8 Battery/Memory card cover switch
9 Battery/Memory card cover
!0 Tripod receptacle
19
qettN
IDENTiFYiNG
THE SCREEN
D SPLAYS
The available functions vary depending on the selected operation mode. Dilf_;rent indbators appear
depending on the setting values. The indicators below only appear in the Video Record mode.
PRECHECK!
• The On Screen display (OSD) below appears only when the camcorder
° Select the Video
the MODE button. _£a_
is in Video record (_)
mode.
31
Video record mode
1 Video record mode
2 Operating status (STBY (standby)/O (recording))/
Self Timer*
3 Time counter(video recording time)
4 Warning indicators and messages
5 Remaining recordabbtime
6 Storage media (merqory card)
7 Battery infe.(remaining battery level/time)
8 Quality, Resolution
9 LCD Enhancer, Anti-Shake (HDIS)
10 Tele Macro*, Back Light
11 Dynamic Range*,Wind Cut
12 MIC Level
•
,,
,
The
The
The
For
The
The
13
14
15
16
17
18
19
20
Menu ([Md_])tab
Optical zoom/Digital zoom bar
Date/Time
Time Zone
Play (_)tab
EV*
Manual aperture*/Manual shutter*/Super C.Nite
Manual Focus*/Touch Point*/Face Detection,
Digital effect
21 White balance, Fader*
22 iSOENE/SMART AUTO, Analog TV (but (when
component/AV cable is connected), Time Lapse REO*
settings of functions
marked wRh * are net retained when you turn the camcorder
off.
emscreen
indicators
are based on an 8GB SDHC memory card capacity.
screen is an exampb and may differ from the actual display.
warning indicators
and messages,
see pages 131_137
illustrated items above and their positions can be changed without notice for better performance.
total number of recordable
photos is based on available space on the storage media.
The available functions vary depending on the selected operation mode. Diff,)rent indicators appear
depending on the setting values. The indicators below only appear in the Video Play mode.
PRECI-IECK!
• The On Screen display (OSD) below appears only when the camcorder is in Video playback (_)
° Select the
tab on the LCD screen to select the _!a_back mode _'._e
49
mode.
Video play mode
/
2
3
4
5
6
7
8
Video play mode
Operating status (Play/Pause)
File name (file number)
Playbacktime/Recorded
time
Warning indicators and messages/Volume control
Storage media (memory card)
Battery info. (Remainirsg battery level/time)
LCD Enhancer, Quality, Resolution
9 Date/lime
10 Menu tab
11 Playback control tabs (Skip/Seamh/Play/Pause/
Slow Playback)
12 Return tab
13 Volume tab
14 Protect, Cont. Capture
15 Play Option, Analog TV Out (when component/
AV cable is connected)
The playback control tabs disappear a few seconds after a video playback starts. Touch anywhere
ors the screen to display them again.
For warning indicators and messages, see pages 131 _137
21
IDENTiFYiNG
THE SCREEN
D SPLAYS
The available functions vary depending on the selected operation mode. Different indicators appear
depending ors the setting values. The indicators below only appear in the Photo Record mode,
PRECHECK!
• The On Screen display (OSD) below only appears when the camcorder
o Select the Photo_
m£de b_pressin£the
MODE button. _,_49
is in Photo record (i_J) mode.
Photo record mode
/
2
3
4
5
6
7
8
9
10
11
22
Photo record mode
Focus indicator (half shutter) / Self Timer*
Warning indicators and messages
Image counter (total number of recordable photo
irrlages)
Storage media (memory card)
Battery info.(remaining battery bveVtime)
Quality, Resolution
LCD enhancer, Anti-Shake (HDIS)
Teb Macro*, Back Light
Dynamic Range*, Flash/Cont. Shot
/Bracket Shot*
ISO, Sharpness
,,
,,
,,
,,
,,
12
13
14
15
16
17'
18
19
Menu (_E_]})tab
Optical zoom/Digital zoom bar
Date/lime
Time Zone
Play ([]_])tab
EV*
Manual aperture*/Manual shutter*
Manual focus*,Metering/Magic
Touch*
/Face Detection
20 White Balance, Digital effect
21 iSCENE mode/SMART AUTO, Analog TV Out
(when component/AV cable is connected)
The settings of functions marked with * are not retained when you turn the camcorder off.
For wamirsg indicators and messages, see pages 131~ 137
The total number of recordabb photos is based on available space on the storage media.
Small changes to the remaining memory space may not change the photo counter after recording.
The largest number the OSD Image Counter cars display is "9,999."
The
available
functions
vary
depending
ontheselected
operation
mode.
Different
indicators
appear
depending
onthesetting
values.
The
indicators
below
only
appear
inthePhoto
Play
mode.
PRECHECK!
• The On Screen display (OSD) below appears only when the camcorder is in Video playback (_)
° Select the
tab on the LCD screen to select the Playback mode _e
49
mode.
Photo play mode
/ Photo play mode
2 Slide show/zooming control
3 Image counter (current image/total number of
recorded images)
4 File name (file number)
5 Storage media (memory card)
6 Battery info.
(Remaining battery level/time)
7 LCD enhancer, Quality, Resolution
8
9
10
11
12
13
14
Date/time
Previous irrlage, Next image tab
Menu((ME,Q
tab
Slide show playback€ _J) tab
Return tab
Print mark
Protect, Analog /"V Out (when component/AV
cable is connected)
23
USING THE BATTERY
PACK
Purchase extra battery packs to allow continuous use of your camcorder.
O
B_serting the battery
pack
the battery
pack
i o Open the battery/memory card cover by
sliding the battery/memory card cover
switch towards _).
2o Insert the battery pack into the battery
pack slot until it softly clicks.
2o Eject the battery pack by sliding the
battery release switch towards C8}.
Make sure that the SAMSUNG logo
is facing up when the camcorder is
placed as shown in the figure.
3o Close the battery/memory card cover by
sliding the battery/memory card cover
switch towards @).
24
Eiecting
i o Open the battery/memory card cover by
sliding the battery/memory card cover
switch towards _).
3o Close the battery/memory card cover by
sliding the battery/memory card cover
switch towards _).
• Use only Samsun%approved
battery packs. Do not use batteries from other manufacturers.
manufacturer's batteries carl cause overheating, fire or explosion.
• Samsung is not responsible for problems that occur you if you use unapproved batteries.
Other
Charging
the battery
pack wit.h the AC power adaptor
Power({ o }) button
PRECHECK!
Before startin
i o Press the power({
_page
29
2. Open
ack is inserted in your camcorder.
_ }) button
to turn off the camcorder,
and then
_
29
close the LCD screen.
the jack cover,
3o Insert the battery
pack
in the camcorder.
4o Connect the AC power adaptor to the DC IN jack on the camcorder,
power adaptor into the wall outlet.
and then
plug the AC
,, The battery pack does not charge in the power saving mode, which may keep the mode indicator
on or flashing. Start charging the battery only after turning off the camcorder by pressing the power
(_)
button.
• Even with the power switched off, the battery pack still discharges if you leave it inserted in the
camcorder.
,, We recommend that you to have one or more additional battery packs to allow continuous use of
your camcorder.
25
CHECKING
THE BATTERY
STATE
You can check the charging state and remaining battery capacity.
To check the charging
The color of the CHG
lamp indicates
state
the power
or charging
state.
The color of the charging indicator shows the charging state.
LED color
•
@
(Orange)
@
(Green)
O
(Red / Blink)
Battery capacity decreases ow_r time and through repeated use. Keep the camcorder turned off
while not operating it.
• Store the battery pack separately when finished charging or when not using it for a long time. This
helps extend the life of the battery.
,, The Battery pack charges to over 95% of capacity after about 2 hour and 40 minutes, and the
indicalor color changes to green.
It takes about 3 hours for the battery pack to charge 100%.
BP125A
Approx. 180 min.
HD (1080/60i)
•
SD (480/601o)
Approx. 85min.
Approx. 90min.
Approx. 140min.
Approx. 170min.
(Unit: minutes.
Charging time: Approximate time (in min.) required to fully charge a completely exhausted
battery pack.
Recording/Playback time: Approximate recording time (in min.) available when you fully
charge the battery pack. 'HD' stands for high definition image quality, and 'SD' stands for
standard image quality.
Recharge the battery pack only where the temperature
is between 0°C (32°F) and 40°C (104°F).
When exposed to cold temperatures
(below 0°C (32°F)), the battery's recording time decreases
and it may cease to function. If this happens, remove the battery from the camcorder, place the it in
your pocket or other warm, protected place for a short time, and then re-insert it.
Do not put the battery pack near any heat source (i.e. fire or a heater).
Do not disassemble, apply pressure to, or heat the battery pack.
Do not allow the battery pack's terminals to be short-circuited.
This may cause the battery to leak,
generate heat, or cause a fire.
• The recording time is aff_,_cted by temperature and erwironmental conditions.
• We recommend using only the battery type that came with your camcorder. This battery type is available
from your Samsung retailer. When the battery reaches the end of its life, please contact your local dealer.
The batteries must be dealt with as chemical waste.
• Make sure that the battery pack is fully charged before starting to record.
• To preserve battery power, keep your camcorder turned off when you are not operating it.
• Even when the power is switched off, the battery pack still discharges if you leave it in the camcorder. We
recommend tha! you remove the battery pack from the camcorder.
• II the battery is not used for a long time, fully charge the battery and then, using your camcorder, drain
the charge corrlpletely once every 6 months to keep the battery functionirlg properly. To store the battery,
remove it from your camcorder and put it in a cool, dry place.
• Battery capacity decreases ow_r time and through repeated use. If decreased usage time between charges
becomes significant, it is probably time to replace the battery with a new one.
• Each battery's life is affected by storage, operating, and erwironmental conditions.
27
•
The recording times in the table on the previous page were measured when using the
camcorder at 25°C (77°F).As the environmental temperature and conditions vary, the actual
battery time may differ form the approximate times given in the table.
The recording and playback time may be shorter depending on the conditions under which
you use your camcorder. For example, in actual recording, the battery may discharge 2 to 3
times faster than listed if you use Record start/stop and Zoom frequently, and use playback
to view your recordings. Assume that the recordable time with a fully charged battery is
between 1/2 and 1/3 of the time in the table, so you have enough charged battery packs to
allow for the time you are planning to record on the camcorder.
The recording and playback time will be shorter when you use your camcorder in low
temperatures.
The CHG (charging)
Battery Info correctly
The battery pack
The battery pack
The battery pack
lamp blinks during charging. However, the battery pack will not display
under the following conditions:
is not inserted correctly.
is damaged.
is worn-out. (For the battery information only)
Using an AC power source
We recommend that you use the AC power adaptor to power the camcorder from a household
AC outlet when you change settings, play back or edit images, or use it indoors. To power the
camcorder from an AC outlet, you make the same connections you make when charging the
battery pack. _page 25
•
•
28
Use a nearby wall outlet when using the AC Adaptor. Disconnect the AC Adaptor from the
wall outlet immediately if any malfunction occurs while using your camcorder.
Do not place the AC Adaptor in a confined space when you use it, such as between a wall
and a piece of furniture.
Do not short-circuit the DC plug of the AC Adaptor or battery terminals with any metallic
objects. This may cause a malfunction.
Even if your camcorder is turned off, the AC adaptor continues to supply AC power to the
camcorder as long as it's plugged in.
TURNING
YOUR CAMCORDER
ON/OFF
This chapter introduces you to the basic operation procedures of this camcorder, such as
turning the power on/off, switching modes, and setting on-screen indicators.
1o Open the LCD screen to turn on the camcorder.
Your camcorder turns on automatically when you
open the LCD screen.
2o To turn off the camcorder, press the Power
button for about one second.
•
(_})
Closing the LCD screen will not turn off the
camcorder.
Set the date and time when using your camcorder
for the first time. _-,page 33
LeD
screen
Power(_)
button
• The camcorder operates tile self-diagnosis function when powered oil. If a warning message
appears, refer to 'warning indicators and messages' (--pages 131 ~137) and take corrective action.
• If you close the LCD screen when the power is on, the power saving mode activates.
29
SWFCH NG
TO THE POWER SAVING MODE
If you need to use the cameorder for an extended time, the following functions enable you to
prevent unnecessary energy consumption.
In STBY mode:
•
The camcorder switches to "Quick On STBY" mode when you dose the LCD screen.
_page 96
In PLayback mode (Includes the thumbnail view mode):
• The camcorder switches to the sleep mode when you close the LCD screen, and then, if idle
for more than 20 minutes, the camcorder turns off.
However, if you set Auto Power Off to 5 Min, the camcorder turns off in 5 minutes.
• If you open the LCD screen or connect a cable to the camcorder when the camcorder is in
sleep mode, the camcorder exits sleep mode and returns to the last active operation.
LCD screen is 3oer
LCD screen
is closec
uIO
After 20 minutes
luO
<Sleep
moae>
<Powerof_
,, The power saving mode does not work in the fo,owing situations:
When the camcorder has a cabb connection. (USB, Component/AV, or HDMI)
While recording, playing back, or running a slideshow.
When the LCD screen is opened.
• The camcorder consumes battery power in the power saving mode (about 50% of the power
consumed in the standby mode) However, if you plan to use the camcorder for the maximum
length of time without recharging, we recommend you turn off the camcorder by pressing the
power ({ _ }) button when not using it.
SETTING THE OPERATION
MODES
You can switch the operating mode in the following order
each time you press the MODE button. Video mode
(_) -_ Photo mode (11_1)-_ Video mode (_).
•
•
Each time the operation mode changes, the
respective mode indicator lights.
Touching the Play (/i;i/) tab in the video or photo
record mode switches the operation mode to the
video or photo playback mode.
°Mode
indicators
Mode
button
Play tab
Video mode
_
Records videos
Photo mode
_
Records photos
• When you turn on the camcorder for the first time, the video mode starts up by default,
You carl select the Booting mode by setting "Booting Mode" to "Photo Mode" or "Previous
Mode," The change takes effect the next time you turn the camcorder on, _page 95
USING THE D_SPLAY {ID#CHECK}
Switching
the information
DISP_Y
BUTTON
mode
You can switch the on-screen 'nformatior ulsplay qloue.
Press the display (Inl/_CmECK) button.
• The full and minimum display moues wl alternate
<Full display
moqe>
<Minimum display mode>
Warning indicators and messages may appear depending ors the recording conditions.
Display (Ir-IUiCHECK)
button does not work in the menu or quick menu screen.
31
Checking
the _emaining battery and _eco_ding capacity
•
When the power
button.
is off, press
and hold the display
(Irml/_OHEOK)
•
When the power is on, press
button for about 3 second.
and hold the display
(DI/_CHECK)
•
The remaining
battery time and the available recording
appear for about 10 seconds
according
to the storage
setting values.
time
and quality
o Battery information b available only when the battery pack b inserted in your camcorder,
If you are using the AC Power adaptor to power the camcorder, and you do not have the battery
inserted, the "No Battery" message appears.
USING THE TOUCH PANEL
The touch panel allows you to enjoy playback
and recording with a simple
Place your hand on the rear side of the LCD screen to support
it.
Then, touch the items displayed
on the screen.
touch
of your finger.
Do not place a protective film on the LCD screen,
If a film is applied for a long while, strong cohesion on the surface of the screen may cause a
malfunction of the touch panel.
32
Be careful not to accidentally press the buttons near the LCD panel while using the touch panel,
If a film is attached for a long time, strong adhesion between the film and the surface of the screen
may cause a malfunction of the touch panel,
frst trne settinqs
S ETTIIIHGTIIHE TillM E ZOH E AH III)III)ATIE_]ME IIF01113
TIIHE III:IIIIIF/ST
TillM E
Set the date and time of your local area when you turn on this camcorder
for the first time,
1o Open the LCD screen to turn on the camcorder.
• Your camcorder turns on automatically when you open the
LCD screen.
• The Time Zone ("Home") screen appears centered on Lisbon,
London (Greenwich Mean Time 00.00).
You can also set your current time zone from the "Settings"
menu. _page 93
EEl EZ3 0£]
2o Select your local area on the map by touching the left ([_1) or right
([_E})tab on the LCD screen, and then press the ([oq) tab.
The "Date/Time
Set" screen appears.
3o Touch the date and time information, and change the setting
values by using the up (_) or down (_) tabs.
4o Make sure the clock is correctly set, and then touch the (/_) tab.
• The message "Date/Time Set" appears.
If you finish the setting with (_ 1)tab without touching the
(_) tab, the camcorder does not apply the date/time values
you selected and the <Time zone> screen appears again the
next time you start the camcorder.
o You carl set the year up to 2039.
Set "Date/Time Display" to "On." _page 91
Activatingthe (Q) icon moves the time ahead by 1 hour.
• Your camcorder includes a built-in rechargeable battery that retains the date and time
settings even after you turn the camcorder's power off.
• If the rechargeable battery discharges completely, the current date/time values are reset
to the default values. If this occurs, you need to recharge the built-in rechargeable battery
(see below), and then re-set the date and time.
Battery capacity decreases over time and through repeated use. If you find the decreased
usage time between charges becomes significant, ask your local Samsung retailer.
The built-in battery is always recharged when you connect your camcorder to AC power
or attach the battery pack.
If you do not connect the camcorder to AC power or attach the battery pack for two
weeks, the built-in battery fully discharges. If this occurs, charge the built-in battery by
connecting the camcorder to the AC adaptor for 24 hours.
frst trne se inqs
SELECTING
A
LANGUAGE
You can select the language the camcorder
uses for menus and messages. The camcorder
retains the
turn it off.
i o Touch Menu (@)--,Setting
2o Touch up (_)/down
3o Touch "Language,"
(_)
(@) tab.
tab until "Language"
appears.
and then touch the desired OSD language.
4o Touch the Exit (0) or Return (F_}) tab to complete the setting.
•
The camcorder displays the menus and messages in the
language you selected.
"English"
"Espafiol"
"Norsk"
"Magyar"
"Hrvatski"
'"[_,"
-,
-*
-,
-,
-*
-*
"o_q"
-*
"Portugu_s" -*
"Dansk"
-,
"R0m_n_"
-,
"YKpai'HcbKa"-*
"TQrkge"
-_
"Fran(_ais"
"Nederlands"
"Polski"
"B]_.nrapcKH"
"PyccK_ff'
" _i_!"
-,
-,
-,
-"
-'
-,
"Deutsch"
"Svenska"
"Cegtina"
"EAAqvIKo"
"_."
" _>@"
-*
-*
-,
-_
-'
-,
"ltaliano"
"Suomi"
"Slovensky"
"Srpski"
"R_n ''
"37,77_"
-,
-,
-,
-*
-_
,, "Language" options may be changed without prior notbe.
,, The camcorder retains the language you selected even without the battery pack or AC power
adaptor.
,, The date and time format may change depending on the language you selected.
INSERTING AND REMOVING A MEMORY CARD (NOT SUPPLIED}
To insert a memory
card
i o Open the battery/memory card cover by
sliding the battery/memory card cover
switch towards _).
2o
Insert the memory card into the card slot
until it softly clicks.
• Make sure that SD/SDHC Card logo is
facing up and the camcorder is placed
as shown in the figure.
To eiect a memory
card
i o Open the battery/memory card cover by
sliding the battery/memory card cover
switch towards _).
2o Gently push the memory card to eject it.
3o Close the battery/memory card cover by
sliding the battery/memory card cover
switch towards @).
3o Close the battery/memory card cover by
sliding the battery/memory card cover
switch in the direction of _).
• To avoid data loss, turn off the camcorder by pressing the power (_))
button for one second
before inserting or ejecting the memory card.
• Do not format the memory card on a PC.
• Do not remove the power supply (battery pack or AC adaptor) during operations such as recording,
playback, formatting, deleting, and editing. Doing so may damage the storage media or data.
• Do not eject a memory card when it is in operation. Doing so may damage the memory card or
data.
Be careful not to push the memory card too hard. The memory card may suddenly pop out.
Your camcorder supports only SD (Secure Digital) and SDHC (Secure Digital High Capacity) cards.
Card compatibility with the camcorder may vary depending on the manufacturer and the type of
memory card.
35
SELECTING
Compatible
•
•
•
•
•
•
A SUITABLE
memory
MEMORY
cards
You can use SD (Secure Digital) and
SDHC (Secure Digital High Capacity) cards
with this camcorder.
We recommend you use an SDHC (Secure
Digital High Capacity) card.
The camcorder supports SD cards up
to 2GB. We cannot guarentee normal
operation with SD cards bigger than 2GB.
MMC (Multi Media Card) and MMC Plus
are not supported.
Compatible memory card capacity:
SD 1 - 2GB, SDHC 4 - 32GB
Use compatible memory card brands.
Others are not guaranteed to work. A list
of compatible brands is below:
SDHC/SD cards: Panasonic, Sandisk,
TOSHIBA
To record videos, use a memory card that
supports faster write speeds (above SDHC
Class 6 card).
SD/SDHC memory cards have a mechanical
write-protection switch. Setting the switch
prevents accidental erasure of files recorded
on the card. To enable writing, move the
switch up in the direction of the terminals.To
set write protection, move the switch down.
CARD
SDHC(Sec_eD!_a HghCapacy)cards
•
SDHC (Secure Digital High Capacity)
memory card
An SDHC card is a higher version
(Ver.2.00) of the SD card and supports
capacities above 2GB.
SDHC cards cannot be used with
current SD enabled host devices.
Commoncautionsfor memorycards
•
•
•
Damaged data may not be recovered.
We recommend you make a back-up of
important data separately on the hard disk
of your PC.
Turning the power off or removing a
memory card during an operation such
as formatting, deleting, recording, and
playback may cause data loss.
After you modify the name of a file or folder
stored in the memory card using your PC,
your camcorder may not recognise the
modified file.
Handling
•
•
•
a memory
card
We recommend you turn the cameorder
off before inserting or removing the
memory card to avoid data loss.
We can not guaranteed that you can use
memory cards formatted by other devices.
When you format a card, be sure to format
the memory card using this camcorder.
You must format newly-purchased
memory cards, memory cards with data
that your camcorder cannot recognise,
and cards with data saved by other
devices. Note that formatting erases aii
data on the memory card.
• Ifyoucannot
useamemory
cardthathas
been
used
withanother
device,
format
it
withyour
camcorder.
Note
thatformatting
erases
allinformation
onthememory
card.
• Amemory
cardhasacertain
lifespan.
Ifthecardcannot
record
new
data,
you
must
purchase
anewmemory
card.
• Donotbend,
drop,
orsubject
thecard
to
strong
impacts.
Donotplace
foreign
substances
onthe
memory
card
terminals.
Use
asoftdry
cloth
toclean
theterminals
ifrequired.
• Donotpaste
anything
other
than
thelabel
provided
with
thecard
onlabel
pasting
area
ofthecard.
• Becareful
tokeep
thememory
cardoutof
thereach
ofchildren,
whomight
swallow
it.
Notes on use
•
•
•
Samsung is not responsible for data loss
due to misuse.
We recommend using a memory card
case to avoid data loss that can be caused
by moving the card or by static electricity.
After a period of use, the memory card
may get warm. This is normal and is not a
malfunction.
The data storagespeed may differ,depending
on the manufacturer and production system.
SLC (singb
bvel cell) system:
faster write
speed enabbd.
• MLC (muki levelcell)system: orly lower write
speed is supported.
For best results, we recommend using
a memory card that supports a faster
write speed.
Using a lower write speed memory
card for recording video may cause
difficulties when storing.
You may even lose your video data
during the recording.
In an attempt to preserve every bit of
the recorded video, the camcorder
forcibly stores the movie on the memory
card, and then displays a warning:
•
"Low speed card. Please record at
lower resolution."
If you are unavoidably using a low
speed memory card, the resolution and
quality of the recording may be lower
than the value you set. _pages 61-62
The higher the resolution and quality,
the more memory the camcorder uses.
for video
Storage media (Capacity)
4GB
8GB
Quality
1GB
2GB
Super Fine
Fine
5min
7min
10min
14rain
20min
28rain
40min
56min
Super Fine
Fine
Super Fine
Fine
Fine
7min
10min
7min
10min
12min
14min
20min
14min
20min
23min
28min
40min
28min
40min
45min
56min
80min
56min
80min
90min
Super Fine
Fine
10min
13min
20min
26min
40min
52min
80min
104min
Super Fine
Fine
Super Fine
Fine
15min
19min
19min
24min
29min
37min
37min
47min
57min
73min
73min
93min
114min
146min
146min
186min
Super Fine
Fine
26min
33min
52min
65rain
103min
129rain
206min
258min
16GB
80min
112min
112min
160min
112min
160min
180min
160min
208min
228rain
292rain
292rain
372min
412min
516min
(Unit: Approximate
Number
of photos
Quality
minutes of recording)
can record
Storage media (Capacity)
4GB
'
8GB
1GB
2GB
16GB
32GB
Super Fine
Fine
169
338
676
1352
2704
5408
253
506
1012
2024
4048
8096
Nomal
380
759
1518
3036
6072
9999
Super Fine
Fine
Nomal
227
339
454
677
908
1353
1816
2706
3632
5412
7264
9999
510
1020
2040
4080
8160
9999
Super Fine
Fine
Nomal
Super Fine
Fine
Nomal
324
648
1296
2592
5184
9999
486
972
1944
3888
7776
9999
724
404
1447
808
2894
1816
5788
3232
9999
8464
9999
9999
599
1197
2393
4786
9572
9999
889
1778
3556
7112
9999
9999
Super Fine
Fine
Nomal
973
1945
3889
7778
9999
9999
1460
2166
2920
4332
5840
8664
9999
9999
9999
9999
9999
9999
6281
9999
9999
9999
9999
9999
8973
9999
9999
9999
9999
9999
9999
9999
9999
9999
9999
Super
F,ne
((50}
camcorder
Fine
Nomal
(Unit: Approximate
•
•
•
•
•
32GB
160min
224min
224min
320min
224min
320min
360min
320min
416min
456rain
584rain
584rain
744min
824min
1032min
9999
number of images)
Actual recording times may differ depending on the recording corlditions and the subject.
The higher the quality and reselution, the more memory the camcorder uses,
Lower resolution and quality increases the recording time, but the image quality may suffer.
The bit rate automatically adjusts to the image being filmed, Accordingly, recording time may vary,
When a video file exceeds 3.8 GB, the next video file is created automatically,
I-o check the remaining memory capacity, use display(ll-ll)/iCHECK
button, _-.page 31
The maximum number of recordable photos and videos is 9,999,
The items above marked with * represents the default setting value.
USING THE HAND STRAP
Attach the strap and place your hand through the loop to
prevent the camcorder from being dropped.
ADJUSTING
THE LCD SCREEN
The wide LCD screen on your camcorder offers high quality imageviewing.
i o Open the LCD screen with your finger.
• The screen opens up to 90 °.
2o Rotate the LCD screen towards the lens.
•
You can rotate it up to 180 ° towards the lens and
up to 90 ° backward.
To view recordings more conveniently, rotate the
screen 180 ° towards the lens, and then fold it back
to the body,
Excessive rotation may damage the connective hinge between the screen and the camcorder.
,
-
Clean fingerprints or dust on the screen with a soft cloth.
Whenyou rotalethe LCDscreen 180° toward the lens, thescreen displays the lefl and the dght
sides of the subject reversed, as if you are looking at them in a mirror. This is not a problem and
does not affect the image the camera records.
39
BASIC CAMCORDER
POSmON NG
Use both hands while taking a vide() or picture to prevent the camcorder from shaking.
Try to avoid any slight movement while shooting.
Adiusting
Aim the camcorder
the shooting
as shown
1o Hold the camcorder
2o Put your
with
hand through
angle
in the illustration.
both your
hands.
the hand strap.
3o Make sure your footing is stable and there
no danger of colliding with another person
object.
4o Aim and focus
as shown
is
or
in the illustration.
The camcorder's lens angle is approximately 25° higher than the rest of the camcorder
sure you angle the camcorder accordingly for proper shooting.
,, We recommend that you keep the sun behind you while shooting.
,, To avoid underexposing a backlit subject when taking a photo, please use the flash.
body. Make
RECORDING
V_DEOS
This camcorder supports both High Definition(HD)and Standard Definition(SD)image resolutions.
Set the resolutionyou want before recording. _page 61
PRECHECK!
• Open the LCD screen to turn on the camcorder.
• Your camcorder turns on automaticallywhen you open the LCD screen.
• Select the Video (,_) mode by pressingthe MODE button. _page 49
i o Select a subject to record.
•
Adjust the LCD panel to the best angle for recording.
Use the Zoom lever or Zoom button to adjust the size of the
subject. _page 48
2o Press the Recording start/stop button.
• The recording (o) indicator appears, and recording starts.
3o To stop recording,
)ress the Recording
start/stop
button again.
4o The Quick View icon appears on the screen.
Touch the Quick View ((_) icon to view the most recently
recorded video.
• After the Quick View is completed, your camcorder returns to
the standby mode.
•
This camcorder features two Recording start/stop buttons. One is on the rear side of
the camcorder, the other is on the LCD screen. Select the one that works best for you.
\l/
,, If power is interrupted or an error occurs during recording, the video may not be recorded/edited.
,, Samsung is not responsible f_)rany damage caused by a failure of normal recording or playback
operation because of memory card error.
,, Note that damaged data cannot be recovered.
,, Videos are compressed in the H.264 (MPEG--4.AVC) format.
• Eject the battery pack when you haw_ finished recording to prevent unnecessary battery power
consumption.
• For the on screen information display, see pages 20--23.
• For approximate recording time, see page 38.
• Sound is recorded from the internal steree microphone below the lens. Make sure that the
microphone is not blocked.
- Before recording an irrlportant video, make sure to test the recording function to see if there are
any problems with the audio and video recording.
- You can adjust the brightness of the LCD screen in the menu options. Adjusting the LCD screen
does not affect the irrlage being recorded. ",page 94.
- For the functiorls available durirlg recordirlg, see "Recording menu items" '- pages 55--85
- Do not turn off the camcorder or remove the memory card while it is accessing the storage media.
Doing so may damage the storage media or the data in the storage media.
- If the power cable/battery is disconnected or recording is disabled during recording, the camcorder
switches to the data recovery mode. While the camcorder is recovering data, no other function is
enabled. After data recovery, the camcorder switches to the STBY mode. When available recording
time is short, data recovery might fail.
- The menu setting tabs shown on the LCD screen do not afflict the image the camcorder is
recording.
. In the Video/Photo Recording mode, you can set the Quick View menu option. The Quick View
icon appears when you have set the Quick View menu option to On.
,, If you record videos continuously with 1080/60p, data loss may occur for several seconds between
the 1st recorded file and the 2rid recorded file.
CAP""I""URIIII/GPHOTOS 11111
VIDEO RECORD MODE (SI"ILL SHOI"")
Your camcorder can capture photos without interrupting video recording, even in STBY mode.
PREOHECK!
Selectthe Video (_) mode by pressing the MODE button. ",page 49
You can record
photos while recording
videos.
1o Press the Recording start/stop button.
• The recording (®) indicator appears, and recording starts.
2o While recording the video, frame the scene you want to
photograph, and then press the PHOTO button.
• When the (_;_;_) indicator disappears, the camcorder has
recorded the photo image without a shutter sound.
• Video keeps recording, even while you take photos.
• To stop recording, press the Recording start/stop button
again.
<Dual recording during video
recording>
You can also record photos in STBY mode.
'1o Press the PHOTO button in STBY mode.
•
The (_s_) indicator appears, and the camcorder makes the
shutter sound and records the photo.
• You cannot capture photos in the following conditions:
When recording a video in the slow motion record mode.
When recording a time lapse video.
When you record in 1080/60p, 720 _-480/30p
• You cannot use the flash during dual recording.
• The reselution of the captured photos varies according to the
resolutien of the recorded videos:
Movie images recorded in HD resolution (1080/60p, 1080/60i,
1080/30p): 1920xl 080 photo resolution.
Movie images recorded in HD resolution (720/60p, 720/30p,
720+480/30p): 1280x720 photo resolution.
Movie images recorded in SD quality (480/60p): 896x504 photo
resolution.
Movie images recorded in the Web&Mobile: 640x480 photo
resolution.
<Dual recording in STBY mode>
43
RECORDING
PHOTOS
You can take photos and store them in an SD/SDHC
befere recording.
memory card. Set the resolution and quality you want
"-,pages 61 ~62
PRECHECK!
• Open the LCD screen to turn on the camcorder.
• Your camcorder turns on automatically when you open the LCD screen.
• Select the Photo (_)
mode by pressing the MODE button. '-,page 49
i o Select a subject to record.
• Adjust the LCD panel to the best angle for recording.
Use the Zoom lever or Zoom button to adjust the size of the
subject. _page 48
2o Frame the subject in the LCD screen, and half-press the PHOTO
button.
•
Your camcorder adjusts to the ideal aperture and focus
automatically (if "Aperture" and "Focus" are set to "Auto"
_pages 65, 70)
When the subject is in focus, (_) indicator appears green. If it
appears red, readjust the focus.
3o Fully press the PHOTO button.
• The shutter sounds (when "Shutter Sound: On" is set).
• To take additional pictures, wait until the camera has saved
the current photo completely on the storage media.
• If you have set the Quick View function to a desired time, the
camcorder displays the recorded photo image for that time as
soon as you finish taking the photo. _page 85
" Recordable number of photos varies deperlding orl the photo size arld quality.
• The camcorder does not record audio when you take photos.
• If focusing is difficult, use the manual focus function. '-.page 70
- Do not turn off the camcorder or remove the memory card when taking photos
the storage media or data.
- For on-screen display information, see pages 20~23.
- Adjust the brightness or contrast of the LCD screen using the menu. Adjusting
contrast does not affect the recorded image. "-,page 94
,, Photo files conform to the DCF (Design rule for Camera File system) standard,
(Japan Electronics and Information Technology Industries Association.)
,, Use the buik--in flash in low lighting conditions.
_page38
as it may damage
the brightness or
established by JEFfA
IlltlEOOIIltlII}IIING
WIIITIHEASE IIFOIIlt
IIF_III_GIIINNEIIltS
(SMAIII_@""III
_AUTO MOIII}E_
When
then
you use the
adjusts
most
SMART
AUTO
of its settings
function,
the
automatically.
camera
This
detects
function
the
kind
of scene
frees you from
making
you want
detailed
to record,
and
adjustments,
PREOHECK!
Select
the
Video
(,_)
or Photo
(_)
mode
by pressing
the
MODE
bu_ton.
".'page
4{)
i o Press the SMART AUTO button.
•
(_) indicator is displayed. (When you activate the SMART
AUTO mode, the Anti-shake ( _ ) indicator also appears.)
2o Adjust the subject on the LCD screen.
• The camcorder automatically detects a scene (Landscape,
Sunset, etc.) and adjusts the camcorder settings accordingly.
• The appropriate scene icon appears on the LCD screen.
Menu
Movie
Photo
i}_
Portrait shot
Functions
@
@
"_
Outdoor portrait shot at night
@
@
'_}}
Night
@
@
_0
Backlight
@
@
",_
Portrait
@
@
,/\_
Outdoor landscape
@
@
_
CIoee-up shot
@
@
_
Sunset shot
@
@
_
Under strong light shot, such as theatrical performances
X
®
Very bright background
X
®
X
®
landscape
shot
landscape
shot
shot without
under
people
backlight
shot
shot
,_j_
CIoee-up character
shot
_s
CIoee-up shot of a subject with various colors
X
®
[]
Character
X
®
Dawn shot
X
®
_'_
Taking pictures under the condition that the
subject moves much
X
®
},',
®
},',
},',
®
®
shot
_
After fixing to a fixture like tripod, proceed with the
shot under the condition that the subject does not
move for a while
,/_
Nature shot such as forest and leaves
/_
Blue sky shot
<Video mode>
<Photo mode>
3o Press the Recording start!stop button or PHOTO button.
_pages 41,44
To record videos, press the Recording start/stop button.
To record photos, press the PHOTO button.
4o To cancel SMART AUTO mode, press the SMART AUTO button
again.
45
IntheSMART
AUTO
mode,
your
camcorder
detects
thesubject
and
selects
anappropriate
scene
mode
automatically.
• Ascene
icon
appears
according
tothescene
thecamcorder
detects.
• Ifthecamcorder
does
notdetecte
ascene,
the(_!)indicator
appears,
i\
\
,, The SMART AUTO mode automatically sets the following record functions: "iSCENE," "White
Balance," "Aperture,"
"Shutter," "EV," "3D-NR," "Super C.Nite," "Back Light," "Focus," "Face
Detection," "Anti-Shake (HDIS)," "Digital Effect," "Fader," "Tele Macro," "Digital Zoom,"
"ISO," "Dynamic Range," "Flash," "Magic Touch," "Metering,"
"Cont. Shot," "Bracket Shot,"
etc. Cancel the SMART AU[O function if you want to add effects or settings to the images.
• Buttons unavailable during SMART AUTO operation:
Menu (_.,E.u)
tab / Q.MENU button / etc. The camcorder adjusts most settings automatically in SMART
AUTO mode. To set or adjust functions on your own, release the SMART AUTO mode first.
,, The camcorder may not detect the Portrait mode when recording a face, depending on the position
of the face or the brightness of the scene.
CAPTURING
PHOTOS WH LE PLAYING
BACK V DEOS
You can capture photos during video playback.
PRECHECK!
Touchthe Play (_)
tab on the LCD screen to select the Playback mode. '-,page 49
i o Recorded videos appear in a thumbnail index view.
• Touch the up (_)/down
(_) tab to move to the previous/next
page.
2o Touch the video clip you want.
• The camcorder plays the video you selected.
3o Aim the camcorder at the scene you want to photograph, and
then press the PHOTO button halfway.
•
The video playback pauses.
4o Press the PHOTO button fully down.
•
The camcorder captures a still image and records it in JPEG
format.
5o When the photo is recorded on the storage media, touch the
Return (1_) tab to view the thumbnail index. Touch the Photo
(_) tab to view the recorded photo images. _page 49
,, The resdution of the captured photos varies according to the
resdution of the recorded videos:
Movie images recorded in HD resolution (1080/60p, 1080/60i,
1080/30p): 1920xl 080
Movie images recorded in HD resolution (720/60p, 720/30p):
1280x720
Movie images recorded in SD qualky (480/60p): 896x504
Movie images recorded in the Web&Mobile: 640x480
You can capture photos continually duringvideo playback.
i o Select the desired options including the maximum number of images you want to record
continuously using the "Cont° Capture" menu. _page 90
2, Touch video clip you want to play.
3o Press and hold the PHOTO button to capture still images continually.
The number of captured images varies depending on how long you press the PHOTO button,
The camcorder captures photos continuously up to the memory's storage capacity.
• The interval between each continuously captured image varies according to the
continuous capture option. _page 90
This camcorder features 12x intelli - zoom in the Video (4t') mode and 8x optical zoom in the Photo (1_1)
mode to make distant subjects appear closer.
To zoom in
Press the T (zoom) button on the LCD panel
towards T (telephoto).
• The distant subject is gradually
magnified.
or slide the zoom
lever
To zoom out
Press the W (zoom) button on the LCD panel
towards W (wide-angle).
,
The subject moves further away.
w : Wide angle
or slide the zoom
T : Telephoto
lever
The zoom speed of this camcorder is not variable. Use the zoom lever for high speed zoom and zoom
button on the LCD panel for low speed zoom.
,, Using the optical zoom does not degrade the image quality and clarity.
• Use the digital zoom when you want to zoom more than the optical or intelli zoom range. '-'page 80
• Automatic focusing may become unstable when you record using a fast zoom or when you zoom
into a subject that is too far away. If this occurs, use the manual focus function. '.-,page 69
• The minimum distance you cars have between the camcorder and subject while maintairsirsg sharp
focus is about 10cm (about 3.9 inches)Ior wide angle and about 1m (about 39.37 inches) for
telephoto. If you want to shoot a subject close up at a wide angle, use the Tele Macro function.
"_page 79
,, When using the zoom function and holding the camcorder in your hands, use "Anti-Shake (HDISy
for stable recording. ',-,page 76
,, Frequent use of the zoom function consumes more power.
CHANGING
o
THE PLAYBACK
MODE
You can switch the operation mode directly into the playback thumbnail display by touching the
Play (
) tab on the LCD screen. The most recently created file is highlighted in the thumbnail
view.
The camcorder selects the thumbnail display options depending on the standby mode that was
last used. However, you can choose the video (HD or SD) or photo thumbnail view display options
by touching the HD (_--_HD),SD (_sD), or photo (_) tab on the LCD screen.
To switch back into the record mode from the thumbnail display mode, touch the video ([_)/
photo ([_) tab on the LCD screen.
In the video or photo thumbnail display mode, you can directly enter the video or photo record
mode by pressing the Recording
start/stop
or PHOTO button.
Understanding
how to change the operation
modes
You can change the operation modes easily by touching
shown in the following figures:
the LCD screen or using the buttons
as
F@q
F qW
o You can choose the thumbnail display options: 3x2 (==_====),
or Date (_).
o You can switch the thumbnail display options between 3x2 and 4x3 by moving the Zoom 0N/]} lever.
!}7(}
49
PLAYING
BACK V DEOS
You can preview recorded videos in a thumbnail index view. Find the video you want quickly, and playback
directly.
PRECHECK!
Touch the Play ([...}) tab on the LCD screen to select the Playback mode. '-,page 50
io Touch "HD" or "SD°"
•
•
•
Video thumbnails corresponding to the selected video quality
appear on the screen.
To change the current thumbnail view, select the (_), or (@)
tab on the screen.
If you select the thumbnail display by date (_), you can sort
videos by specific date. _page 49
To change the current thumbnail page, touch the up (_) or
down (_) tab.
2o Touch the video clip you want to view.
• The camcorder plays the video and playback control tabs
appear briefly. They reappear whenyou touch anywhere on the
screen.
• You can set playback settings using the "PLay Option" menu.
_page 86
• To stop playback and return to the thumbnails, touch the
Return (_) tab.
Drag your finger from left to right to select the previous video on the
LCD screen. Reverse to select the next video.
• The camcorder may take some time to start playback, depending on the size and quality of the
selected video.
• When you close the LCD screen during playback, the buik-in speaker automatically turns off.
- The camcorder may not play the following video files:
A video recorded ors another device
A video whose file format is not supported ors the camcorder
• You cars use various play options during video playback. '-,page 86
,, You cars play the recorded videos ors a TV or PC. "_pages 121,127
,, If you touch the Menu (_) tab or Q.MENU button during a playback, play is paused and the menu
screen appears.
Various
playback
operations
Playback / Pause / Stop
Playback and Pause alternate when you touch the Playback
Touch the Return (_)
tab to stop playback.
(_)
/ Pause (_)
Search playback
During playback, each touch of the Reverse search (_) / Forward search (_)
speed:
RPS (Reverse Playback Search) rate: x2 -* x4 -* x8 -* xl 6 -* x32 -* x2
FPS (Forward Playback Search) rate: x2 -* x4 -* x8 -* xl 6 -* x32 -* x2
tab during playback.
tab increases
Skip playback
Touch the Reverse skip (:_]) / Forward skip (:_J) tab during playback.
Touching the Forward skip (_)
tab plays the next video.
Touching the Reverse skip (_)
plays the beginning of the scene. If reverse skip (_)
within 3 seconds from the start of the file, the previous video plays.
Slow playback
During a pause, touching the Forward slow (_})
Forward playback slow: xl/2 -* xl/4 -* xl/8
tab reduces
-* xl/16
the playback
the image size while
playing
back
is touched
speed:
Frame by frame playback
Frame-by-frame
playback: When the file is paused, press the frame-by-frame
play the scene forward/backward
by each frame,
Magnifying
the play
(_/_)
button to
the videos:
When you play back videos recorded at "Slow Motion" or
"Resolution:
Web & Mobile," you can adjust the image's viewing size
by using the zoom button or the zoom lever.
Touching the zoom button or pushing the zoom lever toward the T,
'telephoto',
magnifies the image's viewing size.
The camcorder's
built-in speaker plays the recorded
You can adjust the sound volume level from "0~19."
you cannot hear sound.
to Touch the Volume
2o Touch
(_+ I)/(/_))
(_)
sound.
When the level is at "0,"
tab on the LCD screen.
tab to increase
or decrease
If you touch and hold the (1_ )/(1continuously.
audio volume.
) tab, the sound
level adjusts
You can also control the vokJme levels by dragging your finger up or down on the LCD screen.
51
V EW NG
PHOTOS
You can view recorded photos by using various playback functions.
PRECHECK!
Touch the Play ([_,.]) tab on the LCD screen to select the Playback mode. '-,page 49
1o Touch the Photo ([_)
•
•
•
•
•
tab.
The thumbnail view appears.
To change the current thumbnail view, select (/=D_]),or (/_]) tab on
the screen.
If you select the thumbnail display by date (/_0, you can sort
videos by specific date. _page 49
To change the current thumbnail page, touch up (_) or down (_) tab.
You carl sert the recorded flies by face by registering the faces to the
Smart Recognition ([_ ]) list.
2o Touch the photo you want to play back.
• The camcorder displays the photo in full screen and playback
control tabs appear briefly. They reappear when you touch
anywhere on the screen.
• Touch previous image (_)/next
image (E_J) tab to view the
previous and next photo.
•
Place and hold your finger on the previous image (l_)/next
image
(_) tab to search for a desired photo quickly. When you lift off
your finger, the camcorder displays the photo you selected.
3o To return to the thumbnails,
Using the touch
touch
the Return (_)
tab.
panel by dragging:
You can also select the previous photo or the nexl photo by dragging
your finger on the LCD screen.
Dragging to the right: Shows the previous photo image.
-- Dragging to the left: Shows the next photo image.
,, Do not power off or eject the memory card during photo playback. Doing so may damage the
recorded data.
,, Your camcorder may not play back the following photo files normally:
A photo recorded on another device.
A photo with a file format not supported by this camcorder (does not conform to DCF standards)
Loading time may vary depending on the size and quality of the selected photo.
V EW NG A SMDE SHOW
You can view a photo slide show.
PRECHECK!
• This function works in Photo (_) mode only.
° Touch the Play (_q}) tab on the LCD screen to select the Playback mode. '-,page 49
i o Touch
,
o
the Photo
(_,)
tab.
The thumbnail view appears.
To change the current thumbnail
(Q) tab.
page, touch
up (_)
or down
2o Touch the Menu (_)
tab --_ "Slide Show Start"
, The ([_) indicator appears.The
slide show starts from the current
selected photo.
, The camcerder plays back all photos continuously while applying
the slide show options ("Music," 'Interval,"
"Effect," "Play
Option") you have selected. See below.
, You can adjust the background
music's volume level using the
Volume (/:,]) tab while playing back the slide show with music.
, To stop the slide show, touch the Return (_)
tab.
,
Every time you touch the LCD screen, the play related tabs appear
on the LCD screen.
To start the slide show during a playback of a single photo, touch the
slide show ({_2])tab on the LCD screen, or you carl touch the Menu (_)
tab -_ "Slide Show Start."
r.'_
.
U._ _g the Slide Show Optlol/o
_ ' _"'
You can apply the options
to your
in the "Slide
Show
Option"
menus
below
slide shows:
Music : (built-in music plays) "Off," "Random,"
"1 .Mist," "2.Muse,"
"3. Fall," "4. Dawn," "5. Party," "6. Drops," "7.Trip."
Interval: "1 Sec," "3 Sec."
Effect: "Off," "Random," "Effect 1," "Effect 2," "Effect 3," "Effect 4."
Play Option: "Play All," "Repeat All," "Random."
53
ZOOMING
You
can magnify
area of the
DURING PLAYBACK
an image
magnified
photo
you've
played
back.
Touch
up (/-£ iydown
(_)/Iefi
(_)/dght
to view.
PRECHECK!
• This funcSonworks only in the Photo play mode,
° Touch the Play(/;8) tab on the LCD screen to select the Playbackmode, _page 49
i o Touch the Photo (_{) tab.
• The thumbnail view appears.
To change the current thumbnail page, touch up
(_) or down (_) tab.
2o Touch a desired photo to magnify.
•
The selected photo is displayed on the full screen.
3o Adjust the magnification with the Zoom (W/T) button or Zoom
(W/T) lever.
•
•
4o
Magnification starts from the the center of the photo.
While the playback zoom is in use, other images cannot be
selected.
Touch the up (_)/down
(F_;i)/left ( _ ])/right (_)
area you want to see on the magnified photo.
5o To cancel, touch the Return (_)
tab.
tab to view the
([2_)
to select
an
HANDLING
MENUS AND Q MENUS
Follow the instructions below to use each of the menu items listed in this manual.
This chapter uses the "Shutter,"
and "Focus" functions of the video record mode as examples.
Using the MENU (@:_1)
tab
Menu(B)
1. Open the LCD screen to turn on the camcorder.
o Jfyou find the LCD screen is already open and the power is turned off,
press the power ({ _' }) button to turn on the camcorder.
2° Sebct the Video (_t_) or Photo (l_J) mode by pressing the MODE button.
3. Touch the Menu (_)
tab on the touch panel.
" The menu screen appears.
,, To change the current page, touch up (_)/down
(5) tab.
4o Touch "Shutter."
• Some functions cannot be used at the same time. If there is a conflict,
a message appears telling you that the related Iunction will be changed
or disabled. [ouch "Yes," to change or disable the related function
setting, and then continue to set the function values.
5o Touch the desired option. Adjust the setting values accordingly.
,, To exit the menu, touch the Exit (_) or Return ([zs_J)tab.
Using the Q.MENU
_n ! Q/Iu
<This illustration is based
on the default setting value>
button
1. Open the LCD screen to turn on the camcorder.
,, If you find the LCD screen is already open and the power is turned off,
press the power ({ 0-}) button to turn ors the camcorder.
2. Select the Video
button.
(_)
or Photo
(_j)
mode
by pressing
the MODE
3.
Press the Q.MENU
button on your camcorder
to see the
available menu options. The quick menu screen appears.
4o Touch "Focus."
5. Touch the desired option.
,, Adjust the setting values accordingly.
,, To exit the menu, touch the Exit (_) or Return (_)
tab.
,, Some menu items listed on the menu or Q.Menu carl not be used at the same time, or may be
grayed out.
,, For more informatiors, see the Troubbshooting
pages, "134-_ 137/'
,, [o make the procedures described above easy to understand, all the menu setting examples ors
this page are based ors the simplest setting methods.
Menu setting methods carl differ, depending ors the menu options you have chosen.
55
Customizing
You can choose
QoMENU
button
the Q_MENU items
which menu items appear
on the LCD screen.
1o Press the Q.MENU
button.
2o Touch
tab.
the Edit (_)
3o Touch the Q.MENU
new one,
The quick
item you want
when
you press
menu screen
to delete
the
appears.
or replace
with
a
4o Touch the replace/add
(_) or delete (s/s}) tab to make changes.
•
Press the(
) tab to save changes.
• The Q,MENU screen is modified according to your changes.
o You cannot use the Q.MENU button in the SMART AUTO mode,
Fo use the Q.MENU function, disable the SMART AUTO function,
This function is not available while you are recording videos or
photos.
MENU
•
•
TEMS
The items available in each menu vary depending
on the operating
mode.
For operation details, see the page number listed under Page in the table.
_ Recording
menu items
Video (_)
;;
:;;
.....
÷: available, x:
'
notavailable
Photo (1_)
Default value
¢
¢
Auto
Page
60
®
®
61
®
®
X
®
®
X
®
®
1080/60i,
6M(3328 x 1872)
Fine
Off
Normal
Auto
X
®
®
®
®
®
Auto
Auto
Auto
65
65
66
®
®
®
X
0
On
66
67
®
®
®
X
®
®
On
Off
Off
67
68
68
X
®
Off
69
62
62
63
64
Video (_)
Photo (1_)
@
@
@
@
X
@
X
@
@
@
@
@
@
X
@
@
@
X
@
X
@
@
l!i_i_!_@_i_!i_i_i_i_i!i_@_!_@!_!_i}i}_i@iii_!!!ilii_l_{_l_i_!_!!_li_i!_ii
X
@
X
@
@
@
@
X
Delault value
Auto
'
Page
70
Off
Off
Multi
Off
Normal
Off
Off
Off
Medium
Off
Off
Off
Off
Off
71
75
76
76
77
78
79
79
80
80
81
82
82
83
@
@
_i_!ii!i_@!ii!_(i_i!_!i_!_!!_i_!_!_!@_@_!_i_i_i_i_i_i!i_l_i_i_i_i!_i!_i!_i!_i_i!i!_
On (Video)/1 Sec(Photo)
@
@
Off
85
86
@ : available, X : not available
Playback
menu items
Vide0(Thumbnail) 'Video(Single)
Photo(Thumbnail!
Default Value
Single)
x
Play All
@
@
x
@
X
x
@
@
@
@
@
@
Off (Single)
@
@
x
@
@
x
@
@
x
@
X
x
@
@
x
Off (Singb)
@
@
x
1 Cut
@
@
@
X
X
@
X
X
@
Random
@
X
X
1Sec
@
X
X
Random
X
X
@
Play All
X
X
@
i!!!!!i!!!i!!!i!!!i!!!i!!!i!!!i!!!i!!_!i!ii@(_iii_L_!_!i_!!_!_!_!i!i_il_ll!_ii_ii_ii_ii_ii_ii_ii_i
¸ii!!i
@
@
@ : available,
86
89
108
105
112
87
105
106
107
89
90
90
53
53
53
53
53
114
X : not available
57
Setting
menu items
m
Default value
£
Ty
£ 88
;
JAN/01/2010
12 Hr
@ii
@ ro!
Off
B
BuB
BBi_ B BB ;
oti
B!
ffs
;:
n B BY ;
B
_re:
oon
BBi B
:
;;
TV
98
92
93
Series
Home
n
n Bot
ii
B;
;;
91
91
92
Brightness 18, Color 18
Off
91
94
94
On
On
On
95
99
99
Video Mode
5 Min
95
100
5 Min
On
96
97
Mass Storage
16:9
101
102
Component
:
On
On
: fa
Or]
8 8i:
Page
97
On
1080i
103
101
103
100
103
34
104
104
Q_MENU _TEMS
Your
button
camcorder
provides
lets you access
Recording
the
quick
menus
functions
that
and
contain
start
functions
changing
you frequently
settings
use. Pressing
the Q.MENU
directly.
menu items (default:)
Video
(_)
Photo
(_)
Default value
Page
1080/60i,
6M(3328x1872)
0
61
®
®
®
®
÷
X
Off
68
÷
Off
69
®
Auto
)
i_!lli_i_iiiiii_iiiii_i_!_!_¢ll_iii#_l_i_i!l_l!l_i_i_l!i!i!i!i!l_lllll_il_l_ili_illlllll!liiiiiilil!lilil_
,
®
66
70
® : available,
®back
X : not available
menu items (default:)
Video(Fhumbnail)
ot
Video(Single)
Photo(ThumbnaiIZ
Single)
i
Default value
Page
®
®
X
89
®
)
X
108
)
)
®
53
®
®
®
105, 113
)
®
®
®
®
X
105
®
®
X
106
®
)
X
107
)
)
®
Off
112
114
® : available,
X : not available
59
Using the i-SCENE function, you carl select a setting that matches the scene you
are shooting (Sports, Portrait, etc.). Based on your selection, the camcorder sets
the appropriate shutter speed and aperture automatically for optimal recording.
PRECHECK!
Selectthe Video(_) or Photo (1_) mode by pressingthe MODEbutton."*page 49
1o Touch the Menu (_-_l)tab --_iSCENE."
2o Touch a desired submenu item.
• To change the current page, touch up (_)/down
(_)
3o To exit the menu, touch the Exit (Q) or Return (_)
tab,
tab.
Functions
Movie
Photo
Jse for the regular recording conditions. The camcorder automatically adjusts
he shutter speed and the aperture values for optimum recording.
Jse to record in dark places or at night. However, an afterimage may appear with
moving subject. If you have difficulty with automatic focusing, adjust the focus
_anually.
:or recording rapidly moving subjects such as people engaged in sports.
®
®
®
®
®
®
:or recording portraits. Use this setting to capture natural skin tone.
:or recording subjects under strong light. For example, stage spotlights in theaters.
:or recording in a place with intense light refl ection, such as a beach or ski resort.
®
®
®
®
®
®
:or recording food images using high color saturation
:or recording subjects under low light conditions, such as candles at night time.
®
®
®
®
This function improves the subject's skin tone (for example, by removing facial
:lark spots) and gives a brighter color tone to the subject's face.
X
®
:or recording moving subjects such as active children. The camcorder
he optimal recording settings automatically.
X
®
X
®
X
®
X
X
®
®
X
X
®
®
:or recording
landscapes
and outdoor
selects
scenes.
:or recording close-ups.
:or recording
:or recording
close-ups
sunsets.
of text.
:or recording at dawn.
:or recording fireworks with the optimal recording settings selected automatically.
Setting the/SCENE mode by dragging on the touch panel:
,, Touch and drag to the lelt or right side on the LCD screen. You can
switch the setting values for the SCENE mode by simply touching
the LCD screen.
You
can
select
thereselution
ofthevideo
toberecorded.
PRECI-IECK!
Select Video (_')
or Photo (_)
mode by pressing the MODE button. '-,page 49
i o Touch the Menu (l_) tab -_"Resolution."
2o Touch a desired submenu item.
3o To exit the menu, touch the Exit (D) or Return ([_/) tab.
• 1080/60p (,_): Records in the HD (1920x1080/60p) format.
1080/60i (_): Records in the HD (1920x1080/60i) format.
1080/30p (_): Records in the HD (1920x1080/30p) format.
720+480/30p
(_): Records both in the HD (1280x720/30p) and SD (720x480/30p) fermats.
720/60p (_0_): Records in the HD (1280x720/60p) format.
720/30p (_): Records in the HD (1280x720/30p) format.
480/60p (_;): Records in the SD (720x480/60p) format.
Web & Mobile (_): Records videos in the VGA (640x480/30p) resolution at Normal image quality.
This setting makes videos easier to upload to a web site without down-sizing via a compression
program. Also, this may be the best option for viewing on mobile devices.
12M (4000x3000)(_),
2M (1920xl 080)(_),
9M (3456x2592)(_),
VGA (640x480)(_)
6M (3328x1872)(_),
5M (2592x1944)(_),
"60p" indicates the camcerder will record in progressive scan mode at 60 frames per second.
• "60i" indicates the camcorder wi, record in interlaced scan mode at 60 fields per second.
• "30p" indicates the camcerder will record in progressive scan mode at 30 frames per second.
• Recorded Iiles are encoded with Variable BitRate (VBR). VBR is an encoding system that
automatically adjusts the bitraIe according to the recording irrlage.
The available video recording time diff_rs according to the video resolution you select.
The camcorder takes photos at 10 mega pixels. When you set the resolution to 12M, the
camcorder up--scales the photos you take to 12 mega pixels.
61
You
can
select
thequality
ofthevideo
toberecorded.
PREOHECK!
Select Video (_)
or Photo (_11) mode by pressing the MODE button. '-*page 49
1o Touch the Menu (_)
tab -_ "Quality."
2o Touch a desired submenu item.
_
3o To exit the menu, touch the Exit (Q) or Return (_)
__
tab.
E_
• Super Fine (_!_): Records video in super fine image quality.
• Fine (1_): Records video in fine image quality.
• Super Fine (_(:._):Records photos in super fine k_age qualky.
• Fine (_): Records photos in fine k_lage quality.
, Normal (_): Records photos in normal image quality.
Slow Motion
You can record videos in slow motion. "Slow Motion" is great for analyzing a golf swing or a viewing a bird in
flight.
PREOHECK!
Select the Video (_)
mode by pressing the MODE button. _page
1o Touch the Menu (_i) tab -*"Slow
49
Motion."
2o Touch a desired submenu item.
3o To exit the menu, touch the Exit (Q) or Return ([_ })tab.
• Off : Disables the function.
• [SD]240frame/sec
(_) : Records 240 frames per second in
"432 x 324" resolution.
• [SD]420frame/sec
(_) : Records 420 frames per second in
"400 x 224" resolution.
[SD]720frame/sec
(_) : Records 720 frames per second in
"208 x 116" resolution.
Understanding
SlowMotion
ex)The
number
offrames
thecamcorder
uses
torecord
video
inonesecond:
When
Slow
Motion
issettoOff:
60frames
per
second
When the Slow Motion function
is set to [SD] 240frame/sec:
240 frames per second
• When recordirlg in slow motion, the camcorder stops recording after 10seconds.
Howew_r, when
you play back the same recording, it plays back for the fellowing times:
240 Frame/Sec: 40 seconds
420 Frame/Sec: 70 seconds
720 Frame/Sec: 120 seconds
• Recording continues for 10 seconds even if you press the Recording start/stop button to stop it.
• The camcorder does not record audio while recording in slow motion.
• If you have the camcorder connected to a FV while it is recording in slow motion, it does not display
the images it is recording on the TV screen.
You cannot capture photos in slow motion.
The Q.MENU function is not available while the camcorder is recording slow motion videos.
The image quality of "Slow Motion" recordings is not as good as that of normal recording.
This function lets you create a sharper or softer image by processing the image after you've recorded ttTe photo.
PRECNECK!
Select the Photo (1_) mode by pressing the MODE button. _page
49
i o Touch the Menu (_i) tab -*"Sharpness."
2o Touch a desired submenu item.
3o To exit the menu, touch the Exit (D) or Return (E_d)tab.
Soft (1_1):Smooths the edges of photo images. Makes edges and images appear softer.
Normal (r&q):The photo images appear with sharp edges and are suitable for printing.
• Sharp (1_1):Sharpens the edges in photo images further.
White
Using
Balance
the White
are shooting
color
Balance
(Daylight,
of the
subject
function,
you can select
Fluorescent,
so the
colors
or Photo
(_
etc.),
in your
Based
recording
a setting
on your
that
matches
selection,
or photo
the
the light
eameorder
illuminating
automatically
look natural,
PREOHECK!
Select
Video
(_)
1o Touch the Menu (_)
) mode
by pressing
tab -*"White
the
MODE
bu_ton.
_page
4{)
Balance."
2o Touch a desired submenu item.
3o To exit the menu, touch the Exit (_) or Return (
) tab.
-
Auto: Sets the whRe balance automatically
in response
Daylight
(©): For recording outdoors in char, natural light.
to the available
light.
•
Cloudy (c%'>): For recording in the shade or cloudy weather.
Fluorescent ( {q ): For recording under white fluorescent lights.
•
Tungsten
(@): For recording under halogen lamps and incandescent
lights.
Custom WB (_c_): Lets you set the white balance manually to match the light source or situatbn.
To set the white balance manually
Touch the Menu (_F_u})
tab -*"White Balance" -_"Custom WB."
The "_) Set White Balance'indicator
appears.
2o Fill the screen with a white object, and touch OK (_) tab.
• The camcorder stores the white balance setting.
3o To exit the menu, touch the Exit (Q) or Return (_) tab.
• The camcorder applies the stored white balance the next time
you record.
Understanding
White
Balance:
The Whke balance (WB) process removes unrealistic color casts, so that whke
objects appear white in your photos and all other colors look nalural. Proper
whke balance has to take into account the "color temperature" of a light
source, which refers to the relative warmth or coolness of white light.
o
o
o
o
o
When setting the white balance manually, the subject must be white, otherwise,
your camcorder may not detect an appropriate setting value.
The adjusted setting remains until you set the white balance again.
During normal outdoor recording, setting White Balance to "Auto" may provide
better results.
Cancel the digital zoom function for a clear and precise white balance setting.
Reset the white balance if light conditions change.
the
subject
adjusts
you
the
ISO sensitivity is a measure of how rapidly the camcorder reacts to a light source, If _ou leave the aperture
(lens opening) setting unchanged, the higher the ISO sensitivity, the brighter your images will be,
PRECHECK!
• This function works in Photo ( I_ ) mode only.
• Select the Photo ( _ ) mode by pressing the MODE button, ,-,page 49
1o Touch the Menu (!MFgO))
tab _"ISO."
2o Touch a desired
submenu
3o To exit the menu, touch
•
•
•
•
•
item.
the Exit _)
or Return (
) tab.
Auto: Automatically sets the ISO to compensate
for various lighting conditions (ISO 3200).
80 (_):
For bright lighting conditions.
100 (_):
For most situations except when lighting is poor or when higher shutter speeds are required.
200 (L_°t): For taking photos of moving subjects. The recorded image might be noisy at the minimum level.
400 (_i)/800
(_})/1600
(_)/3200
(a_): The image may be grainy. These settings help brighten a subject
surroundings.
in dark
Higher ISO sensitivity might produce grainy (noisy) effects in photo images,
The camcorder adjusts the aperture (lens opening) automatically depending on the subject and recording
conditions, You can also manually adjust the aperture,
PRECHECK!
Select the Video (_)
or Photo ( I_ ) mode by pressing the MODE button. _-page 49
1o Touch the Menu (_l)
tab ---"Aperture"
_"Manual."
2o Touch the decrease ( - })or increase (i o_) tab to adjust the aperture.
.
Aperture value can be set between "3.5" and "t 6" (f3.5 to f16).
3o To exit the menu, touch Exit (D) or Return (_)
tab.
,,
Auto:
,,
Manual
Sets the
aperture
(_][_=_):
Understanding
value
automaIically.
Lets you set the aperture
value
manually.
Aperture
You can adjust the aperture value to control the amount of light reaching
sensor. The smaller the aperture value, the greater the amount of light.
The aperture value needs to be adjusted in the following cases:
•
•
•
the image
When shooting against the light or when the background is too bright.
When shooting in a reflective natural environment such as at the beach or when skiing.
When the background
is overly dark (for example, night scenery).
65
The
camcorder
automatically
sets
theshutter
speed
depending
onascene's
brightness,
You
carl
alse
manually
adjust
theshutter
speed,
PRECHECK!
Select the Video (_)
or Photo ( I_ ) mode by pressing the MODE button. _page
i o Touch the Menu (_)
49
tab -*"Shutter."
2o Touch a desired submenu item.
3o To exit the menu, touch the Exit (D) or Return (l,q) tab.
* Auto: The camcorder automatically sets the appropriate shutter speed value.
o Manual (z_ 1/XX): Touch decrease ( - ) or increase ( o_L
.)tab to adjust the setting values.
You can choose from the following values:
- Video Record mode: 1/60, 1/100, 1/250, 1/500, 1/1000, 1/2000, 1/4000, or
1 /10000.
Photo Record mode: 1, 1/2, 1/4, 1/8, 1/15, 1/30, 1/60, 1/125, 1/250, 1/500, or 1/1000.
Using the EV function, you carl manually adjust video and photo image bdghtrless.
PRECHECK!
Select Video (4_) or Photo (1_) mode by pressing the MODE button. _page
49
i o Touch the Menu (IM_U!)
tab -*"EV."
2o Touch the decrease (':::i:)or increase _o*-i)tab to adjust the setting
values. You can choose from:
•
EV values (sa): -2.0EV, -1.6EV, -1.3EV, -1.0EV, -0.6EV, -0.3EV,
0EV, +0.3EV, +0.6EV, +1.0EV, +1.3EV, +1.6EV, +2.0EV
3o To exit the menu, touch Exit (D) or Return (_)
tab.
Understanding
EV(Exposure Value)
Exposure value is the total amount of light allowed to fall on the
photographic medium (Image sensor) during the process of taking
photos or videos. The higher the number, the greater the exposure.
Jfyou have any questions or comments relating to Samsung
products, please contact the SAMSUNG customer care
center Samsung Electronics America, inc.
1-800-SAMSUNG
(726-7864)
www.samsung.com/us
RollS
compliant
Our product
complies
with
"The Restriction
Of the use of certain
Hazardous
Substances
in electrical and electronic
equipment",
and
we do not use the 6 hazardous materialsCadmium(Cd),
Lead (Pb),
Mercury
(PBBs),
(Hg), Hexavalent
Poly Brominated
Chromium
Diphenyl
(Cr +6), Poly Brominated
Ethers(PBDEs)-
Biphenyls
in our products.