1
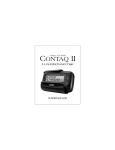
1-Line Alpha/Numeric Pager
Operating Guide
UPZZ01659ZZ
FCC Information
Your pager might cause TV or radio interference even
when it is operating properly. To determine whether
your pager is causing the interference, turn it off. If the
interference goes away, your pager is causing the
interference. Try to eliminate the interference by
moving the pager away from the receiver.
If you cannot eliminate the interference, the FCC
requires that you stop using your pager.
Modifying or tampering with your pager’s internal
components can cause a malfunction and void your
FCC authorization to operate it. If your pager is not
performing as it should, contact your pager service.
This device complies with Part 15 of FCC Rules.
Operation is subject to the following two conditions:
(1) this device may not cause any harmful
interference, and (2) this device must accept
interference received, including interference that may
cause undesired operation.
©1997 Uniden America Corporation
All rights reserved.
Printed in the United States of America
Contents
Introduction. . . . . . . . . . . . . . . . . . . . . . . . . . . . . . . 2
Using this Owners Guide . . . . . . . . . . . . . . . . . . . . . . . 3
Controls. . . . . . . . . . . . . . . . . . . . . . . . . . . . . . . . . 4
Display Indicators . . . . . . . . . . . . . . . . . . . . . . . . . . . 5
Belt Clip/Holster . . . . . . . . . . . . . . . . . . . . . . . . . . . . 6
Illuminated Display. . . . . . . . . . . . . . . . . . . . . . . . . . . 7
Care and Maintenance . . . . . . . . . . . . . . . . . . . . . . . . . 7
Installing and Using a Battery . . . . . . . . . . . . . . . . . . . . . 8
Installing the Battery . . . . . . . . . . . . . . . . . . . . . . . . 8
Low Battery Alarm/Warning . . . . . . . . . . . . . . . . . . . . 9
Memory Saver . . . . . . . . . . . . . . . . . . . . . . . . . . . 9
Power On/Off . . . . . . . . . . . . . . . . . . . . . . . . . . . 9
About Your Pager’s Functions. . . . . . . . . . . . . . . . . . . . 10
Set the Time and Date . . . . . . . . . . . . . . . . . . . . . . . . 11
Setting the Time . . . . . . . . . . . . . . . . . . . . . . . . . 11
Setting the Date . . . . . . . . . . . . . . . . . . . . . . . . . 12
Choosing the Alert Type . . . . . . . . . . . . . . . . . . . . . . . 13
Using the Alarms . . . . . . . . . . . . . . . . . . . . . . . . . . . 14
Setting a Time Alarm . . . . . . . . . . . . . . . . . . . . . . . 15
Setting the Date Alarm . . . . . . . . . . . . . . . . . . . . . . 16
Choose and Change Options . . . . . . . . . . . . . . . . . . . . 17
Time Stamp On or Off . . . . . . . . . . . . . . . . . . . . . . . 17
Quick View On or Off . . . . . . . . . . . . . . . . . . . . . . . 18
Sample Alert On or Off . . . . . . . . . . . . . . . . . . . . . . 19
Word Wrap On or Off . . . . . . . . . . . . . . . . . . . . . . . 20
Managing Message Files . . . . . . . . . . . . . . . . . . . . . . . 21
Understanding the Memory Status Reminder . . . . . . . . . . 21
Reading Personal Messages . . . . . . . . . . . . . . . . . . . 22
Receiving/Displaying Messages . . . . . . . . . . . . . . . . . 23
Unreadable Message. . . . . . . . . . . . . . . . . . . . . . . 25
Message Freeze . . . . . . . . . . . . . . . . . . . . . . . . . 25
Tone Only . . . . . . . . . . . . . . . . . . . . . . . . . . . . 26
Unread Message Reminder . . . . . . . . . . . . . . . . . . . 26
Reading the Mail Drop Message . . . . . . . . . . . . . . . . . 27
Adding an Alert to a Mail Drop Message Type . . . . . . . . . . 28
Deleting a Mail Drop Message . . . . . . . . . . . . . . . . . . 29
Deleting Individual Personal Messages . . . . . . . . . . . . . 30
Deleting All Messages . . . . . . . . . . . . . . . . . . . . . . 31
Adding Personal Memos to the Notebook . . . . . . . . . . . . . 32
1
Introduction
Congratulations on your purchase of the CONTAQ I
ALP 9080 one-line alpha/numeric pager. This
compact, state-of-the-art pager has many features
including:
o 22 Notebook Memo Locations
o A Mail Drop Location
o 19 Personal Message Locations
o Clearvue™ Illuminated Display
o Multiple Alert Tones
o Silent or Vibrate Alerts
o Time/Date Alarms
o Out-of-Range Indicator
To ensure that you understand all of the pager’s
features and capabilities, please read this Operating
Guide carefully before you use the pager.
Visit our internet site:
http:\\www.uniden.com
2
Using this Owners Guide
o Throughout this Operating Guide the action
(such as: press a key) is first, followed by a display
of the results.
Example:
Press N, you will see:
o If you want to cancel or exit a mode, press O.
o If (while setting any function) you do not press any
key for about 8 seconds, the display returns to
standby. If this happens, start over at step 1.
o When you see only the f key in a description,
you can usually use either the f key to scroll
forward or the k key to scroll backward.
o To rapidly change a setting (such as the hour or
minutes when setting the time), hold down the f
or k key.
o When we say “press this key”, press and release
the key. If you need to press and hold, we will say
that.
o These displays are general representations of
what you will see. Your paging service provider
may change the mail drop wording.
3
Controls
[ To stop the page alert, press any key. To light the
display, press and hold any key for two seconds.
1. Backward Scroll Key (f)
2. Enter/Menu Key (N)
3. Forward Scroll Key (k)
4. Speaker
5. Display (see next page)
6. Power/Escape Key (O) – hold to turn power on/off
or press and release to return display to standby.
7. Strap attachment
4
Display Indicators
1. Out-of-Range Indicator and first character of the
12-Character Display
2. Alert
3. Alarm
4. Time
5. Options
6. Mail Drop/Info Service Message
7. Delete
8. Repeat
9. Month/Day
10. 12-Character Display
11. Message Status Indicator
5
Belt Clip/Holster
o Line up the groove on the pager back with the
groove on the holster. It fits in the holster only one
way.
o Slide the pager into the holster. It fits securely.
o Use the spring clip to attach the holster to your belt
or pocket.
o You can view your messages while the pager is in
the holster.
o To use the function keys, slide the pager out of the
holster.
6
Illuminated Display
o Turn on your pager.
o At the standby display, press and hold N, f
or k for about two (2) seconds.
o The display lights for about five (5) seconds.
[ Heavy use of the Clearvue™ illumination shortens
battery life.
Care and Maintenance
o Keep the pager dry. If it gets wet, wipe it dry
immediately.
o Use and store only in normal temperature
environments.
o Keep the pager away from dust and dirt.
o To clean the pager, wipe occasionally with a damp
cloth. Do not use harsh chemicals.
7
Installing and Using a Battery
Your pager requires one AAA battery for power.
Caution: Always use a battery of the specified size
and type.
Installing the Battery
1. Release the battery
compartment lock.
Slide and lift off the
battery cover.
2. Insert a AAA battery in
the compartment
according to the polarity
symbols (+ and -)
marked inside.
3. Match the dots, slide the
battery cover on and
slide the lock-tab down.
8
Low Battery Alarm/Warning
If the battery power is low,
BATTERY LOW appears
in the display once an hour
while a low-beep sounds for 4 seconds.
[ When the battery low indicator appears, replace
the battery as soon as possible to keep your pager
working at peak performance.
Memory Saver
Your pager’s built-in memory saver stores messages
and settings for at least two minutes while you change
the battery or after the battery loses power.
Power On/Off
o To turn power on, press and hold O for about a
second. If you chose an audio or vibrate alert
(page 13), it sounds or buzzes twice.
o To turn power off, press and hold O for about 2
seconds. You will hear a loud beep.
9
About Your Pager’s Functions
There are six choices in the function menu:
a Alert Set - change alert type.
b Alarm Menu - set alarm for time and date.
c Time Menu - set the time and date.
q Option Menu - time stamp, quick view, sample
alert and word wrap.
a Message File - view and/or delete mail drop and
memo messages.
g Delete All - deletes all personal and mail drop
messages.
10
Set the Time and Date
Setting the Time
From the standby display,
go to Time Set (as shown):
1. To select the hour,
press f or k until you
reach the hour you want.
2. To store your selection and
move to the minutes display,
press N.
3. To set the minutes and choose
between 12 or 24 hour mode,
press f or k.
4. To store your selection in
memory, press N.
The display returns to standby.
11
Setting the Date
From the standby display,
go to Date Set (as shown):
1. To select the month,
press f or k until you
reach the month you want.
2. To store your selection and
move to the day display,
press N.
3. To select the day,
press f or k until you
reach the day you want.
4. To store your selection
in memory, press N.
The display returns to standby.
12
Choosing the Alert Type
Go to the Alert Set Menu (as shown):
To listen to the tones as you
select them, set Sample Alert
under the Options Menu
on page 19.
1. To cycle through the alert
types, press f or k.
2. To store your selection
in memory, press N.
3. To toggle between Auto Reset
(alert tone stops after 8 seconds)
and Non-stop (alert tone
sounds until you press any
key), press f or k.
The Silent alert does not use
the Auto Reset or Non-stop
options.
4. To store your selection in
memory, press N.
The standby display returns
showing the audio alert symbol (a).
13
Using the Alarms
You can set the pager to sound an audible or vibrate
alarm at the same time every day, and/or at a specific
time on a certain date.
When a set alarm time arrives – even if the pager is
turned off – the pager repeatedly sounds a unique
alert tone (different than any message alert tone
pattern) or vibrates for about 20 seconds. To stop the
alarm sooner, press any key.
o The bell icon appears in the display when you turn
on any one of the two alarms (daily and/or date).
o The bell icon disappears from the display only
when both alarms are turned off.
14
Setting a Time Alarm
To set an alarm for a specific time every day:
Example: Every day at 5:54 p.m.
From the standby display,
go to Time Alarm (as shown):
1. To set the alarm on or off,
press f or k.
2. To enter your selection,
press N.
3. To select the hour,
press f or k until you
reach the hour you want.
4. To store your selection and
move to the minutes display,
press N.
5. To set the minutes,
press f or k until you
reach the minute you want.
Press N.
6. To set the alarm alert type
(AUDIO ALARM or VIB ALARM),
press f or k.
7. To store your selection in memory, press N.
The display returns to standby.
15
Setting the Date Alarm
To set an alarm for a specific date and time:
Example: February 14, at 5:54 p.m.
From the standby display,
go to Date Alarm (as shown).
1. To set the alarm on or off,
press f or k.
2. To enter your selection,
press N.
3. To select the month,
repeatedly press f or k.
4. To store your choice and
move to the next selection,
press N.
5. To set the day, hour, minutes,
and alarm alert type
(AUDIO ALARM or
VIB ALARM), repeat steps 3
and 4.
6. To store the date alarm
settings in memory,
press N. The standby
display appears.
16
Choose and Change Options
o
o
o
o
Time Stamp
Quick View
Sample Alert
Word Wrap
[ To “escape” from any Option menu, press O.
[ When ? appears above the selected option,
that option is on.
Time Stamp On or Off
Time stamp adds the day, time
and date that a message came in.
From the standby display,
go to Time Stamp (as shown):
1. Press N.
The current setting appears.
(The default setting is on.)
2. To change the setting,
press f or k.
3. To store the selected
setting and return to
standby, press N.
17
Quick View On or Off
Quick View lets you set your pager to automatically
display each message when you receive it.
From the standby display,
go to Quick View (as shown):
1 Press N.
The current setting appears.
2. To change the setting,
press f or k.
(The default setting is on.)
3. To store the selected setting
and return to standby, press N.
18
Sample Alert On or Off
When you turn Sample Alert on, you can hear or feel
a sample of the alert when you are setting it.
From the standby display, go to
Sample Alert (as shown):
1 Press N.
The current setting appears.
(The default setting is on.)
2. To change the setting,
press f or k.
3. To store the selected setting
and return to standby, press N.
19
Word Wrap On or Off
If a word in the display is more than 12 characters,
Word Wrap prevents breaking it up. To see complete
(unbroken) words in the display, turn word wrap on.
From the standby display,
go to Word Wrap (as shown):
1 Press N.
The current setting appears.
(The default setting is on.)
2. To change the setting,
press f or k.
3. To store the selected setting
and return to standby, press N.
20
Managing Message Files
There are two types of messages:
o Personal Messages - your pager holds up to 20
personal messages that you can read and delete.
If you have a mail drop message, your pager holds
up to 19 personal messages.
o Info Service (Mail Drop) Message that you can add
an alert to or delete.
[ The Notebook holds the mail drop message and
22 personal notes that you can enter.
Understanding the Memory Status
Reminder
o No messages to be read or
in memory.
o Unread messages messages that haven’t be read.
o Messages that have been read.
o Your pager’s memory is full.
You need to read and delete
your messages.
21
Reading Personal Messages
Your pager can store up to 20 personal messages, in
the order received. If there is a mail drop message,
the pager stores only 19 personal messages.
o If the pager’s memory is full when it receives a new
message, FULL appears on the display and the
new message replaces the oldest message.
[ To prevent the pager from automatically
replacing personal messages you want to keep,
delete each unwanted message after you read it.
o To read the most recent
message (20 through 01)
from the standby display,
press f.
o To read the oldest message (01 through 20) from
the standby display, press k.
22
o When you receive or read a message, the pager
automatically scrolls through the it – displaying
each screen for 8 seconds. Then, the standby
display reappears. You can press f or k to
move to the next or previous screen. Or, you can
press N to immediately review the message.
o Press O to return to the standby display.
Receiving/Displaying Messages
Receiving Messages with Quick View On and
Time Stamp Off
1. When the pager receives
a message, it beeps (or
vibrates) and the message
displays on the screen.
2. To scroll through the
message, press f .
To scroll through other
stored messages, press f or k.
[ To delete the message, see pages 29, 30, and 31.
3. To return to the standby display,
press O.
23
Receiving Messages with Quick View Off and
Time Stamp On
1. When the pager receives
a message, it beeps (or
vibrates) for 8 seconds.
To immediately stop the alert, press any key.
2. To see the message,
press f.
3. To read the rest of the
message, press N,
then, f.
4. When you have read the
message, you can scroll
through the next message by
pressing f.
5. To return to the standby
display, press O.
24
Receiving Messages With Quick View and Time Stamp On
1. When the pager receives a
message, it beeps (or vibrates)
for about 8 seconds.
2. The message automatically
appears on the display. If the
message is longer than
12 characters, the second part of the message
appears after a second.
3. To stop the alert, press any key.
The display shows you have a
message in memory.
Unreadable Message
If a message is received that is
partially or totally unreadable, the
unreadable characters are
replaced with a lower case “u”.
Message Freeze
When viewing a message, press and hold f. The
message remains as long as you hold f.
25
Tone Only
A “tone only” message doesn’t
have any numeric characters.
It could be an unreadable message,
an error or a preset message that alerts you to check
your voice mail.
Unread Message Reminder
If you are using the Auto Reset alert mode (see
Choosing the Alert Type on page 13), and, you do not
read a message within 3 minutes, the pager sounds
an 8-second series of reminder alert tones. This
unread message reminder repeats up to 10 times or
until you read that message. If you are using the
Non-stop alert mode, the unread message reminder
alert sounds continuously until you read that
message.
[ If you use Non-stop, the alert sounds until you
read the message or your battery runs down.
26
Reading the Mail Drop Message
[ When you receive a Mail Drop message,
e appears in the standby screen.
From the standby display
go to Message File
(as shown):
[ In the example,
Time Stamp is on.
[ The Mail Drop message
is 01 in the Notebook.
1. Press N.
2. To read all the message,
press f or k.
3. Press O to return to the
standby display.
27
Adding an Alert to a Mail Drop
Message Type
[ In our example, the
TIME STAMP is on.
Follow the steps to go
to the Message File:
1. With the message in the
display, press N.
Two options appear Alert (q) and Delete (g).
The g is selected and
flashing.
2. To select Alert (?),
press f. Our
example’s current
setting is ALERT OFF.
3. To change the setting from
OFF to ON, press N.
[ There is no confirmation message. The alert
[
changes to ON and the display returns to the
beginning of the message.
To Cancel the delete, press O.
28
Deleting a Mail Drop Message
In our example,
TIME STAMP is on.
Follow the steps to go
to the message:
1. With the message in the
display, press N.
Two options appear - Alert
(q) and Delete (g).
The g is selected and
flashing.
2. Press N.
The confirmation message
“DELETE OK?” displays.
[ To Cancel the delete,
press O, f or k.
3. Press N again.
4. After about 2 seconds,
the standby appears.
29
Deleting Individual Personal
Messages
Go to the message that you want to delete
(as shown below).
1. Press N.
The Delete (g) option
appears. The g flashes.
2. To select Delete (g),
press f.
3. Press N.
“DELETE OK?” appears.
4. To delete the message,
press N.
To cancel (not delete the
message), press O (escape/cancel).
5. After about 2 seconds, the standby display
appears.
30
Deleting All Messages
From the standby display,
go to Delete All (as shown):
1 Press N.
DELETE ALL appears.
2. Press N.
The confirmation message
“DELETE OK?” displays.
[ To Cancel the delete,
press O, f or k.
3. Press N again.
4. After about 2 seconds, the
standby display appears.
31
Adding Personal Memos
to the Notebook
You can enter personal memos into the 22 message
files (02 through 23) in the Notebook.
o 02 through 10 have 8 alpha/numeric character
capacity
o 11 through 23 have 24 character alpha/numeric
capacity
o The alpha/numeric characters are A through Z, 0
through 9, -, +, /, \, :, ?, [, ], and *.
To enter a blank space, select “_” (underscore).
When you enter the message, a space appears
where the “_” was.
32
To program memos into the Notebook locations:
Go to the Notebook location
where you want to enter
your memo.
1. Press and hold both f
and k for about 2 seconds.
The letter A flashes.
2. To go to the alpha/numeric
character that you want,
press either f or k.
[ To repeat a character,
press N.
3. To select the alpha/numeric
character,. press N.
4. To select the rest of your
memo, repeat steps 2 and 3.
5. To enter your memo into the
Notebook location,
press and hold N until the
display stops flashing.
33
Contaq I ALP9080 Flex™
Two Year Limited Warranty
Important: Evidence of original purchase is required for warranty service.
WARRANTOR: UNIDEN AMERICA CORPORATION (“Uniden”)
ELEMENTS OF WARRANTY: Uniden warrants, for two years, to the original retail owner, this
Uniden Product to be free from defects in materials and craftsmanship with only the limitations or
exclusions set out below.
WARRANTY DURATION: This warranty to the original user shall terminate and be of no further
effect 24 months after the date of original retail sale. The warranty is invalid if the Product is
(A) damaged or not maintained as reasonable or necessary, (B) modified, altered, or used as
part of any conversion kits, subassemblies, or any configurations not sold by Uniden,
(C) improperly installed, (D) serviced or repaired by someone other than an authorized Uniden
service center for a defect or malfunction covered by this warranty, (E) used in any conjunction
with equipment or parts or as part of any system not manufactured by Uniden, or (F) installed or
programmed by anyone other than as detailed by the Operating Guide for this product.
STATEMENT OF REMEDY: In the event that the product does not conform to this warranty at
any time while this warranty is in effect, warrantor will repair the defect and return it to you
without charge for parts, service, or any other cost (except shipping and handling) incurred by
warrantor or its representatives in connection with the performance of this warranty. THE
LIMITED WARRANTY SET FORTH ABOVE IS THE SOLE AND ENTIRE WARRANTY
PERTAINING TO THE PRODUCT AND IS IN LIEU OF AND EXCLUDES ALL OTHER
WARRANTIES OF ANY NATURE WHATSOEVER, WHETHER EXPRESS, IMPLIED OR
ARISING BY OPERATION OF LAW, INCLUDING, BUT NOT LIMITED TO ANY IMPLIED
WARRANTIES OF MERCHANTABILITY OR FITNESS FOR A PARTICULAR PURPOSE. THIS
WARRANTY DOES NOT COVER OR PROVIDE FOR THE REIMBURSEMENT OR PAYMENT
OF INCIDENTAL OR CONSEQUENTIAL DAMAGES. Some states do not allow this exclusion or
limitation of incidental or consequential damages so the above limitation or exclusion may not
apply to you.
LEGAL REMEDIES: This warranty gives you specific legal rights, and you may also have other
rights which vary from state to state. This warranty is void outside the United States of America.
PROCEDURE FOR OBTAINING PERFORMANCE OF WARRANTY: If, after following the
instructions in this Operating Guide you are certain that the Product is defective, pack the
Product carefully (preferably in its original packaging). Include evidence of original purchase and
a note describing the defect that has caused you to return it. The Product should be shipped
freight prepaid, by traceable means, or delivered, to warrantor at:
Uniden America Corporation
Pager Repair Department
4700 Amon Carter Boulevard
Fort Worth, TX 76155
(800) 297-1023, 8 a.m. to 5 p.m. Central, Monday through Friday
®
©1997 Uniden America Corporation
All rights reserved.
Printed in the United States of America