1
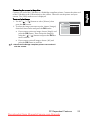
4.2.1 Step 1: Connecting the camera to your computer
English
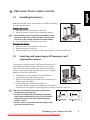
1. Turn on the camera.
2. Connect one end of the USB cable to an available USB
port on your computer.
3. Connect the other end of the USB cable to the USB
terminal on the camera.
4. The [USB] mode screen is displayed. Use the [
]/
[ ] button to select [PC], then press the OK button.
5. Look for a new “Removable Disk” icon appearing in the
“My Computer” window. Your recorded images/video
clips will be in a folder on this “Removable Disk”.
Printer
4.2.2 Step 2: Downloading recorded
images/video clips
When the camera is turned on and connected to your
computer, it is considered to be a disk drive, just like a floppy disk or CD. You can download
(transfer) images by copying them from the “Removable Disk” to your computer hard disk.
For Computers Running Windows
Open the “Removable Disk” by double clicking on it. Double click on the folder contains your
recorded images/video clips. Select the images/video clips that you prefer and then choose
“Copy” from the “Edit” menu. After that, open the destination location and choose “Paste”
from the “Edit” menu.
• Memory card users may prefer to use a memory card reader (highly recommended).
4.3
Using the camera as a PC camera
Your camera can act as a PC camera, which enables you to have a video conference with
business associates, or have a real-time conversation with friends or family. To use the camera
for video conferencing, your computer system must include the items below.
•
•
•
•
Microphone
Sound card
Speakers or headphones
Network or Internet connection
• Video conferencing (or video editing) software is not included with the camera.
20
PC Dependent Features
Downloaded from ManualsCamera.com Manuals