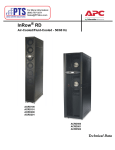
Download APC ACRD201 Specifications
Transcript
DATA CENTER SOLUTIONS
For More Information:
(866) 787-3271
[email protected]
Installation
InRow® RD
Fluid Cooled
ACRD200
ACRD201
This manual is available in English on the enclosed CD.
Dieses Handbuch ist in Deutsch auf der beiliegenden CD-ROM verfügbar.
Deze handleiding staat in het Nederlands op de bijgevoegde cd.
Este manual está disponible en español en el CD-ROM adjunto.
Ce manuel est disponible en français sur le CD-ROM ci-inclus.
Questo manuale è disponibile in italiano nel CD-ROM allegato.
本マニュアルの日本語版は同梱の CD-ROM からご覧になれます。
Instrukcja Obsługi w jezyku polskim jest dostepna na CD.
O manual em Português está disponível no CD-ROM em anexo.
Данное руководство на русском языке имеется на прилагаемом компакт-диске.
您可以从包含的 CD 上获得本手册的中文版本。
您可以从付属的CD上获得本手册的中文版本。
동봉된 CD 안에 한국어 매뉴얼이 있습니다 .
American Power Conversion Legal Disclaimer
The information presented in this manual is not warranted by the American Power Conversion Corporation to be authoritative, error free, or complete. This publication is not meant to be a substitute for a
detailed operational and site specific development plan. Therefore, American Power Conversion Corporation assumes no liability for damages, violations of codes, improper installation, system failures, or any
other problems that could arise based on the use of this Publication.
The information contained in this Publication is provided as is and has been prepared solely for the purpose of evaluating data center design and construction. This Publication has been compiled in good faith
by American Power Conversion Corporation. However, no representation is made or warranty given,
either express or implied, as to the completeness or accuracy of the information this Publication contains.
IN NO EVENT SHALL AMERICAN POWER CONVERSION CORPORATION, OR ANY PARENT, AFFILIATE OR SUBSIDIARY COMPANY OF AMERICAN POWER CONVERSION
CORPORATION OR THEIR RESPECTIVE OFFICERS, DIRECTORS, OR EMPLOYEES BE
LIABLE FOR ANY DIRECT, INDIRECT, CONSEQUENTIAL, PUNITIVE, SPECIAL, OR
INCIDENTAL DAMAGES (INCLUDING, WITHOUT LIMITATION, DAMAGES FOR LOSS
OF BUSINESS, CONTRACT, REVENUE, DATA, INFORMATION, OR BUSINESS INTERRUPTION) RESULTING FROM, ARISING OUT, OR IN CONNECTION WITH THE USE OF,
OR INABILITY TO USE THIS PUBLICATION OR THE CONTENT, EVEN IF AMERICAN
POWER CONVERSION CORPORATION HAS BEEN EXPRESSLY ADVISED OF THE POSSIBILITY OF SUCH DAMAGES. AMERICAN POWER CONVERSION CORPORATION
RESERVES THE RIGHT TO MAKE CHANGES OR UPDATES WITH RESPECT TO OR IN
THE CONTENT OF THE PUBLICATION OR THE FORMAT THEREOF AT ANY TIME
WITHOUT NOTICE.
Copyright, intellectual, and all other proprietary rights in the content (including but not limited to software, audio, video, text, and photographs) rests with American Power Conversion Corporation or its
licensors. All rights in the content not expressly granted herein are reserved. No rights of any kind are
licensed or assigned or shall otherwise pass to persons accessing this information.
This Publication shall not be for resale in whole or in part.
Contents
General Information ........................................................ 1
Overview . . . . . . . . . . . . . . . . . . . . . . . . . . . . . . . . . . . . . . . . . . . . . . . . 1
Save these instructions . . . . . . . . . . . . . . . . . . . . . . . . . . . . . . . . . . . 1
Safety symbols that may be used in this manual . . . . . . . . . . . . . . 1
Cross-reference symbol used in this manual . . . . . . . . . . . . . . . . . 1
Safety . . . . . . . . . . . . . . . . . . . . . . . . . . . . . . . . . . . . . . . . . . . . . . . . . . . 2
Inspecting the Equipment . . . . . . . . . . . . . . . . . . . . . . . . . . . . . . . . . . 3
Storing the Equipment Before Installation . . . . . . . . . . . . . . . . . . . . . 3
Moving the Equipment . . . . . . . . . . . . . . . . . . . . . . . . . . . . . . . . . . . . . 3
Moving the equipment to its final location . . . . . . . . . . . . . . . . . . . . 3
Model Identification . . . . . . . . . . . . . . . . . . . . . . . . . . . . . . . . . . . . . . . 4
Component Identification............................................... 5
Install kit . . . . . . . . . . . . . . . . . . . . . . . . . . . . . . . . . . . . . . . . . . . . . . . 5
Exterior components (front) . . . . . . . . . . . . . . . . . . . . . . . . . . . . . . . 6
Interior components (front) . . . . . . . . . . . . . . . . . . . . . . . . . . . . . . . . 7
Interior components (rear) . . . . . . . . . . . . . . . . . . . . . . . . . . . . . . . . . 8
Electrical panel . . . . . . . . . . . . . . . . . . . . . . . . . . . . . . . . . . . . . . . . . . 9
Top piping and power access locations . . . . . . . . . . . . . . . . . . . . . 10
Bottom piping and power access locations . . . . . . . . . . . . . . . . . . 10
Piping Diagrams . . . . . . . . . . . . . . . . . . . . . . . . . . . . . . . . . . . . . . . . . 11
Water cooled piping . . . . . . . . . . . . . . . . . . . . . . . . . . . . . . . . . . . . . 11
Glycol cooled piping . . . . . . . . . . . . . . . . . . . . . . . . . . . . . . . . . . . . 12
Connections Overview . . . . . . . . . . . . . . . . . . . . . . . . . . . . . . . . . . . . 13
Power connections . . . . . . . . . . . . . . . . . . . . . . . . . . . . . . . . . . . . . . 13
Piping connections . . . . . . . . . . . . . . . . . . . . . . . . . . . . . . . . . . . . . . 13
Insulation . . . . . . . . . . . . . . . . . . . . . . . . . . . . . . . . . . . . . . . . . . . . . . 13
Room Preparation . . . . . . . . . . . . . . . . . . . . . . . . . . . . . . . . . . . . . . . . 14
Air distribution . . . . . . . . . . . . . . . . . . . . . . . . . . . . . . . . . . . . . . . . . 14
Incoming power supply requirements . . . . . . . . . . . . . . . . . . . . . . 14
Weights and Dimensions . . . . . . . . . . . . . . . . . . . . . . . . . . . . . . . . . . 14
InRow RD Fluid Cooled Installation
i
Installation...................................................................... 15
Removing Doors and Panels . . . . . . . . . . . . . . . . . . . . . . . . . . . . . . . 15
Door removal . . . . . . . . . . . . . . . . . . . . . . . . . . . . . . . . . . . . . . . . . . . 15
Side panel removal . . . . . . . . . . . . . . . . . . . . . . . . . . . . . . . . . . . . . . 15
Positioning the Equipment . . . . . . . . . . . . . . . . . . . . . . . . . . . . . . . . 16
Remove the compressor shipping bracket . . . . . . . . . . . . . . . . . . . 16
Service access . . . . . . . . . . . . . . . . . . . . . . . . . . . . . . . . . . . . . . . . . . 17
Leveling the Equipment . . . . . . . . . . . . . . . . . . . . . . . . . . . . . . . . . . . 18
Stabilizing the Equipment . . . . . . . . . . . . . . . . . . . . . . . . . . . . . . . . . 18
Floor brackets . . . . . . . . . . . . . . . . . . . . . . . . . . . . . . . . . . . . . . . . . . 18
Joining the Equipment to Enclosures . . . . . . . . . . . . . . . . . . . . . . . 19
Joining to NetShelter® SX enclosures . . . . . . . . . . . . . . . . . . . . . . 19
Joining to NetShelter VX and VS enclosures . . . . . . . . . . . . . . . . . 19
Mechanical Connections . . . . . . . . . . . . . . . . . . . . . . . . . . . . . . . . . . 20
Liquid piping . . . . . . . . . . . . . . . . . . . . . . . . . . . . . . . . . . . . . . . . . . . 20
Condensate pump . . . . . . . . . . . . . . . . . . . . . . . . . . . . . . . . . . . . . . . 20
Leak sensor (optional) . . . . . . . . . . . . . . . . . . . . . . . . . . . . . . . . . . . 21
. . . . . . . . . . . . . . . . . . . . . . . . . . . . . . . . . . . . . . . . . . . . . . . . . . . . . . . 22
Electrical Connections . . . . . . . . . . . . . . . . . . . . . . . . . . . . . . . . . . . . 23
Control connections . . . . . . . . . . . . . . . . . . . . . . . . . . . . . . . . . . . . . 23
Form C alarm contacts and shutdown input . . . . . . . . . . . . . . . . . . 25
Rack temperature sensor . . . . . . . . . . . . . . . . . . . . . . . . . . . . . . . . . 26
A-Link connections . . . . . . . . . . . . . . . . . . . . . . . . . . . . . . . . . . . . . . 27
Building Management System (BMS) . . . . . . . . . . . . . . . . . . . . . . . 28
Network port . . . . . . . . . . . . . . . . . . . . . . . . . . . . . . . . . . . . . . . . . . . 29
OHE connections . . . . . . . . . . . . . . . . . . . . . . . . . . . . . . . . . . . . . . . . 30
Wiring configurations . . . . . . . . . . . . . . . . . . . . . . . . . . . . . . . . . . . . 30
Top routing . . . . . . . . . . . . . . . . . . . . . . . . . . . . . . . . . . . . . . . . . . . . . 31
Bottom routing . . . . . . . . . . . . . . . . . . . . . . . . . . . . . . . . . . . . . . . . . . 31
Specifications . . . . . . . . . . . . . . . . . . . . . . . . . . . . . . . . . . . . . . . . . . . 32
ii
InRow RD Fluid Cooled Installation
General Information
Overview
Save these instructions
This manual contains important instructions that must be followed during the installation of this
equipment.
Safety symbols that may be used in this manual
Electrical Hazard: Indicates an electrical hazard which, if not avoided, could result in
injury or death.
Danger: Indicates a hazard which, if not avoided, could result in severe personal injury or
death.
Warning: Indicates a hazard which, if not avoided, could result in personal injury or
damage to product or other property.
Heavy: Indicates a heavy load that should not be lifted without assistance.
Caution: Indicates a potential hazard which, if not avoided, could result in damage to the
equipment or other property.
Tip Hazard: This equipment is easily tipped. Use extreme caution when unpacking or
moving.
Note: Indicates important information.
Cross-reference symbol used in this manual
See another section of this document or another document for more information on this
subject.
InRow RD Fluid Cooled Installation
1
Safety
Note: All work should be performed by American Power Conversion (APC®) authorized
personnel only. Follow all local and national codes and regulations when installing this
equipment.
Caution: Keep your hands, clothing, and jewelry away from moving parts. Check the
equipment for foreign objects before closing the doors and starting the equipment.
Heavy: The equipment is heavy. For safety purposes, at least two people must be present
when moving or installing this equipment.
Tip Hazard: This equipment has a high center-of-gravity. Always use two people when
moving equipment. Use extreme caution when unpacking and moving. When using a forklift
to move the equipment, make sure to lift only from the bottom.
Electrical Hazard: Only a licensed electrician may connect the equipment to utility power.
Electrical Hazard: Do not wear jewelry when working near energized components.
2
InRow RD Fluid Cooled Installation
Inspecting the Equipment
Your American Power Conversion (APC) InRow® RD air conditioner has been tested and inspected for
quality assurance before shipment from APC. Carefully inspect both the exterior and interior of the
equipment immediately upon receipt to ensure that the equipment has not been damaged during transit.
Verify that all parts ordered were received as specified and that the equipment is the correct type, size,
and voltage.
Filing a claim. If damage is identified on receipt of the equipment, note the damage on the bill of lading
and file a damage claim with the shipping company. Contact APC Worldwide Customer Support at one
of the numbers listed on the back cover of this manual for information about filing a claim with the
shipping company. The shipping claim must be filed at the receiving end of the delivery.
Note: In case of shipping damage, do not operate the equipment. Keep all packaging for
inspection by the shipping company.
Storing the Equipment Before Installation
If the equipment will not be installed immediately, store it in a safe place, protected from the weather.
Caution: Leaving the equipment uncovered and exposed to possible damage from the
environment will void the factory warranty.
Moving the Equipment
Moving the equipment to its final location
The recommended tools for moving the equipment while it is still on the pallet include the following:
Pallet jack
Forklift
Tip Hazard: The equipment can be rolled to its final location using its casters if the floor is
smooth and clean. Be sure two people move the equipment.
InRow RD Fluid Cooled Installation
3
Model Identification
The model number can be found on the outside of the shipping crate and on the nameplate located on the
rear of the equipment as shown. Use the table below to verify that the equipment is the correct type and
voltage.
Configuration
Voltage
Air Pattern
ACRD200
Fluid-cooled
208-240/1~/60 Hz
Back to front
ACRD201
Fluid-cooled
220-240/1~/50 Hz
Back to front
na2690a
Model
Nameplate
4
InRow RD Fluid Cooled Installation
Component Identification
Install kit
Note: Do not discard the install kit.
na3429a
The install kit contains items which may be necessary to complete the installation of your equipment.
Some items are the literature, floor brackets, and hardware to facilitate joining the equipment to
enclosures.
Item
1
2
3
4
5
6
Description
Quantity
Cable assembly, thermistor/probe - 13ft
1
Netshelter SX bolt-down kit
1
Gasket, union - 3/4in
4
Wire clip, thermistor probe
3
Insulation tube - 0.88-in I.D. x 0.38-in
4
union cover
Pipe clamp boot insulation
2
Item
7
8
9
:
;
Description
Quantity
Resistor, 150 ohm, 1/4 watt
1
Screw, flat head Philips M5 x 12
4
Key
2
Nylon push mount, 1-1/4-in diameter
8
Insulation tube 0.75 I.D. x 0.38 union
2
to clamp (for piping kit liquid lines)
InRow RD Fluid Cooled Installation
5
na2625a
Exterior components (front)
Item
6
Description
Item
Description
1
Removable rear door
6
Adjustable leveling foot
2
Side panel latch
7
Display interface
3
Removable side panel
8
Removable front door
4
Rear casters (nonswiveling)
9
Door lock
5
Front casters (swiveling)
InRow RD Fluid Cooled Installation
na2633a
Interior components (front)
Item
Description
Quantity
Item
Description
Quantity
1
Electrical control box
(retractable)
1
8
Compressor
1
2
Electrical control box
2
9
Front air block panel
1
3
Condensate pumps
2
:
Evaporator fans
6
4
Bypass shutoff valve (2-way)
1
;
Condensate pan
1
5
Water control actuator
1
<
Condensate pan floats
2
6
Water regulating valve (3-way)
1
=
Expansion valve
1
7
Brazed plate heat exchanger
1
>
Evaporator coil
1
InRow RD Fluid Cooled Installation
7
na2635a
Interior components (rear)
8
Item
Description
Quantity
Item
Description
1
Filter/dryer
1
7
Electrical control box
2
2
Pressure transducer (located
behind airblock)
2
8
Hot gas bypass valve
1
3
Suction line
1
9
Power supply unit #2
1
4
Filter differential pressure port
1
:
Power supply unit #1
1
5
Air filter
2
;
Service junction box (top
entry shown)
1
6
Sight glass
1
InRow RD Fluid Cooled Installation
Quantity
na2664a
Electrical panel
Item
Description
Item
Description
1
Leak detector port
6
Building management system (BMS)
RS-485 port
2
Remote temperature sensor port
7
Unused
3
A-Link ports
8
Form C and shutdown input
4
Reset button
9
Configuration RS-232 port
5
Network port
:
Outdoor heat exchanger (OHE) ports
InRow RD Fluid Cooled Installation
9
na2628a
Top piping and power access locations
Item
Description
Item
Description
1
Electrical power input
4
Liquid in
2
Low voltage wiring input
5
Condensate pump outlet
3
Liquid out
na2629a
Bottom piping and power access locations
Item
10
Description
Item
Description
1
Electrical power input
4
Condensate pump outlet
2
Low voltage wiring input
5
Liquid out
3
Liquid in
InRow RD Fluid Cooled Installation
Piping Diagrams
Note: Top or bottom entry can be chosen individually for each type of connection, i.e. power,
condensate drain, fluid supply and fluid return. The top piping configuration will have the
same valves, fittings, and strainers as the bottom piping configuration.
Water cooled piping
na2765a
Note: Bottom piping shown.
Item
Description
Item
Description
1
InRow RD
4
Gate valve*
2
Balancing valve
5
Hose bib*
3
Strainer *
* Field supplied and installed
InRow RD Fluid Cooled Installation
11
Glycol cooled piping
na2766a
Note: Bottom piping shown.
Item
Description
Item
Description
1
Expansion tank*
8
Gate valves*
2
Tank fill*
9
Balancing valve *
3
Fluid-cooler
:
Check valve*
4
Airtrol fitting*
;
Pump package*
5
Temperature and pressure gauges*
<
Flow switch*
6
Air vent*
=
Strainer*
7
Hose bibs*
>
InRow RD
* Field supplied and installed
12
InRow RD Fluid Cooled Installation
Connections Overview
All connections to and from the equipment can be made through either the top or the bottom of the
equipment. Once the connectors are sweated or soldered into place, the equipment can be connected and
disconnected without soldering, welding, or gluing. See the following tables for information about the
sizes and types of connectors.
Warning: Make electrical connections in accordance with all local and national codes.
NOTE: FOR INSTALLATION IN CHINA ONLY - 电源外接导线长度不超过 2m 时其横
截面积不得小于 2.5mm2,超过 2m 按国家和地方规定加大导线规格,其规格应
不轻于 IEC227 的 53 号线。
Power connections
Model
Voltage
Frequency
(Hz)
MCA
MOP
FLA
LRA
(Compressor)
ACRD200
208-240
60
25
40
N/A
87.5
ACRD201
220-240
50
N/A
N/A
28
Above data is based on maximum operating conditions.
Consult local and national codes for wire size, conduit requirements and overload protection.
MCA - Minimum Circuit Ampacity
MOP - Maximum Overcurrent Protection
FLA - Full Load Amps
LRA - Locked Rotor Amps
N/A
Piping connections
Connection
Type
ACRD200/201
Fluid input
Brazed*
7/8-in OD (nominal) copper
Fluid return
Brazed*
7/8-in OD (nominal) copper
Condensate drain
3/16-in ID
5/16-in OD
* Use the provided gaskets to prevent leakage.
Insulation
Apply provided insulation to water lines to protect personnel and to minimize condensation.
Note: Using either tape or glue, completely seal the insulation boots covering the unused
supply and return connections.
InRow RD Fluid Cooled Installation
13
Room Preparation
Air distribution
The equipment distributes air in a back-to-front discharge pattern, removing hot air from a hot aisle and
discharging cooled air into a cold aisle.
Note: The equipment is designed for free air discharge or for use with the Rack Air
Containment System or Hot Aisle Containment System. The equipment is not intended to be
connected to a duct system.
Incoming power supply requirements
Electrical Hazard: Electrical service must conform to local and national electrical
codes and regulations. The equipment must be grounded.
Weights and Dimensions
Packed weight
Unpacked weight
ACRD200, ACRD201
241 kg (532 lb)
199 kg (438.5 lb)
na2231a
Model
Dimensions are shown in mm (in).
14
InRow RD Fluid Cooled Installation
Installation
Removing Doors and Panels
Door removal
Warning: All doors and side panels must be
locked during normal operation. Do not open the
side panels while the fans are operating.
Caution: Use caution when removing the front and
rear doors while the equipment is operating. Unplug
display interface cable.
na2631a
Note: Do not lean the doors against a wall with the
latches facing the wall. This can deform the latches
and prevent them from properly working.
na2632a
Side panel removal
InRow RD Fluid Cooled Installation
15
Positioning the Equipment
Remove the compressor shipping bracket
Caution: Failure to complete the following steps may result in equipment damage and will void
your warranty.
The compressor is secured by a bracket to prevent damage during shipping. This bracket must be
removed before you apply power to the equipment.
1. Remove two T30 Torx screws from the bracket as shown. Save the screws for possible future use.
2. Remove the bracket and save for possible future use.
na2691a
Remove screws
Remove bracket
16
InRow RD Fluid Cooled Installation
Service access
A minimum of 900 mm (36 in) of clear floor space in front of and behind the equipment is
recommended for service. All required periodic maintenance can be performed from the front or rear of
the equipment.
Most of the cooling components in the equipment (e.g. dry filter, sight glass, solenoid, and expansion
valves) must be brazed for repair or replacement. Do not service these components while the equipment
is located inside the data center. Use the casters on the equipment to move it outside the data center for
service. A minimum of 914 mm (36 in) of clear floor space in front of or behind the equipment is
recommended to roll out the equipment.
Note: Check local and national codes and regulations for additional service access
requirements.
Service access
when equipment is
inside the row
na2230a
Free space needed
to move equipment
outside the row
Dimensions are shown in mm (in).
InRow RD Fluid Cooled Installation
17
Leveling the Equipment
Note: The leveling feet at the corners of the equipment provide a stable base if the floor is
uneven, but they cannot compensate for a badly sloped surface.
1. Remove the front and rear doors. See “Door removal” on page 15.
na1572a
2. For each leveling foot, insert a Phillips PH2 or
slotted screwdriver into the screw above the
leveling foot. Turn the screw clockwise to extend
the leveling foot until it makes firm contact with
the floor.
3. Re-install the front and rear doors.
Note: Use a 13-mm open-ended wrench to level the equipment without removing the
doors.
Stabilizing the Equipment
Floor brackets
To prevent the equipment from moving from its final location (if it is not joined with an enclosure), use
the included bolt-down kit (AR7701). Follow the installation instructions included with the kit.
18
InRow RD Fluid Cooled Installation
Joining the Equipment to Enclosures
Joining to NetShelter® SX enclosures
The equipment comes with four joining brackets (two for the front and two for the rear).
1. Remove the front and rear
doors. See “Removing the
front and rear doors” on
page 21.
ns0618a
2. Locate the four joining
brackets. Rotate each bracket
ninety degrees toward the
adjoining enclosure so the
bracket is parallel to the floor
and install using the screws
provided with the enclosure.
For more information, see the Unpacking, Installation, and Customization manual for the
NetShelter SX Enclosure.
Joining to NetShelter VX and VS enclosures
For information on joining the equipment to NetShelter VX and VS enclosures, see the
installation sheet NetShelter® SX to VX or VS External Joining Kit—AR7601, AR7602.
InRow RD Fluid Cooled Installation
19
Mechanical Connections
Liquid piping
Note: Install all piping in accordance with applicable industry guidelines as well as local and
national codes and regulations.
The piping kit for the liquid lines is located in the cabinet. Route the two pipes through either the top or
bottom of the cabinet.
For each liquid line: Remove the fitting 2 from the end
of the pipe 4. Braze the fitting 2 to the inlet or outlet
line 1.
Use the provided gaskets (3 and 6 in the illustration)
for each connection. The other end of the pipe 5 is
installed to the Inrow RD piping 7. Unions are
tightened to 2.26 N-m (20 in-lb).
Insulate the liquid lines with the provided insulation.
na3418a
See “Install kit” on page 5 for more information.
Condensate pump
The condensate pumps 2 (air cooled equipment shown)
are factory-wired and piped internally to the condensate
pan. The pumps are capable of moving liquid a
maximum of 15.2 m (50.0 ft), which may include a
maximum lift of 4.9 m (16.0 ft) as measured from floor
level. For example, if your lift is 3 m (10 ft), you only
have 12.2 m (40.0 ft) of usable run remaining. The
pumps also use an on-board condensate high level float
switch, which is wired into the alarm input for local and
remote alarm capabilities.
Warning: To prevent equipment damage
from condensate, do not leave the
condensate drain line coiled inside the unit.
Route the condensate line out the top or
bottom of the unit as shown on the next
page.
Warning: Do not exceed the lift or the run length of the drain system.
20
InRow RD Fluid Cooled Installation
na2670a
Condensate pump drain connection. Sufficient
PVC drain line 1 is supplied to route the drain to the
outside of the equipment. Provide additional drain line at
installation to allow routing to a remote drain.
Routing the condensate pump drain line.
Top
Route the condensate drain line through the top condensate
or the bottom of the equipment to an appropriate pump drain
routing
drain.
Note: Comply with all local codes
when installing the condensate drain
line to the drain system.
na2671a
Caution: Failure to properly route
condensate drain line before operation
could result in water damage.
Condensate
drain line
n a2 67 2 a
Bottom
condensate
pump drain
routing
InRow RD Fluid Cooled Installation
21
Leak sensor (optional)
AP9325
na2760a
Install one leak sensor (AP9325). To extend the
leak sensor length, add up to three additional leak
sensors (AP9326).
na1584a
AP9325
1. Connect the leak sensor to the equipment
using the leak detector port as shown.
na2676a
Leak detector port
2. Position the leak sensor inside or outside the
equipment.
Note: Install leak sensors on a
clean surface, and do not allow
them to touch metal that is in an
air stream.
3. Route the leak sensor to the outside through
either the bottom plate or the door.
na2675a
4. Secure the leak sensor wire to surfaces using
tie wraps and tie wrap holders (provided with
the leak detector).
22
InRow RD Fluid Cooled Installation
Electrical Connections
The electrical connections required in the field are:
• Controls (display interface, Network Management Card)
• Communication (A-Link, Building Management System)
• Power to InRow RD (single phase plus ground)
All electrical connections must be in accordance with applicable industry guidelines as well as national
and local codes and regulations.
See the equipment nameplate for voltage and current requirements.
Make all low-voltage connections, including data and control connections, with properly insulated wires.
Insulation of low-voltage wiring must be rated for at least the voltage of any adjacent wiring.
Electrical Hazard: Potentially dangerous and lethal voltages exist within this equipment.
More than one disconnect switch may be required to energize or de-energize this equipment.
Observe all cautions and warnings. Failure to do so could result in serious injury or death.
Only qualified service and maintenance personnel may work on this equipment.
Electrical Hazard: The equipment must be grounded. Check the equipment nameplate for
correct ratings.
Warning: Use a voltmeter to ensure that power is turned off before making any
electrical connections.
NOTE: FOR INSTALLATION IN CHINA ONLY - 至少需要一个不小于 3mm 触点开距
的全极断开装置,以便对此设备进行通电和断电。
Control connections
Note: Wire all low voltage input and output connections as Class 2 circuits.
Depending on the configuration, additional control connections may be required for the A-Link remote
communications through APC Network Management Card support or traditional equipment-monitoring
software.
InRow RD Fluid Cooled Installation
23
User interface connections
OHE
Shutdown input
contacts and alarm
output contacts
na2688b
Modbus
24
1
A-Link ports: Pin 1-High; Pin 2-Low;
Pins 3, 6-Perf Power; Pins 4, 5-Ground
<
Alarm NO (normally open contact)
2
Reset button
=
Alarm COM (common contact)
3
Network port
>
Alarm NC (normally closed contact)
4
Shield/ground
?
RS-232 console port
5
A- = True
@
Outdoor heat exchanger (OHE) alarm input -
6
B+ = True
A
OHE alarm input +
7
Shutdown -
B
OHE COM
8
Shutdown +
C
OHE NO
9
24 Vdc (bias)
D
Remote temperature sensor
:
12 Vdc (bias)
;
Return (bias)
Leak detector port (AP9325)
InRow RD Fluid Cooled Installation
Form C alarm contacts and shutdown input
Remote switch using
internal power
(24 Vdc shown)
Field-supplied
voltage
(12/24 Vdc or Vac)
See items 6 through 13 in “User interface connections” on page 24. A relay internal to the user interface
is controlled by a user-defined alarm (for example, malfunctioning fans). Before an alarm condition, the
signal on the COM (common) terminal is routed to the NC (normally closed) terminal. When the alarm
is activated, the relay is energized, causing the signal on the COM terminal to be routed to the NO
(normally open) terminal. The NO and NC terminals could be connected to remote indicator lights, a
warning buzzer, or another device to alert an operator to the presence of an alarm condition.
A remote disconnect switch can be connected to the shutdown inputs as shown.
Note: Either +12 Vdc or +24 Vdc can be used to provide power to the remote disconnect
switch.
InRow RD Fluid Cooled Installation
25
Rack temperature sensor
gen0744a
The rack temperature sensor monitors and controls the equipment
airflow and ensures an adequate supply of cooling air to the server
racks in the data center.
The equipment is supplied with an external rack temperature
sensor. See “Install kit” on page 5 This sensor, along with wire
clamps and wire clips, are included in the installation kit shipped
with the equipment.
Installing the rack temperature sensor
Note: Rack temperature sensor installation is not required if the equipment operates in Rack
Air Containment System (RACS) or Hot Aisle Containment System (HACS) mode. For more
information about those systems, see www.apc.com. The InRow configuration requires
temperature sensor installation.
1. Insert the rack temperature sensor connector in the temperature sensor port at the user interface.
See “User interface connections” on page 24.
a. For a top installation, push the rack temperature
sensor through the access hole located at the top
of the equipment.
2. Route the sensor through either the top or the bottom
of the adjacent server rack.
Temperature
sensor
3. Secure the temperature sensor cable to the front door
of the adjacent server rack at multiple locations using
the provided wire clips as shown. See “Install kit” on
page 5
Wire clip
gen0767a
b. For a bottom installation, route the sensor
through the access hole in the bottom of the
equipment.
Install the sensor where lack of sufficient cooling air
is most likely. The optimum position of the rack temperature sensor will vary from installation to
installation, but must be located in the airflow to allow proper readings.
Servers most likely to have insufficient or inadequately cooled air due to the recirculation of hot
air from the hot aisle include:
a. Servers positioned at the top of a rack.
b. Servers positioned at any height in the last rack at an open end of a row.
c. Servers positioned behind flow-impairing obstacles such as building elements.
d. Servers positioned in a bank of high-density racks.
e. Servers positioned next to racks with Air Removal Units (ARU).
f. Servers positioned very far from the equipment.
g. Servers positioned very close to the equipment.
26
InRow RD Fluid Cooled Installation
A-Link connections
The A-Link bus connection allows multiple InRow RDs (up to twelve) to communicate with one
another. Only one InRow RD must be defined through the display interface; other InRow RDs are
numbered automatically.
To enable the InRow RDs to work as a group, link them using the supplied cables or CAT-5 cables with
RJ-45 connectors. A terminator (150 Ohm, 1/4 W) is installed in the A-Link port, and must remain
inserted into the A-Link ports of the first and final InRow RDs only.
The maximum wire length for the entire group may not exceed 1,000 m (3,280 ft).
InRow RD #2
Final InRow RD
na2677a
InRow RD #1
1 A-Link out port (with provided RJ-45
terminator*)
4 A-Link out port
2 A-Link in port
5 A-Link in port (with provided RJ-45
terminator*)
3 A-Link cable (CAT-5 ethernet cable)
* RJ-45 terminators for A-Link in and out ports are identical.
InRow RD Fluid Cooled Installation
27
Building Management System (BMS)
The Modbus interface allows each InRow RD to communicate with the BMS. Use a three-wire cable to
connect each InRow RD in turn. Wire a 150-Ohm, 1/4-W terminator resistor (included) into the Modbus
master and the final InRow RD between Modbus D0 and Modbus D1.
Each InRow RD has a three-wire Modbus terminal on the user interface. Use a connector with screw
terminals to attach wiring. See “User interface connections” on page 24 for a diagram of the user
interface.
For information on setup of Modbus parameters, see the InRow RD Operation manual.
InRow RD #1
InRow RD #2
Final InRow RD
na2678a
Modbus master
1 Termination resistor (provided)
2 Modbus cable (RS-485)
28
InRow RD Fluid Cooled Installation
Network port
InRow RD #2
Final InRow RD
na2679a
InRow RD #1
Switch/Hub
1 Network port
2 LAN cable (10/100 Base-T)
InRow RD Fluid Cooled Installation
29
OHE connections
OHE
InRow RD #2
Final InRow RD
na2780a
InRow RD #1
1 Class 2 transformer - line voltage to 24 vac
2 Fluid flow switch
3 OHE COM
4 OHE NO
Wiring configurations
Route incoming power to the electrical junction box located at the top or bottom of the equipment.
Electrical Hazard: Only a licensed electrician may connect the equipment to utility power.
Lock out and tag out all power sources before working with electrical wiring.
Do not wear jewelry when working near energized components.
Observe all local and national electrical codes.
Note: To ease installation and future removal of the equipment for repairs, use flexible conduit
for the power wiring.
30
InRow RD Fluid Cooled Installation
Top routing
1. Remove the electrical junction box
cover.
2. Route electrical cabling into the
electrical junction box as shown.
4. Connect the power wiring to the
terminals as shown and torque the
screws to the value shown on the label.
na2645a
3. Secure the incoming cable with a
standard 20 mm (3/4-in) nominal
conduit strain relief (not provided).
5. Reinstall the electrical junction box
cover.
Bottom routing
1. Carefully clip all the cable clamps that secure the electrical
cable to the cabinet frame. Remove the cable clamps from the
cabinet and discard.
2. Remove two screws securing the electrical junction box to the
underside of the cabinet top.
3. Remove the plug from the cabinet floor and insert it in the
cabinet top.
5. Secure the electrical cable to the cabinet frame using new cable
clamps (supplied).
na2646a
4. Turn the electrical junction box over and secure it to the bottom
of the cabinet using the screws removed in step 1. See “Bottom
piping and power access locations” on page 10.
6. To connect electrical power, follow the steps for top routing.
InRow RD Fluid Cooled Installation
31
Specifications
Input voltage
ACRD200 - 208-240/1~/60 H
ACRD201 - 208-240/1~/50 H
Condensate pump
5 l/h (1.3 GPH), 4.9-m (16-ft) vertical rise,
15-m (50-ft) horizontal run
Physical dimensions
W x D x H - mm (in)
300 x 1070 x 1991
(11.80 x 42.13 x 78.39)
Net weight (InRow RD only) - kg (lb)
199.09 (438.5)
Shipping weight - kg (lb)
241 (532)
Cooling capacity at 29.4°C (85°F) kW (BTU/hour)
ACRD200: 10.90 (37,225) total
ACRD201: 10.98 (37,499) total
Sound pressure - dBA at 80% fan speed
76.6 dBA at 0.85 m3/s (1800 SCFM),
1.0 m in front of the unit
(ref 20 μPa)
Nominal fluid flow rate entering the unit - l/s (GPM)
Water: 0.64 (10.0)
Glycol: 0.64 (10.0)
Entering fluid temperature range
for 0.64 l/s (10 GPM)
flow rate into the unit. - °C (ºF)
Water: 12.8 - 43.3 (55.0 - 110.0)
Glycol: 12.8 - 43.3 (55.0 - 110.0)
Maximum heat rejection - kW(BTU/hour)
Water: 15.2 (52,000)
Glycol: 15.2 (52,000)
Maximum glycol percentage - %
Water: 0
Glycol: 40
Pressure drop at 0.64 l/s (10 GPM) - kPa (psi)
Water: 33.1 (4.8)
Glycol: 43.4 (6.3)
Note: For additional capacity and performance data, consult the InRow RD Technical Data
Manual available online at www.apc.com.
32
InRow RD Fluid Cooled Installation
Radio Frequency Interference
Changes or modifications to this unit not expressly approved by the party responsible
for compliance could void the user’s authority to operate this equipment.
USA—FCC
This equipment has been tested and found to comply with the limits for a Class A digital device,
pursuant to part 15 of the FCC Rules. These limits are designed to provide reasonable protection
against harmful interference when the equipment is operated in a commercial environment. This
equipment generates, uses, and can radiate radio frequency energy and, if not installed and used in
accordance with this user manual, may cause harmful interference to radio communications. Operation
of this equipment in a residential area is likely to cause harmful interference. The user will bear sole
responsibility for correcting such interference.
Canada—ICES
This Class A digital apparatus complies with Canadian ICES-003.
Cet appareil numérique de la classe A est conforme à la norme NMB-003 du Canada.
Japan—VCCI
This is a Class A product based on the standard of the Voluntary Control Council for Interference by
Information Technology Equipment (VCCI). If this equipment is used in a domestic environment,
radio disturbance may occur, in which case, the user may be required to take corrective actions.
この装置は、情報処理装置等電波障害自主規制協議会(VCCI)の基準
に基づくクラス A 情報技術装置です。この装置を家庭環境で使用すると、電波
妨害を引き起こすことがあります。この場合には、使用者が適切な対策を講ず
るように要求されることがあります。
Taiwan—BSMI
警告使用者 :
這是甲類的資訊產品 , 在居住的
環境中使用時 , 可能會造成射頻
干擾 , 在這種情況下 , 使用者會
被要求採取某些適當的對策。
APC Worldwide Customer Support
Customer support for this or any other APC product is available at no charge in any of the following ways:
• Visit the APC Web site to access documents in the APC Knowledge Base and to submit customer
support requests.
– www.apc.com (Corporate Headquarters)
Connect to localized APC Web sites for specific countries, each of which provides customer support
information.
– www.apc.com/support/
Global support searching APC Knowledge Base and using e-support.
• Contact the APC Customer Support Center by telephone or e-mail.
– Local, country-specific centers: go to www.apc.com/support/contact for contact information.
For information on how to obtain local customer support, contact the APC representative or other distributors
from whom you purchased your APC product.
DATA CENTER SOLUTIONS
For More Information:
(866) 787-3271
[email protected]
© 2010 APC by Schneider Electric. APC, the APC logo, and InRow are owned by Schneider Electric
Industries S.A.S., American Power Conversion Corporation, or their affiliated companies. All other
trademarks are property of their respective owners.
990-3213B-001
9/2010


