1
English
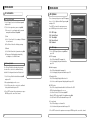
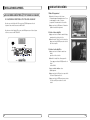
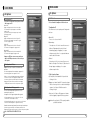
SX-5 USB
STX-5 USB
Please read this User's Manual Carefully
before installing this Receiver
Rev 1.0
(E+E+N+D+F+P)
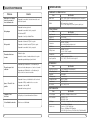
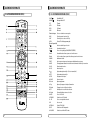
TABLE OF CONTENTS
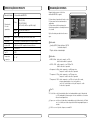
GENERAL SAFETY
2
GENERAL INFORMATION
3
I. UNPACKING
3
II. FEATURES
3
III. REMOTE CONTROL UNIT (RCU)
4
IV. FRONT PANEL
7
V. REAR PANEL
8
INSTALLING EQUIPMENT
9
CHANNEL LIST GUIDE
11
MENU GUIDE
13
MAIN PAGE
13
I. CHANNEL MANAGER
13
II. INSTALLATION
15
III. OPTIONS
19
IV. UTILITY
22
TROUBLESHOOTING
24
SPECIFICATIONS
25
1
GENERAL SAFETY
WARNING
Please read the following recommended instructions carefully to avoid the risk of your
physical Injury before the product is operated.
GENERAL INFORMATION
I. UNPACKING
Please ensure that the following items are included with the receiver in your packing.
1) Remote Control Unit (RCU)
Do not cover the receiver and keep clear space around the receiver for sufficient.
2) Batteries (2EA)
Check the receiver’s operation voltage 90~250V, 50Hz~60Hz Max, 40W Keep liquid away from
the receiver.
3) User’s Manual
4) A/V Cable
The receiver shall not be exposed to dripping or splashing and no objects that filled with
liquid shall not be placed on the receiver.
Unplug the receiver from the wall outlet before cleaning.
II. FEATURES
Use a soft cloth and a mild solution of washing-up liquid to clean the casing.
Do not block the receiver’s ventilation slots which are provided for ventilation and protection
from overheating.
Please maintain the receiver in a free airflow.
Do not allow the receiver to be exposed to hot, cold or humid condition.
∙MPEG-II Digital & Fully DVB-S Compliant.
∙1 Slot smart card.
∙1 slot Common Interface.
∙C/KU band control for each antenna.
∙LNB Tone Switch 22KHz mode on/off.
∙Multi-LNB controlled by DiSeqC 1.0, 1.2 and USALS.
Do not use any cable and attachment that are not recommended as these may damage your
equipment.
∙Total 5,000 Channels Programmable.
Please unplug the receiver from the wall outlet and disconnect the cable between the
receiver and the antenna when you will not use it for long time.
∙PIG(Picture In Graphic).
Do not remove the cover to reduce the risk of electric shock.
∙EPG(Provider Electronic Program Guide) for On Screen Channel Information.
Do not attempt to service the receiver yourself.
∙On-Screen Display with 65,536 Color.
Refer all serving to qualified service personnel.
∙Blind scan(Power Scan) & Powerful EPG.
∙Teletext and subtitle directly from the OSD.
∙Dolby Digital Bitstream Out through S/PDIF.
∙Upgrade Software & Update Channel Database through USB Port and RS232.
Manual may be updated as new features.
∙PVR Ready via USB.
∙Recorded file play on PC.
2
3
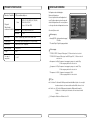
GENERAL INFORMATION
GENERAL INFORMATION
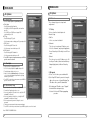
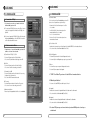
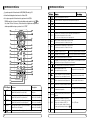
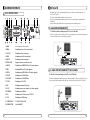
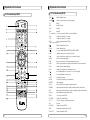
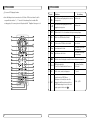
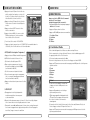
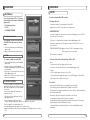
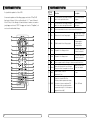
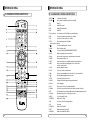
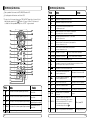
III. REMOTE CONTROL UNIT (RCU)
III. REMOTE CONTROL UNIT (RCU)
1. MUTE
Enables or disables the audio.
2. POWER
Swithches the receiver between operation and standby mode.
3. TV
TV mode.
4. STB
STB mode.
5. VCR
VCR mode.
6. DVD
DVD mode.
7. Numeric buttons
Selects the TV or Radio service channels and individual menu.
8. FAV
Toggles the selected favorite mode.
9. SAT
Toggles the selected Satellite list.
10. EPG
Displays the TV or Radio program guide.
(Electronic Program Guide)
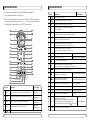
4
11.
Enables subtitle and teletext mode.
12. Audio
Changes the audio languages.
13.
Selects the sound mode(LEFT/RIGHT/STEREO).
14. ▲▼
Changes channels or moves to the item in the menu.
15. ◀ ▶
Adjusts the volume or moves to left or move item in the menu.
16. MENU
Displays the main menu on screen.
17. EXIT
Returns to the previous menu or normal viewing mode from a menu.
18. INFO
Displays the program information box on the screen and edit the name of favorite channel list.
19. V+/V-
Turns volume up or down.
20. P+/P-
Changes channels up or down on normal mode.
21.
Moves up a page in the channel list. (Selects zoom in/out).
22.
Moves down a page in the channel list.
23. STOP
Stops recording or playing.
24. PAUSE
Pauses the playing picture or go to normal mode.
25. Record
Records the program.
26. Play
Displays file lists and plays slow/normal.
27. Rewind
Stars reverse playback and changes the speed of reverse playback.
28. F/F
States fast forward or fast motion playback and changes the speed of forward playback.
29. Position
Displays position bar on the screen to adjust the antenna.
30. AV/TV
Selects the TV or AV mode.
31. TV/RADIO
Switches between TV and Radio.
32. ←PR
Selects the previously viewed channel.
33. Fn
Reserved.
34. STB/DivX
Switches STB or DivX.
35. UHF
Switches to UHF turning mode.
36. PAL/NTSC
Switches PAL or NTSC mode.
5
GENERAL INFORMATION
III. REMOTE CONTROL UNIT (RCU)
GENERAL INFORMATION
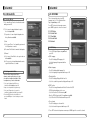
IV. FRONT PANEL
Setting Method
1. 3 digits Setting Method
1) Turn of the TV
2) Press the “TV” Key and “OK” at the same time for more than 2 seconds. Then the TV LED will turn
on/off 2 times.
3) Refer the TV Brand List and Press the three numbers. (TV LED will turn on/off 2 times. If the three
numbers is wrong, TV LED turn on/off 1 time)
4) If there are a few pf fixed numbers in the Brand, repeat the step, until the TV turns off.
5) If the TV turns off, press the “OK” Keay. (If the setting is done properly. the LED of the RCU will turn
on/off 2 times)
6) Check if the POWER and other buttons of the RCU are working properly.
7) If the POWER button works but the other buttons does not work, start again from the stop 1) (In some
Brands, other buttons except POWER can not work properly)
� For VCR & DVD, same procedure as above.
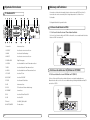
①
②
③
④ ⑤
∙If you don’t press three numbers within 10 seconds, setting will be failed.
∙If you can not find the fixed number with the above method.
2. Auto Search Method
1) Turn on the TV
2) Press the “TV” key and “OK” at the same time for more than 2 seconds. Then, the TV LED will turn
on/off 2 times.
3) Press the “UP” key until the TV turns off (If you want to search from the reverse, press the “DOWN” key)
4) If the TV turns off, press the “OK”key.
(If the setting is done properly. the LED of the RCU will turn on/off 2 times)
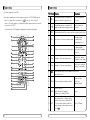
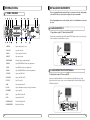
1. POWER
Switches the receiver power On and Standby.
2. CH Up/Down
Channel up / down or selects the item of Menu.
3. VOL Up/Down
Volume up/down or selects the item of Menu.
4. USB PORT
Connects to USB device.
5. USB PORT
DivX file play.
5) Check if the POWER and other buttons of the RCU are working properly.
6) If the POWER button works but the other buttons does not work, start again from the procedure 1)
(In some Brands, ther buttons except POWER can not work properly)
� For VCR & DVD, same procedure as above
∙If you don’t press three numbers within 10 seconds, setting will be failed.
3. How to check current setting number
1) Press the “TV” key and “OK” at the same time for more than 2 seconds. Then, the TV LED will turn
on/off 2 times.
2) Press the “info” key within 3 seconds.
3) TV LED blinks to show the current setting number in order. (TV LED blinks 10 times to show ‘o’
“All USB 2.0 flash drive may not be compatible with the product”
Ex) If the current setting number is 350, the TV LED blinks 3 times, 5 times and 10 times
� For VCR & DVD, same procedure as above.
6
7
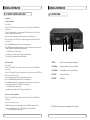
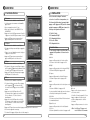
GENERAL INFORMATION
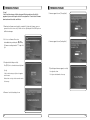
INSTALLING EQUIPMENT
This section explains several ways of connecting the receiver to your existing
TV, VCR and Hi-Fi system.
V. REAL PANEL
You can choose one of the following setups that we recommend.
If you have any problem or need help, consult your dealer or service provider.
Please ensure that the following items are included with the receiver in your packing.
I. CONNECTING THE RECEIVER TO TV
I-1. Connecting the receiver to TV with the SCART cable
Connect one end of the SCRAT cable to the TV SCRAT cocket on the rear panel of the
receiver and the other end to a SCRAT socket on the TV.
8
1. AERIAL
Connects to Terrestrial antenna cable.
2. LOOP OUT
Connects to another STB.
3. LNB IN
Connects to Satellite antenna cable.
4. LNB OUT
Connects to another STB.
5. DIGITAL AUDIO
Output for connecting to a digital amplifier.
6. AUDIO-R
Connects to AUDIO RIGHT to TV or other equipment.
7. VIDEO
Connects VIDEO to the TV or other equipment.
8. AUDIO-L
Connects to AUDIO LEFT to TV or other equipment.
9. TV SCART
Connects to TV SCART cable.
10. VCR SCART
Connects to VCR SCART cable.
11. TV/VCR
Connects to TV or VCR.
12. ANT
Connects to TV antenna input.
13. RS 232
Connects to personal computer for software upgrade.
14. ETHERNET
Connects to LAN cable.
15. YUV
Connects to YUV jack of TV or VCR
16. USB
Connects to USB device.
17. POWER SUPPLY
90~250V AC, 50/60Hz, 40W.
18. POWER BUTTON
Turns On/Off.
II. CONNECTING THE RECEIVER TO TV WITH CINCH CABLE
II-1.Connecting the receiver to TV with the CINCH cable
Connect one end of the CINCH cable to the Audio-R(Red), the Audio-L(White)and the
Video (Yellow) socket on the rear panel of the receiver and and other end to the AudioR(Red), the Audio-L(White) and the VIDEO(Yellow) socket on the TV.
9
INSTALLING EQUIPMENT
III. CONNECTING THE RECEIVER TO TV AND VCR WITH RF CABLE
III-1. Connecting the receiver to TV/VCR with RF cable
Connect one end of the RF cable to the TV socket on the rear panel of the receiver
and the other end to the ANT IN on the TV.
Connect one end of the RF cable to the ANT socket on the rear panel of the receiver
and the other end to the ANT OUT on the VCR.
CHANNEL LIST GUIDE
1. Normal Live Mode
a) When you select one channel, information bar
appears automatically on the screen for few
seconds. This bar provides you the current
channel information.
b) Press INFO button to see the information during
normal live mode.
2. Simple Channel List
a) Press OK on the normal live mode to go to the
channel list.
b) When detail channel list is displayed on screen
press RED button to go to simple channel list.
3. Detail Channel List
a) Press OK on the normal live mode to go to the
channel list.
b) When simple channel list is displayed on screen
press RED button to go to detail channel list.
c) Press◀▶ and ▲▼to sort by Alphabet.
d) Press SAT button to sort by Satellite and FAV
button for Favorite 1~8.
e) Press GREEN button to return to All Channel or
EXIT to return to the current live channel.
f) Press the SAT key to show Satellite Pop-UP
Window then select satellite. Channel list of
selected satellite will be displayed.
g) Press the FAV key to show Favorite Pop-UP
Window then select FAV list. Channel list of
selected FAV will be displayed.
h) Press the Green key then all searched channel
list will be displayed.
i) Press MENU key then cursor will move to ALL,
placed on the left.
j) Sort Key (Yellow Key)~A~Z/Z~A/FAT/CAS.
k) Press Yellow key for sorting A~Z/Z~A/FAT/CAS. If you want to go back to unsort from
the selected CAS go back to Pop-UP Window then select unsort.
10
11
CHANNEL LIST GUIDE
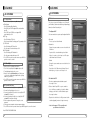
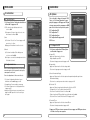
MENU GUIDE
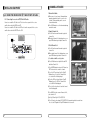
Main Page
4.EPG (Electronic Program Guide)
a) Press EPG button on the live mode.
b) EPG of the current channel appears on the
screen.
c) Select the channel that you want to watch
program.
d) To reserve program with recording function,
press REC(●) button.(PVR model only)
e) It will be appear like rightside picture.
f) If you reserve program, then it will be record
automatically at reserved time.(PVR model only)
Press the MENU button on the RCU to open Main
Page on the screen. Main Page will be displayed.
1. You can move into the main page using ▲▼◀ ▶
on the RCU.
2. Press OK to confirm your selection.
3. Press EXIT to return to the previous menu or press
MENU to go to the current live channel.
I. Channel Manager IV. Utility
II. Installations
V. Accessory
III. Options
g) Press Select button twice to return to current
live channel.
5. ZOOM IN/OUT
a) By selecting page up key ( ) in a normal live
mode you can use Zoom In/Out function.
b) From the Pop-Up Window of Zoom function you
can select(*2*3*4)by page up key( ), for Zoom
out press page down key.
c) When you move cursor of Zoom focus by key
(◀▶▲▼ ) then you can select Zoom In/Out on
the focused point by pressing page up/down
keys. Press Pause key then live mode will be
paused on the mode of Zoom.
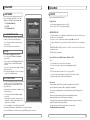
I. Channel Manager
This section may help you to organize channels according to your preference.
1. Select Channel Manager in the Main Page with ▲▼ and press OK.
2. TV Channel Manager Page displays on the screen.
3. Select the mode that you want using ◀ ▶.
4. To see the channel that you choose, go to the channel and then press RED botton.
5. Press EXIT to return to the previous menu or press MENU to go to the current live channel.
I-1. Favorite
I-2. Rename
I-3. Move
I-4. Lock
I-5. Delete
I-1. Favorite
1. Using ◀ ▶ go to the Favorite mode then press
YELLOW button to choose Favorite 1~8.
2. Press OK on the channel that you want to add
or delete.
3.
will be marked at the end of selected channel
name bar. To delete press OK again.
4. Selected channels will be automatically saved.
5. If you want to check the saved Favorite Channel List
go to other mode(Rename~Delete) except Favorite
and then press FAV button to check Favorite 1~8.
6. Press EXIT to return to the previous menu or press
MENU to go to the current live channel.
12
13
MENU GUIDE
MENU GUIDE
I. Channel Manager
II. Installation
I-2. Rename
1. Using◀ ▶go to the Rename mode.
2. Select the channel that you want to rename using ▲▼ and
then press OK.
3. Keypad Dialog displays on the screen.
4. Edit the name entering NUMBERS and / or WORDS in the
Keypad Dialog.
5. Press YELLOW button to rename Favorite 1~8 and press
BLUE button to rename Satellite.
6. Press EXIT to return to the previous menu or press MENU to
go to the current live channel.
This section may help you to set up antenna and
scan satellite or transponder, etc. Select Installations
in Main Page using ▲▼ and press OK.
Press EXIT to return to the previous menu or press
MENU to go to the current live channel.
II-1. Satellite Search
II-2. DiSEqC Switch
II-3. Motor Setup
II-4. Terristrial Search
II-5. Factory Default
I-3. Move
1. Using◀ ▶go to the Move mode.
2. Select channels which you want to move by pressing OK key.
3. Move cursor that you want to place on than press GREEN
button.
4. Press EXIT to return to the previous menu or press MENU to
go to the current live channel.
I-4. Lock
1. Using ◀ ▶ go to the Lock mode.
2. Select the channel that you want to lock and then press OK.
will be marked at the end of the selected channel name bar.
To delete press OK again.
3. Press EXIT to go to Main Page or press MENU to go to the
current live channel.
I-5. Delete
1. Using◀ ▶ go to the Delete mode.
2. Select the channel that you want to delete and then press
OK.
will be marked on the selected channel number.
To delete press Blue button again.
3. Press YELLOW button to delete TP. Select one channel and
press Blue button.
All channels of that TP will be automatically selected.
4. Press YELLOW button to delete Satellite. Select one channel
and press Blue button. All channels of that the Satellite will
be automatically selected.
5. Press EXIT to return to the previous menu or press MENU to
go to the current live channel.
6. Message Box displays on the screen.
7. Select OK on the Message Box and then press OK to delete
the markedchannels.
14
II-1 Satellite Search
1.You can move the cursor using ▲▼ and press OK
when you select the value that you want.
a) Satellite
- Press OK to display the Satellite List Box.
- Select the proper Satellite and then press OK.
b) DiSEqC
- Press OK to display the DiSEqC Port List.
- Select the proper DiSEqC port and then press OK.
c) Frequency
- Press OK to display the Frequency List.
- Select the proper Frequency and then press OK.
d) LNB
- Press OK to display the LNB Frequency List.
- Select the proper LNB Frequency and then press
OK.
g) Search
- You can also input directly the numbers using
- Press Search to start scan channels.
NUMBER KEY on the RCU.
- Selected Satellite displays on the screen.
e) 22KHz Tone
- Press ▶ to select more Satellite or ◀ to
- Select the one among None, 0 KHz or 22 KHz
cancel the selected Satellites.
depending on the user’s antenna switch box.
- Press OK to start scanning.
f) Search Option
- Press OK to display the Search Option list.
※ TP EDIT : To Edit TP, Press the RED
- Select the Search Option that you want and then
button on the RCU.
press OK.
15
MENU GUIDE
MENU GUIDE
II. Installation
II. Installation
II-2. DiSEqC Switch
1. Select Channel Search in Installation using
▲▼ and press OK.
a) If you select DiSEqC Switch and press OK on the
menu will be, DiSEqC Switch Page will be
displayed.
e) Motor Control
Select the position using ◀ ▶ and then press OK.
Message box displays on the screen.
- Store Sat position : Stores the current position
of the motor for the selected satellite.
- Goto Sat Position : Moves the motor to the stored
position of the selected satellite.
- Goto 0 : Goes to the center of the motor.
b) Select the proper Satellite of each DiSEqC port
(A~D) using ◀ ▶ and ▲▼ and press SEARCH.
Selected Satellites will be searched
automatically.
f) Satellite Position
II-3 Motor Setup
- Input directly the position using NUMBER KEY on the RCU
- Select the direction using ◀ ▶ (WEST / EAST).
1. You can move the cursor using ▲▼ and
press OK when you select the value that you
want.
a) Motor Type : DiSEqC 1.2, USAL
- Press OK to display Motor Type
- Select the proper Motor Type and then press OK.
b) Satellite
- Press OK to Display the Satellite List Box
- Select the proper Satellite and then press OK.
- Reset Position : Resets all stored position of the motor.
g) Search Option
- Press OK to display the Search Option list.
- Select the Search Option that you want and then press OK.
h) Search
- Press Search to start scan channels.
- Press OK to start scanning.
※ TP EDIT : To Edit TP Press the RED button on the RCU.
2. Edit my local position
c) Switch & LNB
- Press OK to Display the LNB frequency list or
Switch Setting
- Select proper LNB & proper Switch.
d) Frequency
- Press OK to Display the Frequency List.
- Select the proper Frequency and then press OK.
e) Motor Movement
- Search the appropriate position of the selected
Satellite using◀ ▶.
16
- Press Green Button to edit local Position.
a) Longitude
- Input directly the Longitude using NUMBER KEY on the RCU.
- Select the direction using ◀ ▶ (WEST / EAST).
b) Latitude
- Input directly the Latitude using UNMBER KEY on the RCU.
- Select the direction using ◀ ▶(NORTH/SOUTHd).
3. Press EXIT to return to the previous menu or press MENU to go to the current live channel.
17
MENU GUIDE
MENU GUIDE
II. Installation
III. Options
II-4. Terristrial Search
1. Select Channel Search in Installation using ▲▼
and press OK.
2. 1) Select the region where you are using ◀ ▶.
2) You can select searching type which you want
among Auto and Manual using◀ ▶.
3) Auto
a) Select ‘Search’on the Screen and pres OK button
to scan channels.
This section may help you to set up OSD language,
time, etc. Select Options in Main Page using ▲▼
and press OK.
Press EXIT to return to the previous menu or
press MENU to go to the current live channel.
III-1. OSD Setup
III-2. Control Panel
III-3. Time Adjust
III-4. Parental Lock
III-5. Network
b) Press Exit or Menu after finishing scanning.
4) Manual
a) Select Mux Channel which you want using ◀ ▶.
b) Frequency will be displayed automatically
according to selected Mux Channel.
III-1. OSD Setup
1. Select OSD Setup in Options using ▲▼ and
press OK.
II-5. Factory Default
a) OSD Language
- Press OK to display OSD Language list.
- Select the language that you want and then
press OK.
Use Factory Default function only when you want
to return the receiver to the condition of factory
default. All settings and channels will be deleted.
b) Audio Language
- Press OK to display Audio Language list.
- Select the language that you want and then press OK.
1. Select Factory Default in Installations using ▲▼
and press OK.
c) Display Info Bar
- Press OK to display Display Info Bar time list.
- Select the second that you want to display and then press OK.
2. Message box displays on the screen.
3. Select OK to return the receiver to the condition of
factory default and then press OK.
4. Press EXIT to return to the previous menu or press
MENU to go to the current live channel.
d) OSD Position
- Press OK to change Horizontal and Vertical Position of the OSD.
- OSD Position box displays on the screen.
- Select Hor Position / Ver Position using ▲▼.
- Move the OSD Position to right/left or up/down using ◀ ▶.
- Select OK on the OSD Position box and then press OK.
e) Screen format
- Press OK to display screen format list.
- Select the format that you want and then press OK.
2. Press EXIT to return to the previous menu or press MENU to go to the current live channel.
18
19
MENU GUIDE
MENU GUIDE
III. Options
III. Options
III-2. Control Panel
III-5. Network
1. Select TV Setup in Options using ▲▼ and press OK.
a) Video Output
- Press OK to display Video Output list.
- Select RGB if your SCART supports RGB control and then
press OK.
- Select CVBS if your SCART does not support RGB
control and the press OK.
b) TV Type
- Press OK to display TV Type list.
- Select the proper mode according to your TV type and press OK.
c) UHF Channel
- Press OK to display UHF Channel list.
- Select the proper channel and then press OK.
d) UHF Standard
- Press OK to display UHF Standard list.
- Select the proper mode and then press OK.
2. Press EXIT to return to the previous menu or press MENU to
go to the current live channel.
This section may help you to set up network
configurartion.
III-3. Time Adjust
Set your local time according to your location.
1. Select Time Setup in Options using◀ ▶ and press OK.
2. Time Adjust page displays on the screen.
3. Move the cursor using◀ ▶, ▲▼and press OK when you
select the value that you want. (Input Hour directly using
number keys on the RCU)
4. Press EXIT to return to the previous menu or press MENU to
go to the current live channel.
III-4. Parental Lock Setup
1. Select Parental Lock Setup in Options using◀ ▶ and press OK.
2. Parental Lock Page displays on the screen.
3. You can lock and unlock Parental Lock selecting ON or OFF
using ▲▼ (For Channels).
4. You can lock and unlock Install Lock selecting ON or OFF
using ▲▼ (For Installation Settings).
5. Enter new password if you want to change the current
password.
6. Confirm your new password entering new password again.
7. Press EXIT to return to the previous menu or press MENU to go to the current live channel.
1. IP Setup
Select one from three kinds of options for
Network Setting.
a) Not Use
In this case, network is disabled.
b) Automatic
This is for user to use dynamic IP address service.
After Select Automatic, and just push Apply button,
Box will reboot by itself. Box will get a new IP from
router.
c) Manual
This is for user to use static IP address service Put
in with your IP address, Subnet mask and Gateway.
And push Apply button, then Box will reboot by
itself.
2. SW upgrade
a) Please check first where you can download file
b) Push “Input URL” button if you want to change the
address then you can see Keypad Dialog box Type
URL address where you will be downloaded.
c) After thping your URL address, press “Upgrade”
button and follow showing message.
Attention : Don’t turn off STB during upgrading
procedure.
Note. DEFAULT PASSWORD IS 0000
20
21
MENU GUIDE
MENU GUIDE
VI.Utility
USB PVR
This section may help you to use USB, etc.
Select Utility in Main Page using ▲▼ and press OK.
∙VI -1. System Information
∙VI -2. USB
∙VI -3. Common Interface
Connect your USB memory device to STB
1. Record
∙IF you want to record the program, Press “REC”button.
∙Press “STOP” button to stop recording.
2.PLAY
VI-1. System Information
∙If you want to play the recorded file in your USB
memory device, press “PLAY” button and then File List will be displayed.
This option help you to know the current S/W and
H/W version. Also provides you the product name.
1. Select System Information in Options using ▲▼and
pres OK.
2. Press EXIT to return to the previous menu.
∙Select the file which you want to play using ▲▼and press OK.
VI-2 USB
3. File Manager (Go to Main Menu → Utility → USB)
The receiver is equipped with host.
1. Select USB in Utility with ▲▼ and press OK.
2. If you want to change mode(S/W Upgrade, BootLoader
Upgrade), press RED button on the RCU.
3. Select the file which you want to upgrade using
▲▼ and press OK.
4. After downloading the selected file, the receiver will
reboot automatically.
∙If you want play other file, press OK button and File List will be displayed
∙SLOW : Press “PLAY” button. If you press “PLAY” button again, the speed will be normal.
∙F/F, Rewind, Pause is supported.
∙Delete
- If you want to delete the file, press Yellow button.
- Select the file which you want to delete using ▲▼ and press OK.
∙Fromat
- The STB supports only FAT32 file system
- If you want to format your memory device onto FAT32, press Blue button.
- After format, the all data will be deleted.
VI-3 Common Interface
4. Caution
The receiver is equipped with one slot of Common
Interface which have access to the scrambled the pay per
view services with various conditional access modules and
a valid smart card.
∙The only USB 2.0 high speed device is supported for PVR function.
The programs that can be descrambled are determined by
the conditional access module and smart card that you
use.
1. Select Common Interface in utility with ▲▼ and press OK.
2. Common Interface displays on the screen.
(The phrase ‘No Module’ is indicated when the
conditional access module is not istalled)
3. Insert the conditional access module into Slot.
4. The name of the Slot differs according to each inserted conditional access module.
5. Press EXIT to return to the previous menu or press MENU to go to current live channel.
22
∙S / W download and MP3 play supports USB 1.1 full speed.
∙Plesae use more than 2GByte memory device or USB HDD for PVR function.
∙Normally 1GBtye can record 30~40 minutes depends on program.
∙Some USB memory device cannot be supported.
∙Memory fragmentation can occur record problem, please format your USB memory device
ossasionally.
∙For more information and updated software, please visit our website.
23
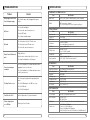
TROUBLESHOOTING
Solution
Problem
Nothing appears on the Front
Panel or No power supply
SPECIFICATIONS
∙Check that the power cable is plugged into the power
socket.
∙Check the dish and adjust it.
No Picture
∙Check the cable connection and correct it.
∙Get out of UHF mode.
∙Check channel and video output.
∙Check the volume level of the TV and receiver.
No Sound
I.Conditional Access Module Interface
PCMCIA
Input Connector
Signal Level
LNB Power &
Polarization
∙Check the cable connection and correct.
22KHz Tone
Service is not running or
scrambled
∙Check the Conditional Access Module and smart card are
appropriate for the selected service.
∙Check the Conditional Access Module and smart card are
correctly inserted or not.
∙Check the signal strength and the signal quality in the
menu.
“No Signal” on the screen
∙Check the LNB and replace the LNB if necessary.
∙Check the LNB cable.
∙Check the Dish and adjust it.
F-type (Output loop-through), IEC 169-24, Female
-25 to -65 dBm
Vertical : +13.5/18.5Vdc±5%
Horizotal : +18.5Vd dc±
Current : Max.500mA.Overload protected
Frequency : 22KHz±2KHz
Demodulation
Amplitude : 0.8±0.2V
Version 1.2 USALS Compatible
QPSK
Input Symbol Rate
2~45Ms/s Convolution Code Rate
1/2, 2/3, 3/4, 5/6, 7/8 with Constraint Length K=7
∙Aim the remote control unit directly to the receiver.
∙Checking that nothing blocks the front panel.
Specification
Item
∙Check the mute status of TV and receiver.
∙Replace batteries.
1 SLOT, ISO 7816, GSM11.11 and EMV (payment systems) compatibility
Slot.type Ⅰor type Ⅱ
DVB Common Interface Standard
(Viaccess, Irdeto, Nagra Vision, Conax, Crytoworks, AlpahCrypt..)
II. Tuner & Channel
DiSEqC Control
Remote Control Unit dose not
work
Specification
Item
SMART CARD
III. TUNER DVB-T
Specification
Item
Input Frequency Range
RF Input Signal Level
Bandwidth
OFDM Spectrum
Demodulation modes
Guard Interval
FEC Decoder
170 to 230MHz(VHF), 470 to 862MHz(UHF)
-77 dBM to -10 dBM
7MHz & 8MHz
2K and 8K Carrier
QPSK, 16, 64 QAM
1/4, 1/8, 1/16, 1/32
1/2, 2/3, 3/4, 5/6 & 7/B
IV. A/V & Data In/Out
Specification
Item
Tuner Defective Check
∙Go to the Option and select System Information.
You have forgotten your
secret PIN Code
∙Contact your Service Provider.
TV Scart Output
RGB, CVBS, L, R Output with Volume Control
VCR Scart In/Out
RGB, CVBS, L, R In
CVBS, RGB, L, R Out
RCA Output
CVBS, RGB, L, R Output(Yellow, White, Red Jack) with Volume Control
Data Interface
24
- RS-232, Bit Rate 115,200baud
Connector : 9-Pin D-Sub Male type
- Ethernet : 10/100Mbps, DHCP Supporting
- USB : USB 2.0 Type A Connector, 2Port(Front & Rear), 1Port(Multimedia file)
25
SPECIFICATIONS
V. RF-Modulator
Specification
Item
RF-Connector
75 ohm IEC 169-2, Male/Female
Frequency
470MHz to 860MHz
Output Channel
CH 21-69 for the Demodulator
TV Standard
PAL G/I/K Selectable by Menu Setting
Audio OUtput
Mono with Volume Control
Preset Channel
Ch 38(or TBD), Software changeable by Menu Screen
VI. MPEG Transport Stream & A/V Decoding
Specification
Item
Transport Stream
MPEG-2 ISO/IEC 13818 / Transport stream Specificartion
Profile Level
MPEG-2 MP@ML
Input Rate
Max. 90 Mbit/
Video Resolution
720×576(PAL)/720×480(NTSC)
Audio Decoding
MPEG/Musicam LayerⅠ&Ⅱ
Audio Mode
Single channel/Dual channel Joint Stereo/Stereo
Teletext
VBI & OSD(Optional)
Sampling Rate
32,44.1 and 48KHz
VII. System Resources
Specification
Item
Main Processor
ARM946 RISC Processor
Flash Memory
2 Mbyte
Program DRAM
32 Mbyte
Channel Capacity
Digital Channel : 5000
VIII. Power Supply
Specification
Item
Input Voltage
AC 90 to 250V, 50~60Hz
Power Consumption
Max. 50W
Poteciton
Separate Internal Fuse
Type
SMPS
IX. Physical Specification
Specification
Item
Size (W×H×D)
290×50×220(mm)
Net Weight
2.0Kg
26
DIVX
PRODUCT DESCRIPTION
28
PRODUCT FEATURES
28
WARNINGS FOR USE AND SAFETY
29
PRODUCT SPECIFICATIONS
30
SETUP MENU
31
MAIN MENU SCREEN
33
PLAY MUSIC
34
PLAY MOVIE
36
VIEWING PHOTO
38
FIRMWARE UPGRADE
40
TROUBLESHOOTING
42
27
PRODUCT DESCRIPTION
MVISION product is a new concept of multimedia player device that connects (movie,
music, image,..) files to external display such as TV with USB2.0 host interface.
Users can enjoy digital contents from various multimedia file, using an USB 2.0
external storage memory device( external HDD, USB memory..) in connection with the
PC.
WARNINGS FOR USE AND SAFETY
Before using this product, please read carefully the user manual first and use product
safely.
1. The contents like software, sound source, image are protected according to the related
copyright and regulation. The users who violates this regulations are responsible for the
infringement of the copyright.
2. This product does not support all the media file. Please check out the kind of codec using
test program. Some part of files might not function due to the characteristics of the files
and environment of use.
You can check out whether it is the playable media file or not, using freeware utility.
Users can use media conversion program to convert it into playable media file.
PRODUCT FEATURES
MVISION product is a entertainment device that you can play all kinds of file like movie,
music, and image on TV.
Use for multimedia MPEG (DiVX, Xvid, DAT, VOB, MPG, MPEG) files with connection to TV
∙Play digital photo album with JPEG file format.
∙Play digital music box with MP3, AC3, Ogg vorbis and WMA file format.
∙Support USB 2.0 interface for external memory storage
∙Upgrade the Firmware in a simple way through USB2.0 & Homepage.
∙Read the multimedia data at high-speed by supporting the USB2.0 external storage
device.
3. Do not damage or drop it. This will lead malfunction.
4. Do not insert any other substances like coins and hair pins.
5. Do not disassemble the product while the power code is on.
This will lead malfunction and electric shock.
6. Do not move the product while it is activated. This may damage the external memory storage.
Only move the product while the power code is off.
7. Do not allow any water or liquids enter into the interior. If any kinds of liquids enter, turn
off the power.
Otherwise it might lead electric shock or fire.
8. The use chemicals and cleanser will lead damage.
9. Do not expose this product under near heat source.
It may cause malfunction.
10. Do not put the product near the magnetic product such as speakers or magnets. This
may erase the data in the product.
11. Watching for long time and hearing with high sound may damage on your sight and
hearing.
12. If you see smoke or smell anything, turn off the product and plug out the power cord and
ask for the customer service.
13. Do not turn off the power while you are using it.
After using it, turn off the power.
28
29
PRODUCT SPECIFICATIONS
Product Name
Supported
File Formats
Movie
MVISION multimedia player
Movie
MPEG-1/2, MPG, MPEG, DAT, VOB, AVI
(DivX 3.x/4.x/5.x, XviD(Except GMC or Qpel option
applied file)
Music
MP3, WMA, OGG Vorbis, AC3
Photo
JPEG
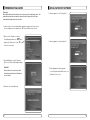
SETUP MENU
Setup menu screen of MVISION multimedia player
is as following.
Left white items are Showing setting items.
Middle yellow items are showing currently
configured values. Right white items shows
alternative options can be set for the selected
menu item.
Alternative options for each items are as
followings.
Main chip set
EM8511 (sigma design), Arm9 266MHz, 32MB SRAM
Audio Output
2CH Analog, Digital audio output(AC3, DTS pass though)
USB Interface
USB2.0 Host, USB1.1 compatible
∙Analog/DPCM : Outputs Analog 2ch/PCM data.
(composite cable audio signal)
HDD file system
FAT32, NTFS
∙Encoded Digital : Output digital audio data.
TV type
NTSC
The range of
temperature
0 ~ 60°
Audio output :
Video Output :
∙CVBS & S-Video : Outputs composite signal in PAL method.
S-video output is also supported.
∙CVBS & RGB
: Outputs composite and RGB signal in PAL method.
S-video output is not supported.
∙Component 480p : Outputs component in 480 progressive method.
Composite and S-video output is not supported.
∙Component 720p : Outputs component in 720 progressive method.
Composite and S-video output is not supported.
∙Component 1080i : Outputs component in 1080 interlaced method. In this mode, still image
can be shaking because of the characteristic of interlaced method.
Composite and S-video output is not supported.
TV Type :
∙4:3 Letter Box : Horizontal ratio of the videos has higher priority to fit into the screen size.
This mode might have black strap on the top and the bottom of the
screen, and shows the video in wide format.
∙4:3 fan & scan : Vertical ratio of the videos has higher priority to fit into the screen size.
Full screen can be viewed, but left and right sides
of the image can be cut little.
∙16:9 Full screen : screen ratio comes out with 16:9 mode.
30
31
SETUP MENU
MAIN MENU SCREEN
Slide Show time :
∙1,3,5,7,10,20 sec, Off : Configure the slide show interval for the JPEG files.
Press the [PLAY] button on remote control to show
images in slide show mode.
Start the slide show.
The picture will be consecutively showed in the seconds set for the time interval.
Subtitle Font Size :
∙Large Font : Subtitle are shown in large font size while playing a movie file.
∙Small font : Subtitle are shown in small font size while playing a movie file.
MVISION product shows all playable media files
on the screen .
If you want to play music, movie, and image files,
press [play] or [OK] button on the remote control.
1. Upper folder : Move back to upper folder by
selecting this item or pressing
[EXIT] button of the remote
control.
2. Folder list : List of all folder in current path.
Press [OK] button.
∙Off : No subtitle will be shown up on the screen.
3. Audio file : All playable music files are shown
Subtitle Color :
∙Font Color / Border Color : You can choose white / transparent, white / black, yellow
/ transparent, yellow / black
in this icon. Extensions of the
music files are mp3, wma, AC3 and
ogg.
4. Firmware file : It shows Firmware files of MVISION product. Firmware can be easily
Language :
upgraded by selecting desired firmware from the main screen.
Extensions of the Firmware files is upd.
∙English : Setup and various UI menu is shown in English
∙French : Setup and various UI menu is shown in French
∙Spanish : Setup and various UI menu is shown in Spanish
5. Image File : All playable image & picture files are shown in this icon.
Extensions of the picture & image file is jpg.
∙Portuguese : Setup and various UI menu is shown in Portuguese
6. Video file : All playable movie files are shown in this icon.
Initialize :
Extensions of the movie files are AVI(Divx 3.x, 4.x, 5.x, XviD), MPG, MPEG, DAT,
and VOB.
∙All the configurations and settings are set back to initial values & default values.
7. Current path : Shows currently selected folder path.
8. File information : Shows number of selected file and file size.
Notation of selected files is shown as
[currently selected file / total number of files in a folder].
32
33
PLAY MUSIC
PLAY MUSIC
∙You can play the MP3, WMA, OGG vorbis, and AC3 music files.
KEY Label
∙The search function does not work on OGG files.
∙If you want to play the music file, pressing “[OK] or [PLAY]” button after select a audio.
file you want, using “△, ▽ ” button to select the file. And then, the chosen music file in a
certain folder is being played until the “STOP ” button pressed.
16
BLUE
▽
Arrow : Move downward among menu items.
4
▷
Change the setting value into next higher level.
1
◁
Change the setting value into next lower level.
3
OK
Select a menu item or plays the chosen
file in current folder.
25
INFO
Shows information of currently played file.
Otherwise, shows how to use remote control.
6
EXIT
It stops while music is on. If you are on a folder,
move back to upper folder.
26
VOL +
It turns up volume.Volume goes 3 steps up when you
press the button for long time.
27
VOL -
It turns down the volume.
Volumes goes 3 steps down when you press the button for long time.
8
CH up
Play next file.
Firmware file and folder are skipped.
9
CH dn
Play previous file.
Firmware file and folder are skipped.
29
■
Stops currently playing music file.
28
▶
Play the selected music file. Continue on execution of all music file in
current folder. (Except firmware file)
Pauses currently playing music file.
13
◀◀
Fast Backward: Movement of the
playing location 5 sec. backward.
It does not support VBR music file.
12
▶▶
Fast Forward: Movement of the
playing location 5 sec. forward.
It does not support VBR music file.
32
SETUP
Go back to Set UP menu screen.
It stops playing music.
TVOUT
Switches between TV output modes.
NTSC
Functions
Description
31
Show all playable video files first [sort video file]
It stops when music
play is on.
15 DISPLAY
Switches between Screen display modes.
letter-box, pan & scan, full-screen.
14 PICTURE
Adjustment of screen contrast, brightness,
and saturation.
1-step.
20
RED
Switches between STB and Divx modes.
It pauses while playing movie, music, picture
and goes back to STB menu mode.If it get back to divx,
it plays after the point it stops when press [▶] button.
23
SORT
It arrays file in order of file names or file size.
17
YELLOW
Show all playable music files first [sort music file]
It stops when music
play is on.
18
GREEN
Show all playable image files first [sort image file]
It stops when music
play is on.
19
RED
Show all firmware files first [sort firmware file]
It stops when music
play is on.
2
△
Up Arrow : Move upward among menu items.
34
Description
5
11
KEY Label
Functions
Divx -> STB mode.
It stops while playing.
35
PLAY MOVIE
PLAY MOVIE
∙You can play AVI, MPG, MPEG, DAT, VOB movie files.
KEY Label
∙The subtitle must be saved in same folder with movie file.
∙If you want to play the video file, pressing “[OK] or [PLAY]” button after select a movie.
file you want, using “△, ▽ “ button to select the file. And then, the chosen movie file in a
certain folder is being played until the “STOP” button pressed.
3
25
6
36
OK
INFO
EXIT
Functions
VOL +
It turns up volume. Volume goes 3 steps up when you press the button
or long time.
27
VOL -
It turns down volume in a step The volume goes 3 steps down when you
press it for long time.
8
CH up
Play previous file in current folder.
Firmware file and folder are skipped.
9
CH dn
Play next file in current folder.
Firmware file and folder are skipped.
7
Fast Backward : Movement of the playing
location 30 sec. backward.
It does not support VBR file.
10
Fast Forward : Movement of the playing
location 30 sec. forward.
It does not support VBR file.
29
■
It deletes OSD. If OSD does not shown up, stops playing
the present movie file and goes back into file list menu.
28
▶
Play all the movie files in current folder.
Press once : Shows time, progress bar, file name.
Press twice : Shows only time information.
Press again : Turns the information status off.
It deletes OSD. If OSD does not shown up, stops playing the present
movie file and goes back into file list menu.
Continue on execution of all
music file in current
folder.(Except firmware file)
Pause the movie file.
13
◀◀
Rewind : REVx4/REVx8/REVx16/REVx32/
It does not support VBR files.
12
▶▶
Fast Forward : FFx4/FFx8/FFx16/FFx32
It does not support VBR files.
15
DISPLAY
Zoom in and out of the screen.
letter-box, pan & scan,
full-screen mode.
14
PICTURE
Adjustment of screen contrast, brightness,
and saturation.
1-step.
Divx -> STB mode.
20
RED
Switches between STB and Divx modes.
It pauses while playing movie,music,picture and
goes back to STB menu mode. If it get back to divx,
it plays after the point it stops when press [▶]button.
22
SUB -T
Changes subtitle settings.
(subtitle size change, subtitle off )
subtitle size (big, small)
subtitle off.
21
SEEK
It play the movie file at user desired time.
This feature is used to move the played video
predefined time forward during playing the file.
It does not support VBR files.
Description
It plays and sync with present time. When move and subtitle is not in sync,
use this button to sync between movie and subtitle.
Description
26
11
KEY Label
Functions
37
VIEWING PHOTO
VIEWING PHOTO
∙You can play JPEG files.
∙If you want to play the image file, pressing “[OK] or [PLAY]” button after select a photo file you
want, using “△, ▽ “ button to select the file. And then, the chosen image file in a certain
folder is being shown as the picture slide until the “STOP” button pressed If you press “CH
up/down” button, it also stop the slide show.
KEY Label
Description
4
▷
The screen can rotate at an angle of 90
degrees, clockwise direction.
It stops slide show.
1
◁
The screen can rotate at an angle of 90
degrees, counterclockwise direction.
It stops slide show.
6
EXIT
Stops the current displayed file and goes back into file list menu.
26
VOL +
Zoom in the original image file.
The Original image will
expand in order of1,
and maximum 5 times.
27
VOL -
Zoom out the original image file.
The Original image will
reduce in order of 1,
and maximum 5 times.
8
CH up
Play previous image file.
Firmware file and
folder are skipped.
9
CH dn
Play next image file.
Firmware file and
folder are skipped.
29
■
15
DISPLAY
Zoom in and out of the screen.
3 OK It fits the image to screen size when zooming.
Letter-box, Pan & Scan,
Full-screen mode
14
PICTURE
Adjustment of screen contrast, brightness,
and saturation.
1-step
Switches between STB and Divx modes.
It pauses while playing movie,music,picture
and goes back to STB menu mode.
If it get back to divx, it plays after the point it stops
when press [▶] button.
Divx -> STB mode
20
38
Functions
RED
Stops the playing image file and goes back into file list menu.
39
FIRMWARE UPGRADE
FIRMWARE UPGRADE
(Caution)
Do not operate or manipulate the power or remote control while you are upgrading it. MVISION
product will be upgraded anytime for codec update and bug fix to satisfy user s needs. You can
download the latest firmware file from MVISION homepage.
5. firmware upgrade screen1 [ Erasing flash ].
1. Download a firmware from homepage and unzip the file , and copy the firmware file to
desired location of the external memory storage. Connect external memory storage to
Divx USB 2.0 port of MVISION product.
2. Select a firmware file using remote control,
and press“[OK]”button to run the firmware
file. The firmware file is shown as“ ****.upd
”in file list.
6. firmware upgrade screen2 [ writing flash ].
3. Following screen appears.
Choose [YES] in warning message to run the
firmware file.
[Caution]
Do NOT power off this MVISION product while
7. When upgrading the firmware completed
successfully, following screen screen appears.
And system restarts automatically.
upgrading the firmware.Otherwise, flash memory
can have severe damage.
4. Firmware reading & decoding screen.
40
41
TROUBLESHOOTING
If you inquire more specific troubleshooting information, please visit MVISION homepage and
refer to FAQ or Q&A on customer support.
1. If you see nothing on TV screen, or screen trembling.
∙If configuration of video output is set up in wrong way, it might lead nothing on screen or
black and white or screen trembling.
Then Press [TV OUT] button slowly and change video output mode.
2. If MVISION Divx freezes after initial screen appears, and does not proceed to main menu
screen.
∙Check out if USB Device is connected well.
∙Check out if the partition of USB Device is set up and formatted properly.
3. If Subtitle is not showing.
∙ If movie or image file and subtitle file names do not match, subtitle does not shown up. For
example, if the file name of the movie file is “ bbb.avi”, the file name of subtitle file must be
”bbb.smi”.
4. When the power is on, nothing appears on the screen or screen appears in monochrome and
screen is shaking.
∙When video output mode setting is not properly set, screen appears in monochrome or
screen might be shaking.
Press [TV Out] button of the remote control to change output mode until video output mode
setting is properly set.
5. When Video file is not being playing , or nothing appears on the screen (black screen).
∙Video file with unsupported CODEC cannot be played. Users can figure out whether the
CODEC is being supported from the test program or use the media conversion program to
convert the file.
Otherwise, press [TV OUT] button of the remote control, twice.
6. When Screen is being displayed with no sound.
∙Check the external TV’s input terminal.
The video input terminals of external equipment such as the composite,
component have separated audio inputs.
Check it the video and sound inputs are properly connected.
42
Español
SX-5 USB
STX-5 USB
Por favor, leereste Manual detenidamente
antes del instalar el Receptor.
INDICE
SEGURIDAD GENERAL
46
INFORMACIÓN GENERAL
47
I. DESEMBALAJE
47
II. CARATERISTICAS
47
III. MANDO A DISTANCIA(RCU)
48
IV. PANEL FRONTAL
51
V. PANEL TRASERO
52
INSTALACIÓN DEL EQUIPO
53
GUÍA LISTA DE CANALES
55
GUÍA MENÚ
57
MENÚ PRINCIPAL
57
I . GETOR DE CANALES
57
I I. INSTALACIÓN
59
III. OPCIONES
63
IV. UTILIDAD
66
SOLUCIÓN DE PROBLEMAS
68
ESPECIFICACIONES
69
45
SEGURIDAD GENERAL
AVISO
Porfavor, leer las siguientes recomendaciones atentamente para evitar el riesgo de posibles
daños del equipo.
INFORMACIÓN GENERAL
I.DESEMBALAJE
Porfavor, asegurarse de que los siguientes articulos están incluidos con el receptor.
1) Mando a distancia (RCU)
No cubrir el receptor y mantener limpio el espacio alrededor del equipo.
2) Pilas (2EA)
Comprobar la tensión de entrada al receptor AC 90~240V, 50Hz~60Hz Max, 40W
Mantener los lÍquidos lejos del receptor.
3) Manula de instrucciones
4) Cable de A/V
El receptor no debe ser expuesto a goteos o salpicaduras, ni colocar objetos llenos de lÍquido
en el receptor.
Utilizar un trapo blando y un jabón de limpieza suave para limpiar la carcasa.
No bloquear las salidas de ventilación del receptor, las cuales le
protegen de calentamientos.
Porfavor, mantener el receptor en un espacio abierto.
II. CARATERISTICAS
∙Mpeg-2 Digital & Compatible DVB-S.
∙1 Lector de tarjetas.
∙1 Interfaz Común (CI).
∙Control de Banda C/KU para cada entrada de antena.
No permitir que el receptor sea expuesto a condiciones de mucho calor,
frio ó humedad.
No usar ningún cable ni accesorios no recomenados. Estos podrían dañar su equipo.
Por favor, desconectar el receptor del enchufe y el cable de antena, cuando no se vaya a
usar durante un largo tiempo.
∙Conmutación de LNB 22KHz, On/Off
∙Multi-LNB controlado por DiseqC 1.0, 1.2 & USALS.(Encendido/Apagado).
∙Memoriza hasta 5,000 Canales.
∙Power Scan & EPG.
∙PIG ( Image en Gráfico).
∙Teletexto y subtitlulos desde OSD.
∙Guia electronica de programación EPG.
No quitar la tapadera para reducir el riesgo de descargas eléctrica.
No intentar reparar equipo por Ud. mismo.
Llevarlo a un servicio técnico autorizado.
∙Graficos en pantalla hasta 65.546 colores.
∙Salida de Audio Digital (S/PDIF).
∙Actualizacion de Software & Lista de Canales via USB y puerto RS232.
∙PVR Ready via USB.
∙Grabaciones reproducibles en ordenador.
El Manual puede ser actualizado por las versiones.
46
47
INFORMACIÓN GENERAL
INFORMACIÓN GENERAL
III MANDO A DISTANCIA (RCU)
III MANDO A DISTANCIA (RCU)
1. MUTE
Enables or disables the audio.
2. POWER
Swithches the receiver between operation and standby mode.
3. TV
TV mode.
4. STB
STB mode.
5. VCR
VCR mode.
6. DVD
DVD mode.
7. Numeric buttons
Selects the TV or Radio service channels and individual menu.
8. FAV
Toggles the selected favorite mode.
9. SAT
Toggles the selected Satellite list.
10. EPG
Displays the TV or Radio program guide.
(Electronic Program Guide)
48
11.
Enables subtitle and teletext mode.
12. Audio
Changes the audio languages.
13.
Selects the sound mode(LEFT/RIGHT/STEREO).
14. ▲▼
Changes channels or moves to the item in the menu.
15. ◀ ▶
Adjusts the volume or moves to left or move item in the menu.
16. MENU
Displays the main menu on screen.
17. EXIT
Returns to the previous menu or normal viewing mode from a menu.
18. INFO
Displays the program information box on the screen and edit the name of favorite channel list.
19. V+/V-
Turns volume up or down.
20. P+/P-
Changes channels up or down on normal mode.
21.
Moves up a page in the channel list. (Selects zoom in/out).
22.
Moves down a page in the channel list.
23. STOP
Stops recording or playing.
24. PAUSE
Pauses the playing picture or go to normal mode.
25. Record
Records the program.
26. Play
Displays file lists and plays slow/normal.
27. Rewind
Stars reverse playback and changes the speed of reverse playback.
28. F/F
States fast forward or fast motion playback and changes the speed of forward playback.
29. Position
Displays position bar on the screen to adjust the antenna.
30. AV/TV
Selects the TV or AV mode.
31. TV/RADIO
Switches between TV and Radio.
32. ←PR
Selects the previously viewed channel.
33. Fn
Reserved.
34. STB/DivX
Switches STB or DivX.
35. UHF
Switches to UHF turning mode.
36. PAL/NTSC
Switches PAL or NTSC mode.
49
GENERAL INFORMATION
III. REMOTE CONTROL UNIT (RCU)
INFORMACIÓN GENERAL
IV. PANLE FRONTAL
Método de Configuración
1. Método Configuración 3 dígitos
1) Encender el TV.
2) Presionar la tecla “TV” y “OK” al mismo tiempo durante 2 segundos.Entonces, el LED TV se
encenderá/apagará 2 veces.
3) Consultar la lista de marcas de TV y presionar los tres números.(El LED TV se encenderá/apagará dos
veces. Si los tres números son incorrectos, el LED TV se encenderá/apagará una sola vez)
4) Si hay varios números para la misma marca, repetir el paso 3, hasta que el TV se apague.
5) Si el TV se apaga, presionar la tecla “OK”. (Si la configuración está bien hecha, el LED del Mando a
Distancia se encenderá/apagará dos veces)
6) Comprobar si el POWER y otras teclas del Mando a Distancia funcionan bien.
7) Si la tecla POWER funciona bien pero las otras teclas no lo hacen,empezar otra vez desde el paso 1.
(En algunas marcas, otras teclas excepto POWER puede que no funcionen correctamente)
� Para VCR (video) & DVD, el procedimiento es el mismo el cual se describe arriba.
* Si no se presiona los tres números en 10 segundos, la configuración no será válida.
* Si no se encuentra el código con el método mencionado arriba, entonces;
①
②
③
④ ⑤
2. Método Búsqueda Automática
1) Encender el TV.
1. POWER
Conmuta el receptor entre encendido y Standby.
2) Presionar la tecla “TV” y “OK” al mismo tiempo durante 2 segundos.Entonces, el LED TV se
encenderá/apagará dos veces.
2. VOL Up/Down
Volumen arriba / abajo o selecciona las opciones del menú.
3) Presionar la tecla “UP” hasta que el TV se apague.(Si se quiere buscar en orden inverso, presionar la
tecla “DOWN”)
3. CH Up/Down
Canal arriba / abajo o selecciona las opciones del menú.
4) Cuando se apague el TV, presionar la tecla “OK”. (Si la configuración está bien hecha, el LED del
Mando a Distancia se encenderá/apagará dos veces)
4. USB PORT
Conectar al Puerto USB.
5) Comprobar si el POWER y otras teclas del Mando a Distancia funcionan bien.
5. USB PORT
DivX file play.
6) Si la tecla POWER funciona bien, pero las otras teclas no lo hacen, empezar otra vez desde el punto
1) (En algunas marcas, otras teclas excepto POWER puede que no funcionen apropiadamente)
� Para VCR (video) & DVD, el procedimiento es el mismo el cual se describe arriba.
* Si no se presiona los tres números en 10 segundos, la configuración no será válida.
3. Como comprobar la configuración actual del código
1) Presionar la tecla “TV” y “OK” al mismo tiempo durante dos segundos. Entonces, el LED TV se
encenderá/apagará dos veces.
2) Presionar la tecla “Info” en menos de tres segundos.
3) El LED TV parpadeará seguidamente para mostrar los números actuales de la configuración.
(El LED TV parpadeará 10 veces para mostrar el ‘0’)
Ej.) Si los números de la configuración actual es 350, el LED TV parpadeará 3 veces, luego 5 veces y por
último 10 veces.
No todas las “memorias USB 2.0” son compatibles con nuestro producto.
� Para VCR (video) & DVD, el procedimiento es el mismo el cual se describe arriba.
50
51
GENERAL INFORMATION
INSTALACIÓN DEL EQUIPO
Esta sección explica varias maneras de conectar el receptor a tu TV, VCR
y sistema HI-FI.
V. PANEL TRASERO
Se puede elegir una de las siguientes configuraciones que recomendamos.
Si tiene algún problema ó necesita ayuda, consulte a su distribidor ó punto de venta.
Por favor comprobar que los siguientes articulos están incluidos con el receptor en su caja.
I. CONECTAR EL RECEPTOR AL TV CON CABLE EUROCONECTOR
I-1.Conectar el receptor al TV con cable euroconector
Conectar un extremo del cable euroconector al conector TV SCART del panel trasero
del receptor y el otro extremo al conector SCART del TV.
1. AERIAL
Conectar al cable de antena Terrestre.
2. LOOP OU
Conectar a otro STB (receptor).
3. LNB IN
Conectar al cable de antenna de Satélite.
4. LNB OUT
Conectar a otro STB (receptor).
5. AUDIO DIGITAL
Salida para conectar a un amplificador digital.
6. AUDIO-R
Conectar a la entrada AUDIO DERECHO del TV u otro equipo.
7. VIDEO
Conectar a la entrada de VIDEO del TV u otro equipo.
8. AUDIO-L
Conectar a la entrada AUDIO IZQUIERDO del TV u otro equipo.
9. TV SCART
Conectar al cable EUROCONECTOR TV.
10. VCR SCART
Conectar al cable EUROCONECTOR VCR.
11. TV/VCR
Conectar al TV ó VCR.
12. ANT
Conectar a la entrada de antena de TV.
13. RS 232
Conectar al ordenador personal para actualizaciones de software.
14. ETHERNET
Conectar al cable LAN.
15. YUV
Conectar a los jack YUV del TV ó VCR
16. USB
Conectar al Puerto USB.
17. FUENTE DE ALIMENTACIÓN
90~250V AC, 50/60Hz, 40W.
18. BOTÓN DE ALIMENTACIÓN
Encendido / Apagado.
52
II. CONECTAR EL RECEPTOR AL TV Y VCR CON CABLE RCA (CINCH)
II-1.Conectar el receptor al TV con un cable RCA (CINCH)
Conectar el cable RCA Rojo al conector Audio-R, el Blanco al Audio-L y el Amarillo al Video del panel
trasero del receptor y el otro extremo del cable a los mismos conectores colores del VCR.
53
INSTALACIÓN DEL EQUIPO
III. CONECTAR EL RECEPTOR AL TV Y VCR CON CABLE RF
III-1. CONECTAR EL RECEPTOR AL TV/VCR Y VCR CON CABLE RF
Conectar un extremo del cable RF al conector TV/VCR del panel trasero del receptor y el otro
extremo al conector ANT IN del TV.
Conectar un extremo del cable RF al conector ANT del panel trasero del receptor y el otro al
conector ANT OUT del VCR.
GUÍA LISTA DE CANALES
1. Modo de vista normal
a) Cuando se selecciona un canal, la barra de información
aparece automáticamente en la pantalla por unos pocos
segundos. Esta barra proporciona la información del
canal actua.
b) Presionar la tecla INFO para ver la información durante
el modo de vista normal.
2. Lista sencilla de canales
a) Presionar la tecla OK en el modo de vista mormal para ir
a la lista de canales.
b) Cuando es visualizado “detalles”en la lista de canales,
presionar la recla ROJA para ir a la lista simple de
canales.
3. Lista de canales de Detalles
a) Presionar la tecla OK en el modo de vista normal para ir
a la lista de canales.
b) Cuando la lista sencilla de canales es visualizada en la
pantalla, presionar la tecia ROJA para ir a la lista de
canales de Detalles.
c) Presionar ◀▶y ▲▼ para ordenar alfabéticamente.
d) Presionar la tecla SAT para ordenar por satélite y la
tecla FAV para favoritos 1-8.
54
55
GUÍA LISTA DE CANALES
GUÍA MENÚ
e) Presionar la tecla VERDE para volver a todos los canales
ó EXIT para volver al canal actual.
MENÚ PRINCIPAL
f) Presionar la tecla SAT para mostrar la ventana de los
satélite configurados (de los cuales se ha hecho una
búsqueda), y seleccionar un satélite, entonces la lista de
canales del satélite seleccionado será mostrado.
Presionar la tecla MENU del mando a distancia para abrir la
pantalla de la página principal La página principal será
mostrado.
g) Presionar la tecla FAV para mostrar la ventana de las
listas de favoritos. Selleccionar la lista de FAV y está
será visualizado.
2. Presionar OK para confirmar la selección.
h) Presionar la tecla VERDE y todos los canales
encontrados serán mostrados.
i) Presionar la tecla MENU y el cursor será movido a
TODOS en la parte izda., entonces se puede ordenar la
lista de canales que ha sido seleccionada.
1. Puede moverse dentro del menú principal presionando
▲▼◀ ▶ del mando a distancia.
3. Presionar EXIT ó MENÚ para volver al menú anterior.
I. Getor de Canales
II. Instalación
III. Opciones
I. Gestor de Canales
j) Tecla Ordenar (Tecla Amarilla) ~A~Z/Z~A/FAT/CAS.
k) Presionar la tecla amarilla para ordernar ~A~Z/Z~A/FAT/CAS. Si se quiere ir a desordenar desde la
selección CAS, y a la ventana anterior ir seleccionar desordenar.
4.EPG (Guía Electrónica de Programas
a) Presionar la tecla EPG en el modo de vista normal.
Esta sección ayuda a organizar canales acorde a las preferencia.
1. Seleccionar Gestor de Canales en el menú principal con ▲▼ y presionar OK.
2. Aparacerá en la pantalla la página de gestor de canales T.
3. Seleccionar el modo que se quiere uilizar ◀ ▶.
4. Para ver el canal que se quiere elegir, ir al canal y presionar la tecla ROJA.
b) Aparecerá la EPG del canal actual en la pantalla.
5. Presionar EXIT para volver al menú anterior ó presionar MENU para ir al canal actual que se estaba viendo.
c) Seleccionar el canal desado par ver la EPG.
I-1. Favorito
I-2. Renombrar
I-3.Mover
I-4. Bloquear
I-5. Borrar
d) Para grabar un programa con fución de grabar, precionar
la tacla REC(●)(solo en el modo de PVR).
e) Aparecerá como la foto que esta en la derecha.
f) Si se reserva para grabar un programa, será grabado
automáticamente en el momeeto reservado (solo en el
modelo de PVR).
g) Presionar la tecla dos veces para regresar al canal actual.
5. ZOOM IN/OUT
I-1. Favorito
1. Utilizando las teclas ◀ ▶ ir al modo favorito y
presionar la tecla AMARILLA para elegir entre
Favorito 1....8.
a) Pressionando la tecla página arriba ( ) desde la vista
normal de un canal, se puede usar la función Zoom
In/Out.
2. Presionar OK en el canal que se quiere añadir ó borra.
b) Desde la ventana de función del Zoom se puede seleccionar
(2-3-4) con la tecla de página arriba ( ) para salir de la
functión Zoom pulsar la tecla página abajo.
4. Los canales seleccionados serán memorizados
automáticamente.
c) Moviendo el cursor ◀▶y ▲▼ se puede seleccionar la
zona que se quiere hacer el zoom y presionando la tecla
página arraba ó abajo, se hace efectiva la selección.
Presionando la tecla Pause, la imagen se parará en el
modo Zoom.
56
IV. Utility
V. Accessory
3.
Una marca aparecerá al final del nombre del canal
seleccionado. Para borrar presionar OK otra vez.
5. Si se quiere comprobar la Lista de Favoritos
memorizada ir al otro modo (Renombrar-Borrar)
excepto Favoritos y presionar la tecla FAV para
comprobar Favoritos 1…8.
6. Presionar EXIT para volver al menu anterior ó presionar MENU
para volver al canal actual que se estaba viendo.
57
GUÍA MENÚ
I. Getor de Canales
I-2. Renombrar
1. Utilizando las teclas ◀ ▶ ir al modo de Renombrar.
2. Seleccionar el canal que se quiere renombrar utilizando
▲▼ presionar OK.
3. Se visulaizará un teclado en la pantalla.
4. Editar el nombre utilizando el teclado NÚMERICO y /ó
PALABRAS .
5. Presionar la tecla AMARILLA para renombrar Favorito 1..8 y
presionar la tecla AZUL para renombrar el Satélite.
6. Presionar EXIT para volver al menu anterior ó presionar
MENU para ir al canal actual que se estaba viendo.
I-3. Mover
1. Utilizando las teclas ◀ ▶ ir al modo Mover.
2. Seleccionar los canales que se quieren mover presionando la tecla OK .
3. Mover el cursor al lugar donde se quiere mover y presionar
la tecla VERDE.
4. Presionar EXIT para volver al menú anterior ó presionar
MENU para ir al canal actual que se estaba viendo.
I-4. Bloquear
1. Utilizando las teclas ◀ ▶ ir al modo Bloquear.
2. Seleccionar los canales que se quiere bloquear y presionar OK.
Apareceá al final del nombre del canal seleccionado Para
borrar presionar OK otra vez.
3. Precionar EXIT para ir al menú principal ó presionar MENU
para ir al canal actual que se estaba viendo.
I-5. Borrar
1.Utilizando las teclas ◀ ▶ ir al modo Borrar.
2. Seleccionar el canal que se quiere Borrar y presionar OK.
Aparecerá una (
) en el número de canal seleccionado.
Para borrar presionar la tecla AZUL otra vez.
3. Presionar la tecla AMARILLA para borrar TP. Seleccionar un
canal y presionar la tecla AZUL. Todos los canales de ese TP
serán seleccionados automáticamente.
4. Presionar la tecla AMARILLA para borrar un Satélite.
Seleccionar un canal y presionar la tecla AZUL. Todos los
canales de ese satélite serán seleccionados automáticamente.
5. Presionar EXIT par air al menú anterior ó presionar MENU
para ir la canal actual que se estaba viendo.
6. Aparecerá en el display una caja con un mensaje.
7. Seleccionar OK en la caja del mensaje y presionar OK para borrar los canales marcados.
58
GUÍA MENÚ
II. INSTALACIÓN
Esta sección ayuda a configurar la antena y buscar satélite
ó transpondedores, etc…Seleccionar instalación en el
menú principal y presionar OK. Presionar EXIT para ir al
menú principal ó presionar MENU para volver al
canal actual que se estaba viendo.
II-1 Satélite Buscar
II-2. Conmutador DiSEqC
II-3. Configuración de Motor
II-4. Terrestre Buscar
II-5. Configuración de Fábrica
II-1 Satélite Buscar
1. Se puede mover el cursor utilizando ▲▼ presionando
Ok, cunado se seleccione el valor deseado.
a) Satélite
- Presionar OK para visualizar la lista de satélites.
- Seleccionar el satélite deseado y presionar OK.
b) DiSEqC
- Presionar OK para visualizar la lista de los puertos de
DiSEqC.
- Seleccionar el DiSEqC deseado y presionar OK.
c) Frecuencia
- Presionar OK para visualizar la lista de las Frecuencias.
- Seleccionar la Frecuencia deseada y presionar OK.
d) LNB
- Presionar OK para visualizar la lista de
frecuencias de LNB.
- Selecionar el LNB deseado y presionar OK.
- Se puede también introducir directamente los números
utilizando el teclado numérico en el mando a distancia.
g) Buscar
- Presionar Buscar para empezar la búsqueda de
canales.
e) 22KHz ToneTono 22KHz
- Seleccionar entre Ninguno, 0 KHz ó 22 KHz
dependiendo de la conmutación de antena.
- El Satélite seleccionado aparecerá en la pantalla.
f) Opción Búsqueda
- Presionar OK para visualizar la lista de Opciones de
Búsqued.
- Selecionar la opción Búsqueda deseada y presionar OK.
- Presionar OK para empezar la búsqueda.
- Presionar ▶ para selecionar más satélites ó ◀
para cancelar los satélites seleccionado.
※ Editar : Para Editar un TP, presionar la tecla
ROJA en el mando a distancia.
59
GUÍA MENÚ
GUÍA MENÚ
II. INSTALACIÓN
II. INSTALACIÓN
II-2. Conmutador DiSEqC
1. Selecionar buscar canales en el modo de instalación
utilizando ▲▼ y presionar OK.
a) Si se presionar DiSEqC Switch y presionar OK en el menu
y aparecerá la página de Conmutación de DiSEqC en la
pantalla.
b) Selecionar el puerto de DiSEqC (A~D) de satélite deseado
utilizando y ◀ ▶▲▼ y precionar BUSCAR. Se buscará el
satélite deseado automáticamente.
f) Control de Motor
Seleccionar la posición utilizando ◀ ▶y presionar OK.
Aparecerá en la pantalla una caja de mensaje.
- Memorizar la Posición del motor para el satélite
seleccionado.
- Ir a Posición Satélite : Mover el motor a la posición
memorizada del satélite seleccionado.
- Ir a 0 : Ir al centro del motor
- Resetear Posición : Resetea todas la posiciones
memorizadas del motor
g) Posición de satélite
II-3 Conficuración del Motor
1.Se puede mover el cursor utilizando ▲▼ y presionar OK
cuando se seleciona el valor deseado.
a) Tipo de Motor : DiSEqC 1.2, USAL
- Presionar OK para visualizar el Tipo de Motor.
- Seleccionar el Tipo de Motor deseado y presionar OK.
b) Satélite
- Presionar OK para visualizar la lista de Satélites.
- Seleccionar el satélite deseasdo y presionar OK.
c) Conmutación y LNB
- Presionar OK para visualizar la lista de las Frecuencias y
Configuración de Conmutación
-Seleccionar LNB & Conmutación desado.
d) Frecuencia
- Presionar OK para visualizar la lista de las Frecuencias.
- Seleccionar frecuencia deseada y presionar OK.
e)Movimiento de Motor
- Buscar la posición apropiada del satélite seleccionando◀ ▶.
- Introducir directamente la posición utilizando el teclado NUMÉRICO en el mando a distancia.
- Seleccionar la dirección utilizando ◀ ▶( Oeste / Este).
h) Opción Búsqueda
- Presionar OK para visualizar la lista de Busqueda de canales.
- Presionar la Opción de Búsqueda que se quiera y presionar OK.
i) Buscar
- Presionar Buscar para empezar la búsqueda de canales.
- Presionar OK para empezar la búsqueda.
※ TP EDIT : Para Editar TP, presionar el teclado ROJA en el mando a distancia.
2. Editar la posición local
- Presionar el teclado VERDE para editar la posición local.
a) Longitud
- Introducir directamente la longitud utilizando el teclado numérico del mando.
- Seleccionar la dirección utilizando ◀ ▶ (Oeste/Este).
b) Longitud
- Introducir directamente la longitud utilizando el teclado numérico del mando.
- Seleccionar la dirección utilizando ◀ ▶ (Oeste/Este).
3. Presionar EXIT para regresar al menú anterior ó presionar MENU para ir al canal que se
estaba viendo.
60
61
GUÍA MENÚ
GUÍA MENÚ
II. INSTALACIÓN
III. OPCIONES
II-4. Terrestre Buscar
1. Seleccionar Buscar Canales en Instalación usando
▲▼ y presionar OK.
2. 1) Seleccionar la region desde donde se quiere
hacer la búsqueda◀ ▶.
2) Se puede seleccionar el tipo de búsqueda entre
Auto y Manual usando◀ ▶.
3) Auto
a) Seleccionar “Buscar” en el pantalla y presionar la
tecla OK para buscar canales.
b) Presionar Exit ó Menú al termino de la búsqueda.
4) Manual
a) Seleccionar el Canal Mux el cual se quiere buscar
utilizando ◀ ▶.
b) La Frecuencia será visualizada automáticamente
según el Canal Mux seleccionado.
II-5. Confuguración de Fábric
Usar la función de Configuración de Fábrica
solamente cuando se quiera volover al receptor
a la condición de configuración de fábrica. Todas
las configuraciones y canales serán borrados.
1. Seleccionar Configuración de Fábrica en
Instalación utilizando ▲▼y presionar OK.
2. Aparecerá en la pantalla una caja de mensaj.
3. Seleccionar OK para volver al receptor a la
condición de configuración de fábrica y presionar OK.
4. Presionar EXIT para volver al menú anterior ó
presionar MENU para ir al canal actual que se estaba
viendo.
This section may help you to set up OSD
language, time, etc. Select Options in Main
Page using ▲▼and press OK.
Press EXIT to return to the previous menu or
press MENU to go to the current live channel.
III-1. OSD Setup
III-2. Control Panel
III-3. Time Adjust
III-4. Parental Lock
III-5. Network
III-1. OSD Setup
1. Select OSD Setup in Options using ▲▼ and
press OK.
a) OSD Language
- Press OK to display OSD Language list.
- Select the language that you want and then
press OK.
b) Audio Language
- Press OK to display Audio Language list.
- Select the language that you want and then press OK.
c) Display Info Bar
- Press OK to display Display Info Bar time list.
- Select the second that you want to display and then press OK.
d) OSD Position
- Press OK to change Horizontal and Vertical Position of the OSD.
- OSD Position box displays on the screen.
- Select Hor Position / Ver Position using ▲▼.
- Move the OSD Position to right/left or up/down using ◀ ▶.
- Select OK on the OSD Position box and then press OK.
e) Screen format
- Press OK to display screen format list.
- Select the format that you want and then press OK.
2. Press EXIT to return to the previous menu or press MENU to go to the current live channel.
62
63
GUÍA MENÚ
GUÍA MENÚ
III. OPCIONES
III. OPCIONES
III-2. Control Panel
III-5. Network
1. Select TV Setup in Options using ▲▼ and press OK.
a) Video Output
- Press OK to display Video Output list.
- Select RGB if your SCART supports RGB control and then
press OK.
- Select CVBS if your SCART does not support RGB
control and the press OK.
b) TV Type
- Press OK to display TV Type list.
- Select the proper mode according to your TV type and press OK.
c) UHF Channel
- Press OK to display UHF Channel list.
- Select the proper channel and then press OK.
d) UHF Standard
- Press OK to display UHF Standard list.
- Select the proper mode and then press OK.
2. Press EXIT to return to the previous menu or press MENU to
go to the current live channel.
This is for user to use static IP address service Put in with
your IP address, Subnet mask and Gateway. And push Apply
button, then Box will reboot by itself.
III-3. Time Adjust
Set your local time according to your location.
1. Select Time Setup in Options using◀ ▶ and press OK.
2. Time Adjust page displays on the screen.
3. Move the cursor using◀ ▶, ▲▼and press OK when you
select the value that you want. (Input Hour directly using
number keys on the RCU)
4. Press EXIT to return to the previous menu or press MENU to
go to the current live channel.
III-4. Parental Lock Setup
1. Select Parental Lock Setup in Options using◀ ▶ and press OK.
2. Parental Lock Page displays on the screen.
3. You can lock and unlock Parental Lock selecting ON or OFF
using ▲▼ (For Channels).
4. You can lock and unlock Install Lock selecting ON or OFF
using ▲▼ (For Installation Settings).
5. Enter new password if you want to change the current
password.
6. Confirm your new password entering new password again.
7. Press EXIT to return to the previous menu or press MENU to go to the current live channel.
1. Configuración IP
Seleccionar una de las tres opciones para Configuración de Red.
a) No usado
En este caso, la red está inutilizada.
b) Automática
Esta opción es para cuando se usa un servicio de dirección
IP dinámica.
Después de Seleccionar Automática, pulsar el botón
Aplicar, el receptor se reiniciará por si solo. El receptor
obten1 mmna nueva IP del router.
c) Manual
Esta opción es para cuando se usa un servicio de dirección
IP estática.
Poner la dirección IP, Subset mask y Gateway. Pulsar el
botón Aplicar, y el receptor se reiniciará por si sol.
2. Actualización SW
a) Por favor, comprobar primero de donde se puede
descargar el fichero.
b) Pulsar el botón “input URL” si se quiere cambiar la
dirección. Entonces se podrá ver la caja del teclado de
dialogo y escribir la dirección URL de donde se quiere
descargar el software.
c) Después de escribir la dirección URL, presionar el botón
actualizar (upgrade) y mostrará el siguiente mensaje.
※ Atención : No apagar el STB (receptor) durante el
procedimiento de actualización.
Note. DEFAULT PASSWORD IS 0000
64
65
GUÍA MENÚ
VI.UTILIDAD
GUÍA MENÚ
USB PVR
Esta sección ayuda a usar USB etc. Seleccionar
Utilidades en la Página Pricipal utilisando ▲▼
Conectar el memoria USB al STB (receptor)
∙VI -1. System Information
∙VI -2. USB
∙VI -3. Common Interface
∙Si se desea grabar el programa, presionar la tecla REC.
1. Grabar (Recor)
∙Presionar la tecla “STOP” si se desea parar la grabación.
2.REPRODUCIR (PLAY)
VI-1. INFORMACIÓN DE SISTEMA
Esta opcion ayuda a saber la actual versión de S/W y H/W.
También se le informa del nombre del producto.
1. Seleccionar Información de sistema en Opciones y
presionar OK.
2. Presionar EXIT para volver al menú anterio.
VI-2 USB
Este receptor esta equipado con Puerto USB.
1. Seleccionar USB en Utilidades uitilisando ▲▼ y
presionar OK.
2. Si desea cambiar de modo (S/W upgrade, BootLoader
Upgrade), presionar el teclado ROJA del mando a
distancia.
3. Seleccionar el fichero que desea “upgrade” utilizando
▲▼ y presionar OK.
4. Una vez que haya “upgrade” el fichero seleccionado el
receptor reiniciará automáticament.
VI-3 INTEFAZ COMÚN
El receptor está equipado con un spot de Interfaz Común,
el cual tiene acceso a los servicios de pago por visión
codificados mediante varios módulos de acceso y una
tarjeta válida oficial.
El canal puede ser descodificado por el módulo de acceso
condicional y la tarjeta.
1. Seleccionar Interfaz Común en Utilidades con ▲▼y
presionar OK.
2. Intefaz Común se visualizará en la pantalla. (La frase
“No Modulo” es indicado cuando el módulo de acceso
condicional no está instalado).
3. Insertar el módulo de acceso condicional dentro del Slot.
4. El nombre del Slot depende de cada módulo de acceso condicional insertado.
5. Presionar EXIT para volver al menú anterior ó presionar MENÚ para volver al canal en vivo.
66
∙Si se desea reproducer un fichero grabado en la memoria USB, presionar la tecla “PLAY” y entonces
la lista de ficheros serán visualizados.
∙Seleccionar el fichero, el cual deseamos reproducir utilizando ▲▼ y presionar OK
∙Si se quiere reproducir otro fichero, presionar la tecla OK y la Lista de Ficheros será visualizada otra
vez.
∙REPRODUCIÓN LENTA (SLOW): Presionar la tecla “PLAY”. Si se presiona la tecla “PLAY” otra vez, la
velocidad será normal.
∙F/F, Rewind, Pausa es soportado.
3. Gestor de Ficheros (Ir al Menú Principal – Utilidades – USB)
∙Borrar
- Si se quiere borrar un fichero, presionar la tecla Amarilla.
- Seleccionar el fichero que se quiere borrar utilizando ▲▼ y presionar OK .
∙Formatear
- El STB (receptor) soporta solamente los ficheros con sistema FAT32.
- Si se quiere formatear un dispositivo de memoria a FAT32, presionar la tecla Azul.
- Después de formatear, todos los datos habrán sido borrados.
4. Precaución
∙Solamente dispositivos USB 2.0 alta velocidad son soportados para la función PVR.
∙Para descargas de S/W y reproducción MP3 es soportado con velocidad USB1.1.
∙Por favor, usar mas de dispositivos de memoria de 2GByte ó discos duros USB para utilizar la
función PVR.
∙Normalmente 1GByte puede grabar 30-40 minutos dependiendo del programa.
∙Algunas dispositivos de memoria USB no pueden ser soportados.
∙La fragmentación de la Memoria puede dar problemas de grabación, por favor, formatear el
dispositivo de memoria USB muy ocasionalmente.
∙Para más información y actualizaciones de software, visitar nuestra web.
http://www.hsmd.tv/> www.hsmd.tv.
67
SPECIFICATIONS
SOLUCIÓN DE PROBLEMAS
Solución
Problema
Nada aparece en el display
frontal ó no enciende la
fuente de alimentación
∙Comprobar la conexión del cable de alimentación con el
enchufe de la pared.
∙Comprobar la antena y ajustarla.
No hay imagen
∙Comprobar la conexión del cable y corregirlo.
∙Salir del modo UHF.
∙Comprobar el canal y la salida de Vídeo.
∙Comprobar el volumen del TV y del receptor.
No hay sonido
I.Conditional Access Module Interface
PCMCIA
Input Connector
Signal Level
LNB Power &
Polarization
∙Comprobar la conexión del cable y corregirla.
22KHz Tone
El canal no opera ó está
codificado
Aparece “ No señal” en la
pantalla
∙Comprobar que el Módulo de Acceso Condicional y la
tarjeta son las adecuadas para ver el canal seleccionado.
∙Comprobar que el Módulo de Acceso Condicional y la
tarjeta están correctamente insertados.
∙Comprobar la fuerza y la calidad de la señal en el menú.
∙Comprobar el LNB y cambiarlo si fuese necesario.
∙Comprobar el cable del LNB.
∙Comprobar la antena y ajustarla.
F-type (Output loop-through), IEC 169-24, Female
-25 to -65 dBm
Vertical : +13.5/18.5Vdc±5%
Horizotal : +18.5Vd dc±
Current : Max.500mA.Overload protected
Frequency : 22KHz±2KHz
Demodulation
Amplitude : 0.8±0.2V
Version 1.2 USALS Compatible
QPSK
Input Symbol Rate
2~45Ms/s Convolution Code Rate
1/2, 2/3, 3/4, 5/6, 7/8 with Constraint Length K=7
∙Apuntar directamente el mando a distancia al receptor.
∙Comprobar que nada bloquea el panel frontal.
Specification
Item
∙Comprobar el estado del mute del TV y del receptor.
∙Cambiar las pilas.
1 SLOT, ISO 7816, GSM11.11 and EMV (payment systems) compatibility
Slot.type Ⅰor type Ⅱ
DVB Common Interface Standard
(Viaccess, Irdeto, Nagra Vision, Conax, Crytoworks, AlpahCrypt..)
II. Tuner & Channel
DiSEqC Control
El mando a distancia no
funciona
Specification
Item
SMART CARD
III. TUNER DVB-T
Specification
Item
Input Frequency Range
RF Input Signal Level
Bandwidth
OFDM Spectrum
Demodulation modes
Guard Interval
FEC Decoder
170 to 230MHz(VHF), 470 to 862MHz(UHF)
-77 dBM to -10 dBM
7MHz & 8MHz
2K and 8K Carrier
QPSK, 16, 64 QAM
1/4, 1/8, 1/16, 1/32
1/2, 2/3, 3/4, 5/6 & 7/B
IV. A/V & Data In/Out
Specification
Item
Comprobar, Tuner
defectuoso
∙Ir a Opción y seleccionar información de Sistema.
Se ha olvidado la contraseña
∙Contactar con el distribuidor.
TV Scart Output
RGB, CVBS, L, R Output with Volume Control
VCR Scart In/Out
RGB, CVBS, L, R In
CVBS, RGB, L, R Out
RCA Output
CVBS, RGB, L, R Output(Yellow, White, Red Jack) with Volume Control
Data Interface
68
-RS-232, Bit Rate 115,200baud
Connector : 9-Pin D-Sub Male type
-Ethernet : 10/100Mbps, DHCP Supporting
-USB : USB 2.0 Type A Connector, 2Port(Front & Rear), 1Port(Multimedia file)
69
SPECIFICATIONS
V. RF-Modulator
Specification
Item
RF-Connector
75 ohm IEC 169-2, Male/Female
Frequency
470MHz to 860MHz
Output Channel
CH 21-69 for the Demodulator
TV Standard
PAL G/I/K Selectable by Menu Setting
Audio OUtput
Mono with Volume Control
Preset Channel
Ch 38(or TBD), Software changeable by Menu Screen
VI. MPEG Transport Stream & A/V Decoding
Specification
Item
Transport Stream
MPEG-2 ISO/IEC 13818 / Transport stream Specificartion
Profile Level
MPEG-2 MP@ML
Input Rate
Max. 90 Mbit/
Video Resolution
720×576(PAL)/720×480(NTSC)
Audio Decoding
MPEG/Musicam LayerⅠ&Ⅱ
Audio Mode
Single channel/Dual channel Joint Stereo/Stereo
Teletext
VBI & OSD(Optional)
Sampling Rate
32,44.1 and 48KHz
VII. System Resources
Specification
Item
Main Processor
ARM946 RISC Processor
Flash Memory
2 Mbyte
Program DRAM
32 Mbyte
Channel Capacity
Digital Channel : 5000
VIII. Power Supply
Specification
Item
Input Voltage
AC 90 to 250V, 50~60Hz
Power Consumption
Max. 50W
Poteciton
Separate Internal Fuse
Type
SMPS
IX. Physical Specification
Specification
Item
Size (W×H×D)
290×50×220(mm)
Net Weight
2.0Kg
70
DIVX
DESCRIPCIÓN DEL PRODUCTO
72
CARACTERÍSTICAS DEL PRODUCTO
72
PELIGROS AL USARLO Y SEGURIDAD
73
ESPECIFICACIONES DEL PRODUCTO
74
MENÚ CONFIGURACIÓN
75
PANTALLA MENÚ PRINCIPAL
77
REPRODUCIR MÚSICA
78
REPRODUCIR PELICULAS
80
VER FOTOS
82
ACTUALIZACION DE FIRMWARE
84
SOLUCIÓN DE PROBLEMAS
86
71
MDESCRIPCION DEL PRODUCTO
El Nuevo producto MVISION es un nuevo concepto de dispositivo multimedia
que conecta (peliculas, música, imagen…) ficheros externos a través de un TV
mediante un interfaz USB 2.0.
El usuario puede disfrutar de contenidos de ficheros multimedia, usando un
dispositivo de almacenamiento de memoria USB 2.0 ( HDD externo, memoria
USB…) en conexión con el PC.
CARACTERÍSTICAS DEL PRODUCTO
El producto MVISION es un dispositivo de entretenimiento con el que se puede
reproducir toda clase de ficheros de peliculas, música e imágenes en la TV.
ADVERTENCIAS PARA EL USO Y SEGURIDAD
Antes de usar este producto, por favor, leer primero atentamente el manual
de usuario y usar con cuidado el producto.
1. Los contenidos como software, fuentes de sonido, imagines son protegidos según las
leyes de copyright y regulaciones establecidas. El usuario que viola estas regulaciones
son responsables de la infracción del copyright.
2. Este producto no soporta todos los ficheros multimedia. Por favor, comprobar el tipo de
codec usando programas para ello. Algunas partes de ficheros pueden no funcionar
debido a las características de los ficheros y entornos de uso.
Se puede comprobar si es un fichero reproducible ó no, utilizando una utilidad
freeware. Los usuarios pueden usar un programa de conversion para converter a un
fichero reproducible.
3. No dañarlo ó mojarlo. Esto permitirá un mal funcionamiento.
4. No insertar ningún otro elemento como monedas y horquillas.
Usar para ficheros multimedia MPEG (DiVX, Xvid, DAT, VOB, MPG, MPEG) con conexión al TV.
5. No abrir el equipo mientras el cable de alimentación está enchufado.
Reproducir fotos digitales con formato de ficheros JPEG.
6. No mover el producto mientrás esté activado. Esto puedo dañar la memoria de
almacenamiento externa.
Solamente mover el producto mientrás esté desconectado el cable de alimentación.
Reproducir música digital con formato de ficheros MP3, AC3, Ogg vorbis y WMA.
Soporta interfaz USB 2.0 para un almacenamiento de memoria externa.
Actualiza el Firmware de una manera sencilla a través del puerto USB 2.0.
7. No permitir que ningún líquido entre en el interior. Si entra alguna clase de líquidos,
apagar rápidamente el receptor. De otra manera puede haber un cortocircuito ó fuego.
Lee los datos multimedia de alta velocidad a través del dispositivo de almacenamiento externo
USB 2.0.
8. Productos químicos ó de limpieza dañaran al equipo.
9. No exponer el equipo cerca de fuentes de calor.
10. No situar el equipo creca de productos magnéticos como altavoces ó imanes.
Esto puede borrar los datos de este producto.
11. Ver durante un largo periodo de tiempo y escuchar con un alto volumen,
puede dañar a la vista y al oido.
12. Si se ve humo ó un mal olor, apagar y desconectar el cable de alimentación
rápidamente y preguntar al servicio de usuario.
13. No desconectar la alimentación mientras se está usando.
Después de utilizarlo, desconectar la alimentación.
72
73
ESPECIFICACIONES DEL PRODUCTO
Nombre del Producto
Soporta ficheros
de películas con
formato
Reproductor multimedia MVISION
Movie
MPEG-1/2, MPG, MPEG, DAT, VOB,
AVI, DivX, 3.x /4.x/5.x, XviD (Excepto
ficheros GMC ó QPEL)
Ficheros de Música
MP3, WMA, OGG Vorbis, AC3
Ficheros de foto
JPEG
Main chip set
EM8511 (sigma design), Arm9 266MHz, 32MB SRAM
Salida Audio
2CH Analog, Digital audio output(AC3, DTS pass though)
Interfaz USB
USB2.0 Host, USB1.1 compatible
Sistema de fichero del HDD
FAT32, NTFS
Tipo TV
NTSC
The rango de temperatura
0 ~ 60°
MENÚ CONFIGURACIÓN
La pantalla del menú Configuración del reproductor
multimedia MVISION muestra lo siguiente.
Las opciones en blanco a la izquierda son los
elementos de configuración.
Las opciones en amarillo en el medio esta mostrando
los valores de configuración actuales.
Las opciones en blanco a la derecha muestra las
opciones alternativas que puedes ser tambien
configuradas.
Opciones alternativas para cada opcion son las siguientes:
Salida de Audio :
Analógica/DPCM : Salidas Analógica 2ch/PCM datos.
(compuesta señal de cable de audio)
Digital Codificado : Salida de datos de audio digital.
Salida de Video:
C V B S & S - V i d eo : Salida de señal compuesta en método PAL.
S-video es soportado tambien.
C V B S & R G B : Salida compuesta y señal RGB en método PAL.
S-video no es soportado.
Componentes 480p : Salida componentes en método progresivo 480.
Salida compuesta y S-video no es soportado.
Componentes 720p : Salida componentes en método progresivo 720p.
Salida compuesta y S-video no es soportado.
Componentes 1080i : Salida componentes en método entrelazado 1080.
En este modo, la imagen puede temblar por las características del método
entrelazado. Salida compuesta y S-video no es soportado.
Tipo TV :
4:3 Letter Box : El ratio Horizontal de los videos tiene alta prioridad para entrar en el tamaño de la
pantalla. Este modo puede tener una banda negra en la parte superior e inferior de la
pantalla, y mostrar el video en formato ancho.
4:3 fan& scan : El ratio vertical de los videos tiene alta prioridad para entrar en el tamaño de la pantalla.
Puede ser vista la pantalla entera, pero los lados izquierdo y derecho pueden estar un poco
cortados.
16:9 Pantalla completa : El ratio de la pantalla estará en el modo.
74
75
MENÚ CONFIGURACIÓN
Tiempo para mostrar deslizando :
1,3,5,7,10,20 sec, Off : Configurar el intervalo de tiempo para mostrar deslizando los ficheros JPEG.
Presionar la tecla (PLAY) en el mando a distancia para mostrar las imágenes en
el modo mostrar deslizamiento. Empieza el deslizamiento a mostrarse.
La imagen será mostrada en los segundos del intervalo de tiempo configurado.
PANTALLA MENU PRINCIPAL
El producto MVISION muestra todos los
ficheros reproducibles en la pantalla.
Si se quiere reproducir música, películas,
e imágenes, presionar la tecla (play) ó (OK)
en el mando a distancia.
1. Carpeta superior
Fuente del Tamaño de los Subtítulos :
Fuente Grande : Los subtítulos serán mostrados en un tamaño de fuente grande mientras se esta
reproduciendo una película.
Fuente Pequeña : Los subtítulos serán mostrados en un tamaño de fuente pequeña mientras se esta
reproduciendo una película.
Off : No serán mostrados los subtítulos.
Color de los Subtítulos :
Fuente del Color / Color del Borde : Se puede elegir entre blanco / transparente, blanco/negro,
amarillo/transparente, amarillo/negro.
Idioma :
Inglés : Menú configuración y varios UI serán mostrados en Inglés.
Seleccionando esta opción se mueve a la
carpeta superior ó presionando la tecla
(EXIT) del mando a distancia.
2. Lista de Carpetas
Muestra la lista de todas las carpetas en la actual ruta.
3. Ficheros de Audio
Todos los ficheros de música reproducibles serán mostrados en este icono. Las
extensiones de ficheros de música son mp3, wma, AC3 y ogg.
4. Ficheros de Firmware
Muestra los ficheros de Firmware para productos MVISION. El Firmware puede ser
fácilmente actualizable seleccionando el firmware deseado desde la pantalla principal
Francés : Menú configuración y varios UI serán mostrados en Francés.
Españo l : Menú configuración y varios UI serán mostrados en Español.
Portugués : Menú configuración y varios UI serán mostrados en Portugués.
Inicializar :
Todos los cambios y configuraciones volveran a los valores iniciales por defecto.
5. Ficheros de Imagenes
Todos los ficheros reproducibles de imagenes y fotos serán mostrados en este icono.
6. Ficheros de Video
Todos los ficheros reproducibles de peliculas serán mostrados en este icono. La
extensión de estos ficheros son AVI (Divx 3.x, 4.x, 5.x, vid), MPG, MPEG, DAT, y VOB.
7. Actual Ruta
Muestra las carpetas de la actual ruta seleccionada.
8. Información de Ficheros
Muestra el número y tamaño del fichero seleccionado.
La notación de los ficheros seleccionados es mostrado como (actual fichero
seleccionado / número total de ficheros en una carpeta).
76
77
REPRODUCIR MÚSICA
REPRODUCIR MÚSICA
Se puede reproducir ficheros de música MP3, WMA, OGG vorbis, y AC3.
La function de búsqueda no funciona en los ficheros OGG.
Si se quiere reproducir ficheros de música, presionar la tecla (OK) ó.
(PLAY) después de seleccionar el fichero de audio deseado, usando la tecla
para
seleccionar el fichero. Y entonces, el fichero de música elegido en una carpeta estará
siendo reproducido hasta que se presione la tecla “STOP”.
TECLA Etiqueta
Funciones
Descripcion
16
Muestra primeros todos los ficheros de video
reproducibles (ordena ficheros de video)
Para cuando reproducir
play is on.
Muestra primeros todos los ficheros de música
reproducibles (ordena ficheros de música)
Para cuando reproducir
música está encendido.
Muestra primeros todos los ficheros de imagenes
reproducibles (ordena ficheros de imágenes)
Para cuando reproducir
música está encendido.
Muestra primeros todos los ficheros de firmware
(ordena ficheros de firmware)
Para cuando reproducir
música está encendido.
17
18
19
2
78
AZUL
AMARILLO
VERDE
ROJO
Flecha hacia Arriba : Mueve página arriba entre las opciones del menú.
KEY Label
Functies
Beschrijving
5
Flecha : Mover página dentro del menu.
4
Cambia los valores de configuración dentro del próximo nivel superior.
1
Cambia los valores de configuración dentro del próximo nivel inferior.
3
OK
Selecciona una opción del menu ó reproduce el fichero seleccionado en la actual carpeta.
25
INFO
Muestra información del actual fichero en
6
EXIT
reproducción. De otra manera, muestra como usar el mando a distancia.
Para mientras la reproducción está encendida.
Si se está en una carpeta, mueve a una carpeta superior.
26
VOL +
Sube el volumen. El volumen sube tres pasos cuando
se mantiene presionada la tecla durante un tiempo.
27
VOL -
Baja el volumen. El volumen baja tres pasos cuando
se mantiene presionada la tecla durante un tiempo.
8
CH up
Reproducir el siguiente fichero.
Los ficheros y carpetas de firmware son saltados.
9
CH dn
Reproducir el fichero anterior.
Los ficheros y carpetas de firmware son saltados.
29
Para la actual reproducción del fichero de música.
28
Reproduce el fichero de música seleccionado. Continua en ejecución todos los ficheros de
música de la actual carpeta. (Excepto ficheros de firmware).
11
Hace Pausa del actual fichero de música en reproducción.
13
Avance Rápido: Reproduce 5 seg.
más rápida la música de lo normal.
No soporta ficheros de música VBR.
12
Retroceso Rápido : Retrocede la reproducción
de la música 5 seg. más rápido de lo normal.
No soporta ficheros de música VBR.
32 CONFIGURACIÓN
(SETUP)
Vuelve a la pantalla del menú Configuración
Para la reproducción de la música.
31
TVOU
Cambia entre los distintos modos de Salida TV
NTSC
15
DISPLAY
Cambia entre los distintos modos de
visualización de la pantalla.
letter-box, pan & scan, pantalla completa.
14
IMAGEN
Ajusta el contraste, brillo y saturación de la
pantalla.
1-paso
ROJO
Cambia entre los modos STB y Divx. Hace
pausa mientras se reproduce música, películas,
fotos y vuelve al modo menú STB. Si se
vuelve a divx, reproduce después del momento
en que se paró cuando se presiona la tecla[ ].
Divx -> STB modo.
Ordena los ficheros por nombre ó por tamaño.
Para la reproducción.
20
23 ORDENAR
79
REPRODUCIR PELÍCULAS
REPRODUCIR PELICULAS
Puede reproducir ficheros AVI, MPG, MPEG, DAT, VOB.
Los subtítulos deben ser grabados en la misma carpeta con los ficheros de la película.
Si se quiere reproducir el fichero de video, presionar la tecla (OK) ó (PLAY) después de
seleccionar el fichero de la película, usando la tecla “ , “ para seleccionar el fichero.
Y entonces, el fichero elegido empezará a reproducirse hasta que se presiona la tecla
“STOP”.
TECLA
Etiqueta
Funciones
26
VOL +
Sube el volumen. El volumen subirá 3 pasos dejando presionada la tecla durante un tiempo.
27
VOL -
Baja el volumen. El volumen bajará 3 pasos dejando presionada la tecla durante un tiempo.
8
CH up
Reproduce el fichero anterior de la actual carpeta. Los ficheros y carpetas de firmware serán saltados.
9
CH dn
Reproduce el siguiente fichero de la actual carpeta. Los ficheros y carpetas de firmware serán saltados.
7
Retroceso Rápido : Retrocede la reproducción de la No soporta ficheros de música VBR.
música 5 seg. más rápido de lo normal
Avance Rápido : Reproduce 5 seg.
más rápida la música de lo normal
10
3
OK
25
6
80
INFO
EXIT
Funciones
Borra el OSD. Si el OSD no es mostrado, para la reproducción del actual fichero de
película y vuelve al menú de la lista de ficheros.
28
Reproduce todos los ficheros de películas
de la actual carpeta.
11
Hace pausa en la película
13
Rebobinar: REVx4/REVx8/REVx16/REVx32
No soporta ficheros VBR.
12
Bobinar: FFx4/FFx8/FFx16/FFx32
No soporta ficheros VBR.
Modo letter-box, pan & scan,
pantalla completa.
Ajusta el contraste, brillo y saturación de la pantalla 1-paso.
20
ROJO
Cambia entre los modos STB y Divx.
Hace pausa mientras se reproduce música,
películas, fotos y vuelve al modo
menú STB. Si se vuelve a divx, reproduce
después del momento en que se paró
cuando se presiona la tecla( )
Divx -> STB modo.
22
SUB-T
Cambia la configuración de subtítulos.
(cambia el tamaño delos subtítulos y lo apaga)
tamaño de subtítulos
(grande, pequeño)
21
SEEK
Reproduce el fichero de película a la hora deseada
BUSCAR Esta opción es usada para mover la hora
No soporta ficheros VBR
hacia delante de reproducción de la película
durante su reproducción.
Presionando una vez : Muestra la hora, la barra de progreso y el nombre del fichero.
Presionando dos veces : Muestra solamente la información del tiempo.
Presionando otra vez : Sale de toda información.
Borra el OSD. Si el OSD no es mostrado, para la reproducción del
actual fichero de película y vuelve al menú de la lista de ficheros.
Continua en ejecución todos los
ficheros de música de la actual
carpeta.(Excepto ficheros de firmware)
14 IMAGEN
Descripcion
Reproduce y sincroniza la hora actual. Cuando la película y subtítulos no están
sincronizados, usar esta botón para sincronizarlos.
No soporta ficheros de música VBR.
29
15 DISPLAY Zoom encendido y apagado de la pantalla.
TECLA Etiqueta
Descripcion
81
VER FOTOS
Se puede reproducir ficheros JPEG
ISi se quiere reproducir un fichero de imagen, presionar la tecla “OK” ó (PLAY) despues de
haber seleccionado el fichero, usando la tecla “ , “ para seleccionar el fichero. Y
entonces, el fichero de imagen seleccionado de una carpeta empezará a mostrarse hasta que
se presione la tecla “STOP”.
VER FOTOS
TECLA Etiqueta
Funciones
Descripcion
4
La pantalla puede girar en un angulo de 90
grados, en sentido de las agujas del reloj.
Para la visualización
de la foto.
1
La pantalla puede girar en un angulo de 90
grados, en sentido contrario de las agujas del reloj.
Para la visualización
de la foto.
Si se presiona las teclas “CH up/down”, tambien para la visualización de la imagen.
6
EXIT
Para la visualización del fichero actual y vuelve al menu de la lista de ficheros.
26
VOL +
Hace zoom en el fichero de la imagen original.
La imagen original
se ampliará hasta
un máximo de 5 veces.
27
VOL -
Reduce el zoom del fichero de la imagen original.
La imagen original se
reducirá hasta un máximo
de 5 veces.
8
CH up
Reproduce el fichero de imagen anterior.
Los ficheros y carpetas
de firmware serán saltados.
9
CH dn
Reproduce el fichero de imagen siguiente
29
Los ficheros y carpetas de
firmware serán saltados.
Para la reproducción del fichero de imagen y vuelve al menu
de lista de ficheros.
15
DISPLAY
Zoom activado y desactivado de la pantalla.
Modo Letter-box,
Pan & Scan,
pantalla completa
14
IMAGEN
Ajusta el contraste,
brillo y saturación de la pantalla
Cambia entre los modos STB y Divx.
1-paso.
ROJO
Hace pausa mientras se reproduce música,
películas, fotos y vuelve al modo menú STB.
Si se vuelve a divx, reproduce después del
momento en que se paró cuando se presiona
la tecla[ ].
Divx -> STB modo.
20
82
.
83
ACTUALIZACIÓN DE FIRMWARE
(Precaución)
No operar ó manipular la alimentación ó mando a distancia mientras se está
actualizando. El producto MVISION se actualizará cuantas veces sea necesario
por actualizaciones code, para intentar satisfacer las necesidades de los
usuarios.
Se puede descargar los últimos firmwares desde la página web oficial
MVISION: www.hsmd.tv (http://www.hsmd.tv/)
1. Descargar el firmware de la página y
descomprimir el fichero.
Copiar el fichero de firmware en la
memoria de almacenamiento externo.
Conectar la memoria externa al puerto
Divx USB 2.0 del receptor MVISION.
ACTUALIZACIÓN DE SOFTWARE
5. Pantalla 1 de actualización de firmware
(Borrando flash).
6. Pantalla 2 de actualización de firmware (
escribiendo flash ).
2. Seleccionar el fichero del firmware usando el
mando a distancia, y presionar la tecla “OK”
para descargar el fichero de firmware. El
fichero de firmware es mostrado como ***.upd
en la lista de ficheros.
3. En la pantalla aparecerá lo siguiente.
Elegir (SI) en el mensaje de alerta para
descargar el fichero de firmware.
[Precaución]
No apagar el receptor MVISION mientras se
está actualizando el firmware.
Deotra manera, la memoria flash puede ser
dañada.
7. Cuando la descarga del firmware se ha
completado con éxito, aperecerá lo siguiente en
la pantalla. Y el sistema se reiniciará
automáticamente.
4. Pantalla de lectura & decodificación de
Firmware.
84
85
SOLUCIÓN DE PROBLEMAS
Si se desea información más detallada para solucionar problemas, por favor
visitor la página de MVISION (www.hsmd.tv (http://www.hsmd.tv/) y
referirse a support ó dirigirse al punto de compra del producto.
1. Si no se ve nada en la pantalla de TV ó la imagen tiembla.
Si la configuración de la salida de video no está correctamente configurada podría hacer no ver nada
en la pantalla, imagen en blanco y negro ó temblar la imagen.
Entonces presionar la tecla (TV OUT) lentamente y cambiar el modo de salida
de video.
2. Si el producto MVISION se congela utilizando el Divx despues de aparecer la pantalla
inicial, y no cambia a la pantalla del menú principal.
si el dispositivo USB está bien conectado.
Comprobar si la partición del dispositivo USB está bien formateado ó configurado.
3. Si los Subtítulos no son mostrados.
Si el fichero de película ó imagen y el fichero de subtítulos no cuadran, los subtítulos no son
mostrados. Por ejemplo, si el nombre del fichero de la película es “bbb.avi”, el nombre del fichero
de los subtítulos debe ser “bbb.smi”.
4. Cuando está conectada la alimentación, y no aparece nada en la pantalla ó la pantalla
aparece en monocromo ó temblorosa.
Cuando la configuración del modo salida de video no está correctamente configurada, la imagen
puede aparecer en monocromo ó temblorosa.
Presionar la tecla (TV Out) del mando a distancia para cambiar el modo de salida de video hasta que
la configuración esté correctamente.
5. Cuando no se reproduce un fichero de video, ó no aparece nada en la pantalla (pantalla en
negro).
El fichero de video no puede ser reproducido si no soporta CODEC. Se puede comprobar si los CODEC
son correctos desde un programa de comprobación ó usar un programa de conversión.
De otra manera, presionar la tecla (TV OUT) del mando a distancia dos veces.
6. Cuando aparece imagen en la pantalla pero no sonido.
Comprobar la entrada externa del TV.
La entrada de video del equipo externo, tanto la compuesta, como la componentes han sido
separadas de las entradas de audio.
Comprobar si las entradas de video y audio están correctamente conectadas.
86
Nederlands
SX-5 USB
STX-5 USB
Lees eerst deze handleiding goed door
voordat u de ontvanger installeert.
INDEX
ALGEMENE VEILIGHEID
90
ALGEMENE INFORMATIE
91
I. UITPAKKEN
91
I I. SPECIFICATIES
91
III. AFSTANDSBEDIENING (RCU)
92
IV. VOORKANT PANEEL
95
V. ACHTERKANI PANEEL
96
INSTALLATIE
97
KANALENLIJST
99
MENU
101
HOOFDMENU
101
I. KANALENLIJST
101
II. INSTALLATIE
103
III. OPTIES
107
IV. UTILITY
110
PROBLEMEN OPLOSSEN
112
SPECIFICATIES
113
89
ALGEMENE VEILIGHEID
WAARSCHUWING
Lees eerst de veiligheidsvoorschriften om eventuele schade aan u of uw installatie te
voorkomen.
ALGEMENE INFORMATIE
I. UITPAKKEN
Verzeker u zelf dat de volgende voorwerpen in de verpakking zitten.
1) Afstandsbediening (RCU)
Bedek de ontvanger niet en houd de omringende omgeving schoon.
2) Batterijen (2EA)
Controleer de ingangsspanning AC 90~240V, 50Hz~60Hz Max, 40W
Houd vloeistoffen op afstand van uw ontvanger.
3) Handleiding
4) A/V Kabel
De ontvanger mag niet worden blootgesteld aan druppels of spetters, plaats ook geen
voorwerpen met vloeistoffen op de ontvanger.
Verwijder allereerst de stekker uit het stopcontact voordat u de ontvanger gaat reinigen.
II. SPECIFICATIES
Gebruik een licht vochtige, zachte doek om de behuizing te reinigen.
Blokkeer de ventilatie openingen van de ontvanger niet en houdt deze vrij.
∙MPEG-II Digitaal & Volledig DVB-S geschikt.
∙1 Kaartlezer Slot.
Plaats de ontvanger niet in een gesloten ruimte maar een goed geventileerde ruimte.
∙1 Common Interface Slot.
Voorkom blootstelling van de ontvanger aan extreme hitte, kou en vochtigheid.
∙C/KU band ontvangst voor iedere antenne.
∙LNB Tone Switch 22KHz mode AAN/UIT.
Gebruik geen kabels of accessoires die niet aanbevolen zijn. Deze kunnen de installatie
beschadigen.
∙Multi-LNB ontvangst via DiSeqC 1.0, 1.2 en USALS.
Bij lange tijd geen gebruik, verwijder stekker uit het stopcontact en haal de antennekabel uit
de ontvanger.
∙Blind Scan (Power Scan) & Powerfull EPG.
Verwijder nooit het deksel van de ontvanger in verband met mogelijke elektrische schokken.
∙Totaal geheugen van 5000 kanalen.
∙PIG (Picture In Graphic).
∙Teletekst en ondertiteling rechtstreeks via OSD.
∙EPG (Elektronische Programma Gids).
Repareer nooit zelf de ontvanger.
∙On-Screen Display met 65536 kleuren.
Breng het naar een erkende reparateur.
∙Dolby Digital Bitstream Out via S/PDIF.
De handleiding kan aangepast worden in verband met nieuwe specificaties.
∙Software Upgrade & Kanalenlijst Update via USB en RS232.
∙PVR Ready via USB.
∙Opgenomen bestand via PC af te spelen.
90
91
ALGEMENE INFORMATIE
ALGEMENE INFORMATIE
III. AFSTANDSBEDIENING (RCU)
III. AFSTANDSBEDIENING (RCU)
1. MUTE
Geluid AAN of UIT.
2. POWER
Ontvanger AAN of UIT.
3. TV
TV mode.
4. STB
STB mode.
5. VCR
VCR mode.
6. DVD
DVD mode.
7. Numerieke knoppen
Selecteren de kanalen en menu opties.
8. FAV
Toont de gewenste favorieten lijst.
9. SAT
Toont de geselecteerde satelliet lijst.
10. EPG
Toont de TV of Radio programma gids.
(Electronic Program Guide)
92
11.
Activeert ondertiteling en teletekst.
12. Audio
Veranderd de audio taal.
13.
Selecteert het geluid type (LINKS/RECHTS/STEREO).
14.▲▼
Veranderd kanalen of beweegt naar een item in het menu.
15.◀ ▶
Stelt het volume of beweegt naar links of beweegt naar item in het menu.
16. MENU
Hoofdmenu in beeld.
17. EXIT
Gaat terug naar vorig menu of om terug naar huidig kanaal terug te gaan.
18. INFO
Toont programma informatie in beelden kan de naam van de favorieten lijst veranderen.
19. V+/V-
Volume harder of zachter.
20. P+/P-
Kanaal op of neer.
21.
Pagina omhoog in kanalenlijst. (Selecteert zoom in/uit).
22.
Pagina omlaag in kanalenlijst.
23. STOP
Stopt opname of afspelen.
24. PAUSE
Pauzeert afspelen.
25. Record
Opname programma.
26. Play
Opname lijst oproepen of afspelen/slow motion.
27. Rewind
Terugspoelen in verschillende snelheden.
28. F/F
Vooruitspoelen in verschillende snelheden.
29. Position
Toont positiebalk om antenne af te stellen.
30. AV/TV
Selecteert TV of AV.
31. TV/RADIO
Schakelt tussen TV en Radio.
32. ←PR
Selecteert vorige bekeken kanaal.
33. Fn
Gereserveerd.
34. STB/DivX
Schakelt STB of DivX.
35. UHF
Schakelt naar UHF tuning mode.
36. PAL/NTSC
Schakelt tussen PAL of NTSC mode.
93
ALGEMENE INFORMATION
III. AFSTANDSBEDIENING (RCU)
ALGEMENE INFORMATIE
IV. VOORKANT PANEEL
Instellingen
1. 3 digits Instellingen
1) Schakel de TV aan.
2) Druk op “TV” knop en “OK” tegelijkertijd voor meer dan 2 seconden.
De TV knop gaat 2 keer aan en uit.
3) Bekijk de TV merken lijst en voer de drie getallen in.
(TV knop gaat 2 keer aan/uit. Indien fout dan gaat hij maar 1 keer aan/uit).
4) Indien er meerdere nummers achter een merknaam staan, voert u deze in totdat de TV uitschakelt.
5) Indien de TV uitschakelt drukt u op de OK knop.
( Indien correct, dan zal de knop van de afstandsbediening 2 keer aan /uit gaan.)
6) Controleer of alle knoppen van uw afstandsbediening goed werken.
7) Indien alleen de aan/uit knop werkt en de rest niet begint u weer bij
①
②
③
④ ⑤
stap 1) (In sommige toestellen werken alle knoppen behalve de aan/uit.)
- Voor VCR & DVD, zelfde procedure als hierboven.
- Indien u de drie cijfers niet binnen 10 seconden invoert, vervalt de instelling.
2. Automatisch Zoeken
1. POWER
Schakelt de ontvanger tussen Aan en Stand By.
1) Schakel de TV aan.
2. VOL Up/Down
Volume opwaarts / neerwaarts of selecteert de opties van het menu.
2) Druk op “TV” knop en “OK” tegelijkertijd voor meer dan 2 seconden. De TV knop gaat 2 keer aan en uit.
3. CH Up/Down
Kanaal opwaarts / neerwaarts of selecteert de opties van het menu.
3) Selecteer de “OP” knop totdat de TV uitgaat. (Indien u andersom wilt zoeken mag u ook de “NEER” knop
gebruiken.)
4. USB PORT
Verbinding voor USB Memory.
4) Indien de TV uitschakelt, druk op de “OK” knop.(Indien correct, dan zal de knop van de
afstandsbediening 2 keer aan /uit gaan.)
5. USB PORT
DivX file play.
5) Controleer of alle knoppen van uw afstandsbediening goed werken.
6) Indien alleen de aan/uit knop werkt en de rest niet begint u weer bij
stap 1) (In sommige toestellen werken alle knoppen behalve de aan/uit.)
Voor VCR & DVD, zelfde procedure als hierboven.
. Indien u de drie cijfers niet binnen 10 seconden invoert, vervalt de instelling.
3. Programma nummer bekijken
1) Druk tegelijkertijd op “TV” knop en “OK” knop gedurende 2 seconden.Daarna zal de TV led tweemaal
aan en uit knipperen.
2) Druk op de “info” knop gedurende 3 seconden.
3) TV LED knippert het aantal programma’s.
Voor VCR en DVD geldt dezelfde procedure
94
“ Niet alle “USB 2.0 geheugens” zijn geschikt voor ons product”
95
ALGEMENE INFORMATIE
V. ACHTERKANI PANEEL
INSTALLATIE
Dit hoofdstuk beschrijft verschillende mogelijkheden voor het aansluiten van de ontvanger met een
TV, VCR en HI-FI systeem.
U kunt kiezen uit de volgende configuraties die wij beschrijven.
Mocht u toch problemen ondervinden dan verwijzen wij u voor eventuele hulp naar de distributeur of
verkooppunt.
Controleer dat de volgende onderdelen in de verpakking samen met de ontvanger zitten.
I. AANSLUITEN ONTVANGER MET TV
I-1. Aansluiten van de ontvanger naar de TV via een Scart kabel
Sluit het ene uiteinde van de Scart kabel aan de TV scart aansluiting aan de achterkant van uw ontvanger en
het andere uiteinde aan de Scart aansluiting achter op uw TV
96
1. LNB IN
Aansluiting voor de antennekabel.
1. AERIAL
Verbinding met terrestrische antennekabel.
2. LOOP OUT
Verbinding met andere ontvanger.
3. LNB IN
Verbinding met satellite antennekabel.
4. LNB OUT
Verbinding met andere ontvanger.
5. DIGITAL AUDIO
Uitgang ten behoeve van audio versterker.
6. AUDIO-R
Verbinding naar AUDIO RECHTS van TV of ander apparaat.
7. VIDEO
Verbinding VIDEO van TV of ander apparaat.
8. AUDIO-L
Verbinding naar AUDIO LINKS van TV of ander apparaat.
9. TV SCART
Verbinding naar TV SCART kabel.
II-1.Aansluiten van de ontvanger met de TV via een RCA kabel
10. VCR SCART
Verbinding naar VCR SCART kabel.
11. TV/VCR
Verbinding naar TV of VCR.
Sluit de RCA-rood plug aan de Audio-R connector, de witte aan de Audio-L en de gele aan de Video-Connector
aan de achterkant van de ontvanger met dezelfde connectors aan de achterkant van uw TV of VCR toestel.
12. ANT
Verbinding naar ingang TV antenne.
13. RS 232
Verbinding naar personal computer for software upgrade.
14. ETHERNET
Verbinding naar LAN kabel.
15. YUV
Verbinding naar YUV connector van TV of VCR.
16. USB
Verbinding voor USB Memory.
17. POWER SUPPLY
90~250V AC, 50/60Hz, 40W.
18. POWER BUTTON
Schakelt AAN/UIT.
II. AANSLUITEN ONTVANGER MET TV VIA RCA KABEL
97
INSTALLATIE
III. AANSLUITEN ONTVANGER MET TV OF VCR VIA RF KABEL
III-1. Aansluiten van de ontvanger met de TV via een RCA kabel
Sluit het ene uiteinde van de RF kabel aan aan de connector aan de achterkant van de ontvanger
of VCR en het andere uiteinde aan de connector ANT IN van de TV.
Sluit het ene uiteinde van de RF kabel aan de connector ANT aan de achterkant van uw
ontvanger en het andere uiteinde aan de connector ANT OUT van de VCR.
KANALENLIJST
1. Normaal Beeld
a) Als u een kanaal kiest verschijnt automatisch
een informatiebalk in beeld gedurende een aantal
seconden. Deze balk geeft informatie over het
betreffende kanaal.
b) Selecteer de INFO knop voor informatie tijdens
normaal gebruik.
2. Eenvoudige kanalenlijst
a) Druk op de OK knop tijdens normaal gebruik om naar
de kanalenlijst te gaan.
b) Als de uitgebreide kanalenlijst verschijnt, kunt u via
het selecteren van de RODE knop overgaan op
eenvoudige kanalenlijst weergave.
3. Uitgebreide Kanalenlijst
a) Druk op de OK knop tijdens normaal gebruik om naar
de Kanalenlijst te gaan.
b) Als de eenvoudige kanalenlijst verschijnt, kunt u via
het selecteren van de RODE knop overgaan op
uitgebreide Kanalenlijst weergave.
c) Selecteer ◀▶ en ▲▼ om alfabetisch te ordenen.
e) Press GREEN button to return to All Channel or EXIT
to return to the current live channel.
f) Press the SAT key to show Satellite Pop-UP Window
then select satellite. Channel list of selected satellite
will be displayed.
g) Press the FAV key to show Favorite Pop-UP Window
then select FAV list. Channel list of selected FAV will
be displayed.
h) Press the Green key then all searched channel list
will be displayed.
98
99
CHANNEL LIST GUIDE
i) Selecteer de MENU knop en de cursor zal naar ALLES
springen aan de linkerkant, dan pas zult u de gekozen
lijst kunnen wijzigen.
j) Sorteer knop (Gele Knop) ~A~Z/Z~A/FAT/CAS.
k) Selecteer de gele knop om te ordenen.
~A~Z/Z~A/FAT/CAS. Als u wilt wijzigen vanuit de functie
CAS, ga dan naar het vorige scherm en kies voor
wijzigen.
4. EPG (Elektronische Programma Gids)
a) Druk op de EPG knop tijdens normaal gebruik.
MENU
HOOFDMENU
Druk op de MENU knop om het scherm van het
hoofdmenu te activeren Het hoofdmenu scherm verschijnt.
1. U kunt door het hoofdmenu schuiven door op de knoppen
▲▼◀ ▶ te drukken van uw afstandsbediening.
2. Druk op OK om uw selectie te activeren.
3. Druk op EXIT om terug te keren naar het vorige
menuscherm of op MENU om terug te keren naar
het kanaal dat u aan het kijken was.
I . Kanalenlijst
I I. Installatie
IV. Utility
V. Accessory
I. KANALENLIJST
b) Er verschijnt een scherm met de EPG van het bewuste
kanaal.
c) Selecteer het gewenste kanaal om de EPG te tonen.
d) Om een programma op te nemen met de functie OPNAME,
druk dan op de knop REC( )
(geldt alleen voor de PVR ready modellen).
e) Verschijnt net als de foto rechts.
f) Als u een kanaal programmeert om op te nemen
zal die automatisch worden opgenomen op het moment van
programmeren (dit geldt alleen voor PVR ready modellen).
Deze selectie helpt u de kanalenlijst te wijzigen naar uw wensen.
1. Kies kanalenlijst in het hoofdmenu ▲▼ en druk op OK.
2. Er verschijnt een scherm waarin u de lijst kan wijzigen.
3. Selecteer de gewenste wijzigingsvorm ◀ ▶.
4. Om het gewenste kanaal te tonen selecteert u het en drukt u op de rode knop.
5. Druk op EXIT om terug te keren naar het vorige menuscherm of op MENU om
terug te keren naar het kanaal dat u aan het kijken wasl.
g) Druk tweemaal op de knop om terug te schakelen naar het
bewuste kanaal.
I-1. Favorieten
I-2. Herbenoemen
I-3. Schuiven
I-4. Blokkeren
I-5. Verwijderen
5. ZOOM IN/OUT
I-1. Favorieten
a) Door op de knop pagina opwaarts te drukken vanuit
normaal gebruik kunt u in en uit zoomen.
1. Door gebruik te maken van de knoppen ◀ ▶ gaat u
naar Favorieten en drukt u op de GELE knop om te
kunnen kiezen tussen Favorieten 1~8.
b) Vanuit het zoom scherm kunt u (2-3-4) met de
opwaartse knop selecteren om IN te zoomen en de
neerwaartse knop gebruiken om UIT te zoomen.
c) Door gebruik te maken van cursor ◀▶ en ▲▼ kunt u
het gebied selecteren dat u wilt zoomen met de
opwaartse en neerwaartse pagina knop. Door op de knop
pauze te drukken kunt u het zoom gebied stilzetten.
100
2. Druk op OK op het kanaal dat u wilt toevoegen of verwijderen.
3.
Een markering komt tevoorschijn achter gekozen
kanaal. Om te verwijderen drukt u nogmaals op OK.
4. De gekozen kanalen zullen automatisch opgeslagen worden.
5. Als u de opgeslagen Favorietenlijst wilt bekijken gaat u via de andere optie (Herbenoemen-Verwijderen)
behalve favorieten en drukt u op de FAV knop voor het inzien van Favorieten 1~8.
6. Druk op EXIT om terug te keren naar het vorige menuscherm of op MENU om terug te keren naar
het kanaal dat u aan het kijken was.
101
MENU
I. KANALENLIJST
I-2. Herbenoemen
1. Door gebruik te maken van de knoppen ◀ ▶ kunt u naar
Herbenoemen gaan.
2. Selecteer het kanaal dat u wilt herbenoemen door gebruik te
maken van ▲▼en druk op OK.
3. Er verschijnt een toetsenbord op het scherm.
4. Wijzig de naam door gebruik te maken van de cijfers en/of
letters in beeld.
5. Druk op de GELE knop om Favorieten 1..8 te herbenoemen en
druk op de BLAUWE knop om de satelliet te herbenoemen.
6. Druk op EXIT om terug te keren naar het vorige menuscherm
of druk op MENU om terug te keren naar het kanaal dat u aan
het bekijken was.
I-3. Schuiven
1. Door gebruik te maken van de knoppen◀ ▶ gaat u naar
de optie Schuiven.
2. Selecteer de kanalen die u wilt verschuiven door op de
knop OK te drukken.
3. Schuif de cursor naar de plek waar u het heen wilt verschuiven
en druk dan op de GROENE knop.
4. Druk op EXIT om terug te keren naar het vorige menuscherm
of druk op MENU om terug te keren naar het kanaal dat u aan
het bekijken was.
I-4. Blokkeren
1. Door gebruik te maken van de knoppen ◀ ▶kunt u naar de
functie Blokkeren gaan.
2. Selecteer de kanalen die u wilt blokkeren en druk dan op OK.
Er verschijnt dan achter het geselecteerde kanaal. Om te
verwijderen drukt u wederom op OK.
3. Druk op EXIT om terug te keren naar het vorige menuscherm of druk
op MENU om terug te keren naar het kanaal dat u aan het bekijken was.
I-5. VERWIJDEREN
1. Door gebruik te maken van de knoppen ◀ ▶ gaat u naar de
functie VERWIJDEREN.
2. Selecteer het kanaal dat u wilt verwijderen en druk op OK. Er verschijnt dan (
) op het nummer van het
gekozen kanaal. Om te verwijderen drukt u op de BLAUWE toets .
3. Door op de GELE knop te drukken verwijderd u een TP. Kies een kanaal en druk op de BLAUWE knop.
Alle kanalen van die bewuste TP zullen automatisch geselecteerd worden.
4. Druk op de GELE knop om een satelliet te verwijderen. Selecteer een kanaal en druk dan op de BLAUWE knop.
Alle kanalen van die bewuste satelliet zulle automatisch geselecteert worden.
5. Druk op EXIT om terug te keren naar het vorige menuscherm of druk op MENU om terug te keren naar het
kanaal dat u aan het bekijken was.
6. Op het scherm verschijnt het volgende bericht.
7. Kies OK in het verschenen bericht in het scherm en druk op OK om alle geselecteerde kanalen te verwijderen.
102
MENU
II. INSTALLATIE
Hier kunt u de antenne configureren en zoeken naar
satellieten of transponders, etc. Selecteer installatie
in het hoofdmenu en druk op OK.
Druk op EXIT om terug te keren naar het vorige
menuscherm of druk op MENU om terug te keren naar
het kanaal dat u aan het bekijken was.
II-1. Satelliet Zoeken
II-2. DiSEqC Switch
II-3. Motor Setup
II-4. Terrestria Zoeken
II-5. Fabrieksinstellingen
II-1 Satelliet Zoeken
1.U kunt de cursor bewegen naar u keuze door gebruik te
maken van ▲▼ en op OK te drukken.
a) Satelliet
- Druk op OK om de lijst met poorten van de
DiSEqC te tonen.
- Selecteer de gewenste satelliet en druk op OK.
b) DiSEqC
- Druk op OK om de lijst met poorten van de DiSEqC te tonen.
- Kies de gewenste DiSEqC en druk op OK.
c) Frequentie
- Druk op OK om de lijst met Frequenties te tonen.
- Selecteer de gewenste Frequentie en druk op OK.
d) LNB
- Druk op OK om de lijst met frequenties te tonen.
- Selecteer de gewenste frequentie en druk op OK.
- U kunt ook rechtstreeks de frequentie waarden invoeren
met behulp van uw afstandsbediening.
e) 22KHz Toon
- Kies uit Geen, 0 KHz ó 22 KHz afhankelijk van de Antenne instellingen.
f) ZOEKEN
- Druk op OK om de lijst met Zoek Opties te tonen.
- Kies de gewenste zoekvorm en druk op OK.
TP WIJZIGEN
Om een TP te WIJZIGEN, druk op de
RODE knop van uw afstandsbediening.
g) ZOEKEN
- Druk op ZOEKEN om de Zoekactie te beginnen.
- De gekozen satelliet verschijnt op het scherm.
- Druk op ▶ om meerdere satellieten te selecteren of ◀ om geselecteerde satellieten uit te schakelen.
- Druk op OK om het ZOEKEN te starten.
103
MENU
MENU
II. INSTALLATIE
II. INSTALLATIE
II-2. DiSEqC Switch
1. Selecteer de optie kanalen zoeken door gebruik te
maken van ▲▼ en druk op OK.
a) Als u DiSEqC Switch kiest en op OK drukt, verschijnt er
een scherm met DiSEqC opties in beeld.
e) Motor Controle
Selecteer de positie door gebruik te maken van ◀ ▶ en druk
op OK. Er verschijnt een scherm met een bericht in beeld.
- Opslaan sat positie : Sla de positie van de motor voor de
gewenste satelliet op.
- Ga naar Satelliet Positie : Beweeg de motor naar de opgesla
gen positie van de gewenste satelliet.
- Ga naar 0 : Ga naar het middelpunt van de motor.
b) Selecteer de poorten (A~D) van elke gewenste satelliet
door gebruik te maken van ◀ ▶ y ▲▼ en druk op
ZOEKEN. De gewenste satellieten zullen dan
automatisch gezocht worden.
II-3 Motor Setup
1. U kunt de cursor verschuiven door gebruik te
maken van ▲▼ en door op OK te drukken bij de
gewenste selectie.
- RESET Positie : Reset alle opgeslagen posities van de motor.
f) Satelliet Positie
- Voer rechtstreeks de positie in door gebruik te maken van de nummers op uw afstandsbediening.
- Selecteer de richting door gebruik te maken van◀ ▶ (WEST / OOST).
g) Zoek Optie
- Druk op OK om de lijst met Zoek Kanalen te tonen.
- Selecteer de gewenste Zoek Optie en druk op OK.
a) Motor Type: DiSEqC 1.2, USALS
h) Zoeken
- Druk op OK om het Motor Type te tonen.
- Selecteer gewenste Motor Type en druk op OK.
- Druk op zoeken om kanalen zoeken te starten.
b) Satelliet
- Druk op OK om de lijst met satellieten te tonen.
- Selecteer gewenste satelliet en druk op OK.
2. Wijzig de lokale positie
- Druk op de GROENE knop om de lokale positie te wijzigen.
c) Switch en LNB
- Druk op OK om de lijst met frequenties en configuratie te
tonen.
- Selecteer de gewenste LNB en configuratie.
d) Frequentie
- Druk op OK om de lijst met frequenties te tonen.
- Selecteer de gewenste frequentie en druk op OK.
e) Motor beweging
- Zoek de gewenste positie van de gewenste satelliet door
gebruik te maken van◀ ▶.
104
- Druk op OK om het zoeken te starten.
a) Longitude
- Voer rechtstreeks de longitude in door gebruik te maken van de nummers op uw afstandsbediening.
- Selecteer de richting door gebruik te maken van de knoppen ◀ ▶ (West / Oost).
b) Latidude
- Voer rechtstreeks de latitude in door gebruik te maken van de nummers op uw afstandsbediening.
- Selecteer de richting door gebruik te maken van de knoppen ◀ ▶ (Noord / Zuid).
※ TP EDIT : Voor het wijzigen van de TP,
druk op de RODE knop van de afstandsbediening
3. Druk op EXIT om terug te keren naar het vorige menuscherm of druk op MENU om terug te keren naar
het kanaal dat u aan het bekijken was.
105
MENU GUIDE
MENU
II. INSTALLATIE
III. OPTIES
II-4. Terrestria Zoeken
1. Selecteer Kanalen Zoeken in Installatie met ▲▼ en
druk op OK.
2. 1) Selecteer de regio waar u gebruik maakt van ◀ ▶.
2) U kunt het type zoeken zelf bepalen, zowel auto
als handmatig met ◀ ▶.
3) Auto
a) Selecteer “Zoeken” in het beeldscherm en druk
op OK om kanalen te zoeken.
b) Selecteer Exit of Menu na het beëindigen van het
Zoeken.
4) Handmatig
a) Selecteer Mux kanaal die u wilt gebruiken met ◀ ▶.
b) Frequentie word automatisch weergegeven met
geselecteerde Mux kanaal.
II-5. Fabrieksinstellingen
Deze optie helpt u bij het instellen van de menutaal, tijd,
etc. Selecteer Opties in het hoofdmenu ▲▼en druk op OK.
Druk op EXIT om terug te keren naar het vorige
menuscherm of druk op MENU om terug te keren
naar het kanaal dat u aan het bekijken was.
III-1. OSD Configuratie
III-2. TV Configuratie
III-3. Tijd Instelling
III-4. Kinderslot
III-5. Netwerk
III-1. OSD Configuratie
1. Selecteer OSD Configuratie in Opties door
gebruik te maken van ▲▼en op OK te drukken.
a) OSD Taal
- Druk op OK om de lijst met talen voor het OSD
menu te tonen.
- Selecteer de gewenste taal en druk op OK.
b) Audio Taal
- Druk op OK om de lijst met talen voor Audio te tonen.
- Selecteer de gewenste taal en druk op OK.
Gebruik Fabrieksinstellingen alleen als u de ontvanger in
de oorspronkelijke staat van aankoop wilt brengen.
Alle instellingen en kanalenlijsten zullen worden verwijderd.
c) Informatiebalk in beeld
- Druk op OK om de informatiebalk in beeld te tonen.
- Selecteer het aantal seconden dat u de informatiebalk in beeld wilt hebben en druk op OK.
1. Selecteer Fabrieksinstellingen door gebruik te maken
van de knoppen ▲▼ en op OK te drukken.
d) OSD Positie
- Druk op OK om de horizontale en verticale positie van de OSD te wijzigen.
- Er verschijnt een scherm die de OSD positie aangeeft.
- Selecteer Positie Hor / Positie Ver door gebruik te maken van ▲▼.
- Verschuif de OSD positie naar Links / Rechts of Op / Neer door gebruik te maken van ◀ ▶.
- Selecteer OK in het scherm van de OSD Positie en druk op OK.
2. Er verschijnt een bericht in beeld.
3. Selecteer OK om de ontvanger naar de oorspronkelijke
staat
van aankoop te brengen en druk dan op OK.
4. Druk op EXIT om terug te keren naar het vorige
menuscherm
of druk op MENU om terug te keren naar het kanaal dat u
aan het bekijken was.
106
e) Beeldformaat
- Druk op OK om de lijst met beeldformaten te tonen.
- Selecteer het gewenste formaat en druk op OK.
2. Druk op EXIT om terug te keren naar het vorige menuscherm of druk op
MENU om terug te keren naar het kanaal dat u aan het bekijken was.
107
MENU
MENU
III. OPTIES
III. OPTIES
III-2. TV Configuratie
III-5. Netwerk
1. Selecteer de TV configuratie in Opties door gebruik te maken
van ▲▼en druk op OK.
a) Video Uitgang
- Druk op OK om de lijst met Video Uitgangen te tonen.
- Selecteer RGB als de euroconnector ondersteund wordt en
druk op OK.
- Selecteer CVBS indien RGB niet ondersteund wordt en druk op OK.
Dit gedeelte helpt u om een netwerk te configureren.
b) TV Type
- Druk op OK om de lijst met TV Types te tonen.
- Selecteer de gewenste instelling behorende bij het type TV en
druk op OK.
c) UHF Kanaal
- Druk op OK om de lijst met UHF kanalen te tonen.
- Selecteer het gewenste kanaal en druk op OK.
d) UHF Standaard
- Druk op OK om de lijst met standaards te tonen.
- Selecteer de gewenste instelling en druk op OK.
2. Druk op EXIT om terug te keren naar het vorige menuscherm
of druk op MENU om terug te keren naar het kanaal dat u
aan het bekijken was.
III-3. Tijd Instelling
Stel de juiste lokale tijd in waar u zich bevindt.
1. Selecteer Tijd Instellen in Opties ◀ ▶en druk op OK.
2. Het scherm Tijd Instellen zal tevoorschijn komen.
3. Verschuif de cursor met behulp van ◀ ▶, ▲▼ en druk op OK
nadat u de gewenste waarde heeft geselecteerd. (Voer het
juiste tijdstip in met behulp van de nummers op uw
afstandsbediening).
4. Druk op EXIT om terug te keren naar het vorige menuscherm
of druk op MENU om terug te keren naar het kanaal dat u
aan het bekijken was.
III-4. Kinderslot Instelling
1. Selecteer Kinderslot in Opties ◀ ▶ en druk op OK.
2. Er verschijnt een scherm met Kinderslot Instellingen.
3. U kunt Kinderslot In- of Uitschakelen door Aan of UIT te
selecteren met behulp van ▲▼.
4. U kunt het blokkeren van de installatie In- of Uitschakelen
door AAN of UIT te selecteren met behulp van ▲▼(Voor de
Installatie Instellingen).
5. Voer het nieuwe paswoord in, als u het actuele paswoord wil wijzigen.
6. Bevestig het nieuwe paswoord door het opnieuw in te voeren.
7. Druk op EXIT om terug te keren naar het vorige menuscherm of druk op MENU om
terug te keren naar het kanaal dat u aan het bekijken was.
Noot : Het standaard paswoord is 0000
108
1. IP Setup
Selecteer één van de drie keuzes voor Netwerk
Instelling.
a) Niet in gebruik
In this case, network is disabled.
b) Automatisch
Dit is voor de gebruiker die gebruik wil maken van
een dynamische IP adres service.
Na de Automatische keuze en selectie van knop
Toepassen(Apply) zal de ontvanger vanzelf
opstarten. De ontvanger zal dan een nieuwe IP van
de router krijgen.
c) Handmatig
Dit is voor de gebruiker die gebruik wil maken van
een statisch IP adres service. Voer uw IP adres,
Subnet Mask en Gateway in en druk op de knop
Toepassen(Apply) De ontvanger zal uit zichzelf
opstarten.
2. SW upgrade
a) Kijkt u eerst waar u de file kunt downloaden.
b) Selecteer “input URL” knop. Indien u het adres wilt
veranderen kunt u dat doen in de KEYPAD DIALOOG
VENSTER. Type hier het URL adres waaruit u wilt
downloaden.
c) Na het typen van de URL adres, drukt u op de
UPGRADE knop en volgt u de gevraagde stappen in
beeld.
Let op : Schakel nooit de ontvanger uit tijdens de
upgrade procedure!
109
MENU GUIDE
VI.UTILITY
MENU GUIDE
USB PVR
Hier kunt u hulp krijgen om de USB te gebruiken etc.
Selecteer Utility in het hoofdmenu met behulp van ▲▼ en
druk op OK.
Sluit u USB memory aan op de ontvanger.
∙VI -1. Systeem Informatie
∙VI -2. USB
∙VI-3 Common Interface
· Als u een programma wilt opnemen, druk op REC knop.
1. Opnemen
· Druk op “TOP” knop om opnemen te stoppen.
2.PLAY
VI-1. Systeem Informatie
∙Als u een opgenomen programma wilt afspelen op uw ontvanger drukt u op de “PLAY” knop en dan
zal de lijst met opnames tevoorschijn komen.
Met behulp van deze optie kunt u zien wat de actuele S/W
en H/W is. Ook vind u hier de naam van het product.
∙Selecteer welke opname u wilt afspelen met ▲▼ en druk op OK.
1. Selecteer Systeem Informatie in Opties ▲▼ en druk op OK.
∙Indien u een andere opname wilt afspelen drukt u wederom op OK knop en dan komt de lijst weer
tevoorschijn.
2. Druk op EXIT om naar het vorige menuscherm terug te
keren.
VI-2 USB
∙Slow Motion: Druk op “PLAY” knop. Als u wederom op “PLAY” drukt gaat u weer naar normale
snelheid.
∙F/F, Terugspoelen, Pauze is ondersteund.
Deze ontvanger is voorzien van een USB poort.
1. Selecteer USB en Utility door gebruik te maken van ▲▼
en druk op OK.
2. Als u van laadinstelling wilt veranderen (S/W upgrade,
BootLoader Upgrade), drukt u op de RODE toets van uw
afstandsbediening.
3. Selecteer het bestand dat u wilt upgraden door gebruik
te maken van ▲▼en druk op OK.
4. Als u eenmaal de upgrade heeft uitgevoerd zal de
ontvanger automatisch eenmaal UIT en weer AAN gaan.
3. File Manager (Ga naar Hoofd Menu - - Utility - USB)
∙Verwijderen
- Als u een opname wilt verwijderen drukt op de gele knop.
- Selecteer de opname die u wilt verwijderen met ▲▼ en druk op OK.
∙Format
- De ontvanger ondersteund alleen FAT32 file system
- Indien u uw memory wilt formatteren naar, druk op de blauwe knop.
VI-3 Common Interface
De ontvanger is voorzien van 1 slot Common Interface,
waarmee u betaal televisie kunt kijken door middel van
daarvoor geschikte modules en Smart Cards.
De kanalen die vrijgegeven zijn, worden bepaald door de
Conditional Acces Module en de Smart Card die u
gebruikt.
1. Selecteer Common Interface in utility met ▲▼ en druk op OK.
2. Common Interface word in beeld weergegeven.
(De zin “No Module” geeft aan dat er geen module is ingevoerd.)
3. Voer de Conditional Acces Module in Slot 1 of Slot 2.
4. De naam van het slot verschilt door middel van elk willekeurig gebruikte module.
- Na het formatteren zal alle data verwijderd zijn.
4. Let op
∙Alleen de USB 2.0 hoge snelheid is geschikt voor de PVR functie.
∙S/W download en MP3 play ondersteund USB 1.1 full speed.
∙Gebruik meer dan 2GByte memory device of USB HDD voor PVR functie.
∙Normaal neemt 1GBtye 30~40 minuten op, afhankelijk van het programma.
∙Sommige USB memory device worden niet ondersteund.
∙Memory fragmentatie kan voorkomen, formatteer uw memory dan eerst!
∙Voor meer informatie en updates, bezoek onze website.
5. Druk op EXIT om terug te gaan naar vorig menu of MENU om naar het huidig kanaal terug te gaan.
110
111
PROBLEMEN OPLOSSEN
Probleem
Er verschijnt niets op de
display
SPECIFICATIONS
Oplossing
I.Conditional Access Module Interface
Specification
Item
SMART CARD
∙Controleer of de stekker in het stopcontact zit.
PCMCIA
1 SLOT, ISO 7816, GSM11.11 and EMV (payment systems) compatibility
Slot.type Ⅰor type Ⅱ
DVB Common Interface Standard
(Viaccess, Irdeto, Nagra Vision, Conax, Crytoworks, AlpahCrypt..)
∙Controleer de schotel en stel deze juist af.
Geen beeld
∙Controleer de kabel aansluiting.
∙Ga uit de UHF mode.
∙Controleer kanaal en Video uitgang.
∙Controleer het volume niveau van de TV en de ontvanger.
Geen geluid
II. Tuner & Channel
Input Connector
Signal Level
LNB Power &
∙Controleer de MUTE status van de TV en de ontvanger.
Polarization
∙Controleer de kabel aansluiting.
22KHz Tone
∙Vervang de batterijen.
Demodulation
Input Symbol Rate
2~45Ms/s Convolution Code Rate
1/2, 2/3, 3/4, 5/6, 7/8 with Constraint Length K=7
∙Richt de afstandbediening juist naar de ontvanger.
∙Controleer dat er geen obstakels tussen zitten.
F-type (Output loop-through), IEC 169-24, Female
-25 to -65 dBm
Vertical : +13.5/18.5Vdc±5%
Horizotal : +18.5Vd dc±
Current : Max.500mA.Overload protected
Frequency : 22KHz±2KHz
Amplitude : 0.8±0.2V
Version 1.2 USALS Compatible
QPSK
DiSEqC Control
Afstandbediening doet het
niet
Specification
Item
III. TUNER DVB-T
Service doet het niet of
gecodeerd
∙Controleer de CAM en Smartcard.
Item
∙Deze moeten juist ingevoerd zijn.
Input Frequency Range
RF Input Signal Level
Bandwidth
OFDM Spectrum
Demodulation modes
Guard Interval
FEC Decoder
∙Controleer de signaalsterkte en signaalkwaliteit in het menu.
“Geen signaal” in beeld
∙Controleer de LNB en vervang deze indien nodig.
∙Controleer de LNB kabel.
∙Controleer de schotel en stel deze indien nodig af.
Specification
170 to 230MHz(VHF), 470 to 862MHz(UHF)
-77 dBM to -10 dBM
7MHz & 8MHz
2K and 8K Carrier
QPSK, 16, 64 QAM
1/4, 1/8, 1/16, 1/32
1/2, 2/3, 3/4, 5/6 & 7/B
IV. A/V & Data In/Out
Specification
Item
Tuner defect
∙Ga naar Opties en selecteer Systeem Informatie.
U bent u pincode vergeten
∙Neem contact op met uw service dienst.
TV Scart Output
RGB, CVBS, L, R Output with Volume Control
VCR Scart In/Out
RGB, CVBS, L, R In
CVBS, RGB, L, R Out
RCA Output
CVBS, RGB, L, R Output(Yellow, White, Red Jack) with Volume Control
Data Interface
112
- RS-232, Bit Rate 115,200baud
Connector : 9-Pin D-Sub Male type
- Ethernet : 10/100Mbps, DHCP Supporting
- USB : USB 2.0 Type A Connector, 2Port(Front & Rear), 1Port(Multimedia file)
113
SPECIFICATIONS
V. RF-Modulator
Specification
Item
RF-Connector
75 ohm IEC 169-2, Male/Female
Frequency
470MHz to 860MHz
Output Channel
CH 21-69 for the Demodulator
TV Standard
PAL G/I/K Selectable by Menu Setting
Audio OUtput
Mono with Volume Control
Preset Channel
Ch 38(or TBD), Software changeable by Menu Screen
VI. MPEG Transport Stream & A/V Decoding
Specification
Item
Transport Stream
MPEG-2 ISO/IEC 13818 / Transport stream Specificartion
Profile Level
MPEG-2 MP@ML
Input Rate
Max. 90 Mbit/
Video Resolution
720×576(PAL)/720×480(NTSC)
Audio Decoding
MPEG/Musicam LayerⅠ&Ⅱ
Audio Mode
Single channel/Dual channel Joint Stereo/Stereo
Teletext
VBI & OSD(Optional)
Sampling Rate
32,44.1 and 48KHz
VII. System Resources
Specification
Item
Main Processor
ARM946 RISC Processor
Flash Memory
2 Mbyte
Program DRAM
32 Mbyte
Channel Capacity
Digital Channel : 5000
VIII. Power Supply
Specification
Item
Input Voltage
AC 90 to 250V, 50~60Hz
Power Consumption
Max. 50W
Poteciton
Separate Internal Fuse
Type
SMPS
IX. Physical Specification
Specification
Item
Size (W×H×D)
290×50×220(mm)
Net Weight
2.0Kg
114
DIVX
PRODUCT BESCHRIJVING
116
PRODUCT SPECIFICATIES
116
VEILIGHEID WAARSCHUWINGEN
117
PRODUCT SPECIFICATIES
118
SETUP MENU
119
HOOFD MENU AFBEELDING
121
AFSPELEN MUZIEK
122
AFSPELEN FILM
124
AFBEELDINGEN BEKIJKEN
126
FIRMWARE UPGRADE
128
PROBLEMEN OPLOSSEN
130
115
PRODUCT BESCHRIJVING
MVISION maakt het mogelijk om externe multimedia opslag apparaten te
verbinden met een TV en de inhoud (film, muziek, afbeeldingen…) door middel
van de geïntegreerde USB2.0 host interface.
Gebruikers kunnen gebruik maken van diverse digitale bestanden met
gebruik
van USB2.0 externe memory devices in verbinding met PC.
VEILIGHEID WAARSCHUWINGEN
Lees allereerst de handleiding goed door voordat u dit product gebruikt.
1. De inhoud zoals software, geluid en beeld zijn beschermd door copyrights.
De gebruikers die hier misbruik van maken zijn zelf verantwoordelijk voor de gevolgen.
2. Dit product ondersteund niet alle media bestanden. Controleer allereerst welke soort
codes test programma wordt gebruikt.
Sommige delen zullen niet functioneren door bepaalde karakteristieken.
U kunt controleren of het bespeelbaar is of niet door gebruik te maken van freeware
utilities. U kunt gebruik maken van conversieprogramma’s om het alsnog volledig
bespeelbaar te maken.
PRODUCT SPECIFICATIES
MVISION apparaten kunnen gebruikt worden om films, muziek en afbeeldingen
op TV aft e spleen.
Gebruikt voor multimedia MPEG (DiVX, Xvid, DAT, VOB, MPG, MPEG) bestanden met
verbinding naar TV.
Speelt digitale foto albums af met JPEG file format.
3. Beschadig de ontvanger nooit of laat het nooit vallen.
4. Voer nooit metalen of munten in de ontvanger.
5. Maak het de ontvanger nooit open met de spanning erop. Dit kan elektrische schokken
geven.
6. Verplaats de ontvanger nooit terwijl het aan staat.
Speelt digitale muziek af met MP3, AC3, Ogg vorbis and WMA file format.
7. Zorg er voor dat er geen vloeistoffen in komen. Dit kan elektrische schokken of brand
veroorzaken.
Ondersteunt USB 2.0 interface voor externe memory opslag.
8. Gebruik geen chemicaliën of schoonmaakstoffen.
Upgrade de firmware op een simpele manier met USB2.0 & homepage.
9. Stel de ontvanger nooit bloot aan extreme hitte.
Leest de data met high-speed via USB2.0 external memory device.
10. Zorg dat de ontvanger uit de buurt blijft van magnetische projecten of luidsprekers. Dit
kan het geheugen van de ontvanger aan tasten.
11. Langdurig kijken of luid beluisteren kan schade veroorzaken.
12. Indien u rook ziet of brand ruikt, schakel de ontvanger dan onmiddellijk uit en neem
contact op met uw leverancier.
13. Haal nooit de spanning eraf tijdens gebruik.
116
117
PRODUCT SPECIFICATIES
Product Naam
Supported
File Formats
Movie
MVISION multimedia player
Movie
Music
Photo
MPEG-1/2, MPG, MPEG, DAT, VOB, AVI
(DivX 3.x/4.x/5.x, XviD(Except GMC or Qpel option
applied file)
SETUP MENU
Setup menu beeld van de MVISION multimedia
player is als volgt.
Linker witte items tonen setting items.
Middelste gele items tonen huidige ingevoerde
settings.
Rechter witte items tonen alternatieve opties die
gebruikt kunnen worden.
MP3, WMA, OGG Vorbis, AC3
JPEG
Main chip set
EM8511 (sigma design), Arm9 266MHz, 32MB SRAM
Audio Output
2CH Analog, Digital audio output(AC3, DTS pass though)
USB Interface
USB2.0 Host, USB1.1 compatible
HDD file system
FAT32, NTFS
TV type
NTSC
The range of
temperature
0 ~ 60°
Alternatieve opties voor elke item zijn kunnen
zijn als volgt
Audio output :
Analog/DPCM : Outputs Analog 2ch/PCM data.
(composite cable audio signal)
Encoded Digital : Output digital audio data.
Video Output :
CVBS & S-Video : Outputs composite signal in PAL method.
S-video output is also supported.
CVBS & RGB
: Outputs composite and RGB signal in PAL method.
S-video output is not supported.
Component 480p : Outputs component in 480 progressive method.
Composite and S-video output is not supported.
Component 720p : Outputs component in 720 progressive method.
Composite and S-video output is not supported.
Component 1080i : Outputs component in 1080 interlaced method. In this mode, still image
can be shaking because of the characteristic of interlaced method.
Composite and S-video output is not supported.
TV Type :
4:3 Letter Box : Horizontal ratio van de video’s hebben een hogere prioriteit om in beeld te passen.
Deze instelling geeft een zwarte balk boven en beneden in beeld.
4:3 fan & scan : verticale ratio van de video’s hebben hogere prioriteit om in beeld te passen.
Full screen wordt getoond, de zijkanten kunnen hierdoor wegvallen.
16:9 Full screen : screen ratio wordt getoond in 16:9 mode.
118
119
SETUP MENU
Slide Show tijd :
1,3,5,7,10,20 sec, Off : Configureerd de slide show interval voor de JPEG files.
Druk op [PLAY] knop van uw afstandsbediening om de foto’s
in slide show mode te tonen.
Start de slide show.
BEELD HOOFDMENU
MVISION producten tonen alle bespeelbare media
bestanden in beeld.
Indien u muziek, films of foto’s wilt afspelen
drukt u op [play] of [OK] knop van uw
afstandsbediening.
De beelden zullen in de gewenste tijden in beeld komen.
1. Upper folder
Ondertiteling formaat :
Groot : Grote ondertiteling tijdens afspelen film.
Klein : Kleine ondertiteling tijdens afspelen film.
Uit : Geen ondertiteling in beeld.
Ga terug naar upper folder door dit item te
selecteren of door de [EXIT] knop van de
afstandsbediening in te drukken.
2. Folder list
Lijst met alle folders in current path. Druk op de [OK] knop.
3. Audio file
Kleur Ondertiteling :
Font Color / Border Color : U kunt wit kiezen / transparant, zwart/wit, geel/transparant,
geel/zwart.
Alle bespeelbare muziek bestanden worden hier getoond. Extensions of the music files are
mp3, wma, AC3 and ogg.
4. Firmware file
Dit toont de Firmware files van de MVISION producten.
Taal :
Engels : Set-up en verschillende UI menu getoond in Engels.
Frans : Set-up en verschillende UI menu getoond in Frans.
Spaans : Set-up en verschillende UI menu getoond in Spaans.
Portugees : Set-up en verschillende UI menu getoond in Portugees.
Firmware kan eenvoudig geselecteerd worden in het hoofdmenu.
Extensions van de Firmware files is upd.
5. Image File
Alle bespeelbare image & picture files worden hier getoond.
Extensions van de picture & image file is jpg.
6. Video file
Initialiseren :
Alle configuraties en instellingen zullen terug worden gezet in fabriekswaarden.
Alle bespeelbare movie files worden hier getoond.
Extensions van de movie files zijn AVI(Divx 3.x, 4.x, 5.x, XviD), MPG, MPEG, DAT, and VOB.
7. Current path
Toont huidige geselecteerde folder path.
8. File information
Toont aantal geselecteerde files en de grootte.
Notation of selected files is shown as
[currently selected file / total number of files in a folder].
120
121
AFSPELEN MUZIEK
AFSPELEN MUZIEK
U kunt afspelen MP3, WMA, OGG vorbis, en AC3 music files.
KEY Label
De zoekfunctie werkt niet met OGG files.
Indien u een muziek bestand wilt afspelen drukt u op “[OK] of [PLAY]” knop na selectie.
file you want, using “
” button to select the file. And then, the chosen music file in a
certain folder is being played until the “STOP ” button pressed.
KEY Label
16
17
BLAUW
GEEL
Functies
Beschrijving
Show alle bespeelbare video files eerst [sort video file]
Stopt als muziek
afspelen aan is.
Show alle bespeelbare music files eerst [sort music file]
Stopt als muziek
afspelen aan is.
18
GREEN
Show alle bespeelbare files eerst [sort image file]
Stopt als muziek
afspelen aan is.
19
RED
Show alle firmware files eerst [sort firmware file]
Stopt als muziek
afspelen aan is.
2
122
Functies
Beschrijving
5
Pijl : Beweeg neerwaarts door menu.
4
Wijzig de instellingen naar een hoger niveau.
1
Wijzig de instellingen naar een lager niveau.
3
OK
Selecteer een menu item of bespeel een file.
25
INFO
Toont informatie van huidig bestand.
Toont anders hoe de afstandsbediening te gebruiken.
6
EXIT
Stopt afspelen muziek.
Als u in een folder zit gaat u hiermee eruit.
26
VOL +
Volume OP.
27
VOL -
Volume NEER.
8
CH up
Bespeel volgende file.
Firmware file en folder overslaan.
9
CH dn
Bespeel vorige file.
Firmware file en folder overslaan.
29
Stopt huidige muziek bestand.
28
Bespeelt gekozen muziek bestand
11
Pauze huidige muziek bestand.
13
Snel terugwaarts
12
Snel voorwaarts
32
SETUP
Gaat terug naar Set UP menu screen.
Stopt muziek.
31
TVOU
Schakelt tussen TV output modes.
NTSC
15 DISPLAY
Schakelt tussen Screen display modes.
letter-box, pan & scan, full-screen.
14 PICTURE
Afstelling van screen contrast,
brightness, and saturation.
1-step.
20
RED
Schakelt tussen STB en Divx modes.
Pauzeert afspelen van films,
muziek en foto’s en gaat terug naar
STB menu mode.
Divx -> STB mode.
23
SORT
Sorteert in gewenste volgorde.
Stopt afspelen.
Pijl OP : Beweeg opwaarts door het menu.
123
AFSPELEN FILM
AFSPELEN FILM
Afspelen AVI, MPG, MPEG, DAT, VOB movie files.
KEY Label
De ondertiteling wordt opgeslagen in zelfde folder met movie file.
Indien u de film wilt afspelen drukt u op “[OK] of [PLAY]” knop na selectie, door de ***
knop te gebruiken
file you want, using “ , “ button to select the file. And then, the chosen movie file in
a certain folder is being played until the “STOP” button pressed.
Functies
Beschrijving
26
VOL +
Volume OP
27
VOL -
Volume NEER
8
CH up
Afspelen vorige file in current folder.
Firmware file en folder overslaan.
9
CH dn
Afspelen volgende file in current folder.
Firmware file en folder overslaan.
7
Snel terugwaarts : Terugspoelen voor 30 seconden
10
Snel voorwaarts : Vooruitspoelen voor 30 seconden.
Verwijderd OSD. Indien OSD niet getoond wordt stopt het de
29
huidige film en keert dan terug naar de lijst in het menu.
28
Afspelen van alle filmbestanden in current folder.
11
Pauseert de movie file.
13
Terugspoelen : REVx4/REVx8/REVx16/REVx32
It does not support VBR files.
12
Vooruitspoelen : FFx4/FFx8/FFx16/FFx32
It does not support VBR files.
15
DISPLAY
Zoom in en out of the screen.
letter-box, pan & scan,
full-screen mode.
14
PICTURE
Afstelling van screen contrast, brightness, and
1-step.
saturation.
Schakelt tussen STB en Divx modes.
20
KEY Label
3
25
6
124
Functies
Pauzeert afspelen van films, muziek en foto’s
en gaat terug naar STB menu mode.
Beschrijving
OK
Bespeelt en synchroniseert in huidige tijd. Indien synchronisatie niet goed is
kunt u met deze knop beeld en geluid op elkaar afstemmen.
22
INFO
Eenmaal drukken : Toont tijd, progressiebalk, file naam.
Tweemaal drukken : Toont alleen tijdsinformatie.
Nogmaals drukken : Schakelt de informatie uit.
21
EXIT
RED
SUB -T
SEEK
SUB-T Veranderd ondertiteling settings.
ondertiteling size (big, small)
Speelt film af op gewenst tijdstip.
ondertiteling uit.
Deze instelling wordt gebruikt om de bespeelde
It does not support VBR files.
film voorwaarts te spoelen.
Verwijderd OSD. Indien OSD niet verschijnt stopt het de
huidige film en keert dan terug naar de lijst in het menu.
125
AFBEELDINGEN BEKIJKEN
AFBEELDINGEN BEKIJKEN
U kunt JPEG files afspelen.
IIndien u de afbeelding wilt afspelen drukt u op de “[OK] or [PLAY]” knop na selectie. Gebruik
de “ , “ knop om een file te selecteren. Hierna zal de gekozen afbeelding verschijnen in
een slide show. De slide show kunt u stoppen door de “STOP” knop ingedrukt te houden. De
slide show stopt ook als u de knoppen “CH up/down” indrukt.
KEY Label
Beschrijving
4
Het beeld kan tot 90 graden roteren
met de klok mee.
Stopt slide show.
1
Het beeld kan roteren in een hoek van 90
graden tegen de klok in.
Stopt slide show.
6
EXIT
Stopt de huidige afbeelding en gaat terug naar lijst in menu.
26
VOL +
Zoom In afbeelding.
De originele afbeelding
vergroot van 1 tot 5 maal
de normale grootte.
De originele afbeelding
27
VOL -
Zoom Uit afbeelding.
vergroot van 1 tot 5 maal
de normale grootte.
8
CH up
Afspelen vorige afbeelding.
Firmware file en folder
overslaan.
9
CH dn
Afspelen volgende afbeelding.
Firmware file en folder
overslaan.
29
Stopt de huidige afbeelding en gaat terug naar lijst in menu.
15
DISPLAY
Zoom in en uit in beeld.
3 OK Beeld grootte instellen tijdens zoomen.
Letter-box, Pan & Scan,
Full-screen mode
14
PICTURE
Afstellen van screen contrast,
brightness, en saturation.
1-stap
RED
Schakelt tussen STB en Divx modes.
Pauzeert afspelen van films,
muziek en foto’s en gaat terug
naar STB menu mode.
20
126
Functies
127
FIRMWARE UPGRADE
(Let op)
Schakel nooit de ontvanger uit tijdens de upgrade. Mvision producten zullen altijd te
upgraden zijn voor verbeteringen en behoeften van gebruikers. U kunt de laatste firmware
downloaden vanuit de website van Mvision.
FIRMWARE UPGRADE
5. firmware upgrade scherm1 [ Erasing flash ].
1. Download een firmware van de website en unzip de file, kopieer de firmware naar een
gewenste locatie of externe schijf. Sluit de externe schijf aan op de Divx USB 2.0 port van
de Mvision ontvanger.
2. Selecteer een firmware file met uw
afstandsbediening en druk op de [OK] knop.
De firmware wordt getoond als ****.upd in file
lijst.
6. firmware upgrade scherm2 [ writing flash ].
3. De volgende afbeelding verschijnt.
Kies [YES] in het scherm dat tevoorschijn komt.
[Let op]
Schakel nooit de ontvanger uit tijdens het upgraden
7. Bij voltooiing van firmware upgrade, verschijnt
het volgende scherm.
Het system start automatisch weer op.
van de firmware.
Hierdoor kunt u ernstige schade veroorzaken aan de
flash memory.
4. Firmware lezen & decodering scherm.
128
129
PROBLEMEN OPLOSSEN
Indien u meer specifieke probleem wilt oplossen, verwijzen wij naar onze website.
1. U ziet niets op TV of beeld trilt.
Dit kan een gevolg zijn van een verkeerde video instelling waardoor u geen of trillend beeld
krijgt.
Druk voorzichtig op de [TV OUT] knop en verander de video output mode.
2. Stilstaand beeld of geen mogelijkheid om door het menu heen te switchen van uw Mvision
Divx.
Controleer of u USB goed is aangesloten.
Controleer of u USB goed geformatteerd is.
3. Ondertiteling verschijnt niet.
Indien de film file-naam of afbeelding file-naam niet overeenkomt met de ondertiteling filenaam, dan zal de ondertiteling niet verschijnen.
Voorbeeld, file-naam film is “ bbb.avi”, dan moet de file-naam ondertiteling ”bbb.smi” zijn.
4. Ontvanger is aan, maar geen of trillend beeld.
Dit kan een gevolg zijn van een verkeerde video instelling waardoor u geen of trillend beeld
krijgt.
Druk voorzichtig op de [TV OUT] knop en verander de video output mode.
5. Video file is niet af te spleen, zwart beeld.
Video file CODEC die niet ondersteund wordt. Gebruikers kunnen uitzoeken of de CODEC
ondersteund wordt en zo niet gebruik maken van de conversie programma’s. Druk 2 maal
de [TV OUT] knop in van uw afstandsbediening.
6. Wel beeld maar geen geluid.
Controleer de TV in aansluitingen van uw TV.
De video aansluitingen zoals composiet component hebben een gescheiden audio ingang.
Controleer of de video en audio aansluitingen goed vast zitten.
130
DEUTSCH
SX-5 USB
STX-5 USB
Bitte lesen Sie diese Bedienungsanleitung
gruendlich durch bevor Sie den Receiver
anschliesen.
INHALT
Sicherheitshinweise
134
Allgemeine Informationen
135
I. Lieferumfang
135
II. Features
135
III. Fernbedienung (RCU)
136
IV. Vorderansicht
139
V. Rueckansicht
140
Bedienung und Funktionen
141
Kanallisten Guide
143
Menu Beschreibung
145
Hauptmenu
145
I. Kanaele bearbeiten
145
II. Installation
147
III. Optionen
151
IV. Utility
154
Fehlersuche
156
Spezifikationen
157
133
Sicherheitshinweise
Warnung
Bitte lesen Sie zuerst die folgende Bedienungsanleitung durch um moegliche Schaeden zu vermeiden.
Das Geraet darf nicht abgedeckt werden und die Lueftungschlitze muessen frei bleiben.
Receiver Betriebsspannung checken AC 90~240V, 50Hz~60Hz Max, 40W.
Allgemeine Informationen
I. Lieferumfang
Pruefen Sie die Lieferung auf Vollstaendigkeit Im Lieferumfang sind enthalten.
1) Fernbedienung (RCU)
2) Batterien (2EA)
Fluessigkeiten vom Receiver fern halten.
3) Bedienungsanleitung
Receiver von brennbaren Gegenstaenden fern halten wie Kerzen Das Geraet darf keinem Tropf-
4) A/V Kabel
Spritzwasser ausgesetzt werden.
Receiver vom Netz trennen bei Reinigungen.
Netzstecker vom Strom trennen und nur mit einem trockenen Tuch reinigen.
die Lueftungschlitze muessen frei bleiben.
Das Geraet muss so aufgestellt warden, dass es ausreichend belueftet wird.
Direkte Sonneneinstrahlung vermeiden, ebenfalls vor Feuchtigkeit schuetzen.
II. Features
∙MPEG-II Digital & Fully DVB-S kompatibel.
∙1 Smarcardleser.
∙1 Common Interface schacht.
∙Empfang von C/Ku band fuer jede Antenne.
Bitte keine Kabel verwenden die fuer den betrieb nicht geeignet sind.
Schalten Sie den Receiver aus,bevor Sie das Antennenkabel anschliessen oder entfernen.
∙LNB Tone Switch 22KHZ ein-ausschaltbar.
∙DiSeqC 1.0,1.2 und USALS fuer Multi-LNB Steuerung.
∙5000 Kanaele Speicherkapazitaet.
Niemals das Geraet selber oeffnen Es besteht die Gefahr eines Elektroschoks.
∙Blind Scan (PowerScan).
Versuchen Sie niemals das Geraet selber zu reparieren.
∙PIG ( Bild in Grafik ).
∙Teletext und Untertitel direkt vom OSD.
Sollte es einmal erfordelich sein das Geraet zu oeffnen, wenden Sie sich bitte an geschultes
Fachpersonal.
Die Bedienunganleitung kann durch Softwareaktualisierungen abweichen.
∙EPG ( Elektronische Programmfuehrung ).
∙OSD mit 65536 Farben.
∙Dolby Digital ausgang durch S/PDIF.
∙Software und Kanallisten Aktualisieren durch den USB Port und RS232.
∙PVR Ready ueber USB.
∙Aufgenommene files ueber PC abspielen.
134
135
Allgemeine Informationen
Allgemeine Informationen
III. Fernbedienung (RCU)
III. Fernbedienung (RCU)
1. MUTE
Habilita ó deshabilita el audio.
2. POWER
Conmuta al receptor entre operativo y en modo stand by.
3. TV
Modo TV
4. STB
Modo STB (receptor)
5. VCR
Modo VCR
6. DVD
Modo DVD.
7. Teclas Numéricas
Selecciona los canales de TV ó Radio y en los menús individuales.
8. FAV
Cambia a la lista de favoritos seleccionados.
9. SAT
Cambia a la lista de satélites seleccionados.
10. EPG
Muestra la guía de programas de TV ó Radio
(Guía Electrónica de Programas)
136
11.
Habilita el modo subtítulos y teletexto.
12. Audio
Cambia el idioma del audio.
13.
Selecciona el modo del audio ( IZDA.(LEFT) / DCHA. (RIGHT) / STEREO ).
14. ▲▼
Cambia de canale ó mueve entre las opciones del menú.
15.◀ ▶
Ajusta el volumen ó mueve a la izda. ó mueve entre las opcines del menú.
16. MENÚ
Muestra el menú principal en pantalla
17. EXIT
Regresa al menu anterior ó a la vista de modo normal desde un menú.
18. INFO
Muestra la caja de información en la pantalla y edita el nombre de la lista de canales favoritos
19. V+/V-
Cambia el volumen del audio arriba / abajo.
20. P+/P-
Cambia canales arriba / abajo en el modo normal de canales
21.
Mueve arriba una página en la lista de canales ( Selecciona el modo Zoom)
22.
Mueve abajo una página en la lista de canales.
23. STOP
Para de grabar ó reproducer.
24. PAUSE
Hace pausa en una reproducción ó va a modo normal.
25. RECORD
Grabar un programa.
26. PLAY
Muestra la lista de ficheros y reproduce en modo lento/normal.
27. REWIND
Empieza la reproducción hacia atrás y cambia la velocidad de la reproducción hacia atrás.
28. F/F
Empieza la reproducción hacia adelante y cambia la velocidad de la reproducción hacia adelante.
29. Posición
Mustra la barra de posición para ajustar la antena.
30. AV/TV
Selecciona entre el modo TV ó AV
31. TV / RADIO
Conmuta entre el modo TV y Radio
32. ←PR
Selecciona el canal que se estaba viendo anteriormente
33. Fn
Reservado
34. STB / DivX
Cambia entre el modo STB / DivX
35. UHF
Cambia a modo de sintonización de canal UHF
36. PAL / NTSC
Conmuta entre modo PAL ó NTSC.
137
Allgemeine Informationen
III. Fernbedienung (RCU)
Allgemeine Informationen
IV. Vorderansicht
Einstellungen:
1. Einstellungen 3 Ziffernmode
1) TV einschalten.
2) Druecken Sie “TV”taste und “OK” gleichzeitig waehrend 2 sekunden.Danach blinkt die TV LED zweimal.
3) Markenlisteabfragen am TV und 3 nummern druecken.
4) Falls mehrere nummern an der jeweiligen Marke sind,schritt 3 wiederholen bis der TV abschaltet.
5) Wenn sich der TV abschaltet,mit OK bestaetigen.
6) Probieren Sie ob Einschalten und andere funktionen korreckt funktionieren.
7) Falls Einschalten richtig geht jedoch die anderen funktionen nicht,fangen Sie nochmal bei schritt 1 an
Para VCR (video) & DVD, el procedimiento es el mismo el cual se describe arriba.
Falls die 3 nummern nicht innerhalb 10 sekunden gedrueckt sin dist die configuration nicht gueltig
①
②
③
④ ⑤
Falls nicht die richtige kombination gefunden wird in dem fall:
2. Automatische Suche
1) TV einschalten.
1. POWER
Schaltet Ein / Aus.
2) TV und OK taste gedrueckt alteen waehrend 2 sekunden.Die LED TV Blink zweimal.
2. CH Up/Down
Hauptmenu.
3. VOL Up/Down
Bestaetigungstaste.
4. USB PORT
Connects to USB device.
5. USB PORT
DivX file play.
3) UP tastegedrueckt halten bis sich der TV abschaltet.
4) Nach abschalten des TV OK taste druecken (falls alles korreckt abgelaufen ist,blinkt die LED zweimal)
5) Testen Sie ob die Powertaste und die anderen funktionen gehen.
6) Falls Einschalten richtig geht jedoch die anderen funktionen nicht,fangen Sie nochmal bei schritt 1 an.
( In einigen faellen kann es vorkommen das die Powertaste korreckt funktioniert jedoch die anderen
tasten nicht)
Fuer Video und DVD, die vorgehensweise ist die gleiche wie oben beschrieben.
Falls die 3 nummern nicht innerhalb 10 sekunden gedrueckt sin dist die configuration nicht gueltig.
3. Wie kann mann die aktuelle configuration bestaetigen
1) TV und OK taste gedrueckt alteen waehrend 2 sekunden.Die LED TV Blink zweimal.
2) Info taste wahrend 3 sekunden gedrueckt halten.
3) Die LED TV blinkt nun fortlaufend um die configuration anzuzeigen (die LED blink zum beispiel 10 mal um
die ziffer “0” anzuzeigen. EIn beispiel, wenn die nummer 350 sein sollte,dann blinkt die LET TV 3 mal
danach 5 mal und danach 10 mal
Nicht alle USB Flash Drives USB 2.0 sind kompatibel mit unserem Receiver.
Fuer Video und DVD, die vorgehensweise ist die gleiche wie oben beschrieben.
138
139
Allgemeine Informationen
Bedienung und Funktionen
Hier werden verschiedene Anschlussmoeglichkeiten beschrieben wie man den TV,VCR anschliesst,Sie
koennen diese ohne weiteres verwenden,sollten Sie fragen haben,wenden Sie sich bitte an Ihren
Fachhaendler.
V. Rueckansicht
Die folgenden Zubehörteile liegen dem Gerät bei.
I. Schliessen Sie den Receiver am TV an
I-1. Schliessen Sie den Receiver am TV an mit dem Scartkabel.
Schliessen Sie eine Buchse des Kabels am TV SCART anschluss des Receivers an und die andere Buchse des
Kabels am SCART -Anschluss des TV.
140
1. Antenne IN
Antennenanschluss.
2. LOOP OUT
Anschluss fuer einen weiteren Receiver.
3. LNB IN
Anschluss der Satellitenanlage.
4. LNB OUT
Anschluss fuer einen weiteren Receiver.
5. DIGITAL AUDIO
Digital Ton ausgang.
6. AUDIO –R
Anschluss Audio Rechts zum TV oder anderem Geraet.
7. VIDEO
Anschluss Video zum TV oder anderem Geraet.
8. AUDIO-L
Anschluss Audio Links zum TV oder anderem Geraet.
9. TV SCART
Anschluss TV Scart.
10. VCR SCART
Anschluss VCR SCART.
11. TV/VCR
Anschluss zum TV oder Video.
12. ANT
Antennenanschluss.
13. RS 232
PC Anschluss zur Software aktualisierung.
14. ETHERNET
Lan anschluss.
15. YUV
Anschluss YUV zum TV oder VCR.
16. USB
Anschluss USB.
17. Netzteil
90~250V AC, 50/60Hz, 40W.
18. HAUPTSCHALTER
Ein- Ausschalten.
II. Schliessen Sie den Receiver mit RCA Kabel am TV (CINCH)
II-1.Schliessen Sie den Receiver mit RCA Kabel am TV (CINCH).
Schliessen Sie den roten RCA-anschluss am Audio-R, den weissen am Audio-L und den gelben am
Videoanschluss der Rueckseite Ihres Receivers an und die anderen gleichfarbigen Kabelenden am Video/TV
anschluss Ihres TV/VCR.
141
Bedienung und Funktionen
III. Anschluss des Receivers am TV /VCR mit dem Antennenkabel
III-1. Anschluss des Receivers am TV /VCR mit dem Antennenkabel.
Eine Buchse des Antennenkabels am RF anschluss des Receivers und die andere Buchse am
ANT IN des TV anschliessen.
Eine Buchse des Antennenkabels am RF anschluss des Receivers und die andere Buchse am
ANT IN des Video anschliessen.
Kanallisten Guide
1. Taegliche Bedienung
a) Wenn man einen Kanal aussucht,dann erscheint
automatisch fuer einige sekunden die
Informationsleiste welche die Informationen des
senders liefert.
b) INFO Taste gibt die Senderinformationen an.
2. Normale Senderliste
a) OK-Taste druecken um die Senderliste zu erhalten.
b) wenn man “details” in der Senderliste sieht, dann
Rote Taste druecken um an die Simple Senderliste zu
gelangen.
3. Detallierte Senderliste
a) Druecken Sie OK um zur Kanalliste zu gelangen.
b) Um zur detaillierte Senderliste zu gelangen, druecken
Sie die ROTE taste in der normalen Senderliste.
c) ◀▶ und ▲▼ Tasten druecken um die Senderliste
Alphabetisch zu ordnen
d) SAT-Taste druecken um nach Satelliten zu ordnen
und FAV-Taste um nach Favoritenlisten zu ordnen 18.
e) Gruene Taste druecken um alle Sender zu
sehen oder Exit um zurueck zum Sender zu gehen.
f) SAT-Taste druecken um das Fenster mit den
konfigurierten Satelliten zu sehen (welche bereits
gesucht worden sind), und einen Satelliten aussuchen
wobei dann die aktuelle Liste erscheint.
g) FAV-Taste druecken um die Favoritenlisten zu
sehen und waehlen Sie dann Ihre liste aus,danach
Word Ihnen diese angezeigt.
h) Gruene Taste druecken um die gesamte Senderliste
zu sehen.
i) MENU-Taste druecken und der cursor wird nach links bewegt um die Liste zu ordnen.
j) Gelbe Taste zum ordnen ~A~Z/Z~A/FAT/CAS.
k) Gelbe Taste druecken zum ordnen ~A~Z/Z~A/FAT/CAS.
Falls Sie ungeordnet wollen bitte aus der position CAS, unordnen auswaehlen.
142
143
Kanallisten Guide
Menu Beschreibung
4.EPG (Elektronischer Programmführer)
Hauptmenu
a) drücken Sie die EPG Taste um den EPG aufzurufen.
b) Sie koennen die EPG Daten nun abrufen.
MENU Taste druecken um ins Hauptmenu zu gelangen
Hauptmenu wird angezeigt.
c) Taste auf dem ausgewählten Kanal können Sie die
EPG Daten abrufen.
1. Mit den Tasten ▲▼◀ ▶bewegen Sie sich im Menu.
2. Druecken Sie OK um zu bestaetigen.
d) Um ein Programm aufnehmen zu koennen druecken
sie die Taste REC(●) (nur mit dem PVR-Modell).
3. Druecken Sie EXIT oder MENÚ um zum vorherigen
Menu zu gelangen.
e) Auf der rechten Seite erscheint ein Bild.
I. Kanaele bearbeiten
II. Installation
III. Optionen
f) Wenn Sie eine Aufnahme programmieren,dann
startet diese automatisch zur gegeben zeit (nur das
PVR modell).
IV. Utility
g) Select Taste zweimal druecken um zum Sender
zurueck zugelangen.
I. Kanaele bearbeiten
Diese Sektion wir Ihnen helfen Ihre Sender zur Organisieren.
1. Suchen Sie Kanaele im Hauptmenu mit den Tasten ▲▼ und druecken Sie OK.
5. ZOMM IN/OUT
2. Kanaele erscheint auf dem Bildschirm.
a) Wenn Sie die UP Taste ( ) gedrueckt halten, dann
koennen Sie die ZOOM Funktion benutzen.
3. Suchen Sie den Mode aus den Sie benutzen wollen ◀ ▶.
b) Von dem Fenster des Zooms koennen Sie die Zoom
funktion aussuchen(2-3-4) und zum zurueckgehen
dann druecken sie die Down taste( ).
5. Druecken Sie EXIT um ins Hauptmenu zurueck zu gelangen oder die Taste
MENU um zum Sender zurueck zu gelangen.
c) Wenn Sie den Cursor bewegen (◀▶▲▼ )koennen
Sie die Zone des Zooms aussuchen,danach die Taste
Auf-Ab zum bestaetigen.Wenn Sie pause drucken
dann Word das Bild gestoppt.
4. Um den ausgewaehlten Kanal auszusuchen,druecken Sie die Rote Taste.
I-1. Favoriten
I-2. Umbennen
I-3. Bewegen
I-4. Blockieren
I-5. Loeschen
I-1. Favoriten
1. Benutzen Sie die Tasten ◀ ▶ um zu den Favoriten
zu gelangen und druecken Sie die Gelbe Taste um
zwischen Favorit 1...8 auszuwaehlen.
2. OK druecken um sender hinzuzufuegen oder loeschen.
3.
Ein zeichen erscheint hinter dem Namen.
Um zu loeschen OK druecken.
4. Die Sender warden automatisch dann abgespeichert.
5. Falls Sie die Favoritenlisten anschauen wollen oder
den Modus wechseln (umbennenen /loeschen)
druecken Sie die Taste FAV.
6. EXIT druecken um ans vorherige Menu zu gelangen oder zum
vorherigen Sender zu gelangen.
144
145
Menu Beschreibung
I. Kanaele bearbeiten
I-2. Umbenennen
1. Benutzen Sie die Tasten ◀ ▶ um zu Umbenennen.
2. Suchen Sie den Sender aus den Sie Umbenennen wollen mit
den Tasten ▲▼ und bestaetigen Sie mit OK.
3. Eine Tastatur erscheint auf dem Bildschirm.
4. Sie koennen nun den Namen bearbeiten mit dieser Tastatur.
5. Druecken Sie die gelbe taste um die Favoritenliste 1
umzubenennen (1-8) und die blaue taste um den Satelliten zu
bearbeiten.
6. EXIT druecken um ins vorherigen menú zu gelangen oder Menu
druecken um zum Sender zu gelangen.
Menu Beschreibung
II. Installation
Dieser Abschnitt dient zur hilfe um die Installation zu
konfigurieren. Waehlen Sie Installation im Menu und
druecken SIe OK. EXIT druecken um ins vorherigen
menú zu gelangen oder Menu druecken um zum
Sender zu gelangen.
II-1. Satellit suche
II-2. DiSEqC Schalter
II-3. Motor Konfiguration
II-4. Terrestrisch suche
II-5. Werkeinstellung
I-3. Bewegen
1. Benutzen Sie die Tasten ◀ ▶ um zu bewegen.
2. Sender aussuchen die Sie bewegen wollen und mit OK
bestaetigen.
3. Cursor dort hinbewegen wo Sie den sender haben wollen und
mit der Gruenen Taste bestaetigen.
4. Exit druecken um ins vorherige Menu zu gelangen oder Menu
druecken um zum Sender zurueck zugelangen.
II-1 Satellit suche
I-4. Blockieren
b) DiSEqC
- OK druecken um die DiSEqC liste anzuzeigen.
- Waehlen Sie den DiSEqC port aus und druecken Sie OK.
1. Benutzen Sie die Tasten ◀ ▶ um ins Blockier-Menu zu gelangen.
2. Waehlen Sie die Sender aus die Sie Blockieren wollen und
bestaetigen Sie mit OK.
◀ ▶ erscheint am ende des ausgewaehlten namens.Um zu
loeschen nochmals OK druecken.
3. EXIT druecken um ins Hauptmenu zu gelangen oder Menu
druecken um zum Sender zurueck zugelangen.
I-5. Loeschen
1. Benutzen Sie die Tasten ◀ ▶ um ins Loesch-Menu zu
gelangen.
2. Waehlen SIe den Sender aus den Sie loeschen wollen und
bestaetigen Sie mit OK, es erscheint (
) Um zu loeschen
nochmals die blaue taste druecken.
3. Druecken Sie die gelbe Taste um ein TP zu loeschen. Waehlen Sie ein Sender und druecken Sie die blaue
Taste.Alle Sender dieses TP werden ausgewaehlt.
4. Druecken SIe die gelbe Taste um einen Satellit zu Loeschen.Einen Sender aussuchen und die blaue Taste
druecken.Alle Sender dieses Satelliten sind markiert.
5. EXIT druecken um ins Hauptmenu zu gelangen oder Menu druecken um zum Sender zurueck zugelangen.
6. Auf dem Bildschirm erscheint eine Meldung.
7. OK druecken in der Messagebox und nochmals OK druecken um die markierten Sender zu loeschen.
146
1.Mit den Tasten ▲▼ bewegen Sie den Cursor und mit
OK bestaetigen.
a) Satélite
- OK druecken um die Satellitenliste anzuzeigen.
- Waehlen Sie den Satelliten aus und dreucken Sie OK.
c) Frequenz
- Druecken Sie OK um die Frequenzliste anzuzeigen.
- Waehlen Sie die Frequenz aus und druecken Sie OK.
d) LNB
- Druecken Sie OK um die LNB frequenzliste anzuzeigen.
- Waehlen Sie Ihr LNB aus und druecken OK.
- Sie koennen auch die daten direkt eingeben indem
Sie die Tastatur benutzen mit der Fernbedienung.
e) 22KHz Ton
- Waehlen Sie zwischen folgenden werten ihrer
Installation aus: keinem, 0 KHz oder 22 KHz.
f) Suchoption
- Druecken Sie OK um die Suchoptionen anzuzeigen.
- Waehlen Sie die gewuenschte Suchoption aus und
druecken Sie OK.
g) Suchen
- Druecken Sie start um die suche zu beginnen.
- Der ausgesuchte Satellit erscheint auf dem
Bildschirm.
- Druecken Sie ▶um weitere Satelliten zu
suchen oder ◀ um die ausgewaehlten zu
loeschen.
- Druecken Sie OK um die Suche zu starten.
Bearbeiten : Um einen TP zu bearbeiten,
druecken Sie die ROTE taste an
der Fernbedienung.
147
Menu Beschreibung
Menu Beschreibung
II. Installation
II. Installation
II-2. DiSEqC Schalter
1. Waehlen Sie Kanalsuche im Installationsmenu mit
den tasten ▲▼und druecken OK.
a) Waehlen Sie DiSEqC Schalter und druecken OK, das
DiSEqc Menu erscheint auf dem Bildschirm.
e) Motoreinstellung
Waehlen Sie die position mit den tasten ◀ ▶aus
und bestaetigen mit OK.
- Eine Meldung erscheint auf dem Bildschirm.
- Speichern Sie die position des ausgewaehlten Satelliten ab
- Zur Satellitenposition gehen : Bewegen Sie den Motor
zur gewuenschten Position.
- Nullpunkt : Motor geht zur Nullposition.
b) Sollten Sie DiSEqC Schalter haben,waehlen Sie diesen
aus DiSEqC (A~D)benutzen Sie dazu die tasten ◀ ▶ und
▲▼ bestaetigen mit OK.
- Reset Position : Loescht alle gespeicherten Daten .
f) Satellitenposition
- Geben Sie die Daten direkt mit der Fernbedienung ein.
- Geben Sie die OST/WEST grenze mit den Tasten ◀▶ein.
II-3 Motor konfiguration
1. Sie koennen den cursor mit den tasten ▲▼
bewegen und mit OK bestaetigen.
a) Motortyp : DiSEqC 1.2, USAL
- OK druecken um die Motortypen anzuzeigen.
- Waehlen Sie Ihren Motor aus und druecken OK.
g) Suchoption
- Druecken Sie Ok um die Suchoptionen anzuzeigen.
- Waehlen Sie die gewuenschte Suchoption aus und
bestaetigen mit OK.
※ TP EDIT :
Um die TP zu bearbeiten, druecken Sie
die ROTE taste an der Fernbedienung.
h) Suchen
- Druecken Sie Suchen um die Kanalsuche zu starten.
- Druecken Sie OK um zu beginnen.
b) Satellit
- Druecken Sie OK um die Satellitenliste anzuzeigen.
- Waehlen Sie den Satelliten aus und druecken OK.
2. Meine Position bearbeiten
- Druecken Sie die Gruene Taste um die lokale position zu bearbeiten.
c) LNB Konfiguration
- Druecken Sie Ok um die LNB Frequenzlisten und
Schalterkonfigurationen anzuzeigen.
- Waehlen SIe das LNB und den Schalter aus.
a) Laengengrad
- Geben Sie den Laengengrad direkt mit den tasten an der Fernbedienung ein.
- Waehlen Sie die richtung mit den tasten ◀▶(Ost/West).
b) Breitengrad
d) Frequenz
- Druecken Sie OK um die Frequenzliste anzuzeigen.
- Waehlen Sie die Frequenz aus und bestaetigen mit OK.
e) Motoreinstellung
- Suchen Sie die position des ausgewaehlten Satelliten
aus◀ ▶.
148
- Geben Sie den Breitengrad direkt mit den tasten an der Fernbedienung ein.
- Waehlen Sie die richtung mit den tasten ◀▶(Nord/Sued).
3. EXIT druecken um ins Hauptmenu zu gelangen oder Menu druecken um zum Sender zurueck
zugelangen.
149
Menu Beschreibung
II. Installation
II-4. Terrestrisch suche
1. Wahelen Sie Sendersuche in Installation mit ▲▼
und bestaetigen Sie mit OK.
2. 1) Waehlen Sie die Region aus mit ◀ ▶.
2) Wahelen Sie zwischen Auto oder Manuellersuche aus
mit◀ ▶.
3) Auto
a) Wahelen Sie “Search” aus und bestaetigen Sie mit OK
um die suche zu starten.
Menu Beschreibung
III. Optionen
Dieser Abschnitt hilft Ihnen die Sprache des OSD,
Zeit, etc. zu bedienen.Waehlen Sie Optionsmenu
aus und bestaetigen mit OK.
EXIT druecken um ins Hauptmenu zu gelangen oder
Menu druecken um zum Sender zurueck zugelangen.
III-1. OSD Konfiguration
III-2. Kontroll Panel
III-3. Zeiteinstellung
III-4. Kindersicherung
III-5. Netzwerk
b) Druecken Sie Exit oder Menu nach der Sendersuche
4) Manual
a) Waehlen Sie den Kanal aus mit ◀ ▶.
b) Die Frequenz erscheint nach der auswahl des Kanales.
III-1. OSD Einstellung
1. Waehlen Sie OSD Konfiguration mit den ▲▼
tasten und bestaetigen mit OK.
a) OSD Sprache
II-5. Werkeinstellung
Auf Werkeinstellung nur in faellen
zuruecksetzen,wenn Sie alle werte auf null setzen
wollen.Alle Konfigurationen werden geloescht.
1. Waehlen Sie Werkeinstellung im Installationsmenu aus mit
den tasten ▲▼ und bestaetigen mit OK.
2. Eine Meldung erscheint auf dem Bildschirm.
3. Waehlen Sie OK damit der Receiver auf die
Werkeinstellung zurueckgesetzt wird.
4. EXIT druecken um ins Hauptmenu zu gelangen oder Menu
druecken um zum Sender zurueck zugelangen.
- Druecken Sie OK um die Sprachenliste anzuzeigen.
- Waehlen Sie Ihre Sprache und bestaetigen mit OK.
b) Audio Sprache
- Dreucken Sie OK um die Audio Sprachenliste anzuzeigen.
- Waehlen Sie Ihre Sprache aus und bestaetigen mit OK.
c) Informationsleiste auf dem Bildschirm
- Druecken Sie OK um die Informationsleite aud dem Bildschirm aunzuzeigen.
- Waehlen Sie die Zeit aus die Sie fuer die Informationsleiste haben wollen.
d) Position OSD
- Druecken Sie OK um die position Horizontal oder Vertical zu veraenderen.
- OSD positionsbox erscheint auf dem Bildschirm.
- Waehlen Sie Position Hor/ Position Ver mit den ▲▼ tasten aus.
- Bewegen Sie position rechts links mit den tasten ◀ ▶.
- Waehlen Sie OK in der Box aus und bestaetigen mit OK.
e) Bildformat
- Druecken Sie OK um die Bildformatliste anzuzeigen.
- Waehlen Sie Ihr Format aus und bestaetigen mit OK.
2. EXIT druecken um ins Hauptmenu zu gelangen oder Menu druecken um zum Sender
zurueck zugelangen.
150
151
Menu Beschreibung
Menu Beschreibung
III. Optionen
III. Optionen
III-2. Kontoll Panel
III-5. Netzwerk
1. Waehlen SIe TV Setup mit den tasten ▲▼ aus
und bestaetigen mit OK.
Dieser Abschnitt hilft Ihnen das Netzwerk zu
konfigurieren.
a) Video ausgang
- Druecken Sie OK um die Videoausgaenge anzuzeigen.
- Waehlen Sie RGB falls Ihr scart diese unterstuetzt und
bestaetigen mit OK.
- Waehlen Sie CVBS falls Ihr scart kein RGB unterstuetzt und
bestaetigen Sie mit OK.
b) TV typ
- Druecken Sie TV typenliste um diese anzuzeigen.
- Waehlen Sie ihr Fernsehtyp aus und bestaetigen Sie mit OK.
c) UHF Kanal
- Druecken Sie OK um die UHF kanalliste anzuzeigen.
- Waehlen Sie Ihren UHF kanal aus und bestaetigen Sie mit OK.
d) UHF Standart
- Druecken Sie OK um die Standartliste anzuzeigen.
- Waehlen Sie ihren standart aus und bestaetigen mit OK.
1. IP Setup
Wahelen Sie eine der folgenden Optionen aus.
a) abgeschaltet
in diesem Falle ist kein netzzugang moeglich.
b) automatisch
Fuer User die einen dynamische IP Adressen nutzen Nach
der auswahl dieser option mit Apply Taste bestaetigen,Box
startet automatisch neu und hat danach eine neue IP des
Routers.
2. EXIT druecken um ins Hauptmenu zu gelangen oder
Menu druecken um zum Sender zurueck zugelangen.
c) Manuell
Fuer User die eine statische IP Adresse manuell eingeben
wollenmit der Submask und dem Gateway Nach der
auswahl dieser option mit Apply Taste bestaetigen,Box
startet automatisch neu und hat danach eine neue IP.
III-3. Zeiteinstellung
2. SW upgrade
Stellen Sie ihre zeitzone ein.
a) Bitte erst pruefen wo Sie das file runterladen koenne.
1. Wahlen Sie Zeiteinstellung im Optionsmenu aus und bestaetigen
mit OK.
2. Zeiteinstellungsmenu erscheint auf dem Bildschirm.
3. Bewegen Sie den cursor mit ▲▼ tasten und bestaetigen mit OK
(Direkteingabe mit der Fernbedienung moeglich)
4. EXIT druecken um ins Hauptmenu zu gelangen oder Menu
druecken um zum Sender zurueck zugelangen.
III-4. Kindersicherung einstellen
1. Waehlen Sie Kindersicherung im Menu aus und bestaetigen mit OK.
2. Kindersicherung erscheint auf dem Bildschirm.
3.Sie koennen mit den tasten ▲▼ nun Sender blockieren.
4. Sie koennen blockieren und desblockieren indem sie On Off
anwaehlen mit den tasten ▲▼).
5. Geben Sie das neue Passwort ein falls Sie das alte aendern wollen.
6. Bestaetigen Sie nochmals die eingabe des neuen Passwort.
7. EXIT druecken um ins Hauptmenu zu gelangen oder Menu druecken um zum Sender zurueck zugelangen.
b) Druecken Sie “input url” wo Sie die adresse eingeben
koennen mit dem Keypad Dialog,geben Sie die URL ein
von wo Sie das file runterladen wollen.
c) Nach der eingabe druecken Sie die Upgrade Taste und
folgende melding erscheint auf dem
Bildschirm : Warnung, bitte nicht abschalten
waehrend der upgrade prozedur
Wichtig : Passwort aus Fabrik ist 0000
152
153
Menu Beschreibung
VI.Utility
Dieser Abschnitt hilft Ihnen USB besser zu nutzen,
druecken Sie die tasten ▲▼ und bestaetigen mit OK.
∙VI -1. Systeminformation
∙VI -2. USB
∙VI -3. Common Interface
VI-1. System Information
Diese Option hilft Ihnen Ihre S/W und H/W zu
erkennen,ausserdem wird der Produktname
angezeigt.
1. Waehlen Sie Systeminformation in Optionen aus mit den
tasten ▲▼ und bestaetigen Sie mit OK
2. EXIT druecken um ins Hauptmenu zu gelangen oder
Menu druecken um zum Sender zurueck zugelangen.
Menu Beschreibung
USB PVR
Schliessen Sie iht USB an den STB an
1. Aufnahme
∙Falls Sie eine Aufnahme machen wollen,druecken Sie REC.
∙Druecken Sie TOP Taste um zu stoppen.
2.Wiedergabe
∙Zur Wiedergabe der Aufnahme druecken Sie einfach die PLAT-Taste und die Aufnameliste wird
angezeigt.
∙Waehlen Sie die entsprechende Aufnahme aus mit den Tasten ▲▼ und bestaetigen mit OK.
∙Falls Sie eine andere Aufnamhe abspielen wollen,druecken Sie einfach OK und die Aufnahme
liste wird wieder angezeigt.
∙SLOW : Druecken Sie die PLAY Taste,falls Sie nochmals die PLAY taste druecken,kehren Sie
zur normalen Wiedergabe zurueck.
∙F/F, Zurueck, Pause wird unterstuetzt.
VI-2 USB
Dieser Receiver besitzt USB anschluss.
3. File Manager (Go to Main Menu - Utility - USB)
1. Waehlen Sie USB in Utility mit den tasten ▲▼ aus und
bestaetigen Sie mit OK.
∙Loeschen
2. Falls Sie den modus wechseln wollen (S/W upgrade,
BootLoader Upgrade), druecken Sie die ROTE Taste an
der Fernbedienung.
3. Waehlen Sie das file aus zum aktualisieren mit den
tasten ▲▼ und bestaetigen mit OK.
4. Einmal beendet startet der Receiver automatisch neu.
- Falls Sie ein file loeschen wollen,druecken Sie die gelbe taste.
- Wahelen Sie das entsprechende file aus mit ▲▼und bestaetigen Sie mit OK.
∙Format
- Der STB unterstuetzt nur FAT32 file systeme.
- Zum formattieren Ihres memory device zu FAT32,druecken Sie die blaue Taste.
- Nach dem formattieren sind alle daten geloescht.
VI-3 Common Interface
4. Wichtig
Dieser Receiver ist mit 1 CI Schaechten ausgestatet mit
denen sie auf verschidenen System emit einer gueltigen
Smartcard zugriff haben
Die Programme die Sie entschluesseln koennen werden
mit der Smartcard und dem entsprechenden CI-Modul
bestimmt.
∙Nur USB 2.0 wird zur PVR Funktion unterstuetzt.
1. Waehlen Sie Common Interface in utility mit ▲▼ aus und
bestaetigen mit OK.
2. Common Interface erscheint auf dem Bildschirm
(“no Module” erscheint und besagt das sich kein CI im Schacht befindet)
3. Schieben Sie ein CI-Modul in Schacht.
4. Der name des Moduls erscheint auf dem Bildschirm.
5. Druecken Sie EXIT um zum vorherigen Menu zu gelangen oder druecken Sie Menu um zum Sender zu gelangen.
154
∙Software Download und MP3 wiedergabe gehen auch mit USB1.1.
∙Bitte benutzen Sie mehr als 2Gb fuer USB HDD oder PVR-funktionen.
∙Mit 1Gb koennen Sie normalerweise 30 bis 40 minuten aufnehmen.
∙Einige USB device koennen nicht unterstuetzt warden.
∙Speicher fragmentation kann fehler bei der aufnamhe bewirken,formattieren Sie gelegentlich
ihr USB device.
∙Fuer weitere Informationen besuchen Sie bitte unsere Webseite.
155
Fehlersuche
Problem
Nicht erscheint im
Frontpanel oder Netzteil
Spezifikationen
Loesungen
I.Conditional Access Module Interface
∙Pruefen Sie ob das Netzkabel eingesteckt ist.
PCMCIA
∙Prufen Sie Ihre Satellitenanlage.
Kein Bild
∙Pruefen Sie ihre anschluesse.
∙Gehen Sie aus dem UHF mode.
∙Pruefen Sie die Kanaleinstelluung und den Videoausgang.
Kein Ton
∙Pruefen Sie die Lautstaerke am TV und Receiver.
∙Pruefen Sie die Mute function am TV und Receiver.
∙Pruefen Sie die Kabelverbudung und korregieren Sie diese
gegebenfalls.
∙Tauschen Sie die Batterien aus.
∙Zielen Si emit der Fernbedinung direct auf den Receiver.
∙Pruefen Sie das nichts das Blickfeld zum Receiver Frontpanel
behindert.
1 SLOT, ISO 7816, GSM11.11 and EMV (payment systems) compatibility
Slot.type Ⅰor type Ⅱ
DVB Common Interface Standard
(Viaccess, Irdeto, Nagra Vision, Conax, Crytoworks, AlpahCrypt..)
II. Tuner & Channel
Specification
Item
Input Connector
Signal Level
LNB Power &
Polarization
22KHz Tone
F-type (Output loop-through), IEC 169-24, Female
-25 to -65 dBm
Vertical : +13.5/18.5Vdc±5%
Horizotal : +18.5Vd dc±
Current : Max.500mA.Overload protected
Frequency : 22KHz±2KHz
Demodulation
Amplitude : 0.8±0.2V
Version 1.2 USALS Compatible
QPSK
Input Symbol Rate
2~45Ms/s Convolution Code Rate
1/2, 2/3, 3/4, 5/6, 7/8 with Constraint Length K=7
DiSEqC Control
Fernbedienung reagiert nicht
Specification
Item
SMART CARD
III. TUNER DVB-T
Kein Signal oder
verschluesselt
∙Pruefen Sie ob das CI Modul und die Smartcard fuer diesen service
freigeschaltet sind.
∙Pruefen Sie ob das CI Modul und die Smartcard richtig eingefuehrt
sind.
∙Pruefen Sie die Signalstaerke und Qualitaet im Menu.
“kein Signal” erscheint im
Bildschirm
∙Pruefen Sie das LNB und ersetzen es gegebenfalls.
∙Pruefen Sie das LNB Kabel.
∙Pruefen Sie die Satellitenanlage.
Specification
Item
Input Frequency Range
RF Input Signal Level
Bandwidth
OFDM Spectrum
Demodulation modes
Guard Interval
FEC Decoder
170 to 230MHz(VHF), 470 to 862MHz(UHF)
-77 dBM to -10 dBM
7MHz & 8MHz
2K and 8K Carrier
QPSK, 16, 64 QAM
1/4, 1/8, 1/16, 1/32
1/2, 2/3, 3/4, 5/6 & 7/B
IV. A/V & Data In/Out
Specification
Item
Tuner defect check
∙Gehen Sie zu Option und gehen auf System Information.
Sie haben Ihren PIN
vergessen
∙Kontaktieren Sie Ihren Fachhaendler.
TV Scart Output
RGB, CVBS, L, R Output with Volume Control
VCR Scart In/Out
RGB, CVBS, L, R In
CVBS, RGB, L, R Out
RCA Output
CVBS, RGB, L, R Output(Yellow, White, Red Jack) with Volume Control
Data Interface
156
- RS-232, Bit Rate 115,200baud
Connector : 9-Pin D-Sub Male type
- Ethernet : 10/100Mbps, DHCP Supporting
- USB : USB 2.0 Type A Connector, 2Port(Front & Rear), 1Port(Multimedia file)
157
Spezifikationen
V. RF-Modulator
Specification
Item
RF-Connector
75 ohm IEC 169-2, Male/Female
Frequency
470MHz to 860MHz
Output Channel
CH 21-69 for the Demodulator
TV Standard
PAL G/I/K Selectable by Menu Setting
Audio OUtput
Mono with Volume Control
Preset Channel
Ch 38(or TBD), Software changeable by Menu Screen
VI. MPEG Transport Stream & A/V Decoding
Specification
Item
Transport Stream
MPEG-2 ISO/IEC 13818 / Transport stream Specificartion
Profile Level
MPEG-2 MP@ML
Input Rate
Max. 90 Mbit/
Video Resolution
720×576(PAL)/720×480(NTSC)
Audio Decoding
MPEG/Musicam LayerⅠ&Ⅱ
Audio Mode
Single channel/Dual channel Joint Stereo/Stereo
Teletext
VBI & OSD(Optional)
Sampling Rate
32,44.1 and 48KHz
VII. System Resources
Specification
Item
Main Processor
ARM946 RISC Processor
Flash Memory
2 Mbyte
Program DRAM
32 Mbyte
Channel Capacity
Digital Channel : 5000
VIII. Power Supply
Specification
Item
Input Voltage
AC 90 to 250V, 50~60Hz
Power Consumption
Max. 50W
Poteciton
Separate Internal Fuse
Type
SMPS
IX. Physical Specification
Specification
Item
Size (W×H×D)
290×50×220(mm)
Net Weight
2.0Kg
158
DIVX
PRODUKT BESCHREIBUNG
160
PRODUKT FEATURES
160
SICHERHEITSHINWEISE
161
PRODUKT SPEZIFIKATION
162
KONFIGURATIONSMENU
163
HAUPTMENU
165
MUSIK ABSPIELEN
166
FILM ABSPIELEN
168
FOTOS SEHEN
170
FIRMWARE AKTUALISIEREN
172
FEHLERBEHEBUNG
174
BRAND LIST
175
159
PRODUKT BESCHREIBUNG
MVision produkte sin ein neues konzept fuer multimedia player die filme,musik,bilder
abspielen an einem TV mit einem USB 2.0 Interface
SICHERHEITSHINWEISE
Bevor Sie dieses Geraet benutzen, lessen Sie bitte genau die Sicherheitshinweise
durch.
1) Die Audioquellen,Software und Bilder sind mit einem Copyright geschuetzt,
Jeder unsachgemaesse Gebrauch wird verfolgt und stellt eine verletzung des
Copyrightes dar.
Dieses Produkt unterstuezt nicht alle multimedia formate,Bitte stellen Sie
vorher sicher welche Codec verwendet wird.
Es ist moeglich das nicht alle Dateien richtig agespielt werden koennen wegen
der karakteristik der Datei.Man kann die Dateien auf kompatibilitaet pruefen
mittels Freeware.Die User koennen.
2) konvertierungsprogramme verwenden um die datei abspielen zu koennen.
3) Vor Feuchtigkeit schuetzen,ansonsten wird der Betrieb nicht gewaehrleistet.
4) Keine Teile in das Geraet einfuegen wie zum beispiel muenzen usw.
PRODUKT FEATURES
5) Geraet waehrend dem Betrieb nicht oeffnen.
MVision Produkte ist ein Unterhaltungsgeraet wo Sie Filme,Musik und Bilder an
einem TV abspielen koennen.
6) Geraet waehrend dem Betrieb nicht bewegen da dies schaeden im Speicher
verursachen koennte.
Benuzung fuer multimedia files MPEG (DiVX,Xvid,DAT,VOB,MPG,MPEG) mit
ferbindung an einem TV
7) Keine Fluessigkeiten dem Geraet zufuegen,sollte trotzdem fluessigkeit ins
Gereat eindringen,sofort abschalten da ansonsten Brandgefahr besteht.
Digitale Fotos abspielen im format JPEG.
8) Chemische Reinigungsprodukte beschaedigen das Geraet.
Digitale Musik abspielen im MP3,AC3,OGG vorbis und WMA format
9) Vor Waerme schuetzen.
USB2.0 Devices warden unterstuetzt fuer externe speicherung.
Update der Firmware ueber USB2.0 port
Spielt die daten einer externen USB2.0 quelle ab.
10) Vor Magnetfeldern schuetzen wie zum beispiel Lautsprecher da sonst daten
verloren gehen koennen.
11) Eine zu hohe Lautstaerke und ein verlaengertes Fernsehen kann die HoerSehverhaeltnisse beinflussen.
12) Sollte mal rauch entstehen oder sonstige anomalien,Geraet sofort vom Netz
trennen.
13) Netzstecker nicht waherend dem Betrieb ziehen, erst ausschalten.
160
161
PRODUKT SPEZIFIKATION
Name des Produktes
Folgende
Videoformate
werden unterstuetzt
KONFIGUATIONSMENU
MPEG-1/2, MPG, MPEG, DAT, VOB, AVI ,
DivX 3.x/4.x/5.x, XviD
(ausser GMC oder QPEL)
Das Hauptmenu des multimediaplayer
Mvision zeigt folgendes an :
Die weissen optionen links sind konfigurationele
mente Die gelben optionen in der mitte zeigen die
aktuellen konfigurationen an Die weissen optionen
rechts zeigen alternative konfigurationselemente an.
Audioformate
MP3, WMA, OGG Vorbis, AC3
Alternative Optionen sind:
Fotoformate
JPEG
MVision multimedia placer
Movie
Main chip set
EM8511 (sigma design), Arm9 266MHz, 32MB SRAM
Audioausgang
2CH Analog, Digital audio output(AC3, DTS pass though)
USB Interface
USB2.0 Host, USB1.1 compatible
HDD file system
FAT32, NTFS
TV type
NTSC
The range of
temperature
0 ~ 60°
Audioausgang :
Analog/DCPM : Analog zweikanalausgang /
PCM data.
Encoded Digital : Digital Ausgang audio data.
Videoausgang :
CVBS& S-VIDEO : Komposit Videosignal / S-Video wird auch unterstuetzt
CVBS& RGB : Komposit Videosignal und RGB signal Pal / S-Video wird nicht
unterstuetzt
Komponenten 480p : Komponentenausgang im progressive mode 480p.
S-Video ausgang wird nicht unterstuetzt
Komponenten 720p : Komponentenausgang im progressive mode 720p .
S-Video ausgang wird nicht unterstuetzt
Komponenten 1080i : Komponentenausgang in 1080i .
S-Video ausgang wird nicht unterstuetzt
TV Type :
4:3 Letterbox : Die Horizontale Bildfrequenz bestimmt die bildbreite,daher ist es moeglich
das oben und unten ein schwarzer balken auf dem Bildschirm erscheint.
4:3 fan & scan : Die Vertikale Bildfrequenz bestimmt das Bildformat,die komplette
Bildflaeche ist sichtbar jedoch links und rechts kann etwas am inhalt
fehlen.
16:9 Kompletter Bildschirm : Bild ratio ist in 16:9.
162
163
KONFIGUATIONSMENU
Slideshow :
1,3,5,7,10,20 sek,of f : Konfigurieren Sie den Zeitintervall der JPEG bilder
Druecken Sie PLAY an der Fernbedienung um die Slideshow
zu starten,die Bilder warden in dem ausgewaehlten interval
angezeigt
UNTERTITEL :
Large Font : Untertitel warden mit grossem Text angezeigt.
Small Font : Untertitel warden mit kleinem Text angezeigt.
OFF : keine untertitel warden angezeigt.
Farben des text :
farbe des randes : man kann zwischen weiss und transparent auswaehlen,
schawrz/weiss , gelb/transparent , gelb/schwarz
HAUPTMENU
Das Produkt MVision Zeist alle abspielbaren
formatea uf dem Bildschirm an Sollten Sie
Filme, Musik oder Fotos abspielen woollen,
dann druecken Sie einfach Play oder OK an der
Fernbedienung.
1. Oberer Folder : Waehlen Sie diese Option um
den folder zu bewegen oder
mit der taste Exit der
Fernbedienung
2. Liste der Folder : Zeigt all Folder an,
druecken Sie OK Taste
3. Audio file : Alle abspielbaren Audio files
werden hier angezeigt. Die files
sind MP3,WMA AC3 und OGG.
4. Firmware file : zeigt Firmware file an im Mvision. Firmware kann einfach aktualisiert
werden aus dem Hauptmenu aus Die Extensionen sind .upd .
Sprachen :
Englisch : Alle Menus werden in Englisch angezeigt.
Franzoesisch : Alle Menus werden in Franzoesisch angezeigt.
Spanisch : Alle Menus werden in Spanisch angezeigt.
5. Image file : Alle abspielbaren Bild files werden hier angezeigt.Die extensionen sind .jpg
6. Video file Alle abspielbaren Video files werden hier angezeigt.
Extensionen sind (Divx 3.x, 4.x, 5.x, XviD), MPG, MPEG, DAT, und VOB.
Portugisisch : Alle Menus warden in Portugisisch angezeigt.
7. Aktueller path : Zeigt aktueller path an
Zuruecksetzten :
Alle Werte werden auf null gesetzt.
164
8. File Information : Zeigt die nummern und die groesse der files an
[aktuelles gewaehltes file / total files).
165
MUSIK ABSPIELEN
MUSIK ABSPIELEN
Es koennen misikfiles abgespielt werden in MP3,WMA,OGG vorbis und AC3.
Die suchfunktion funktioniert nicht mit OGG files.
Key label
Funktionen
Beschreibung
Falls Sie musikfiles abspielen wollen druecken Sie “(Ok)” oder “(PLAY)” tasten nachdem
sie das file ausgewaehlt haben , mit den tasten “△, ▽ ” koennen Sie das file auswaehlen.
5
Pfeil : Bewegt seite im menu.
4
Aendert die konfiguration im naechst hoeheren level.
Danach wird das file abgespielt bis die taste “STOP“ gedrueckt wird.
1
Aendert die configuration im naechst tieferen level.
Key label
16
17
BLAU
GELB
18
GRUEN
19
ROT
2
166
3
OK
Waehlt eine option im menu oder spielt eine datei ab
im aktuellen folder.
25
INFO
Zeigt die aktuellen Informationen an des abspielenden files.
anderfalls werden die fernbedienungs funktionen angezeigt.
6
EXIT
Stoppt die abspielung,falls sie in einem folder sind,
gehen sie ein zum vorherigen menu zurueck.
26
VOL +
Erhoeht die Lautstaerke, falls die taste gedrueck
gehalten wird,geht die laustaerke drei schritte hoeher.
27
VOL -
Senkt die Lautstaerke ,falls die taste gedrueckt
gehalten wird, geht die lautstaerke drei schritte tiefer.
8
CH up
Naechstes file abspielen.
firmware files werden nicht angezeigt.
9
CH dn
Vorheriges file abspielen.
firmware files werden nicht angezeigt.
29
Haelt die aktuelle wiedergabe an.
28
Spielt das ausgewaehlte file ab .Alle aktuellen musik
files in diesem folder werden abgespielt (ausser firmware files).
11
Haelt die aktuelle wiedergabe an des musikfiles.
13
vorspulen:gibt die wiedergabe 5
sekunden schneller als normal an.
keine VBR files warden unterstuezt.
12
zurueckspulen gibt die wiedergabe 5
sekunden schneller als normal an.
keine VBR files warden unterstuezt.
32
SETUP
Konfiguration Kehrt zum Hauptmenu zurueck.
haelt die wiedergabe.
Funktionen
Beschreibung
31
TV OU
Schaltet zwischen verschiedenen ausgangsmodi um.
NTSC
stoppt wenn
musik play an ist.
15
DISPLAY
Schaltet zwischen verschiedenen bildmodus um.
letterbox, pan&scan usw.
Zeigt alle abspielbaren video files an (ordnet alle video files)
14
BILD
Stellt scharfe,contrast,saettigung ein.
1 schritt.
Zeigt alle abspielbaren musik files an (ordnet alle musik files)
stoppt wenn
musik play an ist.
Zeigt alle firmare files an (ordnet alle firmware files)
stoppt wenn
musik play an ist.
ROT
schatlet zwischen STB/ DivX um.
Macht pause falls musik,fotos oder film abgespielt wird,
Beim wiederumschalten auf DivX wird an der gleichen
stele die wiedergabe gestartet mit den tasten [ ] DivX -> STB.
Divx -> STB mode.
Show all firmware files first [sort firmware file]
stoppt wenn
musik play an ist.
Ordnet die Files nach namen und groesse.
It stops while playing.
20
23
ORDNEN
Pfeil nach oben : Bewegt nach oben im Menu.
167
FILME ABSPIELEN
FILM ABSPIELEN
Sie koennen AVI,MPG,MPEG,DAT,VOB filmformate abspielen.
Key label
Die Untertitel muesssen im gleiche folder abgespeichert warden wie der Film
Falls Sie einen Film abspielen woollen,druecken Sie “[OK] oder [PLAY]” taste
nachdem Sie das file ausgewaehlt haben mit den tasten “ , “ der
Fernbedienung,anhalten koennen Si emit der taste “STOP”.
Key label
3
25
6
168
OK
INFO
EXIT
Funktionen
Einmal druecken: Zeigt die Zeit an und den namen des files.
Zweimal druecken: zeigt nur die Zeit an.
Nochmals druecken: zeigt alle infos an.
loescht das OSD, falls das OSD nicht angezeigt wird, haelt es
ie wiedergabe an und kehrt zum menu zurueck.
Beschreibung
26
VOL +
Macht einen ZOOM im aktuellen bild / bis zu 5 mal
bild ansehen.
27
VOL -
It turns down volume in a step The volume goes 3 steps down when you
press it for long time.
8
CH up
Play previous file in current folder.
Firmware file and folder are skipped.
9
CH dn
Play next file in current folder.
Firmware file and folder are skipped.
7
Fast Backward : Movement of the playing
location 30 sec. backward.
It does not support VBR file.
10
Fast Forward : Movement of the playing
location 30 sec. forward.
It does not support VBR file.
29
It deletes OSD. If OSD does not shown up, stops playing
the present movie file and goes back into file list menu.
28
Play all the movie files in current folder.
11
Pause the movie file.
13
Rewind : REVx4/REVx8/REVx16/REVx32/
It does not support VBR files.
12
Fast Forward : FFx4/FFx8/FFx16/FFx32
It does not support VBR files.
Continue on execution of all
music file in current
folder.(Except firmware file)
15
DISPLAY
Zoom in and out of the screen.
letter-box, pan & scan,
full-screen mode.
14
PICTURE
Adjustment of screen contrast, brightness,
and saturation.
1-step.
Switches between STB and Divx modes.
It pauses while playing movie,music,picture and
goes back to STB menu mode. If it get back to divx,
it plays after the point it stops when press [ ]button.
Divx -> STB mode.
20
RED
22
SUB -T
Changes subtitle settings.
(subtitle size change, subtitle off )
subtitle size (big, small)
subtitle off.
21
SEEK
It play the movie file at user desired time.
This feature is used to move the played video
predefined time forward during playing the file.
It does not support VBR files.
Beschreibung
Zeigt die aktuelle Zeit an,falls Film und Untertitel nicht,
syncronisiert sind,druecken Sie diese Taste um zu syncronisieren.
Funktionen
169
FOTOS SEHEN
FOTOS SEHEN
Es koennen JPEG abgespielt warden.
Um ein Bild abspielen zu koennen druecken Sie OK oder PLAY taste nachdem Sie das file
ausgewehlt haben mit den “△, ▽ “ tasten der Fernbedienung. Danach wird das Bild
wiedergegeben ,Sie koennen jederzet mit Stop beenden. Mit “CHup/down” bewegen sie sich.
Key label
Beschreibung
4
Das Bild kann um 90 grad gedreht werden im
uhrzeigersinn.
bild ansehen.
1
Das Bild kann um 90 grad gedreht werden
gegen den uhrzeigersinn.
bild ansehen.
6
EXIT
Um das aktuelle file sehen und zum vorherigen menu zu gelangen.
26
VOL +
Macht einen ZOOM im aktuellen bild.
bis zu 5 mal
27
VOL -
Verkleinert den ZOOM des aktuellen bild.
bis zu 5 mal
8
CH up
Spielt das aktuelle file ab.
die firmware files werden
uebersprungen
9
CH dn
Spielt das naechste file ab.
die firmware files warden
uebersprungen.
Haelt die aktuelle wiedergabe en und kehrt zum vorherigen menu zuruck.
29
15
DISPLAY
OOM aktiv und deaktiv.
3 mal OK stellt das Bild auf den Zoom ein.
Letterbox, Pan&San,
Vollesbild
14
BILD
Stellt scharfe,contrast,saettigung ein.
1 schritt
schatlet zwischen STB/ DivX um.
Macht pause falls musik,fotos oder film
abgespielt wird Beim wiederumschalten a
uf DivX wird an der gleichen stele die wied
ergabe gestartet mit den tasten ( ).
DivX -> STB
20
170
Funktionen
ROT
171
FIRMWARE AKTUALISATION
(Warnung)
Waehrend der aktualisation nicht den Netzstecker ziehen oder an der Fernbedienung schalten . Das
product Mviosion kann jederzeit aktualisiert warden,die letzten Firmwares koennen Sie unter
www.hsmd.tv (http://www.hsmd. tv/) runterladen.
AKTUALISATION DER SOFTWARE
5. firmware upgrade screen1 [ Erasing flash ].
1. irmware von der Seite runterladenund descomprimieren,danacu auf einen externen
speichermedium speichern und diese am USB2.0 port des Mvision anschliessen.
2. Waehlen Sie die Firmware aus mit der
Fernbedienung und druecken [OK] um zu
beginnen,Das Firmware file ist mit ****.upd
in der liste zu erkennen.
6. firmware upgrade screen2 [ writing flash ].
3. Auf dem Bildschirm erscheint folgendes.
Waehlen Sie (JA) bei der Warnungsmeldung.
[WARNUNG]
Nicht vom Netzstecker trennen waehrend der
aktualisation,anderfalls kann der Flashbaustein
7. Bei beendigung des Firmware upgrades
erscheint folgendes auf dem Bildschirm screen
Und das Geraet startet neu.
zerstoert warden.
4. Firmware lesen und decodierung.
172
173
FEHLERBEHEBUNG
1. Falle kein Bild erscheind oder zittert.
falls die Bildkonfiguration nicht richtig gewaehlt wurde kann das bild ohne fabre
erscheinen oder zittern oder gar nicht erscheinen.Druecken Sie TVOUT und wechseln
Sie die configuration.
2. Falls Mvision DivX blockiert nach dem Initialbild und nicht das Hauptmenu erscheint.
Pruefen Sie das USB device.
Pruefen Sie ob das USB device korreckt formattiert worden ist.
3.Wenn Untertitel nicht erscheinen
Wenn der Untertitel nicht mit dem Bild uebereinstimmt .Pruefen Sie ob das file wenn
der Film zum beispiel “ bbb.avi”, heist,so muss der untertitel ”bbb.smi” heissen.
4. Wenn das Geraet korreckt am Netz haengt und kein Bild escheint oder nur schwarzweiss
oder zitternd.
Pruefen Sie ob das Videoausgangsignal korreckt eingestellt ist .Druecken Sie (TV out)
an der Fernbedienung und aendern Sie die einstellung bis das korreckte bild erscheint.
5. Wenn kein Film abgespielt wird / schwarzes Bild.
Dasfile kann nicht abgespielt warden wegen dem Codec, Pruefen Sie ob die Codec
korreckt sind oder benutzen Sie ein konvertierungsprogramm Anderweise druecken
Sie TVout taste zweimal an der Fernbedienung.
6. Bild erschein jedoch kein Ton
Pruefen Sie den externen eingang des TV.
Pruefen Sie die videowuelle des externen geraetes ob der Ton separat geliefert wird.
Pruefen Sie nochmals alle Bild/Ton verbindungen.
174
Français
SX-5 USB
STX-5 USB
S'il vous plaît, lirsez attentivement ce
manuel avant d'installer le recepteur.
INDEX
SÉCURITÉ GÉNÉRALE
178
INFORMATION GÉNÉRALE
179
I. DÉBALLAGE
179
II. CARACTERISTIQUES
179
III. TÉLÉCOMMANDE
180
IV. PANNEAU FRONTAL
183
V. FAÇADE FRONTAL
184
INSTALLATION DE L’APPAREIL
185
GUIDE LISTE DES CHAÎNES
187
GUIDE MENU
189
MENU PRINCIPAL
189
I. GÉSTION DES CHAÎNES
189
II. INSTALLATION
191
III. OPTIONS
195
IV. UTILITAIRES
198
SOLUTION DES PROBLÈMES
200
SPÉCIFICATIONS
201
177
SÉCURITÉ GÉNÉRALE
AVERTISSEMENT
S’il vous plaît lisez les recomandations suivantes attentivement pour éviter tout risque d’abîmer l’appareil.
Ne jamias couvrir le récepteur et maintenir propre l’espace autour l’ equipement
INFORMATION GÉNÉRALE
I.DÉBALLAGE
S’il vous plaît, assurez-vous que les suivants articles sont présents avec le récepteur
1) Télécommande (RCU)
2) Piles (2EA)
Vérifier la tension d’entrée au récepteur AC 90~240V, 50Hz~60Hz Max, 40W
3) Mode d’emploi
Maintenir les liquides éloignez du récepteur
4) Câble A/V
Le récepteur ne doit pas être exposé aux éclaboussements, ni placer des objets pleins de liquide sur le
récepteur
Débrancher le récepteur de la prise avant de le nettoyer.
Utiliser un torchon doux et du savon doux pour nettoyer la carcasse
II. CARATÉRISTIQUES
∙Compatible Mpeg-II Digital & Full DVB-S.
∙1 lecteur de carte.
Ne bloquer pas les sorties du ventilation du récepteur, lesquelles le protégent des risque de surchauffes
S’il vous plaît, maintenir le récepteur dans un espace ouvert
∙2 CI (Interface Commune).
∙Controle de Bande C/KU pour chaque antrée d’antenne.
∙Commutation LNB 22KHz, On/Off (Marche/Arret).
Ne jamias exposer votre récepteur a des conditions extrèmes de chaleur, froid ou humidité
∙Multi-LNB controlé par DiseqC 1.0, 1.2 et USALS.
∙Jusqu’a 5000 Canaux Programmables.
Ne pas utiliser de câble ou accessoire non recommandé. Cela porrait l’ aabîmer.
S’il vous plaît, débranchez le récepteur de la prise de courant et du cable d’antenne, quand il ne va pas etre
utilisé pendant longtemps.
∙Recherche automatique de fréquences & Power EPG.
∙PIG ( Image en Graphic).
∙Teletexte et sous-titres depuis OSD.
∙Accès EPG pour l’information des chaines on-screen.
N’enlever pas le couvercle pour réduire le risque des décharges électriques.
∙OSD de 65,546 colores.
∙Sortie audio numérique (S/PDIF).
N’essayez pas du réparer l’equipement vous même.
∙Mise à jour Software & renouvellement de la liste de chaines via le port USB ou RS232.
Porter-le chez un service technique autorisé.
∙Port USB PVR Ready, permet l'enregistrement et le reproduction sur un disque dur
externe.
Ce manuel peux être actualiser pour les versions plus récentes.
∙Les fichiers enregistrés peuvent etre lus sur un PC.
178
179
INFORMATION GÉNÉRALE
III TÉLÉCOMMANDE (RCU)
INFORMATION GÉNÉRALE
III TÉLÉCOMMANDE (RCU)
1. MUTE
2. POWER
3. TV
4. STB
5. VCR
6. DVD
7. Touches
Numériques
8. FAV
9. SAT
10. EPG
11.
12. Audio
13.
14. ▲▼
15. ◀ ▶
16. MENU
17. EXIT
18. INFO
19. V+/V20. P+/P21.
22.
23. STOP
24. PAUSE
25. RECORD
26. PLAY
27. REWIND
28. F/F
29. Position
30. AV/TV
31. TV / RADIO
32. ←PR
33. Fn
34. STB / DivX
35. UHF
36. PAU / NTSC
180
Habilite ou deshabilite l'audio.
Commute le recepteur entre operationnel et mode veille.
Mode TV.
Mode STB (recepteur).
Mode VCR.
Mode DVD.
Selectionne les chaînes TV ou Radio et dans les menus individuels.
Change a liste des favoris sélectionnés.
Change a liste des satellites sélectionnés.
Montre le guide des émissions TV ou Radio (Guide Électronique des Programmes).
Habilite le mode soutitres et télétexte.
Change la langue d'audio.
Selectionne le mode du audio ( GAUCHE(LEFT) / DROITE (RIGHT) / STEREO ).
Change de chaîne ou déplace dans les options du menu.
Ajuste le volume ou déplace a gauche ou déplace entre les options du menu.
Montre le menu principal sur l'écran.
Retourne au menu antérieur ou au mode normal du menu.
Montre la case d'information sur l'écran et édite le nom de la liste des chaînes favorites.
Change le volume audio en haut / en bas.
Change les chaînes vers le haut / vers le bas dans le mode normal des chaînes.
Déplace vers le haut une page dans la liste des chaînes ( Selectionne le mode Zoom ).
Déplace vers le bas une page dans la liste des chaînes.
Arrete d'enregistrer ou reproduire.
Pause pendant une reproduction ou va au mode normal.
Enregistrer une émission.
Montre la liste des fichiers et reproduit en mode lent/normal.
Commence la reproduction vers l'arrière et change la vitesse de la reproduction vers
l'arrière.
Commence la reproduction en avant et change la vitesse de la reproduction en avant.
Montre la barre de position pour ajuster l'antenne.
Selectionne entre le mode TV ou AV.
Conmute entre le mode TV et Radio.
Selectionne la chaîne que vous aviez regardé antérieurement
Réservé.
Change entre le mode STB / DivX.
Change au mode de la syntonisation de la chaîne UHF.
Conmute entre mode PAU ou NTSC.
181
INFORMATION GÉNÉRALE
III. TÉLÉCOMMANDE (RCU)
GENERAL INFORMATION
IV. PANNEAU FRONTAL
Méthode du Configuration
1. Méthode Configuration 3 chiffres
1) Allumer le TV
2) Appuyer sur la touche "TV" et "OK" en même temps pendant 2 secondes. Alors, la LED TV
s'allumera/éteindra 2 fois.
3) Consulter la liste de marques du TV et tapez les trois chiffres du code correspondant.
(La LED TV s'allumera/éteindra deux fois. Si les trois chiffres son incorrects, la LED TV
s'allumera/éteindra une seule fois)
4) Si il y a plusieurs nombres pour la même marque, répéter le pas 3, jusqu'à ce que le TV s'éteigne..
5) Si le TV s'éteint, appuyer sur la touche "OK".
(Si la configuration est correcte, la LED de la Télécommande s'allumera/éteindra deux fois)
6) Vérifier si POWER et d'autres touches de la Télécommande fonctionnent bien.
7) Si la touche POWER fonctionne bien mais les autres touches non, recommencer le pas 1. (Pour
certaines marques, d'autres touches a part POWER peuvent ne pas bien fonctionner)
� Pour les VCR (vidéo) & DVD, le procédé es le même que décrit ci-dessus.
①
②
③
④ ⑤
∙Si vous ne tapez pas les trois chiffres en 10 secondes, la configuration ne sera pas valable.
∙Si vous ne trouvez pas le code avec la méthode mentionnée ci-dessus, alors;
2. Méthode Recherche Automatique
1) Allumer le TV
2) Appuyer sur la touche "TV" et "OK" en même temps pendant 2 secondes.
Alors, la LED TV s'allumera/éteindra deux fois.
1. POWER
Mise en route / extinction du récepteur.
2. VOL Up/Down
Volume haut / bas ou sélectionne les options du menu.
3. CH Up/Down
Chaîne haut / bas ou sélectionne les options du menu.
3) Appuyer sur la touche "UP" jusqu'à ce que le TV s'éteigne.
(Si vous voulez chercher par ordre inverse, appuyer sur la touche "DOWN")
4. USB PORT
Raccorder avec le port USB.
4) Quand le TV s'éteind, appuyer sur la touche "OK".
(Si la configuration est correcte, la LED de la télécommande s'allumera/éteindra deux fois)
5. USB PORT
DivX file play.
5) Vérifier si POWER et les autres touches de la télécommande fonctionnent bien.
6) Si la touche POWER fonctionne bien, mais les autres touches non, recommencer le point 1)
(Pour certaines marques, d'autres touches a part POWER peuvent ne pas bien fonctionner)
� Pour les VCR (vidéo) & DVD, le procédé es le même.
∙Si vous ne tapez pas les trois chiffres en 10 secondes, la configuration ne sera pas valable.
3. Comment vérifier la configuration actuelle du code
1) Appuyer sur la touche "TV" et "OK" en même temps pendant deux secondes. Alors, la LED TV
s'allumera/éteindra deux fois.
2) Appuyer sur la touche "Info" en moins du trois secondes.
3) La LED TV clignotera a continuation pour montrer les chiffres du code de la configuration actuelle.
Ex) (La LED TV clignotera 10 fois pour montrer le '0') Par ex. Si les nombres de la configuration
actuelle est 350, la LED TV clignotera 3 fois, aprés 5 fois et enfin 10 fois.
� Pour les VCR (vidéo) & le DVD, le procédé es le même.
182
Certaines mémoires USB 2.0 ne sont pas compatibles avec ce produit.
183
GENERAL INFORMATION
V. FAÇADE FRONTAL
INSTALLATION DE L’APPAREIL
Cette section explique differents modes pour raccorder le récepteur au TV, VCR et système HI-FI. .
Vous pouvez choisir une des suivantes configurations que recommandées. Si vous avez quelque probléme ou vous
avez besoin d’aide, consulter votre distributeur ou point de vente.S’il vous plaît, assurer-vous que les suivants
articles sont présents avec le récepteur.
I. RACCORDER LE RÉCEPTEUR AU TV
I-1.Raccorder le récepteur au TV avec un cable péritel
Raccorder une extrémité du cable péritel au connecteur TV SCART du panneau arrière du récepteur et
l’autre extrémité au connecteur SCART du TV
184
1. AERIAL
Raccorder au cable de l'antenne Terrestre.
2. LOOP OUT
Raccorder a un autre STB (recepteur).
3. LNB IN
Raccorder au cable de l'antenne du satellite
4. LNB OUT
Raccorder a un autre STB (recepteur).
5. AUDIO NUMERIQUE
Sortie pour raccorder a un amplificateur numérique.
6. AUDIO-R
Raccorder a l'entrée AUDIO DROITE du TV ou d'un autre appareil.
7. VIDEO
Raccorder a l'entrée VIDEO du TV ou d'un autre appareil.
8. AUDIO-L
Raccorder a l'entrée AUDIO GAUCHE du TV ou d'un autre appareil.
9. TV SCART
Raccorder avec le cable EUROCONNECTEUR TV.
10. VCR SCART
Raccorder avec le cable EUROCONNECTEUR VCR.
11. TV/VCR
Raccorder au TV ou VCR.
12. ANT
Raccorder a l'entrée de l'antenne du TV.
13. RS 232
Raccorder a l'ordinateur pour des actualizations de logiciel.
14. ETHERNET
Raccorder avec le cable LAN.
15. YUV
Raccorder en YUV au TV ou VCR.
16. USB
Raccorder avec le port USB.
17. SOURCE D'ALIMENTATION
90~250V AC, 50/60Hz, 40W.
18. BOUTON D'ALIMENTATION
Allumé/Éteinte
II. RACCORDER LE RÉCEPTEUR AU TV ET VCR AVEC UN CABLE RCA (CINCH)
II-1. Raccorder le récepteur au TV avec un cable RCA (CINCH)
Raccorder le cable RCA Rouge au connecteur Audio-R, le Blanc au Audio-L et le Jaune au Video du panneau
arrière du récepteur et l’autre extrémité du cable aux connecteurs de mêmes couleurs du VCR
185
INSTALLATION DE L’APPAREIL
III. RACCORDER LE RÉCEPTEUR AU TV ET VCR AVEC LE CABLE RF
III-1. RACCORDER LE RÉCEPTEUR AU TV ET VCR AVEC LE CABLE RF
Raccorder une extrémité du cable RF au connecteur TV/VCR du panneau arrière du
récepteur et l’autre extrémité au connecteur ANT IN du TV.
Raccorder une extrémité du cable RF au connecteur ANT du panneau arrière du récepteur
et l’autre au connecteur ANT OUT du VCR
GUIDE LISTE DES CHAÎNES
1. Mode affichega normal
a) Quand on sélectionne une chaîne, la barre
d’information apparaît automatiquement sur l’écran
pendant quelques secondes . Cette barre
proportionne l’information de la chaîne actuelle.
b) Appuyer sur la touche INFO pour voir l’information
pendant le mode d’ affichage normal.
2. Liste de chaînes simplifiée.
a) Appuyer sur la touche OK dans le mode d’affichage
normal pour aller aux listes des chaîne.
b) Quand est visualisé “détails” sur la liste de chaînes,
Appuyer sur la touche ROUGE pour acceder a la liste
des chaînes simplifiée.
3. Liste des chaînes détailllée.
a) Appuyer sur la touche OK dans le mode de vue
normal
pour aller a la liste de chaînes.
b) Quand la liste simplifiée de chaînes apparrait à
l’écran, appuyez sur la touche ROUGE pour aller a la
liste de
chaînes détaillée.
c) Appuyer sur ◀▶ et ▲▼ pour classer
alphabetiquement.
d) Appuyer sur la touche SAT pour classer par satellite
et la touche FAV pour favorites 1-8.
e) Appuyer sur la touche VERTE pour retourner a toutes
les chaînes ou EXIT pour retourner à la chaîne
actuelle.
186
187
GUIDE LISTE DES CHAÎNES
f) Appuyer sur la touche SAT pour afficher la fenêtre des
satellites configurés (sur lesquels une recherche a étè
effectuée), et sélectionner un satellite, alors la liste de
chaînes du satellite sélectionné sera affichée..
g) Appuyer sur la touche FAV pour afficher la fenêtre des
listes des favorits. Sélectionner la liste du FAV pour la
visualiser.
h) Appuyer sur la touche VERTE et toutes les chaînes
trouvées seront montrées.
i) Appuyer sur la touche MENU et le curseur sera mû a
TOUS dans la partie gauche, il est alors possible de
classer la liste des chaînes sélectionnée.
j) Touche classer (Touche Jaune) ~A~Z/Z~A/FAT/CAS.
GUIDE MENU
MENU PRINCIPAL
Appuyer sur la touche MENU de la télécommande
pour ouvrir l’écran de la page
principaleLa page principale sera montrée.
1. Vous pouvez vous déplacer dans le menú principal en appuyant
▲▼◀ ▶ de la télécommande.
2. Appuyer sur OK pour confirmer la sélection.
3. Appuyer sur EXIT ou MENU pour retourner au menu antérieur.
I.
II.
III.
IV.
k) Appuyer sur la touche jaune pour classer ~A~Z/Z~A/FAT/CAS. Si vous voulez désordoner la
sélection CAS, aller a la fenêtre antérieure et sélectionner désordoner.
Gestion des Chaînes
Installation
Options
Utilitaires
I. Gestion des Chaîne
Cette section aide à organiser les chaînes en accord avec votre préférences.
4.EPG (Guide Électronique des Programmes)
1. Dans le menu principal, selectionner Gestion des Chaines avec les touches◀ ▶ et appuyer sur OK.
a) Appuyer sur la touche EPG dans le mode d’affichage normal.
2. La page de gestion des chaînes TV s’affichera alors.
b) L’EPG de la chaîne actuelle s’affichera sur l’écran.
3. Sélectionner le mode que vous voulez utiliser ◀ ▶.
c) Sélectionner la chaîne désirée pour voir l’EPG.
4. Pour voir la chaîne que vous avez choisi, aller sur chaîne et Appuyer sur la touche ROUGE.
d) Pour enregistrer un programme avec la función
d’enregistrement, Appuyer sur la touche REC(●)
(seulement dans le mode PVR)
e) Il s’affichera comme sur la photo située à droite.
f) Si vous le memorizez pour enregistrer un programme,
celui-ci sera enregistré automatiquement au moment
choisi (seulement dans le mode PVR).
g) Appuyer sur la touche deux fois pour retourner à la chaîne
actuelle.
5. ZOOM IN/OUT
a) En appuyant sur la touche Page Haut pendant la
visualization normale d’une chaine vous pouvez
acceder au mode Zoom.
b) Depuis la fenêtre du zoom vous pouvez selecctionner (2-3-4) avec la touche Page Haut pour
activer le zoom et utiliser la touche Page Bas pour desactiver le zoom.
c) En mouvant le curseur ◀▶ et ▲▼ vous pouvez sélectionner la zone sur laquelle vous voulez
faire le zoom et en appuyant la touche page haut ou bas, valider la sélection. En appuyant la
touche Pause, l’image se fermera sur le mode Zoom.
188
5. Appuyer sur EXIT pour retourner au menu antérieur ou appuyer msur MENU pour aller a la chaîne que vous
regardez actuelleme.
I-1. Favori
I-2. Renommer
I-3. Déplacer
I-4. Bloquer
I-5. Effacer
I-1. Favori
1. En utilisant les touches ◀ ▶ aller au mode Favori
et Appuyer sur la touche JAUNE pour choisir entre
Favori 1....8.
2. Appuyer sur OK quand vous etes sur la chaîne que
que vous voulez ajouter ou effacer.
3.
Une marque va apparaître au final du nom de la chaîne
sélectionnée. Pour effacer appuyer sur OK une autre fois.
4. Les chaînes sélectionnées seront memorisées
automatiquement.
5. Si vous voulez vérifier la Liste des Favoris memorisée aller a l’autre mode (Renommer-Effacer) sauf
Favoris et Appuyer sur la touche FAV pour vérifier Favoris 1…8.
6. Appuyer sur EXIT pour retourner au menu antérieur ou appuyer sur MENU pour retourner à la chaîne
que vous regardez actuellement.
189
GUIDE MENU
I. Gestion de Chaînes
I-2. Renommer
1. En utilisant les touches ◀ ▶ aller au mode Renommer.
2. le chaîne que vous voulez renommer en utilisant ▲▼ et
appuyer sur OK.
3. Vous verres apparaitre un clavier à l’écran.
4. Editer le nom en utilisant le clavier NÚMERICE et / ou
ALPHABETIQUE.
5. Appuyer sur la touche JAUNE pour renommer les Favori 1..8
et Appuyer sur la touche BLEUE pour renommer le Satellite.
6. Appuyer sur EXIT pour retourner au menu antérieur ó
appuyer sur MENU pour aller a la chaîne actuelle.
I-3. Déplacer
1. En utilisant les touches ◀ ▶ aller au mode Déplacer.
2. Sélectionner los chaînes que vous voulez déplacer en appuyant la
touche OK.
3. Déplacer le curseur a l’endroit où vous voulez les déplacer
et Appuyer sur la touche VERTE.
4. Appuyer sur EXIT pour retourner au menu antérieur ó
appuyer sur MENU pour aller a la chaîne actuelle.
I-4. Bloquer
1. En utilisant les touches ◀ ▶ aller au mode Bloquer.
2. Sélectionner les chaînes que vous voulez Bloquer et appuyer
sur OK. Le symbole
apparraitra au final du nom de la chaîne
sélectionnée. Pour effacer appuyer sur OK une autre fois.
3. Appuyer sur EXIT pour aller au menu principal ou appuyer
sur MENU pour aller à la chaîne actuelle.
I-5. Effacer
1. En utilisant les touches ◀ ▶ aller au mode Effacer.
2. Sélectionner la chaîne que vous voulez Effacer et appuyer
sur OK. Il apparraitra (
) sur le número de chaîne
sélectionné. Pour effacer Appuyer sur la touche BLEUE à
nouveau.
3. Appuyer sur la touche JAUNE pour effacer un TP.
Sélectionner un chaîne et Appuyer sur la touche BLEUE.
Toutes los chaînes de ce TP seront sélectionnées
automátiquement.
4. Appuyer sur la touche JAUNE pour effacer un Satellite.
Sélectionner une chaîne et Appuyer sur la touche BLEUE.
Toutes los chaînes de ce satellite seront sélectionnées
automátiquement.
5. Appuyer sur EXIT pour aller au menu antérieur ó appuyer sur MENU pour aller à la chaîne actuelle.
6. Vous verrez alors apparraitre un message.
7. Sélectionner OK et appuyer sur OK pour effacer les chaînes marqué es.
190
GUIDE MENU
II. INSTALLATION
Cette section aide à configurer l’antenne et
recchercher les satellites ou transpondeurs, etc…
Sélectionner Installation dans le menu principal et
appuyer sur OK. Appuyer sur EXIT pour aller au menu
principal ou appuyer sur MENU pour retourner à la
chaîne que vous regardez actuellement.
II-1 Satellite Chaîne
II-2. Commutateur DiSEqC
II-3. Configuration du Moteur
II-4. Terrestre Chaîne
II-5. Configuration d’usine
II-1 Satellite Chaîne
1.Le curseur peut se déplacer en utilisant ▲▼ et en
appuyant sur Ok quand on sélectionne la valeur
désirée.
a) Satellite
- Appuyer sur OK pour visualiser la liste des satellites.
- Sélectionner le satellite désiré et appuyer sur OK.
b) DiSEqC
- Appuyer sur OK pour visualiser la liste des ports DiSEqC.
- Sélectionner le DiSEqC désiré et appuyer sur OK.
c) Fréquence
- Appuyer sur OK pour visualiser la liste des Fréquences.
- Sélectionner la Fréquence desirée et appuyer sur OK.
d) LNB
- Appuyer sur OK pour visualiser la liste des fréquences du
LNB.
g) Chercher
- Sélectionner le LNB désiré et appuyer sur OK.
- Il est aussi possible d’introduire directement les valeurs en - Appuyer sur Chercher pour commencer la
recherche des chaînes.
utilisant le pavé numérique de la télécommande.
- Le Satellite sélectionné va apparaître à l’écran.
e) Ton 22KHz
- Appuyer sur ▶ pour sélectionner plus de
- Sélectionner entre Aucun, 0 KHz ou 22 KHz en fonction de
satellites ou ◀ pour annuler les satellites
la commutation d’antenne.
sélectionnés.
f) Option Recherche
- Appuyer sur OK pour commencer la recherche.
- Appuyer sur OK pour visualiser la liste des Options de
Recherche.
※ Éditer : Pour Éditer un TP, Appuyer sur la
touche ROUGE de la télécommande.
- Sélectionner l’option de Recherche desirée et appuyer sur OK.
191
GUIDE MENU
GUIDE MENU
II. INSTALLATION
II. INSTALLATION
II-2. Commutation DiSEqC
1. Sélectionner chercher chaînes dans le mode
d’Installation en utilisant ▲▼ et appuyer sur OK.
a) Si on sélectionne Commutateur DiSEqC et on appuye sur
OK dans le menu, la page de Commutation de DiSEqC va
apparaître à l’écran.
b) Sélectionner le port DiSEqC (A~D) du satellite désiré en
utilisant ◀ ▶▲▼ et appuyer sur CHERCHER. IL
cherchera le satellite désiré automatiquement.
II-3 Configuration du Moteur
1. On peut déplacer le curseur en utilisant ▲▼ et
appuyer sur OK quand on sélectionne la valeur
désiré.
e) Contrôle du Moteur
Sélectionner la position en utilisant ◀ ▶ et appuyer
sur OK. Un message apparrait à l’écran
- Memoriser la Position du moteur pour le satellite sélectionné.
- Aller a Position Satellite : Déplacer le moteur a la position
memorisée pour le satellite sélectionné
- Aller à 0 : Aller au centre du moteur
- Mise à zéro des positions : Remet a zéro toutes les
positions memorisées du moteur.
f) Position du Satellite
- Introduire directement la position en utilisant le pavé numerique sur la télécommande.
- Sélectionner la direction en utilisant ◀▶(Ouest / Est).
g) Option
- Appuyer sur OK pour visualiser la liste de Recherche des chaîn.
- Appuyer sur l’Option de Recherche que vous voulez et appuyer sur OK.
a) Type du Moteur : DiSEqC 1.2, USALS
- Appuyer sur OK pour visualiser le Type du Moteur.
- Sélectionner le Type de Moteur désiré et appuyer sur OK.
b) Satellite
- Appuyer sur OK pour visualiser la liste des Satellites.
- Sélectionner le satellite désiré et appuyer sur OK.
c) Commutation et LNB
- Appuyer sur OK pour visualiser la liste des Fréquences du
LNB et les Configurations de la Commutation.
- Sélectionner le LNB & Commutation désirés.
d) Fréquence
- Appuyer sur OK pour visualiser la liste des Fréquences.
- Sélectionner la fréquence desirée et appuyer sur OK.
e) Mouvement du Moteur
- Chercher la position appropriée du satellite sélectionné ◀▶.
h) Chercher
- Appuyer Chercher pour commencer la recherche des chaînes.
- Appuyer sur OK pour commencer la recherche.
※ TP EDIT : Pour Éditer un TP, appuyer sur la touche ROUGE de la télécommande.
2. Éditer la position locale
- Appuyer sur la touche VERTE pour éditer la position locale .
a) Longitude
- Introduire directement la longitude en utilisant le pavé numerique de la télécommande.
- Sélectionner la direction en utilisant ◀ ▶(Ouest/Est).
b) Latitude
- Introduire directement la latitude en utilisant le pavé numerique de la télécommande.
- Sélectionner la direction en utilisant ◀ ▶(NORD/SUD)
3. Appuyer sur EXIT pour retourner au menu antérieur ou appuyer sur MENU pour aller à la
chaîne que vous regardez.
192
193
MENU GUIDE
GUIDE MENU
II. Installation
III. Options
II-4. Terristrial Search
1. Sélectionner Chercher Chaînes dans Installation en
utilisant ▲▼ et appuyer sur OK.
2. 1) Sélectionner la region d'oú vous voulez faire la
recherche ◀ ▶.
2) Vous pouvez sélectionner le type de recherche entre
Auto et manuel en utilisant ◀ ▶.
3) Auto
a) Sélectionner "Chercher" sur l'écran et appuyer sur OK
pour chercher les chaînes.
b) Appuyer sur Exit ou Menu a la fin de la recherche.
4) Manuel
a) Sélectionner le multiplex (Chaîne Mux) que vous
recherchez en utilisant◀ ▶.
b) La fréquence sera visualisée automatiquement selon la
Chaîne Mux sélectionnée.
II-5. Configuration d’usine
Utiliser la fonction Configuration d’usine seulement quand
vous voulez remettre à zéro les paramètres du récepteur,
comme quand il arrive d’usine.
Toutes les configurations et chaînes seront effaceées.
1. Sélectionner Configuration d’usine dans le menu
Installation en utilisant▲▼et appuyer sur OK.
2. Il va apparaître sur l’écran un encadré avec un message.
3. Sélectionner OK pour revenir a la Configuration d’usine
et appuyer sur OK.
4. Appuyer sur EXIT pour retourner au menu antérieur ou
appuyer sur MENU pour aller à la chaîne actuelle que
vous regard.
Cette section aide à configurer la langue de l’OSD,
l’heure, etc. Sélectionner Options dans le menu
principal et appuyer sur OK. Appuyer sur EXIT pour
retourner au menu antérieur ou appuyer sur MENU
pour aller à la chaîne actuelle que vous regardez.
III-1. Configuration OSD
III-2. Configuration TV
III-3. Configuration Heure
III-4. Configuration Blocage parental
III-5. Réseau
III-1. Configuration OSD
1. Sélectionner configuration OSD dans Options
en utilisant▲▼ et appuyer sur.
a) Langue OSD
- Appuyer sur OK pour visualiser la liste des
langues disponibles pour l’OSD.
- Sélectionner la langue que vous voulez et appuyer sur OK.
b) Langue Audio
- Appuyer sur OK pour visualiser la liste des langues Audio.
- Sélectionner la langue que vous voulez et appuyer sur OK.
c) Barre d’information du Display
- Appuyer sur OK pour visualiser la liste des options de temporization disponibles pour la barre
d’Information du display.
- Sélectionner les secondes que vous voulez visualiser et appuyer sur OK.
d) Position de l’ OS
- Appuyer sur OK pour changer la position Horizontale et Verticale de l’OSD.
- Il va apparaître sur l’écran l’encadré de la position de l’OSD.
- Sélectionner la Position Hor/ Position Ver en utilisant ▲▼.
- Déplacer la position de l’OSD gauche/droit ou en haut/en bas en utilisant◀ ▶.
- Sélectionner OK sur l’encadré de Position de l’OSD et appuyer sur OK.
e) Format de l’Écran
- Appuyer sur OK pour visualiser la liste des formats d’Écran.
- Sélectionner le format que vous voulez et appuyer sur OK.
2. Appuyer sur EXIT pour retourner au menu antérieur ou appuyer sur MENU pour retourner
à la chaîne actuelle que vous regardez.
194
195
GUIDE MENU
MENU GUIDE
III. Options
III. Options
III-2. Configuration TV
III-5. Network
1. Sélectionner la configuration TV dans Options en utilisant
▲▼ et appuyer sur OK.
Cette section aide à configurer la liaison réseau.
a) Sortie Video
- Appuyer sur OK pour visualiser la liste des Sorties Video.
- Sélectionner RGB si la péritel supporte le contrôle RGB et
appuyer sur OK.
- Sélectionner CVBS si la péritel ne supporte pas le contrôle
RGB et appuyer sur OK.
b) Type de TV
- Appuyer sur OK pour visualiser la liste des Types de TV.
- Sélectionner le mode approprié en accorde avec le type de
TV existant et appuyer sur OK.
c) Chaîne UHF
- Appuyer sur OK pour visualiser la liste des chaînes UHF.
- Sélectionner la chaîne appropriée et appuyer sur OK.
d) Standard UHF
- Appuyer sur OK pour visualiser la liste de Standards UHF.
- Sélectionner le mode approprié et appuyer sur OK.
2. Appuyer sur EXIT pour retourner au menu antérieur ou
appuyer sur MENU pour retourner au chaîne actuelle que
vous regardez.
III-3. Configuration de l’Heure
Configurer l’heure locale en accord avec la localisation où vous
vous trouvez.
1.Configuration IP
Sélectionner une de ces trois options pour la Configuration
du réseau.
a) Non utillisé
Dans ce cas le réseau est inutilisé.
b) Automatique
Cette option est celle à choisir si vous utilisez un service
d'adresse IP dynamique. Aprés avoir sélectionné
Automatique, appuyer sur Appliquer, le recepteur
redémarrera par lui même. Le recepteur obtiendra une
nouvelle adresse IP du router.
c) Manuel
Cette option est celle à choisir si vous utilisez un service
d'adresse IP statique. Écrire l'adresse IP, Subset mask et
Gateway. Appuyer sur Appliquer, et le recepteur
redémarrera par lui même.
1. Sélectionner Configuration de l’Heure dans Options et appuyer sur OK.
2. Le menu de réglage de l’heure apparraitra à l’écran.
3. Déplacer le curseur en utilisant ◀ ▶, ▲▼ et appuyer sur OK quand
vous aurez sélectionné la valeur appropriée (Introduire l’heure
directement en utilisant le pavé numerique de la télécommande
4. Appuyer sur EXIT pour retourner au menu antérieur ou appuyer
sur MENU pour retourner au chaîne actuelle que vous regardez.
III-4. Configuration du Blocage parental
1. Sélectionner l’option Configuration du Blocage Parental avec les touches
◀ ▶dans Options et appuyer sur OK.
2. Il va apparaître sur l’écran la page de Configuration du Blocage parental.
3. Le Blocage parental peut s’activer et se desactiver en sélection
nant ON ou OFF en utilisant ▲▼( Par chaînes ).
4. Le Blocage d’Installation peut s’activer ou se desactiver en sélectionnant
ON ou OFF en utilisant ▲▼ (pour les configurations instaurées).
2. Mise à jour de software
a) S'il vous plaît, vérifier d'abord d'où il est possible de
décharger le fichier.
b) Appuyer sur le bouton "input URL" si vous voulez changer
l'adresse. Vous voyez alors la case du clavier de dialogue
et pouvez écrire l'adresse URL d'où vous voulez
décharger le logiciel.
c) Aprés avoir écrit l'adresse URL, appuyer sur le bouton
actualiser (upgrade) et apparaitrá le message suivant.
Attention : Ne pas éteindre le STB (recepteur) pendant le
procédé d'actualisation.
5. Introduire le nouveau mot de passe (password), si vous voulez changer l’ actuel mot de passe.
6. Confirmer le nouveau mot de passe en l’introduisant une nouvelle fois.
7. Appuyer sur EXIT pour retourner au menu et à la chaîne actuelle que vous regardez.
Note : LE MOT DE PASSE PAR DÉFAUT EST 0000
196
197
GUIDE MENU
VI. Utilitaires
Cette section aide à utiliser l’USB etc. Sélectionner
Utilitaires dans la Page Principale en utilisant▲▼ et
appuyer sur OK .
∙VI-1. Information de Système
∙VI-2. USB
∙VI-3 INTERFACE COMMUNE
VI-1. Information de Système
Cette option aide connaitre la version actuelle de
S/W et H/W. Elle informe aussi sur le nom du
produit.
1. Sélectionner Information de système dans Options et
appuyer sur OK.
2. Appuyer sur EXIT pour retourner au menu antérieur.
VI-2 USB
GUIDE MENU
USB PVR
Raccorder la mémoire USB au STB (recepteur).
1. Enregistrer (Record)
∙Si vous voulez enregistrer l'émission, appuyer sur la touche REC.
∙Appuyer sur la touche "STOP" si vous voulez arreter l'enregistrement.
2. REPRODUIRE (PLAY)
∙Si vous voulez reproduire un fichier enregistré sur la mémoire USB, appuyer sur la touche "PLAY" et
alors la liste des fichiers sera affichée.
∙Sélectionner le fichier que vous désirez reproduire en utilisant ▲▼ et appuyer sur OK.
∙Si vous voulez reproduire un autre fichier, appuyer sur la touche OK et la Liste de Fichiers sera
affichée à nouveau.
∙REPRODUCTION LENTE (SLOW) : Appuyer sur la touche "PLAY". Si vous appuyez sur la touche
"PLAY" a nouveau, la vitesse sera normale.
∙F/F, Rewind, Pause sont supportés.
Ce récepteur est équipé avec un Port USB.
3. Gestion des Fichiers (Aller au Menu Principal - Utilités - USB)
1. Sélectionner USB dans Utilitaires en utilisant ▲▼ et
appuyer sur OK.
2. Si vous désirez changer le mode (S/W upgrade,
BootLoader Upgrade), appuyer sur la touche ROUGE de
la télécommande.
3. Sélectionner le fichier que vous désirez mettre à jour en
utilisant ▲▼ et appuyer sur OK.
4. Quand le fichier sélectionné sera charger le récepteur
redemarrera automatiquement.
∙Effacer
VI-3 INTERFACE COMMUNE
Le recepteur est equipé avec un slot d'Interface Commune,
permettant d'acceder aux services de pay per view codés
grâce à plusieurs modules d'accès et la correspondante
carte officielle.
La chaîne peut etre décodée par le module d'accès
conditionnel et la carte.
1. Sélectionner Interface Commune dans Utilités avec
▲▼ et appuyer sur OK.
2. Interface Commune se visualisera sur l'écran.
(La phrase "No Module" indique que le module d'accès conditionnel n'est pas installé)
3. Insérer le module d'accès conditionnel dans le Slot.
4. Le nom du Slot depend de chaque module d'accès conditionnel inséré.
5. Appuyer sur EXIT pour retourner au menu antérieur ou appuyer sur MENU pour retourner a la chaîne en
cours.
198
- Si vous voulez effacer un fichier, appuyer sur la touche Jaune.
- Sélectionner le fichier que vous voulez effacer en utilisant ▲▼ et appuyer sur OK.
∙ Formater
- Le STB (recepteur) supporte seulement les fichiers FAT32.
- Si vous voulez formater un dispositif de mémoire à la norme FAT32, appuyer sur la touche Bleue.
- Aprés formater, toutes les données serons effacées.
4. Précaution
∙Seuls les dispositifs USB 2.0 haute vitesse sont supportés par la fonction PVR.
∙Pour les décharges de S/W et reproduction MP3 est supporté la norme USB1.1.
∙S'il vous plaît, utiliser des dispositifs de mémoire d'uns capacité supérieure a 2GByte ou des disques
durs USB pour la fonction PVR.
∙Normalement 1GByte peermet d'enregistrer 30-40 minutes selon l'émission.
∙Certains dispositifs de mémoire USB ne peuvent pas ser supportés.
∙La fragmentation de la Mémoire peut provoquer des problèmes d'enregistrement, s'il vous plaît,
formater le dispositif de mémoire USB de temps en temps.
∙Pour plus d'information et actualisations de logiciel, visiter notre web: (http://www.hsmd.tv/)
www.hsmd.tv.
199
SPÉCIFICATIONS
SOLUTION DES PROBLÈMES
Solution
Problème
Rien n'apparait sur le display
frontal ou la source
∙Vérifier la liaison du cable d'alimentation a la prise murale.
d'alimentation ne s'allume pas
Il n'y a pas d'image
∙Vérifier l'antenne et l'ajuster.
∙Vérifier la liaison du cable et la corriger.
∙Sortir du mode UHF.
∙Vérifier la chaîne et la sortie Vidéo.
Il n'y a pas du son
∙Vérifier le volume du TV et du recepteur.
∙Vérifier l'état mute du TV et du recepteur.
∙Vérifier la liaison du cable et la corriger.
I.Conditional Access Module Interface
PCMCIA
La chaîne ne se voit pas ou
est codée
Specification
Item
Input Connector
Signal Level
LNB Power &
Polarization
22KHz Tone
F-type (Output loop-through), IEC 169-24, Female
-25 to -65 dBm
Vertical : +13.5/18.5Vdc±5%
Horizotal : +18.5Vd dc±
Current : Max.500mA.Overload protected
Frequency : 22KHz±2KHz
∙Changer les piles.
∙Pointer directement la télécommande au recepteur.
Demodulation
Amplitude : 0.8±0.2V
Version 1.2 USALS Compatible
QPSK
∙Vérifier que rien ne bloque le panneau frontal.
Input Symbol Rate
2~45Ms/s Convolution Code Rate
1/2, 2/3, 3/4, 5/6, 7/8 with Constraint Length K=7
∙Vérifier que le Module d'Accès Conditionnel et la carte sont
les appropriées pour voir la chaîne sélectionnée.
∙Vérifier que le Module d'Accès Conditionnel et la carte sont
bien insérés.
∙Vérifier la force et la qualité du signal dans le menu.
Apparait " No signal" sur
l'écran
1 SLOT, ISO 7816, GSM11.11 and EMV (payment systems) compatibility
Slot.type Ⅰor type Ⅱ
DVB Common Interface Standard
(Viaccess, Irdeto, Nagra Vision, Conax, Crytoworks, AlpahCrypt..)
II. Tuner & Channel
DiSEqC Control
La télécommande ne
fonctionne pas
Specification
Item
SMART CARD
∙Vérifier le LNB et le changer si nécéssaire.
∙Vérifier le cable du LNB.
∙Vérifier l'antenne et l'ajuster.
III. TUNER DVB-T
Specification
Item
Input Frequency Range
RF Input Signal Level
Bandwidth
OFDM Spectrum
Demodulation modes
Guard Interval
FEC Decoder
170 to 230MHz(VHF), 470 to 862MHz(UHF)
-77 dBM to -10 dBM
7MHz & 8MHz
2K and 8K Carrier
QPSK, 16, 64 QAM
1/4, 1/8, 1/16, 1/32
1/2, 2/3, 3/4, 5/6 & 7/B
IV. A/V & Data In/Out
Specification
Item
Vérifier, Tuner défectueux
∙Aller a Option et sélectionner information du Système.
Vous avez oublié le mot de
passe
∙Contacter avec le distributeur.
TV Scart Output
RGB, CVBS, L, R Output with Volume Control
VCR Scart In/Out
RGB, CVBS, L, R In
CVBS, RGB, L, R Out
RCA Output
CVBS, RGB, L, R Output(Yellow, White, Red Jack) with Volume Control
Data Interface
200
- RS-232, Bit Rate 115,200baud
Connector : 9-Pin D-Sub Male type
- Ethernet : 10/100Mbps, DHCP Supporting
- USB : USB 2.0 Type A Connector, 2Port(Front & Rear), 1Port(Multimedia file)
201
SPÉCIFICATIONS
V. RF-Modulator
Specification
Item
RF-Connector
75 ohm IEC 169-2, Male/Female
Frequency
470MHz to 860MHz
Output Channel
CH 21-69 for the Demodulator
TV Standard
PAL G/I/K Selectable by Menu Setting
Audio OUtput
Mono with Volume Control
Preset Channel
Ch 38(or TBD), Software changeable by Menu Screen
VI. MPEG Transport Stream & A/V Decoding
Specification
Item
Transport Stream
MPEG-2 ISO/IEC 13818 / Transport stream Specificartion
Profile Level
MPEG-2 MP@ML
Input Rate
Max. 90 Mbit/
Video Resolution
720×576(PAL)/720×480(NTSC)
Audio Decoding
MPEG/Musicam LayerⅠ&Ⅱ
Audio Mode
Single channel/Dual channel Joint Stereo/Stereo
Teletext
VBI & OSD(Optional)
Sampling Rate
32,44.1 and 48KHz
VII. System Resources
Specification
Item
Main Processor
ARM946 RISC Processor
Flash Memory
2 Mbyte
Program DRAM
32 Mbyte
Channel Capacity
Digital Channel : 5000
VIII. Power Supply
Specification
Item
Input Voltage
AC 90 to 250V, 50~60Hz
Power Consumption
Max. 50W
Poteciton
Separate Internal Fuse
Type
SMPS
IX. Physical Specification
Specification
Item
Size (W×H×D)
290×50×220(mm)
Net Weight
2.0Kg
202
DIVX
DESCRIPTION DU PRODUIT
204
CARACTÉRISTIQUES DU PRODUIT
204
DANGERS PENDANT L'UTILISATION ET SÉCURITÉ
205
SPÉCIFICATIONS DU PRODUIT
206
MENU CONFIGURATION
207
ÉCRAN MENU PRINCIPAL
209
REPRODUIRE MUSIQUE
210
REPRODUIRE FILMS
212
VISIONNAGE DE PHOTOS
214
ACTUALISATION DU FIRMWARE
216
SOLUTION DES PROBLÈMES
218
203
DESCRIPTION DU PRODUIT
Le produit MVISION es un nouveau concept de dispositif multimédia que
raccorde (films, musique, image...) des fichiers externes à la TV grâce à
une interface USB 2.0.
L'utilisateur peut profiter de ses fichiers multimédias, en utilisant un
dispositif de mémoire USB 2.0 ( HDD externe, mémoire USB ...) en liaison
avec le PC.
CARACTÉRISTIQUES DU PRODUIT
Le produit MVISION es un dispositif de loisirs multimédia avec lequel vous
pouvez reproduire toute sorte des fichiers, films, musique et images sur
votre TV.
∙Utiliser pour fichiers multimédia MPEG (DiVX, Xvid, DAT, VOB, MPG, MPEG) avec liaison
au TV.
∙Reproduire photos numériquees avec format des fichiers JPEG.
∙Reproduire musique numérique avec format des fichiers MP3, AC3, Ogg vorbis et WMA.
∙Supporte interface USB 2.0 pour un stockage de mémoire externe.
∙ Actualise le Firmware d'une manière simple à travers du port USB 2.0.
∙Lit les données multimédias a haute vitesse au travers du dispositif de stockage externe
USB 2.0.
DANGERS PENDANT L'UTILISATION ET SÉCURITÉ
Avant d'utiliser ce produit, s'il vous plaît, lisez d'abord attentivement le manuel
d'utilisateur et utiliser avec attention le produit.
1. Les contenus tels que les logiciels, sources audio, images, sont protégés selon les lois
du copyright et droits etablis. L'utilisateur qui viole ces droits sont responsables
d'infraction du copyright.
2. Ce produit ne supporte pas tous les fichiers multimédia. S'il vous plaît, vérifier le type du
codec en utilisant les programmes adécuats. Certaines parties de fichiers peuvent de
pas fonctionner du aux caractéristiques des propres fichiers ou de leur envirronnement
d'utilisation.
Il est possible de vérifier si un fichier est reproductible ou non, en utilisant un utilitaire
freeware. Les utilisateurs peuvent utiliser un programme de conversion pour convertir le
en un fichier reproductible.
3. Ne l'abîmer ou mouiller. Cela fera qu'il marche mal.
4. N'insérer aucun autre élément comme des pièces et épingles.
5. Ne pas ouvrir l'appareil quand le cable d'alimentation est branché.
6. Ne pas déplacer le produit pendant l'activation. Ça peut abîmer la mémoire de stockage
externe. Seulement déplacer le produit quand est débranché le cable d'alimentation.
7. Ne permettre qu'aucun liquide n'entre a l'interieur. Dans le cas d'entrée de liquide,
éteindre rapidement le recepteur. Autrement il peut se produire un court-circuit ou un
incendie.
8. Les produits chimiques ou de nettoyage peuvent abimer l'appareil.
9. N'exposer pas l'appareil près des sources de chaleur.
10. Ne pas situer l'appareil près des sources magnétiques comme haut-parleurs ou
aimants. Ça pourrait effacer les données de ce produit.
11. Voir pendant un long temps et écouter a un volume trop élevé, peut abîmer la vue et
l'ouïe.
12. Si vous voyez de la fumée ou sentez une mauvaise odeur, éteindre l'appareil et
débrancher le cable d'alimentation rapidement et entre en contact avec le service
d'utilisateur.
13. Ne pas débrancher l'alimentation pendant l'utilisation. Aprés l'utilisation, débrancher
l'alimentation.
204
205
SPÉCIFICATIONS DU PRODUIT
Nom du Produit
Reproducteur multimédia MVISION
Movie
Supporte
fichiers vidéo
aux formats
Fichiers audio
Fichiers images
MPEG-1/2, MPG, MPEG, DAT, VOB, AVI, DivX,
3.x /4.x/5.x, XviD (Sauf fichiers GMC ou QPEL)
MP3, WMA, OGG Vorbis, AC3
JPEG
MENU CONFIGURATION
L'écran du menu Configuration du reproducteur
multimédia MVISION montre les éléments suivants:
Les options en blanc a gauche sont les éléments de
configuration.
Les options en jaune au milieu montrent les valeurs
de configuration actuels.
Les options en blanc à droite montrent les options
alternatives qui peuvent etre aussi configurées.
Les alternatives pour chaque option sont
les suivantes:
Main chip set
EM8511 (sigma design), Arm9 266MHz, 32MB SRAM
Sortie Audio
2CH Analog, Digital audio output(AC3, DTS pass though)
Interface USB
USB2.0 Host, USB1.1 compatible
∙Analogique/DPCM : Sorties Analogique 2ch/PCM données.
(composite signal de cable audio)
Système de
fichier du HDD
FAT32, NTFS
∙Numerique Codée: Sortie des données audio numérique.
TV type
NTSC
Rang de temperature
0 ~ 60°
Sortie Audio :
Sortie Vidéo :
∙CVBS & S-Vidéo : Sortie de signal composite en PAL. S-vidéo est supporté aussi.
∙C V B S & R G B : Sortie composite et signal RGB en PAL. S-vidéo n'est pas supporté.
∙Composants 480p : Sortie composite en mode progresif 480p. Sortie composite et S-vidéo n'est pas
supporté.
∙Composants 720p : Sortie composite en mode progresif 720p.
Sortie composte et S-vidéo n'est pas supporté.
∙Composants 1080i : Sortie composite en mode entrelacé 1080. Dans ce mode, l'image peut trembler
à cause des caractéristiques du méthode entrelacé. Sortie composite et S-vidéo
n'est pas supporté.
TV Type :
∙4 : 3 L e t t e r B o x : Le ratio Horizontal des vidéos a priorité pour entrer dans la taille de l'écran. Ce
mode peut avoir une bande noire dans la partie supérieure et inférieure de
l'écran, et montrer le vidéo en format large.
∙4 : 3 f a n & s c a n : Le ratio vertical des vidéos a priorité pour entrer dans la taille de l'écran. Peut
remplir l'écran complet, mais les côtés gauche et droit peuvent etre un peu
coupés.
∙16:9 Écran complet : Le ratio de l'écran sera dans le mode 16:9.
206
207
MENU CONFIGURATION
Diaporama :
∙1,3,5,7,10,20 sec, Off : Configurer l'intervalle de temps pour montrer en mode diaporama (dédilement
automatique) les fichiers JPEG.
Appuyer sur la touche (PLAY) de la télécommande pour montrer les images dans
le mode diaporama. Commence le défilement.
L'image sera montrée pendant l'intervalle de temps configuré.
Taille des Sous-titres :
∙Grande : Les Sous-titres seront montrés de grande taille pendant la vision d'un film.
∙P e t i t e : Les Sous-titres seront montrés de petite taille pendant la vision d'un film.
∙Off : Les sous-titres ne seront pas montrés.
Couleur des Sous-titres :
∙Source de Couleur / Couleur du Bord : Il est possible de choisir entre blanc / transparent, blanc/noir,
jaune/transparent, jaune/noir
Langue :
ÉCRAN MENU PRINCIPAL
Ce produit MVISION montre tous les fichiers
reproductibles sur l'écran.
Si vous voulez reproduire musique, films, et
images, appuyer sur la touche
(play) ou (OK) de la télécommande.
1. Dossier supérieur : En selectionnant cette option on
se déplace vers le dossier
supérieur ou en appuyant la
touche (EXIT) de la
télécommande.
2. Liste des Dossiers : Montre la liste des tous les
dossiers sur la route actuelle.
Appuyer sur la touche (OK).
3. Fichiers Audio : Touts les fichiers de musique reproductibles seront montrés avec cet icône. les
extensions des fichiers de musique sont mp3, wma, AC3 et ogg.
4. Fichiers de Firmware : Montre les fichiers de Firmware pour produits MVISION. Le Firmware peut etre
facilement actualisé en selectionnant le firmware desideré depuis l'écran
principal. L'extension des ces fichiers est upd.
∙Anglais : Menu configuration et plusieurs UI seront montrés en Anglais.
∙Français : Menu configuration et plusieurs UI seront montrés en Français.
∙Espagnol : Menu configuration et plusieurs UI seront montrés en Espagnol.
5. Fichiers des Images : Tous les fichiers reproductibles des imagees et photos seront montrés avec cet
icône. Les extensions de ces fichiers sont jpg.
∙Portugais : Menu configuration et plusieurs UI seront montrés en Portugais.
Initialiser :
6. Fichiers de Vidéo : Tous les fichiers reproductibles des films seront montrés avec cet icône.
Les extensions des ces fichiers sont AVI (Divx 3.x, 4.x, 5.x, vid), MPG, MPEG, DAT, et
VOB).
∙Touts les changements et configurations retourneront aux valeurs initiales par défaut.
7. Route Actuelle : Montre les dossiers de l'actuelle route selectionnée.
8. Information de Fichiers : Montre le numéro et la taille du fichier sélectionné. L'annotation des fichiers
sélectionnés es montrée comme (fichier sélectionné / nombre total des
fichiers dans un dossier).
208
209
REPRODUIRE MUSIQUE
REPRODUIRE MUSIQUE
∙Il est possible de reproduire des fichiers de musique MP3, WMA, OGG vorbis, et AC3.
∙La fonction de recherche ne fonctionne pas avec les fichiers OGG.
∙Si vous voulez reproduire des fichiers de musique, appuyer sur la touche (OK) ou (PLAY)
aprés avoir sélectionné le fichier audio desiré, en utilisant la touche “△, ▽ ” pour
sélectionner le fichier. Le fichier de musique choisi dans un dossier sera alors reproduis
jusqu'à la pression de la touche "STOP".
TOUCHE Étiquette
Description
5
▽
Flèche : Déplacer la page dans le menu.
4
▷
Change les valeurs de configuration dans le niveau supérieur suivant.
1
◁
Change les valeurs de configuration dans le niveau inférieur suivant.
3
OK
Selectionne une option du menu ou reproduit le
fichier sélectionné dans l'actuel dossier.
25
INFO
Montre l'information sur l'actuel fichier en
reproduction. Autrement, montre comment utiliser la télécommande.
6
EXIT
Quand la reproduction est activée. Si vous êtes dans
un dossier, vous déplace à un dossier supérieur.
26
VOL +
Éleve le volume. Le volume s'éleve trois pas quand on
maintient appuyée la touche pendant un temps.
27
VOL -
Baisse le volume. Le volume se baisse trois pas quand
on maintient appuyée la touche pendant un temps.
8
CH up
Reproduire le fichier suivant.
Les fichiers et dossiers de firmware sont sautés.
9
CH dn
Reproduire le fichier précédent.
Les fichiers et dossiers de firmware sont sautés.
29
■
Pour la reproduction du fichier de musique en cours.
28
▶
Reproduit le fichier de musique sélectionné. Continue en exécution de tous les
fichiers de musique de l'actuel dossier. (Sauf fichiers de firmware).
11
Fait Pause de l'actuel fichier de musique en cours de reproduction.
13
◀◀
Avance Rapide : Reproduit la musique 5
sec. plus rapide que normal
Ne supporte pas de fichiers
de musique VBR.
12
▶▶
Recul Rapide : Recule la reproduction de
la musique 5 seg. plus rapide que normal
Ne supporte pas de fichiers
de musique VBR.
retourne à l'écran du menu Configuration
Pour la reproduction de la musique.
Change entre les différents modes de Sortie TV
NTSC
lletter-box, pan & scan, écran complet.
32
CONFIGURATION
31
TVOU
Quand reproduire
musique est allumé.
15
DISPLAY
Change entre les différents modes de
visualisation de l'écran
Montre d'abord tous les fichiers de musique
reproductibles (range les fichiers de musique)
Quand reproduire
musique est allumé.
14
IMAGE
Ajuste le contraste, l'éclat et saturation de l'écran
1-pas
Montre d'abord tous les fichiers d'imagees
reproductibles (range les fichiers d'images)
Quand reproduire
musique est allumé
20
ROUGE
Divx -> STB mode.
Quand reproduire
musique est allumé
Change entre les modes STB et Divx. Fait pause
pendant la reproduction de musique, films, photos
et retourne au mode menu STB. Si on retourne à divx,
reprenda la reproduction au moment dans lequel
elle s'est interrompue en appuyant sur la touche [▶]
23
RANGER
Range les fichiers par nom ou par taille.
Pour la reproduction.
TOUCHE Étiquette
Fonctions
16
BLEU
Montre d'abord tous les fichiers vidéo
reproductibles (range les fichiers vidéo)
17
JAUNE
18
VERT
19
ROUGE
Montre d'abord tous les fichiers de firmware
(range les fichiers de firmware)
2
△
Up Arrow : Move upward among menu items.
210
Fonctions
Description
211
REPRODUIRE FILMS
REPRODUIRE FILMS
∙Peut reproduire fichiers AVI, MPG, MPEG, DAT, VOB.
TOUCHE
Étiquette
∙Les Sous-titres doivent etre enregistrés dans le même dossier que les fichiers du film.
∙Si vous voulez reproduire le fichier vidéo, appuyer sur la touche (OK) ou (PLAY) aprés
avoir sélectionné le fichier du film, en utilisant la touche “△, ▽ “ pour sélectionner le
fichier.
Et alors, le fichier choisi commencera a se reproduire jusqu'à appuyer sur la touche
"STOP".
Fonctions
3
OK
Reproduit et synchronise l'heure actuelle. Quand le film et les sous-titres
ne sont pas synchronisés, utiliser cette touche pour les synchroniser.
INFO
Appuyant une fois: Montre l'heure, la barre de progrès et le nom du fichier.
Appuyant deux fois: Montre seulement l'information du temps.
Appuyant encore: Montre toute l'information.
25
6
212
EXIT
VOL +
Éleve le volume. Le volume s'élevera 3 pas si on apuyye sur
la touche pendant un temps.
27
VOL -
Baisse le volume. Le volume baissera 3 pas si on apuyye sur
la touche pendant un temps.
8
CH up
Reproduit le fichier precédent de l'actuel dossier. Les fichiers et dossiers de firmware seront sautés.
9
CH dn
Reproduit le fichier suivant de l'actuel dossier.
Les fichiers et dossiers de firmware seront sautés.
7
▲
Recul Rapide : Recule la reproduction de 30
seg.
Ne supporte pas les fichiers VBR.
10
▼
Avance Rapide : Avance 30 seg.
La reproduction
Ne supporte pas les fichiers VBR.
29
■
Efface l'OSD. Si l'OSD n'est pas montré, stoppe la reproduction du
fichier actuel et retourne au menu de la liste des fichiers.
28
▶
Reproduit tous les fichiers de
films de l'actuel dossier.
Continue en exécutant tous les
fichiers de l'actuel dossier.
(Sauf fichiers de firmware)
Fait pause pandant le film.
13
◀◀
Rebobiner : REVx4/REVx8/REVx16/REVx32
Ne supporte pas les fichiers VBR.
12
▶▶
Bobine : FFx4/FFx8/FFx16/FFx32
Ne supporte pas les fichiers VBR.
15
DISPLAY
Zoom allumé et éteint de l'écran.
Mode letter-box, pan & scan, écran complet.
14
IMAGE
Ajuste le contraste, éclat et saturation de l'écran
1-pas
20
ROUGE
22
SUB -T
Description
Efface l'OSD. Si l'OSD n'est pas montré, stoppe la
reproduction du fichier actuel et retourne au menu de la liste des fichiers.
Description
26
11
TOUCHE Étiquette
Fonctions
21 CHERCHER
Change entre les modes STB et Divx.
Fait pause pendant la reproduction de musique,
films, photos et retourne au mode menu STB.
Si on retourne à divx, reprenda la reproduction au Divx -> STB mode.
moment dans lequel elle s'est interrompue en
appuyant sur la touche [▶]
Change la configuration des sous-titres.
(change la taille des Sous-titres et l'éteindre)
taille des Sous-titres (grande, petite)
Sous-titres éteints.
Cette option est utilisée pour déplacer
vers l'avant l'heure de la reproduction
du film pendant sa reproduction.
Ne supporte pas fichiers VBR.
213
VISIONNAGE DE PHOTOS
VISIONNAGE DE PHOTOS
TOUCHE
Étiquette
∙Il est possiblr de reproduire les fichiers JPEG.
∙Si vous voulez reproduire un fichier d'image, appuyer sur la touche "OK" ou (PLAY)
Après avoir sélectionner le fichier, en utilisant la touche “△, ▽ “ pour sélectionner le
fichier. ET alors, le fichier d'image sélectionnée d'un dossier commencera se montrer
jusqu'à appuyer sur la touche "STOP". Si on appuye sur les touches "CH up/down", cela
arrete aussi la visualisation de l'image.
Description
4
▷
L'écran peut tourner selon un angle de 90 degrés,
dans le sens des aiguille d'une montre.
Pour la visualisation de
la photo.
1
◁
L'écran peut tourner selon un angle de 90 degrés,
dans le sens contraire des aiguille d'une montre.
Pour la visualisation
de la photo.
6
EXIT
Arrete la visualisation du fichier actuel et retourne au menu de la liste des fichiers.
26
VOL +
Fait zoom sur le fichier de l'image originale.
L'image originale s'élargira
jusqu'à un maximum de 5
fois.
27
VOL -
Réduit le zoom du fichier de l'image originale
L'image originale se
reduira jusqu'à un
maximum de 5 fois.
8
CH up
Reproduit le fichier d'image precédent
Les fichiers et dossiers de
firmware seront sautés.
9
CH dn
Reproduit le fichier d'image suivant
Les fichiers et dossiers de
firmware seront sautés.
29
■
Arrete la reproduction du fichier d'image et retourne au menu de liste de fichiers.
15
DISPLAY
Zoom activé et désactivé de l'écran. 3 OK Ajuste
l'image a la taille de l'écran quand s'active le zoom.
Mode Letter-box, Pan &
Scan, écran complet.a
14
IMAGE
Ajuste le contraste, l'éclat et la
saturation de l'écran
1-pas.
20
214
Functions
ROUGE
Change entre les modes STB et Divx.
Fait pause pendant la reproduction de musique,
films, photos et retourne au mode menu STB.
Si on retourne à divx, reprenda la reproduction
au moment dans lequel elle s'est interrompue en
appuyant sur la touche[▶].
Divx -> STB mode
215
ACTUALISATION DU FIRMWARE
(Précaution)
No pas débrancher ou manipuler l'alimentation ou la télécommande pendant
l'actualisation. Le produit MVISION s'actualisera autant de fois que nécéssaire pour
maintenir à jour les codecs et résoudre les possibles bugas, cela pour essayer de
satisfaire les nécessités des utilisateurs.
ACTUALISATION DU FIRMWARE
5. Écran 1 d'actualisation de firmware
(Effaçant flash).
Vous pouvez telecharger les dernier firmwares depuis la page web officielle
de MVISION : (http://www.hsmd.tv) www.hsmd.tv
1. Décharger le firmware de la page et décomprimer le
fichier. Copier le fichier de firmware dans la mémoire
de stockage externe. Raccorder la mémoire externe
au port Divx USB 2.0 du recepteur MVISION.
6. Écran 2 d'actualisation de firmware
(écrivant flash).
2. Sélectionner le fichier du firmware en utilisant le
télécommande, et appuyer sur la touche "OK" pour
décharger le fichier de firmware. Le fichier de
firmware es montré comme ***.upd dans la liste des
fichiers.
3. Sur l'écran apparaîtra le message suivant. Choisir
(OUI) dans le message d'alerte pour décharger le
fichier de firmware.
7. Quand la décharge du firmware sera completée avec
succès, apparaîtra le message suivant a l'écran. Et le
(Précaution)
Ne pas éteindre le recepteur MVISION pendant
l'actualisation du firmware.
Autrement, la mémoire flash peut etre abîmée.
système redemarrera automatiquement.
4. Écran de lecture & decodificación de Firmware.
216
217
SOLUTION DES PROBLÈMES
Si vous voulez des informations plus détaillée pour solutionner des problèmes, s'il vous
plaît, visitez la page de MVISION {(http://www.hsmd.tv/) www.hsmd.tv} et aller a
support ou adressez vous au point de vente du produit.
1. Si vous ne voyez rien sur l'écran de TV ou l'image tremble.
∙Si la configuration de la sortie de vidéo n'est pas correcte, il est possible que rien
n'apparraisse a l'écran, ou de voir une image en noir et blanc ou que celle-ci tremble.
2. Si le produit MVISION se congele en utilisant le Divx après l'écran initial, et ne
change pas à l'écran du menu principal.
∙Vérifier si le dispositif USB est bien raccordé.
∙Vérifier si la partition du dispositif USB est bien formatée ou configurée.
3. Si les Sous-titres no sont pas montrés.
∙Si le fichier du film ou image et le fichier des Sous-titres ne concordent pas, les Sous-titres ne
sont pas montrés. Par exemple, si le nom du fichier du film est "bbb.avi", le nom du fichier des
Sous-titres doit ser "bbb.smi".
4. Quand l'alimentation est raccordée, et rien n'apparaît sur l'écran ou l'écran apparaît
monochrome ou tremblant.
∙Quand la configuration du mode sortie de vidéo n'est pas correcte, l'image peut apparaître
monochrome ou tremblante. Appuyer sur la touche (TV Out) de la télécommande pour changer
le mode de sortie vidéo jusqu'à ce que la configuration soit correcte.
5. Quand un fichier vidéo ne se reproduit pas, ou il n'apparaît rien sur l'écran (écran en
noir).
∙Le fichier vidéo ne peut pas etre reproduit si il utilise un CODEC non supporté. Il est possible
de vérifier si les CODEC son corrects avec un programme de vérification ou en utilisant un
programme de conversión.
Autrement, appuyer sur la touche (TV OUT) de la télécommande deux fois.
6. Quand apparaît une image sur l'écran mais il n'y a pas de son.
∙Vérifier l'entrée externe du TV. L'entrée vidéo externe composite, comme la composants ont
été séparés des entrées audio.
Vérifier si les entrées vidéo et audio sont bien raccordées.
218
Portugese
SX-5 USB
STX-5 USB
Please read this User's Manual Carefully
before installing this Receiver
TABLE OF CONTENTS
SEGURANÇA GERAL
222
INFORMAÇÃO GERAL
223
I. DESEMBALAGEM DO PRODUTO
223
II. CARACTERÍSTICAS
223
III. UNIDADE CONTROLO REMOTO (RCU)
224
IV. PAINEL FRONTA
227
V. PAINEL TRASEIRO
228
INSTALAÇÃO DO EQUIPAMENTO
229
GUIA DA LISTA DE CANAIS
231
GUIA DO MENU
233
PÁGINA PRINCIPAL
233
I. GESTOR DE CANAIS
233
II. INSTALAÇÃO
235
III. OPÇÕES
239
IV. UTILIDADES
242
RESOLUÇÃO DE PROBLEMAS
244
ESPECIFICAÇÕES
245
221
SEGURANÇA GERAL
AVISO
Por favor leia cuidadosamente as seguintes recomendações antes de operar o equipamento, de modo a
evitar o risco de danos físicos.
Não tape o receptor e deixe sempre espaço suficiente para a sua correcta ventilação.
Verifique a voltagem de operação do receptor: 90~250V, 50Hz~60Hz Máx, 40W.
INFORMAÇÃO GERAL
I. UNPACKING
Por favor verifique que os seguintes itens vêm incluídos com o receptor na
embalagem.
1) Unidade de Controlo Remoto (RCU)
2) Pilhas (2EA)
Mantenha qualquer líquido afastado do receptor.
3) Manual do Utilizador
O receptor não deverá ser exposto a gotas ou salpicos e nenhum recipiente com líquidos deverá ser
colocado por cima ou junto ao receptor.
4) Cabo A/V
Deslique o receptor da tomada eléctrica antes de proceder à sua limpeza.
II. CARECTERÍSTICAS
Utilize um pano macio e uma solução líquida de limpeza suave para limpar a caixa do aparelho.
∙Compatível MPEG-2 Digital e DVB-S.
Não bloqueie as slots de ventilação do aparelho, as quais estão previstas para o proteger do
sobreaquecimento.
∙1 leitor de cartões integrado.
∙2 CI (Common Interface).
Por favor mantenha o receptor num local com livre circulação de ar.
∙Controlo banda C/Ku para cada antena.
Não deixe que o receptor fique exposto a condições de calor, frio ou humidade.
∙Tom de comutação 22KHz on/off.
∙Multi-LNB controlado por DiSEqC 1.0, 1.2 e USALS.
Não utilize nenhum cabo ou ligação que não os recomendados, já que isso poderá danificar o
equipamento.
∙Capacidade para 5000 canais.
∙Busca cega (Power Scan) & EPG avançado.
Tenha o cuidado de desligar o receptor da tomada de alimentação eléctrica e desligue o cabo entre o
receptor e a antena sempre que não o utilize por um período de tempo prolongado.
∙PIG (Picture In Graphic).
Não retire a tampa do aparelho, de modo a prevenir o risco de choque eléctrico.
∙EPG para informação dos canais no ecrã.
Não tente proceder a qualquer eventual reparação do aparelho.
∙Teletexto e legendas através do OSD.
∙OSD com 65.536 cores.
∙Saída áudio Dolby Digital via S/PDIF.
Para qualquer tipo de reparação deverá dirigir-se a um serviço qualificado.
O manual de utilização poderá ser alvo de actualização com novas características.
∙Actualização do software e da base de dados de canais através da
porta série RS-232 e da porta USB.
∙PVR Ready via porta USB (preparado para gravar e reproduzir
através de um disco rígido externo).
∙Os ficheiros gravados podem ser lidos no PC.
222
223
INFORMAÇÃO GERAL
INFORMAÇÃO GERAL
III. UNIDADE DE CONTROLO REMOTO (RCU)
III. UNIDADE DE CONTROLO REMOTO (RCU)
1. MUTE
activa ou desactiva o áudio.
2. POWER
põe o receptor em modo operacional ou em stand-by.
3. TV
Modo TV.
4. STB
Modo STB (receptor).
5. VCR
Modo VCR (videogravador).
6. DVD
Modo DVD.
7. Teclas numéricas
Seleccionam os canais TV ou Rádio e os menus individuais.
8. FAV
Passa para o modo de canais favoritos seleccionados.
9. SAT
Passa para a lista de satélites seleccionados.
10. EPG
Afixa o guia de programas TV ou Rádio.
(Guia Electrónico de Programas)
224
11.
Selecciona o modo legendas e teletexto.
12. Audio
Altera os idiomais áudio
13.
Selecciona o modo som (ESQUERDO/DIREITO/STEREO).
14. ▲▼
Muda canais ou move para o item no menu.
15. ◀ ▶
Ajusta o volume ou move para a esquerda ou move item no menu.
16. MENU
Afixa o menu principal no ecrã.
17. EXIT
Regressa ao menu anterior ou modo visualização normal num menu.
18. INFO
Afixa a caixa de informação do programa no ecrã e edita o nome
da lista de canais favoritos.
19. V+/V-
Aumenta ou diminui o volume.
20. P+/P-
Sobe e desce canais em modo normal.
21.
Move para cima uma página na lista de canais. (Selecciona zoom in/out).
22.
Move para baixo uma página na lista de canais.
23. STOP
Interrompe a gravação ou a leitura.
24. PAUSE
Faz pausa na leitura da imagem ou vai para modo normal.
25. Record
Grava o programa.
26. Play
Afixa listas de ficheiros e lê em modo slow/normal.
27. Rewind
Inicia leitura em sentido inverso (para trás) e muda a velocidade de leitura.
28. F/F
Inicia leitura para a frente ou leitura rápida e muda a velocidade da leitura para a frente.
29. Position
Afixa barra de posição no ecrã para ajustar a antena.
30. AV/TV
Selecciona o modo TV ou AV.
31. TV/RADIO
Muda entre TV e Rádio.
32. PR
Selecciona o canal visualizado previamente.
33. Fn
Reservado.
34. STB/DivX
Muda entre STB ou DivX.
35. UHF
Muda para modo de sintonia UHF.
36. PAL/NTSC
Muda entre os modos PAL ou NTSC.
225
INFORMAÇÃO GERAL
III. UNIDADE DE CONTROLO REMOTO (RCU)
INFORMAÇÃO GERAL
IV. PAINEL FRONTAL
Método de instalação
1. Método de instalação de 3 digitos
1) Ligue o Televisor
2) Pressione “TV” e “OK” ao mesmo tempo por mais de 2 segundos. O LED TV irá acender-se por 2 vezes..
3) Consulte a lista de marcas TV e pressione os três números. (O LED TV irá acender-se 2 vezes. Se os
números estiverem incorrectos, o LED TV irá acender-se 1 vez)
4) Se houver várias referências para a marca, repita o passo anterior até que a TV se desligue.
5) Se a TV se desligar, pressione “OK”. (Se a instalação for feita correctamente, o LED do telecomando irá
acender-se 2 vezes)
6) Verifique que a tecla ligar/desligar e as outras teclas do telecomando funcionam correctamente.
7) Se a tecla ligar/desligar funcionar mas as outras não, recomece a partir do ponto 1) (Nalgumas
marcas, as outras teclas que não a de ligar/desligar podem não funcionar correctamente)
Para o VCR e o DVD, proceda como acima indicado.
Se não introduzir os 3 números durante 10 segundos, a instalação irá falhar.
Se não conseguir encontrar a referência correcta com o método atrás descrito.
2.Método de Busca Automática
①
②
③
④ ⑤
1. POWER
Liga/desliga o receptor.
2) Pressione “TV” e “OK” ao mesmo tempo por mais de 2 segundos. O LED TV irá acender-se por 2 vezes.
2. CH Up/Down
Sobe/desce canais ou selecciona o item do Menu.
3) Pressione a tecla “Para cima” até que a TV se desligue (Se quiser começar ao contrário, pressione
“Para baixo”)
3. VOL Up/Down
Aumenta/diminui Volume ou selecciona o item do Menu.
4) Se a TV se desligar, pressione “OK”. (Se isso não for feito correctamente, o LED do telecomando irá
acender 2 vezes)
4. USB PORT
Connects to USB device.
5) Verifique que a tecla ligar/desligar e as outras teclas do telecomando funcionam correctamente.
5. USB PORT
DivX file play.
1) Ligue o Televisor
6) Se a tecla ligar/desligar funcionar mas as outras não, recomece a partir do ponto 1) (Nalgumas
marcas, as outras teclas que não a de ligar/desligar podem não funcionar correctamente)
Para o VCR e o DVD, proceda como acima indicado.
Se não introduzir os 3 números durante 10 segundos, a instalação irá falhar.
3. Como verificar o número instalado
1) Pressione “TV” e “OK” simultaneamente durante mais de 2 segundos. O LED TV irá então ligar-se 2
vezes.
2) Pressione a tecla “info” por 3 segundos.
3) O LED TV pisca para mostrar o número instalado, por ordem. (LED TV pisca 10 vezes para mostrar ‘o’
Para o VCR e o DVD, procede-se como acima descrito.
226
“Nem todas as “flash drives” USB 2.0 são compatíveis com o receptor”
227
INFORMAÇÃO GERAL
V. PAINEL TRASEIRO
INSTALAÇÃO DO EQUIPAMENTO
Esta secção exemplifica várias maneiras de ligar o receptor ao seu televisor, videogravador
e sistema Hi-Fi. Poderá escolher uma das configurações aqui recomendadas.
Se tiver algum problema ou necessitar de ajuda, consulte o seu distribuidor ou o fornecedor
de serviço.
I. LIGAÇÃO DO RECEPTOR À TV
I-1. Ligação do receptor à TV através do cabo SCART.
Ligue uma das extremidades do cabo SCART à tomada TV SCART situada no painel traseiro do receptor e
a outra extremidade à entrada SCART do seu televisor.
228
1. ANTENA
Liga ao cabo de antena Terreste.
2. LOOP OUT
Liga a outro Receptor.
3. LNB IN
Liga ao cabo de antena Satélite.
4. LNB OUT
Liga a outro Receptor.
5. DIGITAL AUDIO
Saída para ligação a amplificador digital.
6. AUDIO-R
Liga a ÁUDIO DIREITO da TV ou de outro equipamento.
7. VIDEO
Liga a VÍDEO da TV ou de outro equipamento.
8. AUDIO-L
Liga a ÁUDIO ESQUERDO da TV ou de outro equipamento.
9. TV SCART
Liga ao cabo SCART da TV.
10. VCR SCART
Liga ao cabo SCART do VCR.
11. TV/VCR
Liga à TV ou ao VCR.
12. ANT
Liga à entrada de antena TV.
13. RS 232
Liga ao computador pessoal para actualização de software.
14. ETHERNET
Liga ao cabo LAN.
15. YUV
Liga a YUV da TV ou do VCR.
16. USB
Liga ao dispositivo USB.
17. POWER SUPPLY
90~250V AC, 50/60Hz, 40W.
18. POWER BUTTON
Botão de Ligar/Desligar.
II. LIGAÇÃO DO RECEPTOR À TV COM O CABO RCA
II-1.Ligação do receptor à TV com o cabo RCA.
Ligue uma extremidade do cabo RCA aos terminais Áudio-R (vermelho), Áudio-L (branco) e Vídeo
(amarelo) no painel traseiro do receptor e a outra extremidade a Áudio-R (vermelho), Áudio-L (branco)
e VÍDEO (amarelho) da TV.
229
INSTALAÇÃO DO EQUIPAMENTO
III. LIGAÇÃO DO RECEPTOR À TV E AO VCR COM O CABO RF
III-1. LIGAÇÃO DO RECEPTOR À TV E AO VCR COM O CABO RF.
Ligue um lado do cabo RF à tomada TV no painel traseiro do receptor e o outro à entrada ANT
IN do televisor.
Ligue um lado do cabo RF ao terminal ANT na traseira do receptor e o outro a ANT OUT no
videogravador.
GUIA DA LISTA DE CANAIS
1. Modo em directo normal
a) Quando selecciona um canal, a barra de informação
aparece automaticamente no ecrã por alguns segundos.
Esta barra fornece informação actualizada sobre o
canal.
b) Pressione a tecla INFO para aceder à informação
durante o modo normal de visionamento.
2. Lista de Canal simples
a) Pressione OK no modo de visionamento normal para ir
até à lista de canais.
b) Quando a lista detalhada de canais é exibida no ecrã
pressione a tecla RED para ir para a lista simples de
canais.
3. Lista de Canais detalhada
a) Pressione a tecla OK para mostrar à lista de canais.
b) Para mostrar uma lista detalhada de canais, pressione a
tecla vermelha no modo lista de canais.
c) Pressione ▲▼ e ◀ ▶ para classificar os canais por
ordem alfabética.
d) Pressione a tecla SAT para ordenar por Satélite e a tecla
FAV para Favoritos 1~8.
e) Pressione a tecla GREEN para regressar a Todos os
Canais ou EXIT para voltar ao canal actualmente em
direct.
f) SPressione a chave SAT para mostrar a janela de
Satélites e depois seleccionar o satélite. A lista de
satélites seleccionados será então exibida.
g) Pressione a chave FAV para mostrar a janela Favoritos e
depois seleccione a lista FAV. A lista de canais
seleccionados será então exibida.
h) Pressione a chave Green e a lista de todos os canais
pesquisados será exibida.
i) Pressione MENU e o cursor irá para ALL, colocado à esquerda.
j) Ordene Key (tecla amarela)~A~Z/Z~A/FAT/CAS.
k) Pressione a tecla amarela para ordenar A~Z/Z~A/FAT/CAS. Se quiser voltar atrás para sair dos
CAS seleccionados regresse à janela anterior e seleccione então “desordenar”.
230
231
GUIA DA LISTA DE CANAIS
GUIA DO MENU
Página Principal
4. EPG (Guia Electrónico de Programas)
a) Pressione a tecla EPG em modo de emissão em
directo.
MENU Taste druecken um ins Hauptmenu zu gelangen
Hauptmenu wird angezeigt.
b) O EPG do canal actualmente seleccionado aparece
no ecrã.
1. Pode dirigir-se à página principal usando ▲▼◀ ▶no
telecomando.
c) Seleccione o canal de que quer ver o programa..
2. Pressione OK para confirmar a sua selecção.
d) Para agendar a gravação de um programa, pressione
a tecla REC(●).(apenas modo PVR).
3. Pressione EXIT para regressar ao menu anterior ou pressione
MENU para ir para a emissão em directo.
e) Irá aparecer como uma imagem no lado direito.
f) Se agendar o programa, ele será então
automaticamente gravado no horário
previsto.(apenas modo PVR).
g) Select Taste zweimal druecken um zum Sender
zurueck zugelangen.
5. ZOMM IN/OUT
a) Ao seleccionar a chave UP (para cima ) da página
em modo normal de emissão pode usar a função
Zoom In/Out.
b) A partir da janela da função Zoom para Zoom In,
poderá seleccionar(*2*3*4) através da chave página
PARA CIMA, para Zoom Out pressione a chave página
PARA BAIXO( ).
c) Quando mover o cursor de Zoom através da chave (◀
▶▲▼ ) poderá então seleccionar Zoom In/Out no
ponto focado pela pressão das chaves página
cima/baixo”. Pressione a tecla Pausa e o modo em
directo ficará parado em modo Zoom.
I. Gestor de Canals
II. Instalações
III. Opções
IV. Utilidades
I. Gestor de Canals
Esta secção poderá ajudá-lo a organizar canais de acordo com as suas preferências.
1. Seleccione “Channel Manager” na Página Principal com ▲▼ e pressione OK.
2. A página de Gestão de Canais TV aparece no ecrã.
3. Seleccione o modo pretendido usando ◀ ▶.
4. Para ver o canal escolhido, vá até ao canal e pressione então a tecla vermelha (RED).
5. Pressione EXIT para regressar ao menu anterior ou pressione MENU para chamar a emissão em directo.
I-1. Favoritos
I-2. Renomear
I-3. Mover
I-4. Guardar
I-5. Apagar
I-1. Favoriten
1. Usando ◀ ▶ vá ao modo Favoritos e pressione a tecla
amarela para escolher Favoritos 1~8.
2. Pressione OK no canal que quer acrescentar ou apagar.
3.
Será marcado no final da barra de nome do canal
seleccionado. Para apagar pressione outra vez OK.
4. Os canais seleccionados serão automaticamente gravados.
5. Se quiser verificar a Lista de Canais Favoritos memorizada
vá a outro modo (Renomear~Apagar) excepto Favoritos e
pressione a tecla FAV para confirmar Favoritos 1~8.
6. Pressione EXIT para regressar ao menu anterior ou
pressione MENU para voltar à emissão em directo.
232
233
GUIA DO MENU
I. Gestor de Canais
I-2. Renomear
1. Usando◀ ▶ir para modo Renomear.
2. Seleccionar o canal que quer renomear usando ▲▼e depois
pressione OK.
3. A ilustração do Teclado aparece no ecrã.
4. Edite o nome digitando ALGARISMOS e/ou PALAVRAS na
ilustração do Teclado.
5. Pressione a tecla amarela para renomear Favoritos 1~8 e
pressione a tecla azul para renomear Satélite.
6. Pressione EXIT para regressar ao menu anterior ou
pressione MENU para ir para a emissão em direct.
I-3. Mover
1. Usando◀ ▶ vá para o modo Mover.
2. Seleccione os canais que quer mover pressionando a tecla
OK.
3. Movimente o cursor que quer inserir e pressione depois a
tecla verde.
4. Pressione EXIT para regressar ao menu anterior ou
pressione a tecla MENU para ir para a emissão em directo.
I-4. Proteger
GUIA DO MENU
II. Instalação
Esta secção poderá ajudá-lo a instalar a antena e a
pesquisar satélite ou transponder, etc. Seleccione
Instalações na Página Principal usando ▲▼ pressione
OK. Pressione EXIT para regressar ao menu anterior ou
pressione MENU para voltar à emissão em directo
II-1. Satélite Pesquisa
II-2. Comutação DiSEqC
II-3 Configuração Motor
II-4. Terrestre Pesquisa
II-5. Parâmetros de Fábrica
II-1. Satélite Pesquisa
1.Pode mover o cursor usando ▲▼ e pressione OK
quando seleccionar o valor pretendido.
a) Satélite
- Pressione OK para afixar a caixa com a Lista de
Satélites.
- Seleccione o Satélite correcto e pressione depois OK.
b) DiSEqC
1. Usando ◀ ▶ vá para o modo Proteger (“Lock”).
- Pressione OK para afixar a indicação de Porta DiSEqC.
2. Seleccione o canal que quer proteger e pressione OK. Ficará
marcado no final da barra com o nome. Para apagar
pressione novamente OK.
- Seleccione a porta DiSEqC correcta e pressione depois OK.
3. Pressione EXIT para regressar à Página Principal ou
pressione a tecla MENU para ir para a emissão em directo.
c) Frequência
- Pressione OK para afixar a lista de Frequências.
- Seleccione a Frequência correcta e pressione OK.
d) LNB
I-5. Apagar
- Pressione OK para afixar a lista de Frequências LNB.
1. Usando◀ ▶ vá para o modo Apagar (“Delete”).
2. Seleccione o canal que quer apagar e pressione OK. Ficará
marcado no número de canal seleccionado. Para apagar
pressione a tecla azul. (
)
3. Pressione a tecla amarela para apagar TP. Seleccione um
canal e pressione a tecla azul. Todos os canais desse TP
(transponder) serão automaticamente seleccionados.
4. Pressione a tecla amarela para apagar Satélite. Seleccione
um canal e pressione a tecla azul. Todos os canais desse
Satélite serão automaticamente seleccionados.
- Seleccione a Frequência correcta de LNB e depois
pressione OK.
5. Pressione EXIT para regressar ao menu anterior ou pressione MENU para voltar à emissão em directo.
6. A caixa de Mensagens aparece no ecrã.
7. Seleccione OK na caixa de Mensagens e pressione OK para apagar os canais seleccionados.
234
- Pode também introduzir directamente os algarismos
usando as teclas respectivas do telecomando.
e) Tom 22KHz
- Seleccione entre Nenhum, 0 KHz ou 22 KHz em função
da caixa de comutação de antena utilizada.
f) Opção Pesquisa
g) Pesquisa
- Pressione Pesquisa para dar início à busca
de canais.
- O Satélite seleccionado aparece no ecrã.
- Pressione ▶para seleccionar mais Satélites
ou ◀ para cancelar os Satélites
seleccionados.
- Pressione OK para dar início à busca.
- Pressione OK para afixar a lista Opção Pesquisa.
- Seleccione a Opção Pesquisa que pretende e depois
pressione OK.
Editar : Para editar TP, pressione a tecla
vermelha do telecomando.
235
GUIA DO MENU
II. Instalação
II-2. Comutação DiSEqC
1. Seleccione Pesquisa Canal em Instalação usando
▲▼ e pressione OK.
a) Se seleccionar Comutação DiSEqC e pressionar OK no
menu, a página Comutação DiSEqC será afixada.
b) Seleccione o Satélite correcto de cada porta DiSEqC
(A~D) usando ◀ ▶ e ▲▼ pressione PESQUISA. Os
Satélites seleccionados serão automaticamente
pesquisados.
GUIA DO MENU
II. Instalação
e) Controlo do Motor
Seleccione a posição usando ◀ ▶e pressione depois
OK.
- A caixa de Mensagens aparece no ecrã.
- Guardar posição Satélite: Grava a posição actual do motor para o
satélite seleccionado.
- Ir até Posição Satélite: Move o motor até à posição
memorizada do satélite seleccionado.
- Ir até 0 : Vai ao centro do motor.
- Posição Reset: Recupera todas as posições memorizadas
do motor.
f) Posição de Satélite
II-3 Configuração Motor
1. Pode mover o cursor usando ▲▼ e pressione OK
quando seleccionar o valor pretendido.
- Introduza directamente a posição usando as teclas numéricas do tel.
- Seleccione a direcção usando ◀ ▶ (OESTE / ESTE).
g) Opção Pesquisa
- Pressione OK para afixar a lista Opções de Pesquisa.
a) Tipo de Motor : DiSEqC 1.2, USALS
- Pressione OK para afixar Tipo de Motor.
- Seleccione o Tipo de Motor correcto e pressione então OK.
- Seleccione a Opção Pesquisa desejada e depois pressione OK.
h) Pesquisa
- Pressione Pesquisa para dar início à procura de canais.
b) Satélite
- Pressione OK para afixar a caixa com a Lista de Satélites.
- Seleccione o Satélite correcto e pressione então OK.
c) Comutação & LNB
- Pressione OK para afixar a lista de frequências LNB ou
Configuração de Comutação.
- Seleccione o LNB correcto e a comutação correcta.
d) Frequência
- Pressione OK para afixar a lista de Frequências.
- Seleccione a Frequência correcta e pressione então OK.
e) Movimento do Motor
- Pesquise a posição correcta do Satélite seleccionado
usando ◀ ▶.
- Pressione OK para começar a procurar.
2. Editar a minha posição local
- Pressione a tecla verde para editar Posição local.
a) Longitude
- Introduza directamente a Longitude usando as teclas numéricas do telecomando.
- Seleccione a direcção usando ◀▶ (OESTE / ESTE).
b) Latitude
- Introduza directamente a Latitude usando as teclas numéricas do telecomando.
- Seleccione a direcção usando ◀ ▶∫(NORTE / SUL).
3. Pressione EXIT para regressar ao menu anterior ou pressione MENU para voltar
à emissão em directo.
※ EDITAR TP : Para Editar TP pressione a tecla vermelha do telecomando.
236
237
GUIA DO MENU
GUIA DO MENU
II. Instalação
III. Opções
II-4. Terrestre Pesquisa
1. Seleccione Pesquisa de Canais em Instalação
usando ▲▼ e pressione OK.
2. 1) Seleccione a região onde está a usar o receptor◀ ▶.
2) Poderá seleccionar o tipo de pesquisa que
pretende entre Automática e Manual usando◀ ▶.
Esta secção poderá ajudá-lo a configurar o idioma
OSD, a hora, etc. Seleccione Opções na Página
Principal usando ▲▼ e pressione OK.
Pressione EXIT para regressar ao menu anterior
ou MENU para voltar emissão em directo.
a) Seleccione “Pesquisa” no ecrã e depois pressione
a tecla OK para pesquisar canais.
III-1. Configuração OSD
III-2. Painel de Controlo
III-3. Acerto da Hora
III-4. Bloqueio Parental
III-5. Network
b) Pressione Exit ou Menu depois de terminar a
pesquisa.
III-1. Configuração OSD
3) Auto(mática)
4) Manual
a) Seleccione o Canal (Mux) que pretende usando ◀ ▶.
b) A frequência aparecerá automaticamente de
acordo com o Canal (Mux) seleccionado.
1. Seleccione Configuração OSD em Opções usando
▲▼ e pressione OK.
a) Idioma OSD
- Pressione OK para afixar a lista de Idiomas OSD.
- Seleccione o idioma pretendido e depois pressione OK.
II-5. Parâmetros de Fábrica
b) Idioma Áudio
Utilize a função Parâmetros de Fábrica apenas
quando pretender que o receptor retorne à
configuração inicial de fábrica. Todas as selecções e
canais serão apagados.
- Pressione OK para afixar a lista de Idiomas Áudio.
1. Seleccione Parâmetros de Fábrica em Instalações utilizando
▲▼ e pressione OK.
- Seleccione o segundo pretendido para a afixação e depois pressione OK.
2. A caixa de Mensagens aparece no ecrã.
3. Seleccione OK para fazer o receptor regressar à
configuração inicial e pressione depois OK.
4. Pressione EXIT para regressar ao menu anterior ou
pressione MENU para voltar à emissão em directo.
- Seleccione o idioma pretendido e depois pressione OK.
c) Afixar Barra de Informação
- Pressione OK para chamar a lista horária Afixar Barra de Informação.
d) Posição OSD
- Pressione OK para mudar Posição Horizontal e Vertical do OSD.
- A caixa Posição OSD aparece no ecrã.
- Seleccione Posição Hor / Posição Ver usando ▲▼.
- Movimente Posição OSD para esquerda/direita ou para cima/para baixo usando ◀ ▶.
- Seleccione OK na caixa Posição OSD e depois pressione OK.
e) Formato Ecrã
- Pressione OK para afixar a lista Formato de Ecrã.
- Seleccione o formato pretendido e depois pressione OK.
2. Pressione EXIT para regressar ao menu anterior ou pressione MENU para voltar à emissão em directo.
238
239
GUIA DO MENU
GUIA DO MENU
III. Opções
III. Opções
III-2. Painel de Controlo
III-5. Network
1. Seleccione Configuração TV em Opções usando ▲▼ e
pressione OK.
Esta secção poderá ajudá-lo a proceder à
configuração da rede.
a) Saída Vídeo
- Pressione OK para afixar a lista Saída Vídeo.
- Seleccione RGB se a sua SCART suportar controlo RGB e depois
pressione OK.
- Seleccione CVBS se a sua SCART não suportar controlo RGB e
depois pressione OK.
b) Tipo de TV
- Pressione OK para afixar a lista Tipo de TV.
- Seleccione o modo correcto de acordo com o tipo de TV usada e
depois pressione OK
c) Canal UHF
- Pressione OK para afixar a lista Canal UH.
- Seleccione o canal correcto e depois pressione OK.
d) Standard UHF
- Pressione OK para afixar a lista Standard UHF.
- Seleccione o modo correcto e depois pressione OK.
2. Pressione EXIT para regressar ao menu anterior ou pressione
MENU para voltar à emissão em directo.
III-3. Acerto da Hora
Confirme a hora local em que se encontra.
1. Seleccione Acerto da Hora (“Time Setup”) em Opções usando
◀ ▶ e depois pressione OK.
2. A página Acerto da Hora aparece no ecrã.
3. Movimente o cursor usando ◀ ▶, ▲▼e pressione OK quando o
valor seleccionado for aquele que pretende. (Introduza a Hora
directamente usando as teclas numéricas do telecomando)
4. Pressione EXIT para regressar ao menu anterior ou pressione
MENU para voltar à emissão em directo.
III-4. Configuração Bloqueio Parental
1. Seleccione Configuração Bloqueio Parental em Opções usando
◀ ▶e pressione OK.
2. A página Bloqueio Parental aparece no ecrã.
3. Pode activar e desactivar Bloqueio Parental seleccionando ON
ou OFF usando ▲▼ (Para Canais).
4. Pode activar e desactivar Bloqueio Instalação seleccionando ON
ou OFF usando ▲▼ (Para Configuração Instalação).
5. Introduza uma nova password se quiser alterar a password actual.
6. Confirme a nova password introduzindo-a novamente.
7. Pressione EXIT para regressar ao menu anterior ou pressione MENU para voltar à emissão em directo.
Nota : A PASSWORD DE FÁBRICA É 0000
240
1. Instalação IP
Seleccione um destes três tipos de Instalação de
Rede.
a) Sem uso
Neste caso, a rede é desactivada.
b) Automática
Neste caso utiliza-se um serviço de endereço IP
dinâmico. Depois de seleccionar Automático e de
pressionar a tecla de activar, o aparelho será
reinicializado automaticamente. O aparelho ficará
com um novo IP proveniente do router.
c) Manual
Neste caso utiliza-se um serviço de endereço IP
estático. Introduza o seu endereço IP, Máscara de
Rede e Porta.
Pressione a tecla de activar e o aparelho será então
reinicializado automaticamente.
2. Actualização de Software
a) Por favor verifique primeiro onde poderá
descarregar ficheiros.
b) Pressione a tecla “input URL” se quiser alterar o
endereço a partir do qual será feito o download.
c) Depois de introduzir o endereço URL, pressione a
tecla de actualização e siga as instruções que vão
aparecer em mensagem.
Atenção : não desligue o receptor durante o
processo de actualização.
241
GUIA DO MENU
MENU GUIDE
VI.Utilidades
USB PVR
Esta secção poderá ajudá-lo a usar USB, etc.
Seleccione Utilidades na Página Principal usando
▲▼ e depois pressione OK.
∙VI - 1. Informação Sistema
∙VI - 2. USB
∙VI - 3. Interface Comum
Ligue o dispositivo de memória USB ao receptor.
1. Gravar
∙Se quiser gravar o programa, pressione a tecla REC.
∙Pressione a tecla “TOP” para interromper a gravação.
2.LEITURA
VI-1. Informação Sistema
Esta opção ajuda-o a conhecer a versão actual de
software e hardware. Fornece-lhe também o nome do
produto.
1. Seleccione Informação de Sistema em Opções usando
▲▼ e pressione OK.
2. Pressione EXIT para regressar ao menu anterior.
∙Se quiser reproduzir o ficheiro gravado no seu dispositivo de memória USB, pressione a tecla
“PLAY” e a lista de ficheiros aparecerá.
∙Seleccione o ficheiro que quer reproduzir usando ▲▼e pressione OK.
∙Se quiser ler outro ficheiro, pressione a tecla OK e a lista de ficheiros aparecerá.
∙SLOW : Pressione a tecla “PLAY”. Se pressionar novamente “PLAY”, a velocidade de leitura voltará à
normal.
∙F/F, Rewind, Pausa são possíveis.
VI-2 USB
O receptor está equipado com slot leitura USB.
3. Gestor de Ficheiros (Ir para Menu Principal - Utilidades - USB)
1. Seleccione USB em Utilidades com ▲▼ e pressione OK.
2. Se quiser mudar o modo (Actualização S/W,
Actualização BootLoader), pressione a tecla vermelha
do telecomando.
3. Seleccione o ficheiro que quer actualizar usando ▲▼ e
pressione OK.
4. Depois de descarregar o ficheiro seleccionado, o
receptor irá reinicializar-se automaticamente.
∙Apagar
VI-3 Interface Comum
O receptor está equipado com duas 1 slot de Interface
Comum que poderão dar acesso a serviços codificados
com vários módulos de acesso condicional e um cartão
válido.
Os programas que podem ser descodificados são
determinados pelo módulo de acesso condicional e cartão
de acesso que utilizar.Os programas que podem ser
descodificados são determinados pelo módulo de acesso
condicional e cartão de acesso que utilizar.
1. Seleccione Interface Comum em uso com ▲▼ e
pressione OK.
2. Interface Comum aparece no ecrã. (A frase “Nenhum Módulo” aparece quando o módulo de acesso
condicional não está instalado)
3. Insira o módulo de acesso condicional na Slot 1.
4. O nome da Slot difere de acordo com cada módulo de acesso condicional inserido.
5. Pressione EXIT para regressar ao menu anterior ou pressione MENU para voltar à emissão em directo.
242
- Se quiser apagar o ficheiro, pressione a tecla Amarela.
- Seleccione o ficheiro que quer apagar usando ▲▼ e pressione OK.
∙Formatar
- O receptor suporta apenas o sistema de ficheiros FAT32.
- Se quiser formatar o seu dispositivo de memória em FAT32, pressione a tecla Azul.
- Depois de formatar, todos os dados serão apagados.
4. Precauções
∙Apenas o dispositivo de alta velocidade USB 2.0 é suportado pela função PVR.
∙O download de software e a leitura MP3 suportam velocidade integral USB 1.1.
∙Por favor utilize mais de 2GByte de memória ou USB HDD para função PVR.
∙Normalmente 1GBtye pode gravar 30~40 minutos, dependendo do programa.
∙Alguns dispositivos USB não são suportados.
∙Fragmentação de memória pode originar problemas de gravação, por favor formate regularmente o
seu dispositivo de memória.
∙Para mais informações e actualização de software, por favor visite o nosso website.
243
ESPECIFICAÇÕES
RESOLUÇÃO DE PROBLEMAS
Solução
Problema
Não aparece nada no painel
frontal ou o aparelho não dá
indicação de estar ligado
∙Verifique que o cabo de alimentação está ligado na tomada
eléctrica.
∙Verifique a ligação do cabo e corrija-a.
∙Abandone o modo UHF.
∙Verifique o canal e a saída vídeo.
Input Connector
Signal Level
LNB Power &
Polarization
∙Verifique a ligação do cabo e corrija-a.
22KHz Tone
Demodulation
Input Symbol Rate
2~45Ms/s Convolution Code Rate
1/2, 2/3, 3/4, 5/6, 7/8 with Constraint Length K=7
∙Aponte a unidade de controlo remoto na direcção do receptor.
∙Assegure-se que não existe nada a tapar o painel frontal.
F-type (Output loop-through), IEC 169-24, Female
-25 to -65 dBm
Vertical : +13.5/18.5Vdc±5%
Horizotal : +18.5Vd dc±
Current : Max.500mA.Overload protected
Frequency : 22KHz±2KHz
Amplitude : 0.8±0.2V
Version 1.2 USALS Compatible
QPSK
DiSEqC Control
Telecomando não funciona
Specification
Item
∙Verifique o modo “mute” (corte de som) na TV e no receptor.
∙Substitua as pilhas.
1 SLOT, ISO 7816, GSM11.11 and EMV (payment systems) compatibility
Slot.type Ⅰor type Ⅱ
DVB Common Interface Standard
(Viaccess, Irdeto, Nagra Vision, Conax, Crytoworks, AlpahCrypt..)
II. Tuner & Channel
∙Verifique o nível do volume na TV e no receptor.
Sem som
Specification
Item
SMART CARD
PCMCIA
∙Verifique a antena e ajuste-a.
Sem imagem
I.Conditional Access Module Interface
III. TUNER DVB-T
Serviço não emite ou está
codificado
∙Verifique se o Módulo de Acesso Condicional e o “smart card” são
os indicados para o serviço pretendido.
∙Verifique se o Módulo de Acesso Condicional e o “smart card” estão
correctamente inseridos.
∙Verfique a intensidade e qualidade do sinal no menu.
∙Verifique o LNB e substitua o LNB se necessário.
“Sem Sinal” no ecrã
∙Verifique o cabo do LNB.
∙Verifique a Antena e ajuste-a.
Specification
Item
Input Frequency Range
RF Input Signal Level
Bandwidth
OFDM Spectrum
Demodulation modes
Guard Interval
FEC Decoder
170 to 230MHz(VHF), 470 to 862MHz(UHF)
-77 dBM to -10 dBM
7MHz & 8MHz
2K and 8K Carrier
QPSK, 16, 64 QAM
1/4, 1/8, 1/16, 1/32
1/2, 2/3, 3/4, 5/6 & 7/B
IV. A/V & Data In/Out
Specification
Item
Verificação de Tuner defeituoso
Esqueceu-se do seu Código PIN
secreto
∙Vá a Opções e seleccione Informação de Sistema.
∙Contacte o seu fornecedor de serviço.
TV Scart Output
RGB, CVBS, L, R Output with Volume Control
VCR Scart In/Out
RGB, CVBS, L, R In
CVBS, RGB, L, R Out
RCA Output
CVBS, RGB, L, R Output(Yellow, White, Red Jack) with Volume Control
Data Interface
244
- RS-232, Bit Rate 115,200baud
Connector : 9-Pin D-Sub Male type
- Ethernet : 10/100Mbps, DHCP Supporting
- USB : USB 2.0 Type A Connector, 2Port(Front & Rear), 1Port(Multimedia file)
245
ESPECIFICAÇÕES
V. RF-Modulator
Specification
Item
RF-Connector
75 ohm IEC 169-2, Male/Female
Frequency
470MHz to 860MHz
Output Channel
CH 21-69 for the Demodulator
TV Standard
PAL G/I/K Selectable by Menu Setting
Audio OUtput
Mono with Volume Control
Preset Channel
Ch 38(or TBD), Software changeable by Menu Screen
VI. MPEG Transport Stream & A/V Decoding
Specification
Item
Transport Stream
MPEG-2 ISO/IEC 13818 / Transport stream Specificartion
Profile Level
MPEG-2 MP@ML
Input Rate
Max. 90 Mbit/
Video Resolution
720×576(PAL)/720×480(NTSC)
Audio Decoding
MPEG/Musicam LayerⅠ&Ⅱ
Audio Mode
Single channel/Dual channel Joint Stereo/Stereo
Teletext
VBI & OSD(Optional)
Sampling Rate
32,44.1 and 48KHz
VII. System Resources
Specification
Item
Main Processor
ARM946 RISC Processor
Flash Memory
2 Mbyte
Program DRAM
32 Mbyte
Channel Capacity
Digital Channel : 5000
VIII. Power Supply
Specification
Item
Input Voltage
AC 90 to 250V, 50~60Hz
Power Consumption
Max. 50W
Poteciton
Separate Internal Fuse
Type
SMPS
IX. Physical Specification
Specification
Item
Size (W×H×D)
290×50×220(mm)
Net Weight
2.0Kg
246
DIVX
DESCRIÇÃO DO PRODUTO
248
FUNCIONALIDADES DO PRODUTO
248
ALERTAS DE OPERAÇÃO E SEGURANÇA
249
ESPECIFICAÇÕES DO PRODUTO
250
ORGANIZAÇÃO DE MENUS
251
ECRÃ MENU PRINCIPAL
253
REPRODUÇÃO MUSICAL
254
REPRODUÇÃO DE IMAGENS
256
VISUALIZAÇÃO DE FOTOS
258
ACTUALIZAÇÃO DE FIRMWARE
260
RESOLUÇÃO DE PROBLEMAS
262
BRAND LIST
263
247
DESCRIÇÃO DO PRODUTO
O receptor MVISION é um novo conceito de aparelho de reprodução
multimedia que liga ficheiros (filmes, música, imagens...) a dispositivos
externos tais como TV's com interface USB 2.0.
Os utilizadores poderão desfrutar de conteúdos digitais de vários ficheiros
multimedia, usando um dispositivo externo de memória USB 2.0 (HDD externo,
memória USB...) em ligação com o PC.
FUNCIONALIDADES DO PRODUTO
O aparelho MVISION é um dispositivo de entretenimento com o qual poderá ler
todos os tipos de ficheiros, como filmes, música e imagens, no televisor.
Utilização para ficheiros multimedia MPEG
(DiVX, Xvid, DAT, VOB, MPG, MPEG) com ligação à TV.
Reprodução de álbuns de fotos digitais em formato JPEG.
ALERTAS DE OPERAÇÃO E SEGURANÇA
Antes de começar a operar este aparelho, por favor leia atentamente o manual do utilizador e utilize
sempre o aparelho com segurança.
1. Os conteúdos como software, fontes sonoras e imagem são protegidos de acordo com as
correspondentes leis de copyright. Os utilizadores que violarem esses princípios são responsáveis
por infringirem esses direitos.
2. Este aparelho não suporta todos os tipos de ficheiros media. Por favor verifique o tipo de codec
utilizando o programa de teste. Algumas partes dos ficheiros podem não funcionar dadas as
características dos ficheiros e o ambiente de utilização. Poderá confirmar se é ou não um ficheiro
compatível usando as utilidades do freeware. Os utilizadores poderão usar o programa de conversão
media para converter o ficheiro num tipo que possa ser lido pelo aparelho.
3. Não danifique nem deixe cair o aparelho. Isso poderá ocasionar problemas de funcionamento.
4. Não introduza no aparelho objectos como moedas ou alfinetes.
5. Não abra o aparelho com ele ligado à tomada eléctrica. Isso poderá ocasionar problemas de
funcionamento e choque eléctrico.
6. Não movimente o aparelho quando ele estiver activado. Isso poderá danificar a memória externa.
Movimente apenas o aparelho quando ele não estiver ligado à tomada eléctrica.
Reprodução de música digital em formato MP3, AC3, Ogg vorbis e WMA.
7. permita que água ou outro líquido entre no aparelho. Se isso acontecer, desligue de imediato o
aparelho. De outra forma poderão ocorrer choques eléctricos ou fogo.
Suporta interface USB 2.0 para arquivo de memória externo.
8. Não use produtos químicos para limpar o aparelho. Isso poderá danificá-lo.
Actualização do Firmware de modo simples via USB2.0 e Home Page.
9. Não exponha o aparelho a fontes de calor. Isso poderá originar problemas de funcionamento.
Leitura de dados multimedia a alta velocidade ao suportar dispositivo externo
de memória USB2.0.
10. Não ponha o aparelho próximo de campos magnéticos, como colunas de som.Isso poderá originar
que os dados gravados sejam apagados.
11. A visualização prolongada ou escuta com volume de som muito elevado poderão provocar danos na
visão e audição.
12. Se vir fumo ou se cheirar algo, desligue o aparelho, retire a ligação à tomada eléctrica e contacte o
serviço de apoio ao cliente.
13. Não desligue o aparelho enquanto estiver a utilizá-lo. Depois de o utilizar, desligue a alimentação.
248
249
ESPECIFICAÇÕES DO PRODUTO
Nome do Produto
Formatos de
ficheiros
suportados
Leitor multimedia MVISION
Filmes
MPEG-1/2, MPG,
MPEG, DAT, VOB, AVI
(DivX 3.x/4.x/5.x, XviD (excepto GMC ou Qpel)
Música
MP3, WMA, OGG Vorbis, AC3
Foto
JPEG
Main chip set
EM8511 (sigma design), Arm9 266MHz, 32MB SRAM
Saída Áudio
2CH Analógicos, saída áudio Digital (AC3, DTS pass though)
Interface USB
USB2.0 Host, USB1.1 compatível sistema de ficheiros
HDD
FAT32, NTFS
Tipo TV
NTSC
Temperatura
de operação
0 ~ 60°
ORGANIZAÇÃO DE MENUS
Organização dos menus no ecrã do leitor
multimedia MVISION é a seguinte.
Os items a branco à esquerda são items de acertos.
Os items a amarelo no meio mostram valores
configurados.
Os items a branco à direita mostram opções
alternativas que podem ser activadas para o menu
seleccionado.
Opções alternativas para cada item são como se
segue.
Saída áudio :
Analógica/DPCM : Saídas Analógicas 2ch/PCM.
(sinal áudio composite)
Digital codificado: saída áudio digital.
Saída vídeo :
CVBS e S-Video : saídas sinal composite em PAL.
saída S-video também é suportada.
CVBS e RGB : saídas composite e sinal RGB em PAL.
Saída S-video não é suportada.
Componentes 480p : saídas componentes em 480 progressivo.
Composite e saída S-video não é suportada.
Componentes 720p : saídas componentes em 720 progressivo.
Composite e saída S-video não é suportada.
Componentes 1080i : saídas componentes em 1080 entrelaçado. Neste modo,
a imagem parada poderá estar a tremer dadas as
características do método entrelaçado. Composite e saída
S-video não é suportada
Tipo TV :
4:3 Letter Box : a relação horizontal dos vídeos tem elevada prioridade no ajuste à dimensão do
ecrã. Este modo poderá ter barras negras em cima e em baixo do ecrã e mostra o
vídeo em formato panorâmico.
4:3 pan e scan : a relação vertical dos vídeos tem prioridade no ajuste à dimensão do ecrã. Poderá
ver-se o ecrã total, mas os lados esquerdo e direito da imagem poderão aparecer
cortados.
6:9 Full screen : a relação de ecrã aparece no modo 16:9.
250
251
ORGANIZAÇÃO DE MENUS
Tempo do Slide Show :
1,3,5,7,10,20 segundos, Off : Configure o intervalo de slide show para ficheiros JPEG.
Pressione a tecla [PLAY] do telecomando para mostrar as
imagens em modo slide show. Inicie o slide show. A imagem
será consecutivamente mostrada no intervalo de tempo
indicado.
The picture will be consecutively showed in the seconds set for the time interval.
ECRÃ MENU PRINCIPAL
O aparelho MVISION mostra no ecrã todos os
ficheiros media reproduzíveis.
Se quiser reproduzir música, filmes e ficheiros de
imagem, pressione [play] ou [OK] no telecomando.
1. Pasta superior : Regressa à pasta superior ao
seleccionar este item ou
pressionando a tecla [EXIT] no
telecomando.
Tamanho da fonte Legendas :
Fonte grande : legendas são mostradas numa fonte de grande tamanho aquando da
leitura de um ficheiro filme.
Fonte pequena : legendas são mostradas numa fonte de pequena dimensão aquando da
leitura de um ficheiro filme.
Off : as legendas não serão mostradas no ecrã.
2. Lista de pastas : Lista de todas as pastas
actuais. Pressione [OK].
3. Ficheiro áudio : Todos os ficheiros de música
reproduzíveis aparecem neste
ícone. As extensões dos
ficheiros musicais são mp3,
wma, AC3 e ogg.
Cor das Legendas :
Cor da Fonte / Cor dos cantos: poderá escolher branco / transparente, branco / preto,
amarelo / transparente, amarelo / preto
Língua :
Inglês : acertos e os vários menus aparecem em Inglês
4. Ficheiro Firmware : Mostra ficheiros de Firmware no aparelho MVISION. O Firmware pode
ser actualizado facilmente seleccionando o firmware desejado a partir
do menu principal. As extensões de ficheiros Firmware são upd.
5. Ficheiro Imagem : Todos os ficheiros de imagem e fotos reproduzíveis aparecem neste
ícone. As extensões de ficheiros de imagem e fotos são jpg.
Francês : acertos e os vários menus aparecem em Francês
Espanhol : acertos e os vários menus aparecem em Espanhol
Português : acertos e os vários menus aparecem em Português
Inicializar :
6. Ficheiro Vídeo : Todos os ficheiros de filmes reproduzíveis aparecem neste ícone. As
extensões de ficheiros filmes são AVI (Divx 3.x, 4.x, 5.x, XviD), MPG, MPEG,
DAT e VOB.
7. Path actual : Mostra a pasta path actualmente seleccionada.
Todas as configurações e acertos voltarão aos valores iniciais.
8. Informação de ficheiro : Mostra o número de ficheiros seleccionados e o tamanho do
ficheiro. A notação de ficheiros seleccionados aparece como
[ficheiro actualmente seleccionado / número total de ficheiros
numa pasta].
252
253
REPRODUÇÃO MUSICAL
REPRODUÇÃO MUSICAL
TECLAS
Pode reproduzir ficheiros musicais MP3, WMA, OGG vorbis e AC3.
Descrição
A função pesquisa não funciona com ficheiros OGG.
5
Seta : Move para baixo entre os items do menu.
Se quiser ler o ficheiro musical, pressione “[OK] ou [PLAY]” depois de seleccionar o ficheiro
áudio desejado, usando a tecla “ , ” para seleccionar o ficheiro. O ficheiro musical
escolhido será então reproduzido até que a tecla “STOP” seja pressionada.
4
Muda o valor indicado para um nível mais alto.
1
Muda o valor indicado para um nível mais baixo.
TECLAS
16
AZUL
17
AMARELO
18
19
Funções
VERDE
VERMELHO
2
254
Funções
Descrição
Mostra todos os ficheiros vídeo reproduzíveis [tipo ficheiro vídeo]
Interrompe quando a leitura de
música decorre.
Mostra todos os ficheiros música reproduzíveis [tipo ficheiro música]
Interrompe quando a leitura de
música decorre.
Mostra todos os ficheiros imagem reproduzíveis [tipo ficheiro imagem]
Mostra todos os ficheiros imagem
reproduzíveis [tipo ficheiro imagem]
3
OK
Selecciona um item do menu ou reproduz o ficheiro
escolhido na pasta actual.
25
INFO
Mostra informação do ficheiro actualmente em reprodução.
Por outro lado, mostra como usar o telecomando.
6
EXIT
Interrompe aquando da leitura musical. Se estiver numa
pasta, volta à pasta acima.
26
VOL +
Aumenta o volume. O volume aumenta 3 passos quando se
pressiona continuamente a tecla.
27
VOL -
Diminui o volume. O volume diminui 3 passos quando se
pressiona continuamente a tecla.
8
CH para cima
Reproduz ficheiro seguinte.
O ficheiro e o folder firmware são omitidos.
9
CH para baixo
1 Reproduz ficheiro anterior.
O ficheiro e o folder firmware são omitidos.
29
Interrompe o ficheiro musical actualmente lido.
28
Reproduz o ficheiro musical seleccionado. Continua a executar todos os ficheiros
musicais na pasta actual. (excepto ficheiros firmware)
11
Faz pausa no ficheiro musical actualmente lido.
13
Fast Backward : Movimento do ponto de
leitura 5 segundos para trás.
Não suporta ficheiros musicais VBR.
12
Fast Forward : Movimento do ponto de
leitura 5 segundos para a frente.
Não suporta ficheiros musicais VBR.
32
SETUP
Volta ao ecrã do menu acertos.
Interrompe a música em reprodução.
31
TVOUT
Escolhe entre os modos de saída TV.
NTSC
15
DISPLAY
Escolhe entre os modos de afixação ecrã.
letter-box, pan e scan, full-screen.
14 PICTURE
Ajuste do contraste ecrã, luminosidade,
e saturação.
1-passo.
20
Escolhe entre modos STB (receptor) e Divx.
Faz pausa em leitura de filmes, música, imagens
e volta atrás ao modo menu STB. Se regressar a
divx, reproduz a partir do ponto em que
se interrompeuao pressionar a tecla [ ]
VERMELHO
Interrompe quando a leitura de
Mostra todos os ficheiros firmware reproduzíveis [tipo ficheiro firmware] música decorre.
Tecla para cima : Move para cima entre os items do menu.
23 CLASSIFICAR
Dispõe ficheiros por ordem de nome ou dimensão.
Divx > modo STB.
Interrompe quando em leitura.
255
REPRODUÇÃO DE IMAGENS
REPRODUÇÃO DE IMAGENS
You can play AVI, MPG, MPEG, DAT, VOB movie files.
KEY Label
The subtitle must be saved in same folder with movie file.
Functions
Description
If you want to play the video file, pressing “[OK] or [PLAY]” button after select a
movie.
26
VOL +
It turns up volume. Volume goes 3 steps up when you press the button
or long time.
file you want, using “ , “ button to select the file. And then, the chosen movie
file in a certain folder is being played until the “STOP” button pressed.
27
VOL -
It turns down volume in a step The volume goes 3 steps down when you
press it for long time.
8
CH up
Play previous file in current folder.
Firmware file and folder are skipped.
9
CH dn
Play next file in current folder.
Firmware file and folder are skipped.
7
Fast Backward : Movement of the playing
location 30 sec. backward.
It does not support VBR file.
10
Fast Forward : Movement of the playing
location 30 sec. forward.
It does not support VBR file.
29
It deletes OSD. If OSD does not shown up, stops playing
the present movie file and goes back into file list menu.
28
Play all the movie files in current folder.
11
Pause the movie file.
13
Rewind : REVx4/REVx8/REVx16/REVx32/
It does not support VBR files.
12
Fast Forward : FFx4/FFx8/FFx16/FFx32
It does not support VBR files.
KEY Label
3
25
6
15
DISPLAY
Zoom in and out of the screen.
letter-box, pan & scan,
full-screen mode.
14
PICTURE
Adjustment of screen contrast, brightness,
and saturation.
1-step.
Switches between STB and Divx modes.
It pauses while playing movie,music,picture and
goes back to STB menu mode. If it get back to divx,
it plays after the point it stops when press [ ]button.
Divx -> STB mode.
20
RED
Description
OK
It plays and sync with present time. When move and subtitle is not in sync,
use this button to sync between movie and subtitle.
22
SUB -T
subtitle size (big, small)
subtitle off.
INFO
Press once : Shows time, progress bar, file name.
Press twice : Shows only time information.
Press again : Turns the information status off.
Changes subtitle settings.
(subtitle size change, subtitle off )
21
SEEK
It play the movie file at user desired time.
This feature is used to move the played video
predefined time forward during playing the file.
It does not support VBR files.
EXIT
256
Functions
Continue on execution of all music
file in current folder.
(Except firmware file)
It deletes OSD. If OSD does not shown up, stops playing the present
movie file and goes back into file list menu.
257
VISUALIZAÇÃO DE FOTOS
VISUALIZAÇÃO DE FOTOS
Pode ler ficheiros JPEG.
Se quiser reproduzir o ficheiro de imagem, pressione “[OK] ou [PLAY]” depois de seleccionar o
ficheiro foto desejado, usando a tecla “ , “ para seleccionar o ficheiro. O ficheiro de
imagem escolhido é então mostrado como slide de imagem até que a tecla “STOP” seja
pressionada. Se pressionar a tecla “CH para cima/para baixo”, interrompe também o slide
show.
TECLAS
Funções
Descrição
4
O ecrã pode rodar num ângulo de 90 graus,
no sentido dos ponteiros do relógio.
Interrompe o slide
show.
1
O ecrã pode rodar num ângulo de 90 graus,
no sentido contrário ao dos ponteiros do relógio.
Interrompe o slide
show.
6
EXIT
26
VOL +
Zoom in no ficheiro imagem original.
A imagem original
expande-se de 1 até
um máximo de 5 vezes.
27
VOL -
Zoom out no ficheiro imagem original.
A imagem original é
reduzida de 1 até um
máximo de 5 vezes.
CH para cima
Reproduz o ficheiro imagem anterior.
O ficheiro e pasta
Firmware são omitidos.
9 CH para baixo
Reproduz o ficheiro imagem seguinte.
O ficheiro e pasta
Firmware são omitidos.
29
Interrompe o ficheiro de imagem em leitura e regressa ao menu lista de ficheiros.
8
15
DISPLAY
Zoom in e out do ecrã. 3 OK Ajusta a imagem ao
tamanho do ecrã em modo zoom.
modos Letter-box, Pan e
Scan, Full-screen
14
IMAGEM
Ajuste do contraste de ecrã, luminosidade
e saturação.
1-passo
Escolhe entre modos STB e Divx.
Faz pausa na reprodução de filmes, música, imagem
e volta atrás ao modo menu STB. Se regressar
a divx, lê a partir do ponto no qual a leitura foi
interrompida ao ter sido pressionada a tecla [ ].
Modo Divx -> STB
20
258
Interrompe o ficheiro actualmente em exibição e regressa ao menu lista de ficheiros.
VERMELHO
259
ACTUALIZAÇÃO DE FIRMWARE
(Precaução)
Não opere ou manipule o receptor ou o telecomando quando a actualização
estiver a decorrer. Os produtos MVISION serão permanentemente actualizados
para actualizações de codec e correcção de erros de modo a satisfazer as
necessidades dos utilizadores. Poderá fazer o download do mais recente
ficheiro de firmware a partir da home page MVISION.
1. Faça o download do firmware a partir da home
page e descomprima o ficheiro, copiando o
ficheiro de firmware para o local desejado do
dispositivo de memória externo. Ligue o
dispositivo externo à porta Divx USB 2.0 do
aparelho MVISION.
ACTUALIZAÇÃO DE FIRMWARE
5. Actualização de firmware ecrã1 [apagar flash].
6. Actualização de firmware ecrã2 [escrever flash].
2. Seleccione o ficheiro de firmware usando o
telecomando e pressione a tecla [OK]. O
ficheiro de firmware aparece como ****.upd na
lista de ficheiros.
3. Ecrã seguinte aparece. Escolha [YES] na
mensagem de aviso para reproduzir o ficheiro
de firmware.
7. Quando a actualização de firmware tiver sido
feita com sucesso, o ecrã seguinte aparece.
E o sistema reinicia-se automaticamente..
[Precaução]
Não desligue o receptor MVISION enquanto estiver a
ser feita a actualização de firmware. De outra forma,
a memória flash poderá ser seriamente danificada.
4. Ecrã de leitura e descodificação de firmware.
260
261
RESOLUÇÃO DE PROBLEMAS
Se necessitar de informação mais específica na resolução de problemas, por favor visite a
home page MVISION e consulte as secções FAQ ou Q&A no apoio ao cliente.
1. Se não estiver a ver nada no seu ecrã televisivo, ou se o ecrã estiver a tremer.
Se a configuração de saída vídeo estiver feita incorrectamente, isso poderá dar origem
a um ecrã sem nada, a preto e branco ou a tremer. Se isso acontecer, pressione
suavemente a tecla [TV OUT] e altere o modo de saída vídeo.
2. Se o Divx MVISION “congelar” depois de aparecer o ecrã inicial, e não passar para o
menu principal.
Verifique se o dispositivo USB está correctamente ligado.
Verifique se a divisão do dispositivo USB está instalada e formatada correctamente.
3. Se as legendas não aparecerem.
Se o ficheiro filme ou imagem e o ficheiro legendas não corresponderem, as legendas
não aparecerão. Por exemplo, se o nome do ficheiro filme for “bbb.avi”, o nome do
ficheiro legendas terá de ser “bbb.smi”.
4. Quando o receptor está ligado, não aparece nada no ecrã ou o ecrã aparece
monocromático ou o ecrã aparece a tremer.
Quando o modo de saída vídeo não está correctamente indicado, o ecrã pode aparecer
monocromático ou a tremer. Pressione a tecla [TV Out] do telecomando para mudar o
modo de saída vídeo até que o modo de saída vídeo esteja correctamente seleccionado.
5. Quando o ficheiro vídeo não está a ser lido, ou nada aparece no ecrã (ecrã preto).
Ficheiros vídeo com CODEC não compatíveis não podem ser reproduzidos. Os
utilizadores podem verificar se o CODEC é compatível a partir do programa de teste ou
usar o programa de conversão media para converter o ficheiro. De outro modo,
pressione duas vezes a tecla [TV OUT] do telecomando.
6. Quando o ecrã aparece sem som.
Verifique o terminal de entrada da TV.
Os terminais de entrada vídeo de equipamentos externos, como vídeo composto
ou por componentes, têm entradas áudio separadas.
Verifique se as entradas vídeo e áudio estão correctamente ligadas.
262
263
264
265
266
267
268
269
270
271
272
273
274
275
276
277
Memo
278
Memo