1
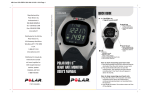
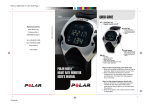
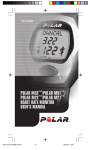
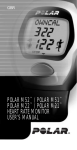
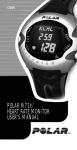
USER MANUAL
MANUEL D'UTILISATION
MANUAL DEL USUARIO
MANUAL DO USUÁRIO
Manufactured by
Polar Electro Oy
Professorintie 5
FIN-90440 KEMPELE
Tel +358 8 5202 100
Fax +358 8 5202 300
www.polar.fi
17923224.00 ENG/FRA/ESP/PRT A
F92ti™ Heart Rate Monitor
Cardiofréquencemètre F92ti™
Monitor de Ritmo
Cardíaco F92ti™
Monitor de Freqüência
Cardíaca F92ti™
Congratulations on purchasing a Polar Heart Rate Monitor.
We are proud to assist you in achieving your personal fitness goals.
This guide will provide you with the basic information on how to
exercise with your Polar Heart Rate Monitor and how to get the
maximum benefit from its functions.
Visual Cues to Read this Guide
Indicates important issues. Please, pay attention!
Indicates a useful tip. It is good to know these things.
Indicates a tip to do things faster.
To ensure the continuous improvement of Polar products, please
complete and mail the enclosed Customer Registration Card within
two weeks of the date of purchase.
Important to Remember!
Thank you for choosing Polar.
•
•
•
•
•
Adjust the strap length snug enough and wet the Polar
transmitter electrodes to ensure flawless heart rate
measurement.
Do not operate the buttons of the wrist unit under water.
Wash and dry your transmitter regularly after use; never store
it wet.
Keep the Polar Heart Rate Monitor out of extreme cold and
heat.
Do not expose the Polar Heart Rate Monitor to direct sunlight
for extended periods.
ENGLISH
43
CONTENTS
1. HOW THE POLAR HEART RATE MONITOR WORKS ...................
Polar WearLink™ Transmitter ......................................
How to shorten the wrist band ......................................
1.1 BUTTONS AND THEIR FUNCTIONS ..................................
1.2 MODES AND THEIR FUNCTIONS .....................................
46
46
47
48
49
2. SETTINGS ..............................................................................
2.1 USER INFORMATION SETTINGS ......................................
Setting User 1 or 2 .......................................................
Setting Weight ..............................................................
Setting Height ..............................................................
Setting Age ...................................................................
Setting Sex ...................................................................
Setting Activity Level ....................................................
2.2 MEASUREMENT OPTIONS SETTING ................................
Turning OwnZone ON/OFF .............................................
Setting Heart Rate Limits Manually ..............................
Turning the OwnCal Calorie Counter ON/OFF ................
Turning Polar Fitness Test ON/OFF ................................
2.3 SETTING THE WATCH .....................................................
Setting the Alarm .........................................................
Setting the Time of Day ................................................
Setting the Date ...........................................................
50
50
50
51
51
51
51
51
52
52
52
53
54
55
55
56
56
44
ENGLISH
3. START THE HEART RATE MEASUREMENT ............................... 58
4. OWNZONE .............................................................................
4.1 HOW TO DETERMINE YOUR OWNZONE ...........................
4.2 OWNZONE METHODS .....................................................
4.3 HOW TO USE PREVIOUSLY DETERMINED OWNZONE .......
59
59
60
61
5. FUNCTIONS DURING HEART RATE MEASUREMENT ................
See Your Heart Rate ......................................................
Illuminate the Display ..................................................
Turn the Sound Signal and
the Button Sound ON/OFF .............................................
Swap the User ..............................................................
Start/Stop the Stopwatch .............................................
Check Exercise Information ..........................................
Check Your Heart Rate Limits .......................................
See Your Progress Bullets During Exercise ....................
Swap the Heart Rate Limits ..........................................
62
62
62
62
62
62
63
63
63
63
6. STOP THE HEART RATE MEASUREMENT ................................. 64
7. RECALLING TRAINING INFORMATION ....................................
Date .............................................................................
Exercise Time (EXE. TIME) .............................................
Exercise Time in the Target Zone (IN ZONE) ..................
65
65
65
65
Target Heart Rate Limits (LIMITS) .................................
Average Heart Rate (AVERAGE Hr) ................................
Calories Expended During the Exercise (KCAL FAT) .........
Total Calorie Count (Tot. KCAL) .....................................
Total Exercise Time (Tot. TIME) ......................................
Latest OwnIndex ...........................................................
65
65
65
65
66
66
10. PRECAUTIONS .......................................................................
10.1 USING A POLAR HEART RATE MONITOR
IN A WATER ENVIRONMENT ...........................................
10.2 POLAR HEART RATE MONITOR AND INTERFERENCE .......
10.3 MINIMIZING POSSIBLE RISKS IN EXERCISING WITH
HEART RATE MONITOR ..................................................
73
8. OWNINDEX ............................................................................
8.1 FITNESS TEST SETTINGS ...............................................
Set the Activity Level ....................................................
Set the Fitness Test Mode On ........................................
8.2 CARRYING OUT THE TEST ..............................................
Prepare the Wrist Unit ..................................................
Relax Yourself for 1–3 Minutes .....................................
Start the Test ................................................................
8.3 FITNESS TEST RESULT ...................................................
67
67
67
68
68
68
68
69
69
11. FREQUENTLY ASKED QUESTIONS ........................................... 75
9. CARE AND MAINTENANCE .....................................................
9.1 TAKING CARE OF YOUR
POLAR HEART RATE MONITOR .......................................
9.2 BATTERIES ....................................................................
9.3 SERVICE .......................................................................
71
INDEX .......................................................................................... 81
73
73
74
12. POLAR GLOSSARY ................................................................. 77
13. TECHNICAL SPECIFICATIONS ................................................ 78
14. LIMITED POLAR INTERNATIONAL GUARANTEE ....................... 79
15. DISCLAIMER ......................................................................... 80
71
71
72
ENGLISH
45
1. HOW THE POLAR HEART RATE MONITOR WORKS
Polar WearLink™ Transmitter:
Electrode areas
R
L
Connector
Polar WearLink Strap
1. Moisten the electrode areas of the strap under running water
and make sure that it is well moistened.
2. Attach the connector to the strap. Position the connector’s
letter R to the word RIGHT on the strap and snap the fastener.
3. Adjust the strap length to fit snugly and comfortably. Secure
the strap around your chest, just below the chest muscles, and
snap the second fastener.
46
ENGLISH
4. Check that the wet electrode areas are firmly against your skin
and that the Polar logo of the connector is in a central, upright
position. It is important that the electrode areas are wet during
exercise.
It is recommended that you wear the transmitter against your bare skin to
ensure flawless operation. However, if you wish to wear the transmitter over
a shirt, moisten the shirt well under the electrodes.
See care instructions of the WearLink Transmitter in chapter 9.
Care and maintenance, page 71.
How to Shorten the Wrist Band
Wear the wrist unit as a watch. If the wrist band needs to be
shortened, visit a local watch or jewellery shop or you can do the
shortening yourself by following these instructions.
1. First detach the link cover which is
next to the buckle by pressing the
spring bar with a sharp-pointed tool.
Buckle
Link cover
4. Also detach the second link cover and
take off the spring bar.
5. Take off the black extension link.
Do not detach the buckle connecting
link.
Extension link
2. Take off the link cover.
6. Attach the buckle connecting link into
the extension link and insert the
spring bar.
3. After the link cover is detached, push
the spring bar with a pin and pull the
spring bar out from the other side.
Extension link
Buckle connecting link
Spring bar
ENGLISH
47
7. Put the link cover on top of the
extension link so that the spring bar is
correctly placed on one side of the link
cover. Then press the spring bar from
the other side and slide the link cover
to its place. You will hear a klicking
sound, when the spring bar is placed
correctly.
1.1 BUTTONS AND THEIR FUNCTIONS
LIGHT
UP
RESET
START/STOP/OK
DOWN
Link cover
8. There are three small holes on both
sides of the buckle plate.
By shifting the spring bar you can do
the final adjustment of the band
length.
Buckle
Adjustment holes
If you need to shorten the wrist band more repeat the steps 1–7 but
remove the link from the opposite side this time so that the buckle
will stay in the middle. Please note that you can only detach the
extension links with small arrows on their back side.
Start/Stop/Ok
• Start heart rate measurement • Activate the displayed mode
• Lock your selection
• Start the stopwatch
• Stop the stopwatch
Up
• Move forward to the next
mode
• Select the desired value
(up)
Down
• Move backward to the
previous mode
• Select the desired value
(down)
• Backlight on
• Signal sound on or off
Reset
• Resets the heart rate monitor, watch settings will return to the
default settings.
Briefly pressing a button (approximately 1 second) will do different things than
pressing and holding button for a longer period of time (approx. 2 to 5 seconds).
48
ENGLISH
1.2 MODES AND THEIR FUNCTIONS
Your Polar Heart Rate Monitor has four main modes:
1. Time of Day
You can use the Polar Heart Rate Monitor as
an ordinary watch with date, weekday
indicator and alarm function.
Press and hold START/STOP/OK to return to the
Time of day display, wherever you are in the
Options setting or File recalling cycle.
Your Polar Heart Rate Monitor starts reminding you at full hours if more than
three days has passed since your last recorded exercise. Keep exercising
regularly!
2. Exercise
In the Exercise mode you measure the heart
rate.
In this mode you can
• see your heart rate reading
• record the exercise data
• use the stopwatch
• determine your OwnZone®
• see your exercising limits
• see the time of day
• see the time you have exercised within your target zone so far
• see the OwnCal® calorie count of your exercise session
• swap heart rate limits
• swap user (before stopwatch is on)
3. File
Polar Heart Rate Monitor saves information
on your latest exercise session. In the File
mode you can see the following information:
• date of the exercise
• total exercising time
• exercising time spent in your target zone
• heart rate limits used during exercise
• average heart rate
• OwnCal calorie count and fat percentage of the energy
expenditure during the exercise session
• total calorie expenditure starting from the moment you have
reset the counter
• total exercising time starting from the moment you have reset
the counter
• your latest OwnIndex™ based on Polar Fitness Test™
4. Options
In the Options mode you can define the
following information:
• User specific information; user 1/2,
weight, height, age, sex and activity level
for Polar Fitness Test. You have two users
and can set the preferences for both user
1 and user 2.
• OwnZone basic, low or high. If you want to determine the values
for the target zone manually, set OwnZone OFF.
• OwnCal calorie counter ON/OFF
• Polar Fitness Test ON/OFF
• Watch settings; alarm, 12h/24h mode, time of day, date
ENGLISH
49
2. SETTINGS
In the Options mode you can set
• your personal user information which is a prerequisite for
using OwnZone and OwnCal functions
• measurement options which are used during Exercise mode
• watch functions
• Polar Fitness Test function ON or OFF
At any time during the settings you can return to the Time of day display
by pressing and holding START/STOP/OK.
The digits run faster if you press and hold the
Release the button at the desired value.
Up or
Setting User 1 or 2
If you are in the Time of day display start from User information.
You can set two users’ preferences.
This function is practical e.g. for another
family member. Make the settings ready for
both users: when you start exercising, just
select your personal user id 1 or 2.
USER appears, 1 or 2 is flashing.
Down.
2.1 USER INFORMATION SETTINGS
Begin with the display showing the time of day.
1. Press Up or Down until OPTIONS is displayed.
2. Press START/STOP/OK to enter the Options mode.
USER SET is displayed.
3. Press START/STOP/OK to enter the user information loop.
1. Press Up or Down to select USER 1 or USER 2.
2. Press START/STOP/OK to lock your selection.
You have now selected the user id. All settings are made to
the selected user.
In File, Measure, Options and Fitness test main modes you can change the
user id by pressing and holding Up.
If you want to disable the user id 2, set the weight of the user 2 to
zero.
Continue by setting your weight or return to the Time of day display
by pressing and holding START/STOP/OK.
50
ENGLISH
Setting Weight
If you are in the Time of day display start from User information.
Press START/STOP/OK until LBS or KG appears and the digits of
pounds/kilograms are flashing.
1. Press Up or Down to adjust your weight.
2. Press START/STOP/OK to lock your selection.
You have now set your weight.
You can change the weight unit between lbs and kg in watch settings.
12 h time mode -> lbs
24 h time mode -> kg
Continue the user settings or return to the Time of day display by
pressing and holding START/STOP/OK.
Continue by setting your age or return to the Time of day display by
pressing and holding START/STOP/OK.
Setting Age
If you are in the Time of day display start from User information.
Press START/STOP/OK until AGE appears and the digits for years are
flashing.
1. Press Up or Down to adjust your age.
2. Press START/STOP/OK to lock your selection.
You have now set your age.
Continue by setting your gender or return to the Time of day display
by pressing and holding START/STOP/OK.
Setting Sex
Setting Height
If you are in the Time of day display start from User information.
Press START/STOP/OK until FT/INCH or CM appears and the digits of
feet/centimeter are flashing.
1. Press Up or Down to adjust your height.
2. Press START/STOP/OK to lock your selection.
You have now set your height.
If you are in the Time of day display start from User information.
Press START/STOP/OK until SEX appears and FEMALE/MALE is
flashing.
1. Press Up or Down to select the right gender.
2. Press START/STOP/OK to lock your selection.
You have now set your gender.
Setting Activity Level
You can change the height unit between cm and ft/ inch in watch
settings.
12 h time mode -> ft
24 h time mode -> cm
You need to set a suitable activity level for Polar Fitness Test.
If you are in the Time of day display start from User information.
Press START/STOP/OK until ACTIVITY appears and LOW/MIDDLE/
HIGH/TOP is flashing.
ENGLISH
51
1. Press Up or Down to select the right activity level.
2. Press START/STOP/OK to lock your selection.
You have now set all necessary user information.
USER SET is displayed.
Choose from the following two alternatives to continue:
1. To set OwnZone function ON or OFF, press Up.
2. To return to the Time of day display, press Up or Down
until you come to the Time of day display or simply press and
hold START/STOP/OK.
2.2 MEASUREMENT OPTIONS SETTING
Turning OwnZone ON/OFF
Select whether you want to use the OwnZone option. You can select
between three different OwnZones. Alternatively, you can set the
target zone limits manually yourself.
• OwnZone BASIC for allround exercising
• OwnZone LOW for light intensity exercising
• OwnZone HIGH for moderate intensity exercising
• OFF – The OwnZone function is off and you can set the target
zone limits manually.
If you choose to use OwnZone, Polar Heart Rate Monitor asks your
user information, if you haven’t set them earlier in the USER SET
mode.
52
ENGLISH
Begin with the display showing the time of day.
1. Press Up or Down until OPTIONS is displayed.
2. Press START/STOP/OK to enter the setting loop.
USER SET is displayed.
3. Press Up once.
OWNZONE OFF or BASIC or LOW or HIGH is displayed.
4. Press START/STOP/OK to enter the setting loop.
OWNZONE is displayed.
OFF or BASIC or LOW or HIGH is flashing.
5. Press Up or Down to select a suitable OwnZone for your
exercise or OwnZone OFF.
6. Press START/STOP/OK to lock your selection.
Choose from the following alternatives to continue:
1. If you selected OwnZone OFF continue directly from
Setting heart rate limits manually.
or
2. If you selected OwnZone ON continue from Turning the
OwnCal calorie counter ON/OFF by pressing Up once.
or
3. Return to the Time of day display by pressing and holding
START/STOP/OK.
Setting Heart Rate Limits Manually
If you choose not to use the OwnZone function, you may manually
enter a target zone. When you start the manual target zone settings
for the first time:
• Polar Heart Rate Monitor automatically calculates you heart
rate limits based on age, if you have set your user information.
• If you haven’t done the user settings, default settings 80/160
are shown on the display.
The highest possible value for the upper limit is 240 and the lowest possible
value for the lower limit is 30. The lower limit cannot be set above the upper
limit.
You can start exercising with these limits right away.
Begin with the display showing the time of day.
1. Press Up or Down until you enter the Options mode.
2. Press START/STOP/OK to enter the setting loop.
USER SET is displayed.
3. Press Up once.
OWNZONE OFF is displayed.
4. Press START/STOP/OK to enter the setting loop.
OWNZONE is displayed.
OFF is flashing.
5. Press START/STOP/OK to lock OwnZone OFF.
LIMITS is displayed.
The upper limit is flashing.
6. Press Up or Down to adjust the value.
The digits run faster if you press and hold the
Release the button at the desired value.
Up or
Down button.
7. Press START/STOP/OK to lock your selection.
The lower limit reading starts to flash.
8. Press Up or Down to adjust the correct value.
9. Press START/STOP/OK to lock your selection.
OWNZONE OFF is displayed.
Choose from the following two alternatives to continue:
1. To continue setting the OwnCal function ON or OFF,
press Up.
2. To return to the Time of day display, press Up or Down
until you come to the Time of day display or simply press
and hold START/STOP/OK.
Turning the OwnCal Calorie Counter ON/OFF
Begin with the display showing the time of day.
1. Press Up or Down until OPTIONS is displayed.
2. Press START/STOP/OK to enter the setting loop.
USER SET is displayed.
3. Press Up or Down until OWNCAL is displayed.
OWNCAL ON or OFF is displayed.
4. Press START/STOP/OK to enter the setting loop.
OWNCAL is displayed.
ON or OFF is flashing.
5. Press Up or Down to select whether you want the
calorie expenditure count to be ON or OFF.
6. Press START/STOP/OK to lock your selection.
ENGLISH
53
Choose from the following two alternatives to continue:
1. To continue settings, press Up.
2. To return to the Time of day display, press Up or Down
until you come to the Time of day display or simply press
and hold START/STOP/OK.
The OwnCal calorie calculation starts when your heart rate
reaches 100 bpm. The higher the heart rate, the faster the energy
expenditure accumulation. Energy expenditure depends on body
weight; the heavier the weight the higher the energy expenditure.
Men’s calorie expenditure is more intense than women’s at the
same heart rate.
The energy expenditure measurement with Polar Heart Rate
Monitor is most accurate in continuous activities such as
walking, cycling and jogging. Polar Heart Rate Monitor shows the
energy expenditure in kilocalories (kcal).
1 kilocalorie (kcal or Calorie) = 1000 calories (cal).
When you expend calories, your body actually uses fat and
carbohydrates as energy resources. The amount of fat from the
total calorie expenditure varies between 10%–60%. The rest
(40%–90%) is mostly carbohydrates.
The lower the heart rate, the bigger the fat percentage is of the
total energy expenditure. If you want to control weight by exercising,
it is recommended to aim at as big a fat percentage of total
energy expenditure as possible. Exercise at the lower limit of your
OwnZone.
Exercise with OwnZone Low.
54
ENGLISH
Turning Polar Fitness Test ON/OFF
Begin with the display showing the time of day.
1. Press Up or Down until OPTIONS is displayed.
2. Press START/STOP/OK to enter the setting loop.
USER SET is displayed.
3. Press Up or Down until FIT. TEST is displayed.
FIT. TEST ON or OFF is displayed.
4. Press START/STOP/OK to enter the setting loop.
FIT. TEST is displayed.
ON or OFF is flashing.
5. Press Up or Down to select whether you want the
Polar Fitness Test to be ON or OFF.
6. Press START/STOP/OK to lock your selection.
If you select Polar Fitness Test ON, the Fitness test mode appears in
the main mode loop. The Polar Fitness Test is carried out in the
Fitness test mode.
Choose from the following two alternatives to continue:
1. To continue settings, press Up
2. To return to the Time of day display, press Up or Down
until you come to the Time of day display or simply press
and hold START/STOP/OK.
2.3 SETTING THE WATCH
Quick enter to the Watch setting loop: In the Time of day display press and
button for a couple of seconds.
hold the
If you want to skip some parts and go directly to set a particular watch
function, press START/STOP/OK until the desired watch function is displayed.
To return to the Time of day display at any stage of watch settings, press and
hold START/STOP/OK.
The digits run faster if you press and hold the
Release the button at the desired value.
Up or
Down.
Setting the Alarm
1. In the Time of day display press Up or Down until OPTIONS
is displayed.
2. Press START/STOP/OK to enter the Options mode.
USER SET is displayed.
3. Press Up or Down until WATCH SET is displayed.
4. Press START/STOP/OK to start the watch settings.
ALARM is displayed.
ON or OFF is flashing.
5. Press Up or Down to set the alarm ON or OFF.
When the alarm is turned on
6. Press START/STOP/OK to lock your selection.
If you have 12h time mode, AM or PM starts to flash.
7. Press Up or Down to select AM or PM.
8. Press START/STOP/OK to lock your selection.
The hours start to flash.
9. Press Up or Down to adjust the desired hour.
10. Press START/STOP/OK to lock your selection.
The minutes start to flash.
11. Press Up or Down to adjust the desired minutes.
12. Press START/STOP/OK to lock your selection.
Choose from the following two alternatives to continue:
1. To set the time of day continue in chapter Setting the time
of day.
2. To return to the Time of day display, press and hold
START/STOP/OK.
When the alarm comes on, it will sound for one minute or you can turn it
off by pressing any of the four buttons.
appears on the display.
ENGLISH
55
Setting the Time of Day
1. In the Time of day display press Up or Down until
OPTIONS is displayed.
2. Press START/STOP/OK to enter the Options mode.
USER SET is displayed.
3. Press Up or Down until WATCH SET is displayed.
4. Press START/STOP/OK to start the watch settings.
ALARM is displayed.
ON or OFF is flashing.
5. Press START/STOP/OK until TIME and the time of day are
displayed.
6.
7.
8.
9.
10.
11.
12.
13.
56
TIME and the time of day are displayed.
12h or 24h is flashing.
Press Up or Down to select 12h or 24h mode.
Press START/STOP/OK to lock your selection.
If you chose 12h time mode, TIME AM or TIME PM is
displayed.
Press Up or Down to select AM or PM.
Press START/STOP/OK to lock your selection.
The hours start to flash.
Press Up or Down to adjust the desired hour.
Press START/STOP/OK to lock your selection.
The minutes start to flash.
Press Up or Down to adjust the desired minutes.
The seconds go to zero.
Press START/STOP/OK to lock your selection.
The seconds start running.
ENGLISH
Choose from the following two alternatives to continue:
1. To set the date continue in chapter Setting the date.
2. To return to the Time of day display, press and hold
START/STOP/OK.
Setting the Date
1. In the Time of day display press Up or Down until
OPTIONS is displayed.
2. Press START/STOP/OK to enter the Options mode.
USER SET is displayed.
3. Press Up or Down until WATCH SET is displayed.
4. Press START/STOP/OK to start the watch settings.
ALARM is displayed.
ON or OFF is flashing.
5. Press START/STOP/OK until DAY or MONTH is displayed.
DAY or MONTH is
displayed.
The first digits start
to flash.
The date is displayed differently depending on which time mode
(12h or 24h) has been chosen.
12h time mode:
MONTH – DAY –YEAR
24h time mode:
DAY – MONTH – YEAR
6. Press Up or Down to adjust the desired value for the
day/month.
7. Press START/STOP/OK to lock your selection.
MONTH or DAY is displayed.
The middle digits start to flash.
8. Press Up or Down to adjust the desired value for the
month/day.
9. Press START/STOP/OK to lock your selection.
YEAR is displayed.
The digits for the year start to flash.
10. Press Up or Down to adjust the desired value for the
year.
11. Press START/STOP/OK to lock your selection.
WATCH SET is displayed.
Choose from the following two alternatives to continue:
1. Press START/STOP/OK to continue from the alarm setting.
2. To return to the Time of day display, press Up or Down
until you come to the Time of day display or simply press
and hold START/STOP/OK.
ENGLISH
57
3. START THE HEART RATE MEASUREMENT
1. Wear the transmitter and the wrist unit as described in the
chapter How the Polar Heart Rate Monitor works.
2. To make sure that the code search will be successful:
• Keep the wrist unit within 1 meter/3 feet of your
transmitter.
• Check that you are not near to other people with heart rate
monitors, high voltage power lines, televisions, mobile
phones, cars, exercise equipment etc.
3. Begin with display showing time of day.
4. Press START/STOP/OK.
MEASURE appears in the display.
A heart shaped frame appears.
The wrist unit starts searching for heart
rate transmission for max. 15 seconds.
Heart rate measurement commences and the heart symbol
inside the frame starts flashing. Your heart rate reading (in
beats per minute) appears in the display.
If the code search was not successful, the frame around the heart
symbol will disappear after 15 seconds. Go back to step 2 to repeat
the code search.
If you still do not succeed in code searching, but your heart rate is
displayed and the heart symbol without a frame is flashing, you can
58
ENGLISH
start exercising but your wrist unit may become disturbed by other
heart rate monitors.
Check that your personal user id is active (USER 1 or USER 2). You
can change the user before starting the stopwatch by pressing and
holding Up. To be able to swap the user you need to set preferences
for two users.
5.Start the stopwatch by pressing START/
STOP/OK.
Stopwatch starts running.
Automatic recording begins.
If you set OwnZone on:
OZ
appears in the display and
OwnZone determination begins.
If you set heart rate limits manually:
EXERCISE appears in the display.
6. You can now start warmup with your Polar Heart Rate Monitor.
Quick start: In the Time of day display, press and hold START/STOP/OK for
a couple of seconds.
To stop the heart rate measurement:
Press START/STOP/OK to stop the stopwatch.
If you want to QUIT the heart rate measurement mode,
press Up or Down to enter the Time of day display.
4. OWNZONE
Polar Heart Rate Monitor is able to determine the individual training
heart rate zone for you. This exercise zone is called your OwnZone (OZ).
For most adults, OwnZone corresponds to 65–85 % of the maximum
heart rate. OwnZone is suitable for cardiovascular training either
for health-related or fitness improvement purposes.
OwnZone works well for those whose goal is weight control via
physical activity and exercise, because the OwnZone corresponds to
intensity from "light to moderate" to "moderate". Exercise of this
intensity level can be conducted even for extended periods safely
and often yields the best results for weight loss.
The OwnZone can be found during a warmup period of an exercise
session lasting 1–5 minutes.
4.1 HOW TO DETERMINE YOUR OWNZONE
OwnZone is easily determined by walking and jogging as instructed
below. However, you are able to find your OwnZone with other
exercise modes as well, e.g. exercising with a stationary bike. The
principle is that you start exercising very slowly with light intensity
and gradually increase your heart rate.
2. Because OwnZone determination needs every heart beat to be
picked up properly, make sure that the transmitter belt is
tight enough and the electrodes well moistened.
3. Check that you have set the OwnZone function on.
4. Start the heart rate measurement as described earlier.
5. Start the stopwatch.
OZ
appears in the display.
Stopwatch starts running.
6. There are five stages in finding your OwnZone.
OwnZone appears typically on the 3rd or 4th stage (in 3–4
minutes). Keep your heart rate below 100 bpm during the
first stage. After each stage you should increase your heart
rate 10–20 bpm. The display shows which stage you are in:
Walking at very slow pace for 1 min.
Walking at brisk pace for 1 min.
Walking at very brisk pace for 1 min.
Jogging at slow pace for 1 min.
Running for 1 min.
1. Check that you have set your personal user information
correctly.
ENGLISH
59
7. At some point during the stages 1–5 you hear two beeps.
This indicates that Polar Heart Rate Monitor has determined
your exercising limits and you can continue your exercising.
The determined heart rate limits are
displayed for a few seconds.
EXERCISE appears in the display.
You can recall the limits onto the display by bringing
the wrist unit close to the transmitter.
You can turn the OwnZone timing signals
off by pressing and holding
for two
seconds before starting the OwnZone
determination.
Reset the stopwatch:
If needed you can reset the stopwatch to zero and restart OwnZone
determination:
1. Stop the OwnZone determination by pressing START/STOP/OK.
Heart rate limits for your previously determined
OwnZone appear on the display.
2. Stop the stopwatch by pressing START/STOP/OK.
QUIT? appears in the display.
3. To reset the stopwatch press and hold Down.
The stopwatch will start blinking and RESET? text appears
in the display.
To reset the stopwatch keep pressing Down.
4. To restart the stopwatch press START/STOP/OK.
60
ENGLISH
4.2 OWNZONE METHODS
Polar Heart Rate Monitor uses multiple methods for determining
your OwnZone. The primary method is based on measuring and
analysing the heart rate variability during graded exercise (OZ.V).
If your heart rate exceeds the safety limit during the determination,
Polar Heart Rate Monitor picks up your latest OwnZone definition
based on heart rate variability (OZ.L). Alternatively, if there is no
previous determination in memory, OwnZone limits, which are
based on your age predicted maximum heart rate (OZ.A), will be
used. These methods ensure that the safest possible exercise zone
is determined for you.
The method used in defining the OwnZone is indicated after the two
beeps as follows:
1. OZ.V (OwnZone Variability) and the currently determined
OwnZone limits appear on the illuminated display.
2. OZ.L (OwnZone Latest) and your previously determined
OwnZone limits appear on the illuminated display.
3. OZ.A (OwnZone Age) and your age-predicted heart rate
limits appear on the illuminated display.
You will also see which OwnZone level you have selected to use:
BASIC (OwnZone Basic for allround exercising)
HIGH (OwnZone High for exercising at moderate intensity)
LOW (OwnZone Low for exercising at light to moderate intensity)
4.3 HOW TO USE PREVIOUSLY DETERMINED OWNZONE
Every time you start the stopwatch and have the OwnZone option
on, the Polar Heart Rate Monitor starts finding your OwnZone. You
can determine your OwnZone for every exercise session separately.
At least it should always be performed when changing exercise
environment, exercise mode or if you have abnormal feelings about
your physiological state when starting the exercise.
However, you can choose to exercise with the latest OwnZone limits
in case you are not willing to start the process redefining your
OwnZone.
1. Start the heart rate measurement and stopwatch as usual.
appears on the display.
OZ
2. Press START/STOP/OK. Polar Heart Rate Monitor starts using
your latest determined OwnZone.
OZ.L and the values for your previously determined
OwnZone appear momentarily on the illuminated display.
In case there is no previously determined OwnZone in memory,
Polar Heart Rate Monitor starts using your age predicted exercising
limits.
OZ.A and your age-predicted heart rate limits appear on the
illuminated display.
ENGLISH
61
5. FUNCTIONS DURING HEART RATE MEASUREMENT
MEASURE
EXERCISE
TIME
IN ZONE
OWNCAL
See Your Heart Rate
You can see your heart rate in beats per minute. A flashing heart
symbol indicates an ongoing heart rate measurement. The inner
heart symbol flashes at the pace of your heart. The outline indicates
that the heart rate reception is coded.
If there is - - reading on the display, there has not been heart rate reception
for at least 5 minutes. Bring the wrist unit up to your chest near the
transmitter’s Polar logo. The wrist unit starts looking for the heart rate again.
Illuminate the Display
Press
Backlight is activated for a few seconds.
Turn the Sound Signal and the Button Sound ON/OFF
When appears in the display, you will hear an alarm sound with
each heart beat if you go above the upper limit or below the lower
limit of your Target Zone. You will hear a beep when pressing the
buttons.
The sound signal will be on in OwnZone determination. The sound
signal will also alarm you at the end of the Fitness test.
62
ENGLISH
Press and hold
for 2 seconds to turn the sound signal and the
button sound on and off.
Sound signal is on.
A flashing heart rate reading also informs you of being outside your target
zone.
The sound signal setting is saved i.e. the next time you start
heart rate measurement the previous setting will be used.
Swap the User
You can swap the user in the beginning of an exercise when the
stopwatch is not running yet.
To be able to swap the user you need to set preferences for two
users.
Press and hold Up
or is displayed to indicate which one of the user
settings are activated.
The following exercise will be recorded in the selected user’s file.
Start/Stop the Stopwatch
Press START/STOP/OK to start/stop the stopwatch.
Exercise information will be stored in an exercise file only when
the stopwatch is running.
You can pause the stopwatch by pressing START/STOP/OK.
Repressing it will restart the stopwatch and the above calculations.
Stopwatch (EXERCISE)
To reset the stopwatch to zero:
1. Stop the stopwatch.
2. Press and hold Down.
Check Exercise Information
When the stopwatch is running press Up or
following information during the exercise:
Check Your Heart Rate Limits
Down to see the
Time of day (TIME)
While exercising you don’t have to press any button to check the
heart rate limits you are using. Just bring the wrist unit up to your
chest near the transmitter’s Polar logo.
The current exercising zone values and backlight will be on
for a few seconds.
See Your Progress Bullets During Exercise
Time spent in target zone (IN ZONE)
A bullet appears for every 10 minutes exercise in Target Zone.
Swap the Heart Rate Limits
You can swap heart rate limits during the exercise while the
stopwatch is running and you have set OwnZone on. You can select
between OwnZone Basic, OwnZone High, OwnZone Low and
manually set limits.
Calorie expenditure (OWNCAL)
The calorie counting feature must be set on
to be able to see the OWNCAL display.
Press and hold
Up or
Down.
If you swap heart rate limits during exercise, the latest ones in use will
be saved as measurement option settings and your next exercise will
start with these limits.
ENGLISH
63
6. STOP THE HEART RATE MEASUREMENT
1. Press START/STOP/OK to stop the stopwatch.
The stopwatch stops.
QUIT?
appears in the display.
Heart rate measurement without exercising limits or calorie
calculation continues.
2. Press Up or Down to leave the Measure mode.
Heart rate measurement stops.
If you press and hold Down for 1.5 seconds, the stopwatch will start
blinking and RESET? text appears in the display. You can restart the
stopwatch by pressing START/STOP/OK. Or, if you want to reset the
stopwatch keep pressing Down. The stopwatch will be reset and the
current exercise information will be deleted.
The Heart Rate Monitor wrist unit turns itself into Time of day mode within
5 minutes in case you forget to quit the heart rate measuring mode after
having stopped the stopwatch and taken the transmitter off your chest.
64
ENGLISH
7. RECALLING TRAINING INFORMATION
Your latest training information is in the memory of the Polar Heart Rate
Monitor until the next time you start the stopwatch. Then your previous
training information will be replaced by the new one. Polar Heart Rate
Monitor saves only one training file at a time. The training information
is saved, if the stopwatch has been on more than one minute.
1. In the Time of day display, press Up or Down until you
enter the FILE mode.
FILE is displayed.
2. Press START/STOP/OK to enter the training information recalling
loop.
3. Press Up or Down to recall the training information.
Date
The date of your last exercise session.
Exercise Time (EXE. TIME)
The exercise time is the time which you have exercised with the
stopwatch running.
Exercise Time in the Target Zone (IN ZONE)
The exercise time, which you have spent within your OwnZone or
your self-defined target zone.
Target Heart Rate Limits (LIMITS)
Average Heart Rate (AVERAGE Hr)
You will see the average heart rate of your exercise session.
Calories Expended During
the Exercise (KCAL/ FAT)
You will see how many kilocalories you have
expended during the exercise and the fat
percentage of the total energy expenditure.
Total Calorie Count (Tot. KCAL)
The total calorie counter is a function, which memorises information for
more than one exercise session. You will have a count for cumulative
calories expended during several exercise sessions. This function allows
you to follow the calorie count as a gauge of effective exercise e.g.
during one week.
You can subtract the total calorie amount.
The kilocalories are subtracted by 10-kcal decrement.
1. Start with the display showing Tot. KCAL.
2. Press START/STOP/OK to enter the Tot. KCAL mode.
The amount of total kilocalories starts flashing.
3. You can now subtract the calories by pressing Down.
4. Press START/STOP/OK to lock the desired amount.
Once you have subtracted the Tot. KCAL value, you cannot return it.
You will see the target heart rate limits of your exercise.
This function is useful in weight management, if you want to follow the
combined effects of exercise and nutrition.
ENGLISH
65
To reset the total calorie expenditure count to zero:
1. Start with the display showing Tot. KCAL.
2. Press START/STOP/OK to enter the Tot. KCAL mode.
The amount of total calories starts flashing.
3. Press and hold Down for a couple of seconds.
RESET starts to flash.
0 appears.
If you release the
is not reset.
Down button, when RESET is flashing, the value
Total Exercise Time (Tot. TIME)
The cumulative exercise time counter is a function, which memorizes
information for more than one exercise session. You will have a count
for the cumulative time of several exercise sessions. This function
can be used as a gauge of exercise time e.g. during one week.
To reset the cumulative exercise time count to zero:
1. Start with the display showing Tot. TIME.
2. Press START/STOP/OK to enter the Tot. TIME mode.
The amount of cumulative exercise time starts flashing.
3. Press and hold Down for a couple of seconds.
RESET starts to flash.
00:0000 appears.
If you release the Down button, when RESET is flashing, the
value is not reset.
66
ENGLISH
Latest OwnIndex
You can see your OwnIndex based on your latest Polar Fitness Test
and the date when it was carried out.
8. OWNINDEX
OwnIndex is a score which is comparable to VO2max, a commonly used
descriptor of aerobic fitness. OwnIndex is a result of the Polar Fitness
Test, which is an easy, safe and quick way to estimate maximal
aerobic power. The OwnIndex is based on heart rate, heart rate
variability at rest, body structure and self-assessed physical activity.
8.1 FITNESS TEST SETTINGS
Cardiovascular or aerobic fitness relates to how well your cardiovascular
system works to transport oxygen to your body. The better the
cardiovascular fitness, the stronger and more efficient your heart is.
Set the Activity Level
Having good cardiovascular fitness has many health benefits. For
example, it decreases your risk of cardiovascular diseases, stroke
and high blood pressure.
If you want to improve your cardiovascular fitness, it takes a
minimum of 6 weeks of regular training to see a noticeable change.
Less fit individuals see progress even more rapidly and for more
active individuals more time is needed.
Cardiovascular fitness is best improved by exercise types which use
large muscle groups. Such activities include e.g. walking, jogging,
swimming, rowing, skating, cross-country skiing and cycling.
To be able to follow your fitness progress start with measuring your
OwnIndex a couple of times during the first two weeks to get a reliable
baseline value. Thereafter repeat the test approximately once a month.
Polar Fitness Test is targeted to healthy adults.
To be able to carry out the Polar Fitness Test you need to do the
following settings:
• Select your long-term physical activity level.
• Set the Fitness test mode on.
Begin with the display showing the time of day.
1. Press Up or Down until you enter the Options mode.
2. Press START/STOP/OK to enter the setting loop.
USER SET is displayed.
3. Press START/STOP/OK to enter the user information loop.
4. Press START/STOP/OK until ACTIVITY appears.
ACTIVITY is displayed and LOW/MIDDLE/HIGH/TOP is flashing.
5. Press Up or Down to select the right activity level.
6. Press START/STOP/OK to lock your selection.
USER SET is displayed.
7. To return to the Time of day display, press and hold START/
STOP/OK.
Activity Level
Assess your long-term physical activity level. Do not change your
activity level description if your regular exercise habits have
changed less than six months ago.
Low
Exercise is not a regular part of your life. You walk only for
pleasure or occasionally exercise sufficiently to cause
heavy breathing or perspiration.
ENGLISH
67
Middle
You participate regularly in recreational sports. For
example, you run 5 miles/8km a week or spend 30–60
minutes a week in comparable physical activity. Or, your
work requires modest physical activity.
High
Exercise is an inseparable part of your life. You exercise
regularly at least 3 times a week with heavy paced intensity.
Exercise causes clear breathlessness and sweating. For
example, you run regularly more than 10 miles/16 km a week
or spend more than 1.5–2 hours in comparable physical
activity.
Top
You participate regularly in heavy physical exercise at least
5 times a week. E.g. you exercise to improve performance
for competitive purposes.
Set the Fitness Test Mode On
1. In the Time of day display press Up or Down until you
enter the Options mode.
OPTIONS is displayed.
2. Press START/STOP/OK to enter the setting loop.
USER SET is displayed.
3. Press Up or Down until you come to the Fitness test
setting mode.
FIT. TEST ON/OFF is displayed.
4. Press START/STOP/OK to enter the Fitness test setting loop.
FIT. TEST is displayed.
ON or OFF is flashing.
5. Press Up or Down to select the test on.
68
ENGLISH
6. Press START/STOP/OK to lock your selection.
7. To return to the Time of day display, press and hold START/
STOP/OK.
8.2 CARRYING OUT THE TEST
To get reliable test results, there are the following basic
requirements:
• You should be relaxed and calm.
• The test can take place anywhere – home, office, health club
– as long as the testing environment is peaceful. No disturbing
noises (e.g. television, radio or telephone), no other people
talking to you.
• Keep the testing place, time of day and environment the same
every time the test is repeated.
• Avoid eating a heavy meal or smoking 2–3 hours prior to
testing.
• Avoid heavy physical effort, alcoholic beverages or pharmacological stimulants on the test day and the day before.
Prepare the Wrist Unit
1. In the Time of day display press
come to the Fitness test mode.
FIT. TEST is displayed.
Up or
Relax Yourself for 1–3 Minutes
2. Lay down, relax your muscles and mind.
Down until you
Start the Test
8.3 FITNESS TEST RESULT
3. Press START/STOP/OK to start the test.
The wrist unit starts searching for your heart rate.
TEST ON and your heart rate are displayed.
The test begins.
The test result, your OwnIndex, is most meaningful when comparing
your individual values and changes in it. OwnIndex can also be
interpreted according to your gender and age. Locate your OwnIndex
on the following table to find out your current cardiovascular fitness
classification, compared to those who are of same age and gender.
If you want to have the sound signal on during the Fitness test, check there
in the display. Press and hold
to have sound signal on. The
is
sound signal will alarm you at the end of the test.
4. It takes 3–5 minutes to carry out the test. Lie relaxed, don’t
raise arms or legs, avoid body movements during the test.
Don’t communicate with other people.
Your current OwnIndex interpretation and the testing date
are displayed.
5. To return to the Time of day display after the test, press and
hold START/STOP/OK.
You can stop the test anytime during the test by pressing START/
STOP/OK. The latest OwnIndex will not be replaced.
FAILED TEST is displayed for a moment.
Your latest OwnIndex interpretation and the test date are
displayed.
1
2
3
4
5
6
7
1–3 Increase exercise for health benefits and fitness.
4
Maintain current exercise habits to ensure better health.
Exercise increase recommended for fitness improvements.
5–7 Maintain current exercise habits for good health and
fitness.
If the wrist unit does not succeed to receive your heart rate at the
beginning or during the test, the test will fail. Check that the
transmitter electrodes are wet and the elastic strap is snug enough.
Restart the procedure.
ENGLISH
69
FITNESS CLASSES
MEN
WOMEN
Age
(years)
20-24
25-29
30-34
35-39
40-44
45-49
50-54
55-59
60-65
20-24
25-29
30-34
35-39
40-44
45-49
50-54
55-59
60-65
1
Very poor
< 32
< 31
< 29
< 28
< 26
< 25
< 24
< 22
< 21
< 27
< 26
< 25
< 24
< 22
< 21
< 19
< 18
< 16
2
Poor
32-37
31-35
29-34
28-32
26-31
25-29
24-27
22-26
21-24
27-31
26-30
25-29
24-27
22-25
21-23
19-22
18-20
16-18
3
Fair
38-43
36-42
35-40
33-38
32-35
30-34
28-32
27-30
25-28
32-36
31-35
30-33
28-31
26-29
24-27
23-25
21-23
19-21
4
Average
44-50
43-48
41-45
39-43
36-41
35-39
33-36
31-34
29-32
37-41
36-40
34-37
32-35
30-33
28-31
26-29
24-27
22-24
5
Good
51-56
49-53
46-51
44-48
42-46
40-43
37-41
35-39
33-36
42-46
41-44
38-42
36-40
34-37
32-35
30-32
28-30
25-27
6
Very good
57-62
54-59
52-56
49-54
47-51
44-48
42-46
40-43
37-40
47-51
45-49
43-46
41-44
38-41
36-38
33-36
31-33
28-30
7
Excellent
> 62
> 59
> 56
> 54
> 51
> 48
> 46
> 43
> 40
> 51
> 49
> 46
> 44
> 41
> 38
> 36
> 33
> 30
The classification is based on literature review of 62 studies where VO2max was measured directly in healthy
adult subjects in the USA, Canada and 7 European countries. Reference: Shvartz E, Reibold
RC: Aerobic fitness norms for males and females aged 6 to 75 years: a review.
Aviat Space Environ Med; 61:3-11, 1990.
70
ENGLISH
9. CARE AND MAINTENANCE
Your Polar Heart Rate Monitor is a high-tech instrument of superior
design and workmanship and should be treated with care. The
suggestions below will help you fulfill the warranty obligations and
enjoy this product for many years to come.
9.1 TAKING CARE OF YOUR POLAR HEART RATE MONITOR
Connector
• Clean the connector regularly after use with a mild soap and
water solution.
• Never use alcohol or any abrasive material such as steel wool or
cleaning chemicals on any part of thetransmitter.
• Do not dry the connector in any other way than with a towel.
Rough handling may damage it.
• Never put the connector in a washing machine or a drier!
Strap
• You can wash the strap in a washing machine at 104 º F/ +40 ºC.
We recommend that you use a washing pouch.
• We recommend that you wash the strap after each time you have
used it in pool water with a high chlorine content.
• Do not spin-dry the strap!
• Do not put the strap in a dryer!
• Do not iron the strap!
Maintenance
• Store your transmitter in a cool and dry place. Do not store it in
any kind of non-breathing material, such as a plastic bag or a
sports bag, if it is wet. Sweat and moisture can keep its electrodes
wet and the transmitter activated, which shortens the battery life.
• Keep your transmitter out of extreme cold (below 14 ºF/ -10 ºC)
and heat (above 122 ºF/ +50 ºC).
• Do not expose transmitter to direct sunlight for extended periods,
such as by leaving it in a car.
9.2 BATTERIES
Transmitter
The estimated average battery life of Polar WearLink Transmitter is
2 years (1h/day, 7 days/week). If your transmitter stops working, it
might be due to the battery running out. We recommend that you have
the battery replaced by an authorized Polar Service Center only.
You can, however, change the battery of the Polar WearLink
Transmitter yourself by following the instructions below. To change
the battery, you need a coin, sealing ring (some included in the
product package) and battery (CR2025).
1. Open the connector’s battery cover by turning it counterclockwise with the coin from the CLOSE position to the OPEN
position. The cover pops out a little from its niche.
2. Remove the battery cover from the connector, lift the battery from
the niche with your fingers and replace it with a new battery.
3. Remove the sealing ring of the battery cover and replace it with
a new ring.
ENGLISH
71
4. Place the negative (-) side of the battery against the connector
and the positive (+) side against the cover.
5. Put the battery in the connector’s niche and put the cover on so
that the arrow points to the OPEN position. Make sure that the
cover’s sealing ring is placed correctly in its groove.
6. Gently press the cover deep enough so that its exterior surface is
on the same level as the connector’s surface.
7. Turn the cover with the coin clockwise so that the arrow on the
cover turns from OPEN to CLOSE. Make sure that the cover is
closed properly!
In order to ensure the maximum life span of the connector’s battery cover,
open it only when you need to change the battery. You can get the sealing
ring/battery kits from well-equipped Polar retailers and authorized Polar
Services. In the USA and Canada: Additional sealing rings are available from
an authorized Polar Service Center.
Polar Wrist Unit
The estimated average battery life of the Polar wrist unit is
20 months in normal use (1 h / day, 7 days a week). Note also that
excessive use of the backlight and the alarm signals will use the
battery more rapidly.
Do not open the Polar wrist unit yourself. To ensure the water
resistance properties and the use of qualified components, the wrist
unit battery should be replaced only by an authorized Polar Service
Center. At the same time a full periodic check of the Polar Heart
Rate Monitor will be done.
72
ENGLISH
9.3 SERVICE
We recommend that you have all service done by an authorized
Polar Service Center only.
Water resistance cannot be guaranteed after unauthorized service.
10. PRECAUTIONS
10.1 USING A POLAR HEART RATE MONITOR IN A WATER
ENVIRONMENT
Your Polar Heart Rate Monitor is water resistant to 330 feet/100
meters. To maintain the water resistance, do not operate the
buttons of the wrist unit under water.
Heart rate measurement in a water environment is technically
demanding for the following reasons:
• Pool water with a high chlorine content and seawater are very
conductive. The electrodes of a transmitter may short-circuit,
which prevents ECG signals from being detected by the
transmitter.
• Jumping into the water or strenuous muscle movement during
competitive swimming may cause water resistance that shifts
the transmitter on the body to a location where it is not possible
to pick up ECG signal.
• The ECG signal strength varies depending on the individual’s
tissue composition and the percentage of people who have
problems in heart rate measuring is considerably higher in a
water environment than in other use.
10.2 POLAR HEART RATE MONITOR AND INTERFERENCE
Electromagnetic Interference
Disturbances may occur near high voltage power lines, traffic
lights, overhead lines of electric railways, electric bus lines or
trams, televisions, car motors, bike computers, some motor driven
exercise equipment, cellular phones or when you walk through
electric security gates.
Crosstalk
The Polar wrist unit in non-coded mode of operation picks up
transmitter signals within 3 feet/1 meter. Non-coded signals from
more than one transmitter picked up simultaneously can cause an
incorrect readout.
Exercise Equipment
Several pieces of exercise equipment with electronic or electrical
components such as LED displays, motors and electrical brakes
may cause interfering stray signals. To try to tackle these problems,
relocate the Polar wrist unit as follows:
1. Remove the transmitter from your chest and use the exercise
equipment as you would normally.
2. Move the wrist unit around until you find an area in which it
displays no stray reading or flashing of the heart symbol.
Interference is often worst right in front of the display panel of
the equipment, while the left or right side of the display is
relatively free of disturbance.
3. Put the transmitter back on the chest and keep the wrist unit in
this interference-free area as far as it is possible.
4. If the Polar Heart Rate Monitor still does not work with the
exercise equipment, this piece of equipment may be electrically
too noisy for wireless heart rate measurement.
ENGLISH
73
10.3 MINIMIZING POSSIBLE RISKS IN EXERCISING
WITH A HEART RATE MONITOR
Exercise may include some risk, especially for those who have been
sedentary.
Before starting a regular exercise program you are recommended to
answer to the following questions for health status checking.
If the answer is yes to any of the questions, we recommend to consult
a doctor before starting an exercise program.
•
•
•
•
•
•
•
•
•
•
Have you not exercised for the past 5 years?
Do you have high blood pressure?
Do you have high blood cholesterol?
Do you have symptoms of any disease?
Are you taking any blood pressure or heart medication?
Do you have a history of breathing problems?
Are you recovering from a serious illness or medical treatment?
Do you use a pacemaker or another implanted electronic device?
Do you smoke?
Are you pregnant?
Note that in addition to exercise intensity, medications for heart,
blood pressure, psyche, asthma, breathing etc. as well as some
energy drinks, alcohol and nicotine, can affect heart rate.
74
ENGLISH
It is important to be sensitive to your body’s reactions during
exercise. If you feel unexpected pain or excessive fatigue when
exercising, it is recommended to stop the exercise or continue at a
lighter intensity.
Notice to persons with pacemakers, defibrillator or other
implanted electronic device. Persons who have a pacemaker use
the Polar Heart Rate Monitor at their own risk. Before starting use,
we always recommend an exercise test under doctor’s supervision.
The test is to ensure the safety and reliability of the simultaneous
use of the pacemaker and the heart rate monitor.
If you are allergic to any substance that comes into contact with
the skin or if you suspect an allergic reaction due to using the
product, check the listed materials in the "Technical Specifications"
chapter. To avoid any skin reaction risk with the transmitter, wear it
over a shirt. However, moisten the shirt well under the electrodes to
ensure flawless operation.
The combined impact of moisture and intense abrasion may cause a black
color, which might stain light-colored clothes especially, to come off the
transmitter's surface.
If you use insect repellent on your skin, you must ensure that it does not
come into contact with the transmitter!
11. FREQUENTLY ASKED QUESTIONS
What should i do if...
...OwnZone determination only seldom gives me heart rate limits
which are based on heart rate variability (OZ.V)?
1. Check that the elastic strap is snug enough.
2. Make sure that the electrodes of the transmitter are moistened
against your skin.
3. Put on the transmitter 15–20 minutes prior to the start of your
exercise to ensure good adaptation between the electrodes and
your skin.
4. Start the first stage of determining your OwnZone sufficiently
slowly. If you obtain the heart rate limits based on age (OZ.A)
within the first 2 minutes you have raised your heart rate too quickly.
The heart rate reading should not rise over 20 beats/minute from
the starting level. During the first stage you can, for example, put
on your sports clothing.
5. If you reach the OwnZone limits based on age (OZ.A) or the
previously determined OwnZone limits based on your heart rate
variability (OZ.L) only after 5 minutes from starting specification
you have not raised your heart rate sufficiently
rapidly. Raise your heart rate more quickly during the OwnZone
determination.
6. If you have always used walking and running to determine your
OwnZone, walking uphill, cycling or using an ergometer may
work better for you.
7. Stress or heavy mental loading may reduce your heart rate
variability so that the needed point where the heart rate
variability vanishes cannot be measured.
Relax for 5–10 minutes before exercising by sitting down and
decreasing your heart rate.
8. For a small percentage of people the heart rate variability will
not totally disappear with increasing workload. In this case the
age-predicted limits are the best estimation for the exercising
zone.
...the OwnZone limits based on heart rate variability (OZ.V) vary
considerably?
Heart rate variability reacts sensitively to all changes taking place
in the body and environment. The OZ.V heart rate limits are affected
by, amongst others, your daily state of fitness, the time of OwnZone
determination, the type of exercise and state of mind. The lower
limit of the OZ.V heart rate limits can change for the same person
by as much as 30 beats.
However it is important that the feeling of exercise carried out in
the OwnZone is light or moderate. For example if you raise your
heart rate too rapidly after the first stage, you may get too high
OwnZone heart rate limits. If the OwnZone limits seem to be too
high we recommend that the OwnZone determination is done again.
...there is no heart rate reading (- -)?
1. Check that the electrodes of the transmitter are moistened and
that you are wearing it as instructed.
2. Check that you have kept the transmitter clean.
3. Check that there are no sources of electromagnetic radiation in
the close vicinity of the Polar wrist unit, such as TV sets, mobile
phones, CRT monitors etc.
ENGLISH
75
4. Have you had a cardiac event which may have altered your ECG
waveform? In this case consult your physician.
...heart symbol flashes irregularly?
1. Check that your Polar wrist unit is inside the transmission range
and not further that 3 feet/1 meter from the Polar Transmitter
you are wearing.
2. Check that the elastic strap has not become loose during
exercise.
3. Make sure that the electrodes of the transmitter are moistened.
4. Make sure that there is no other heart rate transmitter within the
reception range (3 feet/1 meter).
5. Cardiac arrythmia may cause irregular readings. In this case
consult your physician.
...other person with heart rate monitor is causing interference?
Your training partner may have coincidentally activated exactly the
same code as you. In this case keep distance to your training
partner or proceed as follows:
1. Stop the stopwatch and heart rate measurement.
2. Take the transmitter off your chest for 10 seconds.
3. Put the transmitter back and start the heart rate measurement
again.
...heart rate reading becomes erratic or extremely high?
You may have come within range of strong electromagnetic signals
which cause erratic readings on the wrist unit display. Check your
surroundings and move further away from the source of
disturbance.
76
ENGLISH
...there are no reactions to any buttons?
Reset the Polar Heart Rate Monitor. Resetting clears watch settings
which will return to the default settings. User information and
measurement options settings will be saved.
1. Press the RESET button with a pen tip.
Display becomes full of digits.
2. Press any of the four button once.
The Polar Heart Rate Monitor enters the Time of day display.
If you don't press any button after reset within one minute the wrist
unit goes to the battery saving mode.
...the display is blank or fading?
The Polar Heart Rate Monitor is in battery saving mode when it
leaves the factory. Wake up by pressing START/STOP/OK button
twice. The Polar Heart Rate Monitor enters the Time of day display.
Usually the first sign of a discharged battery is fading of the digits
when using the backlight. Have the batteries checked.
...the battery of the wrist unit must be replaced?
We recommend having all service done by an authorized Polar
Service Center. This is especially necessary to ensure the warranty
remains valid and is not affected by incorrect repair procedures
done by an unauthorized agent. Polar Service will test your wrist
unit for water resistance after battery replacement and make a full
periodic check of the complete Polar Heart Rate Monitor.
12. POLAR GLOSSARY
Indicates coded transmission of heart rate.
The inner heart flashes to the beat of your heart.
In the Time of day mode indicates that the alarm is on. In the measure mode
indicates that the sound signal will alarm if you are exercising outside your Target
Zone.
Progress bullets in the measure mode.
One bullet = 10 minutes in target zone.
AGE: Insert your age in User settings.
ALARM: Indicates the alarm clock in watch settings.
AM/PM: 12 hour mode of time.
AVERAGE Hr: Average heart rate of the exercise.
Coded heart rate transmission: Polar coded transmitter automatically locks in a
code to transmit your heart rate to your wrist unit. In coded transmission the wrist
unit accepts heart rate from your Polar coded transmitter only. Coding significantly
reduces crosstalk caused by other users of heart rate monitors. However, it does not
necessarily reduce all environmental interference.
Electrodes: The electrode areas are on the backside of the transmitter.
EXERCISE: Heart rate measurement mode, stopwatch is on and the exercise
information is recorded.
EXE. TIME: Total exercise time.
FAT: Indicates the fat percentage of the total calorie expenditure.
FILE: File mode to recall training information.
Heart rate: The number of heart beats per minute (bpm)
Heart rate variability: Fluctuations of interbeat intervals. Heart rate variability of a
healthy subject is in general large in resting conditions and during light exercise.
Heart rate variability gradually disappears when exercise becomes more intense and
heart rate increases.
HRmax: Maximum heart rate.
IN ZONE: Exercising time in Target Zone.
KCAL: Indicates the energy expenditure of your exercise session.
LIMITS: Manually set target zone limits are determined as percentages of age
predicted or measured maximum heart rate. The percentages are converted into
heart rate beats per minute.
MEASURE: Heart rate measurement mode, stopwatch is off.
OPTIONS: Setting mode for user information, heart rate measurement options and
watch functions.
OWNCAL: Calorie expenditure during exercise.
OWNINDEX: OwnIndex is a score which is comparable to VO2max. OwnIndex is a result
of the Polar Fitness Test.
OWNZONE, OZ.: Target zone which Polar Heart Rate Monitor determines for you.
OwnZone is an individual guide for light to moderate exercise intensity.
OZ
Indicates OwnZone determination procedure.
OZ.A: Indicates OwnZone limits which are determined according to your age.
OZ.L: Your latest OwnZone limits.
OZ.V: Indicates currently measured OwnZone limits which are based on your heart
rate variability.
SEX: Indicates the gender (Male or Female) in User settings.
Target zone, TZ: The area between the upper and lower target zone limits. Can be
defined automatically by Polar Heart Rate Monitor or manually by yourself.
TIME: Indicates the time of day in the watch settings.
Time of day mode: Display showing time of day.
Tot. KCAL: Cumulative total calorie expenditure of your exercise.
Tot. TIME: Cumulative total exercise time of your exercise sessions.
USER SET: Indicates the setting loop for your personal information.
ENGLISH
77
13. TECHNICAL SPECIFICATIONS
Polar Heart Rate Monitor is designed to indicate the level of physiological strain and
intensity in sports and exercise. No other use is intended or implied. Heart rate is
displayed as number of heart beats per minute (bpm).
Polar Connector
Battery type:
Battery sealing ring:
Battery life:
Operating temperature:
Material:
Water resistance:
CR 2025
O-ring 20.0 x 1.0
Material FPM
Average 1300 hours of use
14 °F to 122 °F / -10 °C to +50 °C
Polyamide
To 100 feet/30 meter
Strap
Material:
Polyurethane, polyamide, nylon, polyester and elasthane
Wrist Unit
Battery type:
Battery life:
Operating temperature:
Water resistance:
Accuracy of formula for
age based OwnZone heart
rate limits (OZ.A):
Accuracy of heart rate
measurement:
78
ENGLISH
CR 2032
Average 20 months (1 h / day, 7 days / week)
14 °F to 122 °F/-10 °C to +50 °C
to 330 feet/100 meters
± 1bpm
± 1% or ± 1 bpm, whichever larger, definition applies to
steady state conditions
Back Case, Extend
Link Cover's and
wrist strap buckle:
Stainless steel complying with the EU Directive 94/27/EU
and its amendment 1999/C 205/05 on the release of
nickel from products intended to come into direct and
prolonged contact with the skin.
Default Settings
Time of day
Alarm
User ID
Weight
Height
Age
Sex
Activity
OwnZone
Upper Limit (manual)
Lower Limit (manual)
OwnCal
Polar Fitness Test
24h
OFF
1
00
00
0
Male
Low
OFF
160
80
OFF
OFF
Limit Values
Chronometer
Heart rate limits
Kcal
Tot. kcal
Tot. time
23 h 59 min 59 s
30–240 bpm
99999 kcal
999999 kcal
9999 h 59 min 59 s
14. LIMITED POLAR INTERNATIONAL GUARANTEE
• This limited Polar international guarantee is issued by Polar Electro Inc. for the
consumers who have purchased this product in the USA or Canada. This limited
Polar international guarantee is issued by Polar Electro Oy for the consumers who
have purchased this product in other countries.
• Polar Electro Inc. / Polar Electro Oy guarantees to the original consumer/ purchaser
of this product that the product will be free from defects in material or
workmanship for two years from the date of purchase.
• Please keep the receipt or International Guarantee Card, which is your proof of
purchase!
• The guarantee does not cover the battery, damage due to misuse, abuse, accidents
or non-compliance with the precautions; improper maintenance, commercial use,
cracked or broken cases.
• Guarantee does not cover any damage/s, losses, costs or expenses, direct, indirect
or incidential, consequential or special, arising out of, or related to the product.
During the guarantee period the product will be either repaired or replaced at an
authorized service center free of charge.
• This guarantee does not affect the consumer’s statutory rights under applicable
national or state laws in force, or the consumer’s rights against the dealer arising
from their sales/ purchase contract.
marked with a ® symbol in this user's manual or in the package of this product are
registered trademarks of Polar Electro Oy.
This CE marking shows compliance of this product with Directive 93/42/EEC.
Polar Electro Oy is a ISO 9001:2000 certified company.
This product is protected by one or several of the following patents:
FI 88223, DE 4215549, FR 92.06120, GB 2257523, HK 113/1996, SG 9591671-4,
US 5491474, FI 88972, DE 9219139.8, FR 92.09150, GB 2258587, HK 306/1996,
SG 9592117-7, US 5486818, FI 96380, US 5611346, EP 665947, DE 69414362,
FI 68734, DE 3439238, GB 2149514, HK 812/1989, US 4625733, FI 100924,
FI 100452, US 5840039, FI 4150, DE 20008882.3,US 6477397, FR 0006504, FI 4069,
US 6272365, FR 9907823, GB 2339833, DE 29910633, FI 104463, US 6183422,
FI 4157, DE 20008883.1, FR 0006778, WO 97/33512, GB 2326240,FI 107776,
US 6327486, US 6277080, US 6361502, US 5719825, US 5848027, EP 1055158.
Other patents pending.
Copyright © 2003-2004
Polar Electro Oy, FIN-90440 KEMPELE, Finland
All rights reserved. No part of this manual may be used or reproduced in any form or
by any means without prior written permission of Polar Electro Oy.
The names and logos marked with a ™ symbol in this user's manual or in the
package of this product are trademarks of Polar Electro Oy. The names and logos
ENGLISH
79
15. DISCLAIMER
The material in this manual is for informational purposes only. The products it
describes are subject to change without prior notice, due to the manufacturer’s
continuous development program.
Polar Electro Inc. / Polar Electro Oy makes no representations or warranties with
respect to this manual or with respect to the products described herein. Polar Electro
Inc. / Polar Electro Oy shall not be liable for any damages, losses, costs or expenses,
direct, indirect or incidental, consequential or special, arising out of, or related to the
use of this material or the products described herein.
80
ENGLISH
INDEX
Bullets in the display during exercise .................................... 63
Button sound ON/OFF ............................................................ 62
Buttons and their functions ................................................... 48
Care and maintenance .......................................................... 71
Check exercise information .................................................... 63
Check your heart rate limits .................................................. 63
Disclaimer ............................................................................. 80
Exercise reminder at full hours .............................................. 49
Fitness test settings .............................................................. 67
Frequently asked questions ................................................... 75
Functions during heart rate measurement ............................ 62
Glossary ................................................................................. 77
Guarantee .............................................................................. 79
Illuminate the display ............................................................ 62
Latest OwnIndex .................................................................... 66
Modes and their functions ..................................................... 49
OwnCal calorie consumption ................................................. 54
OwnCal calorie counter ON/OFF ............................................. 53
OwnIndex ............................................................................... 67
OwnZone ................................................................................ 59
OwnZone ON/OFF ................................................................... 52
Polar Fitness Test ON/OFF ...................................................... 54
Precautions ........................................................................... 73
Recalling training information .............................................. 65
Reset stopwatch .............................................................. 60, 63
Reset the total calorie consumption count ............................ 66
Reset the total exercising time .............................................. 66
Return to Time of day display ................................................ 49
See your heart rate ................................................................ 62
See your progress during exercise .......................................... 63
Setting activity level .............................................................. 51
Setting age ............................................................................ 51
Setting heart rate limits manually ......................................... 52
Setting height ........................................................................ 51
Setting measurement options ................................................ 52
Setting sex ............................................................................. 51
Setting the alarm .................................................................. 55
Setting the date ..................................................................... 56
Setting the time of day .......................................................... 56
Setting user 1 or 2 ................................................................. 50
Setting user information ........................................................ 50
Setting weight ....................................................................... 51
Sound signal ON/OFF ............................................................. 62
Start the heart rate measurement ......................................... 58
Start/stop the stopwatch ....................................................... 62
Stop the heart rate measurement .......................................... 64
Subtract the total calorie expenditure amount ...................... 65
Swap the heart rate limits ..................................................... 63
Swap the user ........................................................................ 62
Technical specifications ........................................................ 78
ENGLISH
81