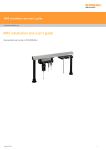
1
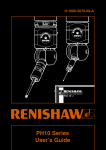
PH10 PLUS installation and user's guide http://www.renishaw.com PH10 PLUS installation and user's guide Documentation part number: H-1000-7592-01-A Issued 01 2013 Page 1 of 48 PH10 PLUS installation and user's guide http://www.renishaw.com General information © 2013 Renishaw plc. All rights reserved. This document may not be copied or reproduced in whole or in part, or transferred to any other media or language, by any means, without the prior written permission of Renishaw. The publication of material within this document does not imply freedom from the patent rights of Renishaw plc. Disclaimer RENISHAW HAS MADE CONSIDERABLE EFFORTS TO ENSURE THE CONTENT OF THIS DOCUMENT IS CORRECT AT THE DATE OF PUBLICATION BUT MAKES NO WARRANTIES OR REPRESENTATIONS REGARDING THE CONTENT. RENISHAW EXCLUDES LIABILITY, HOWSOEVER ARISING, FOR ANY INACCURACIES IN THIS DOCUMENT. Trademarks RENISHAW® and the probe emblem used in the RENISHAW logo are registered trademarks of Renishaw plc in the UK and other countries. apply innovation is a trademark of Renishaw plc. All brand names and product names used in this document are trade names, service marks, trademarks, or registered trademarks of their respective owners. Windows XP, Windows 2000, Vista and Windows 7 are registered trade names of the Microsoft Corporation. All trademarks and trade names are acknowledged. Care of equipment Renishaw probes and associated systems are precision tools used for obtaining precise measurements and must therefore be treated with care. Changes to Renishaw products Renishaw reserves the right to improve, change or modify its hardware or software without incurring any obligations to make changes to Renishaw equipment previously sold. Warranty Renishaw plc warrants its equipment for a limited period (as set out in our Standard Terms and Conditions of Sale) provided that it is installed exactly as defined in associated Renishaw documentation. Prior consent must be obtained from Renishaw if non-Renishaw equipment (e.g. interfaces and/or cabling) is to be used or substituted. Failure to comply with this will invalidate the Renishaw warranty. Claims under warranty must be made from authorised service centres only, which may be advised by the supplier or distributor. Issued 01 2013 Page 2 of 48 PH10 PLUS installation and user's guide http://www.renishaw.com EC declaration of conformity Renishaw plc hereby declares that the PH10 PLUS series of probe heads are in compliance with the essential requirements and other relevant provisions of EU Directives 2006/42/EC and 2004/108/EC . Contact Renishaw plc at www.renishaw.com for the full EC Declaration of Conformity. Issued 01 2013 Page 3 of 48 PH10 PLUS installation and user's guide http://www.renishaw.com FCC (USA only) Information to user (47CFR section 15.105) This equipment has been tested and found to comply with the limits for a Class A digital device, pursuant to Part 15 of the FCC rules. These limits are designed to provide reasonable protection against harmful interference when the equipment is operated in a commercial environment. This equipment generates, uses, and can radiate radio frequency energy and, if not installed and used in accordance with the instruction manual, may cause harmful interference to radio communications. Operation of this equipment in a residential area is likely to cause harmful interference, in which case you will be required to correct the interference at your own expense. Information to user (47CFR section 15.21) The user is cautioned that any changes or modifications not expressly approved by Renishaw plc or authorised representative could void the user's authority to operate the equipment. Equipment label (47CFR section 15.19) This device complies with part 15 of the FCC Rules. Operation is subject to the following two conditions: 1. This device may not cause harmful interference. 2. This device must accept any interference received, including interference that may cause undesired operation. WEEE The use of this symbol on Renishaw products and/or accompanying documentation indicates that the product should not be mixed with the general household waste upon disposal. It is the responsibility of the end user to dispose of this product at a designated collection point for waste electrical and electronic equipment (WEEE) to enable reuse or recycling. Correct disposal of this product will help save valuable resources and prevent potential negative effects on the environment. For more information, please contact your local waste disposal service or Renishaw distributor. TÜV This equipment has been independently certified by TÜV Product Services in accordance with OSHA (US) and SCC (Canada) requirements to the standards UL61010-1 Second Edition and CAN/CSA-C22-2 No. 61010-1 Second Edition. Issued 01 2013 Page 4 of 48 PH10 PLUS installation and user's guide http://www.renishaw.com International safety instructions EN - WARNING Please turn to appendix 1 and read the safety instructions in your own language before unpacking and installing this product. BG ‐ Внимание Моля, обърнете на приложение 1 и прочетете инструкциите за безопасност на вашия собствен език, преди за разопаковате и монтирате този продукт. CS ‐ UPOZORNĚNÍ Před rozbalením a instalací tohoto výrobku čtěte bezpečnostní pokyny uvedené v Příloze 1. DA - SIKKEREDHED Læs sikkerhedsinstrukserne i Appendix 1 FØR udpakning og installation af dette produkt! DE - SICHERHEITSANWEISUNGEN Lesen Sie die Sicherheitsanweisungen in Ihrer Sprache im Anhang 1 vor dem Auspacken und Installieren des Produktes. EL ‐ ΑΣΦΑΛΕΙΑ Πρέπει τώρα να γυρίσετε στο Κεφάλαιο 1 και να διαβάσετε τις οδηγίες ασφαλείας στη δική σας γλώσσα προτού ανοίξετε αυτό το προϊόν για να το εγκαταστήσετε. ES - SEGURIDAD Debe volver al Apéndice 1 y leer las instrucciones de seguridad en su propio idioma antes de abrir e instalar este producto. ET - HOIATUSED Nüüd peate vaatama 1. lisa ja enne selle toote lahtipakkimist ja paigaldamist lugema läbi ohutusjuhendi oma keeles. FI - TURVALLISUUTTA Ennen tämän tuotteen pakkauksen avaamista ja asentamista lue liitteessä 1 olevat omalla kielelläsi kirjoitetut turvaohjeet. FR - SECURITE Vous devez à présent consulter l'annexe 1 et les instructions de sécurité dans votre propre langue avant de déballer et d'installer ce produit. GA - RABHADH Téigh chuig aguisín 1 agus déan na treoracha sábháilteachta a léamh i do theanga féin le do thoil sula ndéantar an táirge seo a dhíphacáil agus a shuiteáil. Issued 01 2013 Page 5 of 48 PH10 PLUS installation and user's guide http://www.renishaw.com HU ‐ FIGYELMEZTETÉS Lapozzon a 1. függelékhez és olvassa el a biztonsági előírásokat az Ön saját nyelvén mielőtt kicsomagolná és beüzemelné a terméket. IT - SICUREZZA Prima di aprire ed installare questo prodotto dovete leggere le istruzioni di sicurezza nella Vostra Lingua riportate nell'Appendice 1. LT ‐ ĮSPĖJIMAI Prieš išpakuojant ir įdiegiant produktą jums reikia grįžti prie 1 priedo ir perskaityti nurodymus dėl saugos savo kalba. LV ‐ BRĪDINĀJUMS Pirms šī izstrādājuma izsaiņošanas un uzstādīšanas jums jāiepazīstas ar 1. pielikuma drošības instrukcijām savā valodā. MT - TWISSIJIET Issa għandek tmur f'appendiċi 1 sabiex taqra listruzzjonijiet tassigurtà fillingwa tiegħek qabel ma tispakkja u tinstalla dan ilprodott. NL - VELIGHEID Ga nu naar Appendix 1 en lees de veiligheidsinstructies, in uw eigen taal, voordat u dit product uitpakt en installeert. PL ‐ BEZPIECZEŃSTWO Przed rozpakowaniem i instalacja produktu nalezy przeczytac zalacznik nr 1 i zapoznac sie z zasadami bezpieczenstwa w jezyku uzytkownika. PT ‐ SEGURANÇA Você deve retornar ao Apêndice 1 e ler as instruções de segurança em seu idioma antes de desembalar e instalar este produto. RO ‐ ATENŢIE Înainte de a desface ambalajul şi a instala acest produs, vă rugăm să căutaţi Anexa 1 şi să citiţi cu atenţie instrucţiunile de protecţia muncii, în limba română. SK ‐ VÝSTRAHY Pred rozbalením a inštaláciou tohto produktu si musíte pozrieť prílohu 1 a prečítať bezpečnostné pokyny vo vašom jazyku. SL - OPOZORILA Sedaj morate v prilogi 1 prebrati varnostne napotke v svojem jeziku, preden odpakirate in namestite produkt. SV ‐ SÄKERHETSFÖRESKRIFTER Du måste nu gå till bilaga 1 och läsa säkerhetsinstruktionerna på ditt eget språk innan du packar upp och installerar denna produkt. Issued 01 2013 Page 6 of 48 PH10 PLUS installation and user's guide http://www.renishaw.com Warnings Where this symbol is displayed on the product the user must refer to the installation and user guide for information and safety advice. Pinch hazards exist between moving parts and between moving and static parts. Do not hold the probe head during movements, or when manually changing a probe. Beware of unexpected movement. The user should remain outside the full working envelope of probe head/extension/probe combinations. In all applications involving the use of machine tools or CMMs, eye protection is recommended. Replace blown fuses with new components of the same type. Refer to the safety information in the relevant product documentation. For instructions regarding the safe cleaning of Renishaw products, refer to the maintenance information in the relevant product documentation. Remove power before performing any maintenance operations. Refer to the machine supplier's operating instructions. It is the machine supplier's responsibility to ensure that the user is made aware of any hazards involved in operation, including those mentioned in Renishaw product documentation, and to ensure that adequate guards and safety interlocks are provided. Under certain circumstances the probe signal may falsely indicate a probe-seated condition. Do not rely on probe signals to stop machine movement. If the equipment is used in a manner not specified by the manufacturer, the protection provided by the equipment may be impaired. The expected method of providing an emergency stop for Renishaw products is to remove power. Issued 01 2013 Page 7 of 48 PH10 PLUS installation and user's guide http://www.renishaw.com References and associated documents It is recommended that the following documentation is referenced when installing and using the PH10 PLUS: User's guide: Touch-trigger probes H-1000-5021 User's guide: SP25M H-1000-5104 User's guide: HCU1 H-1000-5016 User's guide: AM1 H-1000-4010 User's guide: AM2 H-1000-2051 Technical specification: Styli and accessories H-1000-3200 Installation guide: PICS H-1000-5000 Installation guide: PHC10-3 PLUS H-1000-0077 Issued 01 2013 Page 8 of 48 PH10 PLUS installation and user's guide http://www.renishaw.com Introduction This guide describes the installation and product usage of the PH10 PLUS series of motorised probe heads. This guide gives information on physical installation and system connections, as well as assistance in fault-finding during the installation of a system. The components of the PH10 PLUS system are not compatible with PH9 and PH20 system components. No attempt should be made to connect the PH10 PLUS system components to a PH9 or PH20 system as this will result in damage to the product. CAUTION: PH10 PLUS must be used in conjunction with the Renishaw PHC10-3 PLUS. No other controller will operate this head. This guide should be read in conjunction with the PHC10-3 PLUS installation guide (part number H-1000-0077) in order to fully understand the system's features, capabilities and operation. Issued 01 2013 Page 9 of 48 PH10 PLUS installation and user's guide http://www.renishaw.com PH10 system description Product Description PH10T PLUS A shank-mounted head with two-wired probe capability and an M8 thread PH10M PLUS A shank-mounted head with multiwired probe capability and a Renishaw autojoint PH10MQ PLUS A quill-mounted head with multiwired probe capability and a Renishaw autojoint HCU1 A hand control unit for use with PH10 measurement systems PHC10-3 PLUS A controller for use with PH10 measurement systems The PH10 PLUS range of motorised heads consists of three different models: Each head in the PH10 PLUS range is a general purpose, versatile unit designed specifically for use on direct computer controlled (DCC) CMMs and incorporates the following features: 720 indexing positions 0.4 μm indexing repeatability 7.5° indexing steps in both axes 300 mm (maximum) extension bar capability * * NOTE: 450 mm is possible for PH10M / MQ with special order carbon fibre extensions. WARNING: The components of the PH10 PLUS system are not compatible with PH9 system components. No attempt should be made to connect PH10 PLUS system components to a PH9 system, as this will result in damage to the product. Issued 01 2013 Page 10 of 48 PH10 PLUS installation and user's guide http://www.renishaw.com System interconnection diagrams This section describes a number of PH10 PLUS system interconnection and recommended interconnection cables PH10 PLUS system with standard two wired touch-trigger probes Issued 01 2013 Page 11 of 48 PH10 PLUS installation and user's guide http://www.renishaw.com PH10 PLUS system with standard two wire touch-trigger probe and autochange 1 Communication connection to CMM controller RS232 or USB 3 Communication to CMM controller 4 Communication to autochange rack 5 PICS output to CMM 6 Probe output to CMM controller Issued 01 2013 Page 12 of 48 PH10 PLUS installation and user's guide http://www.renishaw.com PH10 PLUS system with standard two wire touch-trigger probe, PI 200-3 and autochange 1 Communication connection to CMM controller - RS232 or USB 3 Communication to CMM controller 4 Communication to autochange rack 5 PICS output to CMM controller 6 Raw probe output to CMM contoller Issued 01 2013 Page 13 of 48 PH10 PLUS installation and user's guide http://www.renishaw.com Styli Renishaw manufacture an extensive range of precision styli and stylus accessories. They are available in M2, M3, M4 and M5 thread sizes with steel, tungsten carbide, graphite fibre and ceramic stems. Each is fitted with a precision industrial synthetic ball (ruby, zirconia or silicon nitride) available in diameters from 0.3 mm (0.012 in) to 10 mm (0.4 in). Special application styli including discs, cylinders, pointers, stars and large ceramic balls up to 30 mm (1.18 in) are available in M2 and M3 thread sizes. For further information on the Renishaw stylus range, please refer to the stylus and accessories guide (part number H-1000-3200). Renishaw also offer a custom design service if your requirements are not met by the standard range. Please contact your Renishaw supplier for details. Issued 01 2013 Page 14 of 48 PH10 PLUS installation and user's guide http://www.renishaw.com Probe extension bars Renishaw manufactures a comprehensive range of extension bars and adaptors to allow increased component penetration. There are three types in the range: • Autojoint to M8 bush (PAA series) • Autojoint to autojoint (PEM series) • M8 thread to M8 bush (PEL series) Autojoint to M8 bush These extension bars connect directly to the autojoint of the PH10M PLUS or PH10MQ PLUS head and terminate in an M8 bush. This permits the use of two-wire touch-trigger probes. Extensions Length Material Weight PAA1 32 mm Steel 57 g PAA2 144 mm Aluminium 85 g PAA3 300 mm Aluminium 144 g The probe is fitted to the extension by hand and tightened by use of the S1 ‘C' spanner as shown. The S1 spanner is designed to fail before damage can occur to the mechanical joint between the two parts. Using the S1 spanner, fully hand-tighten the probe body into the M8 bush (0.3 Nm to 0.5 Nm). Issued 01 2013 Page 15 of 48 PH10 PLUS installation and user's guide http://www.renishaw.com Autojoint to autojoint These extension bars are compatible with the PH10M PLUS and PH10MQ PLUS heads. They allow direct connection to the head via the autojoint and terminate in an autojoint. This permits use of a multiwired probe. Extensions Length Material Weight PEM25 25 mm Aluminium 60 g PEM1 50 mm Aluminium 64 g PEM2 100 mm Aluminium 93 g PEM3 200 mm Aluminium 147 g M8 thread to M8 bush These extension bars can be used directly with the PH10T PLUS head, and also with the PH10M PLUS and PH10MQ PLUS heads using the PAA1 adaptor. Extensions Length Material Weight PEL1 50 g Aluminium 24 g PEL2 100 g Aluminium 57 g PEL3 200 g Aluminium 86 g PEL4 300 g Aluminium 135 g Issued 01 2013 Page 16 of 48 PH10 PLUS installation and user's guide http://www.renishaw.com PH10 compatible probes M8 touch-trigger probes This range of probes utilises the M8 bush for mounting to the head. These can be fitted directly onto the PH10T PLUS head, but when used with the PH10M PLUS or PH10MQ PLUS heads, one of the autojoint to M8 bush extension bars of the PAA1 adaptor must be used. Probe Diameter Application User's guide TP2-5W 13 mm Universal probe for DCC and manual CMMs H-1000-5021 TP6* 25 mm Universal probe for DCC and manual CMMs H-1000-5008 TP20 13.2 mm Universal probe for DCC and manual CMMs with module changing H-1000-5021 TP200 13.5 mm Universal probe with strain gauge for DCC CMM - 100 mm max stylus length H-1000-5014 * An autojoint version (TP6A) is also available Multiwire (autojoint) probes This range of probes is compatible with the PH10M PLUS and PH10MQ PLUS heads only and utilise the Renishaw multiwired autojoint connection to the head. Probe Diameter Application Weight User's guide SP25M 25 mm High speed scanning probe 65 g (body) 35 g (SM25-1) 40 g (SM25-2) 49 g (SM25-3) 40 g (TM25-20) H-1000-5104 TP7M 25 mm Universal probe with strain gauge for DCC CMMs 85 g (without stylus) H-1000-2010 SP600M* 50 mm Analogue contact scanning probe 216 g (without stylus) H-1000-5175 Probes in this range require comprehensive integration with your CMM. * When using PH10MQ PLUS with SP600M, a PEM25 extension bar is required to achieve A = 97.5° or A = 105° in all Baxis positions. Issued 01 2013 Page 17 of 48 PH10 PLUS installation and user's guide http://www.renishaw.com PH10 connection of probes and extensions PH10T PLUS M8 connection PH10T PLUS is designed to carry Renishaw probes and extensions with an M8 screw thread. Probes and extensions are screwed into the probe head's bush and tightened with the appropriate spanner. CAUTION: Never use anything other than the Renishaw spanner provided and do not apply excessive force. PH10M PLUS and PH10MQ PLUS autojoint connection PH10M PLUS and PH10MQ PLUS heads use a Renishaw autojoint which is a highly repeatable kinematic joint, one half is integral to the head. The other half forms part of the adaptor, extension bar or probe. Locking and unlocking the autojoint is carried out either manually, using the autojoint key, or automatically using the Renishaw autochange rack systems (ACR1 or ACR3). In both cases, the connection's repeatability eliminates the need for probe requalification after exchange. If an extension bar, adaptor or probe needs to be attached to the head manually, ensure that the location dots shown in the image below are aligned. Issued 01 2013 Page 18 of 48 PH10 PLUS installation and user's guide http://www.renishaw.com System diagrams PH10T PLUS system diagram The diagram below shows the range of extensions, probes and styli which can be used in conjunction with the PH10T head. Issued 01 2013 Page 19 of 48 PH10 PLUS installation and user's guide http://www.renishaw.com PH10M PLUS and PH10MQ PLUS system diagrams The diagram below shows the range of extensions, probes and styli which can be used in conjunction with the PH10M PLUS and PH10MQ PLUS heads. * PH10MQ PLUS used with SP600M requires a PEM25 extension bar to achieve A = 97.5° or A = 105° in all Baxis positions. ** Other modules versions are available for TP20, TP200 and SP25M. Issued 01 2013 Page 20 of 48 PH10 PLUS installation and user's guide http://www.renishaw.com HCU1 hand control unit The HCU1 hand control unit is an optional control which enables the PH10 PLUS system to be used in manual mode or in a teach cycle. A LCD dot matrix display provides information on system status. See the HCU1 user's guide (part number H-1000-5016) for further information on the features and operation of the unit, or contact your Renishaw representative for advice. Issued 01 2013 Page 21 of 48 PH10 PLUS installation and user's guide http://www.renishaw.com PHC10-3 PLUS probe head controller PH10 PLUS heads must be used in conjunction with either the PHC10-3 PLUS controller or the UCC (universal CMM controller). PHC10-3 PLUS uses an external power supply for the head, manages all head functions and communicates via a suitable interface with the CMM computer. A separate probe interface is required for probe signal conditioning when using the PHC10-3 PLUS. If using the UCC, the PHC1050 daughtercard takes its power from the host unit. Powering PHC10-3 PLUS PHC10-3 PLUS is to be used with the provided PSU - (Emerson DP4024N3M AC power adptor) www.emerson.com. This is a 24 Vdc 49 W supply and is conected to the PHC103 PLUS via Ø5.5 mm dc jack plug. PHC10-3 PLUS does not does require a protective earth, however an equipotential bonding point is provided on the rear panel for connection to the rest of the installation. PHC10-3 PLUS is rated to opperate at +24 Vdc 1A max input current If an internal interface is fitted with the PHC10-3 PLUS it will obtain its power internally from the PHC10-3 PLUS controller. PHC10-3 PLUS rear panel layout Issued 01 2013 Page 22 of 48 PH10 PLUS installation and user's guide http://www.renishaw.com Key Description 1 9-way D-type plug for PICS output 2 9-way D-type connector to HCU1 3 25-way D-type plug RS232 communications connector to CMM computer 4 USB type “B” socket 5 PHC10-3 configuration switches 6 15-way D-type connector to probe head 7 7-pin DIN raw probe connector to probe interface or multiwire input for internal interfaces 8 DC power jack 9 Equipment bond point 10 Reset button Refer to the PHC10-3 PLUS installation guide (part number H-1000-0077) for further detail. PHC10-3 PLUS LED description Name Colour Function POWER Green Power on when lit STOP Red PHC10-3 PLUS asserting PICS STOP when lit PI 200 asserting PICS STOP when flashing HEAD READY Green Head ready for use when lit HEAD ACTIVE Yellow Head indexing when lit DATUM ERROR Red Head datum error when lit OBSTRUCT ERROR Red Head obstruct error when lit, non PLUS interface fitted OVERLOAD ERROR Red Head overload error when lit TP7 Green TP7 detected when lit TP200 Green TP200 detected when lit STD Green TP2 / TP20 / TP6 detected when lit SEATED Green Probe seated when lit DAMPED Yellow Probe damped when lit NOTE: The probe reset button on the front of PHC10-3 PLUS only functions if a probe interface card is installed within the unit. Issued 01 2013 Page 23 of 48 PH10 PLUS installation and user's guide http://www.renishaw.com PHC10-3 PLUS with integrated probe interface PHC10-3 PLUS is available with an integrated PI 200-3 allowing additional PICS output (Renishaw part number A-5863-0300). Issued 01 2013 Page 24 of 48 PH10 PLUS installation and user's guide http://www.renishaw.com Specification Repeatability of position (at a distance of 62 mm) PH10T PLUS PH10M PLUS PH10MQ PLUS <0.4 μm TP20 and stylus <0.4 μm TP6A and stylus <0.4 μm TP6A and stylus Accuracy of step spacing from theoretical position PH10T PLUS PH10M PLUS PH10MQ PLUS ±0.24 mm TP6 probe and stylus ±0.3 mm TP6A probe and stylus ±0.3 mm TP6A probe and stylus Positioning Step Aaxis 0° to 105° Baxis 180° to +180° Total 7.5° 15 positions 48 positions 720 positions Probe mounting PH10T PLUS PH10M PLUS PH10MQ PLUS M8 thread, 18 mm diameter bush face Multiwired autojoint Multiwired autojoint Dimensions from quill face XY (all) Z (PH10T PLUS) Z (PH10M PLUS) Z (PH10MQ PLUS) 62 mm 102 mm 117 mm 73 mm Weight PH10T PLUS PH10M PLUS PH10MQ PLUS 595 g 620 g 730 g The operating voltages of the unit are as follows: 100 V to 240 Vac +10%, -15% 47 Hz to 66 Hz 30 W maximum Environmental conditions The following environmental conditions comply with those defined in BS EN61010 - 1:2001: Indoor use IP30 (no protection against liquids) Altitude Up to 2000 m Operating temperature 0 °C to +50 °C Storage temperature 10 °C to +70 °C Relative humidity 80% maximum for temperatures up to +31 °C Pollution degree 2 Issued 01 2013 Page 25 of 48 PH10 PLUS installation and user's guide http://www.renishaw.com PH10 PLUS range dimensions Issued 01 2013 Page 26 of 48 PH10 PLUS installation and user's guide http://www.renishaw.com Operating modes Manual mode In manual mode the optional HCU1 hand control unit is used to control head and probe functions. If the HCU1 is connected to the PHC10-3 PLUS controller when power is applied to the system, the system will enter manual mode. For further information refer to the HCU1 user's guide (part number H-1000-5016). Automatic mode In automatic mode the system is under the control of the CMM computer. The HCU1 cannot be used to control head or probe functions in automatic mode. With no HCU1 fitted when power is applied to the system, the system will enter automatic mode. The system must be switched to manual mode under CMM control (and an HCU1 connected) for operation under manual mode. Please refer to the documentation provided by your CMM supplier for further details on controlling the PH10 PLUS series of heads using the CMM computer. CAUTION: Please ensure that the head is mounted as rigidly as possible in the CMM's quill. Avoid collisions between the head, workpiece or CMM bed, ensuring that the head is moved clear of any obstruction before requesting a position change. Do not apply force to any moving parts of the head and do not move the head axes by hand when locked or unlocked. Issued 01 2013 Page 27 of 48 PH10 PLUS installation and user's guide http://www.renishaw.com Autochange racks Renishaw's autochange racks shown are probe exchange systems available for use with the PH10M PLUS and PH10MQ PLUS probe heads. Mounted within the CMM's working envelope, the autochange system facilitates fast, automatic probe exchange without the need for requalification.Fast ‘probing to probing' cycles are achieved by the head docking one probe and selecting another. Once calibrated the highly repeatable autojoint removes the need to requalify after each exchange. ACR1 ACR1 is a fully integrated autochange system with eight ports. The ACR1 can be mounted vertically and has the ability to change probes from the end of extension bars. ACR3 ACR3 is a passive modular autochange rack with four ports and is driven by the motion of the CMM. Two ACR3s can be linked to provide an eight port system. The ACR3 is mounted on the horizontal Renishaw MRS (modular rail system). ACR3 is a passive modular autochange rack with four ports and is driven by the motion of the CMM. Two ACR3s can be linked to provide an eight port system. The ACR3 is mounted on the horizontal Renishaw MRS (modular rail system). Issued 01 2013 Page 28 of 48 PH10 PLUS installation and user's guide http://www.renishaw.com Adjustment modules Both modules enable adjustment in pitch, roll and yaw and allow accurate alignment with machine quill or workpiece. AM1 adjustment module The AM1 adjustment module shown below is designed for use on the PH10T PLUS and PH10M PLUS. It has a quick release mechanism allowing for rapid head exchange and features inbuilt overtravel protection. For further information on the AM1, please refer to the AM1 user's guide (part number H-1000-4010). Issued 01 2013 Page 29 of 48 PH10 PLUS installation and user's guide http://www.renishaw.com AM2 adjustment module The AM2 adjustment module shown below is designed for use with the PH10MQ PLUS. For further information on the AM2, please refer to the AM2 product information sheet (part number H-1000-2051). Issued 01 2013 Page 30 of 48 PH10 PLUS installation and user's guide http://www.renishaw.com Maintenance There are no user serviceable parts inside any PH10 PLUS system units. Units requiring attention must be returned to an authorised Renishaw customer service centre. The probe head, controller and hand control unit should be cleaned with a soft, dry, lint-free cloth. Issued 01 2013 Page 31 of 48 PH10 PLUS installation and user's guide http://www.renishaw.com Troubleshooting Overload error Possible cause Solution Head lock up holding force exceeded during CMM acceleration Reduce mass of probe combination Reduce acceleration Collision with workpiece or CMM Check head for damage Remove obstruction and repeat move Obstruct error Possible cause Solution Head / stylus configuration obstructed Check head for damage Remove obstruction and repeat move Probe extension combination too long Use a shorter / lighter stylus combination Internal head fault Contact your Renishaw representative PH10 PLUS head and non-PLUS PHC10-3 or third party controller Contact your Renishaw representative Datum error Possible cause Solution Cable / connections faulty Check condition of cabling from head to controller Head / stylus configuration obstructed Remove obstruction and update head using HCU1 or under CMM control Probe extension combination too long Use shorter / lighter stylus combination Internal head fault Contact your Renishaw representative No head movement Possible cause Solution Power loss Check that controller power on LED is lit Check mains cable condition and integrity Check controller fuse Check emergency stop condition Cable / connections faulty Check condition of cabling from head to controller Issued 01 2013 Page 32 of 48 PH10 PLUS installation and user's guide http://www.renishaw.com No probe signal Possible cause Solution Probe incorrectly attached Remove probe and reattach Cable / connections faulty Check condition of cabling from head to controller Probe failure Contact your Renishaw representative Probe output disabled by CMM Check probe output Poor measurement performance Possible cause Solution Loose head mounting Ensure all mounting screws are tight and that mounting to the CMM is secure Probe incorrectly attached Remove probe and reattach Force applied to head during lock up Lock and unlock the head Incorrect lock up position Reposition head correctly Position not qualified Check qualification information NOTE: Before seeking technical assistance please make a note of the following information: Your CMM manufacturer and model The probe head model The probe head serial number The head controller serial number The head controller version number The LED sequence on the PHC10-3 The stylus configuration fitted If you experience problems which you are not able to identify or solve satifactorily, please contact your Renishaw representative for further advice. Issued 01 2013 Page 33 of 48 PH10 PLUS installation and user's guide http://www.renishaw.com Appendix 1 - International safety warnings BG ‐ ПРЕДУПРЕЖДЕНИЯ Когато върху продукта е показан този символ, потребителят трябва да направи справка с ръководството за потребителя за информация и съвет за безопасност. Съществуват рискове от притискане между движещи се части и между движещи се и неподвижни части. Да не се държи пробникът или главата на пробника по време на работните движения, или при ръчна смяна на пробника. Пазете се от неочаквано движение. Потребителят трябва да остава извън пълния работен обсег на комбинациите глава на пробника / удължител / пробник. Препоръчва се защита на очите във всички приложения, включващи използване на машини или CMM. Заменяйте изгорелите предпазители с нови от същия тип. Вж. информацията по безопасност в съответната документация за продукта. За инструкции по отношение безопасното почистване на продуктите Renishaw вж. информацията за поддръжка в съответната документация на продукта. Преди извършване на всякакви операции по поддръжката да се изключва захранването. Вж. инструкциите за работа на доставчика на машината. Отговорност на доставчика на машината е да гарантира, че на потребителя са обяснени всякакви рискове по време на работа, включително онези, упоменати в документацията на продуктите Renishaw и да гарантира осигуряване на съответни предпазители и обезопасителни блокировки. При определени обстоятелства сигналът от пробника може да посочва фалшиво състояние на опрян пробник. Да не се разчита на сигналите от пробника за спиране движението на машината. Ако оборудването се използва по начин, който не е указан от производителя, осигуряваната от оборудването защита може да се влоши. Очакваният метод за осигуряване на аварийно спиране за продуктите Renishaw е да се изключи захранването. CS ‐ UPOZORNĚNÍ Jestliže je na výrobku zobrazen tento symbol, musí uživatel nahlédnout do příručky pro instalaci a obsluhu a přečíst si informace a bezpečnostní doporučení. Mezi pohyblivými součástmi a mezi pohyblivými a statickými součástmi hrozí nebezpečí přiskřípnutí. Při přesunování nebo ručním nastavování sondy nedržte snímací hlavici. Dejte pozor na nečekaný pohyb stroje. Uživatel by měl setrvávat mimo pracovní rozsah stroje, zejména mimo místa pohybu snímací hlavice, prodloužení a sondy. Při jakékoli práci s obráběcími stroji nebo souřadnicovými měřicími stroji (CMM) je doporučeno používat ochranu očí. Spálené pojistky nahraďte novými pojistkami stejného typu. Pokyny naleznete v informacích o bezpečném provozu uvedených v příslušné dokumentaci k produktu. Issued 01 2013 Page 34 of 48 PH10 PLUS installation and user's guide http://www.renishaw.com Pokyny týkající se bezpečného čištění produktů společnosti Renishaw naleznete v části věnované informacím o údržbě v příslušné dokumentaci k produktu. Před započetím jakékoliv údržby zařízení odpojte napájení. Přečtěte si provozní pokyny dodavatele příslušného stroje. Povinností dodavatele stroje je informovat uživatele o nebezpečích spojených s provozem i o nebezpečích zmiňovaných v dokumentaci k produktům společnosti Renishaw a zajistit dostatečné ochranné a bezpečnostní systémy. Za určitých okolností může signál sondy nesprávně označovat klidový stav sondy. Nevyužívejte signály sondy jako hlavní impuls pro zastavování stroje. Používáli se zařízení způsobem, který není výrobcem specifikován, může dojít ke snížení ochrany zajištěné zařízením. Předpokládaným způsobem nouzového zastavení produktů společnosti Renishaw je odpojení napájení. DA - ADVARSLER Når dette symbol vises på produktet, skal brugeren rådføre sig med installations og brugervejledningen for at søge oplysninger og sikkerhedsråd. Der er risiko for at blive klemt mellem bevægelige dele og mellem bevægelige og statiske dele. Hold ikke sondehovedet under bevægelse eller ved manuelle sondeskift. Pas på uventede bevægelser. Brugeren bør holde sig uden for hele probehovedets/forlængerens/probekombinationernes arbejdsområde. I alle tilfælde, hvor der anvendes værktøjs og koordinatmålemaskiner, anbefales det at bære beskyttelsesbriller. Udskift sikringer, der er sprunget, med nye komponenter af samme type. Se i under sikkerhed i produktdokumentationen. Se under vedligeholdelse i produktdokumentationen for at få instruktioner til sikker rengøring af Renishawprodukter. Afbryd strømforsyningen, før der foretages vedligeholdelse. Se maskinleverandørens brugervejledning Det er maskinleverandørens ansvar at sikre, at brugeren er bekendt med eventuelle risici i forbindelse med driften, herunder de risici, som er nævnt i Renishaws produktdokumentation, og at sikre, at der er tilstrækkelig afskærmning af sikkerhedsblokeringer. Under visse omstændigheder kan sondesignalet ved en fejl angive, at sonden står stille. Stol ikke på, at probesignaler vil stoppe maskinens bevægelse. Hvis udstyret anvendes på en måde, som ikke er specificeret af producenten, kan udstyrets beskyttelse blive påvirket. Den forventede metode til nødstop af Renishawprodukter er afbrydelse strømforsyningen. DE - SICHERHEITSANWEISUNGEN Wenn dieses Symbol auf dem Produkt abgebildet ist, muss der Anwender die Informationen und Sicherheitshinweise des Installations- und Benutzerhandbuchs beachten. Zwischen beweglichen sowie zwischen beweglichen und statischen Bauteilen besteht Einklemmgefahr. Der Dreh-/Schwenkkopf darf Issued 01 2013 Page 35 of 48 PH10 PLUS installation and user's guide http://www.renishaw.com während des Betriebs oder einem Messtasterwechsel nicht berührt oder festgehalten werden. Nehmen Sie sich vor unerwarteten Bewegungen in Acht. Der Anwender darf sich nur außerhalb des MesstasterArbeitsbereiches aufhalten. Bei Arbeiten an Werkzeugmaschinen oder Koordinatenmessgeräten wird Augenschutz empfohlen. Durchgebrannte Sicherungen dürfen nur mit gleichwertigen ersetzt werden. Beachten Sie die Sicherheitshinweise der zugehörigen Dokumentation. Anweisungen zur sicheren Reinigung von RenishawProdukten finden Sie in den Wartungsinformationen der zugehörigen Produktdokumentation. Bevor Wartungsarbeiten begonnen werden, muss die Stromversorgung getrennt werden. Beachten Sie die Bedienungsanleitungen des Maschinenherstellers. Es obliegt dem Maschinenlieferanten, den Anwender über alle Gefahren, die sich aus dem Betrieb der Ausrüstung, einschließlich der, die in der Renishaw Produktdokumentation erwähnt sind, zu unterrichten und sicherzustellen, dass ausreichende Schutzvorrichtungen und Sicherheitsverriegelungen eingebaut sind. Es kann passieren, dass der Messtaster fälschlicherweise eine Ruhestellung signalisiert. Verlassen Sie sich nicht alleine auf das Signal des Mess-Systems, um Maschinenbewegungen zu stoppen. Wird das Gerät für einen nicht vom Hersteller spezifizierten Zweck benutzt, kann dies zu einer Beeinträchtigung des vom Gerät bereitgestellten Schutzes führen. Renishaw-Produkte im Notfall durch Ausschalten der Stromversorgung stoppen. EL ‐ ΠΡΟΕΙΔΟΠΟΙΉΣΕΙΣ Όπου εμφανίζεται αυτό το σύμβολο επάνω στο προϊόν, ο χρήστης πρέπει να ανατρέξει στον οδηγό εγκατάστασης και στον οδηγό χρήστη, για πληροφορίες και για συμβουλές ασφαλείας. Υπάρχει κίνδυνος πιασίματος μεταξύ των κινούμενων μερών όπως και μεταξύ των κινούμενων και στατικών μερών. Μη συγκρατείτε την κεφαλή ανιχνευτή κατά τη διάρκεια των κινήσεων ούτε και κατά τη διάρκεια χειροκίνητων αλλαγών του ανιχνευτή. Προσέξτε τις απροσδόκητες κινήσεις. Ο χρήστης πρέπει να παραμένει εκτός του χώρου στον οποίο διεξάγονται όλοι οι συνδυασμοί λειτουργίας της κεφαλής ανιχνευτή, της προέκτασης και του ανιχνευτή. Σε όλες τις εφαρμογές που συνεπάγονται τη χρήση εργαλείων μηχανημάτων και εξαρτημάτων CMM, συνιστάται η χρήση συσκευής προστασίας των ματιών. Αντικαταστήστε τις καμένες ασφάλειες με νέες ασφάλειες του ίδιου τύπου. Ανατρέξτε στις πληροφορίες σχετικά με την ασφάλεια του έντυπου συνοδευτικού υλικού του αντίστοιχου προϊόντος. Για οδηγίες σχετικά με τον ασφαλή καθαρισμό των προϊόντων Renishaw, ανατρέξτε στις πληροφορίες σχετικά με τη συντήρηση του έντυπου συνοδευτικού υλικού του αντίστοιχου προϊόντος. Αποσυνδέστε το μηχάνημα από το ηλεκτρικό ρεύμα πριν επιχειρήσετε οποιεσδήποτε εργασίες συντήρησης Συμβουλευτείτε τις οδηγίες λειτουργίας του προμηθευτή του μηχανήματος. Αποτελεί ευθύνη του προμηθευτή του μηχανήματος να εξασφαλίσει ότι ο χρήστης είναι ενήμερος για τυχόν κινδύνους που συνεπάγεται η λειτουργία, συμπεριλαμβανομένων όσων αναφέρονται στα εγχειρίδια του προϊόντος της Renishaw. Είναι επίσης ευθύνη του να εξασφαλίσει ότι υπάρχουν τα απαιτούμενα προστατευτικά καλύμματα και οι συνδέσεις ασφαλείας. Issued 01 2013 Page 36 of 48 PH10 PLUS installation and user's guide http://www.renishaw.com Υπό ορισμένες συνθήκες το σήμα του ανιχνευτή μπορεί να υποδεικνύει λανθασμένη ένδειξη τοποθέτησης του ανιχνευτή. Μη βασίζεστε στα σήματα ανιχνευτή για τη διακοπή της κίνησης του μηχανήματος. Εάν ο εξοπλισμός χρησιμοποιείται με τρόπο μη προδιαγεγραμμένο από τον κατασκευαστή, η παρεχόμενη προστασία του εξοπλισμού πιθανώς να παρεμποδίζεται. Η αναμενόμενη μέθοδος διακοπής έκτακτης ανάγκης για τα προϊόντα Renishaw είναι η αποσύνδεσή τους από το ηλεκτρικό ρεύμα. ES - AVISOS Si aparece este símbolo en el producto, el usuario deberá consultar la guía de instalación y de uso para obtener más información y consejos sobre seguridad. Existe el peligro de atraparse los dedos entre las distintas partes móviles y entre partes móviles y fijas. No sujetar la cabeza de la sonda mientras se mueve, ni durante los cambios manuales de la sonda. Preste atención a los movimientos imprevistos. El usuario debe quedarse fuera del grupo operativo completo compuesto por la cabeza de sonda/extensión/sonda o cualquier combinación de las mismas. Se recomienda usar gafas de protección en todas las aplicaciones que implican el uso de MáquinasHerramienta y máquinas de medición de coordenadas. ustituir los fusibles fundidos con componentes nuevos del mismo tipo. Remitirse a la sección titulada SEGURIDAD (SAFETY) en la documentación sobre el producto. Para instrucciones sobre seguridad a la hora de limpiar los productos Renishaw, remitirse a la sección titulada MANTENIMIENTO (MAINTENANCE) en la documentación sobre el producto Quitar la corriente antes de emprender cualquier operación de mantenimiento. Consulte las instrucciones de manejo del proveedor de la máquina. Es responsabilidad del proveedor de la máquina garantizar que el operario sea informado sobre los peligros relacionados con el funcionamiento, incluidos los peligros mencionados en la documentación de los productos Renishaw, y garantizar que se suministran los dispositivos de protección y seguridad adecuados. Bajo determinadas circunstancias la señal de la sonda puede indicar erróneamente que la sonda está asentada. No espere a las señales de la sonda para detener el movimiento de la máquina. Si no se cumplen las indicaciones especificadas por el fabricante para la utilización del equipo, la protección del equipo puede verse dañada. El método previsto para efectuar una parada de emergencia de los productos Renishaw es el de quitar la corriente. ET - HOIATUSED Kui seadmel on kujutatud see sümbol peab kasutaja pöörduma paigaldus ja kasutusjuhendi poole täiendava info ja turvalise käsitsemise nõuannete saamiseks. Masina liikuvad osad võivad põhjustada muljumisohtu. Ärge hoidke masina liikumise ajal või sondi vahetamise ajal kinni sondipeast. Olge ettevaatlik ootamatute liikumiste suhtes. Kasutaja peab jääma väljapoole sondipea ja sondipikendi tööulatust. Issued 01 2013 Page 37 of 48 PH10 PLUS installation and user's guide http://www.renishaw.com Kõikide rakenduste puhul, mis kasutavad tööpinke või koordinaatmõõtemasinaid, on soovitav kasutada silmakaitsmeid. Asendage läbipõlenud kaitsmed uute sama tüüpi kaitsmetega. Täpsemad juhised leiate vastava toote dokumentide ohutusjuhiste alaosast. Täpsemad juhised Renishaw toodete ohutuks puhastamiseks leiate vastava toote dokumentide hooldusjuhiste alaosast. Enne hooldustööde teostamist eemaldage toide. Vaadake masina tarnija kasutusjuhendit. Masina tarnija vastutuseks on tagada, et kasutajat teavitatakse masina tööga kaasnevatest ohtudest, kaasa arvatud need ohud, mida on mainitud Renishaw toote dokumentides, ning samuti tagada, et masinaga oleks kaasas korrektsed kaitsepiirded ja turvalukud. Teatud tingimustel võib sondi signaal valesti viidata sondiga seotud olukorrale. Ärge lootke masina liikumise peatamiseks sondi signaalile. Kui seadet kasutatakse viisil, mis ei ole tootja poolt ette nähtud, võib seadme pakutav kaitse väheneda. Esmaseks masina hädaseiskamise meetodiks Renishaw toodete puhul on elektritoite katkestamine. FI - VAROITUS Kun tuotteessa näkyy tämä symboli, käyttäjän tulee tutustua asennus ja käyttöoppaassa esitettäviin lisätietoihin ja turvallisuusohjeisiin. Liikkuvien osien sekä liikkuvien ja staattisten osien välillä on olemassa puristusvaara. Älä pidä kiinni anturin päästä sen liikkuessa tai vaihtaessasi anturia käsin. Varo odottamatonta liikettä. Käyttäjän tulee pysyä mittapää/jatke/anturiyhdistelmien toimintaalueen ulkopuolella, Silmäsuojainten käyttö on suositeltavaa kaikkia työstökoneita ja koordinaattimittauskoneita (CMM) käytettäessä. Korvaa palaneet sulakkeet samantyyppisillä uusilla sulakkeilla. Lue tuoteselosteen TURVALLISUUTTA (SAFETY) koskeva osa. Renishawtuotteiden turvalliset puhdistusohjeet löytyvät kunkin tuotteen dokumenttien kunnossapitokohdasta. Katkaise virta ennen huoltotoimenpiteiden suorittamista. Tutustu laitteen toimittajan käyttöohjeisiin. Laitteen toimittajan vastuulla on varmistaa, että käyttäjä on tietoinen laitteen käyttöön liittyvistä vaaratekijöistä, mukaan lukien Renishaw'n tuotedokumenteissa mainitut vaaratekijät, ja varmistaa, että asiakas saa asianmukaiset suojalaitteet ja varmistimet. Tietyissä olosuhteissa anturilta tuleva signaali saattaa virheellisesti osoittaa, että mittaanturi on lepotilassa (=eikosketuksessa). Älä luota koneen pysähtyvän probin signaaleista. Jos laitetta käytetään valmistajan ohjeista poikkeavalla tavalla, sen suojavaikutus voi olla puutteellinen. Renishawtuotteiden hätäpysäytys tehdään tavallisesti kytkemällä virta pois päältä. FR - SECURITE Lorsque ce symbole est affiché sur le produit, l'utilisateur doit consulter le manuel d'installation et d'utilisation pour y trouver des informations et des conseils de sécurité. L'effet de pincement dû au mouvement des pièces mobiles entre elles ou avec des pièces fixes présente des dangers. Ne pas tenir la Issued 01 2013 Page 38 of 48 PH10 PLUS installation and user's guide http://www.renishaw.com tête du palpeur lorsqu'elle se déplace ou que le palpeur est changé à la main Attention aux mouvements brusques. L'utilisateur doit toujours rester en dehors de la zone de sécurité des installations multiples Tête/Rallonge/Palpeur Le port de lunettes de protection est recommandé pour toute application sur machineoutil et MMT. Remplacer les fusibles grillés par des composants neufs du même type. Consulter les consignes de sécurité de votre documentation. Les conseils de nettoyage en toute sécurité des produits Renishaw figurent dans les consignes de maintenance de votre documentation. Mettre la machine hors tension avant d'entreprendre toute opération de maintenance. Consulter le mode d'emploi du fournisseur de la machine. Il incombe au fournisseur de la machine d'assurer que l'utilisateur prenne connaissance des dangers d'exploitation, y compris ceux décrits dans la documentation du produit Renishaw, et d'assurer que des protections et verrouillages de sûreté adéquats soient prévus. Dans certains cas, il est possible que le signal du palpeur indique à tort l'état que le palpeur est au repos. Il ne faut pas se fier aux signaux venant du palpeur car ils ne garantissent pas toujours l'arrêt de la machine. Toute utilisation de ce matériel d'une manière non spécifiée par le constructeur peut compromettre la protection dont est pourvu cet équipement. La procédure habituelle d'arrêt d'urgence des produits Renishaw est la mise hors tension. GA - RABHAIDH Nuair a thaispeántar an tsiombail seo ar an táirge, féachtar an treoir suiteála agus úsáideoirí, áit a bhfuil faisnéis agus comhairle shábháilteachta. Tá guaiseacha cúngúcháin ann idir páirteanna atá ag gluaiseacht agus idir páirteanna atá ag gluaiseacht agus páirteanna statacha. Ná coinnigh greim ar cheann an tóireadóra le linn gluaiseachtaí, nó nuair atá tóireadóir á athrú de láimh. Fainic an chorraíl gan choinne. Ba chóir don úsáideoir fanacht lasmuigh d'imchlúdach iomlán oibre an chinn tóireadóra/bhreisithe/na dteaglaimí tóireadóra. Moltar cosaint do na súile i ngach aon fheidhmiú lena mbaineann úsáid uirlisí meaisín nó CMM. Déan fiúsanna séidte a athsholáthar le comhpháirteanna den chineál céanna. Tagair don fhaisnéis shábhailteachta i gcáipéisíocht ábhartha an táirge. Atsholáthair fiúsanna séidte le comhpháirteanna den chineál céanna. Tagair don fhaisnéis sábhailteachta i gcáipéisíocht ábhartha an táirge. Féach an fhaisnéis chothabhála sa cháipéisíocht a théann leis an táirge bainteach chun treoracha a fháil faoi tháirgí Renishaw a ghlanadh go sábháilte. Baintear an chumhacht de sula ndéantar aon oibríochtaí cothabhála. Féach na treoracha oibriúcháin ó sholáthraí an mheaisín. Tá sé de dhualgas ar sholáthraí an mheaisín a chinntiú go dtugtar le fios don úsáideoir na guaiseacha a bhaineann leis an oibriú, lena n áirítear iad sin a luaitear i gcáipéisíocht Renishaw faoina dtáirgí féin, agus a chinntiú go soláthraítear comhghlasáil agus cibé cosaint leordhóthanach eile atá riachtanach. Issued 01 2013 Page 39 of 48 PH10 PLUS installation and user's guide http://www.renishaw.com D'fhéadfadh an tóireadóir comhartha a thabhairt, ar chúinsí áirithe, go bhfuil rud éigin cearr leis go bréagach. Ná braitear ar chomharthaí tóireadóra le gluaiseacht an mheaisín a stopadh. Má úsáidtear an trealamh ar bhealach nach bhfuil sonraithe ag an déantúsóir, tharlódh go ndéanfaí dochar don chosaint a sholáthraíonn an trealamh. HU ‐ FIGYELMEZTETÉSEK Amikor ezt a szimbólumot látja a terméken, kérjük, tekintse meg a telepítési és használati útmutatót további információ és biztonsági ajánlások végett. A mozgó alkatrészek között és a mozgó és statikus alkatrészek között beszorulás veszélye áll fenn. Ne fogja meg a tapintót, vagy a tapintófejet mozgás közben. Vigyázzon, mert a gép váratlanul elindulhat. Tartózkodjon a tapintófej és hosszabbítójának teljes mozgáskörzetén kívül! Szerszámgépek és koordinátamérőgépek használata során mindig javasolt a szemvédő viselése. A kiégett biztosítékokat ugyanolyan típusú, új alkatrésszel cserélje ki. Olvassa el a megfelelő termékismertető BIZTONSÁGgal kapcsolatos fejezetét. A Renishaw szerszámgépek biztonságos tisztítására vonatkozó előírásokat megtalálja a megfelelő termékismertető, karbantartás fejezetében. Bármilyen karbantartási művelet kivitelezése előtt áramtalanítsa a gépet. További tudnivalók a gép szállítójának használati utasításában találhatók. A gép szállítója azért felelős, hogy felhívja a felhasználó figyelmét az üzemeltetéssel kapcsolatos veszélyforrásokra, beleértve a Renishaw termékdokumentációjában ismertetetteket is. Továbbá gondoskodnia kell a megfelelő védőburkolatok és biztonsági reteszelések meglétéről is. Bizonyos körülmények között, a tapintófej tévesen is jelezhet mechanikus érintkezést. Ezért nem szabad a tapintófejre bízni a gép leállítását. Ha a felszerelést a gyártó által előírt módtól eltérő módon használják, a felszerelés által nyújtott védelem érvénytelenné válik. A Renishaw termékek vészleállításának elvárt módszere a berendezés kikapcsolása. IT - SICUREZZA Se questo simbolo è riportato sul prodotto, l'utente deve consultare la Guida di installazione e il Manuale dell'utente per ottenere informazioni e consigli su un utilizzo sicuro. Esiste pericolo di danno da schiacciamento tra le parti in moto o tra le parti in moto e quelle ferme. Evitare di afferrare la testa della sonda quando è in moto, oppure quando la sonda viene cambiata manualmente. Fare attenzione ai movimenti improvvisi. Si raccomanda all'utente di tenersi al di fuori dello spazio operativo della testa della sonda, delle prolunghe e di altri accessori della sonda. Si raccomanda di indossare occhiali di protezione in applicazioni che comportano l'utilizzo di macchine utensili e macchine CMM. I fusibili bruciati dovranno essere sostituiti con altri dello stesso tipo. Consultare le informazioni di sicurezza nella documentazione dello specifico prodotto. Issued 01 2013 Page 40 of 48 PH10 PLUS installation and user's guide http://www.renishaw.com Per le istruzioni relative alla pulizia dei prodotti Renishaw, fare riferimento alle informazioni sulla manutenzione della documentazione del prodotto. Prima di effettuare qualsiasi intervento di manutenzione, disconnettersi dalla rete di alimentazione. Consultare le istruzioni d'uso fornite dal fabbricante della macchina. Il fornitore della macchina ha la responsabilità di avvertire l'utente dei pericoli inerenti al funzionamento della stessa, compresi quelli riportati nelle istruzioni di Renishaw, e di fornire dispositivi di protezione e interruttori di esclusione adeguati. È possibile che in certe situazioni venga erroneamente prodotto un segnale che indica che la sonda è in posizione. Non fare affidamento sui segnali di stato sonda per arrestare il movimento della macchina. Se utilizzato in modo non conforme a quanto specificato dal produttore, il dispositivo potrebbe non fornire il livello di protezione previsto. Il metodo corretto di eseguire un arresto di emergenza per i prodotti Renishaw è l'interruzione dell'alimentazione elettrica. LT ‐ ĮSPĖJIMAI Kai ant gaminio rodomas simbolis , naudotojas privalo informacijos ir saugos rekomendacijų ieškoti įrengimo naudotojo vadove. Tarp judančių detalių bei tarp judančių ir statiškų detalių pakliuvę daiktai gali būti suspausti. Nelaikykite zondo galvutės veikiant įrenginiui ar keisdami zondą rankiniu būdu. Saugokitės netikėtų judesių. Naudotojui nerekomenduojama atidaryti veikiančios zondo galvutės / ilgintuvo / zondų junginio gaubto. Dirbant visus darbus, naudojant įrenginio įrankius ar valant ir prižiūrint įrenginį, rekomenduojama užsidėti apsauginius akinius. Pakeiskite perdegusius saugiklius to paties tipo saugikliais. Laikykitės atitinkamos techninės gaminio dokumentacijos saugos nurodymų. „Renishaw” gaminių saugaus valymo instrukcijas rasite priežiūros nurodymuose, pateikiamuose kartu su gaminiu. Prieš atlikdami techninę priežiūrą, išjunkite elektros srovės tiekimą. Laikykitės įrenginio tiekėjo naudojimo nurodymų. Įrenginio tiekėjas atsako už tai, kad naudotojas būtų įspėtas apie pavojus, susijusius su įrenginio naudojimu, taip pat pavojus, minimus „Renishaw” prietaiso techninėje dokumentacijoje, ir kad būtų sumontuoti atitinkami apsauginiai įrenginiai bei blokatoriai. Susiklosčius tam tikroms aplinkybėms, zondo signalas gali neteisingai informuoti, kad jo reikšmės nustatytos į pradinę būseną. Nepasikliaukite zondo signalais ir iš karto nestabdykite įrenginio. Jei įranga naudojama ne taip, kaip nurodo gamintojas, gali sumažėti įrangos teikiama apsauga. Tinkamiausias būdas sustabdyti Renishaw prietaisą yra nutraukti elektros srovės tiekimą. LV ‐ BRĪDINĀJUMS Ja uz izstrādājuma ir redzams šis simbols, lietotājam jāizlasa uzstādīšanas un lietošanas pamācībā sniegtā informācija un padomi par drošību. Pastāv risks tikt saspiestam starp kustīgajām daļām, ka arī kustīgajām un nekustīgajām daļām. Nepieskarieties ar rokām zondei kustības laikā vai mainot zondi. Issued 01 2013 Page 41 of 48 PH10 PLUS installation and user's guide http://www.renishaw.com Uzmanieties no negaidītas kustības. Lietotājam jāpaliek ārpus zondes/uzgaļa/kontaktmērgalviņas pilna darbības rādiusa. Aizsargājiet acis, strādājot ar darbgaldiem vai koordinātu mērīšanas ierīcēm. Aizvietojiet izdegušus drošinātājus ar tā paša veida jauniem komponentiem. Skatiet drošības tehnikas informāciju attiecīgā izstrādājuma dokumentācijā. Instrukcijas drošai Renishaw izstrādājumu tīrīšanai ir iekļautas apkalpošanas informācijā atbilstošā izstrādājuma dokumentācijā. Atvienojiet no strāvas pirms jebkuru apkalpošanas darbu veikšanas. Skatiet iekārtas piegādātāja ekspluatācijas instrukcijas. Iekārtas piegādātājs atbild par to, lai lietotājs būtu iepazīstināts ar jebkuriem draudiem, kas saistīti ar tās darbību (ieskaitot tos, kas minēti Renishaw izstrādājuma dokumentācijā), un lai būtu nodrošinātas atbilstošas aizsargierīces un aizsargbloķētāji. Noteiktos apstākļos zondes signāls var nepareizi norādīt zondes stāvokli. Nepaļaujieties uz zondes signālu, lai apturētu iekārtas kustību. Ja aparatūra tiek lietota veidā, kas neatbilst ražotāja norādītajam, tas var ietekmēt iekārtas drošību. Tiek pieņemts, ka Renishaw izstrādājumu avārijas apturēšanai lietotājs to atvienos no strāvas. MT - TWISSIJIET Kull fejn jintwera dan issimbolu fuq ilprodott, lutent irid jirreferi għallgwida talutent u lgwida dwar linstallazzjoni għal informazzjoni u pariri dwar issigurtà. Hemm ilperiklu li wieħed jinqaras bejn partijiet li jiċċaqilqu u bejn biċċiet li jiċċaqilqu u biċċiet partijiet. Iżżommx irras tassonda waqt il moviment, jew meta tkun qiegħed/qiegħda tibdel sonda. Oqgħod attenta/a għal moviment mhux mistenni. Lutent għandu jibqa' barra żżona kollha taloperat talkombinazzjonijiet tarras tas sonda/estensjoni/sonda. Fixxogħol kollu li jinvolvu lużu ta' għodda talmagni jew CMMs, ilprotezzjoni talgħajnejn hija rrakkommandata. Ibdel fjusijiet li taru b'komponenti ġodda ta' listess tip. Irreferi għallinformazzjoni tassigurtà fiddokumentazzjoni relevanti talprodott. Għal struzzjonijiet dwar ittindif bla periklu talprodotti ta' Renishaw, irreferi għallinformazzjoni dwar ilmanutenzjoni fiddokumentazzjoni relevanti tal-prodott rilevanti. Itfi ddawl qabel ma tagħmel xi xogħol ta' manutenzjoni. Irreferi għallistruzzjonijiet taloperat talfornitur talmagna. Hija rresponsabbiltà talfornitur talmagna li jiżgura li lutent ikun konxju ta' kwalunkwe perikli involuti fittħaddim, inklużi dawk imsemmija fiddokumentazzjoni talprodotti Renishaw, u li jiżgura li hemm protezzjoni u linterlocks tassigurtà adegwati pprovduti. Taħt ċerti ċirkustanzi, ssinjal tassonda jista' jindika b'mod falz kundizzjoni ta' sonda mhux attiva. Tiddependix fuq issinjali tassonda sabiex twaqqaf il-moviment tal-magna. Jekk dan ittagħmir jintuża b'mod li ma jkunx speċifikat millmanifattur, ilprotezzjoni pprovduta mittagħmir tista' titnaqqas. Ilmetodu mistenni ta' li jiġi provdut waqfien ta' emerġenza għal prodotti ta' Renishaw huwa li jintefa' ddawl.TWISSIJIET Issued 01 2013 Page 42 of 48 PH10 PLUS installation and user's guide http://www.renishaw.com NL - WAARSCHUWINGEN Wanneer dit symbool zich op het product bevindt, dient de gebruiker de installatie- en gebruikersgids te raadplegen voor informatie en veiligheidsadvies. Er is risico op inklemming tussen de bewegende onderdelen onderling en tussen bewegende en niet-bewegende onderdelen. Houd de tasterkop niet vast als de machine in werking is of bij het handmatig verwisselen van een taster. Wees bedacht op onverwachte bewegingen. De gebruiker dient buiten het bereik van de werkende tasterkop/verlengstuk/taster combinaties te blijven. Voor alle toepassingen met bewerkingsmachines of CMM's wordt aanbevolen een veiligheidsbril te dragen. Vervang doorgebrande zekeringen door nieuwe van hetzelfde type. Lees de veiligheidsinstructies in de bijbehorende productdocumentatie. Raadpleeg voor het veilig reinigen van Renishaw producten de onderhoudsinstructies in de betreffende productdocumentatie. Verbreek de stroomtoevoer voordat u onderhoudswerk gaat verrichten. Raadpleeg de bedieningshandleiding van de machineleverancier. De leverancier van de machine dient te zorgen dat de gebruiker op de hoogte is van de risico's die zijn verbonden aan het gebruik van de machine, met inbegrip van de risico's vermeld in de productdocumentatie van Renishaw, en dat de machine is voorzien van voldoende beveiligingen en veiligheidsvergrendelingen. Onder bepaalde omstandigheden kan het tastersignaal een onjuiste tastertoestand aangeven. Vertrouw niet op de tastersignalen om de machine tot stilstand te brengen. Gebruik van de apparatuur op een manier die de fabrikant niet voorgeschreven heeft, kan het apparaat beschadigen of de bescherming beperken. U kunt in geval van nood de Renishaw apparatuur stopzetten door de stroom uit te schakelen. PL ‐ OSTRZEŻENIA Jeżeli symbol ten znajduje się na produkcie, należy zapoznać się z instrukcją i podręcznikiem użytkownika, aby uzyskać informacje dotyczące bezpieczeństwa. Występuje niebezpieczeństwo zakleszczenia pomiędzy częściami ruchomymi oraz częściami ruchomymi i nieruchomymi. Nie wolno trzymać głowicy sondy podczas wykonywania przemieszczeń ani podczas ręcznej zmiany sondy. Należy uważać na nieoczekiwane przemieszczenia maszyny. Użytkownik powinien pozostawać poza pełnym zasięgiem roboczym zespołu głowica sondy/łącznik przedłużający/sonda. Podczas obsługi obrabiarek lub maszyn współrzędnościowych zaleca się używanie osłon na oczy. Spalone bezpieczniki topikowe zastępować nowymi elementami tego samego typu. W dokumentacji odpowiedniego produktu zapoznaj się z informacjami dotyczącymi bezpieczeństwa. Aby zapoznać się z instrukcjami dotyczącymi bezpiecznego czyszczenia produktów firmy Renishaw , należy przejść do rozdziału z informacjami dotyczącymi konserwacji w dokumentacji odpowiedniego produktu. Przed przystąpieniem do jakichkolwiek czynności konserwacyjnych należy odłączyć zasilanie energią elektryczną. Issued 01 2013 Page 43 of 48 PH10 PLUS installation and user's guide http://www.renishaw.com Należy zapoznać się z instrukcjami obsługi dostarczonymi przez dostawcę urządzeń. Na dostawcy maszyny współrzędnościowej spoczywa odpowiedzialność za uprzedzenie użytkownika o wszelkich zagrożeniach związanych z eksploatacją łącznie z tymi, o jakich wspomina się w dokumentacji produktu Renishaw oraz za zapewnienie stosownych osłon i blokad zabezpieczających. W określonych warunkach sygnał sondy może fałszywie wskazywać stan gotowości sondy. Nie należy zatrzymywać pracy maszyny tylko z powodu fałszywego sygnału sondy. Jeżeli wyposażenie jest użytkowane w inny sposób niż określił to producent, zabezpieczenie zapewniane przez to wyposażenie może być osłabione. Zalecaną metodą zapewnienia awaryjnego zatrzymania działania produktów firmy Renishaw jest odłączenie zasilania energią elektryczną. PT ‐ ATENÇÃO Quando este símbolo é exibido no produto, o usuário deve consultar as instruções de instalação e o manual do usuário para informações sobre segurança. Existe perigo de esmagamento entre as peças móveis/estáticas do equipamento. Não segure o apalpador ou o cabeçote do apalpador durante os movimentos. Tome cuidado com movimentos inesperados. O usuário deve permanecer fora da área de trabalho das combinações do cabeçote/extensão/apalpador. Em todas as aplicações que envolvam a utilização de MáquinasFerramenta e CMMs, recomendase a utilização proteção para os olhos. Substituir os fusíveis danificados por fusíveis novos do mesmo tipo. Consultar a seção SEGURANÇA (SAFETY) na documentação do produto. Para instruções relativas à limpeza dos produtos Renishaw em segurança, consultar a seção MAINTENANCE (MANUTENÇÃO) da documentação do produto. Desligar a alimentação de energia antes de efetuar qualquer operação de manutenção. Consultar as instruções de operação do fornecedor da máquina. É responsabilidade do fornecedor da máquina garantir que o usuário está ciente dos perigos envolvidos na operação, incluindo os mencionados na documentação dos produtos Renishaw, e assegurar que foram fornecidas todas as proteções apropriadas e bloqueios de segurança. Sob certas circunstâncias, o sinal do apalpador pode falsamente indicar uma condição de contato do apalpador. Não se basear em sinais de apalpador para interromper o movimento da máquina. Se o equipamento for utilizado de modo não especificado pelo fabricante, a proteção oferecida pelo equipamento poderá ser prejudicada. O método sugerido para uma parada de emergência de produtos Renishaw é desligar a alimentação de energia. RO ‐ ATENŢIONĂRI În punctele marcate pe produs cu acest simbol utilizatorul trebuie să consulte manualul de utilizare şi recomandările de securitate. Issued 01 2013 Page 44 of 48 PH10 PLUS installation and user's guide http://www.renishaw.com Există riscul prinderii pielii atât între piesele în mişcare cât şi între piesele în mişcare şi cele fixe. Nu ţineţi de capul palpatorului în timpul deplasării acestuia sau în timpul schimbării manuale a palpatorului propriuzis. Atenţie la deplasările neaşteptate. Operatorul trebuie să rămână complet în afara zonei de acţiune a ansamblului cap palpator/prelungitor/palpator propriu-zis. În toate aplicaţiile care presupun utilizarea maşinilor unelte sau a MMC, se recomandă protejarea ochilor. Înlocuiţi siguranţele arse numai cu componente noi de aceeaşi valoare. Vezi capitolul SIGURANŢĂ al documentaţiei fiecărui produs implicat. Pentru instrucţiuni referitoare la curăţirea în siguranţă a produselor Renishaw, vezi capitolul Întreţinere al documentaţiei fiecărui produs implicat. Înaintea executării oricăror operaţii de întreţinere, scoateţi echipamentul de sub tensiune. Vezi şi instrucţiunile de operare ale furnizorului echipamentului. Este responsabilitatea furnizorului să se asigure că utilizatorul a fost înştiinţat asupra oricărui pericol implicat de utilizarea echipamentului, inclusiv asupra pericolelor menţionate în documentaţia produsului Renishaw, şi de asemenea să se asigure că au fost prevăzute protecţii şi interblocări adecvate. În anumite circumstanţe, palpatorul poate indica o atingere, în mod eronat. Nu vă bazaţi pe semnalele primite de la palpator pentru a opri deplasarea maşinii. Dacă echipamentul este folosit în alt fel decât cel specificat de producător protecţia oferită de acesta poate fi diminuată. Metoda recomandată pentru efectuarea unei opriri de urgenţă în cazul produselor Renishaw este scoaterea echipamentului de sub tensiune. SK ‐ VÝSTRAHY Ak je uvedený na výrobku tento symbol, používateľ si musí prečítať informácie a bezpečnostné odporúčania v inštalačnej a používateľskej príručke. Medzi pohyblivými časťami a medzi pohyblivými a statickými časťami vzniká riziko pomliaždenia. Snímaciu hlavicu počas pohybu alebo pri ručnej výmene sondy nechytajte. Dávajte si pozor na neočakávaný pohyb. Používateľ by mal zostať mimo celej pracovnej dráhy zostavy snímacej hlavice, ramena a sondy. Vo všetkých aplikáciách zahŕňajúcich používanie obrábacích strojov alebo súradnicových meracích prístrojov sa odporúča ochrana očí. Prepálené poistky vymeňte za nové rovnakého typu. Pozrite si bezpečnostné informácie v dokumentácii k príslušnému produktu. Pokyny týkajúce sa bezpečného čistenia produktov spoločnosti Renishaw získate v informáciách o údržbe uvedených v dokumentácii k príslušnému produktu. Pred každým vykonávaním údržby odpojte napájanie. Pozrite si prevádzkové pokyny dodávateľa stroja. Zodpovednosťou dodávateľa stroja je zaručiť oboznámenie používateľa so všetkými rizikami súvisiacimi s prevádzkou, vrátane tých, ktoré sú uvedené v dokumentácii k produktu spoločnosti Renishaw, a zaručiť poskytnutie adekvátnych zábran a bezpečnostných blokovaní. Signál sondy môže za určitých okolností nesprávne indikovať parkovaciu polohu sondy. Pri zastavovaní pohybov stroja sa nespoliehajte na signály sondy. Issued 01 2013 Page 45 of 48 PH10 PLUS installation and user's guide http://www.renishaw.com Ak sa zariadenie používa spôsobom iným ako špecifikovaným výrobcom, môže to eliminovať ochranu poskytovanú zariadením. Predpokladaný spôsob núdzového zastavenia zariadení spoločnosti Renishaw spočíva v odpojení napájania. SL - OPOZORILA Če je na izdelku nameščen ta simbol, mora uporabnik upoštevati informacije in nasvete glede varnosti v navodilih za inštalacijo in v navodilih za uporabnika. Ob gibanju delov obstaja nevarnost uščipa, zato med ročno menjavo sonde ne držite merilne glave. Bodite pozorni na nepričakovane premike. Zadržujte se zunaj delovnega območja sonde/podaljška/merilne glave. Ob uporabi obdelovalnih strojev ali koordinatnih merilnih strojev priporočamo uporabo zaščitnih očal. Pregorele varovalke zamenjajte z novimi komponentami istega tipa. Glejte varnostne napotke v ustrezni produktni dokumentaciji. O varnem načinu čiščenja izdelkov Renishaw si preberite razdelek Vzdrževanje v odgovarjajoči dokumentaciji. Pred začetkom vzdrževanja stroj izklopite iz električnega omrežja. Držite se navodil dobavitelja stroja. Odgovornost dobavitelja stroja je, da uporabnika opozori na vse nevarnosti pri delovanju, tudi na tiste, ki so navedene v Renishaw-jevi dokumentaciji, in da zagotovi vsa potrebna varovala in varnostne zapore. Signal glave lahko v določenih pogojih lažno javlja, da je sonda spravljena, zato se pri zaustavitvi stroja ne zanašajte nanje. Uporaba opreme na način, ki odstopa od predpisanega, lahko poslabša varnost izdelka. Pricakovana metoda za zaustavitev v sili za Renishaw-ove izdelke je odvzem napajanja. SV - VARNINGAR Om den här symbolen visas på en produkt betyder det att användaren måste se installations och bruksanvisningen för information och råd om säkerheten. Det finns risk för klämning mellan rörliga delar och mellan rörliga och stillastående delar. Håll inte i probhuvudet under rörelse eller vid manuellt probbyte. Se upp för plötsliga rörelser. Operatören ska hålla sig utanför arbetsområdet för probhuvud/förlängning/probkombinationer. Ögonskydd rekommenderas för alla tillämpningar, där verktygsmaskiner eller koordinatmätmaskiner används. Byt trasiga säkringar mot nya av samma typ. Se säkerhetsavsnittet i produktdokumentationen. Se underhållsinformationen i relevant produktdokumentation för instruktioner angående säker rengöring av Renishaws produkter. Koppla bort strömmen innan underhåll utförs. Se maskintillverkarens bruksanvisning. Maskinleverantören ansvarar för att användaren informeras om de risker som drift innebär, inklusive de som nämns i Renishaws produktdokumentation, samt att tillräckliga skydd och säkerhetsförreglingar tillhandahålls. Under vissa omständigheter kan probsignalen felaktigt ange att en prob är monterad. Lita inte på probsignaler för att stoppa maskinens Issued 01 2013 Page 46 of 48 PH10 PLUS installation and user's guide http://www.renishaw.com rörelse. Om utrustningen används på ett sätt som inte tillverkaren har avsett kanske skyddet fungerar sämre. Metoden för nödstopp för Renishaws produkter förutsätter att strömmen kopplas bort. Issued 01 2013 Page 47 of 48 Renishaw plc New Mills, Wotton-under-Edge, Gloucestershire, GL12 8JR United Kingdom T +44 (0)1453 524524 F +44 (0)1453 524901 www.renishaw.com/cmmsupport For worldwide contact details, please visit our main website at www.renishaw.com/contact Issued 01 2013