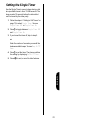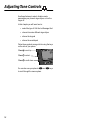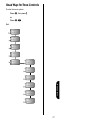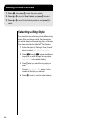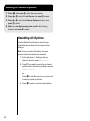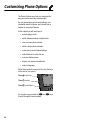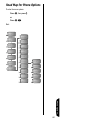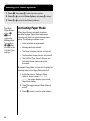
Download Motorola P8190 Specifications
Transcript
Welcome Welcome to the world of Motorola digital wireless communications from a global leader in communications technology! We are pleased you have chosen the Motorola Timeport cellular phone to keep you connected with ease. All Motorola phones are designed and manufactured to meet Motorola’s rigorous specifications and world-class quality standards. During development, our testing team took the Motorola Timeport through rigorous durability tests including temperature, humidity, shock, dust, vibration, and drop tests—and the phone still worked! We are confident that you and your callers will find your wireless phone to be a convenient and reliable way to stay in touch. Thank you for choosing Motorola Timeport, and enjoy your new phone! Contents Welcome . . . . . . . . . . . . . . . . . . . . . . . . . . . . . . . . 1 Safety Information . . . . . . . . . . . . . . . . . . . . . . . . 6 Overview . . . . . . . . . . . . . . . . . . . . . . . . . . . . . . . 11 Package Content Options . . . . . . . . . . . . . . . . 11 Phone Overview . . . . . . . . . . . . . . . . . . . . . . . . 12 Phone Diagram . . . . . . . . . . . . . . . . . . . . . . . . 14 Understanding the Guide . . . . . . . . . . . . . . . . 15 Using the Battery . . . . . . . . . . . . . . . . . . . . . . . . 16 Storing and Disposing of Batteries . . . . . . . . . 16 Removing and Attaching Battery Covers . . . . 17 Installing and Removing Batteries . . . . . . . . . . 18 Checking Battery Levels . . . . . . . . . . . . . . . . . 19 Charging Batteries . . . . . . . . . . . . . . . . . . . . . . 20 Using the Phone . . . . . . . . . . . . . . . . . . . . . . . . . 23 Turning the Phone On and Off . . . . . . . . . . . . . 24 Reading the Indicators . . . . . . . . . . . . . . . . . . 25 Standby Mode . . . . . . . . . . . . . . . . . . . . . . . . . 28 Storing Your Phone in Its Holster . . . . . . . . . . . 28 Using the Smart Button . . . . . . . . . . . . . . . . . . 28 Viewing Your Phone Number . . . . . . . . . . . . . . 29 Placing a Call . . . . . . . . . . . . . . . . . . . . . . . . . . 29 Ending a Call . . . . . . . . . . . . . . . . . . . . . . . . . . 30 Receiving a Call . . . . . . . . . . . . . . . . . . . . . . . . 30 Switching Between Digital and Analog Modes . . . . . . . . . . . . . . . . . . . . . . . . . 31 Redialing a Number . . . . . . . . . . . . . . . . . . . . . 32 Controlling Volume . . . . . . . . . . . . . . . . . . . . . . 33 Using Phone Memory . . . . . . . . . . . . . . . . . . . . 34 Using Your Phone’s Built-in Phone Book . . . . . 35 Storing Names and Numbers . . . . . . . . . . . . . 36 Recalling an Entry by Name . . . . . . . . . . . . . . 39 Recalling an Entry by Memory Location . . . . . 39 Clearing a Phone Memory Entry . . . . . . . . . . . 40 Shortcuts for Recalling Phone Book Entries . . 40 Making Notes on the Scratchpad . . . . . . . . . . 41 2 Using the Menu System . . . . . . . . . . . . . . . . . . . 42 Introducing the Menu Features . . . . . . . . . . . . 42 Navigating the Menu . . . . . . . . . . . . . . . . . . . . 43 Road Maps . . . . . . . . . . . . . . . . . . . . . . . . . . . . 43 Managing Recent Calls . . . . . . . . . . . . . . . . . . . 44 Road Map for Recent Calls . . . . . . . . . . . . . . . 45 About Recent Calls . . . . . . . . . . . . . . . . . . . . . 45 Reviewing Received Call . . . . . . . . . . . . . . . . . 47 Reviewing Dialed Calls . . . . . . . . . . . . . . . . . . 48 Clearing Caller Line ID . . . . . . . . . . . . . . . . . . . 49 Managing the Phone Book . . . . . . . . . . . . . . . . 50 Road Map for Phone Book . . . . . . . . . . . . . . . . 51 Recalling an Entry by Name . . . . . . . . . . . . . . 52 Recalling an Entry by Location . . . . . . . . . . . . 53 Storing with the Menu . . . . . . . . . . . . . . . . . . . 53 Storing and Placing Numbers with Pause Dialing . . . . . . . . . . . . . . . . . . . . . . . . . . 54 Storing and Placing Numbers for Calling Card Information . . . . . . . . . . . . . . . . . 56 Editing a Memory Location . . . . . . . . . . . . . . . 60 Editing an Email Address . . . . . . . . . . . . . . . . . 62 Assigning an Individual Ring Style to a Phone Book Entry . . . . . . . . . . . . . . . . . . . . . 63 Setting the Time and Date . . . . . . . . . . . . . . . . . 64 Road Map for Time and Date . . . . . . . . . . . . . . 65 Setting the Time . . . . . . . . . . . . . . . . . . . . . . . . 66 Setting the Date . . . . . . . . . . . . . . . . . . . . . . . . 67 Changing Your Date Format . . . . . . . . . . . . . . 67 Changing the Time Format . . . . . . . . . . . . . . . 68 Turning Autoupdate On and Off . . . . . . . . . . . . 68 Timing Your Calls . . . . . . . . . . . . . . . . . . . . . . . . 69 Road Map for Call Timers . . . . . . . . . . . . . . . . 70 Viewing Call Timers . . . . . . . . . . . . . . . . . . . . . 71 Displaying the Individual Timer Automatically . . . . . . . . . . . . . . . . . . . . . . . . . . 73 Setting the One-Minute Audible Timer . . . . . . . 73 Setting the Repeating Audible Timer . . . . . . . . 74 Setting the Single Timer . . . . . . . . . . . . . . . . . . 75 3 Adjusting Tone Controls . . . . . . . . . . . . . . . . . . 76 Road Map for Tone Controls . . . . . . . . . . . . . . 77 Selecting Call Alert Type . . . . . . . . . . . . . . . . . 78 Selecting Message Alert Type . . . . . . . . . . . . . 79 Selecting a Ring Style . . . . . . . . . . . . . . . . . . . 80 Turning Keypad Tones On and Off . . . . . . . . . 81 Turning Scratchpad Tones On and Off . . . . . . 82 Using Lock/Security Features . . . . . . . . . . . . . . 83 Road Map for Lock Security . . . . . . . . . . . . . . 84 Activating Voice Privacy . . . . . . . . . . . . . . . . . 85 Locking/Unlocking Your Phone . . . . . . . . . . . . 86 Activating Priority Calling . . . . . . . . . . . . . . . . . 87 Viewing and Changing the Lock Code . . . . . . 88 Restricting Call Placement . . . . . . . . . . . . . . . 89 Resetting All Options . . . . . . . . . . . . . . . . . . . . 92 Clearing All Stored Information . . . . . . . . . . . . 93 A-Key Entry . . . . . . . . . . . . . . . . . . . . . . . . . . . 93 Customizing Phone Options . . . . . . . . . . . . . . 94 Road Map for Phone Options . . . . . . . . . . . . . 95 Activating Pager Mode . . . . . . . . . . . . . . . . . . 96 Selecting Preferred Call Mode . . . . . . . . . . . . 97 Viewing Your Own Number . . . . . . . . . . . . . . . 98 Switching Between Numbers . . . . . . . . . . . . . 98 Reviewing Feature Settings . . . . . . . . . . . . . . . 99 Activating Automatic Hands-Free . . . . . . . . . 100 Activating Multiple Key Answer . . . . . . . . . . . 101 Deactivating Open to Answer . . . . . . . . . . . . 101 Activating Automatic Answer . . . . . . . . . . . . . 102 Selecting Battery Options—Status Light . . . . 103 Displaying System Identification . . . . . . . . . . 103 Selecting a Language . . . . . . . . . . . . . . . . . . 104 Selecting a Network . . . . . . . . . . . . . . . . . . . . . 105 Road Map for Selecting a Network . . . . . . . . 106 Performing a Manual Network Search . . . . . . 107 Selecting a New Network . . . . . . . . . . . . . . . 108 Selecting a Public Network . . . . . . . . . . . . . . 109 Specifying an Automatic Search . . . . . . . . . . 110 Viewing All Non-Public Networks . . . . . . . . . 110 4 Using the Message Center . . . . . . . . . . . . . . .111 Road Map for Message Center . . . . . . . . . . .112 Voice Mail Alerts . . . . . . . . . . . . . . . . . . . . . . .113 Dialing Voice Mail . . . . . . . . . . . . . . . . . . . . . .113 Reading and Managing Text Messages . . . . .114 Sending Text Messages . . . . . . . . . . . . . . . . .123 Sending, Creating, Editing, and Deleting Quick Notes . . . . . . . . . . . . . . . . . . .126 Reading and Sending Draft Messages . . . . .129 Reviewing Messages in Your Outbox . . . . . . .130 Deleting Unsent Messages from the Outbox . . . . . . . . . . . . . . . . . . . . . . . . . . .134 Editing the Voice Mail Number . . . . . . . . . . . .135 Reference Information . . . . . . . . . . . . . . . . . . .136 Accessory Options . . . . . . . . . . . . . . . . . . . . .136 Troubleshooting . . . . . . . . . . . . . . . . . . . . . . .140 Glossary . . . . . . . . . . . . . . . . . . . . . . . . . . . . . . .142 Patent Information . . . . . . . . . . . . . . . . . . . . . .156 Index . . . . . . . . . . . . . . . . . . . . . . . . . . . . . . . . . .159 5 Safety Information Important: Read this information before using your wireless handheld phone. Exposure to Radio Frequency Signals Your wireless handheld portable telephone is a low power radio transmitter and receiver. When it is ON, it receives and also sends out radio frequency (RF) signals. In August 1996, The Federal Communications Commission (FCC) adopted RF exposure guidelines with safety levels for handheld wireless phones. Those guidelines are consistent with safety standards previously set by both U.S. and international standards bodies: • American National Standards Institute (ANSI) IEEE. C95. 1-1992 • National Council on Radiation Protection and Measurement (NCRP). Report 86 • International Commission on Non-Ionizing Radiation Protection (ICNIRP) 1996 • Ministry of Health (Canada), Safety Code 6 Those standards were based on comprehensive and periodic evaluations of the relevant scientific literature. For example, over 120 scientists, engineers, and physicians from universities, government health agencies, and industry reviewed the available body of research to develop the ANSI Standard (C95.1). The design of your phone complies with the FCC guidelines (and those standards). For additional information concerning exposure to radio frequency signals, see the statement by the FDA at the end of this user guide. 6 To maintain compliance with FCC RF exposure guidelines, if you wear a handset on your body, use the Motorola-supplied or approved carrying case, holster, or other body-worn accessory. If you do not use a body-worn accessory, ensure the antenna is at least one inch (2.5 centimeters) from your body when transmitting. Use of nonMotorola accessories may violate FCC RF exposure guidelines. Antenna Care Use only the supplied or an approved replacement antenna. Unauthorized antennas, modifications, or attachments could damage the phone andmay violate FCC regulations. Phone Operation Normal Operation Hold the phone as you would any other telephone, with the antenna pointed up and over your shoulder. Tips on Efficient Operation Observe the following guidelines to operate your phone most efficiently. • Extend your antenna fully, if applicable. • Do not touch the antenna unnecessarily when the phone is in use. Contact with the antenna affects call quality and may cause the phone to operate at a higher power level than otherwise needed. Batteries Caution: All batteries can cause property damage, injury, or burns if a conductive material, such as jewelry, keys or beaded chains, touches exposed terminals. The material may complete an electrical circuit and become quite hot. To protect against such unwanted current drain, exercise care in handling any charged battery, particularly when 7 placing it inside your pocket, purse, or other container with metal objects. When the battery is detached from the phone, your batteries are packed with a protective battery cover; please use this cover for storing your batteries when not in use. Driving Check the laws and regulations on the use of wireless telephones in the areas where you drive. Always obey them. Observe the following guidelines when using your phone while driving. • Give full attention to driving--driving safely is your first responsibility. • Use hands-free phone operation, if available. • Pull off the road and park before making or answering a call if driving conditions so require. Electronic Devices Most modern electronic equipment is shielded from RF signals. However, certain equipment may not be shielded against the RF signals from your wireless phone. Pacemakers The Health Industry Manufacturers Association recommends that a minimum separation of six inches (6") be maintained between a handheld wireless phone and a pacemaker to avoid potential interference with the pacemaker. These recommendations are consistent with the independent research by and recommendations of Wireless Technology Research. Persons with pacemakers: 8 • should ALWAYS keep the phone more than six inches from their pacemaker when the phone is turned ON • should not carry the phone in a breast pocket • should use the ear opposite the pacemaker to minimize the potential for interference • should turn the phone OFF immediately if you have any reason to suspect that interference is taking place Hearing Aids Some digital wireless phones may interfere with some hearing aids. In the event of such interference, you may want to consult your hearing aid manufacturer to discuss alternatives. Other Medical Devices If you use any other personal medical device, consult the manufacturer of your device to determine if it is adequately shielded from external RF energy. Your physician may be able to assist you in obtaining this information. Turn your phone OFF in health care facilities when any regulations posted in these areas instruct you to do so. Hospitals or health care facilities may be using equipment that could be sensitive to external RF energy. Vehicles RF signals may affect improperly installed or inadequately shielded electronic systems in motor vehicles. Check with the manufacturer or its representative regarding your vehicle. You should also consult the manufacturer of any equipment that has been added to your vehicle. Posted Facilities Turn your phone OFF in any facility where posted notices so require. 9 Aircraft Switch OFF your phone before boarding an aircraft. Airline regulations prohibit using your phone while in the air. Check and comply with the policy of your airline regarding the use of your phone while the aircraft is on the ground. Blasting Areas To avoid interfering with blasting operations, turn your phone OFF when in a "blasting area" or in areas posted: "Turn off two-way radio." Obey all signs and instructions. Potentially Explosive Atmospheres Turn your phone OFF, do not remove your battery when you are in any area with a potentially explosive atmosphere, and obey all signs and instructions. Sparks from your battery in such areas could cause an explosion or fire resulting in bodily injury or even death. Areas with a potentially explosive atmosphere are often but not always clearly marked. They include: fueling areas such as gasoline stations; below deck on boats; fuel or chemical transfer or storage facilities; areas where fuel odors are present (for example, if a gas/propane leak occurs in a car or home); areas where the air contains chemicals or particles, such as grain, dust, or metal powders; and any other area where you normally would be advised to turn off your vehicle engine. For Vehicles Equipped with an Air Bag An air bag inflates with great force. Do NOT place objects, including both installed or portable wireless equipment, in the area over the air bag or in the air bag deployment area. If in-vehicle wireless equipment is improperly installed and the air bag inflates, serious injury could result. US021600 10 Overview Overview Package Content Options Your digital cellular phone typically comes equipped with a transformer charger and at least one battery. A large selection of accessory options can customize your wireless package for maximum performance and portability. Below is a sampling of the different package options. Note: Your phone and accessories may not look exactly as pictured. Slim Battery with Battery Cover Standard Battery with Battery Cover Cellular Telephone Holster Headset 11 Desktop Charger (AC Adapter required) Vehicle Power Adapter AC Adapter Phone Overview See “Phone Diagram” on page 14 for an illustration of the components described below. Earpiece—Ultra-compact phone speaker. Headset Jack—Connects an optional headset. Power/Status Indicator—Provides status information on the current type of service and message status. Signal Strength Indicator—Indicates the strength of your phone’s connection with the local cellular system. > and < Volume Keys—The upper and lower volume keys can adjust keypad, earpiece, and ringer volume. After pressing the Smart Button, the volume keys also scroll through memory entries and menu features. 12 Overview = Smart Button—Use the Smart Button to recall information from memory, place and end calls, select menu features, and toggle features on and off. The symbol A in your display represents the Smart Button. Icon Indicators—Displays various indicators such as the digital, in use, in building, no service, SMS message waiting, and voice message waiting indicators. Battery Level Indicator—Show the amount of charge remaining in your battery. VibraCall® Alert Indicator—Indicates the on/off status of the ringer and VibraCall® alert. Function Keys r—Recalls phone numbers from memory. s—Stores phone numbers into memory. c—Clears characters from the screen. S—Places or answers calls. P—Turns the phone on and off. f—Acts as a “shift” key to access the secondary functions of other keys. m Message Center Button—Allows access to digital messages and voice mail messages. e—Ends phone calls. * and #—Can be used to scroll through memory entries and menu features. Microphone—Positioned for convenient conversation. Accessory Connector Port—Provides the connections for an external power supply and vehicular and optional accessories. 13 Phone Diagram Earpiece Headset Jack Power/Status Indicator Signal Strength Indicator Clock Battery Level Indicator Volume Keys Smart Button 09:55 VibraCall® Alert Indicator Icon Indicators Alphanumeric Keypad Function Keys Microphone Accessory Connector Port 14 Understanding the Guide Overview Key Presses Key presses are represented in this guide using symbols so that you may locate and use the required sequence quickly. A sequence of key presses may be shown as follows: f07c This means you should press f followed by 0, 7, and then c, in sequence, not simultaneously. Prompts and Messages Your phone responds to key presses by displaying either a prompt that guides you to the next action or a message confirming that your action is complete. Prompts and messages are represented in this guide in LCD style, for example Reset Timer. Short Cuts and Tips In the margins of your guide are short cuts and useful hints and ways to improve your phone’s performance. These are especially helpful for experienced Motorola users, who can find many of the same key sequences used with other Motorola models. 15 Using the Battery Your digital phone uses Lithium Ion (LiIon) batteries. Batteries are available in Slim and Extra Capacity sizes. In this chapter, you will learn how to: • store and dispose of batteries • remove and attach the cover to the battery • install and remove batteries • interpret battery talk-time and standby-time • check the battery level • charge batteries using the internal charger and the desktop charger Storing and Disposing of Batteries To prolong the life of your batteries, do not expose them to temperatures below -10°C (14°F) or above 45°C (113°F). Always take your phone with you when you leave your car. To dispose of batteries, check with your local recycling center for a battery recycler near you. Never dispose of batteries in a fire. Caution: To prevent injuries or burns, do not allow metal objects to contact or short-circuit the battery terminals. 16 Removing and Attaching Battery Covers Batteries Your phone’s batteries are shipped uncharged and fitted with protective covers. Before you install the batteries, remove these covers, and save them for storing unused batteries. The covers prevent metal objects from contacting the battery terminals, reducing the risk of injury or damage from a battery short circuit. Removing the Battery Cover 1. Press the release latch. 2. 2. Rotate the battery upward and lift it out of the cover. 1. Release Latch Attaching the Battery Cover 1. Lower the edge of the battery opposite the release latch into the cover. 2. Drop the side with the release latch down until the latch clicks into place. 1. 2. Release Latch 17 Installing and Removing Batteries Installing a Battery 1. Set the edge of the battery opposite the release latch into the cover. 2. 1. 2. Press the release latch side of the battery into the cover until the latch clicks into place. Removing a Battery 1. Press P to turn your phone off. 2. Press the release latch back toward the battery, and lift the battery out. Release Latch 18 Checking Battery Levels Battery Level Indicator Batteries The three bar segments on your phone’s Battery Level Indicator display the amount of charge remaining in your battery. The more segments visible, the greater the charge. For a detailed battery level reading: Press f 4. The following is displayed: Main The more segments filled on the battery gauge, the greater the charge. Low Battery Warning When the battery level is low and only a few minutes of talk-time remain, your phone signals you in three ways: • Low Battery appears in the first line of the display. • No bar segments are highlighted. • A short tone plays periodically. Y High X Low To confirm low battery signals: Press f 4. 19 Power Status Messages You may also see one of the following messages: Main Main battery fitted; phone is operating from main battery. Charging Main Main battery fitted; main battery is being charged. Charging Batteries Tip: You can still place and answer calls while using either the internal charger or the vehicle power adapter. Remember that talking on the phone requires energy, so charging takes more time. To place the phone in charger-only mode, turn off the phone by pressing P once. Using the Internal Charger Your phone has a built-in battery charger. Using either the AC or vehicle power adapter, you can plug the handset directly into a power source to charge any attached battery. To charge: 1. Plug the AC adapter or vehicle power adapter into the accessory connector on the bottom of your phone as shown, with the release tab facing up. 2. Plug the power adapter into a 110V AC electrical outlet. or Plug the vehicle power adapter into the power adapter plug in the vehicle. In both cases, a beep-tone sounds, and the battery icon flashes. 20 Using the Desktop Charger You can use the desktop charger to charge batteries while they are attached to your phone, or you can charge a main battery separately. Batteries To charge: 1. Plug the AC adapter into the back of the charger, release tab facing up. HS UP 2. Plug the other end of the adapter into an AC wall socket. 3. With battery attached, place the phone into the charger’s front pocket. Optionally, place an additional battery into the charger’s back pocket. Note: When the phone is charging, the battery level indicator flashes. When the battery is fully charged, this icon stops flashing. If your phone cannot charge the battery, this indicator does not appear. Battery Charging Tips To ensure that you enjoy maximum battery life and use your battery to its fullest capacity: • Always use Motorola approved battery chargers. • For the best results, charge Li-Ion batteries using the E•P™ Desktop Charger or your phone’s internal charger. 21 • The battery should be at or near room temperature when charging. • New batteries or batteries that have been stored for long periods of time may not rapid charge properly. In these instances, the battery requires an overnight charge. • When you don’t intend to use a battery for a while, store it uncharged in a cool, dark, dry place, such as a refrigerator. • Over extended periods of time, batteries gradually wear down and require longer charging times. This is normal. If you charge your battery regularly and notice a decrease in talk-time or an increase in charging time, then it is probably time to purchase a new battery. • Battery life depends on the battery used, network configuration, signal strength, and the features selected. Talking or using features on the phone uses more power than leaving it idle. • Your phone operates more efficiently in digital mode than in analog mode. Quick Change Power Source The quick change feature enables you to switch power sources while a call is in progress without losing the call. If you hear a low-battery warning while you are in a call, plug in the vehicle power adapter or AC adapter. 22 Using the Phone This chapter introduces you to the basic features of your phone. You will learn how to: turn the phone on and off • read the indicators • store your phone in its holster • view your own phone number • place, end, and receive a call • switch between digital and analog modes • use the Smart Button • redial a number • control the volume Using the Phone • 23 Turning the Phone On and Off 1. Open your phone to expose the keypad. 2. To turn the phone on, press and hold P until the display appears and you hear an audible alert. 3. Press and hold P again to turn the phone off. Powering Off is displayed, and you hear an audible alert. What You Will See When you turn on your digital phone, it performs a self-test to let you know it is operational. When the test is completed, the display shows: • 24 one of several possible greetings, such as one of the following: - the name of your Service Provider - an indication of local or non-local coverage area - Motorola - Motorola Timeport • your phone number • the Digital icon Reading the Indicators 1 8 9 09:55 on 10 3 4 5 6 Using the Phone 2 7 Signal Strength Indicator (1) The Signal Strength Indicator (SSI) indicates the strength of your phone’s connection with the local cellular system. A strong signal increases your chances of placing and receiving calls. Weak signal strength can occur in a fringe area of the cellular system. Buildings, tunnels, and bad weather can block or interfere with reception. Digital Indicator (2) The digital indicator displays if you are receiving a digital signal. In Use Indicator (3) B Strong C Weak D I The In Use (IU) Indicator appears when a call is in progress. In-Building Indicator (4) The In-Building Indicator lights when the phone accesses an In-Building Cellular System or other non-public system. No Service Indicator (5) E N If you travel beyond the range of a cellular system, the No Service Indicator appears to let you know that calls cannot be placed or received from your location. 25 M O SMS Message Waiting Indicator (6) The Short Message Service (SMS) Message Waiting Indicator is displayed when the phone receives a message. (This is an optional, network and subscription-dependent feature that is not available in all areas.) Voice Message Waiting Indicator(7) The Voice Message Waiting Indicator is displayed when your Voicemail has received a message. (This is an optional, network and subscription-dependent feature that is not available in all areas.) Battery Level Indicator (8) Y High X Low The three bar segments on the Battery Level Indicator show the amount of charge remaining in your battery. The more segments you see, the greater the charge. The phone alerts you to a low charge in three ways: • No bar segments are highlighted. • Low Battery is displayed. • A short tone plays periodically. Alphanumeric Display (9) The middle area of the display shows input from the keypad, information recalled from memory, and other messages. VibraCall® Alert Indicator (10) One of the VibraCall® alert combinations appears in the display: W VibraCall® on—Your phone’s ringer is turned ® off, and the VibraCall alert is on. V Vibrate then® ring—Both your phone’s ringer and the VibraCall alert are on. J Ring only—Your phone’s ringer is turned on ® and the VibraCall alert is turned off. K Ring and vibrate off—Both your phone’s ® ringer and the VibraCall alert are turned off. 26 Power/Status Indicator Using the Phone While wearing your phone in its holster or while carrying it, you can check the Power/Status indicator on top of the phone for status information on your current type of service and message status. The messages can include voice mails and Short Message Services (SMS) messages, or the receipt of recent calls. (This is an optional, network and subscription-dependent feature that is not available in all areas.) During wake-up and while the phone is “ringing,” the Power/Status Indicator flashes alternating red and green. Otherwise, if the flip is closed and the Status Light setting in the Phone Options menu is set to On, then the Power/Status Indicator flashes according to the following chart. (See “Selecting Battery Options—Status Light” on page 103 for information on the status indicator.) First Flash Second Flash Green Green Red Yellow Yellow Red Service Condition Service in home system No message Roaming (service in non-home system) No message Off Red Message waiting No message No service Red Message waiting Message waiting Note: The Power/Status Indicator is off when the phone is open or in charger-only mode, or when the status light feature is turned off. 27 Standby Mode To conserve energy, your phone may turn off its lights when in standby mode. The display backlight comes back on the next time you press a key or open the phone. Storing Your Phone in Its Holster To slip your phone into its holster, make sure the battery is facing the outside of the holster. Then clip the holster onto a belt, purse or briefcase. Notes: • For body-worn use, keep the antenna at least one inch from your body when transmitting. • The holster has been designed for your convenience and is not meant to secure your phone under all circumstances. Using the Smart Button Use the Smart Button to place and end calls, enter menus, toggle features on and off, and select items in the display. The Smart Button is the middle key on the left side. Smart Button The symbol A in your display represents the Smart Button. Selecing Items in the Display The most basic use of the Smart Button is for making selections. Whenever you are given a choice such as a ringer setting, press the Smart Button to select the setting you want. 28 Toggling Features On and Off Some of your phone’s features toggle on and off. Use the upper or lower volume key to scroll to the desired feature, then press the Smart Button to select it. Entering the Menu System Placing and Ending a Call You can use the Smart Button to place and end a call, as described in “Placing a Call” on page 29 and “Ending a Call” on page 30. Viewing Your Phone Number Press r# for a quick look at your phone number. Placing a Call To place a call: 1. Power the phone on by pressing and holding P until the display appears and you hear an audible alert. 2. Enter the number you want to call. • Press c to erase one digit at a time if you make a mistake. • Press and hold c to clear the entire entry. You can also recall a previously dialed or stored number. (See “Using Phone Memory” on page 34 for details on storing or recalling.) 29 Using the Phone Press f, then press = to access the menu system. You see Recent Calls—the first entry in the menu list. Tip: You can also enter the menu system by pressing f 1. 3. Press and hold = until you hear two tones. You see Dialing XXX, where XXX is the number you are calling. or Press S to place the call. You hear a singletone alert (if the keypad tones are turned on) and see Dialing XXX, where XXX is the number you are calling. You can dial phone numbers with up to 32 digits, but only the last 20 digits appear in the display. Press r to see the entire phone number. Ending a Call Select one of the following three ways to end a call: • Press e. or • Close the phone. or • Use the Smart Button: 1. Press and hold = until you hear two tones. You see A To End Call. 2. Press = again to end the call. Receiving a Call Your phone must be powered on to receive calls. To answer a call: Press S or open the phone when the phone rings. Note: Opening the phone does not answer the call if the Open to Answer feature is off. (See “Deactivating Open to Answer” on page 101.) 30 Unanswered Call Indicator When you cannot take a call, your digital phone keeps a count of your unanswered calls and alerts you with the message Missed XX Calls, where XX is the number of missed calls. Press = to view missed calls. Using the Phone Terminating the Ring or Vibrate Alert You can terminate either the ring or the vibrate alert by pressing either of the volume keys during the ring/vibrate cycle. Switching Between Digital and Analog Modes To switch from digital to analog model during a call: Press f 2. Depending upon availability, your phone selects the TDMA digital system or the analog system. Notes: • Your battery use increases significantly in analog mode. • This feature is not available on all models of this phone. • Once you switch from digital to analog mode, you can not switch back to digital mode until you turn your phone off and on again. • When you switch from digital to analog mode, you may still see the digital D indicator while the phone is idle (that is, not in an active call). 31 Redialing a Number Automatic Redial A fast busy signal indicates that the cellular system is busy. With Automatic Redial, your phone calls continuously for the next four minutes. When it makes a connection, the phone rings or vibrates. You can distinguish this ring because it is half as long as the ring or vibrate for a new incoming call. When the person you are calling answers, you can begin talking. If you hear a fast busy signal: 1. You see Redial Call?. Press = or S to redial, or press e to exit. 2. If the call does not go through after four minutes, press = or S to continue the call attempt. You see Redial. If you hear an ordinary busy signal: 1. Press e to hang up. 2. Press and hold =, or press S, to redial the busy number. 32 Controlling Volume Adjusting Volume Use the upper and lower volume keys to adjust earpiece, keypad, and ringer volume. When you press these keys, the phone’s speaker demonstrates the current volume level. Using the Phone To adjust earpiece and keypad volume: Press > or < to raise or lower the volume. To adjust the ringer volume: 1. Press f. 2. Press > or < to raise or lower the ringer volume. Muting the Microphone For privacy during a call, mute the microphone. You can hear the person on the other end, but he or she cannot hear you. 1. Press f 6 to mute the microphone. You see Mute. 2. Press f 6 again to resume normal conversation. Selecting Silent Vibration Mode In situations where you don’t want your phone to ring, or in noisy places where you may not hear your phone, select the VibraCall® Alert function for discreet vibration: Press f 8 to toggle between ringer and vibration mode. You see Ring only or Vibrate only. 33 Using Phone Memory Use your TDMA digital phone’s internal Phone Book to store up to 99 names and numbers for easy access. In this chapter you will learn how to: • store names and numbers into the phone book • recall phone numbers from memory • clear names and numbers • dial a number with Speed Dial and Turbo Dial® • make notes on the scratchpad Follow these symbols as a guide for using the keys on the side of your phone: Press > to scroll up. Press = to select. Press < to scroll down. You can also use your phone’s * and # keys to scroll through the menu system. 34 Using Your Phone’s Built-in Phone Book Each phone number in your phone book is stored in a memory location numbered 01-99. Using Memory Arrange numbers for easy recall by storing related numbers in groups. If you store the numbers you call most in locations 01-09, then you can use Turbo Dial® to call those numbers with a single key. (See “Using the Turbo Dial® Function” on page 40 for details.) You can also store names to identify phone numbers. Later, you can recall a number by the name that corresponds to it. 35 Storing Names and Numbers How to Store Phone Numbers 1. Enter the phone number you want to store. Note: You can store up to 32 digits per phone number entry. 2. Press s to begin storing. The phone prompts you to enter a memory location by displaying Location ——. 3. Enter the two-digit memory location where you want the sequence stored. or Press * to store the sequence in the first available location. or Enter the first digit of the memory location, then press * to store the sequence in the first available location beginning with that digit. You see Enter Name:. 4. Enter a name to identify the phone number. (See the following section for details on entering names.) 5. Press = or s when you finish entering the name. Your phone confirms your entry by displaying the information you stored. 36 How to Enter Letters and Numbers You can press the numeric keys one or more times to produce any letter or number in the alphabet. Use the letters printed on each key as a guide. For example, press 2 to enter “A,” “B,” “C,” or “2” as shown: press one time to insert an A press two times to insert a B press three times to insert a C press four times to insert a 2 1. Press the appropriate keys to generate the characters shown. 1 Space . 1 ? ! , @ & : ; " ( ) ' ® ≠ % $ — 2 A B C 2 a b c 2 3 D E F 3 d e f 3 4 G H I 4 Tip: Press the upper or lower volume key to toggle between upper and lower case letters. g h i 4 5 J K L 5 j k l 5 6 M N O 6 m n o 6 7 P Q R S 7 p q r s 7 8 T U V 8 t u v 8 9 W X Y Z 9 w x y z 9 0 + - 0 x * / = > < # _ The top line for each key shows the upper case characters, the lower line shows the lower case characters. Press < or > to toggle between upper and lower case letters. You can use the f key to toggle among different typing modes. A Shift indicator shows the currently selected typing mode. A counter beside the Shift indicator shows the number of free spaces remaining for input. 37 Using Memory How to Enter a Name 09:55 J Shift Indicator abc 010 Character Counter Presses Mode Selected Result When Entering Characters Shift Indicator Displays 1 lowercase all characters are lower case abc 2 Shift first character is upper case, all following are lower case Abc 3 Caps Lock all characters are upper case ABC 4 NumLock all characters are numbers 123 f Key The cursor advances automatically to the next space after you enter a letter or after a short period of inactivity. If you are repeating a character, then press # to advance the cursor to the next space. 2. Press *to move back or c to erase a letter if you make an error. 3. Press = or s when you finish entering text. 38 Recalling an Entry by Name After storing names and numbers, you can recall them alphabetically and immediately place calls. Use the Smart Button for instant access to the name directory. 1. Press = once to enter your name directory. 2. Enter the first letter of the name you want to recall. The display shows the first name in the phone book that begins with that letter. Using Memory If no entry is found beginning with a particular letter, then a message is displayed. For example, if no name begins with the letter A, then No AZs is displayed. 3. Press > or < to scroll to the name you want. When the name is displayed, the corresponding number is displayed on a third line, and the phone memory location is displayed in the upper right corner. 4. Press and hold =, or press S, to call the number you selected. Recalling an Entry by Memory Location Each name and number you store is placed in a memory location numbered 01-99. Once you have stored names and numbers, you can recall them by memory location: 1. Press r. 2. Enter the two-digit memory location of the phone number you want. 3. Press and hold =, or press S, to call the number you selected. 39 Clearing a Phone Memory Entry 1. Recall by name the entry that you want to erase. (See “Recalling an Entry by Name” on page 39.) 2. Press c to clear the entry. You see Delete Entry?. 3. Press = or s to confirm that you want to erase the entry. Your phone displays the numbered location of the cleared entry. or Press e to exit without clearing the entry. Shortcuts for Recalling Phone Book Entries Using Speed Dial If you know the memory location of the number you want to call, try the Speed Dial function: 1. Enter the two-digit memory location (01-99). 2. Press and hold =, or press S, to place the call. Using the Turbo Dial® Function The Turbo Dial® function enables you to dial numbers stored in locations 01-09 with the push of a single button: Press and hold a number 1 through 9 on the keypad, and your call is placed. You hear a two-tone alert afterwards. Your phone’s Priority Call feature gives you fast access to any number stored in location 01. To learn more about this feature, see “Activating Priority Calling” on page 87. 40 Making Notes on the Scratchpad In addition to your internal phone book, you also have a built-in scratchpad for making quick notes. The scratchpad remembers the last phone number shown on your display. Entering a Number in the Scratchpad Using Memory If you are on the phone and your party gives you another number to call, enter the number on the scratchpad so you can place the call later. 1. Enter the number into the keypad. (The person on the line can hear tones as you dial.) 2. Press e to end the current call, if necessary. 3. Press S to call the number you saved on the Scratchpad. Storing Numbers During a Call You can also store numbers during a call: 1. Enter the number into the keypad. (The person on the line can hear tones as you dial.) 2. Press s and continue storing with step 3 in “Storing Names and Numbers” on page 36. 41 Using the Menu System Your digital cellular phone includes many features to help you be more productive. The phone’s userfriendly menu system helps you find what you need quickly and easily. In this chapter you will learn: • what are the main menu features • how to navigate through the menus • how to read a menu road map Introducing the Menu Features As you scroll through the menu system, you will see the following icons, each representing a high-level menu. F Recent Calls L Phone Book Time and Date T Timers Tone Control U H Lock Secure Phone Options Network Selection 42 Navigating the Menu You can navigate through the menu system using the three keys located on the left side of the phone. Use the upper and lower volume keys to scroll to sub-menus and to control volume. Use the middle Smart Button to choose menus and functions. Follow these symbols as a guide for using the keys on the side of your phone: Press > to scroll up. Press = to select. ˇhe Menu System Press < to scroll down. You can also use your phone’s * and # keys to scroll through the menu system. Road Maps To help you navigate through the phone’s menu system, each chapter begins with an easy-to-follow visual “road map.” Press the key shown, and observe the message that appears in the display. For example, try this: 1. Press f, then press = to enter the menu features or Press f 1. “menu” is printed on the 1 key as a reminder. 2. Press > and < to scroll through the menu’s top level, shown here in the margin. 3. Press = to select a menu item. 4. Press e to exit the menu. Detailed instructions within each chapter describe how each feature works. Recent Calls Phone Book Time and Date Timers Tone Control Lock Secure Phone Options Network Selection 43 Managing Recent Calls The recent calls menu option allows you to access your Caller Line ID and review previous calls. Caller Line ID is an optional network and subscriptiondependent feature that is not available in all areas. In this chapter you will learn how to review all calls that you have received or dialed. Follow these symbols as a guide for using the keys on the side of your phone: Press > to scroll up. Press = to select. Press < to scroll down. You can also use your phone’s * and # keys to scroll through the menu system. 44 Road Map for Recent Calls To enter the menu system: Press f, then press =. or Press f 1. Start: Recent Calls Received Calls Dialed Calls To Main Menu Recent Calls About Recent Calls The Recent Calls menu allows you to review previous calls that you have received or dialed. Following are some useful tips and information about reviewing recent calls. • To view Caller Line ID information prior to answering a call, you must turn off the Open to Answer feature. (See “Deactivating Open to Answer” on page 101.) • Your digital cellular phone can store the telephone numbers and names of the last thirty incoming calls. • If the caller’s phone number matches a phone number stored in the phone’s memory, the phone automatically displays the name associated with that phone number. 45 • • If you subscribe to call waiting and receive a call while another call is in progress: - You hear a call waiting tone. - The caller’s name and number are displayed. - The name and number are automatically stored and can be viewed after ending the call, using the procedure described in “Reviewing Received Call” on page 47. Caller Line ID allows you to view the name and number of the calling party in the phone’s display while the phone is ringing. Caller Line ID is an optional feature that is not available in all markets. Contact your Service Provider for availability information. 46 • If the caller has restricted transmission of the phone number, your phone displays Anonymous. If the Calling Number ID information is not available to the cellular network, your phone displays Unavailable. • You can store any number contained in your Caller Line ID memory to a memory location in the same way you would save any phone number. Once the correct number is displayed, press sand a memory location or s * to autoload. See “Recalling an Entry by Location” on page 53 for more information on storing phone numbers. Getting to Recent Calls 1. Press f, then press = to enter the menu system. 2. When you see Recent Calls, press = to select. 3. Press > or < to scroll to the following features. Reviewing Received Call 1. Follow the steps in “Getting to Recent Calls” above to scroll to Received Calls. The total numbers of received calls stored is displayed in the upper right corner. If there are no numbers in the Caller Line ID list, you see 00 in the upper right corner. 3. Press > or < to scroll through the list. Your phone displays the order in which the call was received in the upper right corner, with the phone number and name of the calling party (if available). The received call list can range from 01 (the most recent previous phone call) to 30 (the least recent phone call). Your phone also displays the time and date of the incoming call. The following symbols appear next to the received calls: F G Answered Missed 4. Press S to dial the displayed number. 47 Recent Calls 2. Press = to enter your Caller Line ID list of received calls. Shortcut: Press r r to view your received calls. You must hold the second r until the received call list is displayed. Getting to Recent Calls 1. Press f, then press = to enter the menu system. 2. When you see Recent Calls, press = to select. 3. Press > or < to scroll to the following features. Reviewing Dialed Calls 1. Follow the steps in “Getting to Recent Calls” above to scroll to Dialed Calls. Your phone displays the total number of dialed calls that are stored in the upper right corner. You can see up to the last twenty numbers dialed. If there are no numbers in the Dialed Call list, you see 00. Shortcut: Press r 0 0 to enter your dialed calls list. 2. Press = to enter your dialed calls list. 3. Press > or < to scroll through the list. The dialed call list can range from 01 (the most recent dialed phone call) to 20 (the least recent dialed phone call). Your phone displays the order of the previously dialed phone call in the upper right corner, with the phone number and name (if available) of the party called. Your phone also displays the time and date of the outgoing call. 4. Press S to dial the displayed number. 48 Clearing Caller Line ID To erase all entries saved in your Caller Line ID memory: 1. Follow the steps in “Getting to Recent Calls” on page 48 to scroll to Received Calls. 2. Press and hold c when a Caller Line ID name and number is displayed. You see Delete All?. 3. Press = or s to clear. Tip: To erase all entries you must press and hold c, whereas to erase a single entry you simply press c. or Press e to leave your Caller Line ID memory intact. To erase a single entry saved in your Caller Line ID memory: Recent Calls 1. Press c or any other key when a Caller Line ID name and number is displayed. You see Delete Entry?. 2. Press = or s to clear. or Press e to leave your Caller Line ID memory intact. 49 Managing the Phone Book In “Using Phone Memory” you learned how to store and recall phone numbers with the internal Phone Book. You can access the same features, along with several advanced features, using your phone’s convenient menu system. In this chapter you will learn how to: • recall and store phone numbers using the menu system • store numbers with pause dialing • store calling card sequences for easy access • edit your memory information • select the individual ringer style • attach email addresses to phone book entries Follow these symbols as a guide for using the keys on the side of your phone: Press > to scroll up. Press = to select. Press < to scroll down. You can also use your phone’s * and # keys to scroll through the menu system. 50 Road Map for Phone Book To enter the menu system: Press f, then press =. or Press f 1. Start: Recent Calls Phone Book Recall By Name Recall By Location Store Name and Number Attach Email Addr Phone Book Edit Name and Number Edit Email Addr Individual Ring Style To Main Menu 51 Getting to Phone Book 1. Press f, then press = to enter the menu system. 2. Press > or < to scroll to Phone Book, and press = to select. 3. Press > or < to scroll to the following features, and press = to select. Recalling an Entry by Name Shortcut: You can recall phone numbers without using the Phone Book. See “Recalling an Entry by Name” on page 39 or “Recalling an Entry by Memory Location” on page 39. Once you have stored entries, you can recall them alphabetically with the Phone Book menu. Find the name, choose the number, and instantly place a call. To recall a stored name: 1. Follow the steps in “Getting to Phone Book” above to select Recall By Name. You see Enter 1st Letter. 2. Enter the first letter of the name you want to recall. Your phone displays the first name in the phone book that begins with that letter. If no entry is found beginning with a particular letter, then a message is displayed. For example, if no name begins with the letter “A”, then No AZs is displayed. 3. Press > or < to scroll to the name you want. When the name is displayed, the corresponding number is displayed on the third line, and the phone memory location is displayed in the upper right corner. 4. Press and hold =, or press S, to call the number you selected. 52 Recalling an Entry by Location Each name and number you store is placed in a memory location numbered 01-99. After storing names and numbers, you can recall them by memory location with the Phone Book menu. 1. Follow the steps in “Getting to Phone Book” on page 52 to select Recall By Location. You see Location ——. 2. Enter the two-digit memory location of the number you want. Tip: Select a Phone Book entry and press m to send a text message. Refer to “Sending Text Messages” on page 123. 3. Press and hold =, or press S, to call the number you selected. Storing with the Menu To store names and numbers into the Phone Book: Phone Book 1. Follow the steps in “Getting to Phone Book” on page 52 to select Store Name and Number. You see Enter Number. 2. Enter the phone number you want to store. See “How to Enter Letters and Numbers” on page 37. 3. Press = when you finish entering the number. You see Location ——. 4. Press * to store the sequence in the next available location. or Enter the first digit of the memory location and press * to store the sequence in the first available location beginning with that digit. Tip: If the chosen location is full, press e and restart the storing sequence. or Enter the two-digit memory location where you want the sequence stored. 53 5. When you see Enter Name:, enter a name to identify the phone number. (See “How to Enter a Name” on page 37 for details on entering names.) 6. Press = or s, when you finish entering the name. Your phone confirms your entry by displaying the location, number, and name you stored. Proceed with step 7 below, or return to step 2 above to store more numbers. 7. Press e to exit the menu. Storing and Placing Numbers with Pause Dialing Entering a Pause in a Number When you call automated systems, a recorded message prompts you for PIN numbers, Voice Mail numbers, etc. You can store these numbers in your phone’s memory, separated by “pauses”—special characters that tell your phone to wait before sending additional numbers. 1. Follow the steps in “Getting to Phone Book” on page 52 to select Store Name and Number. You see Enter Number. 2. Enter the phone number you use to access the automated system. 3. Press f S. You see Insert Wait o. 4. Press = to insert a pause (o) into the sequence. 5. Enter the next group of numbers (such as an account number or PIN number). 6. Enter any other required symbols (such as * or #). 54 7. Insert another pause, and enter the next group of numbers by repeating steps 3 through 5 as many times as necessary. Then store the entire sequence as you would any phone number. Tip: You can store up to 32 digits, including pauses. 8. Press s to begin storing. You see Location——. 9. Enter the two-digit memory location where you want the sequence stored. You see Enter Name:. 10. Enter a name for your sequence. (See “How to Enter a Name” on page 37 for details on entering names.) 11. Press = when you finish entering the name. Your phone confirms your entry by displaying the location, number, and name you stored. Placing a Call with Pauses Phone Book To use your stored sequence: 1. Recall the stored number with the pause inserted. 2. Press and hold =, or press S, to place the call. 3. When the recording prompts you for information, press = or S to send the next set of stored numbers. 4. Press = or S as many times as necessary, to transmit all the numbers. 55 Getting to Phone Book 1. Press f, then press = to enter the menu system. 2. Press > or < to scroll to Phone Book, and press = to select. 3. Press > or < to scroll to the following features, and press = to select. Storing and Placing Numbers for Calling Card Information Storing Calling Card Information Like Pause Dialing, you can store calling card access numbers, separated by pauses, for recall later. You can also store a Number Character in the memory sequence to save a place for the number you call when you use your calling card. See “Using Lock/Security Features” on page 83 for more information on protecting your calling card information. 1. Follow the steps in “Getting to Phone Book” above to select Store Name and Number. You see Enter Number. 2. Enter the phone number you use to access your calling card system. (Skip this step if you only dial 0.) 3. Press f S. You see Insert Wait o. 4. Press = to insert a pause (o) into the sequence. 5. Enter the next numbers, if needed. (For example, some long distance carriers require you to dial a 0 first. If no further numbers are needed, skip to step 7.) 56 6. Press f S. 7. Press < to scroll to the Number Character. You see Insert Number 'N. 8. Press = to insert the 'N Character. This special character saves a place for the phone number you will be calling. The number is inserted automatically when you place the call. 9. Press f S. 10. Press = to insert another pause, as in steps 3 and 4. 11. Enter your calling card PIN number. 12. Press s to store your calling card sequence. You see Location ——. 13. Enter the two-digit memory location where you want the sequence stored. Phone Book You see Enter Name:. 14. Enter a name for your sequence. (See “How to Enter a Name” on page 37 for details on entering names.) 15. Press = when you are finished entering the name. Your phone confirms your entry by displaying the location, number, and name you stored. 57 Placing a Calling Card Call To recall your stored calling card information: 1. Recall the calling card information you stored. (See “Recalling an Entry by Name” on page 52 and “Recalling an Entry by Location” on page 53 for more information on Recalling Numbers.) 2. Press S before entering the number. You see Enter Number. 3. Enter the phone number you want to call, including the area code. Enter the number manually, by location, or recall. 4. Press and hold =, or press S, to place the call. Your phone dials the number to access your long distance provider. 5. Press =, or press S, to send the next group of numbers when you are prompted. The phone automatically inserts the selected number to call at the appropriate time in the sequence. 6. Repeat step 5 to send the next group of numbers as many times as necessary. 58 Getting to Phone Book 1. Press f, then press = to enter the menu system. 2. Press > or < to scroll to Phone Book, and press = to select. 3. Press > or < to scroll to the following features, and press = to select. Attaching an Email Address You can attach email addresses to your Phone Book entries with the Phone Book menu. 1. Follow the steps in “Getting to Phone Book” above to select Attach Email Addr. You see Enter 1st Letter Phone Book 2. Enter the first letter of the name for the entry you want to modify. Your phone displays the first name in the phone book that begins with that letter. If no entry beginning with that letter is found, No AZs is displayed. 3. Press < or > to scroll to the name you want. 4. Press = to select the name. You see Enter Email Addr. 5. Enter the email address. (Press 1 repeatedly to enter symbols. See “How to Enter a Name” on page 37 for more on entering names.) 6. Press =, or s, when you finish entering the address. Your phone confirms your entry by displaying Email Addr Attached. 59 Getting to Phone Book 1. Press f, then press = to enter the menu system. 2. Press > or < to scroll to Phone Book, and press = to select. 3. Press > or < to scroll to the following features, and press = to select. Editing a Memory Location After you store names and numbers in the Phone Book, you can edit the information or erase entries at any time. 1. Follow the steps in “Getting to Phone Book” above to select Edit Name and Number. 2. Recall the entry by location or by name. (See “Recalling an Entry by Name” or “Recalling an Entry by Location” on page 53.) 3. Press = to begin editing the phone number. Your phone displays the name briefly, then the phone number. 4. Press c to erase one digit at a time. Press and hold c to erase the entire number. 5. Enter your changes to the phone number. 6. Press = when you finish editing the phone number. Your phone displays the location where your number is currently stored. 60 7. Press c to erase the memory location, then enter a new two-digit location. or Press = to keep the phone number in its current location. Your phone displays the name stored with the phone number you are editing. 8. Enter your changes to the name. (See “How to Enter a Name” on page 37.) Press c to erase one letter at a time, or skip to step 9 to leave the name unchanged. 9. Press = when you finish editing the name. Your phone displays the new information. 10. Press = to save your changes. Your phone confirms your entry by displaying the location, number, and name you stored. or Phone Book Press e to leave the information unchanged. 11. Press e to exit, or scroll to other features. 61 Getting to Phone Book 1. Press f, then press = to enter the menu system. 2. Press > or < to scroll to Phone Book, and press = to select. 3. Press > or < to scroll to the following features, and press = to select. Editing an Email Address After you attach an email address to a Phone Book entry, you can edit the address at any time. 1. Follow the steps in “Getting to Phone Book” above to select Edit Email Addr. You see Enter 1st Letter 2. Enter the first letter of the name whose address you want to edit. The display shows the first name in the phone book that begins with that letter. If no entry beginning with that letter is found, No AZs is displayed. 3. Press < or > to scroll to the name you want. 4. Press = to select the name. You see the current email address. 5. Press c to erase one character at a time. Press and hold c to erase the entire number. 6. Enter your changes to the email address. (Press 1 repeatedly to enter symbols. See “How to Enter a Name” on page 37 for more on entering names.) 7. Press =, or s, when you finish entering the address. Your phone confirms your entry by displaying Email Addr Changed. 62 Assigning an Individual Ring Style to a Phone Book Entry You can use the individual ring style feature to assign one of nine ring styles to alert you of an incoming call from a phone number listed in your phone book. Note: This feature will only operate if you subscribe to Caller ID from your service provider. Caller ID is not available in all areas. 1. Follow the steps in “Getting to Phone Book” above to select Individual Ring Style. 2. Select the phone book entry to which you want to assign an individual ring style. a. Enter the first letter of the name entry associated with the phone number. b. Scroll up and down to reach the desired phone book entry. Phone Book 3. When you reach the phone number you want, select it by pressing = or s. Your phone displays Press 0-9, 0=OFF. 4. Press 0 to remove the last ring style selected. or Press an entry from 1 to 9 to select one of the nine ring styles. The ring style will sound. 5. Press = or s to select that ring style. Your phone confirms the selection by displaying Ring Style Assigned. 6. Press e to exit, or scroll to other features. 63 Setting the Time and Date The Time and Date menu lets you format and edit your phone’s time and date information. In this chapter you will learn how to: • set the time and date • set the date format • automatically update your time and date The time and date settings are used by the Caller Line ID feature to indicate the time of incoming and outgoing calls. (See “Reviewing Received Call” on page 47 and “Reviewing Dialed Calls” on page 48.) Follow these symbols as a guide for using the keys on the side of your phone: Press > to scroll up. Press = to select. Press < to scroll down. You can also use your phone’s * and # keys to scroll through the menu system. 64 Road Map for Time and Date To enter the menu system: Press f, then press =. or Press f 1. Start: Recent Calls Phone Book Time and Date Set Time Set Date Set Date Format Set Time Format SA ue t o uD pa dt ae t e OF fo fr m a t To Main Menu Time and Date 65 Activating Pager Mode Getting to Time and Date 1. Press f, then press = to enter the menu system. 2. Press > or < to scroll to Time and Date, and press = to select. 3. Press > or < to scroll to the following features. Setting the Time Use this feature to manually set your phone’s clock: 1. Follow the steps in “Getting to Time and Date” above to select Set Time. The phone displays the current Time setting, with an arrow under the hour field. 2. Press > or < to scroll to the correct hour setting. or Enter the hour on the keypad. 3. Press = to store the hour setting. The arrow moves to the minutes field. 4. Press > or < to scroll to the correct minute setting. or Enter the minutes on the keypad. 5. Press = to store the minutes setting. If the Time Format is set to 24-hour format, your phone now exits the time setting function. Skip to step 7. or If the Time Format is set to 12-hour format, the arrow moves to the am/pm field. 66 6. Press > or < to scroll to the correct am/pm setting, and press = to select it and exit the time setting display. 7. Press e to exit, or scroll to other features. Setting the Date Use this feature to manually set your phone’s date: 1. Follow the steps in “Getting to Time and Date” on page 66 to select Set Date. Your phone displays the current Date setting, with an arrow under the first field. 2. Press > or < to scroll to the correct month (for MM/DD/YY format) or day (for DD/MM/YY format), and press = to select it. or Enter the month or day on the keypad. 3. Press = to store the month or day, and move to the next field. 4. Repeat these steps for the next two date settings. Time and Date 5. Press e to exit, or scroll to other features. Changing Your Date Format Your phone can display dates in a day/month/year format, or in a month/day/year format. Use this feature to select the format you want: 1. Follow the steps in “Getting to Time and Date” on page 66 to select Set Date Format. 2. Press > or < to scroll to the sample date that matches the format you want, and press = to select it. 3. Press e to exit, or scroll to other features. 67 Changing the Time Format Your phone can display time in a 12-hour or 24-hour format. To select the format you want: 1. Follow the steps in “Getting to Time and Date” on page 66 to select Set Time Format. 2. Press > or < to scroll to the sample time that matches the format you want, and press = to select it. 3. Press e to exit, or scroll to other features. Turning Autoupdate On and Off When you activate this feature, your phone updates its time and date from the network each time you turn it on. Notes: • If you turn Autoupdate off, you must set your phone’s clock and date manually. (See “Setting the Time” on page 66 and “Setting the Date” on page 67.) • Network updating is not available in all areas. To turn Autoupdate On and Off: 1. Follow the steps in “Getting to Time and Date” on page 66 to select Autoupdate. 2. Press = to toggle the autoupdate setting on and off. 3. Press e to exit, or scroll to other features. 68 Timing Your Calls Your phone’s Call Timers give you a variety of options for managing your time. You can monitor the length of individual calls, or have the phone alert you at intervals that you specify. In this chapter you will learn how to: • view the timers • monitor the length of your calls • set and view the resettable timer • program audible timers for your individual needs Follow these symbols as a guide for using the keys on the side of your phone: Press > to scroll up. Press = to select. Press < to scroll down. Call Timers You can also use your phone’s * and # keys to scroll through the menu system. 69 Road Map for Call Timers To enter the menu system: Press f, then press =. or Press f 1. Start: Recent Calls Phone Book Time and Date Timers I n d i vi d u a l XX YY R e s e tt a b l e XXXXX Cumulative XXXXX R e s e t Timer I n d i vi d u a l Timer Off O n e Mi n u t e Timer Off R e p e at Timer Off S i n g le Timer Off T o M ai n Menu 70 Getting to Call Timers 1. Press f, then press = to enter the menu system. 2. Press > or < to scroll to Timers, and press = to select. 3. Press > or < to scroll to the following features, and press = to select. Viewing Call Timers Network connection time is the elapsed time, in one-minute intervals, from the moment you connect to your service provider’s network to the moment you end the call by pressing e. The time includes busy signals and ringing. The amount of network connection time you track on your resettable timer may not equal the amount of time for which you will be billed by your wireless service provider. For billing information, please contact your service provider directly. Viewing the Individual Call Timer Shortcut: Press r # # for a quick look at this timer. 1. Follow the steps in “Getting to Call Timers” above to select Individual XX YY. Your phone displays the network connection time of your last call in minutes (XX) and seconds (YY). 2. Press e to exit, or scroll to other features. You can also choose to have the timer display while calls are in progress. See “Displaying the Individual Timer Automatically” on page 73. 71 Call Timers You can view the network connection time of the most recent call or the call in progress (in minutes and seconds) at any time. The Individual Call Timer resets when you place the next call and when you turn the phone off. Viewing the Resettable Call Timer Shortcut: Press r # # # for a quick look at this timer. You can track, in one-minute intervals, the approximate amount of network connection time elapsed. Use this feature to view the time elapsed, and refer to “Resetting the Timer” on page 72 to reset the timer. 1. Follow the steps in “Getting to Call Timers” on page 71 to select Resettable XXXXX. Your phone displays your network connection time in minutes (XXXXX) since you last reset the timer. 2. Press e to exit, or scroll to other features. Follow the instructions in “Resetting the Timer” on page 72 to reset the timer. Viewing the Cumulative Timer Shortcut: Press r # ## # for a quick look at this timer. This is a non-resettable timer that keeps track of your phone’s total network connection time (in minutes). 1. Follow the steps in “Getting to Call Timers” on page 71 to select Cumulative XXXXX. Your phone displays network connection time in minutes since your phone was activated. 2. Press e to exit, or scroll to other features. Resetting the Timer After you reset this timer, it continues to keep track of your network connection time (in minutes) until you reset it again. 1. Follow the steps in “Getting to Call Timers” on page 71 to select Resettable XXXXX. 2. Press < to scroll to Reset Timer. 3. Press = to reset the timer. Your phone may display Busy for a few seconds. 4. Press e to exit, or scroll to other features. 72 Getting to Call Timers 1. Press f, then press = to enter the menu system. 2. Press > or < to scroll to Timers, and press = to select. 3. Press > or < to scroll to the following features, and press = to select. Displaying the Individual Timer Automatically When you turn this feature on, your phone automatically displays your network connection time in minutes (XX) and seconds (YY) during and after each call. 1. Follow the steps in “Getting to Call Timers” above to select Individual Timer. You see Individual Timer Off or Individual Timer On. Tip: Activating the Individual Timer may reduce both standby and talk times. 2. Press = to toggle between Individual Timer Off and Individual Timer On. 3. Press e to exit, or scroll to other features. Call Timers Setting the One-Minute Audible Timer Activate this feature to hear an audible beep 10 seconds before the end of every minute during a call. The party on the other end does not hear the beeps. 1. Follow the steps in “Getting to Call Timers” above to select One Minute Timer. You see One Minute Timer Off or One Minute Timer On. 2. Press = to toggle between One Minute Timer Off and One Minute Timer On. 3. Press e to exit, or scroll to other features. 73 Setting the Repeating Audible Timer You can set this timer to beep during your calls at an interval that you select—from 11-999 seconds. You will hear the beep 10 seconds before the end of each interval, but the party on the other end does not hear the beeps. 1. Follow the steps in “Getting to Call Timers” on page 73 to select Repeat Timer. You see Repeat Timer Off or Repeat Timer On. 2. Press = to toggle between Repeat Timer Off and Repeat Timer On. 3. If you turned the timer off, skip to step 5. or Enter the number of seconds you would like between audible beeps. You see Beep At YYY Secs. 4. Press = to set the timer. The phone confirms the setting by displaying Set At YYY Secs. 5. Press e to exit, or scroll to other features. 74 Setting the Single Timer Use the Single Timer to sound a beep during calls at a specified interval—from 11-999 seconds. The beep sounds 10 seconds before the interval but can’t be heard by the other party. 1. Follow the steps in “Getting to Call Timers” on page 73 to select Single Timer. You see Single Timer Off or Single Timer On. 2. Press = to toggle between Single Timer Off and Single Timer On. 3. If you turned the timer off, skip to step 5. or Enter the number of seconds you would like between audible beeps. You see Beep At YYY Secs. 4. Press = to set the timer. The phone confirms the setting by displaying Set At YYY Secs. 5. Press e to exit, or scroll to other features. Call Timers 75 Adjusting Tone Controls Use these features to select vibration mode, personalize your phone’s ringer styles, or turn the ringer off. In this chapter you will learn how to: • select the type of Call Alert or Message Alert • choose from nine different ringer styles • silence the keypad • silence the scratchpad Follow these symbols as a guide for using the keys on the side of your phone: Press > to scroll up. Press = to select. Press < to scroll down. You can also use your phone’s * and # keys to scroll through the menu system. 76 Road Map for Tone Controls To enter the menu system: Press f, then press =. or Press f 1. Start: Recent Calls Phone Book Time and Date Timers Tone Control Call Alert Type Msg Alert Type Call Alert Ring Style Tone Controls Keypad Tone On Scratchpad Tone On To Main Menu 77 Getting to Tone Controls 1. Press f, then press = to enter the menu system. 2. Press > or < to scroll to Tone Control, and press = to select. 3. Press > or < to scroll to the following features, and press = to select. Selecting Call Alert Type Shortcut: Press f 8 to toggle the VibraCall® Alert function on and off. Using this feature, you can choose to be alerted to incoming calls using the vibrating alert, the ringer, both, or neither. Ring Only is the default. In particular, the VibraCall® Alert vibrating alert is ideal for situations where ringing may not be appropriate, or in noisy places where you might not hear the ringer. When both the ringer and vibrating alerts are selected, the phone alerts you by vibrating for three cycles and then ringing. Notes: • Although you set your call alert type below, the selection is temporarily suppressed if Pager Mode is enabled. See “Activating Pager Mode” on page 96 for details. • When your phone is connected to an external power supply and you receive an incoming call, your phone will ring, regardless of the call alert setting. To select an alert type, complete the following steps: 1. Follow the steps in “Getting to Tone Controls” above to select Call Alert Type. Your phone displays your current alert type setting. 78 2. Press > or < to scroll through your choices: Option Ring Only Vibrate Only Vib then Ring Ringer Off Vib Off Icon (appears in idle display) J W V K 3. Press = when you reach the setting you want. 4. Press e to exit, or scroll to other features. Selecting Message Alert Type Using this feature, you can choose to receive an alert to incoming voice mails and short messages using the VibraCall® alert, beeping alert, or no alert. The beep tone and vibrating patterns differ if the incoming message is marked urgent versus normal. You will receive one beep for a normal message and three beeps for an urgent message. 1. Follow the steps in “Getting to Tone Controls” on page 78 to select Msg Alert Type. Tone Controls 2. Press > or < to scroll through your choices: Messages Beep, Messages Vibrate, and Beep Off Vib Off. Messages Beep is the default setting. 3. Press = when you reach the setting you want. 4. Press e to exit, or scroll to other features. 79 Getting to Tone Controls 1. Press f, then press = to enter the menu system. 2. Press > or < to scroll to Tone Control, and press = to select. 3. Press > or < to scroll to the following features, and press = to select Selecting a Ring Style Your phone lets you select any of nine different ring styles. After you choose a style, the phone gives you a brief sample of the new ring style, or vibrates if you have selected the VibraCall® Alert feature. 1. Follow the steps in “Getting to Tone Controls” above to select Call Alert Ring Style. 2. Press 1 through 9 to hear the different ring styles, or scroll through the ring styles. Ring Style 1 is the default setting. 3. Press = when you reach the ring style you want. You see Ring Style X Set, where X is the number of the style you selected. 4. Press e to exit, or scroll to other features. 80 Turning Keypad Tones On and Off Keypad tones are the sounds you hear when you press any key on the phone. By default, keypad tones are turned on. If you want to be discreet, use this feature to silence the audio feedback from the keypad. Note: The other party still hears tones when you use the keypad during a call. 1. Follow the steps in “Getting to Tone Controls” on page 80 to select Keypad Tone. You see Keypad Tone On or Keypad Tone Off. 2. Press = to toggle between Keypad Tone On and Keypad Tone Off. 3. Press e to exit, or scroll to other features. Tone Controls 81 Turning Scratchpad Tones On and Off Scratchpad tones are the tones that your phone sends to access automated calling systems like Voice Mail. By default, scratchpad tones are turned on. If you don’t want your party to hear these sounds when you use the scratchpad, turn the scratchpad tones off. 1. Follow the steps in “Getting to Tone Controls” on page 80 to select Scratchpad Tone. You see Scratchpad Tone On or Scratchpad Tone Off. 2. Press = to toggle between Scratchpad Tone On and Scratchpad Tone Off. 3. Press e to exit, or scroll to other features. Note: If you turned the scratchpad tones off but want to access a tone-activated system like Voice Mail, place the call, enter the numbers you need to transmit, then: Press r S to send the tones. 82 Using Lock/Security Features While you probably would not want to leave your phone unattended, your digital phone has a number of built-in security features to prevent unauthorized use. In this chapter you will learn how to: • activate the Voice Privacy feature • lock and unlock your phone • place priority calls • change your lock code • restrict call placement and memory access • reset or clear your phone’s settings Follow these symbols as a guide for using the keys on the side of your phone: Press > to scroll up. Press = to select. Press < to scroll down. You can also use your phone’s * and # keys to scroll through the menu system. Lock/Security 83 Road Map for Lock Security To enter the menu system: Press f, then press =. or Press f 1. Start: Recent Calls Phone Book Time and Date Timers Tone Control Lock Secure Privacy Off Code Automatic Lock Off View Lock Code Priority Call On Change Lock Code Secure Options Service Level X To Main Menu Master Reset Master Clear A-Key Entry To Main Menu 84 Getting to Lock Security 1. Press f, then press = to enter the menu system. 2. Press > or < to scroll to Lock Secure, and press = to select. 3. Press > or < to scroll to the following features, and press = to select. Activating Voice Privacy When you activate your phone’s Voice Privacy feature, you request your cellular system to search for a Voice Privacy channel with each call. If no Voice Privacy channel is available (or your call is “handed off” to a cell where a Voice Privacy channel is not available), five short beeps alert you that the call is no longer private. You must select the Voice Privacy feature before you make a call in order for that call to search for a Voice Privacy channel. Note: This feature is not available in all markets. Contact your Service Provider for additional information about your service area. To turn the Voice Privacy feature on or off: 1. Follow the steps in “Getting to Lock Security” above to select Voice Privacy. You see Privacy Off or Privacy Preferred. 2. Press = to toggle between Privacy Off and Privacy Preferred. Lock/Security 3. Press e to exit, or scroll to other features. 85 Locking/Unlocking Your Phone Locking Your Phone Automatically When you turn this feature on, your phone automatically locks itself each time you turn it off. 1. Follow the steps in “Getting to Lock Security” on page 85 to select Automatic Lock. You see Automatic Lock Off or Automatic Lock On. 2. Press = to toggle between Automatic Lock Off and Automatic Lock On. 3. Press e to exit, or scroll to other features. Locking Your Phone Manually Tip: “LOCK” is printed on the 5 key, as a reminder. You can lock your phone manually at any time to prevent unwanted use. Once you lock the phone, it remains locked whether it is powered on or off. 1. Press f. 2. Press and hold 5 for at least one full second.You see Lock?. 3. Press s or = to lock. You see Locked. Unlocking Your Phone To unlock your phone: Once your phone is on, enter your threedigit lock code to unlock your phone. (See “Viewing and Changing the Lock Code” on page 88 for more information on your lock code.) 86 Answering Calls While the Phone Is Locked You can still receive calls when the phone is locked. To answer an incoming call: 1. Enter your three-digit lock code. 2. Press and hold =, or press S to receive the call. Tip: If you forget your lock code, try pressing 1 2 3 or the last three digits of your cellular phone number. Activating Priority Calling Priority Call allows the Turbo Dial® function to dial from memory location 01—even when the phone is locked. You can store an emergency number or the number of someone you would like to contact in case of emergency. Note: Some cellular systems have their own emergency numbers and deny access to emergency numbers like 911 (not available in some areas). Check with your Service Provider for more information. By default, Priority Call is activated. To turn it off or to switch it back on, complete the following steps: 1. Follow the steps in “Getting to Lock Security” on page 85 to select Priority Call. You see Priority Call Off or Priority Call On. 2. Press = to toggle between Priority Call Off and Priority Call On. 3. Press e to exit, or scroll to other features. Lock/Security 87 Getting to Secure Options 1. Press f, then press = to enter the menu system. 2. Press > or < to scroll to Lock Secure, and press = to select. 3. Press > or < to scroll to the Secure Options submenu, and press = to select. 4. Enter your six-digit security code, scroll to the following features, and press = to select. Viewing and Changing the Lock Code For your protection, you must enter the six-digit security code to access the features that your phone contains. The factory-programmed lock code for unlocking the phone is 123. The six-digit default security code is 000000. These codes may have been changed when your phone was activated. Contact your Service Provider if you are unsure of your lock and security codes. Viewing the Lock Code To display the active three-digit lock code: 1. Follow the steps in “Getting to Secure Options” above to select View Lock Code. You see View Lock Code. 2. Press = to display your three-digit lock code. The code appears for a few seconds. 3. Press e to exit, or scroll to other features. 88 Changing the Lock Code To change your three-digit lock code: 1. Follow the steps in “Getting to Secure Options” on page 88 to select Change Lock Code. You see Enter Code __. 2. Enter the new three-digit code. You see Changed To XXX, where XXX is your new code. 3. Press e to exit, or scroll to other features. Note: If you try to change your lock code to 911 or the first three digits of an emergency number, you will see Code Invalid, and the code you entered will not be accepted. You will return to step 1 above. Restricting Call Placement You may want to restrict call placement or hide memory information when loaning your phone to others. Selecting a Service Level 1. Follow the steps in “Getting to Secure Options” on page 88 to select Service Level. The phone displays your current service level. Refer to the chart on the next page. 2. Press > or < to scroll through the service level settings, and press = to select the service level you want. If you select Level 7, the phone prompts you for the range of memory locations you want to remain active. You see Range 1-__. Lock/Security Enter the range of digits memory locations from which calls are allowed. The phone confirms the allowed range, and you see 1-XX Allowed. 3. Press e to exit, or scroll to other features. 89 Service Level Settings Each of your phone’s eight service levels offers a different combination of access privileges and restriction. Note: Caller Line ID is an optional network and subscription feature that is not available in all areas. Level Description • Calls can be placed from memory locations 1-10 only. No dialing from keypad No memory edit or storage No access to name directory No access to last number dialed 1 Memory 1-10 2 • Calls can be placed from all memory locations. • No dialing from keypad • No memory edit or storage • No access to Caller Line ID stack or Last Number Dialed 2 Memory Only 3 • Calls can be placed manually from the keypad only. • No access to memory information • No memory edit or storage • No access to Caller Line ID stack or Last Number Dialed 3 Keypad Only 4 Standard setting, no restrictions 4 Standard Setting 5 Seven-digit (local) dialing only 5 Local Only 1 • • • • 90 Display Level Description • 6 • • 7 • • 8 Display Calls can be placed from the keypad and from memory. No edit or memory storage to memory locations 1-10 6 No Store 1-10 Calls can be placed from a selected memory range only. Memory edit and storage allowed with the selected range. No access to name directory 7 Allow Range No edit, storage, or recall from memory locations 1-9 8 Hide Turbo Lock/Security 91 Getting to Secure Options 1. Press f, then press = to enter the menu system. 2. Press > or < to scroll to Lock Secure, and press = to select. 3. Press > or < to scroll to the Secure Options submenu, and press = to select. 4. Enter your six-digit security code, scroll to the following features, and press = to select. Resetting All Options Use the Master Reset feature to reset all userselectable options back to their original factory settings. Note: Once you select this feature, the reset process cannot be canceled or reversed. 1. Follow the steps in “Getting to Secure Options” above to select Master Reset. 2. Press = if you want to reset all your phone’s options back to their factory settings. You see Standard Setting. or Press e to exit the menu if you do not want to reset your phone’s options. 3. Press e to exit, or scroll to other features. 92 Clearing All Stored Information If you want to start over, use Master Clear to reset all user-selectable options, clear the resettable timer, and erase all Phone Book information. Note: Once you select this feature, the process cannot be canceled or reversed. 1. Follow the steps in “Getting to Secure Options” on page 92 to select Master Clear. 2. Press = to clear the memory and reset all your phone’s options back to their factory settings. You see Busy. (This takes a few seconds.) or Press e to exit the menu if you do not want to reset your phone’s options. 3. Press e to exit, or scroll to other features. A-Key Entry This menu item is locked and can only be used when instructed by your Service Provider. Lock/Security 93 Customizing Phone Options The Phone Options menu lets you customize the way your phone sends and receives calls. You can personalize your phone’s settings, view information about the phone, and choose from a number of convenient features. In this chapter you will learn how to: • activate pager mode • switch between analog or digital mode • view your own phone number • switch cellular phone numbers • review your phone’s feature settings • select features for vehicular use • conserve battery power • display your system identification • select a language Follow these symbols as a guide for using the keys on the side of your phone: Press > to scroll up. Press = to select. Press < to scroll down. You can also use your phone’s * and # keys to scroll through the menu system. 94 Road Map for Phone Options To enter the menu system: Press f, then press =. or Press f 1. Start: Recent Calls Phone Book Time and Date Pager Mode Off Call Mode Preference My Number Timers Change Number Tone Control Feature Review Lock Secure Phone Options Call Options Automatic HF On Battery Options Multi Key Answer Off System Options Open to Answer On Language Automatic Answer Off To Main Menu To Main Menu Phone Options 95 Activating Pager Mode Getting to Phone Options 1. Press f, then press = to enter the menu system. 2. Press < or > to scroll to Phone Options, and press = to select. 3. Press < or > to scroll to the following features Tip: When Pager Mode is active, f 8 only toggles the Message Alert Type settings. f 8 has no effect on the Call Alert Type settings. Activating Pager Mode When Pager Mode is activated, the phone simulates a pager. Pager Mode suppresses incoming call alerts but leaves message alerts active. The following conditions occur: • Voice call alerts are suppressed. • Message alerts are allowed. • The Open to Answer function is turned off. • The Automatic Answer function is turned off. • The Call Alert Type, Open to Answer, and Automatic Answer menus cannot be accessed. By default, Pager Mode is turned off. Complete the following steps to turn Pager Mode on and off. 1. Follow the steps in “Getting to Phone Options” above to select Pager Mode on/off. Your phone displays your current Pager Mode setting. 2. Press = to toggle between Pager Mode on and off. 3. Press e to exit, or scroll to other features. 96 Selecting Preferred Call Mode You can assign either a digital or analog channel to your phone, based on system channel availability. 1. Follow “Getting to Phone Options” on page 96 to select Call Mode Preference. 2. Press < or > to scroll through Digital Voice Pref, Analog Voice Only, and Digital Voice Only. 3. Press s to make your selection. 4. Press e to exit, or scroll to other features. Notes: • This is a network- and subscriptiondependent feature that is not available in all areas. Contact your Service Provider for more information. • When powered on, your phone searches for a digital channel. If no digital channel is available, the phone selects an analog channel. • When you select Analog Voice Only, your phone remains in digital mode until you make a call (if a digital channel is available), The Analog Voice Only setting then remains active until you change to another setting or until you turn the phone off and back on. • If you select Analog Voice Only or Digital Voice Only, you will not be able to make a call if the selected system is not available. Tip: Press f 2 to switch from digital to analog mode during a call. (You cannot switch from analog to digital mode.) Pressing f 2 does not switch modes if your selected call mode is Analog Voice Only or Digital Voice Only. Phone Options 97 Getting to Phone Options 1. Press f, then press = to enter the menu system. 2. Press < or > to scroll to Phone Options, and press = to select. 3. Press < or > to scroll to the following features, and press = to select. Viewing Your Own Number Shortcut: Press r # for a quick look at your phone number. Use this feature to view your phone’s currently active phone number. If you have more than one phone number, you can change the active number with the Change Number feature in the Phone Options menu. 1. Follow the steps in “Getting to Phone Options” above to select My Number. 2. Press = to view your own phone number. Your active phone number appears on the screen. After six seconds, the phone returns to step 1. 3. Press e to exit, or scroll to other features. Switching Between Numbers Note: This option is not available in all areas. If unavailable, please contact your Service Provider. Your phone can operate on two different home systems. If you travel often, you can have your phone programmed with two cellular numbers to reduce roaming. This feature allows you to change your active number to the one appropriate for the area you are in. 98 When your phone has two numbers, both are designated as your home system but only one number can be active at any given time. Calls are placed and received by the currently active number only. Each time you turn your phone ON, you’ll see a message in the display that indicates which phone number and home system are currently active. To switch your phone number: 1. Follow the steps in “Getting to Phone Options” on page 98 to select Change Number. The active phone number appears in the display (for example, 5155551515). 2. Press < to switch to your other phone number (for example, 7085551212). 3. Press = to confirm the new setting. 4. Press e to exit, or scroll to other features. Reviewing Feature Settings Use this feature to review the changes you’ve made to feature settings. Note: While scrolling through Feature Review, you can only review settings. You cannot change them. 1. Follow the steps in “Getting to Phone Options” on page 98 to select Feature Review. 2. Press < or >, or press * or #, to scroll through features you changed from their default settings. If all of the features are set to the factory standard settings, the your phone displays Standard Setting. 3. Press e to exit the menu. Phone Options 99 Getting to Call Options 1. Press f, then press = to enter the menu system. 2. Press < or > to scroll to Phone Options, and press = to select. 3. Press < or > to scroll to the Call Options submenu, and press = to select. 4. Press < or > to scroll to the following features. Activating Automatic Hands-Free Turn this feature on when you are using Hands-Free vehicular accessories. Note: The use of wireless telephones and their accessories (devices) may be prohibited or restricted in certain areas. Always obey the laws and regulations on the use of these devices. To find out more about accessories for your car, refer to “Accessory Options” on page 136. 1. Follow the steps in “Getting to Call Options” above to scroll to Automatic HF. You see Automatic HF On or Automatic HF Off. 2. Press = to toggle between Automatic HF On and Automatic HF Off. 3. Press e to exit, or scroll to other features. 100 Activating Multiple Key Answer Turn on the Multiple Key Answer feature to answer calls by pressing the Smart Button, any key on the upper keypad 1 - #, or the upper and lower volume keys. 1. Follow the steps in “Getting to Call Options” on page 100 to scroll to Mult Key Answer. You see Mult Key Answer On or Mult Key Answer Off. 2. Press = to toggle between Mult Key Answer On and Mult Key Answer Off. 3. Press e to exit, or scroll to other features. Deactivating Open to Answer The Open to Answer feature allows you to set whether or not your phone automatically answers when opened. With Open to Answer set to off, you can open the phone to see the message in the display and then answer by pressing S or =. Notes: • To view Caller ID information prior to answering a call, you must turn off the Open to Answer feature. • You cannot access the Open to Answer setting while the Pager Mode feature is active. To toggle the Open to Answer feature, complete the following steps: Phone Options 1. Follow the steps in “Getting to Call Options” on page 100 to scroll to Open to Answer. You see Open to Answer On or Open to Answer Off. 101 2. Press = to toggle between Open to Answer On and Open to Answer Off. Note: The Open to Answer function cannot be accessed when in Pager Mode. 3. Press e to exit, or scroll to other features. Activating Automatic Answer Tip: If the ringer and VibraCall™ alert are off, the phone answers without ringing or vibrating. Turn Auto Answer on to have your phone automatically answer incoming calls after two rings. Note: Auto Answer does not work if the keypad cover is closed or if Pager Mode is activated. However, the Auto Answer will work with a headset while the keypad cover is closed. 1. Follow the steps in “Getting to Call Options” on page 100 to scroll to Automatic Answer. You see Automatic Answer On or Automatic Answer Off. 2. Press = to toggle between Automatic Answer On and Automatic Answer Off. 3. Press e to exit, or scroll to other features. 102 Getting to Phone Options 1. Press f, then press = to enter the menu system. 2. Press < or > to scroll to Phone Options, and press = to select. 3. Press < or > to scroll to the following features, and press = to select. Selecting Battery Options— Status Light This feature enables you to turn off the Power/Status Indicator. Turn this mode off to increase talk or standby times. 1. Follow the steps in “Getting to Phone Options” above to select the Battery Options sub-menu. You see Status Light On or Status Light Off. 2. Press = to toggle between Status Light On and Status Light Off. 3. Press e to exit, or scroll to other features. Displaying System Identification This feature shows the System ID number that identifies the cellular system your phone is currently accessing. 1. Follow the steps in “Getting to Phone Options” above to enter the System Options sub-menu. You see Display SID. Phone Options 2. Press = to view the System ID number. After six seconds, the phone goes back to step 2. 3. Press e to exit, or scroll to other features. 103 Selecting a Language This feature enables you to select the language in which your phone displays prompts and messages. 1. Follow the steps in “Getting to Phone Options” on page 103 to select the Language sub-menu. 2. Press < to scroll through the language options. 3. Press = to select the language setting you want. 4. Press e to exit, or scroll to other features. 104 Network Selection Selecting a Network Note: This is an optional network- and subscriptiondependent feature that is not available in all areas. The Network Selection menu lets you decide which network your phone will use. In this chapter you will learn how to: • perform a manual search for a network • select a non-public network • select a public network • specify an automatic network search • view all non-public networks Follow these symbols as a guide for using the keys on the side of your phone: Press > to scroll up. Press = to select. Press < to scroll down. You can also use your phone’s * and # keys to scroll through the menu system. 105 Road Map for Selecting a Network To enter the menu system: Press f, then press =. or Press f 1. Start: Recent Calls Phone Book Time and Date Timers Tone Control Lock Secure Phone Options Network Selection Manual Search New System Search Use Public Network Automatic Search View All Non-Public To Main Menu 106 Network Selection Getting to Network Selection 1. Press f, then press = to enter the menu system. 2. Press < or > to scroll to Network Selection, and press = to select. 3. Press < or > to scroll to the following features. Performing a Manual Network Search To perform a manual search for a network: 1. Follow “Getting to Network Selection” above to scroll to Manual Search, and press = to activate a search. Your phone begins to search for all available networks to which you have subscriptions, and displays the names of any networks it locates. • If the phone is registered with a public network when you start the search, it displays the names of all non-public networks first. • If the phone is registered with a public network when you start the search, it displays the names of all public networks first. If the phone cannot locate an available network, it displays Not Available. 2. Press < or > to scroll through the list of available networks. 3. Press = to register with a displayed network. If registration is successful, your phone displays a confirmation message from the network. 107 Note: The phone is registered with the selected network until you place or receive a call or until you turn the phone off and on. If registration is not successful, you see Not Available. (Registration can fail if you travel outside the network range after you locate the network but before you attempt to register.) Press e to exit, and retry later. Selecting a New Network To search for and select a new network: 1. Follow “Getting to Network Selection” on page 107 to scroll to New System Search, and press = to activate a search. 2. Follow the appropriate instructions below: If You See This Message: Search Done: [network ID] Search All Bands? Do the Following: • To search for the next best network, press c. When you see the desired network, go on to step 3. • To cancel the search and exit the menu, press e. • • 108 To continue searching for networks in another band, press =. When you see the desired network, go on to step 3. To cancel the search and exit the menu, press c. Not Available Press e to exit, and retry the search later. Non-Public Not Found The phone returns to standby mode. Retry the search later. Network Selection 3. Press = to register with the displayed network. If registration is successful, your phone displays a confirmation message from the network. Note: The phone is registered with the selected network until you place or receive a phone call or until you turn the phone off and on. If registration is not successful, your phone displays Not Available. (Registration can fail if you travel outside the network range after you locate the network but before you attempt to register.) Selecting a Public Network To search for and select a public network: Follow “Getting to Network Selection” on page 107 to scroll to Use Public Network, and press = to activate a search. If the phone finds a public network, it attempts to register. When registration is successful, your phone displays a confirmation message. Note: The phone is registered with the selected network until you place or receive a phone call or until you turn the phone on and off. If the phone does not find a public network, it displays Public Not Found. Press e to exit, or scroll to other features. To cancel a search, press c or e. 109 Specifying an Automatic Search To reset the phone to perform an automatic network search (rather than forcing the selection of a public or non-public network): Follow “Getting to Network Selection” on page 107 to scroll to Automatic Search, and press = to select it. Viewing All Non-Public Networks You can list up to fifteen non-public networks that your phone has located in previous searches. To list non-public networks: 1. Follow “Getting to Network Selection” on page 107 to scroll to View All Non-Public, and press = to select it. Your phone displays the first network in the list. 2. Press < or > to scroll through the entire list. 3. Press e to exit, or scroll to other features. 110 Using the Message Center Message Center The Message Center gives you easy access to both voice mail and your text messages. In this chapter you will learn how to: • use voice mail • use short messaging services (SMS) to send and receive text messages • edit a phone number to access voice mail Notes: • Voice mail and SMS are optional network and subscription-dependent features that are not available in all areas. • Sending SMS messages to email addresses may not be supported by all networks and Service Providers. Follow these symbols as a guide for using the keys on the side of your phone: Press > to scroll up. Press = to select. Press < to scroll down. Press m to enter the message center. You can also use your phone’s * and # keys to scroll through the menu system. 111 Road Map for Message Center Start: m Voice Mail XX Msgs Read Msgs XX New Send New Message Drafts Outbox XX Unsent Quick Notes Msg Center Options 112 (only if interrupted while writing message text) Getting to Voice Mail Message Center 1. Press m to enter the message center. 2. Press > or < to scroll to Voice Mail. Voice Mail Alerts This feature notifies you whenever a message is sent to your voice mail number, providing real-time information on messages waiting to be retrieved. When a voice mail message is received: • Voice Mail XX Msgs is displayed, where XX is the number of message you have waiting. • The • The phone beeps three times or vibrates one time for a message. icon appears. Dialing Voice Mail You can retrieve your voice mail messages in one of two ways. From the Voice Mail Alert Screen When you receive a voice mail alert and Voice Mail XX Msgs appears, press = to dial your voice mail number. Your phone automatically dials the access number for the voice mail center and displays Dialing XXXX, where XXXX is the access number. From the Message Center Follow the steps in “Getting to Voice Mail” above, and press = to dial your voice mail number. Your phone automatically dials the access number for the voice mail center and displays Dialing XXXX, where XXXX is your access number. 113 Getting to Read Messages 1. Press m to enter the message center. 2. Press > or < to scroll to Read Msgs. You see Read Msgs XX New, where XX is the number of unread messages. 3. Press = to select Read Msgs. Reading and Managing Text Messages If you subscribe to a Short Message Service (SMS), you may be able to receive alphanumeric messages on your phone, just like a pager. Contact your Service Provider for information about the availability of messaging in your area. You can save from 1225 to 6125 message characters, depending on your phone model. Your phone saves all incoming messages. When message memory is full, each new incoming message automatically replaces the oldest unlocked message. How Your Phone Receives Message Alerts New Message Alerts When your phone is on and receives a new text message, it alerts you in two different ways: 114 • Your phone displays Text Msgs XX New (where XX is the number of new messages). • The message icon M appears. Reading Text Messages 1. Follow the steps in “Getting to Voice Mail” on page 113. Message Center • If you have text messages, you see Read Msgs XX New, where XX is the number of unread messages. The total number of messages stored is displayed in the upper right corner. • If you have no messages, you see Read Msgs 00 New, and 00 is displayed in the upper right corner. • If the Message Center is full, you see Msg Memory Full and then the list of message headers. 2. Press < or > to scroll through the list of message headers. Messages are numbered from oldest to newest. (The oldest is number 1.) Each header includes: • the message number • the first two lines of the message text • a status icon: - If the message is locked, you see the lock icon. - If the message has been read, you see a check mark. - If the message is unread and is normal priority, no status icon is displayed. - If the message is unread and its priority is Urgent or Emergency, you see !. (The status icon changes to a check mark when the message is read.) 115 3. Press = to select and view the message text, starting on the top line. 4. Press < or > to scroll through the message text. After you scroll through the entire message, you return to the list of message headers. or Select a message option: a. Press = to select Options. b. Press < or > to scroll through the Options menu, and press = to select one of the following: • Reply to Message—See “Message Options—Replying to a Message” on page 117. • Forward Message—See “Message Options—Forwarding a Message” on page 118. • Message Details—See “Message Options—Viewing Message Details” on page 119. To exit the Options menu and return to the message text, scroll to Return To Message and press = to select, or press e at any time. 5. Press e to exit the Message Center, or scroll to other features. 116 Message Options—Replying to a Message To reply to a message from the messages Options menu: Message Center 1. Scroll to Reply to Message, and press = to select. 2. Press = to confirm the reply address. or Edit the reply address, and press = when finished. 3. Enter the message text and press =. (See “How to Enter Letters and Numbers” on page 37.) 4. Press < or > to scroll to Normal, Urgent, or Emergency priority. 5. Press = to select the priority and send the message. Your phone: • sends the message and briefly displays Sending Message • saves a copy of the message to the Outbox • exits the Message Center 117 Message Options—Forwarding a Message To forward a message from the messages Options menu: 1. Press < or > to scroll to Forward Message, and then press = to select. 2. Press < or > to scroll to Send to a Mobile or Send as E-Mail, and press = to select. 3. Enter the phone number or email address, and press = when finished. To send the message to a number or email address stored in your Phone Book, press = to open the Phone Book, scroll to an entry, and press = to select it. 4. Press = to send the message text without changes. or Edit the message text, as desired: a. Press * or # to scroll through message text. Press c to delete one letter at a time. Press and hold c to delete the entire message. (See “How to Enter Letters and Numbers” on page 37.) b. When you finish editing message text, press =. 5. Press < or > to scroll to Normal, Urgent, or Emergency priority. 6. Press = to select the priority and send the message. Your phone: • sends the message and briefly displays Sending Message • saves a copy of the message to the Outbox • exits the Message Center 118 Message Options—Viewing Message Details 1. Press < or > to scroll to Message Details, and press = to select. Message Center Your phone displays Sent:, followed by the time and date stamp. This is the time and date the message was sent to the network (not the time and date that the message was received). 2. Press = to display the number or email address from which the message was sent. If the message was sent from another phone, you see Callback: followed by the Call Back Number. If the Call Back Number matches a number in your Phone Book, the name is displayed. If there are multiple numbers in the message, continue scrolling to view them. or If the message came from an email address, you see From:, followed by the address. 3. To store the Call Back number or originating email address: a. When the Call Back number or email address you want to store is displayed, press s to begin storing. b. Enter a name to identify the phone number. (See “How to Enter Letters and Numbers” on page 37.) c. Press = when you finish entering the name. You see Number: XXXX, where XXXX is the Call Back number or email address. 119 d. Edit the number or email address, if desired. Press c to delete one character at a time. Press and hold c to delete the entire number or email address. e. Press = when you finish editing the number or email address. You see Location —. f. Enter the two-digit memory location where you want the sequence stored. or Press * to store the sequence in the first available location. or Enter the first digit of the memory location, then press * to store the sequence in the first available location beginning with that digit. Your phone displays Stored at XX (where XX is the memory location) and then returns to message details. 4. Press = to return to the message text. 5. Press e to exit, or scroll to other messages. 120 Locking and Unlocking a Message You can lock important messages to ensure their safekeeping for later review. A locked message cannot be deleted until the message is unlocked. Message Center When viewing a message, press f 5 to toggle between locked and unlocked. Msg Locked is displayed when a message is locked. Note: If your message memory is full and a new message is received, the oldest unlocked message that has been read is deleted. If message memory is full and all messages are locked: • You cannot receive new messages. • When you access message headers and then attempt to read a message, you see Inbox full. • The M indicator flashes. Clearing Messages Note: You must unlock a locked message before you can clear it. For more information, see “Locking and Unlocking a Message” on page 121. Clearing the Current Message 1. Press c when the message you want to delete is on the display. You see Delete XX?, where XX is the number of the message to be cleared. 2. Press = to delete the message. You see Msg XX Deleted, where XX is the number of the deleted message. or Press e or any other key if you do not wish to delete the message. 3. Press e to exit, or scroll to other messages. 121 Clearing All Messages To erase all the messages in a folder at once: 1. While in the folder, press and hold c. You see Delete All?. 2. Press = or s to verify that you want all the messages cleared. or Press e if you decide not to clear all the messages. You return to the Message Center. 3. Press e to exit from the Message Center. If all messages have been cleared and no locked messages remain, Msg Center Empty is displayed. Initiating a Call Back While you are reading a text message, you can call back a number embedded in the message. 1. While viewing message headers, reading message text, or viewing message options, press S to initiate a Call Back, if the originating phone number or a Call Back number was included in the message. 2. Press = to dial the number shown. or If the text message includes more than one Call Back number, or if there is a Call Back number and an embedded phone number, the phone displays a list of the numbers. Press < or > to scroll to the number you want to call, then press = to dial the number shown. 122 Getting to Send New Message Message Center 1. Press m to enter the Message Center. 2. Press < or > to scroll to Send New Message, and press = to select it. Sending Text Messages If you subscribe to a Short Message Service (SMS), you may be able to send alphanumeric messages from your TDMA digital StarTAC™ phone. Contact your Service Provider for information about the availability of messaging in your area. Sending a Message from the Message Center Note: Sending SMS messages to email addresses may not be supported by all networks and Service Providers. To send a message from the Message Center: 1. Follow the steps in “Getting to Send New Message” above. 2. Press < or > to scroll to Send to a Mobile or Send as E-Mail, and press = to select. 3. Enter the phone number or email address, and press = when finished. To send the message to a number or email address stored in your Phone Book, press = to open your Phone Book, scroll to an entry, and press = to select it. 123 Tip: When you reach the character limit of a message, the cursor stops scrolling and you are unable to enter more text. 4. Enter the message text. (See “How to Enter Letters and Numbers” on page 37.) or Select text from a message in the Quick Notes folder: a. Open the Quick Notes folder by pressing =. b. Scroll through the message headers and press = to select the message you want. 5. When you finish entering the message text, press =. 6. Press < or > to scroll to Normal, Urgent, or Emergency priority. 7. Press = to select the priority and send the message. Your phone: • sends the message and briefly displays Sending Message • saves a copy of the message to the Outbox • exits the Message Center 124 Sending a Message from the Phone Book To send a message from your Phone Book: Message Center 1. Enter the Phone Book, and select the entry to receive the message. (See “Managing the Phone Book” on page 50.) 2. Press m to enter the Message Center. If the current phone book entry contains only a phone number or an attached email address, you see Enter Msg:. or If the current phone book entry has both a phone number and an attached email address, press > or < to scroll to Send to a Mobile or Send as E-Mail, and press = to select. 3. Enter a new text message. (See “How to Enter Letters and Numbers” on page 37.) 4. When you finish entering the message, press =. 5. Press < or > to scroll to Normal, Urgent, or Emergency priority. 6. Press = to select the priority and send the message. Your phone: • sends the message and briefly displays Sending Message • saves a copy of the message to the Outbox • exits the Message Center 125 Getting to Quick Notes 1. Press m to enter the Message Center. 2. Press < or > to scroll to Quick Notes, and press = to select it. Sending, Creating, Editing, and Deleting Quick Notes Quick Notes are pre-written text messages that you can edit and send. You can also create or delete Quick Notes. Sending Quick Notes Tip: You cannot select Send a Quick Note unless you have one created. 1. Follow the steps in “Getting to Quick Notes” above. 2. Press < or > to scroll to Send a Quick Note, and press = to select it. You see the Quick Note list. 3. Press < or > to scroll to the Quick Note text you want to send, and press = to select it. 4. Press < or > to select Send to a Mobile or Send as E-Mail, and press = to select it. 5. Enter the phone number or email address, and press = when finished. To send the message to a number stored in your Phone Book, press = to open the Phone Book, scroll to an entry, then press = to select it, 6. Press = to send the message text without changes. or 126 Edit the message text, as desired: Message Center a. Press * or # to scroll through message text. Press c to delete one digit at a time. Press and hold c to delete the entire message. (See “How to Enter Letters and Numbers” on page 37.) b. When you finish editing message text, press =. 7. Press < or > to scroll to Normal, Urgent, or Emergency priority. 8. Press = to select the priority and send the message. Your phone: • sends the message and briefly displays Sending Message • saves a copy of the message to the Outbox • exits the Message Center Creating Quick Notes You can create Quick Notes that you can select and send later. 1. Follow the steps in “Getting to Quick Notes” on page 126. 2. Press < or > to scroll to Create a Quick Note, and press = to select it. You see Enter Msg:. If your Quick Notes folder is full, you see QuickNotes Full and cannot create another Quick Note until you first delete an existing one. (See “Deleting Quick Notes” on page 128.) 3. Enter the Quick Note text, and press = to store it. (See “How to Enter Letters and Numbers” on page 37.) 127 Editing Quick Notes 1. Follow the steps in “Getting to Quick Notes” on page 126. 2. Press < or > to scroll to Edit a Quick Note, and press = to select it. Your phone displays the Quick Note list. 3. Press < or > to scroll to the Quick Note you want to edit, and press = to select it. 4. Edit the Quick Note text, and press = to store it. (See “How to Enter Letters and Numbers” on page 37.) 5. Press e to exit the Change a Quick Note menu. Deleting Quick Notes To delete a single Quick Note: 1. Follow the steps in “Getting to Quick Notes” on page 126. 2. Press < or > to scroll to Delete a Quick Note, and press = to select it. Your phone displays the Quick Note list. Note: Any time you are viewing the Quick Notes list, you can delete all Quick Notes by pressing and holding c. 3. Press < or > to scroll to the Quick Note you want to delete, and press = to select it. You see Delete XX?, where XX is the number of the Quick Note you will delete. 4. Press = to delete the Quick Note. or Press e to exit without deleting the Quick Note. 5. Press e to exit the Delete a Quick Note menu. 128 Getting to the Draft Folder Message Center 1. Press m to enter the Message Center. 2. Press < or > to scroll to Drafts, and press = to select it. Reading and Sending Draft Messages If an incoming call or other event interrupts you while you are creating a message, your phone saves the message to the Draft folder. The draft folder holds one message. This message is erased if you start another new message or turn off your phone. To open and complete a draft message: 1. Follow the steps in “Getting to the Draft Folder” above. Your phone displays the draft message. 2. Complete and then send the message. (Refer to “Sending Text Messages” on page 123.) 129 Getting to the Outbox 1. Press m to enter the Message Center. 2. Press < or > to scroll to Outbox, and press = to select it. Reviewing Messages in Your Outbox All sent messages are saved in your Outbox. The Outbox contains: • messages that have been successfully transmitted A check mark beside a message indicates that the message has been successfully transmitted. • messages that are waiting to be transmitted • messages for which transmission failed The Outbox holds up to 6125 characters. When the Outbox is full and a new message is sent, the oldest message that was successfully transmitted is deleted to make room for the new message. You can review the messages in your Outbox to see if a message has been sent or to retry transmission, if necessary. To access the messages in your Outbox: 1. Follow the steps in “Getting to the Outbox” above. 2. Press < or > to scroll through the list of headers for messages in the Outbox. Each header includes: • the message number • the beginning of the message text • a check mark, if the message has been sent 130 3. Press = to select and view the message text, starting on the top line. Message Center 4. Press < or > to scroll through the message text. After you scroll through the entire message, you return to the list of message headers. or Select an Outbox option: a. Press = to select Options. b. Press < or > to scroll through the Options menu, and press = to select one of the following: • Resend Message—See “Outbox Options—Resending a Message” on page 132. • Forward Message—See “Outbox Options—Forwarding a Message” on page 133. • Message Details—See “Outbox Options—Viewing Message Details” on page 134. To exit the Options menu and return to the message text, scroll to Return to Message and press = to select, or press e at any time. 5. Press e to exit the Outbox, or scroll to other message headers. 6. Press e to exit the Message Center. 131 Outbox Options—Resending a Message To resend a message from the Outbox Options menu: 1. Scroll to Resend Message, and press = to select. 2. Press < or > to select Send to a Mobile or Send as E-Mail, and press = to select it. 3. Edit the phone number or email address, if needed, and press =. 4. Press = to send the message text without changes. or Edit the message text, as desired: a. Press * or # to scroll through message text. Press c to delete one character at a time. Press and hold c to delete the entire message. (See “How to Enter Letters and Numbers” on page 37.) b. When you finish editing message text, press =. 5. Press < or > to scroll to Normal, Urgent, or Emergency priority. 6. Press = to select the priority and send the message. Your phone: • sends the message and briefly displays Sending Message • saves a copy of the message to the Outbox • exits the Message Center 132 Outbox Options—Forwarding a Message Message Center To forward a message from the Outbox Options menu: 1. Press < or > to scroll to Forward Message, and press = to select. 2. Press < or > to select Send to a Mobile or Send as E-Mail, and press = to select it. 3. Enter the phone number or email address, and press =. To send the message to a number stored in your Phone Book, press = to open the Phone Book, scroll to an entry, and press = to select it. 4. Press = to send the message text without changes. or Edit the message text, as desired: a. Press * or # to scroll through message text. Press c to delete one digit at a time. Press and hold c to delete the entire message. (See “How to Enter Letters and Numbers” on page 37.) b. When you finish editing message text, press =. 5. Press < or > to scroll to Normal, Urgent, or Emergency priority. 6. Press = to select the priority and send the message. Your phone: • sends the message and briefly displays Sending Message • saves a copy of the message to the Outbox • exits the Message Center 133 Outbox Options—Viewing Message Details 1. Press < or > to scroll to Message Details, and press = to select. Your phone displays Sent:, followed by the time and date stamp and the number or email address to which the message was sent. 2. Press = to return to the message text. 3. Press e to exit, or scroll to other messages. Deleting Unsent Messages from the Outbox You can cancel any unsent messages that are still in the Outbox: 1. Press c when the message you want to delete is displayed. You see Delete entry?. 2. Press = to clear the message. You see Message XX Deleted, where XX is the number of the deleted message. or Press e or any other key if you do not wish to clear the message. 3. Press e to exit, or scroll to other features. If you delete a message in this list, your phone does not send it. Note: If the Outbox is full of unsent messages, you must delete one before you can send any more messages. 134 Getting to Message Center Options select. 3. Press < or > to scroll to the following features. Editing the Voice Mail Number This feature allows you to save your voice mail access number. Note: When you receive your phone, the default voice mail number is your phone number. 1. Follow the steps in “Getting to Message Center Options” above. 2. Press = to select Set Voice Mail No. 3. Enter your voice mail number. The digits appear as you enter them. Press c to delete one digit at a time. Press and hold c to delete the entire number. 4. Press = or s. A message confirms that your number has been saved. Note: If you subscribe to a system that provides a shortcut number for voice mail, enter the complete number—not the shortcut number. Tip: When you enter the voice mail number, remember to add pauses at appropriate intervals so you can enter required information (such as password) when prompted. See “Entering a Pause in a Number” on page 54. 5. Press e to exit, or scroll to other features. 135 Message Center 1. Press m to enter the Message Center. 2. Press < or > to scroll to Msg Center Options, and press = to Reference Information Accessory Options An exciting line of Motorola accessories, now smaller and lighter than ever, can enhance and personalize your cellular experience. Lithium Ion Batteries Motorola’s Lithium Ion (LilON) batteries are high-energy density batteries that offer increased capacity and are lighter in weight than similar sized Nickel Cadmium and Nickel Metal Hydride batteries. Vehicle Power Adapter With the vehicle power adapter, you can power your phone and charge your phone’s battery directly from your vehicle’s power adapter plug! In some cars, the engine must be running in order for the power adapter plug to operate. Desktop Charger (AC Adapter required) The desktop charger is designed for optimal performance and compatibility with Motorola’s new generation of cellular telephones. The desktop charger’s pocket can charge batteries while they are attached to or separate from your phone. Now it is easy to rotate batteries and always have a charged spare. 136 Charger Insert The charger insert allows you to make an existing Motorola charger base compatible with your new Timeport phone. Holster Reference Your digital phone is so small and light, it is positively wearable. Slip it in and clip it on—for the ultimate in high-tech fashion. Notes: • The holster is designed for your convenience and is not meant to secure your phone under all circumstances. • For body-worn use, keep the antenna at least one inch from your body when transmitting. Headset The convenient headset provides both an earphone and microphone in one small piece for simple hands-free and private telephone conversations. The headset plugs directly into the jack on the top of your phone, so that you can wear your phone and move freely. Place the foam cover on the earpiece for a more comfortable fit. 137 Easy Install Hands-Free Car Kit The optional Hands-Free Kit gives you the convenience of hands-free, speaker phone operation while in your car. Full duplex operation lets you simultaneously talk and listen, so both parties can interrupt each other for a normal sounding conversation. The Hands-Free Kit powers your phone and charges its battery whenever your vehicle’s engine is running. Note: The use of wireless telephones and their accessories (devices) may be prohibited or restricted in certain areas. Always obey the laws and regulations on the use of these devices. Clip-On Organizer The Clip-On Organizer enables you to store, view, and edit thousands of names, numbers, appointments, notes, and tasks in a space smaller then the average wallet. When used with your Motorola Timeport phone, it provides increased functionality and value. 138 Note: Certain features including VibraCall® alert will not operate on select StarTAC TDMA, Timeport, or analog phones. Accessory Limited Warranty Information Reference We recommend that you use Motorola original batteries and accessories. Under its limited cellular telephone warranty, Motorola specifically disclaims any responsibility for damage caused by the use of portable cellular telephone accessories not manufactured by Motorola. For details on the complete line of Motorola cellular accessories, see your dealer or visit our Web site at http://www.motorola.com/. 139 Troubleshooting Question Answer I pressed the power button, but nothing happened. What’s wrong with my phone? Be sure to press and hold the power button until the display appears and you hear an audible alert. If nothing still happens, check that you have installed a battery and that the battery is charged. For more information about batteries and charging see the sections on batteries starting with “Installing and Removing Batteries” on page 18. My battery didn’t last as long as I expected. What can I do to extend battery life? Your battery’s “talk-time” and “standby-time” are relative measurements of the battery’s capacity. The more you talk on the phone, the less standby-time you have, and vice versa. To get the most from your battery, allow it to charge fully. To charge the battery to 100% of its capacity, leave it in the charger for an extra hour after the charger’s light turns green. You can also turn off the Power/Status Indicator to extend battery life. Certain features demand power from your battery and reduce battery life. If you have selected the Automatic Display of Individual Call Timer feature, the display uses battery power to remain active during each call. Turn this feature off to conserve battery energy. (See “Displaying the Individual Timer Automatically” on page 73 for more information on this feature.) Make sure that you are calling in Digital mode. Use only batteries that are compatible with your phone. Exposing your battery to extreme temperatures—below -10°C (14°F) or above 45°C (113°F)—can shorten battery life. Batteries are especially sensitive to high temperature extremes. As a good rule, always take your phone with you when you leave your car. The display says, “Locked.” How do I unlock my phone? Enter the last three digits of your cellular number. If that doesn’t work, use the factory preset lock code: 123. If all else fails, call your service provider (the company that sends you your monthly cellular bill). (See “Locking/ Unlocking Your Phone” on page 86 for more information on Security Features.) 140 Answer I tried to place a call and received a fast busy signal. The cellular system did not process your call. For example, the cellular system may be overloaded with call attempts. To redial, press S before ending your call attempt, or press e and try the call again later. (See “Redialing a Number” on page 32.) I tried to place a call and received an alternating high/low tone. Your call did not reach the cellular system. You may have dialed the number too soon after turning the phone on. Wait until the “NS” light stops blinking before placing a call. An alternating tone may also indicate that your phone’s signal is blocked. Be sure you’re clear of any obstructions such as bridges, parking garages, or tall buildings. I tried to listen to my Voice Mail (or use a paging service, a calling card, etc.) but nothing happened. You may have turned off the Scratchpad tones. Place your call, enter the access numbers when prompted by the recording, then press r S. To avoid this problem in the future, follow the directions “Turning Scratchpad Tones On and Off” on page 82 to turn the Scratchpad tones on. My phone was stolen. What should I report and to whom? Report a stolen phone to the police and to your service provider (the company that sends you your monthly cellular service bills). I tried to place a calling card call using the internal Phone Book, but it didn’t work. You may have turned off your Scratchpad tones. Follow the directions in “Turning Scratchpad Tones On and Off” on page 82 to turn the Scratchpad tones on. Check that you stored your calling card information in the correct order, and make sure the groups of numbers are separated by pauses. The easiest way to correct the sequence may be to start from scratch. Follow the instructions on “Storing Calling Card Information” on page 56, enter your calling card information again, and store it in the same memory location as your previous attempt. Also keep in mind that when using your calling card, you must enter the number you are calling with the area code, but without the initial “1.” Check with your long distance carrier for details on using your calling card. 141 Reference Question Glossary A AC adapter An accessory device that allows you to power your phone and charge any attached batteries from a wall outlet. AMPS (Advanced Mobile Phone System) A cellular technology that operates on 832 channels. accessory connector port A socket on the bottom of the phone where you can attach accessories such as an AC adapter, battery charger, vehicle power adapter, or optional accessories. antenna The device attached to your phone that sends and receives cellular signals. Auto Answer When you activate this feature, your phone automatically answers after two rings. See “Selecting Battery Options—Status Light” on page 103. Automatic Redial When your cellular network cannot handle your call, this feature enables your phone to automatically redial for the next four minutes. See “Redialing a Number” on page 32. C Caller Line ID A network/subscription dependent service that allows you to view information on incoming calls before answering. Not available in all areas. cellular carrier One of multiple competing organizations in a given geographic area that owns and operates a cellular system. cellular signal The radio waves that carry information between your cellular phone and the cellular system. cellular system The cellular equipment in a given geographic area that relays signals to and from individual cellular telephones and the landline telephone system. D DTMF tones See Dual Tone Multi-Frequency tones. default A feature’s original setting as pre-programmed in the factory. 142 Dual Tone Multi-Frequency tones The tones that your telephone transmits when you press a key on the keypad. These tones are used to access automated calling systems such as Voice Mail, paging services, banking-by-phone, etc. These tones are also heard by the party on the other line if you use the Scratchpad while a call is in progress. Synonymous with Scratchpad tones or touch tones. E emergency call This feature allows you to make an emergency call even if your phone is locked, by dialing 911 or another emergency access number. F fringe area The outermost range of a cellular system where signals are weak. function keys The non-numeric keys on your phone’s keypad used to perform specific tasks. H home system The local cellular system where you obtain your cellular service. home type system A cellular system of the same type as your local cellular system. I icon One of the variety of symbols used to designate menu features and messages. indicator A light on your phone that gives you information about your phone’s status. Internal Charger A charger built into your phone for use with an AC adapter or vehicle power adapter. See “Using the Internal Charger” on page 20. K Keypad Tones The sounds produced through your phone’s speaker when you press the keys. See “Turning Keypad Tones On and Off” on page 81. L landline The telephone system used for conventional office and home phones. 143 Lithium Ion (LiIon) A battery technology used in personal cellular telephones. lock Use this feature to prevent unauthorized access to your telephone. lock code A three-digit code used to access your phone once it has been locked. The factory programmed lock code is 123. To view or change your lock code, see “Locking/Unlocking Your Phone” on page 86. M memory location A space in the internal Phone Book where you can store a telephone number and a name. menu feature Any feature that can be accessed through the menu system. menu system The hierarchical arrangement of your phone’s features that allows for quick, intuitive access.The top-level menu contains: Recent Calls, Phone Book, Time and Date, Call Timers, Tone Control, Lock Security, Phone Options, Network Selection, and Message Center. Message Center Key Located on the bottom row of the keypad, the dedicated Message Center Key provides quick access to messages and messaging functions. See “Using the Message Center” on page 111. N network connection time The elapsed time, in one-minute intervals, from the moment you connect to your service provider’s network to the moment you end the call. The time includes busy signals and ringing. P pause A special character that tells your phone to “pause” or wait for your input before sending a group of numbers stored in memory. Pause Dialing A method of storing Phone Book entries that allows you to store multiple strings of numbers in one memory location; useful, for instance, in accessing automated phone systems. See “Storing and Placing Numbers with Pause Dialing” on page 54. Personal Identification Number (PIN) A private numeric password that protects personal accounts such as bank-by-phone or Voice Mail. prompt A message requesting input. 144 R road map The visual representation of your phone’s menu system provided in this user guide. S scratchpad tones See Dual Tone Multi-Frequency tones. scroll To move backward or forward through a list; for example: to move backward or forward through the menu system or the name directory. security code A six-digit code used to access sensitive features in the Secure Options submenu of the Lock/Security menu. Service Provider A company affiliated with a cellular carrier that provides cellular service to its customers. signal The radio waves that carry information between your phone and the cellular system. Smart Button The middle key on the side of your phone used to access the Phone Book’s name directory, send calls, end calls, enter the menu system, select features, and toggle features on and off. Speed Dial a feature that enables you to place a number by entering the two-digit location of your number and then pressing and holding the Smart Button. standby-time The length of time a battery typically lasts if the phone is left on but is not in use. status indicator See indicator. submenu A secondary level of your phone’s menu system hierarchy. System Identification A five-digit number that identifies your home cellular system. An even number indicates a wireline system and an odd number indicates a non-wireline system. T talk-time The amount of time that you spend talking on the phone. toggle To switch between two possible options; for example: on versus off. Turbo Dial® keys a feature that enables you to dial numbers stored in memory locations by pressing and holding a single number key. 145 TDMA (Time Division Multiple Access) TDMA is an efficient method of providing digital cellular communication by allowing several different conversations on the same carrier frequency. V vehicle power adapter An accessory device that allows you to power your phone and charge any attached batteries from a car’s cigarette lighter. VibraCall® alert Motorola’s silent vibration mode that discreetly alerts you to incoming calls. Voice Mail Contact your Service Provider for availability. volume keys Located on the side of your phone, the upper and lower volume keys are used to adjust phone volume. 146 The U.S. Food and Drug Administration's Center for Devices and Radiological Health Consumer Update on Mobile Phones FDA has been receiving inquiries about the safety of mobile phones, including cellular phones and PCS phones. The following summarizes what is known—and what remains unknown—about whether these products can pose a hazard to health, and what can be done to minimize any potential risk. This information may be used to respond to questions. Why the concern? Mobile phones emit low levels of radio frequency energy (i.e., radio frequency radiation) in the microwave range while being used. They also emit very low levels of radio frequency energy (RF), considered non-significant, when in the stand-by mode. It is well known that high levels of RF can produce biological damage through heating effects (this is how your microwave oven is able to cook food). However, it is not known whether, to what extent, or through what mechanism, lower levels of RF might cause adverse health effects as well. Although some research has been done to address these questions, no clear picture of the biological effects of this type of radiation has emerged to date. Thus, the available science does not allow us to conclude that mobile phones are absolutely safe, or that they are unsafe. However, the available scientific evidence does not demonstrate any adverse health effects associated with the use of mobile phones. What kinds of phones are in question? Questions have been raised about hand-held mobile phones, the kind that have a built-in antenna that is positioned close to the user's head during normal telephone conversation. These types of mobile phones are of concern because of the short 147 distance between the phone's antenna—the primary source of the RF—and the person's head. The exposure to RF from mobile phones in which the antenna is located at greater distances from the user (on the outside of a car, for example) is drastically lower than that from hand-held phones, because a person's RF exposure decreases rapidly with distance from the source. The safety of socalled “cordless phones,” which have a base unit connected to the telephone wiring in a house and which operate at far lower power levels and frequencies, has not been questioned. How much evidence is there that hand-held mobile phones might be harmful? Briefly, there is not enough evidence to know for sure, either way; however, research efforts are ongoing. The existing scientific evidence is conflicting and many of the studies that have been done to date have suffered from flaws in their research methods. Animal experiments investigating the effects of RF exposures characteristic of mobile phones have yielded conflicting results. A few animal studies, however, have suggested that low levels of RF could accelerate the development of cancer in laboratory animals. In one study, mice genetically altered to be predisposed to developing one type of cancer developed more than twice as many such cancers when they were exposed to RF energy compared to controls. There is much uncertainty among scientists about whether results obtained from animal studies apply to the use of mobile phones. First, it is uncertain how to apply the results obtained in rats and mice to humans. Second, many of the studies that showed increased tumor development used animals that had already been treated with cancer-causing chemicals, and other studies exposed the animals to the RF virtually continuously—up to 22 hours per day. For the past five years in the United States, the mobile phone industry has supported research into the safety of mobile phones. This research has 148 resulted in two findings in particular that merit additional study: 1. In a hospital-based, case-control study, researchers looked for an association between mobile phone use and either glioma (a type of brain cancer) or acoustic neuroma (a benign tumor of the nerve sheath). No statistically significant association was found between mobile phone use and acoustic neuroma. There was also no association between mobile phone use and gliomas when all types of types of gliomas were considered together. It should be noted that the average length of mobile phone exposure in this study was less than three years. When 20 types of glioma were considered separately, however, an association was found between mobile phone use and one rare type of glioma, neuroepithelliomatous tumors. It is possible with multiple comparisons of the same sample that this association occurred by chance. Moreover, the risk did not increase with how often the mobile phone was used, or the length of the calls. In fact, the risk actually decreased with cumulative hours of mobile phone use. Most cancer causing agents increase risk with increased exposure. An ongoing study of brain cancers by the National Cancer Institute is expected to bear on the accuracy and repeatability of these results.1 2. Researchers conducted a large battery of laboratory tests to assess the effects of exposure to mobile phone RF on genetic material. These included tests for several kinds of abnormalities, including mutations, chromosomal aberrations, DNA strand breaks, and structural changes in the genetic material of blood cells called lymphocytes. None of the tests showed any effect of the RF except for the micronucleus assay, which detects structural effects on the genetic material. The cells in this assay showed 149 changes after exposure to simulated cell phone radiation, but only after 24 hours of exposure. It is possible that exposing the test cells to radiation for this long resulted in heating. Since this assay is known to be sensitive to heating, heat alone could have caused the abnormalities to occur. The data already in the literature on the response of the micronucleus assay to RF are conflicting. Thus, follow-up research is necessary.2 FDA is currently working with government, industry, and academic groups to ensure the proper followup to these industry-funded research findings. Collaboration with the Cellular Telecommunications Industry Association (CTIA) in particular is expected to lead to FDA providing research recommendations and scientific oversight of new CTIA-funded research based on such recommendations. Two other studies of interest have been reported recently in the literature: 1. Two groups of 18 people were exposed to simulated mobile phone signals under laboratory conditions while they performed cognitive function tests. There were no changes in the subjects' ability to recall words, numbers, or pictures, or in their spatial memory, but they were able to make choices more quickly in one visual test when they were exposed to simulated mobile phone signals. This was the only change noted among more than 20 variables compared.3 2. In a study of 209 brain tumor cases and 425 matched controls, there was no increased risk of brain tumors associated with mobile phone use. When tumors did exist in certain locations, however, they were more likely to be on the side of the head where the mobile phone was used. 150 Because this occurred in only a small number of cases, the increased likelihood was too small to be statistically significant.4 In summary, we do not have enough information at this point to assure the public that there are, or are not, any low incident health problems associated with use of mobile phones. FDA continues to work with all parties, including other federal agencies and industry, to assure that research is undertaken to provide the necessary answers to the outstanding questions about the safety of mobile phones. What is known about cases of human cancer that have been reported in users of hand-held mobile phones? Some people who have used mobile phones have been diagnosed with brain cancer. But it is important to understand that this type of cancer also occurs among people who have not used mobile phones. In fact, brain cancer occurs in the U.S. population at a rate of about 6 new cases per 100,000 people each year. At that rate, assuming 80 million users of mobile phones (a number increasing at a rate of about 1 million per month), about 4800 cases of brain cancer would be expected each year among those 80 million people, whether or not they used their phones. Thus it is not possible to tell whether any individual's cancer arose because of the phone, or whether it would have happened anyway. A key question is whether the risk of getting a particular form of cancer is greater among people who use mobile phones than among the rest of the population. One way to answer that question is to compare the usage of mobile phones among people with brain cancer with the use of mobile phones among appropriately matched people without brain cancer. This is called a case-control study. The current case-control study of brain cancers by the National Cancer Institute, as well as the follow-up research to be sponsored by industry, will begin to generate this type of information. 151 What is FDA's role concerning the safety of mobile phones? Under the law, FDA does not review the safety of radiation-emitting consumer products such as mobile phones before marketing, as it does with new drugs or medical devices. However, the agency has authority to take action if mobile phones are shown to emit radiation at a level that is hazardous to the user. In such a case, FDA could require the manufacturers of mobile phones to notify users of the health hazard and to repair, replace or recall the phones so that the hazard no longer exists. Although the existing scientific data do not justify FDA regulatory actions at this time, FDA has urged the mobile phone industry to take a number of steps to assure public safety. The agency has recommended that the industry: • support needed research into possible biological effects of RF of the type emitted by mobile phones • design mobile phones in a way that minimizes any RF exposure to the user that is not necessary for device function • cooperate in providing mobile phone users with the best possible information on what is known about possible effects of mobile phone use on human health At the same time, FDA belongs to an interagency working group of the federal agencies that have responsibility for different aspects of mobile phone safety to ensure a coordinated effort at the federal level. These agencies are: 152 • National Institute for Occupational Safety and Health • Environmental Protection Agency • Federal Communications Commission • Occupational Health and Safety Administration • National Telecommunications and Information Administration The National Institutes of Health also participates in this group. In the absence of conclusive information about any possible risk, what can concerned individuals do? If there is a risk from these products—and at this point we do not know that there is—it is probably very small. But if people are concerned about avoiding even potential risks, there are simple steps they can take to do so. For example, time is a key factor in how much exposure a person receives. Those persons who spend long periods of time on their hand-held mobile phones could consider holding lengthy conversations on conventional phones and reserving the hand-held models for shorter conversations or for situations when other types of phones are not available. People who must conduct extended conversations in their cars every day could switch to a type of mobile phone that places more distance between their bodies and the source of the RF, since the exposure level drops off dramatically with distance. For example, they could switch to: • a mobile phone in which the antenna is located outside the vehicle • a hand-held phone with a built-in antenna connected to a different antenna mounted on the outside of the car or built into a separate package • a headset with a remote antenna to a mobile phone carried at the waist Again, the scientific data do not demonstrate that mobile phones are harmful. But if people are concerned about the radio frequency energy from these products, taking the simple precautions outlined above can reduce any possible risk. 153 Where can I find additional information? For additional information, see the following websites: Federal Communications Commission (FCC) RF Safety Program (select “Information on Human Exposure to RF Fields from Cellular and PCS Radio Transmitters”): http://www.fcc.gov/oet/rfsafety World Health Organization (WHO) International Commission on Non-Ionizing Radiation Protection (select Qs & As): http://www.who.int/emf United Kingdom, National Radiological Protection Board: http://www.nrpb.org.uk Cellular Telecommunications Industry Association (CTIA): http://www.wow-com.com U.S. Food and Drug Administration (FDA) Center for Devices and Radiological Health: http://www.fda.gov/cdrh/consumer/ 1. Muscat et al. Epidemiological Study of Cellular Telephone Use and Malignant Brain Tumors. In: State of the Science Symposium;1999 June 20; Long Beach, California. 2. Tice et al. Tests of mobile phone signals for activity in genotoxicity and other laboratory assays. In: Annual Meeting of the Environmental Mutagen Society; March 29, 1999, Washington, D.C.; and personal communication, unpublished results. 3. Preece, AW, Iwi, G, Davies-Smith, A, Wesnes, K, Butler, S, Lim, E, and Varey, A. Effect of a 915-MHz simulated mobile phone signal on cognitive function in man. Int. J. Radiat. Biol., April 8, 1999. 4. Hardell, L, Nasman, A, Pahlson, A, Hallquist, A and Mild, KH. Use of cellular telephones and the risk for brain tumors: a case-control study. Int. J. Oncol., 15: 113-116, 1999. FDA020400 154 EXPORT LAW ASSURANCES: This product is controlled under the export regulations of the United States of America and Canada. The Governments of the United States of America and Canada may restrict the exportation or reexportation of this product to certain destinations. For further information contact the U.S. Department of Commerce or the Canadian Department of Foreign Affairs and International Trade. 155 Patent Information Manufactured under one or more of the following U.S. patents: 4291475 4809356 5008925 5127040 5214774 4302845 4811377 5010309 5127042 5216389 4312074 4811404 5010570 5127100 5220290 4365221 4817157 5014294 5128834 5220936 4369516 4827507 5014346 5133010 5222078 4369520 4829543 5017856 5134717 5222104 4369522 4831647 5018188 5140286 5222251 4374370 4843621 5020076 5140635 5230007 4378603 4845772 5020091 5142551 5230093 4390963 4851966 5020092 5142696 5233506 4398265 4852090 5020093 5144533 5233633 4400584 4860336 5023580 5146620 5235492 4400585 4860341 5023866 5148471 5237257 4434461 4868576 5023911 5148473 5237570 4455534 4870686 5025387 5150075 5239127 4486624 4872196 5027388 5150359 5241545 4491972 4873683 5028083 5150384 5241548 4523155 4876552 5028859 5151643 5241592 4546329 4876656 5029233 5152006 5241688 4574243 4876740 5036532 5152007 5242767 4581602 4879533 5038253 5153590 5243355 4581749 4885553 5040127 5157693 5247544 4585957 4887050 5042071 5160898 5247565 4593155 4890199 5045824 5162144 5249302 4594657 4896124 5053924 5163159 5251331 4602218 4896361 5055800 5164652 5255292 4605987 4897873 5055802 5166596 5257414 4616314 4903326 5055803 5166642 5259005 4617520 4903327 5057762 5168522 5260170 4628529 4904549 5058136 5170173 5260988 4629829 4904992 5059885 5170485 5261119 4633141 4905288 5060264 5170492 5262710 4636593 4905301 5063340 5175729 5263052 4636741 4912602 5065408 5175759 5263055 4648125 4916262 5067139 5175874 5265271 4649543 4918431 5070310 5182749 5267230 4654655 4918732 5077757 5185566 5276588 4680787 4922178 5077790 5185790 5276707 4704588 4941203 5081674 5187640 5276913 4711361 4942570 5083304 5187809 5276915 4715063 4945570 5087004 5192924 5278832 4717884 4956854 5093632 5193223 5278994 4730195 4959851 5095503 5195106 5280630 4731813 4963812 5107487 5195108 5280637 4736277 4964121 5109400 5198887 5280644 4737976 4970475 5111162 5200655 5285443 4741018 4972355 5113400 5201069 5287013 4742562 4972432 5113436 5203009 5287553 4761621 4972455 5117073 5203012 5287555 4764737 4975808 5117441 5203013 5287556 4775998 4977589 5117449 5203021 5289505 4791527 4977616 5117450 5204977 5297142 4794489 4979207 5121047 5205751 5299232 4797929 4984219 5121288 5210793 5301365 4797947 4984290 5121412 5211581 5308716 4798975 4989230 5122480 5212815 5321705 4802236 4992753 5122722 5212826 5321737 4803726 4996529 5124889 5214675 5321847 156 5323421 5325405 5325429 5327578 5327642 5331123 5333153 5336984 5338909 5343213 5349588 5351245 5359696 5361400 5363071 5365549 5366826 5367538 5367558 5371791 5373101 5375143 5375258 5379324 5381114 5384825 5392000 5392023 5392331 5396654 5401927 5402447 5402448 5404580 5404582 5406146 5406562 5408693 5410275 5410741 5414711 5420759 5424689 5428362 5428820 5428836 5430416 5432017 5434947 5436802 5438684 5442680 5444764 5446763 5446766 5448763 5448770 5448771 5453997 5457744 5459640 5459774 5461643 5463351 5463406 5463628 5463646 5463674 5463688 5463694 5465409 5465412 5469177 5471671 5475752 5477192 5485506 5485513 5486843 5487184 5488649 5490177 5491739 5493198 5493700 5493714 5495206 5495208 5497126 5497382 5497383 5499273 5499394 5499397 5502437 5504494 5504812 5506490 5508709 5509048 5510693 5511235 5513078 5513996 5519303 5519346 5519506 5519777 5524276 5526398 5528666 5530399 5530922 5533119 5535258 5535434 5539360 5542016 5542103 5542106 5542116 5544250 5546275 5546380 5551078 5551627 5553137 5553376 5554996 5555550 5557743 5559471 5559522 5559806 5561436 5561437 5561852 5565881 5566224 5568548 5570453 5572223 5572224 5574976 5577267 5577268 5583520 5584054 5586146 5588041 5589796 5590177 5594778 5594951 5598129 5598431 5600341 5604050 5604468 5604787 5606332 5606560 5606730 5613229 5613863 5615233 5615259 5615260 5621763 5621766 5625316 5625683 5628001 5628057 5628089 5629979 5630159 5630210 5630213 5630215 5631538 5633484 5633786 5634202 5640690 5642368 5646576 5649306 5649309 5656914 5656917 5657418 5659601 5660945 5661433 5664973 5666429 5668871 5670912 5673001 5673003 5673287 5674326 5675591 5675702 5678201 5678221 5678227 5680063 5684384 5691947 5692046 5692101 5696497 5696821 5699070 5699389 5699408 5701130 5701244 5701589 5703470 5703539 5703909 5706019 5706313 5708445 5710862 5710987 5711001 5715520 5715524 5717307 5722052 5724004 5726983 5729221 5732350 5737327 5737685 5738954 5739792 5740525 5742894 5745116 5745566 5745848 5747970 5748727 5754141 5754455 5754583 5754645 5754956 5758271 5760714 5761300 5761610 5764100 5764111 5764730 5764743 5766794 5771182 5771471 5777521 5777856 5784368 5784419 5784585 5787128 5787577 5793315 5793866 5796822 5797101 5798716 5799011 5799256 5801513 5801567 5802111 5805992 5807012 5808585 5808586 5809020 5809419 5809421 5809430 5809433 5809544 5812093 5812542 5812590 5814798 5815507 5815570 5815804 5815805 5815807 5815820 5821820 5822726 5826224 5831826 5832080 5832388 5835006 5835535 5835785 5838202 5841851 5842122 5844943 5846094 5848072 5848152 5848356 5848718 5850440 5854549 5854785 5854972 5856763 5856766 5857148 5857192 5859522 5859567 5859890 5861853 5862460 5862493 5864799 5865487 5867063 5867127 5867140 5867510 5870670 5872744 5877633 5878075 5878209 5878336 5878353 5880637 5880646 5881377 5889737 5889768 5889859 5892410 5893036 5894597 5896054 5896261 5898933 5900829 5901347 5901357 5903825 5903852 5905956 5907418 5907615 5909102 5910944 5912648 5920549 5920550 5923007 5924044 5925835 5925942 5926119 5926503 5926751 5930268 5930288 5930299 5933330 5936516 5936972 5939939 5940452 5940746 5943027 5945852 5945964 5946395 5949020 5950131 5950139 5953413 5954817 5955700 5955999 5956626 5963848 5963876 5964858 5966101 5966667 5966671 5969545 5974042 5977916 5980268 5982881 5983082 5987012 5988577 5995050 5996178 5999115 5999821 5999832 6002922 6002937 6005498 6006104 6008636 6009168 6009309 6009325 6009336 6009552 6011699 6011784 6011959 6011961 6012634 6014376 6014552 6016312 6016422 6018584 6018651 6018671 6021332 D284759 D285439 D288432 D288683 D289156 D292578 D292920 D295627 D295973 D295975 D296187 D297734 D297735 D297736 D299136 D299137 D299232 D300742 D300827 D301473 D301476 D301883 D302015 D303656 D304189 D305427 D305717 D306015 D306163 D306293 D306299 D306441 D306583 D306594 D307271 D309301 D309451 D314173 D315330 D315346 D315543 D315559 D315565 D315907 D316417 D316859 D320780 D322783 D324024 D324388 D325028 D325029 D325032 D325583 D325915 D327061 D327062 D328302 D332261 D332785 D334746 D337332 D338012 D338887 D339127 D339335 D339336 D339337 D339564 D339578 D339581 D339582 D340709 D340710 D340711 D340906 D341589 D342248 D342663 D342729 D342730 D342741 D343173 D343615 D343616 D343834 D343835 D343836 D344087 D344271 D344444 D344511 D344512 D344945 D345977 D346785 D346786 D346798 D348071 D348250 D348427 D348470 D348665 D348666 D348668 D348674 D348880 D349273 D349701 D350113 D350348 D350349 D350350 D351375 D351840 D352497 D352503 D352946 D353131 D353361 D353587 D353588 D353591 D354055 D354062 D355181 D355895 D356084 D356309 D357224 D357249 D357457 D357680 D357681 D358148 D359052 D359734 D359735 D359959 D360398 D360632 D361070 D361763 D362840 D362852 D365094 D365817 D366872 D367640 D368479 D368696 D369162 D369359 D369797 D370016 D370463 D370672 D372237 D372481 D372703 D372896 D372919 D373585 D373764 D374013 D374014 D374227 D374424 D374872 D375732 D375733 D375734 D375932 D375935 D375952 D376127 D377792 D377934 D378366 D378911 D379558 D379624 D379981 D379982 D380468 D380751 D381021 D381664 D382537 D382538 D382872 D383115 D383748 D383749 D383759 D384080 D384662 D384951 D384952 D385271 D385283 D385555 D385873 D385874 D385875 D385877 D385888 D386175 D386494 D386757 D387054 D387055 D387199 D387346 D388078 D388079 D388080 D388081 D388082 D388424 D388429 D388430 D388775 D388783 D388793 D389157 D389476 D389478 D389488 D389641 D390221 D390222 D390509 D391567 D391955 D391966 D393470 D394256 D394423 D394425 D394433 D394438 D394439 D395301 D395302 D395431 D395642 D395875 D396472 D397337 D397689 D397694 157 D398926 D400527 D400161 D400874 D400165 D401554 D400204 D401929 D400209 D403265 D400496 D404397 D400526 D405080 Other patents pending. 158 D405782 D405801 D406098 D406191 D406586 D406695 D406812 D407063 D407685 D407708 D408401 D408402 D408418 D408783 D408815 D409186 D410459 D410460 D410929 D411165 D411196 D411202 D411204 D411507 D411535 D411843 D411844 D412000 D412487 D412709 D413893 D413898 D414159 D415122 D415499 D416226 D417224 D417449 D419155 D419290 D419565 PAT022500 Index A access number for voice mail 135 accessories 136 batteries 136 desktop charger 136 hands-free kit 138 headset 137 holster 137 vehicle power adapter 136 accessory connector port 13 analog mode 31 audible timer one-minute 73 repeating 74 automatic answer 102 automatic hands-free 100 autoupdate 68 B battery accessories 136 charging 20 desktop charger 21 internal charger 20 tips 21 checking levels 19 cover attachment 17 removal 17 desktop charging 21 disposal 16 installing 18 life 140 low battery warning 19 main installing 18 removing 18 power save mode 103 removing 18 slim main 11 standard main 11 storage 16 battery cover attaching 17 removing 17 battery level checking 19 indicator 19, 26 messages 20 Battery Level Indicator 13, 26 busy signal 141 button Message 13 Smart 13 C call ending 30 placing 29 calling card call 58 restricting call placement 89 receiving 30 open to answer 101 while phone is locked 87 Call Back number 122 Call Mode selecting preferred 97 call timer automatically display individual 73 cumulative 72 individual 71 resettable 72 resetting 72 call waiting 46 Caller ID 49 Caller Line ID 45, 46 calling card PIN number 57 159 placing calling card call 58 storing information 56, 141 calls dialed 48 managing recent 44 received 47 changing your number 98 chargers desktop charger 136 internal 20 charging batteries 20 clearing a memory entry 40 clock, setting 66 connector port 13 cumulative timer 72 D date changing format 67 setting 67 desktop charger 12, 21, 136 dialed calls 48 digital mode 31 digital indicator 24, 25 display System Identification 103 E earpiece 12 ending a call 30 F feature review 99 function keys 13 G glossary 142–146 H hands-free automatic 100 160 kit 138 operation 138 headset 11, 137 headset jack 12 holster 11, 28, 137 home system 99 I In Use Indicator 25 In-Building Indicator 25 indicator Battery Level 26 Digital 25 In Use 25 In-Building 25 No Service 25 Power/Status 27 reading 25 Signal Strength 25 SMS message waiting 26 Voice Message Waiting 26 J jack, headset 12 K key answer, multiple 101 key presses 15 keypad tones 81 L language, select for display 104 lock code changing 89 viewing 88 locking phone answering calls 87 automatically 86 manually 86 locking/unlocking phone 86 M main battery installing 18 removing 18 Master Clear 93 Master Reset 92 memory location editing 60 service level 89 using phone book 35 menus entering 29 navigating 43 message clearing 122 draft messages 129 forwarding messages 118 Outbox forwarding a message 133 resending a message 132 viewing message details 134 outbox messages 130 Quick Notes creating 127 deleting 128 sending 126 quick notes 126 reading messages 115 replying to messages 117 sending messages 123 unlocking 121 viewing message details 119 message alert 114 Message Center button 13 messages, locking 121 microphone 13 Multiple Key Answer 101 N network connection time 71 network selection 105 automatic search 110 listing non-public network 110 manual search 107 non-public 107 public network 109 search for new network 108 No Service Indicator 25 non-public network listing 110 O open to answer 101 option clearing stored information 93 reset 92 Outbox forwarding a message 133 resending a message 132 viewing message details 134 P package contents 11 Pager Mode 96, 101 pager mode 78 pause dialing 55 pauses entering into a number 54 placing a call with pauses 55 phone book clearing entry 40 editing entries 60 entering a name 37 entering letters 37 entry attaching email address 59, 62 recalling by location 53 recalling by name 48, 52, 53, 54, 73 recalling with short cuts 40 recalling entry by location 39 by name 39 storing entry 53 161 storing names and numbers 36 using 35 phone number viewing your own 29 phone number, viewing your own 24, 98 phone overview 12 PIN number 57 placing a call 29 power button 13, 140 power save mode 103 power sources, switching 22 power status messages 20 Power/Status Indicator 12, 140 Priority Call 40 prompts, defined 15 public network 109 Q Quick Notes 126 creating 127 deleting 128 sending 126 R recalling entry by location 39 recalling entry by name 39 received calls 47 receiving call automatic answer 102 multiple key answer 101 procedure 30 Recent Calls menu 45 redialing a number 32 ringer selecting style 80 suppressing 31 vibrating 78, 80 road map 43 call timers 70 lock security 84 phone book 51 recent calls 45 162 tone controls 77 S scratchpad tones 41, 82, 141 Seamless Connection 22 security options resetting 92 service levels 90 Short Message Service clearing message 122 draft messages 129 forwarding a message 118 indicator 26 locking message 121 outbox messages 130 quick notes 126 reading messages 115 replying to messages 117, 132 sending messages 123 unlocking a message 121 viewing message details 119 Short Messaging Services (SMS) 114 Signal Strength Indicator 12, 25 single timer 75 Smart Button 28 smart button 13 SMS Message Waiting Indicator 26 Speed Dial 40 standby mode 28 storing calling card information 56 names and numbers 36 storing names and numbers 53 System Identification viewing 103 T time changing format 68 time, setting 66 timer audible one-minute 73 audible repeating 74 automatically display individual timer 73 cumulative call timer 72 individual call timer 71 one-minute audible 73 repeating audible timer 74 reset 72 resettable call timer 72 single 75 tips, defined 15 tones alternating high/low 141 turning scratchpad tones on and off 82 Turbo Dial® 35, 40 turning phone on and off 24 U unanswered call indicator 31 unlock phone 140 V vehicle power adapter 12, 136 VibraCall® Alert 26, 33, 78, 79, 80 vibrating ringer 78, 80 viewing your phone number 29 voice mail 79, 141 dialing 113 edit access number 135 voice privacy 85 Voicemail 26 volume adjusting 33 muting 33 silent vibration mode 33 volume keys 12 163