1
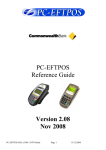
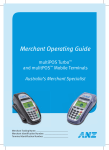
PC-EFTPOS Reference Guide PX368 I3070 NPT-710 Version 1.05 April 2008 Confidential Page 1 6/10/2010 Table of Contents PC-EFTPOS Contact Details ............................................................................................................................. 2 Introduction ........................................................................................................................................................ 2 Using PC-EFTPOS with a POS ......................................................................................................................... 2 ANZ Specific Details ......................................................................................................................................... 3 Terminal Functionality Supported by ANZ ....................................................................................................... 3 PC-EFTPOS Overview ...................................................................................................................................... 4 PC-EFTPOS Hardware Installation ................................................................................................................... 5 PC-EFTPOS Software Installation .................................................................................................................... 8 Function Key Menus .......................................................................................................................................... 9 Standalone Mode ............................................................................................................................................. 12 System Timeouts .............................................................................................................................................. 14 PC-EFTPOS Generated Response Codes ........................................................................................................ 14 Bank Generated Response Codes .................................................................................................................... 17 TMS Generated Response Codes..................................................................................................................... 20 Argent Error Codes .......................................................................................................................................... 21 Settlement Receipts and Options ..................................................................................................................... 23 Receipt Layouts ............................................................................................................................................... 25 Trouble Shooting ............................................................................................................................................. 27 Who to Contact for Help .................................................................................................................................. 29 PC-EFTPOS Contact Details PC-EFTPOS office hours are Monday to Friday, 8:30am to 5:30pm EST. PC-EFTPOS Reception: Phone (02) 9998 9800 PC-EFTPOS Website: http://www.pceftpos.com/ Support Website: http://support.pceftpos.com/ General Enquiries Email: [email protected] Introduction The PC-EFTPOS terminal allows online transactions to be processed for Debit Cards (Savings and Cheque accounts), Credit Cards (Bankcard, Visa and MasterCard) and Charge Cards (American Express, Diners Club and JCB) The features of PC-EFTPOS include: Process Purchases, Cashout, Refunds Process Mail/Telephone Order Transactions Integrate to POS Standalone EFTPOS terminal (model NPT710 only) PSTN, Argent ISDN or WAN communications Using PC-EFTPOS with a POS When PC-EFTPOS is configured to be used with a POS, all the EFTPOS functionality is initiated through the POS. Consult your POS vendor on the operation of EFTPOS through your POS. When configured in Standalone Lite Mode PC-EFTPOS offers a limited functionality standalone EFTPOS Confidential Page 2 6/10/2010 pinpad. Depending on the model the pinpad can be configured to use the internal modem or an external connection via a PC. ANZ Specific Details ANZ help Desk Number: 1800 039 025 Requires only a Merchant ID. It is 11 digits and is referred to by ANZ as the Terminal ID. Dial-up system uses CLNP headers. The default SHA is 82805110. POS-AME can be left blank Terminal Functionality Supported by ANZ Functionality EFTPOS Functionality: Purchase Cash Out Refund MOTO processing Pre-Authorisation Completion Tipping Training Mode Balance Enquiry Voucher Entry Electronic Fallback (EFB) EMV processing Stand-Alone Lite Mode (NPT710 only) Settlement Options Settlement Pre-Settlement Last Settlement Sub-Totals Summary Totals Detailed Transaction List Shift Totals Hardware Options: PX318 PINpad PX328 PINpad PX368 PINpad NPT Terminal I3070 PINpad Confidential Page 3 6/10/2010 PC-EFTPOS Overview EFT-Client Settings: COM port: that the PINpad is plugged into. Printer: (Not used when POS is printing). NPT denotes using the internal printer of NPT Host Interface: This is normally blank. It is the IP address of the EFTSRV which is normally on this machine. NPT indicates to use the internal NPT modem. Tracing: This is enabled by default and records information on the hard-drive to help us track down any issues. EFTPOS Control Panel Press the control panel button on the Client settings page (above) to activate the control panel. Logon: Performs a logon to the host Reprint: reprints last receipt Diagnostics: Provides reports on s/w configuration and version Setup Page: Enter terminal details. Press APPLY and then 7410 is the password Confidential Page 4 6/10/2010 PC-EFTPOS Hardware Installation PX368 EFTPOS PINpad Supplied Equipment with terminal: EFTPOS PINpad PINpad Power Supply Installation Steps 1. Plug the supplied power adaptor into a power point 2. Connect the power supplies DB9 connector into the PC Com Port that will be used for the PINpad 3. Plug the PINpad into the RJ45 connector on the powered adaptor NPT-710 EFTPOS Terminal Supplied Equipment with terminal: NPT-710 Terminal Power brick and cord POS connector cable (RS232 Cable) Dial-up phone cable Installation Steps 1. Power the terminal. Connect the brick and cord then plug into a power point. 2. Connect the power adaptor to the power socket on the back of the terminal 3. Connect the RS232 cable (supplied) to the COM port on the back of the PC (normally COM 1) 4. For a terminal integrated to a POS, connect the other end of the RS232 cable to the RS232 connector on the back of the terminal. (The slot next to the power supply) 5. If the terminal is using the internal modem, plug the phone cable in to the phone connector on the back of the terminal. Confidential Page 5 6/10/2010 I3070 EFTPOS PINpad Supplied Equipment with terminal: I3070 PINpad PINpad power supply POS connector cable (USB Cable) POS connector cable (RS232 Cable) Installation Steps (USB) 1. Do not connect the PINpad to your PC until instructed to by the PC-EFTPOS installer. 2. Connect the USB cable directly to your PC. The PINpad is powered via USB. 3. Switch the PINpad to USB mode by press FUNC, 11112227 and using the CHQ key to select USB. Installation Steps (RS232) 1. Plug the supplied power adaptor into a power point 2. Connect the power supplies DB9 connector into the PC Com Port that will be used for the PINpad 3. Plug the PINpad into the RJ45 connector on the powered adaptor P66 Dialup Modem Supplied Equipment: P66 Modem Power brick and cord P60 Load Cable (Modem cable) Dial Up Phone Cable Installation Steps 1. Power the P66 modem 2. Connect the power adaptor to the power socket on the back of the modem, and plug the cord into a power socket. 3. Connect the P60 Load cable (modem cable) into the “PINpad” slot and the other end to the com port on the pc. 4. Connect the Dial Up phone cable into the “Line” slot and the other end into the phone socket in the wall. Confidential Page 6 6/10/2010 Telstra Argent Terminal Adapter Telstra use an ATA. Optus supply an MTA. PC-EFTPOS connects to both devices the same way. Argent does not need a P66 modem The connection from ATA to PC is via a standard 25-pin to 9-pin RS232 modem cable. This is generally not supplied by Telstra and will need to be purchased separately. See back-plate of ATA for correct connection of RS232 cable. You will need your “POSAME” or “Argent Terminal ID” when installing the Telstra ATA. You can get this number from Telstra or your bank. The Telstra Argent help desk number is 1300137100 option 4. Ensure you have your Argent line number ready when you call. Argent Enhanced Terminal Adaptor Back-plate RS232 cable connects to here Confidential Page 7 6/10/2010 PC-EFTPOS Software Installation 1. Install Terminal See Hardware Installation above. Please note you should not connect the USB PINpad until instructed to by the installer. 2. Configure USB\RS232 Mode If you have connected the terminal via a USB cable ensure the PINpad is in USB mode by pressing FUNC, 11112227, ENTER and using the CHQ key to select USB Mode. 3. Install Software If the POS does not have the latest PC-EFTPOS software installed, install the software from the PCEFTPOS installation CD, or the setup file available for download from our website. Follow installation wizard closely. 4. Configure Terminal Usually the terminal is configured by the installer. To configure the terminal manually, either Press Function 9905 + ENTER + ENTER and swipe your merchant card or press CLEAR and enter the Terminal ID – 11 digits (goes in Merchant ID) . Press Red Cancel key to exit or continue pressing Enter Key From the Client Control Panel, go to the setup page and enter the Terminal ID details (into the Merchant ID field for ANZ only) and press APPLY. The confirmation password is 7410. PC-EFTPOS Client icon OR Consult your POS provider to see how the details are entered into the POS 5. Initial PINpad Setup Before an ANZ terminal can be used you must perform a TMS and remote initialisation. PX368 and NPT710 1. Configure the terminal with a Terminal ID. 2. Press the Function key then enter 2468. The terminal will download parameters from the bank. 3. Press the Function key then enter 87. The terminal will logon, download prompts, card prefix tables etc. from the bank. 4. If successful the terminal display should show READY. I3070 1. Connect the PINpad when instructed to by the PC-EFTPOS installer. Set USB mode if required. 2. Configure the PINpad with a Terminal ID 3. Do a standard bank logon. This will perform the required TMS and RSA logons first. 7. Bank Logon Open the PC-EFTPOS EFTPOS Control Panel and click on the “Logon” button from the EFTPOS (F2) tab. 8. Ready to Go If the previous steps were successful the PINpad is ready to use. Confidential Page 8 6/10/2010 Function Key Menus To access the functions, press the FUNC key on the PINpad when the terminal is in its IDLE mode. The following function menus are available: 11112227 - (Toggle between USB and RS232 Mode – i3070 only) Terminal Display Response Press [ENTER] to accept, [CLEAR], [CANCEL] to exit. CONFIGURE TERMINAL COMMS? SERIAL PORT RS 232…………………… USB Press [CHQ] to scroll between RS232 and USB. Press [ENTER] to accept, [CLEAR], [CANCEL] to exit. PROTOCOL ASYNC DLE 9600……… VLI 38400 Press [CHQ] to scroll between ASYNC and VLI. Press [ENTER] to accept, [CLEAR], [CANCEL] to exit. 9902 - (Memory Reset Functions) Option 0 1 5 7 9 Description Exit Reset Configuration Clear Statistics Clear Stored Transactions Reset Everything 9904 - Terminal Maintenance Terminal Display Response SELF TEST? Press [ENTER] to accept, [CLEAR], [CANCEL] to exit. CARD READ TEST? Press [ENTER] to accept, [CLEAR] to go forward one menu, [CANCEL] to exit. KEYBOARD TEST? Press [ENTER] to accept, [CLEAR] to go forward one menu, [CANCEL] to exit. DISPLAY TEST? Press [ENTER] to accept, [CLEAR] to go forward one menu, [CANCEL] to exit. PRINTER TEST? Press [ENTER] to accept, [CLEAR] to go forward one menu, [CANCEL] to exit. 9905 - Configuration Functions Terminal Display Response Description SET CONFIG Press [ENTER] to accept, [CLEAR], [CANCEL] to exit. Request access to the configuration functions. PARAM? Confidential Page 9 6/10/2010 TERMINAL ID? Press [ENTER] if no Terminal ID is required. Alternatively enter a terminal ID. This prompt is only displayed if the [CLEAR] key is pressed at the ENTER CARD prompt. Terminal ID as assigned by ANZ. If the terminal ID is changed the terminal is require to logon. If there is any pending TIP or SAF transactions the terminal ID cannot be changed and this prompt is replaced with „ADVICE PENDING‟. POS? Press [ENTER] if no POS is required. Alternatively, enter a POS number. POS - this is a concatenation of the Tran$end ID and Terminal AME in Hex and converted to decimal. COMMS MODE? Enter the comms mode. Press [ENTER] to continue. The COMMS Mode indicates the method of communication: 1 = Telstra Dial-up Network 2 = Optus Dial-up Network 4 = Dial-up using CLNP headers for EFTPOS and TMS (default) 5 = Dial-up using CLNP headers for EFTPOS. TPDU headers for TMS and TMS dial its own number. DIAL MODE? Enter the dial mode. Press [ENTER] to continue. The Dial Mode indicates the method of dialling: 1 = Tone Dial 2 = Pulse Dial 3 = Tone with blind dial 4 = Pulse with blind dial PABX? Press [ENTER] if no PABX is required. Alternatively, enter the PABX. Prompts the user to enter a PABX number. After a PABX number is entered, press [ENTER] to proceed. It is possible to insert a control character „A‟ via the alpha key entry. This forces the terminal to pause for 1 second before dialling the host phone number. This prompt is not displayed if comms mode of leased line is selected. HOST PHONE NO? Enter the ANZ host phone number. Press [ENTER] to continue. Allows entry of the number to dial the ANZ host. A default number shall appear in this field. It can be altered if required. If the Host phone number is altered re-logon will be required. This prompt will not appear if comms mode of leased line is selected. TMS PHONE NO? Enter the ANZ TMS phone number. Press [ENTER] to continue. Allows entry of the number to dial the ANZ TMS. A default number shall appear in this field. It can be altered if required. This prompt will not appear if comms mode of leased line is selected. LINE SPEED? Enter the Line speed for the TMS number. Possible values are „1‟ = 1200 „2‟ = 2400 (default) 9999 Confidential Page 10 6/10/2010 QUICK DIAL MODE? Enter the Quick dial mode. Press [ENTER] to continue. Quick Dial allows for the removal of the V52 handshaking that is associated with V22. The removal of V52 is required when communicating through Optus via the TPDU method. 0 = Quick Dial Off (Typically used with Telstra) 1 = Quick Dial On (Typically used with 0ptus) This prompt will not appear if comms mode of leased line is selected. TMS NII? Network International Identifier (NII) Enter the NII required. Press [ENTER] to continue. A default value of 0200 is displayed in this field. The NCC1 previously used this value as a means of routing messages to Prod Or Dev TMS servers. The NII values are now 200 for Dev and Prod but different dial numbers are used. TMS SHA? Enter the TMS Symbolic Host Address. Press [ENTER] to continue. Allows entry of the symbolic host address to contact TMS. A default SHA is displayed in this field but can be altered if required. 11112224 - Configure idle mode Terminal display Comment The merchant press [FUNC]. FUNCTION ******** The merchant enters [1] [1] [1] [1] [2] [2] [2] [4] and press [ENTER]. ENABLE IDLE MODE? If the operator selects [ENTER], the terminal will revert to Idle mode after a defined timeout when in Standalone-lite mode. ENABLE IDLE IMG Pressing [ENTER] will allow the terminal to display its customer logo on the Idle screen. DISPLAY THE DATE Pressing [ENTER] will display the current date on the bottom line of the Idle display DISPLAY THE TIME Pressing [ENTER] will display the current time on the bottom line of the Idle display IDLE TIMEOUT -10 20 +10 This allows the setting of the Idle Timeout. The middle value indicates the current value (inc seconds). Selecting the function key under -10 decreases the value by 10 and the function key under the +10 increases the value by 10. Pressing [ENTER] selects the new value 11112222 - Invoke Stand-Alone Lite Mode. This function will switch the terminal to/from standalone mode. 2468 - TMS Init This function will send a message to the Terminal Management System (TMS) 74 - Print Software version (NPT in Standalone Mode) This function will print the software version report on the NPT printer. 87- Remote Init This function will send an RSA message to the bank. This is required when the terminal is installed. 88 - Upload stored transactions. This function will upload all currently stored transactions. Confidential Page 11 6/10/2010 Standalone Mode The NPT710 and PX328 support a simple standalone mode. Configure Standalone Mode 1. If using the internal NPT modem, ensure Dial-up parameters are set up. 2. Configure Standalone Mode options (Function 11112223), refer to table below. 3. Switch to Standalone Mode by pressing [Func] button then enter, followed by 11112222 then enter. The terminal will prompt switch to standalone mode, press enter to accept. Terminal display Comment The merchant press [FUNC]. FUNCTION ******** The merchant enters [1] [1] [1] [1] [2] [2] [2] [3] and press [ENTER]. INTERNAL PRINT? Pressing [ENTER] will enable the terminal to use the internal printer. Pressing [CLEAR] will allow the terminal to send receipts to the POS to be printed. USE WINDOWS DEFAULT PRINTER? If the operator selected [ENTER] from above, this will prompt. Select [ENTER] if the default Windows printer is to be used on the POS. Select [CLEAR] if the POS printer is to be used for printing. INTERNAL MODEM? Pressing [ENTER] will enable the terminal to use the internal modem. Pressing [CLEAR] will allow the terminal to use the POS to send messages to and from the bank. JOURNAL TXNS? If both Internal Print and Internal modem were both selected, this option will be displayed. It allows the terminal to journal the transactions to the EFT-Client on the POS. It should only be selected if the POS will be connected and the Eft-client is running. PRINT SECOND RECEIPT? Selecting [ENTER] will allow the standalone mode to prompt for the printing of a customer receipt after the merchant receipt has been printed. Selecting [CLEAR] will only print the customer copy of debit card receipts. SWIPE START TRANSACTIONS? Selecting [ENTER] will allow the standalone mode to start a transaction by the customer swiping a card or selecting the option from the menu, Selecting [CLEAR] will only allow a transaction to be started by the menu. Confidential Page 12 6/10/2010 Using Standalone Mode Terminal Menu Screens The menu system represents the user interface for the terminal. The menu allows the operator to access all of the terminal functionality without the need for a POS system. The terminals functionality is grouped with similar functions and is accessed via menus. A menu contains up to 3 menu items. Each of the menu items allows access to a function or sub menu. If the terminal as other applications installed, these menus will follow on from EFTPOS EFTPOS PUR CASH RFND EFTPOS TOTL DETL SETL SUPERVISOR XTRA INIT COPY Key Description ENTER Cycles clockwise through the menus. CLEAR Cycles anti-clockwise through the menus. CANCEL Exit from Totals Sub-menu CHQ Selects the menu item directly above the soft function key. SAV Selects the menu item directly above the soft function key. CR Selects the menu item directly above the soft function key. Confidential Page 13 6/10/2010 System Timeouts The PINpad will support the following 'time outs' for its PCEFTPOS Client and Network interface: PINPAD TIMEOUT 3 seconds 3 seconds 10 seconds 10 seconds 45 seconds 45 seconds 45 seconds 60 seconds 30 seconds 60 seconds 180 seconds 120 seconds EVENT PCEFTPOS Client ACK to PIN pad request PCEFTPOS Client ACK to send Host message request PCEFTPOS Client response to display request PCEFTPOS Client response to print request Host response to Financial Transaction requests Host response to administration requests Host response to Reversals and SAF uploads Customer response to Card entry prompt Customer response to Account prompt Customer response to PIN entry prompt PCEFTPOS Client response to insert slip request PCEFTPOS Client response to verify signature request PC-EFTPOS Generated Response Codes CODE PINPAD DISPLAY DESCRIPTION T0 PINpad is in the Idle mode awaiting a PCEFT Client request. TA Application error. TB No CPAT entry for swiped card. TC Auth number of completion could be found. TD Amount of completion does not match pre-auth. TE No cash out allowed on credit card sales. TF The PINpad is not logged on. TH Printer Error TI The customer has exceeded the PIN pad‟s time out limit. TJ TMS Init required. TK Manual card entry not allowed. Confidential READY TRAN CANCELLED SYSTEM ERROR CARD NOT ACCEPTED AUTH NOT FOUND AMOUNT NOT MATCHED TRAN CANCELLED NO CASH ON CR INIT REQUIRED TRAN CANCELLED OPERATOR TIMEOUT TMS INIT REQUIRED Page 14 CARD MUST BE 6/10/2010 CODE PINPAD DISPLAY DESCRIPTION SWIPED TL The operator has cancelled the transaction because of an invalid signature. TRAN DECLINED SIGNATURE ERROR TM The operator has cancelled the transaction when a card or PIN or Account retry prompt is being displayed. TRAN CANCELLED TN No matching transaction for tip adjust. TO Transaction already tipped. TP Transaction not allowed. TQ Tip amount exceeds percentage. TR Over floor limit. TT Pre-Auth batch full TU SAF batch full. TV EMV SDA error TW Auth declined. TX SAF batch full TY Card rejected by PINpad. TZ Account error. TRAN CANCELLED SYSTEM ERROR CARD NOT ACCEPTED ACCOUNT TYPE ERROR X0 No answer was received from the Bank for the transaction request. TRAN CANCELLED NO RESPONSE X1 EFB disallowed. X2 Expired card in EFB. X3 EFB floor limit exceeded. X4 EFB refund limit exceeded. X5 Cash-out not allowed in EFB. Confidential RECALL NO NOT FOUND ALREADY TIPPED TRAN CANCELLED SYSTEM ERROR TP TIP AMOUNT EXCEEDS MIMIT LIMIT EXCEEDED TRAN CANCELLED SYSTEM ERROR TT EFB DISALLOWED SAF FULL DECLINED CALL YOUR BANK TRAN CANCELLED AUTH DECLINED EFB DISALLOWED EXPIRED CARD OVER EFB LIMIT EFB REFUND LIMIT Page 15 CASH OUT NOT ALLOWED 6/10/2010 DESCRIPTION PINPAD DISPLAY X6 The PIN pad has received a Host message with an incorrect Terminal Id. TRAN CANCELLED ERROR 02 X7 The PINpad has received a message from the Bank that failed its authentication. TRAN CANCELLED ERROR 05 X8 An error code has been returned from the Tran$end network 'XX' represents the PDU error and 'YY' the PDU Code. TRAN CANCELLED SYSTEM ERROR X9 A message with an incorrect length was received from the network. TRAN CANCELLED SYSTEM ERROR X9 XA A message with an incorrect address was received from the network. TRAN CANCELLED SYSTEM ERROR XA XB A message with an incorrect Response Code has been received from the Bank. TRAN CANCELLED SYSTEM ERROR XC A message with an incorrect Message Type has been received from the Bank OR the message received is greater than 360 bytes. TRAN CANCELLED MSG TYPE ERROR XD The luhn check on a manual card read has failed. XE The month of the expiry date on a manual card read is invalid XF The transaction is not supported by the PINpad. XG Terminal has not been keyloaded. Return to ANZ XH The STAN returned from the bank was not the one expected. XI Key was pressed during bank upload. CODE XK Advice or reversal pending. Cannot configure. XN Transaction not allowed. XO Trace # invalid. XP Invalid amount received from POS. XQ Batch empty error. XR Pin mismatch on smart card. XT Configuration required. Confidential Page 16 CARD NUMBER INVALID INVALID EXPIRY DATE TRAN CANCELLED INVALID TRANS TRAN CANCELLED KEYS REQUIRED TRAN CANCELLED ERROR 03 TIMEOUT EXPIRED READY Or INIT REQUIRED TRAN CANCELLED SYSTEM ERROR TRAN CANCELLED SYSTEM ERROR TRAN CANCELLED SYSTEM ERROR TRAN CANCELLED SYSTEM ERROR TRAN CANCELLED PIN MISMATCH CONFIGURATION REQUIRED 6/10/2010 CODE PINPAD DISPLAY DESCRIPTION APPROVED XU Completion timeout. XY Upload/download interrupted. Z0 General modem error Z1 No dial tone. Z2 No Answer. The number that was dialled did not answer. Z3 Line Busy. The number that was dialled was engaged. Z4 No phone number programmed in terminal Z5 Power fail. The terminal has power failed during processing Z6 No Carrier. The modem lost carrier during processing Z7 No EFT Server. The connection from the client to the EFTSRV is missing. MODEM ERROR NO LINE NO ANSWER NUMBER BUSY HOST NO INVALID POWER FAIL ERROR 01 TRANS CANCELLED SYSTEM ERROR Z7 Bank Generated Response Codes *For assistance with the following codes, contact your Bank. CODE DESCRIPTION Approved or completed successfully 00 PINPAD DISPLAY 01 Declined-refer to card issuer 02 Declined-issuer‟s special conditions 03 Invalid sequence number 05 Do not honour 06 Error 08 Honour with identification 12 Invalid Transaction or if returned on a settlement – Settlement already taken. 13 Invalid Amount TRAN CANCELLED CARD ERROR REFER TRAN CANCELLED CARD ERROR REFER TRAN CANCELLED SYSTEM ERROR 03 TRAN CANCELLED SYSTEM ERROR 05 TRAN CANCELLED SYSTEM ERROR 06 SIGNATURE REQUIRED TRAN CANCELLED TRAN NOT ALLOWED SETTLEMENT ALREADY TAKEN TRAN CANCELLED SYSTEM ERROR 13 Confidential Page 17 APPROVED 6/10/2010 CODE DESCRIPTION Invalid card number (no such number) 14 15 No such issuer 21 No action taken 30 Format Error 31 Bank not supported by switch 33 Expired card 34 Suspected fraud 36 Restricted card 38 Allowable PIN retries exceeded 39 No credit account 41 Lost card 43 Stolen card 51 Not sufficient funds 52 No cheque account 53 No savings account 54 Expired card 55 Incorrect PIN 56 No card record 57 Transaction not permitted to cardholder 58 Transaction not permitted to terminal 61 Exceeds withdrawal amount limit 62 Restricted Card 63 Security Violation 75 Allowable number of PIN tries exceeded 91 Issuer or switch is inoperative 94 Duplicate transmission Confidential Page 18 PINPAD DISPLAY TRAN CANCELLED CARD NOT VALID TRAN CANCELLED SYSTEM ERROR 15 TRAN CANCELLED SYSTEM ERROR 21 TRAN CANCELLED SYSTEM ERROR 30 TRAN CANCELLED CARD SUPPORTED TRAN CANCELLED CARD ERROR REFER TRAN CANCELLED SYSTEM ERROR 34 TRAN CANCELLED CARD ERROR REFER TRAN CANCELLED PIN ERROR REFER TRAN CANCELLED ACCT TYPE ERROR TRAN CANCELLED CARD ERROR REFER TRAN CANCELLED CARD ERROR REFER TRAN CANCELLED NOT AUTHORISED TRAN CANCELLED ACCT TYPE ERROR TRAN CANCELLED ACCT TYPE ERROR TRAN CANCELLED CARD EXPIRED PIN INCORRECT TRY AGAIN TRAN CANCELLED SYSTEM ERROR 56 TRAN CANCELLED SYSTEM ERROR 57 TRAN CANCELLED SYSTEM ERROR 58 TRAN CANCELLED SYSTEM ERROR 61 TRAN CANCELLED CARD ERROR REFER TRAN CANCELLED KEYS INCORRECT TRAN CANCELLED PIN ERROR REFER ERROR ISSUER NOT AVAILABLE TRAN CANCELLED SYSTEM ERROR 94 6/10/2010 PINPAD DISPLAY CODE DESCRIPTION System malfunction 96 97 Advises that reconciliation totals have been reset 98 MAC error P2 Software deletion failure P3 Invalid software in terminal P6 Invalid Module Name/Version Number/Checksum received P7 Parameter download aborted by terminal re-logon P8 Incorrect acquirer software version level re-initialise Confidential Page 19 TRAN CANCELLED SYSTEM ERROR 96 APPROVED TRAN CANCELLED SYSTEM ERROR 98 TRAN CANCELLED SYSTEM ERROR P2 TRAN CANCELLED SYSTEM ERROR P3 TRAN CANCELLED SYSTEM ERROR P6 TRAN CANCELLED SYSTEM ERROR P7 TRAN CANCELLED SYSTEM ERROR P8 6/10/2010 TMS Generated Response Codes *For assistance with the following codes, contact your Bank. PINPAD DISPLAY CODE DESCRIPTION Successful TMS request. 00 N8 Terminal cannot get pages from OS necessary for download. N9 Application activation failed. I1 I3 During a software download or a generic file download the TMS has tried to open a file that does not exist. A query that was generated for the database file. I4 The terminal has requested a download that is too large. I5 The TMS is unable to correctly read a version file for a software download. An internal TMS error has caused a buffer overflow. I6 I8 An invalid download request has caused TMS to read past the end of a download file. The terminal has not been configured. I9 The terminal has requested a table that does not exist. IA The terminal has sent an unknown request to TMS. IB An internal TMS value has become out of bounds and the TMS is unable to complete a request. File does not exist on TMS. I7 IC IZ Confidential Some thing has failed that never should and we have not defined an error for it! Page 20 TMS LOGON SUCCESSFUL TRAN CANCELLED SYSTEM ERROR N8 TRAN CANCELLED SYSTEM ERROR N8 TRAN CANCELLED SYSTEM ERROR I1 TRAN CANCELLED SYSTEM ERROR I3 TRAN CANCELLED SYSTEM ERROR I4 TRAN CANCELLED SYSTEM ERROR I5 TRAN CANCELLED SYSTEM ERROR I6 TRAN CANCELLED SYSTEM ERROR I7 TRAN CANCELLED SYSTEM ERROR I8 TRAN CANCELLED SYSTEM ERROR I9 TRAN CANCELLED SYSTEM ERROR IA TRAN CANCELLED SYSTEM ERROR IB TRAN CANCELLED SYSTEM ERROR IC TRAN CANCELLED SYSTEM ERROR IZ 6/10/2010 Argent Error Codes Argent Basics The seven segment display on the Argent Terminal Adaptor will light up and will move through a sequence of numbers on start-up. The numbers displayed will be steady when the call is progressing and the configuration downloading normally on the D-channel during start-up. The display will flash continuously if call progress encounters an error condition during start-up. The table below provides a list of “start-up status codes” that the ATA will display in order of sequence when the power is being applied, the call is being set up and the configuration is being downloaded by the Argent Network Management System (NMS). Argent Error Codes Display Interpretation Building Bars..........Program decompressing into memory Steady 1 .................Power-on test executing. Dot will pulse on/off Steady 2 ................D-channel interface active for EFTPOS Steady 3 ................Pre-configuration in progress, learning identity Steady 4.................Remote management in progress, configuration Steady 5 ................Software download in progress Steady 6 ................Reserved Steady 7 ................Reserved Steady 8 ................Reserved Steady 9 ................Reserved Steady 0 ................Reserved Steady dot..............Normal Operation (no fault) ATA Seven Segment Display Start-up Status Codes Display Interpretation Flashing 1...............Power up test fails Flashing 2...............ISDN connection down Flashing 3..............No carrier on EFTPOS port Flashing 4..............Data overrun/underrun on Serial V.24 port Flashing 5 .............No stations responding to polls on EFTPOS port Flashing 6 .............Last call attempt failed-Channel (X.25 fault or Argent server or NMS unavailable) Flashing 7 .............Not applicable Flashing 8 .............NMS has no pre-configuration to download Flashing 9 .............NMS main configuration failure Flashing 0 .............Not applicable Confidential Page 21 6/10/2010 CLNP error codes CLNP error codes are reported as XX/YY where XX =Information code and YY=Error code as below: Info Code Meaning 0 Unspecified 1 Validation failure on incoming Terminal message 2 Not Supported 3 Reserved 4 Reserved 5 Validation failure on sign-on command 6 Successful sign-on 7 Validation failure on sign-off command 8 Successful sign-off Error Code Meaning 0 No Error 1 Unknown terminal ID 2 Invalid AME 3 Not Supported 4 Not Supported 5 Unknown Host reference 6 (Reserved) 7 Not Supported 8 Destination unreachable 9 Not Supported 10 Not Supported 11-16 (Reserved) 17 Not Supported 18 Not Supported 19 (Reserved) 20 Not Supported 21 Not Supported 22 Undefined Symbolic Host Address 23 Invalid Station for Terminal 24 Invalid Command from Terminal 25 Not Supported 26 Not Supported 27-29 (Reserved) 30 No Data in PDU 31 Not Supported 32 Unknown Host 33 Not Supported Confidential Page 22 6/10/2010 Settlement Receipts and Options Settlement Receipt -----------------------MERCHANT NAME MERCHANT ADDRESS 1 MERCHANT ADDRESS 2 ANZ SETTLEMENT TERMINAL ID ttttttttttt REFERENCE NO rrrrrr Terminal ID of terminal STAN DD/MM/YY APPROVED Settlement date and time. hh:mm 00 ------------------------ Last Totals Receipt -----------------------MERCHANT NAME MERCHANT ADDRESS 1 MERCHANT ADDRESS 2 ANZ EFTPOS LAST SUMMARY TOTALS AS AT DD/MM/YY TERMINAL ID ttttttttttt REFERENCE NO ssssss Terminal ID of terminal STAN PUR CASH RFND TOTAL Total calculated by the bank. $$$$.cc $$$$.cc $$$$.cc $$$$.cc nnnn nnnn nnnn nnnn DD/MM/YY hh:mm APPROVED 00 Current date. ------------------------ Confidential Page 23 6/10/2010 Summary Totals Receipt -----------------------MERCHANT NAME MERCHANT ADDRESS 1 MERCHANT ADDRESS 2 ANZ EFTPOS SUMMARY TOTALS TERMINAL ID ttttttttttt REFERENCE NO rrrrrr Terminal ID of terminal STAN TOTALS PUR CASH RFND TOTAL Totals calculated by bank. $$$$.cc $$$$.cc $$$$.cc $$$$.cc DD/MM/YY APPROVED nnnn nnnn nnnn nnnn hh:mm 00 ------------------------ Sub Totals Receipt -----------------------MERCHANT NAME MERCHANT ADDRESS 1 MERCHANT ADDRESS 2 ANZ EFTPOS SUB TOTALS TERMINAL ID ttttttttttt REFERENCE NO rrrrrr Terminal ID of terminal STAN xxxxxxxxxxxxxxxx PUR $$$$.cc CASH $$$$.cc RFND $$$$.cc TOTAL $$$$.cc All transactions printed by Card Name Section. nnnn nnnn nnnn nnnn TOTALS PUR CASH RFND TOTAL DD/MM/YY APPROVED $$$$.cc $$$$.cc $$$$.cc $$$$.cc nnnn nnnn nnnn nnnn Totals calculated by bank. hh:mm 00 ------------------------ Confidential Page 24 6/10/2010 Receipt Layouts Logon Receipt -----------------------MERCHANT NAME MERCHANT ADDRESS 1 MERCHANT ADDRESS 2 ANZ INITIALISATION TERMINAL ID ttttttttttt REFERENCE NO rrrrrr Pin pad terminal ID. System Trace Audit Number DD/MM/YY hh:mm If a response is received from the host within the allowed communication timeout period, then the date from the host’s response message shall be printed, otherwise the terminal’s local date shall be printed. APPROVED 00 APPROVED - otherwise error lines GREETING MSG LINE 01 GREETING MSG LINE 02 ------------------------ Debit Card Receipt -----------------------MERCHANT NAME MERCHANT ADDRESS 1 MERCHANT ADDRESS 2 EFTPOS TERMINAL ID ttttttttttt REFERENCE NO rrrrrr CARD NUMBER cccc YYYYYY CARD AC tttttttt cccccccc TOTAL AUD MMYY aaa cccc are the last 4 digits Card number Where YYYYYY is either Credit or Debit and aaa is account type. $$$$$$.cc $$$$$$.cc tttttttt - Purchase, Refund / $$$$$$.cc - Transaction amount Cash out (only appears if a cash out amount is present) $$$$$$.cc Total transaction record amount. For a two part transaction, it shall be the sum of both the purchase and cash out amounts. The “AUD” shall be printed immediately to the left of the most significant digit. DD/MM/YY hh:mm APPROVED 00 If a response is received from the host within the allowed communication timeout period, then the date from the host’s response message shall be printed, otherwise the terminal’s local date shall be printed. Approved or Declined Text Authorisation identification response (if any) or xx response code. GREETING LINE 1 GREETING LINE 2 ------------------------ Confidential Page 25 6/10/2010 Merchant Receipt for signature -----------------------MERCHANT NAME MERCHANT ADDRESS 1 MERCHANT ADDRESS 2 EFTPOS TERMINAL ID ttttttttttt REFERENCE NO rrrrrr CARD NUMBER cccc YYYYYY CARD AC tttttttt cccccccc TOTAL AUD MMYY aaa cccc are the last 4 digits Card number Where YYYYYY is either Credit or Debit and aaa is account type. $$$$$$.cc $$$$$$.cc tttttttt - Purchase, Refund / $$$$$$.cc - Transaction amount Cash out (only appears if a cash out amount is present) $$$$$$.cc Total transaction record amount. For a two part transaction, it shall be the sum of both the purchase and cash out amounts. The “AUD” shall be printed immediately to the left of the most significant digit. -----------------------SIGNATURE DD/MM/YY hh:mm APPROVED 413327 If a response is received from the host within the allowed communication timeout period, then the date from the host’s response message shall be printed, otherwise the terminal’s local date shall be printed. Approved or Declined Text aaaaaa - Authorisation identification response (if any) or xx response code. GREETING LINE 1 GREETING LINE 2 ------------------------- Confidential Page 26 6/10/2010 Trouble Shooting Installation Problems PINpad offline The most common reason for this error message is that the PINpad is not connected to the PC correctly. Check the power to the PINpad. The PINpad should be showing something on its display screen. Check the PINpad is connected to the COM port on the PC Check that the PC-EFTPOS Client Settings is configured to use the correct COM port, usually COM1. No Response from bank to logon Check the terminal and merchant ID from the logon receipt Have the bank verify that the terminal ID being used is setup on the bank system If the TID is correct at the bank, check the EFTSRV settings to ensure the message is being sent to the correct bank. Client Offline This error means that one of the following has occurred: The most common cause of this error on a correctly installed machine is that there are more than one application running that uses our EFTPOS system. Examples are the POS system and our test POS system. There can only be one POS running. Shutdown any other applications that may also use EFTPOS. The EFT client is not running (or installed). Check if the client icon (little cents sign) is on the task bar near the clock. (Warning…. Not all POS system shows the task bar). Start client by rebooting POS. Certain cards won’t process If the EFTPOS system only fails on Refunds, American Express or Diners cards or Cash Out the bank may have disabled them. Check with the bank to see if they are enabled on your terminal settings. Hardware Problems Hardware error troubleshooting Try to access one of the supported functions by pressing the function key If the PINpad goes into maintenance functions the PINpad hardware is working If the PINpad will not respond, it is probably broken Check power & cables If possible try another PINpad on this power point If there is still no activity on the PINpad screen the PINpad is probably broken PINpad issues that may require a replacement Card reader fails card reading on call cards PINpad has been dropped and the display is smashed Missing keys on keyboard Non-responsive keys on keyboard. Re-power on PINpad and try keys again before replacing If the PINpad display contains the text APPLI NOT OK, then the PINpad has lost its software. Return the PINpad for repair If the terminal response code 63 or 96 after an RSA logon, the PINpad has lost its keys. Return the PINpad for repair. Confidential Page 27 6/10/2010 Communication Problems The most common reason for a P66 modem line to fail is that it is not communicating to the PC. All parameters can be altered manually but if any are wrong it‟s advised to re-run the installation wizard and answer the questions correctly. Ensure all cables are plugged in correctly Check that the modem is getting power. The power indicator on the power pack is on. The modem will click while connecting & disconnecting to the power supply Check that the modem is connected to a COM port on the PC Ensure the correct COM port is configured in EFT server (Lines tab) If you are using a PABX line (ie dial 0 for outside line) the number dialled will need to be prefixed eg 0,1800032027 Common Dial-up Errors No Dial Tone ~ Check the phone is connected Line Busy ~ Check phone number and PABX No Answer ~ Check phone number and PABX No Carrier ~ Check modem settings to see if correct for this bank Argent Line An Argent line needs to be configured to run the AABP Protocol at 9600bps. Ensure that Telstra installs this type of line. Telstra will provide an Argent Terminal Adaptor (ATA) and an ISDN line. Argent Terminal Adaptor Connection to the PC The Argent TA must be connected to the PC Via a 25-pin (V.24 port on TA) to 9-pin (COM port on PC) standard RS-232 modem cable (available from any PC or Electronics Store) This connection will fail if…. The cable is incorrect, you CANNOT use a null-modem cable (type 1), and you must use a standard RS232 modem cable. The incorrect COM port is configured for the Argent line in EFT server (lines tab) If the Argent ATA display is a steady dot, then the Argent ATA is configured for AABP and is ready to be connected to the PC running the EFTSRV software. CLNP Errors If the EFTSRV can communicate with the ATA, then errors will be reported via CLNP error codes on the display receipt. (Refer to error codes on page 25) The most common errors are: X8 CNP 01 08 ~ this means that the Argent systems can‟t communicate with the bank. Check the POS ame and the Host Address, and then call Telstra. X8 CNP 01 01 Confidential ~ this means that the POSAME is wrong. Confirm it with Telstra. Page 28 6/10/2010 Who to Contact for Help For a financial Transaction enquiry: ANZ Help Desk 1800 039 025 For hardware and software assistance: Your POS vendor Credit Card Authorisations Visa MasterCard 1800 999205 Amex & JCB 1300 363 614 Diners 1800 331 112 For assistance with Argent: Telstra Argent Help Desk 1300 137 100 option 4 PC-EFTPOS (02) 9998 9800 Monday to Friday 9am to 5pm Email: [email protected] Web: www.pceftpos.com.au The web site contains full installation diagrams and instructions. Confidential Page 29 6/10/2010