1
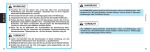
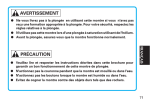
Cal. 5M85 INSTRUCTIONS (P.3) BEDIENUNGSANLEITUNG (S.33) INSTRUCTIONS (P.64) ISTRUZIONI (P.94) INSTRUCCIONES (P.124) INSTRUÇÕES (P.154) ИНСТРУКЦИИ (P.185) (214) English Sie sind jetzt stolzer Besitzer einer SEIKO KINETIC® Taucheruhr Kal. 5M85 . Bitte lesen Sie diese Bedienungsanleitung vor der Verwendung Ihrer SEIKO KINETIC® Taucheruhr sorgfältig durch, um die optimale Nutzung dieser Uhr zu gewährleisten. Heben Sie diese Bedienungsanleitung gut auf, um jederzeit wieder nachlesen zu können. Vous voici l’heureux propriétaire d’une montre de plongée SEIKO KINETIC® Cal. 5M85 . Pour en obtenir de bonnes performances, veuillez lire attentivement les explications de ce mode d’emploi avant d’utiliser votre montre de plongée SEIKO KINETIC®. Conservez ce mode d’emploi pour toute référence ultérieure. Grazie di aver acquistato questo orologio SEIKO KINETIC® ad uso subacqueo, Cal. 5M85 . Per ottenerne i migliori risultati leggere attentamente le istruzioni di questo libretto prima di passare all'uso dell'orologio stesso. Tenere poi il manuale a portata di mano, per ogni eventuale futura, ulteriore consultazione. Puede sentirse ahora orgulloso de poseer un reloj de buceo SEIKO KINETIC® Cal. 5M85 . Para obtener de él los mejores resultados, lea las instrucciones del presente folleto con cuidado antes del uso de su reloj de buceo SEIKO KINETIC®. Guarde este manual para fácil referencia. Você pode sentir-se orgulhoso de possuir um Relógio do Mergulhador SEIKO KINETIC® Cal. 5M85 . Para obter dele os melhores resultados, leia atentamente as instruções contidas neste opúsculo antes de usar o seu Relógio do Mergulhador SEIKO KINETIC®. Conserve este manual para referéncias futuras. Теперь вы являетесь обладателем для дайвинга смотреть SEIKO KINETIC® Кал. 5M85. Перед их использованием и для достижения лучших результатов, пожалуйста, внимательно ознакомьтесь с данной инструкцией и обязательно сохраните ее. 歡迎你購買精工 5M85 機型動力潛水手錶 ®。 為了更好地使用精工動力手錶 ®,請您在使用前詳細閱讀本說明 手冊,並把説明手冊妥善保管,以備随時用於參考。 2 WARNING lDo not attempt to dive using this watch unless you have been properly trained in diving. For your safety, please abide by the rules of diving. l Do not use the watch for saturation diving using helium gas. l Before diving, make sure that the watch operates normally. l When diving, never carry out operations other than those specified in the accompanying booklet. Misuse of the product and misunderstanding of the displayed content may lead to a fatal or serious accident. l This watch is an auxiliary instrument which is intended to be used as a timepiece. Use this watch with proper diving equipment, such as a residual pressure gauge, water depth meter, etc., which is required for safe diving. ENGLISH English You are now the proud owner of a SEIKO KINETIC ® Diver’s Watch Cal. 5M85 . For best results, please read the instructions in this booklet carefully before using your SEIKO KINETIC ® Diver’s Watch. Please keep this manual handy for ready reference. CAUTION l Please read and observe the instructions described in this booklet to ensure the proper functioning of your diver's watch. l Do not operate the crown when the watch is wet or in water. l Avoid hitting the watch against hard objects such as rocks. 3 English WARNING notes indicate any condition or practice which, if not strictly observed, could result in severe personal injury or possible death. CAUTION CAUTION notes indicate any condition or practice which, if not strictly observed, may result in personal injury or property damage. PRECAUTIONS ON USING THE WATCH FOR DIVING Before diving, make sure that the watch operates normally and be sure to observe the precautions described below. BEFORE DIVING English WARNING l Do not use the watch for saturation diving using helium gas. l To measure the elasped time while you are underwater, always use the rotating bezel. l Check that: • the second hand is moving at one-second intervals. • the crown is locked tightly in place. • there are no visible cracks in the crystal or the watch band. • the strap or bracelet is securely fastened to the watch case. • the buckle keeps the strap or bracelet firmly secured to the wrist. • the rotating bezel turns counterclockwise smoothly (the rotation must not be too loose or too tight) and the “ ” mark aligns with the minute hand. • the time and calendar are appropriately set. If there are any malfunctions, we recommend that you contact an AUTHORIZED SEIKO SERVICE CENTER. WHILE DIVING l Do not operate the crown when the watch is wet or in water. l Take care not to hit the watch against hard objects such as rocks. l Bezel rotation may become slightly stiffer underwater. This is not a malfunction. AFTER DIVING l Rinse the watch in fresh water after diving and wash out all seawater, soil, sand, etc. l Wipe the watch thoroughly dry to prevent possible rust on the case after cleaning the watch in fresh water. 4 5 English CONTENTS Page WARNING / CAUTION ................................................................................................................................. 3 PRECAUTIONS ON USING THE WATCH FOR DIVING ............................................................................... 4 FEATURES ................................................................................................................................................... 7 NAMES OF THE PARTS .............................................................................................................................. 8 HOW TO CHARGE AND START THE WATCH............................................................................................. 9 POWER RESERVE INDICATOR.................................................................................................................... 11 SCREW LOCK TYPE CROWN...................................................................................................................... 12 HOW TO SET THE TIME AND DATE, HOW TO USE THE TIME DIFFERENCE ADJUSTMENT FUNCTION.................... 13 IF THE SECOND HAND STARTS MOVING AT TWO-SECOND INTERVALS................................................ 24 INSTANT-START FUNCTION......................................................................................................................... 24 REMARKS ON THE RECHARGEABLE BATTERY......................................................................................... 25 NOTES FOR USING THE WATCH................................................................................................................ 26 ROTATING BEZEL........................................................................................................................................ 28 TO PRESERVE THE QUALITY OF YOUR WATCH........................................................................................ 29 SPECIFICATIONS......................................................................................................................................... 32 6 IFor the care of your watch, see "TO PRESERVE THE QUALITY OF YOUR WATCH" in the attached Worldwide Guarantee and Instruction Booklet. SEIKO KINETIC Cal. 5M85 is an analogue quartz watch equipped with the Kinetic technology developed by SEIKO. It generates the electric energy to power the watch, utilizing the movement of your body, and stores it in the rechargeable battery, which requires no periodical replacement unlike conventional button-type batteries. The watch is equipped with a 24-hour hand and features an hour-hand independent adjustment function (for time difference adjustment), offering several types of 24-hour hand usage. For instance, if you set the 24-hour hand to show your home time, you can independently set the hour hand to display the time of the place you are staying at as well as easily check your home time with the 24hour hand. Alternatively, you can set the 24-hour hand to display the time in a different time zone. English FEATURES lCalibre number of your watch Please check the case back of your watch to find its calibre number inscribed on it. As illustrated at right, the calibre number of your watch is the 4-digit number to the left of the hyphen mark. Calibre No. 7 English HOW TO CHARGE AND START THE WATCH Minute hand Hour hand Date 1 Swing the watch from side to side. 2 Charge the rechargeable battery sufficiently. 3 Set the time/calendar and put on the watch. * Swing rhythmically at a rate of twice a second. English NAMES OF THE PARTS CROWN Second hand a b c 24-hour hand CROWN a) Normal position b) First click position: hour-hand independent adjustment, date setting c) Second click position: time setting 8 9 NUMBER OF SWINGS 1 DAY APPROX. 6 MONTHS 2 DAYS FULL 250 500 1. When the watch stops completely, or if you find the second hand moving at twosecond intervals, swing the watch from side to side at a rate of twice a second. 2. 250 swings will reserve up to 1 day of power. The second hand will start moving at one-second intervals. * It is recommended that the watch be swung further until 2 days of power is reserved. As a guideline of recharging, additional 250 swings, about 500 swings in total will reserve 2 days of power. 3. Wear the watch on your wrist. POWER RESERVE ACCUMULATED WHILE YOU ARE WALKING 720 m ★ Wearing the watch. Power reserve 10 l Press the button at the 2 o'clock position. *To allow easy reading of the second hand, press the button when the second hand is at the 12 o'clock position. QUICK MOVEMENT OF SECOND HAND English POWER RESERVE 5 seconds 10 seconds 20 seconds 30 seconds POWER RESERVE More than 1 day More than 7 days More than approximately 1 month Approximately 6 months English POWER RESERVE INDICATOR NUMBER OF SWINGS AND POWER RESERVE Toward the end of the quick movement, the second hand will gradually slow down until it stops. The second hand will resume normal movement after the indicated 5, 10, 20 or 30 seconds have elapsed. 2 days P The illustrations above provide only general guidelines of the relationship between the power reserve and the number of swings/the distance you walk. Actual amount of power reserve differs from person to person. 11 English l Some models have the screw lock type crown, which can be locked by the screw when it is not necessary to be operated. l Locking the crown will prevent operating errors. l Unscrew the crown before any crown operation. When the operation is over, screw the crown in to lock. n HOW TO OPERATE THE SCREW LOCk TYPE CROWN If your watch has a screw lock type crown, unscrew it before any crown operation. v Always keep the crown locked unless it is necessary for operating the crown. [To unscrew the crown] Turn the crown counterclockwise (downward) to unscrew it. The crown is unlocked and can be operated. [To screw the crown in] Upon completion of the crown operation, screw the crown in completely until it stops by turning it clockwise (upward) while gently pressing it back into the original position. 12 The crown can be pulled out. HOW TO SET THE TIME AND DATE, HOW TO USE THE TIME DIFFERENCE ADJUSTMENT FUNCTION l How to set the time English SCREW LOCK TYPE CROWN • When setting the time, ensure that the watch is working: the second hand is moving at one-second intervals. • In a case that the watch is completely stopped due to a shortage of stored elec- trical energy, recharge the watch until the second hand resumes the normal one-second interval movement, and then reset the time and calendar. (Refer to "IF THE SECOND HAND STARTS MOVING AT TWO-SECOND INTERVALS" on page 28.) • The 24-hour hand can be used in two ways. Since the time setting procedure differs according to the usage, please choose the method before setting the time. <Method 1> Simply using the 24-hour hand to show the 24-hour time as an AM/PM indicator. Turn the crown while pressing it back in. • This is the standard usage for the 24-hour hand. 13 English How to set the 24-hour hand as a regular 24-hour indicator <When method 1 usage is selected> 1. Pull out the crown to the second click. * Pull the crown out when the second hand is at the 12 o’clock position and the second hand will stop on the spot. * When setting the time, ensure that the watch is working: the second hand is moving at one-second intervals. 14 Second click position 2. Turn the crown to set the 24-hour and minute hands to the current time. <Example> To set to 10:00 A.M., adjust the 24hour hand to indicate “10” on the 24hour scale (5 o’clock position), and the minute hand to the “0” minute position. To set to 6:00 P.M., adjust the 24hour hand to indicate “18” on the 24hour scale (9 o’clock position), and the minute hand to the “0” minute position. * Only the 24-hour and minute hands are to be set at this stage. The hour hand is to be set later so it is not necessary to adjust the hour hand yet, even if it is indicating the wrong time. * The date may be altered depending on the position of the hour hand, however it should not cause any concern since it can also be adjusted later. * Set the minute hand ahead of the time and then slowly turn it back to the desired time. English <Method 2> Using the 24-hour hand to indicate the time in a different time zone. • For instance, by setting the 24-hour hand to GMT while setting the hour and minute hands to indicate the time in your area, you can easily check GMT with the 24-hour hand at any time. 3. Push the crown back in simultaneously with a time signal. * The setting of the 24-hour, minute and second hands to the current time is now completed. 4. Pull out the crown to the first click. 15 English How to set the 24-hour hand as a dual time indicator for a "different time zone area” <when method 2 usage is selected> 1. Pull out the crown to the second click. * Pull the crown out when the second hand is at the 12 o’clock position and the second hand will stop on the spot. * When setting the time, ensure that the watch is working: the second hand is moving at one-second intervals. 16 Second click position 2. Turn the crown to set the 24-hour and minute hands to the time in the "different time zone area" you wish to set. <Example> To set the 24-hour hand to the time in New York while setting the hour/ minute hands to indicate the time in London. When the time in London is 10:00 A.M., it is 5:00 A.M. in New York. Set the 24-hour hand to indicate “5” on the 24-hour scale (the 2.5 o’clock position), while the minute hand is pointing at the “0” minute position. * Only the 24-hour and minute hands are to be set at this stage. The hour hand is to be set later so it is not necessary to adjust the hour hand yet, even if it is indicating the wrong time. * The date may be altered depending on the position of the hour hand, however it should not cause any concern since it can also be adjusted later. * Set the minute hand ahead of the time and then slowly turn it back to the desired time. English 5. Turn the crown to set the hour hand to the current hour. * Also, adjust the date at this point if necessary. * The moment the date changes is midnight. When setting the hour hand, be sure that AM/PM is set correctly. * Turn the crown slowly, checking that the hour hand moves in one-hour increments. * When adjusting the hour hand, the other hands may move slightly. However, this is not a malfunction. 6. Push the crown back in upon completion of time setting. 3. Push the crown back in simultaneously with a time signal. * The setting of the 24-hour, minute and second hands to the time in the “different time zone area” is now completed. * The time difference adjustment function serves only for a time in a “different time zone area” where the time difference from the time in London is represented in one-hour increments. 4. Pull out the crown to the first click. 17 English * Also, adjust the date at this point if necessary. * The moment the date changes is midnight. When setting the hour hand, be sure that AM/PM is set correctly. * Turn the crown slowly, checking that the hour hand moves in one-hour increments. * When adjusting the hour hand, the other hands may move slightly. However, this is not a malfunction. 6. Push the crown back in upon completion of time setting. l How to set the date • This watch is designed so that the date changes one day by turning the hour hand two full rotations in the same way as in "the time difference adjustment function." • The date advances one day by turning the hour hand two full rotations clockwise, while the date is set back one day by turning the hour hand two full rotations counterclockwise. • After setting the time, it is necessary to set the date. Manual date adjustment is required on the first day after a month that has less than 31 days. English 5. Turn the crown to set the hour hand to the current hour. (In this example, the current hour in London.) 1. Pull out the crown to the first click. 2. Each time the hour hand makes two full rotations by turning the crown, the date is adjusted one day. Clockwise: the hour hand turns counterclockwise. The date is set back one day when the hour hand makes two full rotations counterclockwise. Counterclockwise: the hour hand turns clockwise. The date advances one day when the hour hand makes two full rotations clockwise. First click position 18 * The date can be adjusted either by advancing it or by setting it back. Choose whichever requires fewer rotations. * Turn the crown gently. * To adjust the date without changing the time, turn the hour hand in two full rotation increments. 19 English l How to adjust the time difference • While staying in a place in a different time zone area from where you live, you can conveniently set the watch to indicate the local time in the place where you are staying without stopping the watch. • The time difference adjustment function is interrelated with the date display. If the time difference is correctly adjusted, the watch displays the correct date of the place where you are staying. * Refer to "Time difference table" for time differences from GMT (UTC). * When adjusting the time difference, make sure that AM/PM and the date are correctly set. * When adjusting the hour hand, the other hands may move slightly. However, this is not a malfunction. * When turning the crown clockwise to set the hour hand to indicate any time between 9:00 P.M. and midnight, keep turning until the hour hand points to 8:00 P.M., and then advance it to the desired time. English * When adjusting the hour hand, the other hands may move slightly. However, this is not a malfunction. 3. After completing the date setting, check the position of the hour hand once again and push the crown back in. 3. After completing the time difference adjustment, check the position of the hour hand once again and push the crown back in. 1. Pull out the crown to the first click. 2. Turn the crown to set the hour hand to indicate the time of the place where you are staying. The hour hand is independently set to the current hour. Clockwise: Setting the time back (The hour hand turns counterclockwise.) Counterclockwise: Advancing the time (The hour hand turns clockwise.) First click position * Turn the crown slowly, checking that the hour hand moves in one-hour increments. 20 21 English English l Time difference table * Refer to the table below for time differences from GMT (UTC) in major cities in the world. Jeddah, Mecca, Nairobi Dhaka 22 * Cities marked with " " use daylight saving time. * The time differences and use of daylight saving time in each city are subject to change according to the governments of the respective countries or regions. 23 English l When the second hand starts moving at two-second intervals whether it is worn or left untouched, the watch may run down within approximately 24 hours. l In such a case, swing the watch from side to side to sufficiently charge the rechargeable battery (refer to "HOW TO CHARGE AND START THE WATCH" on page 6), and then reset the time and calendar. INSTANT-START FUNCTION l When a long time has passed since the watch stopped, you can get it started quickly with only a few swings. l The instant-start function will remain active for approximately 3 years after a fully-charged watch stops working. REMARKS ON THE rechargeable battery l The electric energy generated while the watch is worn on your wrist is stored in the rechargeable battery. It is a power source completely different from conventional batteries for watches and does not require any periodic replacement. ● When the rechargeable battery. is fully charged, the watch will keep operating for approximately 6 months without recharging the rechargeable battery. ● The duration of charge decreases gradually over time. The extent of decrease, however, varies depending on the environment and conditions of use. ● The rechargeable battery is a clean and environmentally friendly power source. English If the second hand starts moving at two-second intervals (ENERGY DEPLETION FOREWARNING FUNCTION) CAUTION Never install a silver oxide battery for conventional watches in place of the rechargeable battery. The battery may burst, become very hot or catch fire. * When this function is activated, the second hand will start moving at two-second intervals. Swing the watch from side to side to charge the rechargeable battery by referring to "NUMBER OF SWINGS AND POWER RESERVE" on page 7. *After the second hand starts moving at one-second intervals, put the watch on your wrist so that it will be charged further. * The watch remains accurate even while the second hand is moving at two-second intervals. 24 25 English HOW TO CHARGE AND START THE WATCH l To charge the rechargeable battery efficiently, swing the watch from side to side, making an arc of about 20 cm. l No additional benefit is obtained by swinging the watch more quickly or with greater vigor. l When the watch is swung, the oscillating weight in the generating system rotates to drive the mechanism. As it rotates, it gives out a sound, which is not a malfunction. l When the watch has been left untouched for more than one year after it has completely stopped, the second hand may not start moving at normal one-second intervals even if the watch is swung the number of times indicated in "NUMBER OF SWINGS AND POWER RESERVE" on page 7. In this case, swing the watch further until the second hand starts moving at one-second intervals. l The watch is equipped with a system to prevent overcharge. Even if it is further swung after being fully charged, no malfunction will result. l The watch is equipped with an instant-start function, and it may start operating after it is swung several times. For details, see "INSTANT-START FUNCTION". l It is not necessary to charge the watch fully, as it is charged automatically while it is worn on your wrist. l Wear the watch daily for at least 10 hours. l Even when the watch is worn on your arm, it will not be charged if your arm is not in motion. POWER RESERVE INDICATOR 26 l The power reserve indicator provides only a general guideline of the duration within which the watch keeps operating without needing to be charged. l You can immediately press the button again to recheck the power reserve one more time. To do so a third time, however, wait until the second hand resumes normal movement before pressing the button again. l When the second hand moves at two-second intervals, the power reserve is very low and the indicator does not function. l Immediately after the watch is swung to charge the rechargeable battery, the second hand may not properly indicate the power reserve. Please check again after 10 to 15 minutes have elapsed. l Precaution on see-through case-back models: If your watch has a glass case back, do not expose the case back to strong light such as direct sunlight or an incandescent light at close range, as this may temporarily increase the power consumption of the watch circuit, thus reducing the power reserve in the rechargeable battery. This condition, however, will be corrected when the case back is turned away from the light. English NOTES FOR USING THE WATCH TIME/CALENDAR SETTING l To set the exact time, pull out the crown all the way when the second hand is at the 12 o'clock position and push it back in to the normal position in accordance with a time signal. l When setting the hour hand, pull out the crown to the first click, turn it to set the hour hand to the current hour, and then check that AM/PM is correctly set. The watch is designed so that the calendar changes once in 24 hours. Turn the hand past the 12 o'clock marker to determine whether the watch is set for the A.M. or P.M. period. If the calendar changes, the time is set for the A.M. period. If the calendar does not change, the time is set for the P.M. period. Turn the crown slowly, checking that the hour hand moves at one-hour intervals. l When setting the minute hand, pull out the crown all the way to turn the minute hand. Advance the hand 4 to 5 minutes ahead of the desired time and then turn it back to the exact minute. l When setting the time, make sure that the second hand is moving at one-second intervals. l It is necessary to adjust the date at the end of February and 30-day months. l When setting the date, pull out the crown to the first click and turn it to rotate the hour hand until the date changes. The date advances one day by turning the hour hand two full rotations clockwise, while the date is set back one day by turning the hour hand two full rotations counterclockwise. 27 English TO PRESERVE THE QUALITY OF YOUR WATCH The rotating bezel can show the elapsed time up to 60 minutes. By setting it before diving, you can know how many minutes you are underwater. l Repair of diver's watches requires special expertise and equipment. If you find that your diver's watch is malfunctioning, therefore, never attempt to repair it but immediately send it to a nearby SEIKO Service Center. l To prevent accidental rotation, the rotating bezel is so designed that rotation n TEMPERATURES becomes harder in water. Also for safty's sake, it roatates only counterclockwise, so that the time measured is never shorter than the actual elapsed time. Your watch works with stable accuracy within a temperature range of 5° C and 35° C (41° F and 95° F). Temperatures over 60° C (140° F) may cause battery leakage or shorten the battery life. Do not leave your watch in very low temperatures below -10° C (+14° F) for a long time since the cold may cause a slight time loss or gain. However, the above conditions will be corrected when the watch returns to normal temperature. 1.Turn the rotating bezel to align its " "mark with the minute hand. * The rotating bezel rotates with clicks. With each click, it turns half a minute. 2.To know the elapsed time, read the number on the rotating bezel that the minute hand points to. Example: Start(10:10 AM) " " mark Minute hand "30" on rotating bezel 30 minutes have elapsed. 28 English ROTATING BEZEL n MAGNETISM N n CHEMICALS n PERIODIC CHECK S Your watch will be adversely affected by strong magnetism. Keep it away from close contact with magnetic objects. Be careful not to expose the watch to solvents, mercury, cosmetic spray, detergents, adhesives or paints. Otherwise, the case, bracelet, etc. may become discolored, deteriorated or damaged. It is recommended that the watch be checked once every 2 to 3 years by an AUTHORIZED SEIKO DEALER or SER V ICE CENTER to ensure that the case, crown, gasket and crystal seal remain intact. 29 English To prevent possible rusting of the case and bracelet, wipe them periodically with a soft dry cloth. n SHOCKS & VIBRATION Be careful not to drop y o u r w a t c h o r h it it against hard surfaces. n PRECAUTION REGARDING CASE BACK PROTECTIVE FILM If your watch has a protective film and/or a sticker on the case back, peel them off before using your watch. LUMIBRITETM LumiBrite is a luminous paint that is completely harmless to human beings and the natural environment, containing no noxious materials such as radioactive substances. LumiBrite is a newly-developed luminous paint that absorbs the light energy of sunlight or artificial light in a short time and stores it to emit light in the dark. For example, if exposed to a light of more than 500 lux for approximately 10 minutes, LumiBrite can emit light for 5 to 8 hours. Please note, however, that, as LumiBrite emits the light it stores, the luminance level of the light decreases gradually over time. The duration of the emitted light may also differ slightly depending on such factors as the brightness of the place where the watch is exposed to light and the distance from the light source to the watch. When you make a dive in dark water, LumiBrite may not emit light unless it has absorbed and stored light sufficiently. Before diving, therefore, be sure to expose the watch to light under the conditions specified above, so that it fully absorbs and stores light energy. Otherwise, use the watch together with an underwater flashlight. English n CARE OF CASE AND BRACELET < Reference data on luminance > (A)Sunlight [Fine weather]: 100,000 lux [Cloudy weather]: 10,000 lux (B) Indoor (Window side during daytime) [Fine weather]: more than 3,000 lux [Cloudy weather]: 1,000 to 3,000 lux [Rainy weather]: less than 1,000 lux (C) Lighting apparatus (40-watt daylight fluorescent light) [Distance to the watch: 1 m]: 1,000 lux [Distance to the watch: 3 m]: 500 lux (average room luminance) [Distance to the watch: 4 m]: 250 lux 30 * "LUMIBRITE" is a trademark of SEIKO HOLDINGS CORPORATION. 31 English SPECIFICATIONS 1 2 Frequency of crystal oscillator ������������������� 32,768 Hz (Hz = Hertz…Cycles per second) Loss/gain (Monthly rate) ���������������������������� Less than 15 seconds at normal temperature range (Between 5 ° C and 35 ° C) (Between 41 ° F and 95 ° F) 3 Operational temperature range ������������������ Between -10 ° C and + 60 ° C (Between 14 ° F and 140 ° F) 4 Display system Calendar indication���������������������������������� Date is displayed. Time indication���������������������������������������� 4 hands (hour, minute, second, and 24-hour hands) 5 Driving system�������������������������������������������� Step motor 6 Power reserve Full charge ���������������������������������������������� Approximately 6 months 7 Additional function�������������������������������������� Power reserve indicator, energy depletion forewarning function and overcharge prevention function 8 IC (Integrated Circuit)���������������������������������� C-MOS-IC, 1 piece 9 Rechargeable battery���������������������������������� Button type, 1 piece * The specifications are subject to change without prior notice for product improvement. 32