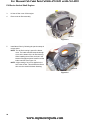
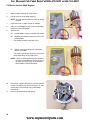
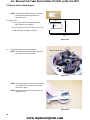
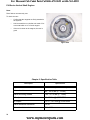
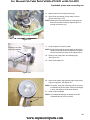
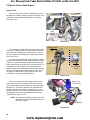
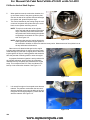
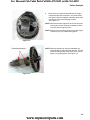
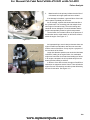
1
For Discount Cub Cadet Parts Call 606-678-9623 or 606-561-4983 Professional Shop Manual P90 Series Vertical Shaft Engines NOTE: These materials are for use by trained technicians who are experienced in the service and repair of outdoor power equipment of the kind described in this publication, and are not intended for use by untrained or inexperienced individuals. These materials are intended to provide supplemental information to assist the trained technician. Untrained or inexperienced individuals should seek the assistance of an experienced and trained professional. Read, understand, and follow all instructions and use common sense when working on power equipment. This includes the contents of the product’s Operators Manual, supplied with the equipment. No liability can be accepted for any inaccuracies or omission in this publication, although care has been taken to make it as complete and accurate as possible at the time of publication. However, due to the variety of outdoor power equipment and continuing product changes that occur over time, updates will be made to these instructions from time to time. Therefore, it may be necessary to obtain the latest materials before servicing or repairing a product. The company reserves the right to make changes at any time to this publication without prior notice and without incurring an obligation to make such changes to previously published versions. Instructions, photographs and illustrations used in this publication are for reference use only and may not depict actual model and component parts. © Copyright 2011 MTD Products Inc. All Rights Reserved www.mymowerparts.com For Discount Cub Cadet Parts Call 606-678-9623 or 606-561-4983 www.mymowerparts.com For Discount Cub Cadet Parts Call 606-678-9623 or 606-561-4983 Table of Contents Chapter 1: Introduction Professional Service Manual Intent . . . . . . . . . . . . . . . . . . . . . . . . . . . . . . . . . . . 1 Safety . . . . . . . . . . . . . . . . . . . . . . . . . . . . . . . . . . . . . . . . . . . . . . . . . . . . . . . . . . 1 Fasteners . . . . . . . . . . . . . . . . . . . . . . . . . . . . . . . . . . . . . . . . . . . . . . . . . . . . . . 3 Assembly instructions . . . . . . . . . . . . . . . . . . . . . . . . . . . . . . . . . . . . . . . . . . . . . 3 Model and serial number . . . . . . . . . . . . . . . . . . . . . . . . . . . . . . . . . . . . . . . . . . . 5 Maintenance . . . . . . . . . . . . . . . . . . . . . . . . . . . . . . . . . . . . . . . . . . . . . . . . . . . . 5 Spark plugs . . . . . . . . . . . . . . . . . . . . . . . . . . . . . . . . . . . . . . . . . . . . . . . . . . . . . 6 Air filter . . . . . . . . . . . . . . . . . . . . . . . . . . . . . . . . . . . . . . . . . . . . . . . . . . . . . . . . 7 Oil type and capacity . . . . . . . . . . . . . . . . . . . . . . . . . . . . . . . . . . . . . . . . . . . . . . 8 Changing the oil . . . . . . . . . . . . . . . . . . . . . . . . . . . . . . . . . . . . . . . . . . . . . . . . . 9 Oil filter . . . . . . . . . . . . . . . . . . . . . . . . . . . . . . . . . . . . . . . . . . . . . . . . . . . . . . . 10 Oil pre-screen . . . . . . . . . . . . . . . . . . . . . . . . . . . . . . . . . . . . . . . . . . . . . . . . . . 10 Fuel system . . . . . . . . . . . . . . . . . . . . . . . . . . . . . . . . . . . . . . . . . . . . . . . . . . . . 11 Servicing the fuel system . . . . . . . . . . . . . . . . . . . . . . . . . . . . . . . . . . . . . . . . . 11 Fuel filter . . . . . . . . . . . . . . . . . . . . . . . . . . . . . . . . . . . . . . . . . . . . . . . . . . . . . . 11 Valve lash . . . . . . . . . . . . . . . . . . . . . . . . . . . . . . . . . . . . . . . . . . . . . . . . . . . . . 12 Exhaust system . . . . . . . . . . . . . . . . . . . . . . . . . . . . . . . . . . . . . . . . . . . . . . . . . 14 Cleaning the engine . . . . . . . . . . . . . . . . . . . . . . . . . . . . . . . . . . . . . . . . . . . . . 14 General torque specifications . . . . . . . . . . . . . . . . . . . . . . . . . . . . . . . . . . . . . . 14 Chapter 2: Basic Troubleshooting Definitions . . . . . . . . . . . . . . . . . . . . . . . . . . . . . . . . . . . . . . . . . . . . . . . . . . . . . Introduction . . . . . . . . . . . . . . . . . . . . . . . . . . . . . . . . . . . . . . . . . . . . . . . . . . . . Steps to troubleshooting . . . . . . . . . . . . . . . . . . . . . . . . . . . . . . . . . . . . . . . . . . Define the problem . . . . . . . . . . . . . . . . . . . . . . . . . . . . . . . . . . . . . . . . . . . . . . Identify factors that could cause the problem . . . . . . . . . . . . . . . . . . . . . . . . . . Repairing the problem . . . . . . . . . . . . . . . . . . . . . . . . . . . . . . . . . . . . . . . . . . . . Prime test . . . . . . . . . . . . . . . . . . . . . . . . . . . . . . . . . . . . . . . . . . . . . . . . . . . . . Leak-down test . . . . . . . . . . . . . . . . . . . . . . . . . . . . . . . . . . . . . . . . . . . . . . . . . Compression test . . . . . . . . . . . . . . . . . . . . . . . . . . . . . . . . . . . . . . . . . . . . . . . PCV testing . . . . . . . . . . . . . . . . . . . . . . . . . . . . . . . . . . . . . . . . . . . . . . . . . . . . 15 15 15 15 17 21 22 22 24 25 Chapter 3: Air Intake System Air filter . . . . . . . . . . . . . . . . . . . . . . . . . . . . . . . . . . . . . . . . . . . . . . . . . . . . . . . 27 Blower/air filter housing . . . . . . . . . . . . . . . . . . . . . . . . . . . . . . . . . . . . . . . . . . . 29 Carburetor and Insulator . . . . . . . . . . . . . . . . . . . . . . . . . . . . . . . . . . . . . . . . . . 30 I www.mymowerparts.com For Discount Cub Cadet Parts Call 606-678-9623 or 606-561-4983 Chapter 4: The Fuel System and Governor Inspecting the fuel . . . . . . . . . . . . . . . . . . . . . . . . . . . . . . . . . . . . . . . . . . . . . . . Test fuel for alcohol . . . . . . . . . . . . . . . . . . . . . . . . . . . . . . . . . . . . . . . . . . . . . . Choke/throttle cable adjustment . . . . . . . . . . . . . . . . . . . . . . . . . . . . . . . . . . . . Carburetors . . . . . . . . . . . . . . . . . . . . . . . . . . . . . . . . . . . . . . . . . . . . . . . . . . . . Inspecting the carburetor . . . . . . . . . . . . . . . . . . . . . . . . . . . . . . . . . . . . . . . . . Disassembly and rebuilding the carburetor . . . . . . . . . . . . . . . . . . . . . . . . . . . . Engine speed adjustment . . . . . . . . . . . . . . . . . . . . . . . . . . . . . . . . . . . . . . . . . Afterfire solenoid . . . . . . . . . . . . . . . . . . . . . . . . . . . . . . . . . . . . . . . . . . . . . . . . Testing the afterfire solenoid . . . . . . . . . . . . . . . . . . . . . . . . . . . . . . . . . . . . . . . Governor . . . . . . . . . . . . . . . . . . . . . . . . . . . . . . . . . . . . . . . . . . . . . . . . . . . . . . Governor arm . . . . . . . . . . . . . . . . . . . . . . . . . . . . . . . . . . . . . . . . . . . . . . . . . . Governor shaft . . . . . . . . . . . . . . . . . . . . . . . . . . . . . . . . . . . . . . . . . . . . . . . . . . Governor cup and the governor gear . . . . . . . . . . . . . . . . . . . . . . . . . . . . . . . . 33 34 35 36 36 37 41 42 44 46 46 48 48 Chapter 5: Lubrication Oil type and quantity . . . . . . . . . . . . . . . . . . . . . . . . . . . . . . . . . . . . . . . . . . . . . Oil dipstick . . . . . . . . . . . . . . . . . . . . . . . . . . . . . . . . . . . . . . . . . . . . . . . . . . . . . Dip stick tube removal . . . . . . . . . . . . . . . . . . . . . . . . . . . . . . . . . . . . . . . . . . . . Lubrication system . . . . . . . . . . . . . . . . . . . . . . . . . . . . . . . . . . . . . . . . . . . . . . Testing the oil Pump . . . . . . . . . . . . . . . . . . . . . . . . . . . . . . . . . . . . . . . . . . . . . Positive crankcase ventilation valve . . . . . . . . . . . . . . . . . . . . . . . . . . . . . . . . . 49 50 50 51 51 53 Chapter 6: Starter and Charging Systems Starter removal . . . . . . . . . . . . . . . . . . . . . . . . . . . . . . . . . . . . . . . . . . . . . . . . . Bench testing the electric starter . . . . . . . . . . . . . . . . . . . . . . . . . . . . . . . . . . . . Rebuilding the starter . . . . . . . . . . . . . . . . . . . . . . . . . . . . . . . . . . . . . . . . . . . . Charging system . . . . . . . . . . . . . . . . . . . . . . . . . . . . . . . . . . . . . . . . . . . . . . . . Charging system testing . . . . . . . . . . . . . . . . . . . . . . . . . . . . . . . . . . . . . . . . . . Stator . . . . . . . . . . . . . . . . . . . . . . . . . . . . . . . . . . . . . . . . . . . . . . . . . . . . . . . . . Rotor . . . . . . . . . . . . . . . . . . . . . . . . . . . . . . . . . . . . . . . . . . . . . . . . . . . . . . . . . 55 56 57 68 69 71 72 Chapter 7: Ignition System Troubleshooting the ignition system . . . . . . . . . . . . . . . . . . . . . . . . . . . . . . . . . The module . . . . . . . . . . . . . . . . . . . . . . . . . . . . . . . . . . . . . . . . . . . . . . . . . . . . Module removal . . . . . . . . . . . . . . . . . . . . . . . . . . . . . . . . . . . . . . . . . . . . . . . . . Installing the module and setting the air gap . . . . . . . . . . . . . . . . . . . . . . . . . . . Flywheel . . . . . . . . . . . . . . . . . . . . . . . . . . . . . . . . . . . . . . . . . . . . . . . . . . . . . . Spark plug . . . . . . . . . . . . . . . . . . . . . . . . . . . . . . . . . . . . . . . . . . . . . . . . . . . . . Cleaning the spark plug . . . . . . . . . . . . . . . . . . . . . . . . . . . . . . . . . . . . . . . . . . Inspection of the spark plug . . . . . . . . . . . . . . . . . . . . . . . . . . . . . . . . . . . . . . . . Spark plug removal . . . . . . . . . . . . . . . . . . . . . . . . . . . . . . . . . . . . . . . . . . . . . . II www.mymowerparts.com 73 74 75 76 77 78 78 78 78 For Discount Cub Cadet Parts Call 606-678-9623 or 606-561-4983 Chapter 8: Exhaust Spark arrestor (if equipped) . . . . . . . . . . . . . . . . . . . . . . . . . . . . . . . . . . . . . . . . 79 Muffler removal/replacement . . . . . . . . . . . . . . . . . . . . . . . . . . . . . . . . . . . . . . . 80 Catalytic converter . . . . . . . . . . . . . . . . . . . . . . . . . . . . . . . . . . . . . . . . . . . . . . 82 Chapter 9: Cylinder Head Cylinder head removal . . . . . . . . . . . . . . . . . . . . . . . . . . . . . . . . . . . . . . . . . . . Cylinder head installation . . . . . . . . . . . . . . . . . . . . . . . . . . . . . . . . . . . . . . . . . Valves . . . . . . . . . . . . . . . . . . . . . . . . . . . . . . . . . . . . . . . . . . . . . . . . . . . . . . . . Push rod guide plate . . . . . . . . . . . . . . . . . . . . . . . . . . . . . . . . . . . . . . . . . . . . . 83 86 87 90 Chapter 10: Crankshaft, piston and Connecting Rod Crankshaft inspection . . . . . . . . . . . . . . . . . . . . . . . . . . . . . . . . . . . . . . . . . . . . 94 Piston Inspection . . . . . . . . . . . . . . . . . . . . . . . . . . . . . . . . . . . . . . . . . . . . . . . . 95 Connecting rod inspection . . . . . . . . . . . . . . . . . . . . . . . . . . . . . . . . . . . . . . . . . 97 Cylinder inspection . . . . . . . . . . . . . . . . . . . . . . . . . . . . . . . . . . . . . . . . . . . . . . . 97 Balance Shaft . . . . . . . . . . . . . . . . . . . . . . . . . . . . . . . . . . . . . . . . . . . . . . . . . . 98 Reassembly . . . . . . . . . . . . . . . . . . . . . . . . . . . . . . . . . . . . . . . . . . . . . . . . . . . 99 Engine specifications chart . . . . . . . . . . . . . . . . . . . . . . . . . . . . . . . . . . . . . . . 101 Engine torque values chart . . . . . . . . . . . . . . . . . . . . . . . . . . . . . . . . . . . . . . . 103 Chapter 11: Failure Analysis Abrasive Ingestion . . . . . . . . . . . . . . . . . . . . . . . . . . . . . . . . . . . . . . . . . . . . . . Insufficient lubrication . . . . . . . . . . . . . . . . . . . . . . . . . . . . . . . . . . . . . . . . . . . Engine Overspeed . . . . . . . . . . . . . . . . . . . . . . . . . . . . . . . . . . . . . . . . . . . . . Overheated . . . . . . . . . . . . . . . . . . . . . . . . . . . . . . . . . . . . . . . . . . . . . . . . . . . Mechanical Breakage/ Wear . . . . . . . . . . . . . . . . . . . . . . . . . . . . . . . . . . . . . . Detonation/preignition . . . . . . . . . . . . . . . . . . . . . . . . . . . . . . . . . . . . . . . . . . . 105 108 110 111 112 112 III www.mymowerparts.com For Discount Cub Cadet Parts Call 606-678-9623 or 606-561-4983 IV www.mymowerparts.com For Discount Cub Cadet Parts Call 606-678-9623 or 606-561-4983 Introduction CHAPTER 1: INTRODUCTION Professional Service Manual Intent This manual is intended to provide service dealers with an introduction to proven diagnostic and repair procedures for MTD P90 series vertical shaft engines. Disclaimer: The information contained in this manual is correct at the time of writing. Both the product and the information about the product are subject to change without notice. About the text format: NOTE: Is used to point out information that is relevant to the procedure, but does not fit as a step in the procedure. • 1. Bullet points: indicate sub-steps or points. ! CAUTION Caution is used to point out potential danger to the technician, operator, bystanders, or surrounding property. ! WARNING Warning indicates a potentially hazardous situation that, if not avoided, could result in death or serious injury. ! DANGER Danger indicates an imminently hazardous situation that, if not avoided, will result in death or serious injury. This signal word is to be limited to the most extreme situations Numbered steps indicate specific things that should be done, and the order in which they should be done. 1a. Substeps will be lettered and nested within steps. Two or more substeps may be combined to describe the actions required to complete a step. Disclaimer: This manual is intended for use by trained, professional technicians. • Common sense in operation and safety is assumed. • In no event shall MTD be liable for poor text interpretation or poor execution of the procedures described in the text. • If the person using this manual is uncomfortable with any procedures they encounter, they should seek the help of a qualified technician or MTD Technical Support. Safety This Service Manual is meant to be used along with the Operator’s Manual. Read the Operator’s Manual and familiarize yourself with the safety and operational instructions for the equipment being worked on. Keep a copy of the Operator’s Manual for quick reference. Operator’s manuals may be viewed for free at the brand support website. It will be necessary to have the complete model and serial number for the equipment. 1 www.mymowerparts.com For Discount Cub Cadet Parts Call 606-678-9623 or 606-561-4983 P90 Series Vertical Shaft Engines • Be prepared in case of emergency: ! CAUTION Keep a fire extinguisher nearby Keep a first aid kit nearby Keep emergency contact numbers handy • Replace any missing or damaged safety labels on shop equipment. • Replace any missing or damaged safety labels on equipment being serviced. • Grooming and attire: ! WARNING Do not wear loose fitting clothing that may become entangled in equipment. Long hair should be secured to prevent entanglement in equipment. Jewelry is best removed. • Protective gear: includes, but is not limited to Clear eye protection ................................ while working around any machinery Protective gloves ..................................... where necessary Armored footwear .................................... when working around any machinery Hearing protection ................................... in noisy environments Chemically resistant gloves ..................... when working with chemicals or solvents Respirator ................................................ when working with chemical or solvents Appropriate tinted eye protection............. when cutting or welding Flame resistant headgear, jacket, chaps . when cutting or welding • Remember that some hazards have a cumulative effect. A single exposure may cause little or no harm, but continual or repeated exposure may cause very serious harm. • Clean spills and fix obviously dangerous conditions as soon as they are noticed. • Lift and support heavy objects safely and securely. • Be aware of your surroundings and potential hazards that are inherent to all power equipment. All the labels in the world cannot protect a technician from an instant of carelessness. ! CAUTION • ! DANGER Exhaust fumes from running engines contain carbon monoxide (CO). Carbon monoxide is a colorless odorless gas that is fatal if inhaled in sufficient quantity. Only run engines in well ventilated areas. If running engines indoors, use an exhaust evacuation system with adequate make-up air ventilated into the shop. 2 www.mymowerparts.com For Discount Cub Cadet Parts Call 606-678-9623 or 606-561-4983 Introduction Fasteners • Most of the fasteners used on the MTD engine are metric. Some are fractional inches. For this reason, wrench sizes are frequently identified in the text, and measurements are given in U.S. and metric scales. • If a fastener has a locking feature that has worn, replace the fastener or apply a small amount of releasable thread locking compound such as Loctite® 242 (blue). • Some fasteners, like cotter pins, are single-use items that are not to be reused. Other fasteners such as lock washers, retaining rings, and internal cotter pins (hairpin clips) may be reused if they do not show signs of wear or damage. This manual leaves that decision to the judgement of the technician. Assembly instructions • Torque specifications may be noted in the part of the text that covers assembly. They may be summarized in tables along with special instructions regarding locking or lubrication. Whichever method is more appropriate will be used. In many cases, both will be used so that the manual is handy as a quick-reference guide as well as a step-by-step procedure guide that does not require the user to hunt for information. • Lubricant quantity and specification may be noted in the part of the text that covers maintenance, and again in the section that covers assembly. They may also be summarized in tables along with special instructions. Whichever method is more appropriate will be used. In many cases, the information will be found in several places in the manual so that the manual is handy as a quick-reference guide as well as a step-by-step procedure guide that does not require the user to hunt for information. • The level of assembly instructions provided will be determined by the complexity of reassembly, and by the potential for damage or unsafe conditions to arise from mistakes made in assembly. • Some instructions may refer to other parts of the manual for subsidiary procedures. This avoids repeating the same procedure two or three times in the manual. 3 www.mymowerparts.com For Discount Cub Cadet Parts Call 606-678-9623 or 606-561-4983 P90 Series Vertical Shaft Engines MTD Vertical Engine Model Designators 1P61MUA • Starter/Alternator s 1=Recoil start • • • • • Major Revision 2=Electric start (12V) 3=E. start/alt. 18W 4=E. start/alt. 3A/5A 5= AutoChoke/ Recoil 6= AutoChoke/Electric Start 7= AutoChoke/Electric Start/Alt • Change Compliance U H C 0 (Zero) G W P= Vertical (1 cyl.) Q= Vertical (2 cyl.) United States (50 State) Europe California 49 State U.S.(49) and Europe U.S.(50) and Europe Bore Dia. (mm) End Product B C D E F R L Mower (long shaft M0) Chipper/Shredder Mower (long shaft M1) Mower (short shaft M1) Mower (short shaft/no shroud) Mower (long shaft/no shroud) Log splitter M N P Q T W Mower (long shaft/no shroud) Mower (short shaft M0) Mower (long shaft M0) Mower (short shaft M0) Tiller World Tiller MTD Engine Serial Numbers 1P65FH/0510271A0023 Model number Year Month Date Producing Line# and Shift#: 1A=Line 1, 1st Shift 1B=Line 1, 2nd Shift 2A=Line 2, 1st Shift 2B=Line 2, 2nd Shift 3A=Line 3, 1st Shift 3B=Line 3, 2nd Shift 4A=Line 4, 1st Shift 4B=Line 4, 2nd Shift Engine number 4 www.mymowerparts.com For Discount Cub Cadet Parts Call 606-678-9623 or 606-561-4983 Introduction Model and serial number The model and serial number can be found on a white sticker with a bar code. The sticker is located between the dipstick and the muffler. See Figure 1.1. Model /serial number Oil screen Muffler Dipstick Figure 1.1 NOTE: The serial number will always start with the model number. Maintenance The recommended maintenance intervals listed in this manual are a guideline. They are adjustable for local conditions. Maintenance items Interval Oil Change* 50 hrs Oil filter 200 hours Oil pre-screen Annually Clean the air filter 100 hrs Replace the air filter 200 hrs Spark plugs 100 hrs Fuel filter 100 hrs Clean the engine 100 hours * First oil change at 5 hours. 5 www.mymowerparts.com For Discount Cub Cadet Parts Call 606-678-9623 or 606-561-4983 P90 Series Vertical Shaft Engines Spark plugs The information in this manual applies to the MTD engine. Some basic principles may apply to engines produced by other manufacturers. As the saying goes “an ounce of prevention is worth a pound of cure”. The same can be said about preventive maintenance on outdoor power equipment. By changing the spark plug and oil at recommended intervals many failures can be avoided. NOTE: Please refer to Chapter 7: Ignition for the complete service instructions on spark plugs. 1. The spark plug used in the MTD engine is a F6RTC (part # 951-10292) gapped to 0.024” - 0.031” (0.60 0.80 mm). See Figure 1.2. 2. Figure 1.2 Wear rate will vary somewhat with severity of use. If the edges of the center electrode are rounded-off, or any other apparent wear / damage occurs, replace the spark plug before operating failure (no start) occurs. 3. Cleaning the spark plug: NOTE: MTD does not recommend cleaning spark plugs. Use of a wire brush may leave metal deposits on the insulator that causes the spark plug to short out and fail to spark. Use of abrasive blast for cleaning may cause damage to ceramic insulator or leave blast media in the recesses of the spark plug. When the media comes loose during engine operation, severe and non-warrantable engine damage may result. 4. Inspection of the spark plug can provide indications of the operating condition of the engine. • Light tan colored deposits on insulator and electrodes is normal. • Dry, black deposits on the insulator and electrodes indicate an over-rich fuel / air mixture (too much fuel or not enough air) • Wet, black deposits on the insulator and electrodes indicate the presence of oil in the combustion chamber. • Heat damaged (melted electrodes / cracked insulator / metal transfer deposits) may indicate detonation. • A spark plug that is wet with fuel indicates that fuel is present in the combustion chamber, but it is not being ignited. 6 www.mymowerparts.com For Discount Cub Cadet Parts Call 606-678-9623 or 606-561-4983 Introduction Air filter Paper-pleated element Foam pre-filter Generally air filters come in two different types, a pleated-paper element or foam. A combination of the two are used on the MTD engine. See Figure 1.3. 1. The main function of the air filter is to trap air borne particles before they enter the engine. Dirt ingestion can cause serious internal engine damage. 2. Air filters used on the MTD engine are designed to prevent particles larger than 3-5 micron from passing through into the engine. 3. The filter should be checked on a regular basis possibly several times in a season. 4. Typically an air filter should be changed before every season. 5. If a foam air pre-cleaner is dirty, but not in bad of condition, it can be cleaned and reused. The paper pleated filters can be shaken or lightly tapped to free the debris from the filter. Figure 1.3 NOTE: Never use compressed air on a paper air filter. Compressed air will remove the tiny fibers that are used to catch the dirt in the air. Without these fibers the filter is useless. 6. Foam pre-filters can be washed in warm soapy water. NOTE: When drying a foam filter either squeeze it inside of a paper towel or let it air dry. DO NOT wring it because the filter will tear. 7. Before installing any foam filter, after it has been washed, it needs to be free of moisture. NOTE: Always check with factory specification prior to servicing/replacing any engine components. NOTE: Do not oil the foam pre-filter. The paper filer will absorb the oil and it will become plugged. 7 www.mymowerparts.com For Discount Cub Cadet Parts Call 606-678-9623 or 606-561-4983 P90 Series Vertical Shaft Engines Oil type and capacity The recommended oil for MTD engines is an SAE 10W-30 oil with an SM API rating or better. The oil capacity for all of the P90 series engines is 57 fl.oz (1.7 liters). • Check the oil level daily and change the oil more frequently in severe operating conditions such as high ambient temperature, dusty conditions, or high load use in exceptionally thick grass. • Synthetic oil is a suitable alternative, but it does not extend service intervals. NOTE: MTD recommends the use of petroleum oil during the break in period to ensure the piston rings correctly break in. • Synthetic vs. Petroleum based oil: To simply look at synthetic oil and to compare it with Petroleum based oil there is very little difference. However, when you look at the two through a microscope it is easy to see the difference. Synthetic is made up of smaller molecules. This allows the oil to get into areas that petroleum based oil cannot. • No oil additives or viscosity modifiers are recommended. The performance of a good oil meeting the API specifications will not be improved by oil additives. NOTE: Some oil additives may cause severe and non warrantable engine damage, constituting a lubrication failure. NOTE: If the oil is noticeably thin, or smells of gasoline, a carburetor repair may be needed before the engine can be run safely. To check the oil: 1. Twist and remove the dipstick from the engine. 2. Clean the oil off of the tip of the dipstick. 3. Re-insert the dipstick and turn it until it is fully seated to get the oil level reading. See Figure 1.4. 4. The oil level is determined by the highest point on the dipstick that is completely covered with oil. Fully seat the dip stick before reading it Figure 1.4 8 www.mymowerparts.com For Discount Cub Cadet Parts Call 606-678-9623 or 606-561-4983 Introduction Changing the oil The oil change interval is every 100 hrs. NOTE: The first oil change should be preformed at 8 hours. NOTE: The oil filter should be replaced when the oil is changed. To change the oil: Oil drain Figure 1.5 1/2” hose 1. Remove the cap from the oil drain. See Figure 1.5. 2. Remove the dipstick. 3. Slide a piece of 1/2” hose onto the drain. See Figure 1.6. 4. Route the other end of the hose into an approved oil drain pan. 5. Turn the oil drain a quarter turn counter-clockwise to unlock it, then pull out 3/8” (9.5 mm) to open the valve. 6. After all of the oil has been drained, close the oil drain by pushing it in and turning it back a quarter turn. 7. Remove the drain hose. 8. Place the cap back on the oil drain. 9. Fill engine with 57 oz (1.7 L) of SAE 10W-30 oil with a SM API rating or better. NOTE: Refer to the oil chart to determine the proper weight of oil to use. 10. Check the dip stick to verify that the oil is at the proper level before returning to service. Figure 1.6 ) ) ) ) ) ) ) 6$( 6$( 6$(:6$(: 6$(: & & & & & & & 2LO&KDUW 9 www.mymowerparts.com For Discount Cub Cadet Parts Call 606-678-9623 or 606-561-4983 P90 Series Vertical Shaft Engines Oil filter To replace the oil filter: 1. Drain the oil by following the steps described in the previous section of this chapter. 2. Clean the area around the oil filter 3. Remove the oil filter by turning it counter-clockwise, as seen from the left side of the engine. See Figure 1.7. 4. Place a light coating of oil on the O-ring of the new filter. 5. Pre-fill the new filter with fresh, clean oil. 6. Thread the new filter on to the engine. Hand tighten only. 7. Fill engine with 57 oz (1.7 L) of SAE 10W-30 oil with a SM API rating or better. 8. Test run the engine and check for leaks before returning the engine to service. Oil filter Figure 1.7 Oil pre-screen To clean the pre-screen: 1. Drain the oil by following the procedures described in the previous section of this chapter. 2. Remove the pre-screen plug using a 15/16” wrench. NOTE: There is a spring that will come out with the plug. See Figure 1.8. 3. Remove the screen. 4. Inspect the o-ring for signs of damage or wear. Replace the o-ring if any are found. 5. Clean the screen in parts cleaning solution. 6. Rinse the screen in warm water. 7. Dry the screen using compressed air. 8. Install the screen. 9. Install the plug and spring. 10. Fill engine with 57 oz (1.7 L) of SAE 10W-30 oil with a SM API rating or better. 11. Test run the engine and check for leaks before returning the engine to service. Pre-screen Spring Plug Figure 1.8 10 www.mymowerparts.com For Discount Cub Cadet Parts Call 606-678-9623 or 606-561-4983 Introduction Fuel system What you should know about fuel. Most of the fuel presently available in North America is oxygenated to some extent. This is commonly done through the addition of ethanol. Most engines offered for sale on outdoor power equipment in the North American markets are designed to tolerate no more than 10% ethanol by volume Ethanol is hygroscopic, meaning it absorbs water. If left exposed to air, it will draw water out of the air. Ethanol is an oxygenator, which means that it will oxidize (corrode) metal that it comes into contact with. Exposure to air causes fuel to go bad quickly, leaving gum and varnish deposits. Fuel used in Cub Cadet outdoor power equipment should be no more than 30 days old. Because it may already have been stored at the refinery or gas station for a week or more, fuel should be purchased in small quantities and stored in safety approved gas cans with the caps closed. For storage, all fuel should be run out of the tank and engine. Anti-oxidation additives will help keep the fuel fresher. Servicing the fuel system Inspect the fuel system every time the engine is operated. If dirty fuel is found in the fuel tank or fuel that does not smell “right”, drain the fuel tank and replace the fuel filter. Dispose of bad fuel in a safe and legal manner. Refer to the units service manual for the procedures to drain the fuel tank. ! CAUTION Gasoline and its vapors are extremely flammable. Use common sense when working around the fuel system. Avoid sparks, open flames or heat sources that can ignite the fuel vapors. Fuel filter A dirty fuel filter can result in a lean run condition. The fuel filter should be replaced every 100 hours. To replace the fuel filter: NOTE: The part number for the fuel filter is BS - 298090S. It is a 150 micron (red) filter. Use of a filter with a lower micron rating will cause fuel starvation issues. 1. Fuel filter Clamp off the fuel lines to prevent fuel from leaking when the lines are disconnected. See Figure 1.9. NOTE: Take care that the fuel lines are not damaged when clamping them off. Never insert a screw or anything else into the fuel line to prevent fuel from coming out. This will damage the inside of the fuel line. Figure 1.9 NOTE: There are commercially available fuel line clamping tools that will not damage the fuel lines. 2. Squeeze the tabs on the fuel line clamps and slide them away from the filter. 3. Carefully slide the fuel lines off of the filter. If there are pieces of rubber on the barbs of the fuel filter, replace the affected fuel line. IMPORTANT: The P90 series engines uses low permeation fuel line to meet EPA guidelines. When replacing the fuel lines, they must be replaced with the same type of low permeation fuel line. 4. Install the new filter by following the above steps in reverse order. 5. Test run the engine and check for leaks before returning to service. 11 www.mymowerparts.com For Discount Cub Cadet Parts Call 606-678-9623 or 606-561-4983 P90 Series Vertical Shaft Engines Valve lash Valve lash is the clearance between the top of the valve stem and the rocker arm. The valve lash should be checked after the first 25 hours of use and every 100 hours after that. Valve lash can be checked and adjusted using the following steps:. 1. If the engine has been run, allow it to cool thoroughly. Position the mower for easy access to the cylinder head. 2. Disconnect the high-tension lead from the spark plug and ground it well away from the spark plug hole. 3. Remove the spark plug using a 13/16” or 21mm wrench. A flexible coupling or “wobbly” extension may help. See Figure 1.10. High tension lead Muffler Valve cover Figure 1.10 4. Remove the four bolts that secure the valve cover using a 10mm wrench, and remove the valve cover from the engine. Probe to confirm piston is at top of travel NOTE: If care is used not to damage the valve cover gasket, it can be re-used. 5. Confirm that the piston is at Top-Dead-Center on the compression stroke. See Figure 1.11. • • The compression stroke can be distinguished from the overlap stroke by the presence of air pressure at the spark plug hole and the fact that neither of the valves should move significantly on the compression stroke. There is an automatic compression release mechanism that “bumps” the exhaust valve as the piston rises on the compression stroke. At TDC, the exhaust valve should be fully closed. Valves closed (push rods slack) Figure 1.11 12 www.mymowerparts.com For Discount Cub Cadet Parts Call 606-678-9623 or 606-561-4983 Introduction .005” feeler gauge 6. Check valve lash between each valve stem and rocker arm using a feeler gauge. 7. Intake valve lash (top valve) should be 0.004” 0.006” (0.10 - 0.15mm). See Figure 1.12. 8. Exhaust valve lash (bottom valve) should be 0.006” 0.008” (0.15 - 0.20mm). See Figure 1.13. 9. Use a 10mm wrench to loosen the jam nut, and a 14mm wrench to adjust the rocker arm fulcrum nut. See Figure 1.13. Figure 1.12 • Tighten the rocker arm fulcrum nut to close-up the clearance between the end of the valve stem and the contact point on the rocker arm. .007” feeler gauge • Loosen the rocker arm fulcrum nut to open-up the clearance between the end of the valve stem and the contact point on the rocker arm. Figure 1.13 10. Hold the fulcrum nut with a 14mm wrench, tighten the jam nut to a torque of 80 - 106 in-lb. (9 - 12 Nm) using a 10mm wrench. 11. Double-check the clearance after tightening the jam nut, to confirm that it did not shift. Re-adjust if necessary. 12. Rotate the engine through several compression cycles: • Observe the movement of the valve gear. • Return the piston to TDC compression stroke and re-check the valve lash to confirm consistent movement of the valve gear, including the slight bump to the exhaust valve from the automatic compression release. 13. Clean-up any oil around the valve cover opening, clean the valve cover, replace the valve cover gasket if necessary. 14. Install the valve cover, tightening the valve cover screws to a torque of 62 - 80 in-lbs (7 - 9 Nm). IMPORTANT: Over tightening the valve cover will cause it to leak. 15. Install the spark plug. 16. Test run the engine before returning it to service. 13 www.mymowerparts.com For Discount Cub Cadet Parts Call 606-678-9623 or 606-561-4983 P90 Series Vertical Shaft Engines Exhaust system The exhaust system is a frequently overlooked component of an engine. It is important to make sure the muffler is in good condition and free of blockage. NOTE: A blocked muffler will result in poor performance. If a muffler is completely blocked, the engine may not start. Cleaning the engine 1. To maintain a proper operating temperature and to keep the equipment looking good, all debris should be removed from the engine. 2. It is recommended to use compressed air to blow all of the debris off of the engine. NOTE: A pressure washer may be used to clean outdoor power equipment but only after the unit has been allowed to properly cool. General torque specifications * UDG H * *UUD DG GH H 1 FULWLFDOO RQ 1 1VR DO RWHQ QQFFHUULLUWWVLLFFLD ) D ) D V W H Q LLQ Q VWOX HP QH HLQUUVVXP Q )D$ P Q $ O X L X P $OXPLQXP VVLL]]H VL]H H LLQ OEVV Q LQOOE EV 1 P 1 1P P LLQ OOE V Q E LQOEVV 1 P 1 1P P LLQ QOOOE EVVV LQ E 1 P 1 1P P LLQ O V E LQ QOOE EVV 1 P 1 1P P LLQ O V E LQ QOOE EVV 1 1P P 1 P 0 0 0 0 0 0 0 0 0 0 0 0 VVLL]]H VL]H H IIWWOOE V IWOE EVV 1 P 1 1P P IIWWOOE V E IWOEVV 1 P 1 1P P IIWWOOE EVVV IWOE 1 P 1 1P P IIWWOOE V IWOE EVV 1 P 1 1P P IIWWOOE V IWOE EVV 1 1P P 1 P 0 0 0 0 0 0 0 0 0 LLQ OEVV LQ QOOE EV 1 P 1 1P P IIWWOOE V IWOE EVV 1 P 1 1P P Useful Engine Specifications Description SAE Metric Engine displacement 25.6 cubic inch 420 cc Spark plug gap 0.024” - 0.031” 0.6 - 0.8 mm Spark plug torque 177 - 221 in lbs 20 - 25 Nm Ignition module air gap 0.016” - 0.024” 0.4 - 0.6 mm Intake valve lash 0.004” - 0.006” 0.10 - 0.15 mm Exhaust valve lash 0.006” - 0.008” 0.15 - 0.20 mm Oil capacity 57 oz 1.7 L 14 www.mymowerparts.com For Discount Cub Cadet Parts Call 606-678-9623 or 606-561-4983 BASIC TROUBLESHOOTING CHAPTER 2: BASIC TROUBLESHOOTING Definitions Troubleshooting - The act of gathering information by preforming tests and direct observations. Diagnosis - Developing and testing theories of what the problem is, based on the information gathered in troubleshooting. Introduction Diagnosing an engine is an art form that is built upon several factors. First and most importantly is a good understanding of how the engine works. The second is skills that have been honed by experience. Finally the use of visual observations and a structured, systematic approach to troubleshooting a problem. The first part of this chapter will outline the steps of troubleshooting an engine so a technician can form a proper diagnosis. The second half of this chapter will describe specific procedures and tests to perform while troubleshooting. ! CAUTION The first two rules in troubleshooting is to cause no further harm to the engine and prevent injuries. Always make sure to check the oil for level and condition before starting an engine. Also check attachments for damage and make sure they are firmly mounted. Steps to troubleshooting NOTE: The steps and the order of the steps that follow are a suggested approach to troubleshooting the MTD engine. The technician does not necessarily have to follow them as described in this chapter. Define the problem The first step in troubleshooting is to define the problem: • Crankshaft will not turn. A. Starter not working B. Engine in a bind (external - attachment jammed) C. Engine in a bind (internal - engine seized) • Crankshaft turns, no start • Starts, runs poorly A. Starts, then dies B. Runs with low power output C. Makes unusual smoke when running I. Black smoke, usually heavy II. White smoke, usually heavy III. Blue smoke. usually light D. Makes unusual sounds when running I. Knock II. Click III. Chirp 15 www.mymowerparts.com For Discount Cub Cadet Parts Call 606-678-9623 or 606-561-4983 P90 Series Vertical Shaft Engines IV. Unusual exhaust tone There are tools that the technician can use in order to define the problem, such as: 1. Interview the customer. 1a. Get a good description of their complaint. 1b. If it is an intermittent problem, verify what conditions aggravate the problem as best as possible. 1c. Get an accurate service history of the equipment. 1d. Find out how the customer uses and stores the equipment. 2. Direct observation: 2a. Do not automatically accept that the customer is correct with their description of the problem. Try to duplicate the problem. 2b. Check the general condition of the equipment (visually). I. Cleanliness of the equipment will indicate the level of care the equipment has received. II. Make sure the engine and attachments are securely fastened. III. The tune-up factors. NOTE: Most hard starting and poor running conditions can be solved by performing a tune-up. a. Check the condition and amount of oil in the crankcase. b. Check the level and condition of the fuel. c. Check the ignition and “read” the spark plug. d. Look for obvious signs of physical damage, exhaust system blockage or cooling system blockage. 16 www.mymowerparts.com For Discount Cub Cadet Parts Call 606-678-9623 or 606-561-4983 BASIC TROUBLESHOOTING Identify factors that could cause the problem This is the second step in the troubleshooting process. 1. Crankshaft will not turn. A. Starter not working. This can be an electrical failure or a mechanical failure. The likely suspects are: I. A dead battery. II. A bad ground III. A failure in the electrical circuit. IV. A failure of the starter itself. B. Engine in a bind (external - attachment jammed). This usually indicates that the unit being powered by the engine either failed or has something jammed in it, locking up the system. C. Engine in a bind (internal - engine seized). This is usually either a quick fix or a catastrophic failure. The likely suspects are: I. Complete hydraulic lock (easy fix). II. Bent crankshaft (unrepairable) III. Internal binding, crankshaft, connecting rod or piston (unrepairable) 2. Crankshaft turns, no start. 2a. Most gasoline engine diagnosis involves isolating problems in the four critical factors an engine needs to run properly: I. Ignition- sufficient spark to start combustion in the cylinder, occurring at the right time. II. Compression- enough pressure in the cylinder to convert combustion into kinetic motion. It also needs sufficient sealing to generate the vacuum needed to draw in and atomize the next intake charge. III. Fuel- correct type and grade of fresh gasoline; in sufficient quantity, atomized (tiny droplets) and in correct fuel/air proportions. IV. Flow- if all of the above conditions are met but the flow of air is constricted on the inlet or exhaust side, it will cause the engine to run poorly or not at all. This also includes ensuring the valves are timed to open at the proper time. 2a. Isolate the ignition system and compression from the fuel system by preforming a prime test. I. Burns prime and dies. This would indicate a fuel system issue. II. Does not burn prime. Not a fuel system issue. Check for an ignition, compression or flow problem. 2c. Compression or ignition problem I. Check the engine stop and safety switch. II. Test the ignition system using a proper tester. III. Replace the spark plug with a new one or a known good one. IV. Check compression or leak down. V. Check valve lash. VI. Check valve timing/actuation. VII. Check exhaust. 3. Starts, runs poorly 3a. Starts, then dies 17 www.mymowerparts.com For Discount Cub Cadet Parts Call 606-678-9623 or 606-561-4983 P90 Series Vertical Shaft Engines I. Run the engine with a spark tester in-line between the spark plug wire and the spark plug or use an oscilloscope and see if the spark goes away at the same time the engine dies. II. Check choke operation. a. Black smoke? b. Wet plug? III. Prime test immediately after engine dies. If it restarts, this may indicate a problem with fuel flow to the carburetor. Check the gas cap, fuel line, fuel filter, and the float in the carburetor. 3b. Runs with low power output. I. Look for unusual exhaust color (smoke). II. Unusually hot muffler (may glow red). a. Retarded ignition b. Exhaust valve opening early (lash too tight) III. Mechanical bind a. A slightly bent crankshaft. In some cases the drag may increase and decrease as the crankshaft rotates. This produces a pulsing feeling that is different than a jerk back. b. Parasitic external load. A bind in the equipment the engine is powering. c. Internal drag from a scored piston or similar damage. IV. Low governor setting or stuck governor. a. Check RPMs using a tachometer. b. RPMs should not droop under moderate to heavy loads. V. Low compression a. Check valve lash b. Check compression c. Check leak down to identify the source of the compression loss. VI. Flow blockage a. Exhaust blockage, usually accompanied by an unusual exhaust sound. • Just as a throttle on the carburetor controls the engine RPMs by limiting the amount of air an engine can breathe in, an exhaust blockage will limit engine performance by constricting the other end of the system. • The muffler itself my be blocked. • The exhaust valve may not be opening fully, possibly because of extremely loose valve lash settings. • The exhaust valve seat may have come loose in the cylinder head. This may cause a loss of compression, a flow blockage or it may randomly alternate between the two. NOTE: The cause of an exhaust valve coming loose is usually over heating. b. Intake blockage • An intake blockage up-stream of the carburetor will cause a rich fuel/air mixture and constrict the amount of air that the engine can draw in, limiting performance. • The intake valve not fully opening. A possible cause of this is loose valve lash. 18 www.mymowerparts.com For Discount Cub Cadet Parts Call 606-678-9623 or 606-561-4983 BASIC TROUBLESHOOTING V. Makes unusual smoke when running a. Black smoke, usually heavy, usually indicates a rich air fuel mixture • Not enough air: air flow blockage or a partially closed choke. • Too much fuel: carburetor float or float valve stuck or metering / emulsion issues with the carburetor. b. White smoke, usually heavy • Oil in muffler, usually the result of improper tipping. The engine will “fog” for a minute or so, then clear-up on its own. • Massive oil dilution with gasoline. It may be caused by improper tipping. It can also be caused by leaky carburetor float valve, if there is a down-hill path from the carburetor to the intake port. Check oil for gasoline smell, repair carburetor. c. Blue smoke, usually light. PCV system • May be blocked or unplugged. • May be over-come by massive over-filling or oil dilution with gasoline. • Will cause oil to exit the engine via any low-resistance paths. Piston rings • Confirm with leak-down test. • Smoke will be more pronounced under load. • Repair may not make economic sense. Valve guides (and intake valve stem seal). • Smoke will be more pronounced on over-run. VI. Makes unusual noise when running a. Knock • Check for loose mounting of engine or driven implement • Rotate crankshaft back-and-forth to check for loose connecting rod. b. Click • Clicks and pops on engine shut-down: Compression release coming into play as the engine RPMs cross the activation threshold. This will have no ill effects on engine performance. • Half-engine speed clatter: loose valve lash. • Half-engine speed clatter, slightly heavier: wrist-pin. • Rhythmic heavy-light engine speed click: piston slap c. Spark-knock • Advanced ignition timing • Low octane fuel • Over-heating engine (check for blocked cooling air flow) • Carbon build-up in cylinder: glowing carbon chunks pre-igniting air fuel mix. d. Chirp • Compression, blowing-by the fire-ring of a damaged head gasket will sometimes produce a 19 www.mymowerparts.com For Discount Cub Cadet Parts Call 606-678-9623 or 606-561-4983 P90 Series Vertical Shaft Engines chirping noise. • Confirm with a compression test and leak-down test. e. Unusual exhaust tone Splashy or blatty • Splashy idle usually indicates a slight rich condition. • May indicate an exhaust blockage, usually slightly muffled. Backfire • On over-run: unburned fuel igniting past exhaust valve. Mixture not burning completely in combustion chamber. It may be too rich or it may be spark-plug or ignition problem. • Occasional, under load: engine momentarily runs lean, usually will cycle with float bowl level or governor pull-in, sometimes sounds like a slight stumble. Ethanol content exceeding 10% will make the engine run artificially lean. Skip • Usually ignition related. • Run the engine with a spark tester in-line between the spark plug wire and the spark plug or use an oscilloscope and see if the spark goes away at the same time the engine dies. 4. Engine over-speed A. Continual over-speed • Binding or damaged external governor linkage or carburetor throttle. • Mis-adjusted governor arm. • Internal governor failure. B. Momentary over-speed • Intermittent bind (very unusual). • Interference: This is fairly common when debris can fall on the governor linkage during normal operations. 5. Engine RPMs surge (hunting) A. Over-governed condition- Return spring replaced with wrong part or hooked into wrong hole. NOTE: This is an extremely rare condition, usually created by tampering. B. Lean Air-fuel mixture condition- When AFR (Air Fuel Ratio) is significantly below stoichiometric ratio (14.7:1) engine RPMs sink until they reach a point that can be supported by the available fuel. This causes a momentary surge in power until the available fuel is consumed, then the RPMs fall again, repeating the cycle. • Too much air: look for an air leak in the intake tract • Not enough fuel: look for fuel supply or carburetor problems 20 www.mymowerparts.com For Discount Cub Cadet Parts Call 606-678-9623 or 606-561-4983 BASIC TROUBLESHOOTING Repairing the problem The third step in the troubleshooting process is to repair the problem. This step consists of: A. Form a diagnosis by using all of the information gathered from the troubleshooting that was performed. B. Physically perform the repair. The fourth, and hopefully final, step in the troubleshooting process is the follow through. This step consists of: A. Thoroughly test the repaired equipment: confirming that the initial diagnosis was correct. If it was wrong, start the troubleshooting process over again. NOTE: Sometimes the engine will have multiple problems at the same time. By performing one repair, other issues may show up that are unrelated to the first repair. B. Delivery to customer: We are not just repairing equipment, we are repairing customers. • Inoculate against recurring problem with education, e.g.: if the problem was caused by stale fuel, make sure the customer is aware that fuel goes bad over time. • Make sure the customer understands the repair, preventing “superstitious” come-backs. 21 www.mymowerparts.com For Discount Cub Cadet Parts Call 606-678-9623 or 606-561-4983 P90 Series Vertical Shaft Engines Prime test To perform a prime test: 1. Prime the engine through the carburetor throat using a squirt bottle, filled with clean fresh gasoline. 2. Make sure the throttle is in the run position. 3. Attempt to start the engine. 4. If the engine starts and runs long enough to burn the prime, the problem is effectively isolated to the fuel system. Proceed to Chapter 4: The Fuel System and Governor. 5. If the engine did not start, check ignition system as described in Chapter 7: Ignition System. 6. If the ignition system is working, check the compression or perform a leak down test. Leak-down test A leak-down test is the preferred method to test the engine’s ability to compress the charge. It will also show where pressure is leaking from. To perform a leak-down test: NOTE: A leak down test pressurizes the combustion chamber with an external air source and will allow the technician to listen for air “leaking“ at the valves, piston rings and the head gasket. NOTE: These are general instructions. Read and follow the instructions that came with the tester before attempting to perform this test. • If possible, run the engine for 3-5 minutes to warm up the engine. • Remove the spark plug and air filter. • Find top dead center of the compression stroke. ! CAUTION If the engine is not centered at top dead center, the engine will rotate when compressed air is introduce to the combustion chamber. 1. Find top dead center by following the steps described in the valve lash section of Chapter 1: Introduction 2. Thread the leak down tester adapter into the spark plug hole. See Figure 2.1. 3. Connect tester to compressed air. 4. Adjust the regulator knob until the needle on the gauge is in the yellow or set area of the gauge. 5. Connect the tester to the adapter. NOTE: If the engine rotates it was not at top dead center. 6. Check the reading on the gauge. Leak down tester Leak-down tester adapter Figure 2.1 22 www.mymowerparts.com For Discount Cub Cadet Parts Call 606-678-9623 or 606-561-4983 BASIC TROUBLESHOOTING 7. Compare the results to the following chart. Leak-down Testing Results Symptom Possible cause Air escaping from the breather Worn cylinder or piston rings. Possible blown head gasket Air escaping from the exhaust Leaking exhaust valve Air escaping from the carburetor Leaking intake valve Gauge reading low Cylinder and piston rings are in good condition Gauge reading moderate There is some wear in the engine, but it is still usable Gauge reading high excessive wear of cylinder and/ or piston rings. Engine should be short blocked or it could be a blown head gasket. 23 www.mymowerparts.com For Discount Cub Cadet Parts Call 606-678-9623 or 606-561-4983 P90 Series Vertical Shaft Engines Compression test To perform a compression test: NOTE: Compression should be in the range of 55 - 80 PSI (3.8 - 5.5 Bar). • Disconnect the high-tension lead from the spark plug and ground it well away from the spark plug hole. • Remove the spark plug using a 13/16” or 21mm wrench. A flexible coupling or “wobbly” extension may help. • Pull the starter rope several times to purge any fuel or oil from the combustion chamber. NOTE: Air compresses readily, liquid does not. Liquid in the combustion chamber will result in an artificially high compression reading. 1. Install a compression gauge in the spark plug hole. 2. Confirm that the gauge is “zeroed”, then pull the starter rope repeatedly, until the needle on the gauge stops rising. See Figure 2.2. Compression gauge Figure 2.2 3. Interpreting compression readings. Compression Readings Readings in psi Possible causes <20 (1.4 Bar) Most likely a stuck valve or too tight of a valve lash, provided the starter rope pulls with normal effort. 20 - 55 (1.4-3.8 Bar) Valve seat damage or piston ring and/or cylinder wear. 55 - 80 (3.8-5.5 Bar) Normal readings >80 (>5.5 Bar) Excessive valve lash, a partial hydraulic lock, a bad cam or a bad automatic compression relief. 24 www.mymowerparts.com For Discount Cub Cadet Parts Call 606-678-9623 or 606-561-4983 BASIC TROUBLESHOOTING PCV testing The PCV (Positive Crankcase Ventilation) valve is located in the engine block and allows the crankcase pressure to escape. Leakage and blockage are the two failure modes for a PCV system. Either mode will cause crankcase pressure to build-up, though the effects of a blocked PCV are generally more dramatic. Increased case pressure will result in oil entering the combustion chamber. 1. The PCV chamber is vented to the intake manifold through a rubber hose. The rubber hose directs crankcase fumes to the heat box assembly. See Figure 2.3. 2. When functioning properly, the PCV valve works with the inherent pumping action of the piston in the bore to expel pressure from the crankcase. crankcase air chamber NOTE: Normally, small engines run with slightly negative case pressure. This case pressure can be measured using a slack-tube water manometer, or an electronic version of the same tool. Less than -3” to -4” (-7.6 - 10.2cm) of water is a typical reading at idle. Figure 2.3 3. An engine that fails to purge extra case pressure in a controlled manner will build case pressure. The pressure will find it’s own way out of the engine in undesirable ways. • Oil will be forced by the rings and valve guides, being burnt in the combustion chamber. • The cause of this oil burning can be mistaken for a worn-out engine, if proper diagnosis (compression, leakdown, and case pressure) is not performed. 4. Experimentation by MTD’s Training and Education Department has revealed the following characteristics of MTD engines: • A leaky PCV system will not build-up substantial case pressure. • A leaky PCV system will allow the engine to ingest contaminants through the system, accelerating engine wear. • A blocked PCV system will allow crankcase pressure to build very rapidly. Noticeable oil fumes will be evident in the exhaust within several minutes of normal operation. 25 www.mymowerparts.com For Discount Cub Cadet Parts Call 606-678-9623 or 606-561-4983 P90 Series Vertical Shaft Engines 26 www.mymowerparts.com For Discount Cub Cadet Parts Call 606-678-9623 or 606-561-4983 AIR INTAKE SYSTEM CHAPTER 3: AIR INTAKE SYSTEM Air filter Paper-pleated element Generally air filters come in two different types, a pleated-paper element or foam. A combination of the two are used on the MTD engine. See Figure 3.1. • Air filters used on the MTD engine are designed to prevent particles larger than 3-5 micron from passing through into the engine. • The filter should be checked on a regular basis possibly several times in a season. Foam pre-filter NOTE: Never use compressed air on a paper air filter. Compressed air will remove the tiny fibers that are used to catch the dirt in the air. Without these fibers the filter is useless. NOTE: Refer to Chapter 1: Introduction for the maintenance interval and cleaning instructions for the air filter. Figure 3.1 Air filter cover To remove/replace the air filter: 1. Wipe down the air filter housing to prevent any debris from getting into the engine. 2. Un-screw the two wing nuts. See Figure 3.2. NOTE: The wing nuts are part of the air filter cover and do not come off. Figure 3.2 27 www.mymowerparts.com For Discount Cub Cadet Parts Call 606-678-9623 or 606-561-4983 P90 Series Vertical Shaft Engines 3. Lift the air filter cover off the engine. 4. Remove the air filter assembly. Air filter Figure 3.3 5. Install the air filter by following the previous steps in reverse order. NOTE: The air filter housing is part of the blower cover. The intake manifold extends through a hole in the bottom of the air filter housing. When installing the air filter, the hole in the bottom of the paper element must fit over the intake manifold. See Figure 3.4. NOTE: A light coating of oil can be applied to the hole in the air filter. This will allow the filter to slide over the manifold without distorting. Manifold Figure 3.4 28 www.mymowerparts.com For Discount Cub Cadet Parts Call 606-678-9623 or 606-561-4983 AIR INTAKE SYSTEM Blower/air filter housing On the P90 series of engine, the air filter housing is part of the blower housing. To remove/replace the blower/air filter housing: 1. Remove the air filter following the steps described in the previous section of this chapter. 2. Remove the nut that was under the air filter (indicated by the arrow in Figure 3.5.) using a 10mm wrench. 3. Loosen the two shoulder bolts (indicated by the arrows in Figure 3.6.) using a 12 mm wrench. 4. Remove the three acorn nuts (indicated by the arrows in Figure 3.7.) using a 10 mm wrench. 5. Lift the blower/air filter housing off of the engine. 6. Install the blower/air filter housing by following the previous steps in reverse order. Figure 3.5 Control panel Choke lever Figure 3.6 NOTE: tighten the blower/air filter housing nuts to a torque of 80 - 106 in lbs (9 - 12 Nm). 7. Test run the engine before returning it to service. Figure 3.7 29 www.mymowerparts.com For Discount Cub Cadet Parts Call 606-678-9623 or 606-561-4983 P90 Series Vertical Shaft Engines Carburetor and Insulator To remove/replace the carburetor and insulator block: 1. Remove the blower/air filter housing by following the steps described in the blower/air filter housing section of this chapter. 2. Disconnect the breather hose from the intake manifold. See Figure 3.8. EVAP port Breather hose NOTE: On units equipped with an evaporative emissions system, disconnect the hose from the EVAP port of the intake manifold. NOTE: If a unit does not have EVAP emissions system, the EVAP port on the intake manifold will have a plug on it. 3. Remove the intake manifold by removing the two nuts (indicated by the arrows in Figure 3.8.) using a 10 mm wrench. Figure 3.8 To avoid personal injury or property damage, use extreme care in handling gasoline. Gasoline is extremely flammable and the vapors are explosive. Serious personal injury can occur when gasoline is spilled on yourself and/or your clothes which can ignite. Wash your skin and change clothes immediately ! WARNING 4. Clamp off the fuel line to prevent fuel from leaking when the line is disconnected. See Figure 3.9. IMPORTANT: Take care that the fuel lines are not damaged when clamping them off. Never insert a screw or anything else into the fuel line to prevent fuel from coming out. This will damage the inside of the fuel line. Hose pinching pliers Figure 3.9 NOTE: There are commercially available hose pinching pliers that will not damage the fuel lines. 5. Disconnect the fuel line from the carburetor. NOTE: MTD uses low permeation fuel lines to meet EPA guidelines. Low permeation fuel lines are made with a soft membrane that lines the inside of the line. Any tear in this membrane will allow the fuel to get in between the membrane and the hose, choking off the fuel flow. NOTE: Every time the fuel line is pulled off of a brass nipple, the fuel line must be replaced with the same type of low permeation fuel line. 30 www.mymowerparts.com For Discount Cub Cadet Parts Call 606-678-9623 or 606-561-4983 AIR INTAKE SYSTEM 6. Double nut the carburetor studs and remove them. See Figure 3.10. NOTE: The insulator block and gaskets may fall out when the studs are removed. NOTE: The most likely reason to remove the insulator block and its gaskets is to cure a lean running condition. Inspect all removed parts carefully to identify the point where additional air is entering the intake tract. Double nut 7. Disconnect the choke linkage. 8. Disconnect the throttle linkage and spring. 9. Turn the carburetor upside down. Figure 3.10 10. Remove the afterfire solenoid by removing the two screws (indicated by the arrows in Figure 3.11.). NOTE: The screws are installed with a thread locking compound. It may be necessary to use a #2 phillips driver with a ratchet in order to get enough torque to loosen the screws. NOTE: There is an O-ring between the afterfire solenoid and the carburetor. It is important that the O-ring is in place when re-installing the afterfire solenoid. Figure 3.11 NOTE: The carburetors are not inter-changeable from one engine model to another. To help prevent carburetor mix-ups, the engine model number is stamped on the carburetor by the fuel nipple. See Figure 3.12. NOTE: Some red paint was smeared onto the carburetor so that the numbers will stand out in the photograph. Engine model number Figure 3.12 31 www.mymowerparts.com For Discount Cub Cadet Parts Call 606-678-9623 or 606-561-4983 P90 Series Vertical Shaft Engines 11. Install the carburetor by following the previous steps in reverse order. Gasket NOTE: Use new gaskets between the cylinder head, the insulator, the carburetor and the intake manifold. NOTE: Tighten the carburetor nuts to a torque of 62 - 80 in lbs (7 - 9 Nm). 12. Gasket Gasket Studs Test run the engine before returning it to service. Insulator Carburetor Figure 3.13 32 www.mymowerparts.com Manifold For Discount Cub Cadet Parts Call 606-678-9623 or 606-561-4983 FUEL SYSTEM AND GOVERNOR CHAPTER 4: THE FUEL SYSTEM AND GOVERNOR The function of the fuel system is to store fuel, mix the fuel with air in the correct ratio and deliver it to the intake port. The fuel system consists of the following components: • Fuel tank • Fuel lines • Fuel filter • Carburetor and insulator block NOTE: When working on the fuel systems, look at the whole system. A problem will rarely be isolated to one component. Inspecting the fuel NOTE: Fuel is the maintenance item most often overlooked by consumers. A lot of fuel systems problems are caused by gas that is out of date or fuel with too much alcohol in it. When inspecting the fuel: • Look for water. • Look for dirt. • Look for discoloration. • Sniff carefully to see if it smells like varnish or kerosene. • Save the fuel to show to customer. • Look for oil in the fuel. • Test the fuel for alcohol content if there is a reason to suspect it. NOTE: Save a sample of the fuel collected to show the customer. NOTE: Customers pouring engine oil into the fuel tank seems to be a growing problem. 33 www.mymowerparts.com For Discount Cub Cadet Parts Call 606-678-9623 or 606-561-4983 P90 Series Vertical Shaft Engines Test fuel for alcohol Fuels currently on the market contain a wide array of additives. Some of these additives oxygenate the fuel. Oxygenated fuel reduces emissions, and is required in some parts of the United States. Fuel make-up varies seasonally and geographically. Ethanol is the primary additive used to oxygenate fuel. Ethanol in fuel creates a lot of problems for gasoline engines. The biggest problem is that alcohol attracts and holds water. This corrodes the metal components of the fuel system, especially the carburetor. Alcohol also does not produce as much heat as gasoline when burnt and it burns at a different stoichiometric ratio. This results in less power for the engine. A 10% ethanol (E10) mix is acceptable for MTD engines. Anything higher than that will result in performance issues. NOTE: E15 and E85 fuels are not to be used in any MTD engines. There are several alcohol test kit available commercially. See Figure 4.1. Figure 4.1 Generally these kits involve mixing a measured amount of water and gas together and seeing were the boundary layer is. See Figure 4.2. The test kit should come with a chart to compare the boundary layer height to alcohol percentage. Figure 4.2 34 www.mymowerparts.com For Discount Cub Cadet Parts Call 606-678-9623 or 606-561-4983 FUEL SYSTEM AND GOVERNOR Choke/throttle cable adjustment The choke/throttle cable will need to be adjusted any time the cable or the control panel is replaced. NOTE: The procedures to remove/replace the choke/throttle cable can be found in the service manual for the piece of equipment that the engine is mounted to. Choke lever NOTE: The choke should be opened when the engine starts. This can be a source of starting issues with customers who are not familiar with manual chokes. The choke is controlled by the throttle linkage. When properly adjusted, the high speed throttle stop screw should be touching the choke lever but not pushing it. See Figure 4.3. High speed stop screw NOTE: The guard was removed in the picture for clarity. Figure 4.3 To adjust the choke/throttle cable: 1. Insert a #1 phillips screw driver into the alignment hole in the control panel and guard. See Figure 4.4. 2. Loosen the cable clamp. 3. Verify that the high speed stop screw is just touching the choke lever • If the screw does not touch the lever, tighten the screw until it just touches the lever. • If the screw is pushing on the lever, back the screw out until it no longer touches the lever. Then tighten the screw until it just touches the lever. #1 phillips screw driver Figure 4.4 Throttle control lever 4. Move the throttle control lever to the detent between full throttle and the choke position. See Figure 4.5. 5. Tighten the cable clamp to lock the throttle cable in place. 6. Verify that the throttle cable will move the choke to the closed position. 7. Start the engine and check the maximum engine speed. Adjust it as needed by following the procedures described in the engine speed adjustment section of this chapter. Figure 4.5 35 www.mymowerparts.com For Discount Cub Cadet Parts Call 606-678-9623 or 606-561-4983 P90 Series Vertical Shaft Engines Carburetors If diagnosis indicates a fuel problem, inspect the carburetor. This is important even if problems are identified elsewhere in the fuel system. IMPORTANT: The fuel must be tested for alcohol content before diagnosing anything else on the engine. NOTE: It is important to perform a compression or leak down test before condemning a carburetor. An engine can have a borderline compression reading and not create enough of a vacuum to draw in a sufficient fuel/air charge. NOTE: To determine if border-line compression is the problem; remove the spark plug. Squirt a little bit of oil into the combustion chamber to seal the rings. Reinstall the spark plug. If the engine starts and runs ok, then that was the problem. If it does not start, move on to the carburetor. Inspecting the carburetor 1. Remove the float bowl and check for dirt and/or varnish. 2. Inspect the needle valve and needle valve seat for dirt and/or damage. 3. Inspect the gaskets and O-rings for damage. 4. Inspect the vents and orifices, verify that they are free of debris. NOTE: If a little cleaning and new gaskets will fix the carburetor, do it. If the carburetor requires extensive cleaning; it is better to replace the carburetor. IMPORTANT: Never try to mechanically clean orifices. That will damage them and ruin the carburetor. NOTE: The jet markings (if present) may be used for identification purposes, but the technician should not attempt to infer orifice sizes from the identification numbers. NOTE: Installing the wrong main jet, or a carburetor with the wrong main jet will produce performance and emissions issues. 36 www.mymowerparts.com For Discount Cub Cadet Parts Call 606-678-9623 or 606-561-4983 FUEL SYSTEM AND GOVERNOR Disassembly and rebuilding the carburetor 1. Remove the carburetor by following the procedures described in Chapter 3: Air Intake System. NOTE: An insulator separates the carburetor from the cylinder head. • A bowl vent port is in a recessed passage on the end of the carburetor that faces the insulator. • A second passage in the insulator supplements the passage on the carburetor. • Gaskets separate the insulator from the cylinder head and the carburetor from the insulator. • A port in the carburetor to insulator gasket ties the bowl vent passages together. 2. Check the vent passages. See Figure 4.6. 3. Check the gaskets and the insulator block. 4. Remove the afterfire solenoid seat using a 14mm wrench. See Figure 4.7. NOTE: From this point an assessment can be made about the viability of rebuilding the carburetor. • If extensive corrosion is evident, replace the carburetor. Bowl vent Bowl vent port channel • If varnish build-up is too extensive to clean, replace the carburetor. Afterfire solenoid seat Figure 4.6 5. Remove the pin that the float hinges on to remove the float. Float pin Figure 4.7 37 www.mymowerparts.com For Discount Cub Cadet Parts Call 606-678-9623 or 606-561-4983 P90 Series Vertical Shaft Engines NOTE: Because the float valve is crucial to the functioning of the carburetor and the viton tip of the valve is subject to wear, technicians should replace the valve and spring any time the carburetor is disassembled for cleaning. Float Float valve NOTE: If the needle seat is worn or damaged, the carburetor must be replaced. Compression spring Figure 4.8 6. Remove the main jet using a narrow-shank straight blade screwdriver. See Figure 4.9. • A square cross-section gasket seals the bowl to the body of the carburetor. NOTE: Fuel enters the central column through a port about 1/2” (1cm) from the bottom to help prevent the ingress of any residue in the bottom of the bowl. NOTE: The orifice in the main jet meters fuel into the central column. NOTE: Air from the main jet emulsion port enters the central column near the top, then gets bubbled through the emulsion tube into the metered fuel flow to promote atomization. NOTE: The main jet secures the emulsion tube in the central column of the carburetor. See Figure 4.10. Bowl gasket Main jet Figure 4.9 Main jet Emulsion tube Figure 4.10 38 www.mymowerparts.com For Discount Cub Cadet Parts Call 606-678-9623 or 606-561-4983 FUEL SYSTEM AND GOVERNOR Throttle stop screw 7. The throttle stop screw has a large pliable lip around the head of the screw. That lip secures a metering plug for the pilot and transition ports. Remove the screw to reach the plug. See Figure 4.11. 8. Carefully pry out the metering plug and spacer using a small screwdriver. See Figure 4.12. Welch plug Shot plug in feed bore Fuel feed leg on central column for pilot and transition Fuel port to central column Figure 4.11 NOTE: Do not remove the throttle shaft. The screws that hold the throttle plate to the throttle shaft are peened. When they are removed, they will expand the holes in the throttle shaft, ruining it. Spacer NOTE: Do not try to remove the choke shaft. The plastic end of the shaft is molded over a grove to hold it in place. Prying on it will break the shaft. Metering plug Figure 4.12 End view 9. Examine the metering plug: See Figure 4.13. • Fuel, drawn from the central column via the long fuel feed leg, is metered by the brass orifice in the tip of the metering plug. O-rings • Air, drawn from the emulsion air port, is metered by the size of the brass orifice at the entrance to the port. Air passage Fuel metering orifice Figure 4.13 • The fuel and air that feed the pilot and transition ports are mixed at the metering plug. • The metering plug creates a small venturi. The pressure drop of the air passing through the metering plug draws the fuel into the passage to the pilot and transition ports, in an emulsified mixture. 39 www.mymowerparts.com For Discount Cub Cadet Parts Call 606-678-9623 or 606-561-4983 P90 Series Vertical Shaft Engines Transition ports NOTE: The pilot screw regulates how much of this pre-mixed fuel/air emulsion is allowed to enter the throat of the carburetor, to atomize down-stream of the throttle plate. On current production units, it is set at the factory and the screw head is removed. See Figure 4.14. Pilot port Pilot screw (before head is removed) NOTE: The transition ports are fixed. They are drilled into the throat of the carburetor, down-stream of the venturi. They lie behind the brass welch plug near the pilot screw. 10. Soak the Carburetor body in a suitable solvent until clean. NOTE: Ultrasonic cleaning using a suitable water/ detergent mixture will clean carburetors safely and effectively. Figure 4.14 11. Rinse it thoroughly. 12. Dry the carburetor body using compressed air. 13. Reassemble the carburetor and install it by following steps 1-8 in reverse order. 14. Start the engine and check the idle RPM using a tachometer. 15. Check the top no load speed of the engine. NOTE: The top no-load speed of the engine is 3300 RPM’s + 100. 16. Adjust the engine speed as needed by following the procedures described in the speed adjustment section of this chapter. 17. Test run the engine before returning it to service. 40 www.mymowerparts.com For Discount Cub Cadet Parts Call 606-678-9623 or 606-561-4983 FUEL SYSTEM AND GOVERNOR Engine speed adjustment To adjust the engine speed: Tab 1. Start the engine and let it reach operating temperature. 2. Move the throttle control lever to the full throttle position. 3. Measure the engine’s speed using a tachometer. 4. Bend the tab, that the governor spring is attached to, as needed to adjust the engine speed to 3,300 RPM + 100. See Figure 4.15. • Bend the tab up to increase speed. • Bend the tab down to decrease speed. Figure 4.15 41 www.mymowerparts.com For Discount Cub Cadet Parts Call 606-678-9623 or 606-561-4983 P90 Series Vertical Shaft Engines Afterfire solenoid When an engine is turned off, the engine does not “instantly” stop spinning. As the engine slows down, it is still drawing fuel out of the carburetor. This raw fuel passes through the engine because the ignition system is grounded to prevent the spark plug from firing. When the raw fuel reaches the hot muffler it can ignite, resulting in an afterfire. An Afterfire solenoid is an electromechanical device that prevents fuel from reaching the main jet in the carburetor when the ignition key is turned to the “off” position. Generally this will prevent an afterfire. Fuel will still be drawn into the engine from the idle port, but the fuel/air mixture will be too lean to burn. NOTE: If the throttle is moved to the idle position when turning off the engine, the fuel/air mixture ratio will be in a range that will support combustion resulting in an afterfire. To remove/replace an afterfire solenoid: 1. Remove the carburetor by following the procedures described in Chapter 3: Air Intake System. 2. Disconnect the ground lead using a 10 mm wrench. See Figure 4.16. Ground lead Figure 4.16 3. Disconnect the power lead. NOTE: The oil dipstick can be removed for more access to the power lead; however, it can be difficult to re-install the dipstick tube without shearing the O-rings. Power lead 42 www.mymowerparts.com For Discount Cub Cadet Parts Call 606-678-9623 or 606-561-4983 FUEL SYSTEM AND GOVERNOR Old style NOTE: Early production engines have a simple bullet connector between the stator and the afterfire solenoid (power lead). Current production engines have locking bullet connectors. The two connectors are not interchangeable. All new stators and afterfire solenoids sold as service parts will have the new connectors. NOTE: All service replacement stators and afterfire solenoids will be shipped with an adaptor and an instruction sheet on how to use the adaptor, if needed. New style Figure 4.17 4. Mark or note the routing of the afterfire solenoid’s power lead. 5. Remove the after fire solenoid. 6. Install the after fire solenoid by following the previous steps in reverse order. NOTE: Make sure the power lead is routed properly to prevent damage to the wire. 7. Test run the engine before returning it to service. Power lead Figure 4.18 43 www.mymowerparts.com For Discount Cub Cadet Parts Call 606-678-9623 or 606-561-4983 P90 Series Vertical Shaft Engines Testing the afterfire solenoid An afterfire solenoid that is not working properly can prevent the engine from starting. The solenoid itself rarely fails, usually there is some type of fault in the wiring to the solenoid to prevent it from energizing. To determine if the afterfire solenoid is faulty: 1. Test the unit’s battery. • 2. The battery must be fully charged before any testing can be preformed. Turn the ignition key on and off while holding the afterfire solenoid. • An audible click should be heard and a “thump” should be felt when the key is turned on. • If the thump is felt or the click is heard, the wiring is most likely working properly. Bench test the solenoid. • Afterfire solenoid If nothing is felt or heard, investigate the wiring before condemning the solenoid. Figure 4.19 3. Check the ground lead of the afterfire solenoid. NOTE: Running a jumper wire from the negative post of the unit’s battery directly to the solenoids ground lead is the fastest way to test the ground. See Figure 4.20. Jumper wire NOTE: Do not try to ground the solenoid housing. The coil inside the solenoid is insulated from the housing. 4. Repeat step 1. • If the solenoid is now working, repair the ground connection. Figure 4.20 44 www.mymowerparts.com For Discount Cub Cadet Parts Call 606-678-9623 or 606-561-4983 FUEL SYSTEM AND GOVERNOR 5. Afterfire solenoid lead from main harness With the ignition key in the “on” position, test for voltage at the power lead connection. See Figure 4.21. • If battery voltage is present, bench test the solenoid. • If the voltage at the connection is not the same as the battery voltage or there is no voltage, the problem is with the equipment’s electrical system and not the solenoid. Follow the troubleshoot procedures found in the appropriate service manual for that piece of equipment. Figure 4.21 Bench testing the solenoid To bench test the solenoid: Ground lead 1. Remove the afterfire solenoid by following the procedures described in the afterfire solenoid section of this chapter. 2. Connect the ground lead of the solenoid to the negative side of a 12 volt power supply NOTE: A battery charger set to the trickle charge (2 amp) setting works fine for this test. 3. Connect the power lead of the solenoid to the positive side of the power source while watching the solenoid’s plunger. • If the plunger does not retract, the solenoid is faulty and must be replaced. • If the plunger does retract, there is most likely an increased resistance type of failure in the equipment’s electrical system. Perform voltage drop tests to find the source of the resistance. Retracted Extended Figure 4.22 45 www.mymowerparts.com For Discount Cub Cadet Parts Call 606-678-9623 or 606-561-4983 P90 Series Vertical Shaft Engines Governor The engine speed is controlled by a balance between the force applied by a spring (pulling the throttle open) and a flyweight mechanism within the engine applying force to the governor arm (pushing the throttle closed). See Figure 4.23. Throttle linkage Spring tension NOTE: While the mechanism is simple and robust, it is important to pay attention when working on parts near the governor. Binding caused by interference with mis-routed lines or cables may make the governor unresponsive. NOTE: When a governed engine “hunts”, it is generally an indication of a lean fuel/air mixture, rather than a problem with the governor. Governor action Governor spring Figure 4.23 Governor arm To remove the governor arm from the governor shaft: 1. Remove the two screws, indicated by the arrows in Figure 4.24., that hold the governor guard in place using a 8 mm wrench. 2. Lift the guard up and hold it out of the way. NOTE: The fuel line is attached to the guard with two barbed eyelets. It is not necessary to disconnect the fuel line from the guard, but doing so will make it easier to access the governor arm. 3. Remove the throttle cable clamp. 4. Disconnect the throttle cable. Figure 4.24 5. Remove the upper screw that holds the control panel to the engine block. See Figure 4.25. 6. Loosen the lower screw that holds the control panel to the engine block. 7. Swing the control panel towards the front of the engine. upper screw Figure 4.25 46 www.mymowerparts.com For Discount Cub Cadet Parts Call 606-678-9623 or 606-561-4983 FUEL SYSTEM AND GOVERNOR 8. Put an alignment mark on the governor arm and shaft. See Figure 4.26. 9. Loosen the nut and T-bolt that secures the governor arm to the shaft. 10. Carefully spread open the seam on the arm. 11. T-bolt Carefully slide the Governor arm off of the governor shaft. 12. Unhook the governor linage and throttle return spring. 13. Unhook the governor spring. Figure 4.26 To install the governor arm: 1. Attach the throttle linkage and return spring. 2. Attach the governor spring 3. Rotate the governor shaft clockwise until it stops. 4. Slide the arm onto the shaft. The flat on the top of the shaft should be roughly parallel to the arm that connects to the spring. See Figure 4.26. NOTE: There is a hairpin clip that keeps the governor shaft from sliding into the engine. It may be necessary to hold the shaft while sliding the arm on to prevent the hairpin clip from “popping off” and allowing the governor shaft to fall into the engine. NOTE: The alignment marks from the previous section can help align the arm. 5. Tighten the nut on the clamp bolt to secure the arm. 6. Install the screw removed from the throttle control plate. 7. Tighten the lower screw of the throttle control plate. 8. Install the governor guard. 9. Adjust the governor to maintain top no-load speed as described in the throttle and choke adjustment section of this chapter. 47 www.mymowerparts.com For Discount Cub Cadet Parts Call 606-678-9623 or 606-561-4983 P90 Series Vertical Shaft Engines Governor shaft To remove or replace the governor shaft: 1. Remove the engine from the equipment that it powers. 2. Remove the governor arm by following the procedures described in the governor arm section of this chapter. 3. Remove the sump cover by following the steps described in Chapter 10: Cam, Crankshaft and Piston. 4. Remove the hairpin clip from the governor shaft. See Figure 4.27. 5. Slide the governor arm out of the engine block from the inside of the engine. 6. Check the movement of the fly-weights and cap on the governor gear. 7. Install the shaft by following the above steps in reverse order. 8. Install the engine on the equipment it powers. 9. Test run the engine and adjust the top no load engine rpms by following the steps described in the throttle and choke adjustment section of this chapter. hairpin clip Figure 4.27 Governor cup and the governor gear The Governor gear and cup are located inside the crankcase cover. See Figure 4.28. The flyweights and the governor cup are interlocked on this family of engines. The governor gear and cup are not serviceable. If there is a failure of the governor gear, cup or flyweights, the sump cover must be replaced as an assembly. Governor gear Oil pump Figure 4.28 48 www.mymowerparts.com For Discount Cub Cadet Parts Call 606-678-9623 or 606-561-4983 Lubrication CHAPTER 5: LUBRICATION Oil type and quantity The recommended oil for MTD engines is an SAE 10W-30 oil with an SM API rating or better. The oil capacity for all of the P90 series engines is 57 fl.oz (1.7 liters). ) ) ) ) ) ) ) 6$( 6$( 6$(:6$(: 6$(: & & & & & & & 2LO&KDUW • If the oil is noticeably thin, or smells of gasoline, carburetor repair may be needed before the engine can be run safely. • Check the oil level frequently and change the oil more frequently in severe operating conditions such as exceptionally deep snow falls. • Synthetic oil is a suitable alternative, but it does not extend service intervals. NOTE: MTD recommends the use of petroleum oil during the break in period to ensure the piston rings correctly break in. Synthetic vs. Petroleum based oil: To simply look at synthetic oil and to compare it with Petroleum based oil there is very little difference. However, when you look at the two through a microscope it is easy to see the difference. Synthetic is made up of smaller molecules. This allows the oil to get into areas that petroleum based oil cannot. 49 www.mymowerparts.com For Discount Cub Cadet Parts Call 606-678-9623 or 606-561-4983 P90 Series Vertical Shaft Engines Oil dipstick To check the oil: 1. Twist and remove the dipstick from the engine. 2. Clean the oil off of the tip of the dipstick. 3. Re-insert the dipstick and turn it until it is fully seated to get the oil level reading. See Figure 5.1. 4. The oil level is determined by the highest point on the dipstick that is completely covered with oil. Fully seat the dip stick before reading it Dipstick Figure 5.1 Dip stick tube removal To remove/replace the dip stick tube: 1. Remove the blower/air filter housing by following the procedures described in Chapter 3: Air Intake System. 2. Remove the screw that passes through the flexible clamp and the dipstick tube mounting flange using a 10 mm wrench. See Figure 5.2. 3. Rotate the tube until the mounting flange clears the flywheel. 4. Pull the dip stick tube out of the engine block. 5. Inspect the O-rings on the dip stick and the dip stick tube. Replace if damaged. 6. Install by following the above steps in reverse order. NOTE: Lubricate the O-rings for installation. Dipstick tube Flexible clamp Figure 5.2 NOTE: Keep extra O-rings on hand. It is very easy to shear the O-rings when installing the dipstick tube. NOTE: Compressing the O-rings while inserting the dipstick tube will help prevent shearing the O-rings. 50 www.mymowerparts.com For Discount Cub Cadet Parts Call 606-678-9623 or 606-561-4983 Lubrication Lubrication system Balance shaft The 4P90 engine uses a combination pressurized and splash lubrication system. There is an oil pump in the sump that is driven by the balance shaft. The oil is drawn into the pump through a pre-screen. The pump pushes the oil through a relief valve then into the oil filter. From the filter, the oil flows through a passage in the sump cover until it reaches the crankshaft PTO bearing. The oil passes through the PTO bearing and is forced into a passage in the crankshaft. The oil follows this passage to the crankshaft crankpin. It is forced out between the crankshaft and the connecting rod. Oil filter Dipper Oil pump Figure 5.3 The rest of the engine is lubricated by the oil mist created by the moving parts in the sump. The oil in the head drains back into the sump through a passage cast into the cylinder block. Testing the oil Pump To test the oil pump: Kohler oil pressure tester 1. Allow the engine to cool. 2. Connect an oil pressure tester to the engine. NOTE: There are two methods that can be used to connect an oil pressure tester: A. Kohler oil pressure test kit #25 761 06-S 1a. Remove the oil filter. 1b. Thread the oil pressure tester onto the oil filter nipple. See Figure 5.4. Figure 5.4 B. Connecting an oil gauge to the port in the sump cover. Adapter 1a. Remove the oil plug from behind the oil filter base using a 12mm wrench. 1b. Install an M8 x 1.25 male to 1/8” NPT female adapter on to the oil pressure gauge. NOTE: Mem-co part # ”M8 to 1/8 F” can be used. 1c. Thread hose and adapter from oil pressure gauge into the port hand tight. Figure 5.5 51 www.mymowerparts.com For Discount Cub Cadet Parts Call 606-678-9623 or 606-561-4983 P90 Series Vertical Shaft Engines 2. Check the oil level. NOTE: Top off the oil as needed with an SAE 10W30 oil with an SM API rating or better 3. Start the engine. 4. Let the engine run until the oil reaches operating tempurature 176° - 212° (80° - 100°C). 5. With the engine at 3,300 RPM, the oil pressure should reading be a minimum of 5 psi (0.3 bar). See Figure 5.6. NOTE: A reading below what is specified could be the result of: • Clogged oil screen • Failed oil pump • The oil pump gear failed • The pressure relief valve is stuck open. • Worn PTO bearing • Worn rod bearing • Engine is filled with the wrong oil. Figure 5.6 NOTE: The pressure relief valve is not accessible. If it fails, the sump cover must be replaced. • The ring gear on the balance shaft or the crankshaft (very rare). 52 www.mymowerparts.com For Discount Cub Cadet Parts Call 606-678-9623 or 606-561-4983 Lubrication Positive crankcase ventilation valve The PCV valve is located under the flywheel and allows the crankcase pressure to escape. The function and test procedures for the PCV is covered in Chapter 2: Basic Troubleshooting. To service the PCV: PCV cover 1. Remove the flywheel by following the steps described in the Chapter 7: Ignition System. 2. Remove the five screws that hold the PCV chamber cover to the engine block using a 10mm wrench. See Figure 5.7. 3. The cover and gasket can be separated from the chamber. See Figure 5.8. Figure 5.7 NOTE: The dimple in the cover helps locate the fiber disc over the port that leads into the crankcase. Fiber disc Spring Gasket Figure 5.8 Spring 4. Inspect the disc for any signs of dirt, damage or leaking. 5. Inspect the folded wire mesh in the chamber. See Figure 5.9. Fiber disc Wire mesh Figure 5.9 53 www.mymowerparts.com For Discount Cub Cadet Parts Call 606-678-9623 or 606-561-4983 P90 Series Vertical Shaft Engines 6. Inspect the oil drain-back port. Make sure it will allow oil to drain back into the engine. See Figure 5.10. 7. Reassemble the PCV valve. 8. Tighten the cover bolts to a torque of 53 - 71 in lbs (6 - 8Nm). Oil drain port Figure 5.10 9. Inspect the PCV tubing for cracks, brittleness or signs of leaking. Replace the PCV tube if any are found. See Figure 5.11. 10. Re-assemble the engine by following the above steps in reverse order. 11. Test run the engine before returning to service. PCV chamber cover PCV tubing Figure 5.11 54 www.mymowerparts.com For Discount Cub Cadet Parts Call 606-678-9623 or 606-561-4983 Starter and Charging System CHAPTER 6: STARTER AND CHARGING SYSTEMS Starter removal To remove/replace the starter assembly: Starter screws 1. Disconnect the negative battery cable. 2. Disconnect the starter cable using a 10 mm wrench. 3. Remove the two screws that secure the starter to the engine using a 12 mm wrench. See Figure 6.1. 4. Slide the starter off of the dowel pins, indicated by the arrows in Figure 6.2. 5. Install the starter by following the previous steps in reverse order. Starter cable Figure 6.1 NOTE: Tighten the starter screws to a torque of 16 - 18 ft lbs (22 - 25 Nm). 6. Test run the engine before returning it to service. Figure 6.2 55 www.mymowerparts.com For Discount Cub Cadet Parts Call 606-678-9623 or 606-561-4983 P90 Series Vertical Shaft Engines Bench testing the electric starter IMPORTANT: Always bench test an electric starter before condemning it. To bench test an electric starter: 1. Remove the starter by following the procedures described in the previous section of this chapter. 2. Mount the starter in a vise. NOTE: If the vise is tightened too tight, the starter can be crushed. 3. Negative lead Attach the negative lead of a 12 volt power source to the starter housing. NOTE: A battery charger set to the 12 volt/ 40 amp range or a fully charged battery and a pair of jumper cables can be used. Figure 6.3 4. Connect the positive lead to the cable stud on the starter. • The starter should spin fast enough for the bendix gear to slide out fully. If not, rebuild the starter. • If the starter does not spin, repair or replace the starter. Positive lead 56 www.mymowerparts.com For Discount Cub Cadet Parts Call 606-678-9623 or 606-561-4983 Starter and Charging System Rebuilding the starter The starter motor used on the 4P90 engine is a permanent magnet dc motor with a radial commutator, similar to what is found in a repulser start motor. A radial commutator means that the commutator plates are perpendicular to the axis of the rotor. Springs With this arrangement, the brushes and brush holder are mounted to the end cap and the rotor will ride on top of them. Brushes Figure 6.4 Starter motor disassembly: Stator housing 1. Remove the starter by following the procedures described in the starter removal section of this chapter. 2. Put alignment marks on the stator housing and the starter gear housing. 3. Put an alignment mark on the end cap and the stator housing. See Figure 6.5. NOTE: The starter will not work properly if the stator housing is put on upside down. Vary the alignment marks to prevent this. Figure 6.5 4. Remove the end cap using an 8 mm wrench. End cap Figure 6.6 57 www.mymowerparts.com For Discount Cub Cadet Parts Call 606-678-9623 or 606-561-4983 P90 Series Vertical Shaft Engines 5. Slide the stator housing off of the starter. 6. Pull the rotor out of the stator housing. NOTE: The rotor will be held to the stator by strong magnets. 7. Inspect the rotor for signs of wear or damage. 8. If the rotor is damaged, it may not be economically feasible to rebuild the starter. 9. Test the rotor: 9a. Set the DMM to measure resistance (Ω scale). 9b. Measure the resistance across all of the commutator plates. • 9c. • The reading should be less than 0.3 Ω. Rotor Commutator Figure 6.7 Test for continuity between the commutator and the rotor shaft. The reading should read open line, over limit or infinity depending on the meter used. NOTE: If there is continuity between the commutator and the rotor shaft, the rotor is shorted. If the rotor is shorted it may not be economically feasible to rebuild the starter. Figure 6.8 10. Remove the negative brushes by removing the two screws, indicated by the arrows in Figure 6.9., that secure them to the end cap using a #2 phillips screwdriver. 11. Remove the brush holder and springs. Figure 6.9 58 www.mymowerparts.com For Discount Cub Cadet Parts Call 606-678-9623 or 606-561-4983 Starter and Charging System Washers Nut 12. Remove the nut and washers from the cable stud using a 10 mm wrench. See Figure 6.10. 13. Remove the cable stud and the positive brushes. 14. Remove the insulator seal. Seal Figure 6.10 5/16” punch 15.Remove the bearing: 15a. Fill the bearing hole with grease. 15b. Insert a 5/16” pin punch. 15c. Tap the punch with a hammer to hydraulically press the bearing out of the end cap. NOTE: It may be necessary to add addition grease as the bearing is being pressed out. Figure 6.11 16. Remove the two screws, indicated by the arrows in Figure 6.12., from the underside of the starter gear housing using a #2 phillips screw driver. NOTE: The screws were installed with a high strength thread locking compound. It may be necessary to use a hand impact driver and/or heat to get the screws to release. Figure 6.12 59 www.mymowerparts.com For Discount Cub Cadet Parts Call 606-678-9623 or 606-561-4983 P90 Series Vertical Shaft Engines 17. Remove the screw, indicated by the arrow in Figure 6.13., from the topside of the starter gear housing using a #2 phillips screwdriver. Figure 6.13 18. Separate the starter gear housing. See Figure 6.14. 19. Remove the pinion gear. 20. Remove the bendix gear assembly. Bendix gear pinion gear Figure 6.14 21. Remove the bushing from the starter gear housing. See Figure 6.15. Screw extractor NOTE: A blind hole bearing puller with a 12mm arbor or a screw extractor can be used. Figure 6.15 60 www.mymowerparts.com For Discount Cub Cadet Parts Call 606-678-9623 or 606-561-4983 Starter and Charging System Screw extractor 22. Remove the bushing from the clutch/pinion cover. See Figure 6.16. NOTE: A blind hole bearing puller with a 11mm arbor or an screw extractor can be used. Figure 6.16 23. Drive the rotor upper bearing out of the clutch/pinion cover using a flat tipped punch. See Figure 6.17. rotor upper bearing Figure 6.17 61 www.mymowerparts.com For Discount Cub Cadet Parts Call 606-678-9623 or 606-561-4983 P90 Series Vertical Shaft Engines To re-assembly a starter motor: 1. Press the bushing into starter gear housing until there is 0.055” (1.4 mm) sticking out. See Figure 6.18. 0.055” Figure 6.18 2. Press the rotor’s upper bearing into the clutch/pinion cover until it is flush with the cover. See Figure 6.19. Bearing Figure 6.19 3. Press the bushing into the clutch/pinion cover until it is flush. See Figure 6.20. Bushing is flush with the casting Figure 6.20 62 www.mymowerparts.com For Discount Cub Cadet Parts Call 606-678-9623 or 606-561-4983 Starter and Charging System Clutch/pinion gear assembly 4. Insert the clutch/pinion gear assembly into the starter gear housing. See Figure 6.21. 5. Install the pinion gear. See Figure 6.22. 6. Mount the clutch/pinion cover to the starter gear housing. Figure 6.21 Pinion gear clutch/pinion cover Figure 6.22 NOTE: Apply a thread locking compound, such as Loctite® 262, to the threads of the screws before installing them. NOTE: The screw that lines up with the screw boss, indicated by the arrow in Figure 6.23., is shorter than the other two screws. Figure 6.23 63 www.mymowerparts.com For Discount Cub Cadet Parts Call 606-678-9623 or 606-561-4983 P90 Series Vertical Shaft Engines 7. Clean the carbon from the commutator. NOTE: A pencil eraser is very effective in cleaning commutators. See Figure 6.24. Figure 6.24 8. Rotor assembly Insert the splined end of the rotor into the starter gear housing. See Figure 6.25. Figure 6.25 9. Slide the stator housing over the rotor assembly. Keep fingers clear while sliding the stator housing over the rotor. The magnets inside the stator housing will draw the stator up against the starter gear housing with great force. ! CAUTION 10. Alignment marks Rotate the stator housing until the alignment marks (made before disassembly) line up. See Figure 6.26. Figure 6.26 64 www.mymowerparts.com For Discount Cub Cadet Parts Call 606-678-9623 or 606-561-4983 Starter and Charging System 11. Bushing is flush with casting Press a new bushing into the end cap until it is flush with the casting. See Figure 6.27. Figure 6.27 positive brushes/cable stud assembly 12. Insert the seal into the end cap from the inside. 13. Install the positive brushes/cable stud assembly. 14. Install the insulator washer. See Figure 6.28. 15. Install the flat washer against the insulator washer. 16. Install the lock washer. 17. Install the nut that retains the positive brushes/cable stud assembly. Seal Insulator washer Figure 6.28 Brush holder 18. Install the brush holder. 19. Insert the springs in the brush holder. 20. Install the negative brushes. NOTE: The screws that anchor the negative brushes also anchor the brush holder. See Figure 6.29. Negative brush Figure 6.29 65 www.mymowerparts.com For Discount Cub Cadet Parts Call 606-678-9623 or 606-561-4983 P90 Series Vertical Shaft Engines NOTE: A special tool will be needed to compress the brushes for assembly of the motor. See Figure 6.30. To make the tool: 1 5/8” A. Cut a piece of sheet metal approximately 0.040” thick (19 or 20 gauge). 5/8” 2” B. Cut a slot in the metal, 5/8” wide x 1 5/8” long. C. Buff and debur all edges of the tool. 4.5” Figure 6.30 21. Insert the brushes into the brush holder. This side faces down NOTE: The side of the brush with the copper wire faces down in the brush holder. Figure 6.31 NOTE: Insert the brushes one at a time. Sliding the tool made earlier over them to press and hold them in place. NOTE: It will take some force to compress all four springs at once. Figure 6.32 66 www.mymowerparts.com For Discount Cub Cadet Parts Call 606-678-9623 or 606-561-4983 Starter and Charging System 22. Set the starter motor onto the end cap while keeping the brushes compressed into the brush holder. See Figure 6.33. 23. Carefully slide the brush holding tool out of the starter. 24. Rotate the end cap to line up the alignment marks with the stator housing. NOTE: Keep the starter motor compressed together. 25. Install the two screws that secure the end cap to the starter motor. Figure 6.33 26. Bench test the starter before installing it on the engine. 67 www.mymowerparts.com For Discount Cub Cadet Parts Call 606-678-9623 or 606-561-4983 P90 Series Vertical Shaft Engines Charging system The charging system used on MTD engines consists of a dual output alternator and a rectifier/regulator. The charging system has a 5 amp AC output and a 3.75 amp DC output. The alternator consists of two parts; the rotor and the stator. • Alternator rotor: The rotor consists of five magnets on the inside of the flywheel that rotate around a stator that is mounted to the cylinder block. As the crankshaft and flywheel rotate, the moving magnets induce a charge in the stator. See Figure 6.34. Magnets Figure 6.34 • Alternator stator: The stator consists of copper field windings around an iron core. The stator is attached to the engine block beneath the flywheel. See Figure 6.35. Stator Figure 6.35 Rectifier/regulator • Rectifier/regulator: The rectifier is a set of four diodes that convert the AC current into DC current. The rectifier also has a regulator circuit built into it regulates the voltage to a specified range. See Figure 6.36. Figure 6.36 68 www.mymowerparts.com For Discount Cub Cadet Parts Call 606-678-9623 or 606-561-4983 Starter and Charging System Charging system testing To test the charging system: Engine harness connector 1. Locate the connection between the engine harness and the main harness of the machine. See Figure 6.37. 2. Start the engine and run it at full throttle. 3. Check the engine RPMs. NOTE: The engine must be at 3,300 RPMs to test the alternator output. Figure 6.37 Positive probe 4. Connect the black (-) lead of a digital multimeter to a good ground on the engine. 5. Set the multimeter to read AC voltage. 6. Back probe the orange wire in the charger harness with the red (+) lead of the multimeter. See Figure 6.38. 7. The multimeter should read a voltage of 11 - 20 Vac. NOTE: If the AC voltage is too low, remove the flywheel by following the procedures described in Chapter 7: Ignition System and check the internal magnets. If they are still magnetic, replace the stator. Figure 6.38 Purple wire 8. Set the multimeter read DC voltage. 9. Back probe the purple wire of the charger harness. See Figure 6.39. NOTE: Will be a different color on the equipment side of the harness connection. 10. The multimeter should read 13.75 - 15.5 Vdc. Figure 6.39 69 www.mymowerparts.com For Discount Cub Cadet Parts Call 606-678-9623 or 606-561-4983 P90 Series Vertical Shaft Engines 11. If the results do not match the specifications: 11a. Turn off the engine. 11b. Disconnect the regulator/rectifier. 11c. Start the engine again and run it at full throttle. 12. Set the multimeter to read AC voltage. 13. Connect the black (-) lead of a digital multimeter to a good ground on the engine. 14. Connect the red probe to one of the red wires from the stator harness. See Figure 6.40. NOTE: The meter should read 8.5 to 10 Vac. 15. Move the red probe to the other red wire. Figure 6.40 NOTE: The meter should read 8.5 to 10 Vac. NOTE: If the meter shows the proper readings, the regulator/rectifier is bad and needs to be replaced. NOTE: If the readings don’t match what is listed above, check the flywheel magnets. If the magnet are still magnetic, replace the stator. 70 www.mymowerparts.com For Discount Cub Cadet Parts Call 606-678-9623 or 606-561-4983 Starter and Charging System Stator To remove/replace the stator: 1. Remove and ground the spark plug wire. 2. Remove the flywheel by following the steps described in Chapter 7: Ignition System. 3. Remove the starter by following the procedures described in the starter section of this chapter. 4. Remove the two screws, indicated by the arrows in Figure 6.41., that secure the stator with a 10mm wrench. 5. Remove the two screws, indicated by the arrows in Figure 6.42., that hold the baffle to the engine block using a 10 mm wrench. 6. Slide the baffle off of the engine. 7. Disconnect the stator harness from the afterfire solenoid. 8. Disconnect the stator harness from the ignition module. 9. Disconnect the stator harness from the regulator/rectifer. Figure 6.41 10. Remove the stator assembly. Figure 6.42 Old style 11. Install the stator by following the above steps in reverse order. NOTE: Early production engines have a simple bullet connector between the stator and the afterfire solenoid (power lead). Current production engines have locking bullet connectors. The two connectors are not interchangeable. All new stators and afterfire solenoids sold as service parts will have the new connectors. See Figure 6.43. NOTE: All service replacement stators and afterfire solenoids will be shipped with an adaptor and an instruction sheet on how to use the adaptor, if needed. New style 12. Test run the engine in a safe area and retest the voltage output before returning to service. Figure 6.43 71 www.mymowerparts.com For Discount Cub Cadet Parts Call 606-678-9623 or 606-561-4983 P90 Series Vertical Shaft Engines Rotor Rotor failures are extremely rare. To check the rotor: • Confirm that the magnets are firmly attached to the flywheel. • Hold a screwdriver or a similar tool made of ferrous metal within a 1/4” of each magnet. • If the tool is drawn to the magnet, the rotor is good. Figure 6.44 Chapter 6: Specification Table Description Specification Flywheel nut 74 - 85 ft lbs (100 - 115Nm) Alternator stator screws 80 - 106 in lbs (9 - 12 Nm) Starter mounting screws 195 - 221 in lbs (9 - 12Nm) AC output 11 - 20 Vac @ 3,300 RPM DC output 13.75 - 15.5 Vdc @ 3,300 RPM Starter armature resistence <0.2Ω Alternator stator resistence 0.5 - 1.0Ω 72 www.mymowerparts.com For Discount Cub Cadet Parts Call 606-678-9623 or 606-561-4983 Ignition System CHAPTER 7: IGNITION SYSTEM Troubleshooting the ignition system The purpose of the ignition system is to provide a spark in the combustion chamber at the proper time to efficiently ignite the fuel/air mixture. The steps in troubleshooting the ignition system are: 1. Spark tester Examine the spark plug(s) by following the steps described in the spark plug section of this chapter. NOTE: It is convenient to check the compression when the spark plug is removed for examination. 2. Connect a spark tester between the spark plug wire and a good ground point on the engine. See Figure 7.1. NOTE: Do not connect the spark tester to the spark plug when testing for ignition. Never remove the spark plug and hold it against the cylinder head to test for spark. The fuel/air mix coming out of the spark plug hole will catch on fire. ! CAUTION Figure 7.1 NOTE: It only takes 1,000 volts to jump a 0.025” air gap in open atmosphere, it takes 10,000 volts to jump the same gap at 120 psi; therefore, an open air spark test is not valid. NOTE: The spark should be a minimum of 10 Kv (10,000 volts) at pull over speed. 3. Move the throttle lever to the full throttle position. 4. Turn the ignition key to the start position. If sparks can be seen in the spark tester, the ignition system is working. NOTE: If there are sparks present in the spark tester, install a known-good spark plug and prime test the engine. If the engine does not start, check the fly wheel key. If the fly wheel key is intact, the problem is not in the ignition system. Check the engine’s compression. 5. If no sparks or weak sparks are seen in the spark tester, check the module air gap. NOTE: If the module air gap is correct, further testing is required. 6. Unplug the wire that connects the ignition module primary windings to a ground for engine shut down (the connector is behind the dipstick tube). 7. Re-test for sparks. • If there are no sparks, the module is bad or the flywheel magnets have lost their magnetism (very rare). • If there are sparks, troubleshoot the electrical system of the equipment that the engine is mounted to. 73 www.mymowerparts.com For Discount Cub Cadet Parts Call 606-678-9623 or 606-561-4983 P90 Series Vertical Shaft Engines The module The coil in this ignition system is an inductive discharge magneto, contained in a single module. • The inductive discharge module has a two leg design. • The module is energized by the passing of a magnet mounted in the flywheel. • Ignition timing is set by the location of the flywheel in relation to the crankshaft. Proper timing is maintained by a steel key. Normal performance of the coil is to produce at least 10,000 volts at start-up speed. The presence or absence of strong spark, with the ignition switch disconnected, is generally enough to identify the ignition coil as good or bad. Resistance readings may help confirm the source of the failure, but are generally meaningless because they only measure a small part of the module. NOTE: No spark or a weak spark may be the result of an improper air gap. The air gap space should be 0.016”-0.024” (0.4 - 0.6mm). Simple spark-testers are readily available and inexpensive. Thexton Part # 404 is available from a variety of retailers, and similar tools are available from other manufacturers. See Figure 7.2. Instructions on back of package Figure 7.2 NOTE: If the complaint is that the engine quits running when it gets hot, the ignition module should be tested with the engine at normal operating temperature. NOTE: An in line spark tester can be used between the spark plug and the spark plug wire. Run the engine until it starts to quit and check the spark tester for sparks to determine if this is an ignition or carburetion issue. • At operating speed, the ignition should produce voltage approaching 12,000. • At start up speed (~ 600 RPM), voltage should be at least 10,000V. NOTE: The voltage required for a flash-over will vary with spark plug condition and gap. NOTE: Failure of the magnets in the flywheel is exceedingly rare. To test the magnets, simply hold an item made of ferrous metal roughly 1/4” (0.635cm) away from the magnets in the flywheel. It should be drawn to the flywheel. A wrench or screwdriver is suitable for this test. 74 www.mymowerparts.com For Discount Cub Cadet Parts Call 606-678-9623 or 606-561-4983 Ignition System Module removal Afterfire solenoid lead 1. Unplug the spark plug. 2. Remove the blower/air filter housing by following the steps procedures in Chapter 3: Air Intake System. 3. Disconnect the module wire that goes to the system harness. See Figure 7.3. 4. Remove the module using a 10 mm wrench. Module wire Figure 7.3 NOTE: The engine model number is on the module. When installing a new module, make sure the model numbers match. See Figure 7.4. Engine model number Figure 7.4 75 www.mymowerparts.com For Discount Cub Cadet Parts Call 606-678-9623 or 606-561-4983 P90 Series Vertical Shaft Engines Installing the module and setting the air gap NOTE: If just setting the air gap, loosen the module mounting screws first then follow the procedures described below. 1. Rotate the flywheel so that the magnets are away from where the module is mounted. 2. Install the module. Do not tighten the module screws. 3. Place a non-ferrous feeler gauge between the module and the flywheel. Plastic feeler gauge NOTE: The air gap should be 0.016” - 0.024” (0.40.6 mm). 4. Rotate the flywheel so that the magnets align with the legs of the module while holding the feeler gauge in place. See Figure 7.5. 5. Tighten the module mounting screws to a torque of 80 - 106 in-lbs (9 - 12 Nm). 6. Rotate the flywheel to remove the feeler gauge. 7. Connect the module lead to the system harness. 8. Connect the spark plug wire to the spark plug. 9. Install the blower/air filter housing. 10. Test run the engine before returning to service. Figure 7.5 76 www.mymowerparts.com For Discount Cub Cadet Parts Call 606-678-9623 or 606-561-4983 Ignition System Flywheel The flywheel holds the magnets. These magnets induce a field in the module which in turn produces a spark. It also controls the timing of the ignition system by controlling when the magnets are introduced to the module. A sheared flywheel key will throw off the ignition timing. Sheared keys are uncommon on MTD engines. If one is found, check the crankshaft and flywheel for damage. To Remove and/or inspect the flywheel and key: 1. Remove the blower/air filter housing by following the steps procedures in Chapter 3: Air Intake System. 2. Remove the ignition module by following the procedures described in the module section of this chapter. 3. Block the piston to prevent the crankshaft from turning by: Harmonic balance puller 3a. Remove the spark plug. 3b. Insert approximately 3.3’ (1 m) of starter rope in the spark plug hole. NOTE: Leave part of the rope sticking out of the engine so that the rope can be removed later. - or 3c. Figure 7.6 4. Use a strap wrench to hold the flywheel. Remove the flywheel nut, using a 23mm wrench. NOTE: The three screws needed for the puller are 6mm x 1.0, 60mm in length or longer depending on the puller used. 5. Remove the flywheel by using a harmonic balancer puller. See Figure 7.6. NOTE: It is not necessary to remove the plastic fan and support washer to install the puller. NOTE: Never strike the crankshaft with a hammer. ! CAUTION 6. If the flywheel shows any signs of physical damage such as cracks, broken vanes (if equipped), or a damaged keyway, replace it. A damaged flywheel poses a threat of a burst failure. Burst failures are extremely hazardous to surrounding people and property. Inspect the key, keyway, and tapered mating surfaces of the flywheel and crankshaft. NOTE: If the key is damaged, the crankshaft must be replaced. NOTE: On installation, confirm that the key is properly seated (the flat of the key parallel with the threaded section of the crankshaft) in the keyway, and that the tapers are fully seated. Key or keyway failure may result from improper seating. IMPORTANT: The tapers in flywheel and on the crankshaft must be clean and dry. The flywheel is held in place by the friction between the flywheel and the crankshaft, not the key. The key is only to guide the flywheel to the proper position until it is torqued down. 7. Install the flywheel nut to a torque of 81 - 85 ft-lbs (110 - 115 Nm). 8. Install the module by following the procedures described in the module section of this chapter. 9. Reassemble the engine. 10. Test run the engine before returning to service. 77 www.mymowerparts.com For Discount Cub Cadet Parts Call 606-678-9623 or 606-561-4983 P90 Series Vertical Shaft Engines Spark plug • The spark plug is a F6RTC, part #951-10292, gapped to 0.024” - 0.031” (0.6 - 0.8 mm). • Wear rate will vary somewhat with severity of use. If the edges of the center electrode are rounded-off, or any other apparent wear / damage occurs, replace the spark plug before operating failure (no start) occurs. Cleaning the spark plug • Cleaning the spark plug is not recommended. If the plug needs to be cleaned, replace it. • Use of a wire brush may leave metal deposits on the insulator that cause the spark plug to short-out and fail to spark. • Use of abrasive blast for cleaning may damage the ceramic insulator or leave blast media in the recesses of the spark plug. When the media comes loose during engine operation, severe and non-warrantable engine damage may result. Inspection of the spark plug Inspection of the spark plug can provide indications of the operating condition of the engine. • Light tan colored deposits on insulator and electrodes is normal. • Dry, black deposits on the insulator and electrodes indicate an over-rich fuel / air mixture (too much fuel or not enough air) • Wet, black deposits on the insulator and electrodes indicate the presence of oil in the combustion chamber. • Heat damage (melted electrodes / cracked insulator / metal transfer deposits) may indicate detonation. • A spark plug that is wet with fuel indicates that fuel is present in the combustion chamber, but it is not being ignited. Spark plug removal 1. Disconnect and ground the spark plug wire. See Figure 7.7. 2. Remove the spark plug using a 13/16” or 21mm wrench. 3. Gap a new spark plug to 0.024” - 0.031” (0.6 - 0.8 mm). 4. Install the new spark plug and tighten to a torque of 15 - 18 ft - lbs (20 - 25 Nm). Spark plug wire Figure 7.7 78 www.mymowerparts.com For Discount Cub Cadet Parts Call 606-678-9623 or 606-561-4983 Exhaust CHAPTER 8: EXHAUST The exhaust system is a frequently overlooked component of an engine. It is important to make sure the muffler is in good condition and free of debris and/or insects. NOTE: A blocked muffler will result in poor performance. If a muffler is completely blocked, the engine may not start. Spark arrestor (if equipped) A spark arrestor, part #951-12329, is available as an option. NOTE: Spark arrestors are an option that are required on all engines used in California and U.S. national parks. See Figure 8.1. The spark arrestor also serves to keep blockages out of the exhaust system. NOTE: Typical blockages include insect nests built during the dormant season. Spark arrestor The spark arrestor should be checked and/or cleaned every month. The spark arrestor can be inspected by shining a flash light into the muffler. See Figure 8.1. Figure 8.1 If the spark arrestor needs to be cleaned or replaced: 1. Allow the engine to cool. 2. Remove the four screws, indicated by the arrows in Figure 8.2. that retain the muffler shield using a 10mm wrench and lift it off of the engine. 3. Lift the muffler shield off of the engine. 4. Remove the spark arrestor retaining screw using a #2 phillips screwdriver. 5. Pull the spark arrestor out of the muffler. 6. The spark arrestor can be: • Replaced • Cleaned by mechanical means Figure 8.2 • Solvent cleaned • Burned clean using a butane or propane torch. 7. Install the spark arrestor by following steps 1-3 in reverse order. 79 www.mymowerparts.com For Discount Cub Cadet Parts Call 606-678-9623 or 606-561-4983 P90 Series Vertical Shaft Engines Muffler removal/replacement 1. Remove the four screws, indicated by the arrows in Figure 8.2. that retain the muffler shield using a 10mm wrench and lift it off of the engine. 2. Lift the muffler shield off of the engine. Figure 8.3 3. Remove the screw, indicated by the arrow in Figure 8.4. that secures the rear of the muffler to the engine block using a 10mm wrench. Figure 8.4 4. Remove the two nuts that hold the manifold pipe to the cylinder head using a 13mm wrench. See Figure 8.4. 5. Slide the muffler and manifold pipe off of the engine. NOTE: The muffler and the manifold pipe are serviced as one assembly on the 4P90 service of engines. Manifold pipe Figure 8.5 80 www.mymowerparts.com For Discount Cub Cadet Parts Call 606-678-9623 or 606-561-4983 Exhaust 6. Clean all of the gasket material off of the cylinder head and the muffler. See Figure 8.6. NOTE: The MTD engine uses a graphite exhaust gasket. It is not reusable and must be replaced every time the muffler nuts are loosened. NOTE: The graphite exhaust gasket transfers heat from the cylinder head to the muffler. The heat transfer helps to keep the engine operating temperature under control. Do not substitute an exhaust gasket made from another material. 7. Remove all gasket material Figure 8.6 Install the muffler by following the previous steps in reverse order. NOTE: Tighten the manifold nuts to a torque of 22 - 26 ftlbs (30 - 35 Nm). 8. Test run the engine before returning to service. 81 www.mymowerparts.com For Discount Cub Cadet Parts Call 606-678-9623 or 606-561-4983 P90 Series Vertical Shaft Engines Catalytic converter On engines equipped with a catalytic converter muffler, there is an air injector assembly on the cylinder head, as show in Figure 8.7. There is a passage from the air injector to the exhaust port. When the exhaust valve is open the gases inside the engine escape to the muffler at great velocity. The pressure of the exhaust gases will close the reed valve in the air injector, preventing them from escaping through the injector. The exhaust gases are forced through the catalyst, which will chemically change the gases to lower the emissions. When the exhaust valve closes, the momentum of the gases keep them flowing out of the muffler. This will create a low pressure in the exhaust port. The low pressure will cause fresh air to be drawn in through the air injector. The fresh air is needed to re-charge the catalyst for the next exhaust cycle. Air injector Figure 8.7 NOTE: The catalytic converter is part of the muffler and can not be serviced separately. To service the air injector: NOTE: The air injector red valve can become plugged up from dirt, grass, insects and many other things. This would prevent fresh air from getting to the converter. 1. Remove the two screws that hold reed valve assembly to the cylinder head using a #2 phillips screwdriver. See Figure 8.7. 2. Clean the reed valve as needed. 3. Install the reed valve. 4. Test run the engine before returning it to service. 82 www.mymowerparts.com For Discount Cub Cadet Parts Call 606-678-9623 or 606-561-4983 Cylinder head CHAPTER 9: CYLINDER HEAD Cylinder head removal The Cylinder head of the MTD engine can be removed without removing the engine from the piece of equipment. To remove the cylinder head: 1. Disconnect and ground the spark plug high tension lead. 2. Remove the blower/air filter housing, carburetor and insulator plate by following the steps described in Chapter 3: Air Intake System. NOTE: The fuel line and the linkages can be left attached to the carburetor. NOTE: If the fuel line is disconnected from the carburetor, the line must be discarded and new fuel line used when the carburetor is installed. Figure 9.1 Ground lead 3. Disconnect the afterfire solenoid’s ground lead using an 8 mm wrench. See Figure 9.2. 4. Remove the screw that attaches the baffle to the bottom of the head using an 8 mm wrench. 5. Remove the muffler and heat shield by following the steps described in Chapter 8: Exhaust. Figure 9.2 83 www.mymowerparts.com For Discount Cub Cadet Parts Call 606-678-9623 or 606-561-4983 P90 Series Vertical Shaft Engines 6. Remove the two screws, indicated by the arrows in Figure 9.3, that secure the baffle to the cylinder using an 8 mm wrench. 7. Remove the baffle. Figure 9.3 8. Remove the spark plug using a 13/16” or 21mm wrench. 9. Rotate the crankshaft until it is at TDC of the compression stroke by following the steps described in the valve lash section of Chapter 1: Introduction. 10. Remove the four screws securing the valve cover using a 10mm wrench. See Figure 9.4. Valve cover Figure 9.4 11. Loosen the jam nuts and fulcrum nuts that secure the rocker arms using a 10mm wrench and a 14mm wrench. 12. Pivot the rocker arms aside, or remove them completely, and remove the push rods. NOTE: Once broken-in, the rocker arm should be kept with its corresponding valve. NOTE: The intake and exhaust push rods are identical and interchangeable. It is preferable, but not absolutely necessary, to return the same push rods to their original locations on engine with substantial (>100 hours) operating time. 13. Remove the head bolts using a 14 mm wrench. Jam nut Fulcrum nut Figure 9.5 84 www.mymowerparts.com For Discount Cub Cadet Parts Call 606-678-9623 or 606-561-4983 Cylinder head Sealing surface 14. Lift the cylinder head off of the engine. 15. Carefully clean all sealing surfaces of all gasket residue. Do not scratch the sealing surfaces. See Figure 9.6. surface NOTE: If replacing the head, double-nut and remove the exhaust studs. NOTE: Make a visual inspection of the valves and cylinder bore to confirm the initial diagnosis. Figure 9.6 85 www.mymowerparts.com For Discount Cub Cadet Parts Call 606-678-9623 or 606-561-4983 P90 Series Vertical Shaft Engines Cylinder head installation 1. Place a new head gasket on the cylinder, allowing the alignment dowels to hold it in place. See Figure 9.7. NOTE: The 4P90 series of engines use a metal head gasket with rubber seals. Dowel pins Figure 9.7 2. Position the cylinder head on the engine block. 3. Install the 4 head bolts, and tighten them to a step torque of 41 - 44 ft lbs. (55 - 60 Nm) in an alternating diagonal pattern. See Figure 9.8. 3 1 NOTE: The bolt closest to the exhaust valve must be the last bolt tightened. Failure to do so can result in the head bolt loosening up. 4 NOTE: The head bolts have a self locking thread form. 2 Exhaust port 4. Insert the push rods. 5. Install the rocker arms. 6. Adjust the valve lash by following the steps described in Chapter 1: Introduction. 7. Install the baffle. 8. Install the muffler by following the steps described in Chapter 8: Exhaust. 9. Install the carburetor and engine shroud, using new gaskets, by following the steps described in Chapter 3: Air Intake 10. Test run the equipment in a safe area before returning it to service. Check all safety features. Figure 9.8 86 www.mymowerparts.com For Discount Cub Cadet Parts Call 606-678-9623 or 606-561-4983 Cylinder head Valves The valves and valve seats can be serviced by grinding and lapping or the head can be replaced. Depending on local machine and labor costs, it is probably more economical to replace the cylinder head versus servicing the valves. To service the valves: Valve adjusters NOTE: Servicing valves during the warranty period will void the warranty. Warranty valve repairs are to be accomplished by replacing the cylinder head. 1. Remove the cylinder head by following the steps described earlier in this chapter. 2. Remove the rocker arms by: 3. Figure 9.9 Remove the jam nuts. 2b. Remove the fulcrum nut. 2c. Slide the rocker arms off of the rocker studs. Remove the valve adjusters. See Figure 9.9. NOTE: It may be necessary to press down on the valve retainers to unseat the adjusters. 4. Valve keeper 2a. Remove the valve retainers by applying light finger pressure and moving the retainer so that the valve stem passes through the large part of the “keyhole” opening in the retainer. See Figure 9.10. NOTE: The valve keepers are not interchangeable. NOTE: If the engine has a dropped valve, remove the cylinder head, inspect the valve and the piston for damage. Figure 9.10 87 www.mymowerparts.com For Discount Cub Cadet Parts Call 606-678-9623 or 606-561-4983 P90 Series Vertical Shaft Engines 5. Lift the springs off of the valve stems. 6. Slide the valves out of the cylinder head. NOTE: Only the intake valve has a valve guide seal. See Figure 9.11. Seal Figure 9.11 7. Inspect the valve seat. See Figure 9.12. • Valve seats are 45 degrees, with a 25 degree topping cut and a 60 degree narrowing cut. • Seat width should be 0.028” - 0.035” (0.7 0.9mm) with a margin of 0.049” - 0.061 (1.25 1.55 mm) on the exhaust valve and 0.027” (1mm) on the intake valve. 0.028 - 0.035” NOTE: The valve seat can be ground to clean it up as long as the finished seat is within the tolerances listed above. Seat angle is 45o margin Seat contact Figure 9.12 8. Inspect the valve stem. See Figure 9.13. 9. Inspect the valve springs. NOTE: Valve spring free length should be at least 1.2” (30.5mm). Original length is 1.54” (39mm). 10. Install the valves in the cylinder head by following steps 2 - 5 in reverse order. 45o Inspect for a burnt edge Figure 9.13 88 www.mymowerparts.com For Discount Cub Cadet Parts Call 606-678-9623 or 606-561-4983 Cylinder head 11. Test the valves for leaks by: 11a. Place the cylinder head on a couple of wood blocks with the valves facing up. 11b. Pour a small amount of gasoline or parts cleaning solvent into the combustion chamber (just enough to cover the valves). 11c. Let the cylinder head sit for ten minutes. 11d. Check for gasoline leaking out of the intake and exhaust ports. 12. Install the cylinder head by following the steps described earlier in this chapter. 13. Set the valve lash by following the steps described in Chapter 1: Introduction. 14. Test run the engine in a safe area before returning it to service. Check all safety features. 89 www.mymowerparts.com For Discount Cub Cadet Parts Call 606-678-9623 or 606-561-4983 P90 Series Vertical Shaft Engines Push rod guide plate The push rods move through a guide plate that aligns the push rods with the rocker arms. The guide plate also acts as a bushing for the push rods. Over time, the guide plate will wear out and need to be replaced. NOTE: A guide plate that is worn out can allow the push rod to slip out from under the rocker arm. When that happens, the push rod will side load the rocker arm, breaking the rocker arm stud. To service the push rod guide plate: 1. Remove the valve cover. 2. Disconnect and ground the spark plug wire. 3. Remove the spark plug. 4. Rotate the engine to TDC of the compression stroke. See Figure 9.14. 5. Remove the rocker arm jam nuts using a 10 mm wrench while holding the fulcrum nuts with a 14 mm wrench. 6. Remove the fulcrum nuts and the rocker arms. 7. Remove the push rods. Fulcrum nit Probe for TDC Figure 9.14 8. Remove the rocker arm studs and the guide plate using a 14mm wrench 9. install the guide plate by following the previous steps in reverse order. NOTE: Tighten the rocker studs to a torque of 195 221 in lbs (22 - 25 Nm). 10. Adjust the valve lash by following the procedures described in Chapter 1: Introduction. 11. Test run the equipment in a safe area before returning it to service. Figure 9.15 90 www.mymowerparts.com Jam nut For Discount Cub Cadet Parts Call 606-678-9623 or 606-561-4983 Crankshaft, piston and connecting rod CHAPTER 10: CRANKSHAFT, PISTON AND CONNECTING ROD The exact procedure a technician uses to disassemble an engine depends on the type of repairs needed. This chapter is written as a set of procedures that should provide the user with sufficient information to complete any feasible repair to the engine short block assembly. The instructions are written with the assumption that the engine has been removed from the equipment. These are bench work instructions.. 1. Drain and save the oil from the engine by following the steps described in Chapter 1: Introduction. 2. Remove the blower/air filter housing and carburetor by following the steps described in Chapter 3: Air Intake System. 3. Remove the starter by following the steps described in Chapter 6: Starter and Charging System. 4. Remove the flywheel and ignition module by following the steps described in Chapter 7: Ignition system. 5. Remove the muffler by following the steps described in Chapter 8: Exhaust. 6. Remove the cylinder head by following the steps described in Chapter 9: Cylinder Head. 7. Remove the dipstick tube. 8. Remove the crank case cover bolts using a 12mm wrench. 9. Carefully slide the crank case cover off of the crank shaft. 10. Remove the thrust washer. See Figure 10.1. Thrust washer Figure 10.1 91 www.mymowerparts.com For Discount Cub Cadet Parts Call 606-678-9623 or 606-561-4983 P90 Series Vertical Shaft Engines 11. Align the timing marks on the cam and the crankshaft to allow easier removal of the cam and to help protect the compression relief from damage. See Figure 10.2. NOTE: The timing marks were filled in with red paint for the picture. 12. Remove the camshaft. Timing marks Figure 10.2 13. Remove the balance shaft. See Figure 10.3. Remove the balance shaft Cam shaft Compression relief Figure 10.3 NOTE: The valve tappets should be kept riding against their original lobes. Once broken in, switching the tappets to run on different cam lobes will cause rapid tappet and cam wear. 14. Remove the valve tappets. See Figure 10.4. Valve tappets Figure 10.4 92 www.mymowerparts.com For Discount Cub Cadet Parts Call 606-678-9623 or 606-561-4983 Crankshaft, piston and connecting rod 15. Match mark the connecting rod and cap. 16. Remove the connecting rod cap using a 10mm wrench. See Figure 10.5. NOTE: Rotating the crank shaft after the connecting rod bolts are removed will help to separate the connecting rod from the cap. Remove the connecting rod bolts Figure 10.5 17. Push the piston out of the cylinder. Remove one of the piston pin retainers NOTE: Sometimes a ridge of carbon builds up where the cylinder meets the head. If this happens, the piston can be removed from inside of the cylinder block. 18. Remove one of the piston pin retaining rings. See Figure 10.6. 19. Remove the piston pin. Figure 10.6 20. Remove the piston rings from the piston using a pair of piston ring pliers. See Figure 10.7. NOTE: The piston, rings and connecting rod are currently not available as service parts. If they are damaged or worn, the engine must be short blocked. 21. Remove the crankshaft. Piston ring pliers NOTE: The crankshaft bearings are pressed onto the crankshaft and will come out with it. Figure 10.7 93 www.mymowerparts.com For Discount Cub Cadet Parts Call 606-678-9623 or 606-561-4983 P90 Series Vertical Shaft Engines Crankshaft inspection 1. Inspect the crankshaft journals and the crank pin for galling, scoring, pitting or any other form of damage. NOTE: This is mostly a visual check. Measurement is to determine if it is within the specifications after it is found to be OK visually. NOTE: The crankshaft and bearing are serviced as one assembly. 2. Measure the crank pin where the connecting rod attaches to the crankshaft using a vernier caliper or a micrometer. See Figure 10.8. NOTE: Micrometers are the preferred way to measure the journals. Measure the center and the ends to check for tapering or egging. 3. Crank pin micrometer Figure 10.8 Check the crankshaft for straightness by measuring the run out. The crankshaft run out can be checked by: 3a. Place the crankshaft on a pair of matched V-blocks or in the engine block with the sump installed. 3b. Place a dial indicator at a smooth point at either end of the crank shaft. 3c. Slowly turn the crank shaft while watching the dial indicator. NOTE: Stop the crank shaft before the dial indicator hits the keyway. 3d. Compare the reading on the dial indicator to the specification listed at the end of this chapter. 3e. Repeat the above steps on the other end of the crank shaft. 94 www.mymowerparts.com For Discount Cub Cadet Parts Call 606-678-9623 or 606-561-4983 Crankshaft, piston and connecting rod Piston Inspection 1. Clean the piston and remove all carbon from the rings and ring groves. 2. Clean the cylinder bore and remove all carbon. 3. Insert one ring into the cylinder. Push it down about one inch from the top. See Figure 10.9. 4. Measure the end gap with a feeler gauge and compare to the chart at the end of this chapter. See Figure 10.9. 5. Repeat steps 3 and 4 on the other rings. Piston ring Feeler gauge Figure 10.9 Top piston ring NOTE: Piston rings are not available as service parts. If any of the end gaps are out of spec, the engine must be short blocked. 6. Install rings back onto the piston. NOTE: The compression rings on the MTD engine have different profiles. It is important that the proper profiled ring is on the right groove. See Figure 10.10. Middle piston ring 3-piece oil ring Figure 10.10 NOTE: To help identify the top surface of the piston rings, They have letter(s) etched on them. See Figure 10.11. Top ring Middle ring Figure 10.11 95 www.mymowerparts.com For Discount Cub Cadet Parts Call 606-678-9623 or 606-561-4983 P90 Series Vertical Shaft Engines 7. Measure the gap between the ring and the ring land using a feeler gauge and compare the measurement to the chart at the end of this chapter. See Figure 10.12. Feeler gauge Figure 10.12 8. Measure the piston pin bore on both sides of the piston using telescoping gauges or vernier caliper. See Figure 10.13. NOTE: Measurements should be taken at right angles to check the roundness of the holes. Piston pin bore Figure 10.13 9. Measure the piston pin at the center and the ends using a micrometer or a vernier caliper. See Figure 10.14. Figure 10.14 96 www.mymowerparts.com For Discount Cub Cadet Parts Call 606-678-9623 or 606-561-4983 Crankshaft, piston and connecting rod Connecting rod inspection Measure at right angles Measure at right angles 1. Inspect the connecting rod for cracks or any signs of damage. 2. Install the rod cap and tighten to a torque of 177 - 212 in-lbs (20 - 24 Nm). 3. Measure the inside diameter of the connecting rod at both ends and compare the measurements to those listed in the chart at the end of this chapter. See Figure 10.15. NOTE: Take two measurements 90 degrees apart. This will check the roundness of the connecting rod bearing surfaces. Figure 10.15 4. NOTE: Connecting rods are not available as service parts. If the connecting rod is bad, the engine must be short blocked. Take the crank pin and piston pin measurements and subtract them from the connecting rod measurements to get the connecting rod to journal running clearance and the piston pin to connecting rod running clearance. Compare that number to the one listed in the chart at the end of this chapter. NOTE: Plasti-gauge can be used to measure the connecting rod to journal running clearance, but it is very technique sensitive and it is not as reliable as the method described above. Cylinder inspection Measure the cylinder bore 1. Clean and inspect the cylinder, inside and out. NOTE: If there is any sign of damage, especially cracked cooling fins, short block the engine. NOTE: Take two measurements of the cylinder bore 90 degrees apart at the top, bottom and middle of the cylinder. See Figure 10.16. NOTE: The measurements can be made using telescoping gauges, inside micrometers or dial indicating bore gauge. 2. Compare the measurements to those that are listed in the chart at the end of the chapter. • The bore should not be worn too large Figure 10.16 • The bore should not be tapered. • The bore should be round, not oval shaped. 3. Inspect the cylinder cross hatch. NOTE: The cross hatch is important because it helps hold oil on the cylinder walls. NOTE: If the cross hatch is polished off, that is a sign of dirt ingestion. The cylinder can not be re-honed because replacement piston rings are not available. The engine must be short blocked. 97 www.mymowerparts.com For Discount Cub Cadet Parts Call 606-678-9623 or 606-561-4983 P90 Series Vertical Shaft Engines Balance Shaft There are two primary motions that generate most of the vibrations in single-cylinder engines; the rotation of the crankshaft, and the reciprocating motion of the piston. See Figure 10.17. Piston travel Connecting rod Crankshaft travel Figure 10.17 Rotating mass The connecting rod translates the linear motion of the piston to the rotating motion of the crankshaft. Two-thirds of its mass can be attributed to rotating motion, and onethird of its mass can be attributed to reciprocating motion. See Figure 10.18. If you balance the rotational mass perfectly by adding weight to the crankshaft counter-weights, there will still be a large force generated by the reciprocating masses (the piston, piston pin and one-third of the connecting rod). The crankshafts on MTD engines are not balanced. Extra weight is added to the crankshaft counter-weight to reduce the total reciprocating and rotational forces. This causes the engine to shake side to side (perpendicular to the crankshaft), but reduces overall vibrations. counter-weight Reciprocating mass Figure 10.18 Piston’s axis of movement As an extra feature, the 4P90 series engines come with a balance shaft. The balance shaft further reduces side to side shaking forces by having an eccentric weight attached to it. The shaft is geared to the crankshaft and rotates at the same speed as the crankshaft, but in the opposite direction. The eccentric weight helps counter act the shaking forces as well as dynamically balances the crankshaft. See Figure 10.19. NOTE: The timing of the balance shaft to the crankshaft will be covered in the Reassembly section of this chapter. Balance shaft Figure 10.19 98 www.mymowerparts.com For Discount Cub Cadet Parts Call 606-678-9623 or 606-561-4983 Crankshaft, piston and connecting rod Reassembly 1. Clean the cylinder 1a. Remove all gasket material from all mating surfaces. 1b. Clean the cylinder and crank case cover. 2. Oil seals 2a. Install a new oil seal in the cylinder block. 2b. Install a new seal in the crank case cover. 3. Insert the crankshaft and bearing into the cylinder block. NOTE: Pre-lube the crankshaft with clean 10W-30 motor oil. NOTE: Use an old piece of microfiche or a seal protector to protect the oil seal lip while inserting the crank shaft. 4. Install the piston by: NOTE: If the piston and connecting rod were separated, reconnect them so that the arrow on the piston head points to the hole in the connecting rod. See Figure 10.20. Hole Arrow 4a. Compress the piston rings using a piston ring compressor. 4b. Pre-lube the cylinder wall with clean 10W-30 motor oil 4c. Slide the connecting rod and piston into the cylinder. NOTE: The arrow on the piston must point towards the push rod cavity. Figure 10.20 4d. Tap piston with hammer handle Figure 10.21 Tap the piston through the ring compressor into the cylinder using a wooden hammer handle. See Figure 10.21. NOTE: Make sure the crank pin is at BDC (bottom dead center) to prevent damage from the connecting rod. 4e. Pre-lube the connecting rod with clean 10W-30 motor oil 4f. Apply a small amount of releasable thread locking compound such as Loctite® 242 (blue) to the connecting rod bolts. 4g. Install the connecting rod cap. Tighten the cap bolts to a torque of 177 - 212 in-lbs (20 - 24 Nm). NOTE: The connecting rod and the rod cap should have alignment marks so that the cap will be properly orientated to the rod. 99 www.mymowerparts.com For Discount Cub Cadet Parts Call 606-678-9623 or 606-561-4983 P90 Series Vertical Shaft Engines 5. Install the balance shaft by: 5a. Pre-lube the balance shaft with clean 10W-30 motor oil 5b. Rotate the crankshaft until the timing mark on the larger gear points to the 7:30 position. 5c. Insert the balance shaft, aligning the timing marks. See Figure 10.22. Timing marks NOTE: The timing marks were marked with red paint for the picture. 6. Install the valve tappets. 7. Install the cam shaft by: 7a. Pre-lube the cam shaft with clean 10W-30 motor oil 7b. Rotate the crank shaft until the timing mark points to the tappets. 7c. Insert the cam shaft, aligning the timing marks. See Figure 10.23. 8. Place a new gasket on the crankcase cover, let the alignment dowels hold it in place. 9. Using a seal protector, slide the crankcase cover on to the crank shaft. 10. Gently rock the crank case cover while rotating the crankshaft until it seats fully against the cylinder block. 11. Install the crankcase cover bolts and tighten to a torque of 80 - 106 in-lbs (9 - 12 Nm). NOTE: Use a star torque pattern to tighten the cover bolts. Figure 10.22 Timing marks Figure 10.23 12. Install the cylinder head by following the steps described in Chapter 9: Cylinder head. 13. Install the muffler by following the steps described in Chapter 8: Exhaust. 14. Install the carburetor by following the steps described in Chapter 3: Air Intake and Filters. 15. Install the dipstick and tube. 16. Install the flywheel and module by following the steps described in Chapter 7: Ignition system. 17. Install the starter by following the steps described in Chapter 6: Starter and Charging Systems. 18. Install the blower/air filter housing by following the procedures described in Chapter 3: Air Intake and Filters. 19. Install the engine on the application by following the steps described in the application’s service manual. 20. Install the spark plug by following the steps described in Chapter 7: Ignition system. 21. Fill the engine with oil and fuel by following the steps described in Chapter 1: Introduction. 22. Test run the engine in a safe area and make any carburetor and governor adjustments needed. 100 www.mymowerparts.com For Discount Cub Cadet Parts Call 606-678-9623 or 606-561-4983 Crankshaft, piston and connecting rod Engine specifications chart Specification Minimum Maximum in mm in mm in mm Bore 3.544” 90.01 3.544” 90.02 3.553” 90.25 Cylindricity 0.000” 0.000 0.000” 0.008 0.000” 0.008 Cylinder taper 0.000” 0.000 0.000” 0.000 0.000” 0.000 Displacement Service Limit 25.6 cu. in (420 cc) Crankshaft journal OD (flywheel end) 1.375” 34.94 1.377” 34.98 1.369” 34.77 Crankshaft journal OD (flywheel end) 1.377” 34.98 1.378” 34.99 1.370” 34.81 Crank pin diameter 1.417” 35.98 1.417” 35.99 1.414” 35.91 Connecting rod max. ID (crank side) 1.418” 36.02 1.418” 36.03 1.420” 36.07 Connecting rod to crank pin running clearance 0.001” 0.03 0.002” 0.05 0.003” 0.08 Connecting rod to crank pin side clearance 0.122” 3.10 0.157” 4.00 0.300” 7.62 Crankshaft run out 0.000” 0.00 0.001” 0.03 0.001” 0.03 Crankshaft end play 0.004” 0.10 0.018” 0.45 0.018” 0.45 Crankshaft bearing cavity (cylinder block) 2.835” 72.00 2.835” 72.02 2.861” 72.67 Crankshaft bearing ID (sump) 1.379” 35.03 1.380” 35.06 1.393” 35.37 Cam shaft OD (cylinder block) 0.636” 16.17 0.637” 16.18 0.633” 16.09 Cam shaft OD (sump side) 0.636” 16.17 0.637” 16.18 0.633” 16.09 Cam shaft bearing ID (cylinder block) 0.638” 16.20 0.639” 16.22 0.640” 16.25 Cam shaft bearing ID (sump) 0.638” 16.20 0.639” 16.22 0.640” 16.25 Intake lobe overall height 0.768” 19.51 0.774” 19.67 0.761 19.33 Exhaust lobe overall height 0.748” 18.99 0.754” 19.15 0.741” 18.82 Balance shaft OD (cylinder block) 0.589” 14.97 0.590” 14.98 0.587” 14.90 Balance shaft OD (sump) 0.589” 14.97 0.590” 14.98 0.587” 14.90 Balance shaft bearing cavity (cylinder block) 1.376” 34.96 1.377” 34.99 1.377” 34.99 Balance shaft bearing ID (sump) 0.589” 14.97 0.590” 14.98 0.587” 14.90 101 www.mymowerparts.com For Discount Cub Cadet Parts Call 606-678-9623 or 606-561-4983 P90 Series Vertical Shaft Engines Specification Minimum Maximum Service Limit Compression ring end gap 0.008” 0.20 0.016” 0.40 0.039” 1.00 Scraper (second) ring end gap 0.008” 0.20 0.016” 0.40 0.039” 1.00 Compression ring to land clearance 0.001” 0.02 0.002” 0.06 0.008” 0.20 Scraper (second) ring to land clearance 0.001” 0.02 0.002” 0.06 0.008” 0.20 Intake valve lash 0.004” 0.10 0.006” 0.15 Exhaust valve lash 0.006” 0.15 0.008” 0.20 spark plug gap 0.024” 0.60 0.031” 0.80 Module air gap 0.016” 0.40 0.024” 0.60 102 www.mymowerparts.com For Discount Cub Cadet Parts Call 606-678-9623 or 606-561-4983 Crankshaft, piston and connecting rod Engine torque values chart Fastener in lbs Nm Blower housing studs 80 - 106 9 - 12 Breather cover 53 - 71 6-8 Carburetor drain bolt 49 - 80 5.5 - 9 Carburetor mounting nuts 62 - 80 7-9 Connecting rod cap bolts 177 - 212* 20 - 24 Drain plug 106 - 124 12 - 14 74 - 85 ft-lbs 100 - 115 41 - 44 ft lbs step 55 - 60 step 80-106 9 - 12 Exhaust manifold at head 266 - 310 30 - 35 Exhaust manifold at muffler 177 - 212 20 - 24 80-106 9 - 12 Rocker stud 195 - 221 22 - 25 Spark plug 177 - 212 20 - 24 80-106 9 - 12 Starter (electric) 195 - 221 22 - 25 Sump bolts 195 - 221 22 - 25 Valve cover 62 - 80 7-9 Flywheel nut Head bolt Module Rocker jam nut Starter (recoil) NOTE: * - apply a small amount of releasable thread locking compound such as Loctite® 242 (blue). 103 www.mymowerparts.com For Discount Cub Cadet Parts Call 606-678-9623 or 606-561-4983 P90 Series Vertical Shaft Engines 104 www.mymowerparts.com For Discount Cub Cadet Parts Call 606-678-9623 or 606-561-4983 Failure Analysis CHAPTER 11: FAILURE ANALYSIS A properly maintained engine will provide years of service. Occasionally an engine will fail. An important part of working on engines is being able to recognize the root cause of engine failures. Was it something the customer did? Was it a manufacturing defect? Did the engine just wear out? All of these questions need to be answered. Identifying and eliminating the cause of the failure is the only way to prevent recurring failures. Engines can fail in a variety of ways but most failures can be classified in the following categories: • Abrasive ingestion • Insufficient lubrication • Over heating • Over speed • Mechanical breakage/ wear NOTE: There may be a combination of failures. Each cause of an engine failure leaves its own fingerprint on the engine. Careful gathering of information about the engine will identify one or more of these fingerprints. Start by getting as much information as possible from the customer, such as: symptoms, how it is used and the maintenance history. Abrasive Ingestion Abrasive Ingestion is when hard particles are introduced into the engine. Particles can be introduced into the engine by leaks in the air intake system, through a dirty oil fill plug or by particles of metal that wore off of a part, especially during the break in cycle. Particles may also be introduced through worn or improperly installed seals or gaskets. Figure 11.1 1. Abrasive particles that enter the engine through the intake system can be sand, hay or dirt. See Figure 11.1. 2. Abrasive particles that enter the engine usually leave tracking marks where the particles entered the system. Use these marks to find the source of the abrasives. 3. Particles that enter the intake system travel at great speed and act like sand blasting media inside the engine. This causes wear to the parts affected. NOTE: Choke and throttle shafts are very vulnerable to this wear. If an air filter becomes clogged, the vacuum produced by the engine will try to draw air in by any means possible. This usually happens around the throttle and choke shafts. Because the throttle shaft moves more than the choke, it will wear faster. 4. The particles can pass through the intake system to the valves and valve seats. 105 www.mymowerparts.com For Discount Cub Cadet Parts Call 606-678-9623 or 606-561-4983 P90 Series Vertical Shaft Engines 5. 6. When particles enter the combustion chamber, the up and down motion of the piston grinds the particles into the side of the cylinder walls and damages the cylinder wall, piston and piston rings. Cross hatch polished off This can be identified by the scoring along the vertical axis of the piston and cylinder wall or the cross hatch on the cylinder wall being worn off. NOTE: To help in the lubrication of the cylinder walls, and help with the seating of the piston rings, a diamond cross hatch is honed into the cylinder wall. Debris entering the cylinder will polish the cross hatch off of the cylinder wall. See Figure 11.2. Figure 11.2 NOTE: Abrasives that enter the engine through the intake system will cause the upper portion of the combustion chamber to wear more than the lower portion. Measurements of the cylinder bore at the top and bottom will show this. Other sources of abrasives that get into the engine includes carbon that builds up on the top side of the piston, metal shavings from the wear of engine parts or dirt entering through the oil fill port. Leaking gaskets and seals also have the potential of allowing debris to enter the engine. A symptom of abrasive ingestion is smoky exhaust. As the cylinder walls wear, pressure from the combustion chamber blows by the piston and pressurizes the engine sump. This overpowers the PCV valve and allows oil to build up in the combustion chamber. See Figure 11.3. Figure 11.3 7. It is normal for engine oil to suspend some abrasive material. The problem comes when the amount of abrasive materials overcomes the ability of the oil to keep parts from being damaged by contact with the abrasive material. See Figure 11.4. Figure 11.4 106 www.mymowerparts.com For Discount Cub Cadet Parts Call 606-678-9623 or 606-561-4983 Failure Analysis 8. Because the oil suspends the particles, the engine components that are immersed in oil will show definite signs of abrasive ingestion especially around the connecting rod and main bearing journals. See Figure 11.5. NOTE: Abrasives that are trapped in the oil will cause the lower portion of the combustion chamber to wearing more than the upper portion. NOTE: Wear of only one bearing surface on a new engine could be a sign of a manufacturing defect. Figure 11.5 NOTE: Abrasive particles can also be embedded into materials that are softer than the abrasive. This will cause the affected part to act like a piece of sand paper or a grinding wheel. See Figure 11.6. Embedded abrasives Figure 11.6 107 www.mymowerparts.com For Discount Cub Cadet Parts Call 606-678-9623 or 606-561-4983 P90 Series Vertical Shaft Engines Insufficient lubrication The bearing surfaces in an engine are not smooth. The machining processes used to make the engine parts, leave little peaks and valleys that are only visible under a microscope. These peaks are called asperities. As the engine breaks in, the asperities break off leaving plateaus that become the bearing surface. The valleys become reservoirs for the lubricant. The oil in an engine performs three functions: • Cools - It carries heat away from the hotter parts to the cooler parts of the crankcase, allowing the heat to dissipate • Clean - The oil carries metal particles and contaminants away from the contact surfaces. • Lubricates - It forms a cushion between moving parts, protecting them from contact with each other. When an engine is properly lubricated, all of the moving parts glide on a thin film of oil. If that film breaks down or carries enough grit to bridge the film, damage will occur. 1. When the parts are at rest, they push the lubricant or oil away resting on the bearing surfaces. As the parts rotate, they climb over the oil, pulling the oil between the bearing and the part, riding on a film of oil. The asperities are the first thing to make contact between two moving engine parts with an insufficient oil film between them. This creates friction and causes a transfer of metal between the parts. The heat and friction further breaks down the oil film, accelerating the process. 2. Insufficient lubrication failures include: • Low oil level • Wrong oil for the application • Contaminated oil • Degraded oil (heat, age, acids) 108 www.mymowerparts.com For Discount Cub Cadet Parts Call 606-678-9623 or 606-561-4983 Failure Analysis Discoloration 3. Metal transfer is the primary indicator that the film of oil between two engine parts has been violated. If the damage is localized, a general failure of the lubrication system is probably not the cause. As an example: a piston skirt shows metal transfer to the cylinder wall. The connecting rod and wristpin show some signs of excessive heat. The main bearings and camshaft are not damaged. This would indicate that the problem was probably related to cylinder temperature. Metal to metal transfer The hall mark of a lubrication failure is the presence of discoloration and/or metal transfer on all friction surfaces within the engine. See Figure 11.7. Figure 11.7 An important thing to note is that just because there are signs of insufficient lubrication, that does not mean that was the cause of the failure. It may only be a symptom of the real cause of the failure. Discoloration Larger size abrasive particles can render the lubricants ineffective, leading to an engine failure. An overheated engine can cause the oil to break down leading to a failure. In an engine overspeed, the oil is pushed away from the bearing surface leading to a failure. In all three of the above cases, the signs of insufficient lubrication are symptoms not the cause. There will also be signs of heat or discoloration around the parts affected by the lack of lubrication. See Figure 11.8. Figure 11.8 109 www.mymowerparts.com For Discount Cub Cadet Parts Call 606-678-9623 or 606-561-4983 P90 Series Vertical Shaft Engines Engine Overspeed The MTD engine is designed for a maximum speed of 3300 rpm. When the governor is unable to control the engine rpm, the engine can accelerate past the safe maximum speed. When an engine runs beyond its designed speed, a few things happen: 1. As the piston moves up and down in the cylinder, it builds momentum. The higher the rpm’s the more momentum produced by the pistons. As the momentum builds, the connecting rods will start to stretch. When the connecting rod stretches, it gets weaker. The stress is concentrated at the narrowest part of the connecting rod. On the MTD engine this point is at the wrist pin. The force on the connecting rod is greatest when the piston transitions from the upward stroke to the downward stroke. Because of this, most overspeed connecting rod failures will occur with the piston at top dead center. When a connecting rod fails, the piston stops moving but the crankshaft is still moving. This will allow the broken connecting rod to get knocked around in the cylinder causing more damage to it. Usually the connecting rod will be in several pieces after it breaks making it hard to find where the first failure was. 2. All engines create a certain amount of vibration when they are operating within their designed speed range. Engines are built to withstand this normal level of vibration. When an engine is over speeding, the amplitude and frequency of vibration is beyond what the engine is designed to cope with. When moving parts of an engine are creating vibrations that are outside of the engines design parameters, other parts can break and fasteners can loosen. Normally stationary parts of the engine start to flex and vibrate in resonance with the frequencies created by the moving parts. Fatigue cracks in the blower housing, mufflers and brackets are key indicators of either an over speed problem or an imbalance problem. 3. When an engine overspeeds, the moving parts can not pull the oil in between them. This allows metal to metal contact. Because of this, signs of inadequate lubrication will show. 4. When trying to diagnose an overspeed failure, look at all the pieces. Individually the lack of lubrication, piston position and condition of the connection rod will usually indicate separate failures. Collectively they would indicate an overspeed failure. 110 www.mymowerparts.com For Discount Cub Cadet Parts Call 606-678-9623 or 606-561-4983 Failure Analysis Overheated The MTD engines are air cooled engines. Because of this, cleanliness of the engine is very important to the life of the engine. Dirt, grass and sludge all form an insulating layer on the engine. This will trap the heat in the engine and cause it to over heat. Discolored rockers As metal parts heat up enough to change their properties, they will take on a yellowish or blue cast. As oil is heated to the point that it evaporates, black deposits are left behind. This is called “coking”. An engine with lots of coked oil deposits inside the crankcase or cylinder head indicates that it has been over heated. See Figure 11.9. Figure 11.9 Another sign of an overheat failure is warped parts. As metal parts heat up, they expand. In an engine, a certain amount of expansion is expected. Engines are built so that when parts are at operating temperature, the parts will expand to be within the tolerances needed for the engine to run. A problem occurs when the parts are over heated. They expand more than they were designed to. Some parts are mounted firmly, like cylinder heads (the hottest part of the engine). As they try to expand, they fight against the head bolts. The head bolts will not move to allow the expansion so the head warps to allow the expansion. This warping of the head allows the head gasket to leak. A leaking head gasket allows the compressed gases in the engine to escape, lowering the compression in the engine and hurting engine performance. As the cylinder head cools, it shrinks back down to its normal size, but there will still be some warpage of the head. See Figure 11.10. Localized over heating will leave localized “hot spot” indications, such as discoloration. Rapid over heating of a cylinder, like when there is a cooling air flow obstruction, may cause hot spots and metal transfer between the piston skirt and the cylinder wall. Over heating of the cylinder head may be caused by: Figure 11.10 • Lack of air flow • Exhaust system issues. • Recirculation of cooling air caused by a modification that restricts air flow. • Debris build up on the cooling fins Typical damage from this kind of over heating is a dropped valve seat. A dropped exhaust valve seat combined with coked oil in the cylinder head would be sure indicators of an over heated engine. 111 www.mymowerparts.com For Discount Cub Cadet Parts Call 606-678-9623 or 606-561-4983 P90 Series Vertical Shaft Engines Mechanical Breakage/ Wear Sometimes an engine fails because a part breaks. There are generally three causes of a broken part, outside of the previously discussed engine failures. They are abuse, wear, and manufacturing defects. Bent blade A very common sign of an abused engine is a bent crank shaft. Crankshafts bend when they, or something bolted to them hits something. A prime example of this is when a mower blade hits a rock. See Figure 11.11. As the engine runs, there is friction between the moving parts. This friction wears down the parts. Lubrication slows the process, but wear can not be prevented. Over time, the parts wear to the point they break or fail in some way. Car tires are a good example of wear. A tire will only last for so many miles before all the rubber is worn off and the tire goes flat. Bushings are another example; they are designed to wear so that the wear of other parts will be minimized. Figure 11.11 Vibration issues have a “chicken and the egg” relationship to mechanical failures. Which came first? Bent crankshafts and imbalanced implements will cause vibration issues. However a vibration issue, such as a over speed or loose mounting bolts on the engine, can shake an engine to pieces. The technician must find the source of the vibration in order to properly diagnosis an engine. Manufacturing defects are wrongly blamed for failed parts. A manufacturing defect is when a part is made wrong. It could be a porous casting, parts assembled wrong, the wrong parts used or so on. A manufacturing defect will generally show up within the first couple of hours of use. Detonation/preignition Detonation is the undesirable condition of the fuel spontaneously igniting the combustion chamber prior to the spark plug firing. In this state, the flame front from the detonation will start to travel through the combustion chamber and a second flame front, from the spark plug, will crash into it. The pressure spike caused by this will send shock waves through the engine. The shock wave cause a knocking or pinging noise. This is why detonation is sometimes called “knocking”, “spark knocking” or “pinging”. The shock wave will also try to push the piston down against the direction of rotation of the crankshaft. The extreme pressures and temperatures that occur in the combustion chamber as a result of detonation will cause piston damage. In its initial stages, small spots of molten metal will erupt on the piston crown and may stick to the spark plug. The next stage of damage usually crushes the top ring land, pinching the top piston ring. More extreme damage happens as the piston crown melts. Metal transfer to the cylinder wall damages the wall and the piston skirt. NOTE: Resonance from the shock waves generated by detonation can also cause fatigue damage that resembles a vibration issue. NOTE: The sudden onset of a violent detonation can blow a hole through the crown of the piston. A build up of carbon deposits in the combustion chamber will increase the compression ratio. This is a major factor for the development of detonation. Carbon deposits also hold glowing embers that can trigger preignition. Preignition is similar to detonation, but on a smaller scale. Preignition is cause by a localized hot spot or a hot deposit in the cylinder. As the fuel/air mixture is drawn into the cylinder, it is ignited. This creates pressure that tries to push the piston down against the direction of rotation of the crankshaft. The sounds and damage created by this is the same as detonation. 112 www.mymowerparts.com For Discount Cub Cadet Parts Call 606-678-9623 or 606-561-4983 www.mymowerparts.com For Discount Cub Cadet Parts Call 606-678-9623 or 606-561-4983 MTD Products Inc - Product Training and Education Department FORM NUMBER - 769-06294 10/2011 www.mymowerparts.com