1
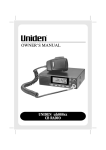
UNIDEN uh088sx
CB RADIO
UNIDEN UHF CB Transceiver
Contents
Controls/Indicators/Connections
Controls....................................................................................... 3
Indicators.................................................................................... 4
Connections................................................................................ 5
Introduction
Features.......................................................................................
Preventative Maintenance............................................................
Troubleshooting..........................................................................
Memory Backup..........................................................................
Layout.........................................................................................
6
6
6
6
7
Included with your uh088sx CB radio................................................
8
Operation
Setting the Squelch.......................................................................
Selecting a Channel......................................................................
Transmitting................................................................................
Using Repeater Channels.............................................................
Operating the uh088sx in Duplex Mode........................................
Scanning......................................................................................
Open Scan (OS) Mode..................................................................
Group Scan (GS) Mode.................................................................
Choosing a Priority Channel.........................................................
Drop Out Delay.............................................................................
Programming Scan Channels.......................................................
Channel Seeking Operation..........................................................
9
10
10
10
11
11
11
12
13
13
14
15
1
UNIDEN UHF CB Transceiver
Contents
Continuous Tone Coded Squelch System (CTCSS)............................... 16
Selective Calling (Optional Selcall PCB Required)
Outline........................................................................................
Selective Calling (SELCALL).........................................................
Receiver Quieting (Tone Squelch)................................................
Call Alarm....................................................................................
Tone Squelch Scanning................................................................
Tone Calling.................................................................................
Group Calling Capability...............................................................
17
17
17
17
17
17
17
Tables
FM-CB Frequency List.................................................................. 18
CTCSS Tone List............................................................................ 18
Warranty............................................................................................. 19
2
UNIDEN UHF CB Transceiver
Controls/Indicators/Connections
uh088sx
CONTROLS
19
1
10
9
2
7
8
3
4
5
6
1.
LIQUID CRYSTAL DISPLAY (LCD) PANEL - Indicators for TX, CAL, MEM, TSQ, GS (OS), SCN
PRI, Channel Number, Frequency, Signal Strength Level (S), Transmit Power Level (RF),CTCSS Code
and DUP.
2.
UP/DOWN CHANNEL SELECTOR -These controls are used to select the desired
communication channel.
3.
ON/OFF, VOLUME & SQUELCH CONTROLS
ON/OFF & Volume Control (Centre Knob)
Turns the uh088sx power ON or OFF and adjusts the volume.
Squelch Control (Outer Ring)
Eliminates background noise in the absence of an incoming spiral.
4.
PUSH-TO-TALK (PTT) - SWITCH - Press to transmit and release to receive.
5.
TONE CALL CONTROL BUTTON - Press to transmit SELCALL codes, it functions on condition that
SELCALL option is installed.
6.
DUPLEX Control
Press this button momentarily to choose semi-duplex opeartion for channels 1 through 8.
7.
OPEN SCAN/GROUP SCAN CONTROL (OS/GS)- Switches operation between OPEN SCAN and
GROUP SCAN Mode.
8.
SCAN CONTROL (SCAN) - Press to activate Normal OS/GS scanning or press and hold to enable Seek Mode
OS/GS Scanning.
3
UNIDEN UHF CB Transceiver
Controls/Indicators/Connections
9.
MEMORY CONTROL (MEM) - Places channel numbers into the memory scan list (OS or GS).
10. TONE SQUELCH CONTROL (TSQ) - Controls Tone Squelched operation (quiet Mode) on condition that
SELCALL option is installed.
10 Secondary function: Continuous Tone Coded Squelch System (CTCSS) - is a feature that allows a
group to talk to each other without hearing other users on the same channel.
INDICATORS
18
19
20
21
22
12
17
16
11
12
14 13
11. Channel Indicator - Indicates the channel number currently selected. On TX SELCALL usage the Channel
Indicator becomes a Memory location indicator.
15
12. Scan Indicator (SCN) - SCN icon appears when normal Scan mode is activated. When Seek mode Scanning is
selected the SCN icon blinks.
13. Priority Indicator (PRI) - Indicates that priority channel is active when continuously lit or flashes when it is
regularly being checked for activity while GS scanning.
14. Continuous Tone Coded Squelch System (CTCSS) Code - Indicates the CTCSS code selected for the
current channel.
15. Frequency Indicator - Shows the frequency of the current selected channel.
16. RECEIVE SIGNAL/ RF LEVEL indicator (S/RF) - Indicates the relative signal strength level when receiving (S)
or the relative transmit power (RF) when transmitting.
17. DUPLEX Indicator (DUP) - The DUP icon appears when duplex operation is selected.
18. TRANSMIT indicator (TX) - TX appears when the PTT button on the microphone is pressed and the radio is
transmitting. The RF icon also appears at this time.
19. TONE SQUELCH indicator (TSQ) - The TSQ icon will appear when the selected channel is set to operate in
Quiet Mode, or flashes when the radio is called using SELCALL.
20. CALL Indicator (CAL) - The CAL icon appears when the uh088sx radio is called using SELCALL. It also
appears when SELCALL codes are being transmitted.
21. MEMORY Indicator (MEM) - MEM appears when the displayed channel is programmed either in GS or
OS Memory.
22. GROUP SCAN Indicator (GS) - The GS icon appears when Group Scan Mode is activated. Open scan is
indicated by the absence of the GS icon.
4
UNIDEN UHF CB Transceiver
Controls/Indicators/Connections
CONNECTIONS
FRONT PANEL
23
23. MICROPHONE SOCKET
The microphone plug is inserted into this socket.
BACK PANEL
24
26
25
24. EXTERNAL SPEAKER JACK - used for remote receiver monitoring. When the external speaker is connected, the
internal speaker is automatically disconnected. The connecting wire must use a 3.5mm miniature plug only.
25. ANTENNA CONNECTOR - Connect the Antenna here using a standard UHF (PL259) type connector.
26. DC POWER CORD - DC Power is connected to the transceiver through this jack. A power cord is supplied with the
transceiver.
5
UNIDEN UHF CB Transceiver
Introduction
The Uniden uh088sx is designed to provide you with years of trouble free service. It's rugged components and
materials are capable of withstanding harsh environments.
We are certain that you will enjoy your uh088sx. Please read this operating Manual carefully to ensure you gain the
optimum performance of the unit.
Features
!
!
!
!
!
!
!
!
Transmit & Receive FM 40CH (UHF - CB, TX Power 5w)
7 Segments LCD
CTCSS function
Tone Squelch (Selcall) Capability
Duplex Capability (from CH01 - CH08 per channel)
Open Scan/Group Scan
Variable Squelch Level adjust
Volume Control with power ON/Off Switch
Preventative Maintenance
The following system checks should be made every six to twelve months:
!
!
!
!
Check the standing Wave Ratio (SWR)
Inspect the tightness of all electrical connections.
Inspect the antenna coaxial cable for wear or breaks on the shielding.
Inspect the tightness of all screws and all other mounting hardware.
Troubleshooting
Should the unit malfunction or perform poorly, follow these procedures:
!
Check the power cord and fuse.
If there is trouble with receiving...
! Check the VOLUME control setting. Be sure the SQUELCH is adjusted properly. Possibly the radio is
over squelched.
If there is trouble with transmitting...
! Check that the transmission line (coaxial cable) is securely connected to the ANTENNA connector.
! Check that the antenna is fully extended for proper operation.
! Check that all transmission line (coaxial cable) connections are secure and free of corrosion.
Memory Backup
A built in EEPROM protects the channels stored in the uh088sx memory after the DC power cable is
disconnected
6
UNIDEN UHF CB Transceiver
Introduction
LAYOUT
Front Panel Layout
Microphone Layout
PTT
Tone Call
7
UNIDEN UHF CB Transceiver
Included with your uh088sx CB radio
uh088sx
UNIDENRADIO
CB
uh088sx Owners Manual
Microphone
Mounting Bracket, Knobs,
Rubber washer, Washer Stars
and Screws.
Microphone Hanger Screws
and washers
DC Power Cord with fuse
8
UNIDEN UHF CB Transceiver
Operation
Setting the Squelch
1. To turn the unit ON, rotate volume clockwise.
Adjust volume to a comfortable level.
You must select a
channel which is
not in use before
setting the SQUELCH
control.(see p.10)
2. Think of the Squelch control as a gate. If you turn SQUELCH
fully clockwise it raises the "Squelch Gate so
that no signals get through.
3. If you turn the SQUELCH fully counter clockwise, it lowers the
"Squelch Gate" so that everything gets through - noise,
weak signals and strong signals.
4. To set the "Squelch Gate" to the desired level, turn SQUELCH
counterclockwise until you hear noise. Then turn the SQUELCH
clockwise just until the noise stops. Now only strong signals get through.
9
UNIDEN UHF CB Transceiver
Operation
SELECTING A CHANNEL
Press
or
button to select a channel
PTT
TRANSMITTING
Select the desired channel. Press the Microphone's PTT button, hold it approx
7cm from your mouth and speak normally into the microphone.
The
icon will light. Release the PTT button to end
the transmission and listen for a reply.
USING REPEATER CHANNELS
UHF CB Repeaters are used to retransmit or relay your signal. Repeaters will extend the range of your radio and
overcome the shielding effect caused by solid obstructions. In normal Simplex operation, your radio transmits on
one particular frequency and receives on that same frequency. If there is a barrier that partially blocks your
transmitted signal, the probability of another radio receiving the signal is very slim. Hills, tall buildings, metallic
structures, ... etc. tend to act as a screen between radios.
The Signal coming from your radio is received by the Repeater Station and then retransmitted at the same time
on another channel. This operation is called "Duplexing".
For example,
CH01 on Duplex Mode will Receive on CH 01 but Transmit on CH31
CH02 on Duplex Mode will Receive on CH 02 but Transmit on CH32 etc ....
If you transmit on CH01 Duplex mode, you are actually transmitting on CH31, the repeater station down-converts
your signal and retransmits on CH01.
10
UNIDEN UHF CB Transceiver
Operation
Operating the uh088sx in Duplex Mode
For this example we are adopting CH01 as the channel
being used in your area for repeater use.
Press
to switch Duplex On. The duplex icon DUP appears.
If Duplex is not required - press again to switch Duplex off.
Only channels 01 - 08 are available for Duplex
Check with your local Retailer to
determine if there is a Repeater in your
area.
Scanning
The uh088sx has a scanning feature that allows you to
search for active channels automatically.
Furthermore, the uh088sx is designed to have two types
of scanning; Open Scanning (OS) and Group Scanning
(GS), to give you flexibility and allow you to use the radio
more effectively. Press
and scanning starts.
The scan icon SCN appears.
Open Scan (OS) Mode
Allows continuous scanning of channels stored in the Open Scan memory. If an active channel is found, scanning
will stop on that channel.
This example shows CH40 active.
If the received signal ceases, the unit will wait 3 seconds for the signal
to return, otherwise scanning resumes.
To skip the active channel, press
momentarily. Scanning resumes.
To deactivate scan, press
while scanning
or the PTT button on the microphone.
If SCAN is deactivated while on an
active channel, the uh088sx will stay
on that active channel. If no channels
are active, the uh088sx will reinstate
the starting channel.
11
UNIDEN UHF CB Transceiver
Operation
Group Scan (GS) Mode
Allows you to monitor a priority channel while scanning.
To use GS Mode Scanning, press the
key.
GS icon appears on the display. OS Mode is indicated by the
absence of the GS icon.
TOGGLES
GS Scanning checks the priority channel activity regularly.
If the Priority channel becomes active the radio will stay on
that channel for as long as the signal is active.
If the received signal ceases, the unit will wait 3 seconds
for the signal to return, otherwise scanning resumes.
If scanning stops on a channel which is not a Priority channel,
uh088sx will continue monitoring the priority channel for
activity while listening to the active one.
eg CH40 becomes active.
TOGGLES
If SCAN is deactivated while it is turned to an active channel, the uh088sx will stay on
that active channel. If none of the channels are active, the uh088sx will reinstate the
starting channel.
If GS is initiated when there are no channels programmed in GS memory, an error tone
will be heard and scanning will not start (see programming Scan Channels - below).
12
UNIDEN UHF CB Transceiver
Operation
Choosing a Priority Channel
The starting channel, when Group Scanning is initiated, is always the priority channel.
Changing the PRI channel setting while scanning
eg: PRI Channel is CH17 (476.825 Mhz)
a press
, to select a higher channel (scanning pauses)
- or b. press
, to select a lower channel
Drop-out delay
While scanning, the uh088sx stops at a busy channel and receives a transmission. When the received signal is over,
the unit will wait for three seconds for the return of the signal, otherwise, the radio resumes scanning.
13
UNIDEN UHF CB Transceiver
Operation
Programming Scan Channels
1 Select which Scanning Mode you
wish to use on the channel.
OS or GS Mode
2. Select the channel you want to store.
3. Press and hold
for 1.5sec. to store.
MEM icon appears and a short tone
beep is heard.
4. To remove the channel form memory, press and hold
for 1.5 sec. once more.
Two successive beeps are heard and the MEM icon disappears.
14
UNIDEN UHF CB Transceiver
Operation
Channel Seeking Operation
Unlike normal scanning, CHANNEL SEEK is used more often when checking for active channels.
If a signal is detected, while seeking, the uh088sx will tune to that signal for 4 seconds only and the
resumes Seeking Operation.
Changing from SCAN to SEEK Mode Operation.
1 Firstly, activate scan mode by pressing
2. Press and hold
until a 'beep' is heard.
The SCN icon starts to flash.
3. If an active channel is detected the uh088sx will stop on that
channel for 4 seconds. (eg CH17)
4. After 4 seconds, the uh088sx will start seeking again for
active channels.
5. If you find the channel interesting, simply press either
the PTT switch or
to stop the operation
before the 4 second timer elapses.
When
is pressed again SEEK is still the mode of operation.
To change back to SCAN, while SEEKING, press and hold
until a beep is heard. The SCN icon stops flashing.
SEEK checks the same channel stored in SCAN
memory. Thus, you can Seek either in OS or GS Mode.
15
UNIDEN UHF CB Transceiver
Operation
Continuous Tone Coded Squelch System (CTCSS)
This feature allows signals to be received only from callers who have selected the same CTCSS code.
Press
or
Press and hold
Press
Press
or
to select the desired channel to use CTCSS.
for 2 seconds. CTCSS code flashes.
to select the desired CTCSS code 01 - 38.
once to store the new setting.
To turn CTCSS OFF please follow the above steps but select the desired CTCSS code oF (before code 01).
Channels 05 and 35 are Emergency Channels.
CTCSS cannot be selected on these channels.
If a button is not pressed within 10
seconds the uh088sx will automatically
exit Select Mode.
16
UNIDEN UHF CB Transceiver
Selective Calling (Optional Selcall PCB Required)
Outline
Selective Calling (SELCALL) is a special Sequential Tone Squelch System that allows the user to
receive/transmit calls selectively from/to an individual or group, on a shared busy channel.
The uh088sx has an Optional Selective Calling system.
Exceptional features, like Receiver Quieting, Tone Squelch Scanning, Tone and Group Calling make the uh088sx
superior to any transceivers in its class.
Receiver Quieting (Tone Squelch)
When activated, it automatically mutes the receiver audio circuit of the radio.
It will stay in this ‘Quiet’ mode as long as the SELCALL tone code (SELCALL ID) required to open the muting
circuit is not received.
Call Alarm
When a received code matches to your SELCALL ID, an alarm (CA Alert) will be emitted informing you that a
caller is on the channel.
Tone Squelch Scanning
Scans only tone squelched Channels.
Tone Calling
Allows you to selectively call another radio.
Group Calling Capability
Transmits and Responds to Group Calls.
17
UNIDEN UHF CB Transceiver
Tables
FM - CB Frequency List - Australia & New Zealand
Simplex Mode
Duplex Mode
Transmit / Receive
Transmit
CH No. Frequency (MHz)
Frequency (MHz)
Simplex Mode
Transmit / Receive
CH No. Frequency (MHz)
476.425
477.175 CH31
21
01
476.450
22
477.200 CH32
02
476.475
477.225 CH33
03
23
477.250 CH34
476.500
04
24
476.525
477.275 CH35
05
25
477.300 CH36
476.550
06
26
477.325 CH37
476.575
07
27
477.350 CH38
476.600
08
28
476.625
09
29
476.650
10
30
476.675
11
31
476.700
12
32
476.725
13
33
476.750
14
34
476.775
15
35
476.800
16
36
476.825
17
37
476.850
18
38
476.875
19
39
476.900
20
40
Note: Channel 05 and 35 are Emergency Channels and Channel 11 is a calling channel
CTCSS TONE List
Tone
Tone
No.
Frequency (Hz)
00 (’oF’)
01
02
03
04
05
06
07
08
09
10
11
12
OFF
67.0
71.9
74.4
77.0
79.7
82.5
85.4
88.5
91.5
94.8
97.4
100.0
Tone
No.
Tone
Frequency (Hz)
Tone
No.
13
14
15
16
17
18
19
20
21
22
23
24
25
103.5
107.2
110.9
114.8
118.8
123.0
127.3
131.8
136.5
141.3
146.2
151.4
156.7
26
27
28
29
30
31
32
33
34
35
36
37
38
NOTE: Channel 05 and 35 are not CT CSS programmable
18
476.925
476.950
476.975
477.000
477.025
477.050
477.075
477.100
477.125
477.150
477.175
477.200
477.225
477.250
477.275
477.300
477.325
477.350
477.375
477.400
Tone
Frequency (Hz)
162.2
167.9
173.8
179.9
186.2
192.8
203.5
210.7
218.1
225.7
233.6
241.8
250.3
UNIDEN UHF CB Transceiver
Warranty
ONE YEAR LIMITED WARRANTY
IMPORTANT: Evidence of the original purchase is required for warranty service.
WARRANTOR: Uniden New Zealand Limited. Uniden Australia Pty Ltd. ACN 001 865 498
ELEMENTS OF WARRANTY: Uniden warrants to the original retail owner for the duration of this
warranty its uh088sx (hereinafter referred to as the Product), to be free from defects in materials
and craftsmanship with only the limitations or exclusions set out below.
WARRANTY DURATION: This warranty to the original retail owner only is only valid in the original
country of purchase and shall be of no further effect 12 months after the date of original retail
sale. This warranty will be deemed invalid if the Product is: (A) Damaged or not maintained as
reasonable and necessary, (B) Modified, altered or used as part of any conversion kits,
subassemblies, or any configurations not sold by Uniden, (C) Improperly installed, (D) Repaired
by someone other than an authorised Uniden Repair Agent for a defect or malfunction covered
by this warranty, (E) Used in conjunction with any equipment or parts or as a part of a system
not manufactured by Uniden. (F) Only available in the original country of sale.
PARTS COVERED: This warranty covers for one (1) year, the uh088sx transceiver only. All
accessories (Mounting bracket, Microphone etc.) are covered for 90 days only.
STATEMENT OF REMEDY: In the event that the Product does not conform to this warranty at
any time while this warranty is in effect, the warrantor, at its discretion, will repair the defect or
replace the Product and return it to you without charge for parts and service. THIS WARRANTY
DOES NOT COVER OR PROVIDE FOR THE REIMBURSEMENT OR PAYMENT OF INCIDENTAL
OR CONSEQUENTIAL DAMAGES. THIS GUARANTEE IS IN ADDITION TO AND DOES NOT
IN ANY WAY AFFECT YOUR RIGHTS UNDER THE CONSUMER GUARANTEE ACT.
PROCEDURE FOR OBTAINING PERFORMANCE OF WARRANTY: in the event that the Product
does not conform to this warranty, the Product should be shipped or delivered, freight prepaid,
with evidence of original purchase (e.g. a copy of the sales docket) to the warrantor at:
UNIDEN AUSTRALIA PTY LIMITED
SERVICE DIVISION
UNIDEN NEW ZEALAND LIMITED
SERVICE DIVISION
345 Princes Highway,
Rockdale,
NSW 2216,
AUSTRALIA
Fax: (02) 9599 3278
www.uniden.com.au
150 Harris Road,
East Tamaki,
Auckland,
NEW ZEALAND
Fax: (09) 274 4253
www.uniden.co.nz
19
2004 Uniden Australia Pty Limited / Uniden New Zealand Limited
Printed in the in China
UTZZ01924ZZ
uh064sx-2
Operating Guide
txp
txp
mic
mic
To bring outstanding wireless communication products
to people's lives throughout the world.
CONTROL & INDICATORS
INCLUDED IN YOUR PACKAGE:
• uh064sx-2 Radio (2)
• Operating Guide
• Belt Clip (2)
•
•
•
•
TORS
Charging Cradle with AC Adaptor
NiMH Battery Pack (2)
VOX Headset (2)
External Speaker Mic (2)
OPTIONAL ACCESSORIES
• VOX Earset
• Carry Case
21
22
23
24
13
14
15
txp
mic
1 Antenna
2 PTT(Push-To-Talk) Key
3 Monitor Key
4 Keylock/Call Key
5 Memory/Scan Key
6 Channel/ Transmit Power Key
7 Speaker
8 Headset Jack
9 Select/Power On-Off Key
10 Volume/Select Up Key
11 Volume/Select Down Key
12 Microphone
13 Receive Indicator
14 Transmit Indicator
15 Channel Indicator
10
11
12
16
17
18
19
20
25
26
27
28
29
16 DCS ON Indicator
17 Scan Indicator
18 Memory Indicator
19 Priority Channel Indicator
20 CTCSS ON Indicator
21 Battery Level Indicator
22 HI Transmit Indicator
23 Lo Transmit Indicator
24 CTCSS and DCS Code/Volume Level Indictor
25 Volume Setting Indicator
26 VOX Indicator
27 Busy Channel Lockout Indicator
28 Keypad Lock Indicator
29 Charging LEDs
(1)
GETTING STARTED
Uniden does not represent this product to be waterproof. Do not
expose this product to Rain or Moisture.
BATTERY INSTALLATION
Your uh064sx unit uses the included NiMH battery pack for power. The unit
can be powered with optional 4 AAA ALKALINE batteries.
If you don't use the uh064sx for long periods, Uniden
recommend removing the batteries. The uh064sx is designed
to retain the previous user settings. This feature will continue to
use a small amount of battery power while the unit is
switched off.
To avoid damage to the unit do not mix old and new batteries.
To install the batteries:
1. Make sure your radio is off.
2. Release the battery cover clip, then remove the
battery cover.
3. Insert NiMH battery pack according to the
orientation on the battery pack.
OR
Insert 4 AAA ALKALINE batteries (not included)
according to the polarity symbols inside the battery
compartment.
4. Align the battery cover tabs with the uh064sx tab
holes then replace the cover clip.
Do not charge alkaline or non rechargeable batteries.
(2)
INSTALLING THE CHARGE CRADLE
1. Plug the AC adaptor into the rear of the charge cradle and into the
mains power.
2. Place the uh064sx into the charge cradle. The charge light will come on
to indicate the unit is charging.
3. Before operating the uh064sx, charge the battery pack for 16 hours.
Do not charge alkaline or non rechargeable batteries.
USER LICENCE INFORMATION
The citizen band radio service is licenced in Australia by
ACMA Radio-communications (Citizen Band Radio Stations)
Class Licence and in New Zealand by MED General User
Licence for Citizen Band Radio and operation is subject to
conditions contained in those licences.
(3)
BELT CLIP
To attach the belt clip:
Slide the belt clip until it snaps into place.
To remove the belt clip:
To remove the belt clip, press and hold
belt clip locker, slide the belt clip at the
same time until released.
LOW BATTERY ALERT
If the battery level becomes low, the battery indicator
icon on the display begins flashing. When the batteries
in the unit are low, the unit will go into a battery Low
mode. The Transmit mode is disabled. Replace the
alkaline batteries immediately or if you are using the
NiMH battery pack, place the radio on the charge
cradle to recharge. Full charge will take up to 16 Hrs.
BACK LIGHT
The uh064sx has an automatic display back light which remains on for 10
seconds after a key press (all keys except PTT key). The back light will work
even if the keypad is locked but will not work during low battery alert mode.
(4)
OPERATION
POWER ON/OFF
1. Press and hold select/ key to turn the radio on.
A channel number will appear on the display.
2. Press and hold select/
key to turn the radio off.
VOLUME
1. Press or key to increase or decrease the
volume level. ‘VOL’ icon appears on the display
while volume is being adjusted.
There are 8 volume levels. Level 0 (No Audio) to
Level 7 (Maximum Volume).
ADJUSTING THE KEY BEEPS
txp
mic
Your radio emits a beep each time one of the keys (except for the PTT key) is
pressed.
1. To turn OFF this beep: Press and hold
/call key while turning on
the radio.
2. To turn ON this beep: Press and hold
/call key while turning on
the radio.
ROGER BEEP
Roger Beep is a BEEP that is sent to notify the end of transmission (both PTT
and VOX transmission.) Roger Beep can be heard through the speaker when
Key Beep is on. Roger Beep is transmitted even if Key Beep is turned off.
However, Roger Beep will not be heard from the speaker.
1. To turn OFF Roger Beep: Press and hold key while turning on the radio.
2. To turn ON Roger Beep: Press and hold
key while turning on the radio.
KEYLOCK ON/OFF
1. Press
/call key for 1.5 seconds to enter keylock on mode.
2. Press
/call key for 1.5 seconds while in Keylock mode to exit the
Keylock mode.
While in Keylock on mode, the uh064sx can still receive and
transmit.
(5)
SELECTING A CHANNEL
1. Press ch/txp key momentarily to activate channel select
mode. The displayed channel will flash.
2. Press or key to select the desired channel.
For your reference a list of the available channels,
corresponding frequencies and guidelines for
their use is printed on page 12. For Australia,
Channels 05 and 35 are reserved for
Emergency Calls.
txp
3. Press ch/txp key momentarily to exit channel select mode. If no key is
pressed within 5 sec the uh064sx will exit from the channel select mode.
TO TRANSMIT AND RECEIVE
The uh064sx uses the 40 UHF-CB Channels (Channels
22 and 23 are for telemetry and telecommand
applications. Transmit is inhibited on these channels).
1. Before you transmit, listen for activity on the selected channel.
2. When the channel is clear, press and hold the PTT key to transmit. ‘TX’
icon appears on the display.
Hold the radio with microphone approximately 5 cm in front of your mouth
with the antenna at approximately 45° angle away from your head. Speak in
a clear, normal conversational voice.
3. When you have finished speaking, release the PTT and listen for a response.
‘TX’ icon then disappears on the display. While receiving, the ‘RX’ icon is
displayed.
TRANSMIT Hi/Mid/Lo POWER SELECT
1. Press and hold ch/txp key to select desired transmit
level. ‘HI’ icon will appear on the display for
maximum transmit level. ‘LO’ icon will appear on the
display for minimum transmit level. When there is no 'HI' or 'LO' icon then
the middle transmit level is set. With quality alkaline batteries the transmit
power of the uh064sx is 2.0W (Hi), 0.5W (Mid) and 0.1W (Lo).
(6)
AUTOMATIC SQUELCH FEATURE
The uh064sx is equipped with an Automatic Squelch System which shuts off
weak transmissions and unwanted noise.
MONITOR
This feature enables users to listen for weak signals on the current channel
at the press of a key.
To use monitor:
1. Press mon key. The ‘RX’ icon will flash.
2. Release within 1.5 seconds and the unit exits Monitor
mode.
3. Press and hold mon key for 2 seconds for
continuous listening.
The receiver circuit will stay open, letting in both the noise & weak
signals. The ‘RX’ icon flashes in this status.
4. To return to normal Receive mode press mon key. The ‘RX’ icon
disappears or stops flashing in this status.
SCANNING
The scan function scans all channels which are stored in the SCAN CHANNEL
MEMORY and stops at an active channel. If a PRIORITY channel has been
selected then this channel will be monitored for activity every 3 seconds.
When the signal stops, the uh064sx waits 2 seconds (Reply Delay) before
scanning resumes.
To initiate scanning;
1. Press mem/SCN key momentarily to begin scanning.
The ‘SCAN’ icon is displayed.
/call key to cancel.
2. Press select/ , mem/SCN or
When scan stops at a busy channel, pressing ch/txp key
will resume scan.
(7)
txp
REPLY DELAY
While scanning, the uh064sx stops at a busy channel and receives a
transmission. When the received signal is over, the unit will wait for 2
seconds for the return of the signal, otherwise, the radio resumes scanning.
TO OPERATE IN DUPLEX MODE (REPEATERS)
The Duplex function enables you to access local repeater stations. You can
only activate Duplex from CH01-CH08.
UHF CB Repeaters are used to retransmit or relay your signal. Repeaters will
extend the range of your radio and overcome the shielding effect caused by
solid obstructions.
Contact your retailer for a list of repeaters available in
Your area.
Operation with the aid of a Repeater
P
1. Press select/
key six times. P appears on the display.
2. Press or
to change o to .
3. Press select/
to confirm
To deactivate the duplex operation repeat activation process and change
o. uh064sx will return to normal operation.
If or key is pressed when the channel is not from Ch01 Ch08, an error tone sounds.
(8)
to
CTCSS & DCS
(Continuous Tone Coded Squelch System) & (Digital Coded Squelch)
CTCSS is a feature that allows a group to talk to each other
without hearing other users on the same channel.
1. Press select/ key momentarily to enter CTCSS
mode. The current selected CTCSS tone flashes.
2. Press
key to select the required CTCSS
tone (OFF or 1-38).
3. Press select/ key six times to confirm the
selected setting and exit to standby mode.
For channels with a CTCSS tone setting, the CTCSS tone is displayed below
the channel indicator. For channels with the setting of CTCSS OFF, there will
be no display below the channel indicator.
DCS
DCS is a digital extension of CTCSS. It provides 104 extra, digitally
coded, squelch codes that follow after the 38 CTCSS codes. CTCSS 138, followed by DCS 1-99 plus DCS 100-104 (represented by o0-o4 on
the display).
1. Press select/ key momentarily to enter CTCSS/DCS mode.
2. Use
key to select a DCS code. The DCS codes
follow on after the CTCSS codes. The DCS icon will
replace the CTCSS code on the display.
3. Press select/ key six times to confirm the
selected setting and exit to standby mode.
The DCS icon will appear when selected. To turn
off DCS select CTCSS OFF and no display will show
below the channel indicator.
Channels 05 and 35 are used for emergency channels.
CTCSS and DCS will not operate on these two channels.
(9)
VOX
VOX is the automatic transmitting function by inputting voice into
the VOX headset mic without pressing the PTT key.
1. Press select/ key momentarily twice while in
standby mode to enter VOX Sensitivity mode. The
current selected VOX setting will flash on the display.
2. Press
or
key to adjust the VOX sensitivity. 1 is
the highest sensitivity and 4 is the lowest sensitivity.
VOX can be turned off by selecting ‘oF’ icon.
3. Press select/
key five times to confirm the
setting and exit to standby mode.
The ‘VOX’ icon is shown on the display when VOX is selected to on and VOX
Headset is plugged into VOX Headset Jack.
The ‘TX’ icon blinks when the voice level is possible to transmit at the
current selected VOX sensitivity level.
TRANSMITTING A CALL TONE
Your uh064sx radio is equipped with 5 selectable call tones that will be
transmitted when the
/call key is pressed momentarily.
To select a call tone:
1. Press select/ key momentarily three times while
in standby mode to enter Call Tone mode. The
current call tone number (C1-C5) will be indicated.
2. Press the or
key to select desired call tone.
Each tone will be heard through the speaker.
3. Press select/ key four times to confirm and exit to standby mode.
To transmit the selected call tone, press the
/call key.
The selected tone will automatically be transmitted for a fixed length
of time. Call Tone will be cancelled when the PTT key is pressed.
Current regulations require calling tones to be restricted to one
transmission per minute. If a second transmission is
attempted within one minute then an error tone will sound.
(10)
PRIORITY SCAN CHANNEL
To set a priority scan channel:
1. Press select/
momentarily four times while in
standby mode to enter Priority Scan Channel
mode. The current priority channel will be
indicated.
2. Press or
key to increase or decrease the
desired channel number.
3. Press select/ three times to confirm and exit
to standby mode. PRI will be displayed when a
priority channel has been selected.
BCL (Busy Channel Lockout) ON/OFF
BCL is used when CTCSS or DCS is selected to prevent transmission when
the uh064sx detects a transmission from another unit using the same CTCSS
or DCS code.
To set BCL ON/OFF:
1. Press select/ momentarily five times while in
standby mode to enter BCL ON/OFF mode.
The current BCL status will be indicated.
2. Press
or
key to select ON (on) or OFF (oF).
3. Press select/
two times to confirm and exit to
standby mode. BCL will be displayed when BCL on
has been selected.
SCAN CHANNEL MEMORY
To store a channel into Scan Channel Memory:
1. Select desired channel using ch/txp key and
or
key.
2. Press and hold mem/SCN key. MEM will appear on the display.
Repeat steps 1 and 2 to clear channel from Scan Channel Memory.
(11)
UHF CB CHANNELS & FREQUENCIES
Please follow these guidelines for channel use in Australia:
• Channels 05 and 35 are Emergency Channels.
• Channel 11 is a Calling Channel.
• Channels 22 and 23 are for telemetry and telecommand applications
and TX is inhibited on these channels.
General communication is accepted on all other channels with
these guidelines:
• Channel 40 - road channel (Australia).
• Channels 01-08 (and 31-38) are repeater channels.
CH No.
Simplex Mode
Transmit / Receive
Frequency (MHz)
Duplex Mode
Transmit
Frequency (MHz)
1
2
3
4
5
6
7
8
9
10
11
12
13
14
15
16
17
18
19
20
476.425
476.450
476.475
476.500
476.525
476.550
476.575
476.600
476.625
476.650
476.675
476.700
476.725
476.750
476.775
476.800
476.825
476.850
476.875
476.900
477.175 CH31
477.200 CH32
477.225 CH33
477.250 CH34
477.275 CH35
477.300 CH36
477.325 CH37
477.350 CH38
(12)
CH No.
Simplex Mode
Transmit/Receive
Frequency (Mhz)
21
22
23
24
25
26
27
28
29
30
31
32
33
34
35
36
37
38
39
40
476.925
476.950 (RX only)
476.975 (RX only)
477.000
477.025
477.050
477.075
477.100
477.125
477.150
477.175
477.200
477.225
477.250
477.275
477.300
477.325
477.350
477.375
477.400
CTCSS & DCS Code List
(o0)
(o1)
(o2)
(o3)
(o4)
(13)
WARRANTY
UNIDEN uh064sx UHF CB RADIO
Limited One Year Warranty
Please keep your sales docket as it provides evidence of warranty.
Warrantor: Uniden Australia Pty Limited ABN58 001 865 498 Uniden New Zealand Limited.
Warranty only available in original country of purchase.
Elements of Warranty: Uniden warrants to the original retail owner for the duration of this
warranty, its uh064sx UHF CB Transceiver Radio (hereinafter referred to as the Product) to be free
from defects in materials and craftsmanship with only the limitations or exclusions set out below.
Warranty Duration: This warranty to the original retail owner only, shall terminate and be of no
further effect ONE (1) Year after the date of original retail sale. This warranty will be deemed invalid
if the Product is; (A) Damaged or not maintained as reasonable and necessary, (B) Modified,
altered or used as part of any conversion kits, subassemblies, or any configurations not sold by
Uniden, (C) Improperly installed, (D) Repaired by someone other than an authorised Uniden
Repair Agent for a defect or malfunction covered by this warranty, (E) Used in conjunction with any
equipment or parts or as part of a system not manufactured by Uniden, (F) Installed, programmed
or serviced by anyone other than an authorised Uniden Repair Agent, or (G) Where the Serial
Number label of the product has been removed or damaged beyond recognition.
Parts Covered: This warranty covers for 1 year, the UHF CB Transceiver Unit only.
Accessories: Belt Clip, Battery cover, Batteries etc are covered for 90 days.
Statement of Remedy: In the event that the product does not conform to this warranty
at any time while this warranty is in effect, the warrantor at its discretion, will repair the
defect or replace the product and return it to you without charge for parts and service.
This warranty does not cover provide for the reimbursement or payment of incidental or
consequential damages.
Procedure for Obtaining Performance or Warranty: In the event that the Product
does not conform to this warranty, the Product should be shipped or delivered, freight
prepaid with evidence of original purchase, (eg. a copy of the sales docket), to the warrantor at:
UNIDEN AUSTRALIA PTY LIMITED
Service Division
345 Princes Highway, Rockdale, NSW 2216
Fax (02) 9599 3278
www.uniden.com.au
UNIDEN NEW ZEALAND LIMITED
Service Division
150 Harris Road, East Tamaki, Auckland
Fax (09) 274 4253
www.uniden.co.nz
Customers in other states should ship or deliver the Product freight pre-paid to the nearest
Uniden Authorised Repair Centre. (Contact Uniden for the Warranty Agent nearest you.)
(14)
© 2006 Uniden Australia Pty Limited/Uniden New Zealand Limited
Printed in China UTZZ01933ZZ(0)