1
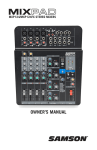
MXP144/MXP144FX STEREO MIXERS
OWNER’S MANUAL
Important Safety Information
EMC Notice
•
MXP144 and MXP144FX can be used in following electromagnetic environment:
residential, commercial and light industrial, urban outdoors.
•
For MXP144 and MXP144FX, the peak inrush current is 4.90 A
FCC Notice
This device complies with part 15 of the FCC Rules. Operation is subject to the following
two conditions: (1)this device may not cause harmful interference,and (2)this device
must accept any interference received,including interference that may cause undesired
operation.
Changes or modifications not expressly approved by the party responsible for compliance
could void the user’s authority to operate the equipment.
NOTE: This equipment has been tested and found to comply with the limits for a Class
B digital device, pursuant to Part 15 of the FCC Rules. These limits are designed to provide reasonable protection against harmful interference in a residential installation. This
equipment generates, uses and can radiate radio frequency energy and, if not installed
and used in accordance with the instructions, may cause harmful interference to radio
communications. However, there is no guarantee that interference will not occur in a
particular installation. If this equipment does cause harmful interference to radio or television reception, which can be determined by turning the equipment off and on, the user
is encouraged to try to correct the interference by one or more of the following measures:
•
Reorient or relocate the receiving antenna.
•
Increase the separation between the equipment and receiver.
•
Connect the equipment into an outlet on a circuit different from that to which the
receiver is connected.
•
Consult the dealer or an experienced radio/TV technician for help.
Copyright 2014
v1.2
Samson Technologies Corp.
45 Gilpin Avenue
Hauppauge, New York 11788-8816
Phone: 1-800-3-SAMSON (1-800-372-6766)
Fax: 631-784-2201
www.samsontech.com
Important Safety Information
ATTENTION
RISQUE DE CHOC ÉLECTRONIQUE NE PAS OUVRIR
WARNING: TO REDUCE THE RISK OF ELECTRIC SHOCK,
DO NOT REMOVE COVER (OR BACK) AS THERE ARE NO
USER-SERVICEABLE PARTS INSIDE. REFER SERVICING
TO QUALIFIED SERVICE PERSONNEL.
This lightning flash with arrowhead symbol within an equilateral triangle
is intended to alert the user to the presence of non-insulated “dangerous
voltage” within the product’s enclosure that may be of sufficient magnitude to constitute a risk of electric shock.
The exclamation point within an equilateral triangle is intended to alert
the user to the presence of important operating and maintenance instructions in the literature accompanying the appliance.
If you want to dispose this product, do not mix it with general household waste. There is a
separate collection system for used electronic products in accordance with legislation that
requires proper treatment, recovery and recycling.
Private household in the 28 member states of the EU, in Switzerland and Norway may return their
used electronic products free of charge to designated collection facilities or to a retailer (if you
purchase a similar new one).
For Countries not mentioned above, please contact your local authorities for a correct method of
disposal.
By doing so you will ensure that your disposed product undergoes the necessary treatment, recovery
and recycling and thus prevent potential negative effects on the environment and human health.
3
Important Safety Information
1. Read these instructions.
2. Keep these instructions.
3. Heed all warnings.
4. Follow all instructions.
5. Do not use this apparatus near water.
6. Clean only with dry cloth.
7. Do not block any ventilation openings.
Install in accordance with the manufacturer’s instructions.
8. Do not install near any heat sources
such as radiators, heat registers,
stoves, or other apparatus (including
amplifiers) that produce heat.
9. Do not defeat the safety purpose of
the polarized or grounding type plug.
A polarized plug has two blades with
one wider than the other. A grounding
type plug has two blades and a third
grounding prong. The wide blade or
the third prong are provided for your
safety. If the provided plug does not
fit into your outlet, consult an electrician for replacement of the obsolete
outlet.
10. Protect the power cord from being
walked on or pinched particularly at
the plugs, convenience receptacles,
and at the point where they exit from
the apparatus.
11. Only use attachments/accessories
specified by the manufacturer.
12. Use only with the cart, stand, tripod, bracket, or table specified by
the manufacturer, or sold with the
4
apparatus. When
a cart is used, use
caution when moving
the cart/apparatus
combination to avoid
injury from tip-over.
13. Unplug the apparatus during lightening storms or when unused for long
periods of time.
14. Refer all servicing to qualified
personnel. Service is required when
the apparatus has been damaged in
any way, such as power supply cord
or plug is damaged, liquid has been
spilled or objects have fallen into the
apparatus has been exposed to rain or
moisture, does not operate normally,
or has been dropped.
15. This appliance shall not be exposed
to dripping or splashing water and
that no object filled with liquid such
as vases shall be placed on the apparatus.
16. Caution-to prevent electrical shock,
match wide blade plug wide slot fully
insert.
17. Please keep a good ventilation environment around the entire unit.
18. To prevent injury, this apparatus must
be securely attached to the stand
in accordance with the installation
instructions.
19. CAUTION: Danger of explosion if battery is incorrectly replaced. Replace
only with the same or equivalent type.
Table of Contents
Introduction . . . . . . . . . . . . . . . . . . . . . . . . . . . . 6
Basic Operation . . . . . . . . . . . . . . . . . . . . . . . . . . 7
Adding Digital Effects (MXP144FX Only) . . . . . . . . . . . . . . 8
USB Connectivity (MXP144FX Only) . . . . . . . . . . . . . . . .
9
Features . . . . . . . . . . . . . . . . . . . . . . . . . . . . . 10
Top Panel Controls . . . . . . . . . . . . . . . . . . . . . . . . 11
Mono Input Channel Section . . . . . . . . . . . . 11
Stereo Input Channel Section . . . . . . . . . . . . 13
Stereo Return Section . . . . . . . . . . . . . . . 14
Digital Effects Section (MXP144FX only) . . . . . . 15
Master Section . . . . . . . . . . . . . . . . . . . 16
Rear Panel Connections . . . . . . . . . . . . . . . . . . . . . 18
Wiring Guide . . . . . . . . . . . . . . . . . . . . . . . . . . . 19
Specifications . . . . . . . . . . . . . . . . . . . . . . . . . . 20
Digital Effects Program List (MXP144FX Only) . . . . . . . . . . . 22
Block Diagram . . . . . . . . . . . . . . . . . . . . . . . . . . 23
5
Introduction
Congratulations on your purchase of the Samson MixPad MXP144 or MXP144FX
mixer! The MXP144 and MXP144FX are 12-channel mixers, with four mic/line
channels with low-noise, microphone preamps, two stereo channels with XLR
mic inputs and ¼” line input channels, and two stereo line input channels with
RCA and ¼” inputs. The input channels feature a 3-band equalizer and 60mm
faders. The microphone inputs have gain controls, and high-pass filters. The first
four channels have compression controls to increase the level of the inputs which
is helpful to control clipping or overload.
To add depth to mix, the MXP144FX has 100 24-bit digital studio quality
effects, which include Delays, Chorus, Flanging, and lush Reverbs. It’s easy to
dial up your favorite effects preset with the large seven-segment LED display.
The MXP144FX also feature an on-board USB digital interface allowing you
to record and playback digital audio from a computer running most recording
software. The flexible routing option lets you assign the USB return signal to the
main stereo mix, or to the headphones and mix 2 bus.
Clean, clear sound reproduction with accurate equalization and flexible
signal routing in a rugged enclosure, ensure reliable high quality sound from
performance to performance. Optimized for recording, live sound reinforcement
and commercial installations, the MXP144 and MXP144FX are ideal mixer
solutions, offering big sound in a compact package.
In these pages, you’ll find a detailed description of the features of the MixPad
mixers, as well as a description of its front and rear panels, step-by-step
instructions for its setup and use, and full specifications. If you purchased the
mixer in the United States, you will find a warranty card enclosed, please fill it
out and mail it in so that you can receive online technical support and so we can
send you updated information about these and other Samson products in the
future.
We recommend you record your serial number in the space provided below for
future reference.
Serial number: _________________________
Date of purchase: _______________________
With proper care and maintenance, your MixPad mixer will operate trouble-free
for many years. Should your speaker ever require servicing, a Return Authorization
(RA) number must be obtained before shipping your unit to Samson. Without this
number, the unit will not be accepted. Please call Samson at 1-800-3SAMSON
(1-800-372-6766) for an RA number prior to shipping your unit. Please retain
the original packing materials and, if possible, return the unit in its original
carton. If your mixer was purchased outside of the United States, contact your
local distributor for warranty details and service information.
6
Basic Operation
The following section explains the basic setup and operation of the MixPad
MXP144 and MXP144FX.
1. Before connecting any microphones
or instruments, make sure that
the power of all your systems
components including the MixPad
mixer is turned off. Make sure that
the MAIN MIX and MIX 2/PHONES
controls are turned all the way down.
2. Connect the cables from your
microphones and instruments to
the mixer. Microphones should be
connected to the XLR inputs of
channels 1-4. Line level devices
can be plugged into the mono ¼”
input channels (1-4) or the stereo
input channels (5-12). Acoustic
instruments and electric guitars and
basses need to be connected to a
direct box or preamp before plugging
into the mixer.
3. Switch on the power of any peripheral devices, and then power up the
MixPad mixer.
NOTE: It is important to remember the Golden Rule of audio… “LAST ON,
FIRST OFF.” Translated, this means that when turning on your system, you
should always turn your power amplifiers or powered monitors on LAST, and
when turning your system off, turn your power amps off FIRST. This helps
avoid any loud pops caused by rush current at power up, or down, which
can sometimes damage loudspeakers.
4. Turn on your power amp or powered monitors and raise the level control to
the manufacturers recommended operating level.
5. Set the input gain of each input channel so that the PEAK indicators only
light occasionally during the loudest input each channel will see.
6. Set the MAIN MIX fader to the “0” position.
7. While speaking into the microphones (at performance level) or playing an
instrument, slowly raise the input channel volume faders until the desired
level is reached.
8. If you wish to adjust the tone of each channel, adjust the equalizer controls
as desired. You may have to re-adjust the channel volume.
7
Adding Digital Effects (MXP144FX Only)
The MXP144FX features built-in, high quality, 24-bit Multi Effect Processors,
offering 100 studio grade effects presets. The DIGITAL EFFECTS section
features clean Delays, lush Reverbs and multi-effects like Delay + Reverb. The
following details the operation of the internal DSP effects in the DIGITAL
EFFECTS section.
1. Connect a mic or instrument to the desired channel,
adjust the level and equalizer to your liking and make
sure the MAIN MIX fader level is set so you can hear
it in your speakers.
2. Press the effects ON button to activate the digital
effects channel strip.
3. Select the desired effects program using the SELECT
control knob located in the middle of the channel
strip. Rotate the SELECT switch to one of the 100
effects and press to confirm the selection.
4. Rotate the master FX send clockwise and set the
effects to FX fader to the 0 (unity) position.
Note: If sending multiple channels to the internal
effects, and the Digital Effects peak indicator is
flashing red, turn the master FX down.
5. Use the FX control on the input channel to adjust the
level of signal to sent to the effects.
Note: The signal feeding the FX control is sent after
the channel Fader, so the channel Fader has an effect
on that level, meaning the FX level tracks up and
down with the channel Fader.
6. To send the Digital Effects to the monitors, for
example - to add reverb to vocals in the state
monitors, raise the MON control in the Digital Effects
channel strip.
8
USB Connectivity (MXP144FX Only)
The MXP144FX has a built-in stereo USB audio interface allowing you to record
and playback from a computer using virtually any digital recording software.
Setting up your mixer with a computer is a simple procedure that takes just
a few minutes. The following section describes how to connect and setup the
MXP144FX with a computer.
1. Connect the MXP144FX to the
computer using a standard USB
cable (not included).
2. In your audio software, set the
input and output device to the
MXP144FX.
3. The audio sent from the
MXP144FX to the computer
follows the Main Mix bus.
4. For playback, you can return the
USB stereo signal directly into the
main left and right mix bus so that
the playback from the PC sums
with the MAIN mix on the console.
To hear the USB playback in the MAIN MIX press the TAPE/USB TO MAIN
MIX switch.
5. The TAPE/USB TO MIX 2 + PHONES switch is used to assign the USB
return to the Mix 2 and headphones bus. This allows you to mix the
playback in studio monitors or isolate the playback to a mix zone.
9
Features
The Samson MixPad mixers are comprehensive, all-in-one solution for live
sound, recording, fixed installation and post production applications. Here are
some of their main features:
• Ultra-low noise, high headroom analog mixer
• Six Class A MDR (Maximum Dynamic Range) mic preamps
• Four stereo channels with RCA and ¼” inputs
• Three-band active channel EQ
• High-quality, 60mm precision faders
• 100 24-bit, low-noise digital effects (MXP144FX Only)
• High-integrity, bi-directional USB interface (MXP144FX Only)
• Four single-knob, studio-quality compressors
• Pre-fader Aux Send for monitor mix
• Post-fader Aux Send for external effects
• All mic channels equipped with input Gain and high pass filters
• 48-volt Phantom Power for condenser microphones
• Multiple outputs: Main Mix, Mix 2, Phones and Tape
• XLR and 1/4” Main Mix outputs
• USB (MXP144FX) and Tape inputs assignable to Main Mix or Mix 2/Phones
outputs
10
Top Panel Controls
Mono Input Channel Section
The following section details four mono input channels.
1.
2.
MIC Inputs - Use these balanced XLR inputs to connect
low Impedance microphones and low level signals from
direct boxes. The MIC inputs feature +48V phantom
power, allowing you to use condenser microphones.
XLR Connector pin-out - Pin 1: Ground, Pin 2: Hot (+),
Pin 3: Cold (-)
Line Level Input - Use these balanced TRS ¼” inputs to
connect synthesizers, drum machines, effects processors
or any line-level signal. You can connect balanced and
unbalanced devices to these inputs.
TRS phone jacks Connector pin-out - Sleeve: Ground,
Tip: Hot (+), Ring: Cold (-)
1
2
3
4
5
1
3.
INSERT (Send and Return) Jack - The ¼” TRS (Tip, Ring,
Sleeve) INSERT jack is for connecting outboard effects processors directly
on the channel input. The signal is sent on the tip (the Send) and returns
2
on the ring (the Return) of the connector.
6
4.
GAIN Control - Variable GAIN control with a range of +5 to +45dB on the
3
MIC input and -20 to +20dB on the LINE input.
5.
HPF Switch - The high pass filter rolls off the low frequencies
4 from the
XLR MIC inputs from 80Hz and below at the rate of 12dB per octave. The
7 you don’t
5
high pass filter allows you to remove the lower frequencies that
want the microphone to pick up. In live sound applications, the high pass
filter is useful for removing stage rumble.
6.
COMP Control - The COMP knob adjusts the level of
compression applied to the channel. As the COMP knob
8
is turned clockwise, the compression ratio is raised and
the output gain is adjusted accordingly. The dynamic
9
range of the channel is narrowed, where softer signals
will be magnified and loud signals will be subdued to sit
better in the mix. Too much compression can create a
10
7
pumping effect, eliminate all dynamic range, and lead
to feedback.
7.
Equalizer (HIGH, MID, and LOW) - This three-band
12
equalizer allows you to contour a channel’s high, mid,
and low frequency bands. When the control is set to the 128o’clock
(detent) position, there is no effect on the signal. Turning the controls
fully clockwise will raise the level of the frequency band +15 dB, while
9 of the
turning the controls fully counterclockwise will lower the level
13
frequency band -15 dB.
10
6
11
11
7
Top Panel Controls
8.
9.
MON Auxiliary Control - Controls the amount of that
channel’s signal that is sent to the MON Output. The
signal feeding MON is sent before, or pre, the channel
fader, so the channel fader has no effect on the MON
level. The MON is usually used to create a separate mix
for a floor monitor system.
8
9
10
FX Auxiliary Control - FX Auxiliary Control - The channel’s
FX knob controls the amount of signal that is sent
to the effects bus. The signal of the FX bus in the
MXP144FX is routed to the Digital Effects section for
12
on-board signal processing. The FX signal can also be
sent to an external effect device connected to the FX
SEND jack located on the front panel jack field.
11
10. PAN Control - The PAN control is used to place or
13
position the mono signal into the stereo main left and
right mix bus. You can create a stereo image by panning
some input signals to the left and others to the right.
11. PEAK Indicator - This LED indicator will flash red when
the channel input signal peaks. To reduce distortion,
turn the GAIN control counterclockwise until the clip
indicator does not light during normal use.
12. MUTE Switch - The MUTE switch allows you to turn the
channel on or off.
13. Volume Fader - The Volume Fader control adjusts the level of each mono
input channel.
12
Top Panel Controls
Stereo Input Channel Section
The following section details four stereo input channels.
14. MIC Inputs (CH5/6 & CH7/8) - Use these balanced XLR
inputs to connect low Impedance microphones and low
level signals from direct boxes. The MIC inputs feature
+48V phantom power, allowing you to use condenser
microphones.
XLR Connector pin-out - Pin 1: Ground, Pin 2: Hot (+),
Pin 3: Cold (-)
14
15
15. Stereo ¼” Input Jacks - Use the ¼” jacks for connecting
stereo line level sources. For stereo inputs use the LINE L 16
to connect
the left channel and the LINE R to connect the right channel. Use the
LEFT input when connecting a mono input signal to the Stereo Input
channels. You can connect outputs from high impedance microphones,
synthesizers and drum machines to these inputs. The LINE inputs have a
nominal operating level of -40dBV through - 10dBV.
TRS phone jacks Connector pin-out - Sleeve: Ground, Tip: Hot (+), Ring:
Cold (-)
16. Stereo RCA Input Jacks (CH9/10 & 11/12) - The stereo
channel’s RCA connectors accept signals from stereo
line devices. The RCA line level inputs have a nominal
operating level of -40dBV through - 10dBV.
17. Equalizer (HIGH, MID, and LOW) - This three-band
equalizer allows you to contour a channel’s high, mid,
and low frequency bands. When the control is set to the
12 o’clock (detent) position, there is no effect on the
signal. Turning the controls fully clockwise will raise the
level of the frequency band +15 dB, while turning the
controls fully counterclockwise will lower the level of
the frequency band -15 dB.
18. MON Auxiliary Control - Controls the amount of that
channel’s signal that is sent to the MON Output. The
signal feeding MON is sent before, or pre, the channel
fader, so the channel fader has no effect on the MON
level. The MON is usually used to create a separate mix
for a floor monitor system.
16
17
18
19
20 of signal
19. FX Auxiliary Control - The channel’s FX knob controls the amount
17
that is sent to the effects bus. The signal of the FX bus in the MXP144FX
is routed to the Digital Effects section for on-board signal processing. 21
The
FX signal can also be sent to an external effect device connected to the
22
FX SEND jack located on the front panel jack field.
18
13
18
Top Panel Controls
20. BAL Control - This control is used to place, or position,
the stereo signal into the main left and right stereo mix
field. You can create a stereo image by panning some
input signals to the left and others to the right.
21. PEAK Indicator - This LED indicator will flash RED when
the channel input signal peaks. To reduce distortion,
turn the LEVEL control counterclockwise or lower the
volume of the input device until the clip indicator does
not light during normal use.
22. MUTE Switch - The MUTE switch allows you to turn the
channel on or off.
19
20
24
21
22
24
23
23. Volume Fader - The Volume Fader control adjusts the
level of each stereo input channel.
Stereo Return Section
The following section describes the features control of the
Stereo Return section.
24. Stereo ¼” Input Jacks - These ¼” jacks are for
connecting stereo line level sources like those from the
outputs of effects processors. The LINE inputs have a
nominal operating level of -40dBV through - 10dBV.
TRS phone jacks Connector pin-out - Sleeve: Ground,
Tip: Hot (+), Ring: Cold (-)
25
26
25. MON Master Send - The MON signals from mono and
stereo input channels, along with the Digital Effects
25
return, are mixed together and sent to the MON Output.
Use the MON level control to set the amount of signal
26
being sent to MON SEND jack.
26. FX Master Send - The FX signals from mono and stereo
input channels, are mixed together and sent to the
internal Digital Effects and the FX Output. Use the FX
level control to set the amount of signal being sent to
the internal Digital Effects and the FX SEND jack.
27
27. Volume Fader - The Volume Fader control adjusts the
level of Stereo Return.
27
25
14
26
24
Top Panel Controls
Digital Effects Section (MXP144FX only)
The following section describes the features control of the on-board 24-bit
digital Multi-effects section.
28. PROGRAM Effects Display - The mixer’s multi-effects
processors feature a dual digit, seven-segment
numerical display for showing the effects PROGRAM
number from 00 - 99.
29. SELECT Control Knob - The SELECT control knob is
a continuously variable encoder to call up one of
the 100 built-in digital effects presets. Rotate the
SELECT knob to scroll through the preset programs
and press to load the selected effect.
28
29
30
30. To MON Control - This control is used to adjust the
level of the effects from the built-in Digital Effects
that’s being sent to the MON bus. This allows you to
add the effects to the signal in your monitor speakers.
31. Effects ON Switch - The effects ON switch is used to
turn the internal digital effect on and off. The effects
are by-passed when the switch is in the out position.
32. On/Peak Indicator - This LED indicator lights green
when the Digital Effects is turned on. The indicator
lights red when the input signal to the internal Digital
Effects is overloaded.
33. FX Fader - The FX fader is used to adjust the level of
the effects from the built-in digital effect that is sent
to the MAIN MIX bus. This allows you to hear the
DSP effects in your main speakers.
32
31
33
15
Top Panel Controls
Master Section
This following section details the master section of the mixer.
34. TAPE IN (RCA jacks) - Stereo line
level input, on RCA connectors,
for connecting the output of
devices such as MP3, CD,
computer sound-card, or any
other line level device.
35. TAPE OUT (RCA jacks) - The
signal present at this connector
is the MAIN bus signal before
it has passed through the
MASTER level control and
graphic equalizer. The nominal
output level is -10dBV and the
impedance is 100 Ohms.
38
34
35
36
37
39
40
41
36. MON SEND - The signal present at the MON SEND output is sent from the
MON bus, which is fed from the MON send on the input channels.
37. FX SEND - The signal present at the FX SEND output is sent from the FX
bus, which is fed from the FX send on the input channels.
42
38. MAIN MIX XLR Outputs - The stereo MAIN MIX is sent to the LEFT and
RIGHT MAIN MIX XLR connectors. The signal level at these MAIN MIX
connectors follows the MAIN MIX volume fader. In a live 43
sound application, you can drive a speaker system using the MAIN MIX outputs connected to a power amplifier or powered speakers.
XLR Connector pin-out - Pin 1: Ground, Pin 2: Hot (+), Pin 3: Cold (-)
44
39. MAIN MIX ¼” Outputs - The MAIN MIX ¼” jacks can be connected to a
power amplifier, powered speaker system, or inputs of a digital recorder.
The signal at the MAIN OUT jacks follows the MAIN volume fader. 45
40. MIX 2 - These line level MIX 2 outputs can be used to drive a second
46
speaker system or connect to a stereo device such as computer sound
card, MP3, or recorder. The signal at the MIX 2 jacks follows the MIX 2
47
level control knob allowing you to set a different level at the outputs.
41. PHONES Output - Connect standard ¼” TRS stereo headphones, 60 to 600
48
Ohms. The PHONES output level is controlled by the MIX 2/PHONES
control.
49
16
Top Panel Controls
42. POWER Indicator - The POWER LED lights up to
indicate that the main POWER switch (located on the
rear panel) is on.
43. Output Level Meter - The output level meter allows you
to monitor the level of the signal, which is being sent
to the MAIN MIX jacks.
NOTE: To avoid distortion, adjust the MAIN MIX level
control so that the 0 indicator LED lights occasionally.
44. PHANTOM Power Switch and Indicator - The mixer
features an on-board, 48-Volt Phantom power supply
to operate condenser microphones. When the switch
is engaged, the LED will illuminate indicating that
phantom power is now available at the microphone
preamps.
IMPORTANT NOTE: To avoid a loud pop, be sure to
turn down the master level controls before plugging
and unplugging the mic cables when the phantom
power is active. Be sure the MAIN level fader is turned
all the way down before activating the Phantom Power
to prevent pops from entering any external device
connected to the mixer. Also, be sure the Phantom
Power is OFF when connecting or disconnecting
microphones.
42
43
44
45
46
47
48
49
45. TAPE & USB (MXP144FX only) TO MIX 2 + PHONES
- This switch is used to assign the TAPE and USB
(MXP144FX only) inputs to the MIX 2 and PHONES
outputs.
46. TAPE & USB (MXP144FX only) TO MAIN MIX - This switch
is used to assign the TAPE and USB (MXP144FX only)
inputs to the MAN MIX output.
47. USB RETURN (MXP144FX only) and TAPE IN
Control - This level control is used to adjust the volume of the signal
returning from a computer via the USB input (MXP144FX only) and audio
connected to the TAPE IN RCA jacks.
48. MIX2/PHONES Control - The mixer has a second set of output connectors
carrying a duplicate of the MAIN MIX signal for the purpose of feeding
another speaker zone or recorder. The MIX 2/PHONES control knob is
used to set the volume of the MIX 2 output and the overall level of the
Headphone output.
49. MAIN MIX Fader - The MAIN MIX Level fader adjusts the level of main
left and right stereo mix sent to the MAIN MIX outputs.
17
Rear Panel Connections
This following section details the rear panel connections.
A
B
C
A.
AC Inlet - Connect the supplied power cable here.
B.
POWER - Switches on the MXP144 and MXP144FX main power.
C.
USB Port (MXP144FX Only) - Connect the MixPad mixer to a computer
using standard USB cable here.
18
Wiring Guide
There are several ways to interface the MXP mixer to support a variety of applications. Follow the cable diagrams below for connecting your mixer.
RCA
Pin 2 (hot)
Hot to Tip
Tip (signal)
Pin 3 (cold)
Male XLR
Shield & Cold to Sleeve
Pin 1 (shield)
Tip to Tip
Tip (+Signal)
Ring (-Signal)
Sleeve (ground)
Tip (signal)
Balanced ¼” Connector
Sleeve (ground)
Sleeve & Ring to Sleeve
Tip (signal)
Tip to Tip
Sleeve (ground)
Tip (signal)
Unbalanced ¼” Connector
Sleeve (ground)
Unbalanced ¼” Connector
Pin 2 (hot)
Male XLR
Pin 1 (shield)
Pin 3 (cold)
Balanced ¼” Connector
Pin 2 (hot)
Sleeve to Sleeve
Hot to Tip
Tip (signal)
Sleeve (ground)
Shield & Cold to Sleeve
Hot to Tip
Male XLR
Pin 1 (shield)
Pin 3 (cold)
Sleeve (ground)
Tip (+Signal)
Ring (-Signal)
Sleeve (ground)
Shield & Cold to Sleeve
19
Specifications
Frequency Response (Trim @ Min, unity gain ± 3 dB)
Mic to Main 20Hz~30KHz
Line to Main 20Hz~30KHz
Aux Return to Main 20Hz~30KHz
Line to Aux Send 20Hz~30KHz
T.H.D. (Trim @ Min, +4dBu output, unity gain, 1 kHz w/30 kHz LPF)
Mic/Line to Main (Mono Ch) <0.03%
Line to Main (Stereo Ch) <0.03%
Line to Aux Send <0.03%
Equivalent Input Noise (“A” filter on, input shorted)
Mic (Trim @ Min﹐ Fader set ”0”) < -90dB 20HZ~30KHZ A-weighted
Line (Trim @ Min﹐ Fader set ”0”) < -90dB 20HZ~30KHZ A-weighted
Maximum Voltage Gain
Mic to Main (bal)
70dB
Line to Main (bal) (Mono Ch) 43dB
Line/Tape to Main (Stereo Ch) 33dB
Aux Return to Main 25db
Mic to Aux Send 75dB
Line to Aux Send (Stereo Ch) 30dB
Residual Noise (30 kHz LPF, all control Min)
Main (All fader min) -100dBu A-weighted
Aux Send (All fader min)
-105dBu A-weighted
Crosstalk (@ 1 kHz w/ 30 kHz LPF)
Ch vs. Ch (Trim @ min﹐Fader set 0) >75dB A-weighted
Input vs. Output >60dB A-weighted
PEAK Indicators
Mic (Mono Ch)
+16dBu
Line (Stereo Ch)
+16dBu
Headphone output (600 ohm load) +20dBu
Maximum Input Level (1 kHz, ± 3dB)
Mic Input (Mono Ch) Line Input (Mono Ch) +16dBu
+40dBu
Input Channel Equalizer (± 3dB)
High ±15 dBu
Mid
±15 dBu
Low
±15 dBu
20
Specifications
Phantom Power48V±3V
Power RequirementAC100~240V 50~60Hz
Fuse T1.6A AL250V
Power Consumption<48W
Dimensions (W x D x H) 15.3” x 14.5” x 3.9”
391 mm x 370 mm x 100 mm
Weight 8.3lb / 3.8kg
USB Bus Power USB2.0 +5V DC 0.5A max
USB A-TYPE FEMALE
Internal DSP Effects
100 presets
Digital Effects Program List (MXP144FX Only)
22
Number
Effect
Parameter
00-09
Echo
Delay Time: 145~205ms
10-19
Echo + Verb
Delay Time: 208~650ms
Decay Time: 1.7~2.1s
20-29
Tremolo
Rate: 0.6~5Hz
30-39
Plate
Decay Time: 0.9~3.6s
40-49
Chorus
Rate: 0.92~1.72Hz
50-59
Vocal
Reverb Decay Time: 0.8~0.9s
Pre-Delay: 0~45ms
60-69
Rotary
Modulation Depth: 20~80%
70-79
Small Room
Decay Time: 0.7~2.1s
Pre-Delay: 20~45ms
80-89
Flanger + Verb
Decay Time: 1.5~2.9s
Rate: 0.8~2.52Hz
90-99
Large Hall
Pre-Delay: 23~55ms
2TK
TAPE IN
STEREO RETURN
STEREO IN
5e
4d
2b
1a
0dB
0dB
5e
3c
4d
2b
1a
5e
3c
4d
2b
1a
5e
3c
4d
2b
1a
5e
3c
4d
2b
1a
5e
0dB
-10dBV
RIGHT
LEFT
RIGHT
LEFT(MONO)
RIGHT
LEFT(MONO)
RIGHT
LEFT
RIGHT
4d
2b
1a
+20~-20dB3c
5e
3c
4d
2b
1a
-5dB~-45dB
LEFT(MONO)
MIC IN
2
3
1
PHANTOM
POWER
+48V
5e
3c
4d
2b
1a
+20~-20dB
INSETR
LINE IN
CHANNELS (9/10,11/12)
STEREO IN
CHANNELS (5/6,7/8)
2
3
1
-5dB~-45dBu
3c
MIC IN
GAIN
+
+
+
+
+
+
COMP.
LOW CUT
1
2
3
MUTE
PRESETS
MXP144FX Only
USB PLAYBACK
USB PLAYBACK
MUTE
DSP BOARD
TAPE 0dB
USB +10dB
3-BAND EQ
+/-15dB
-00~+10dBu
LEVEL
2TK TO MIX
-00~+10dBu
LEVEL
-00~+10dBu
LEVEL
-00~+10dBu
LEVEL
MUTE
2
MUTE
-00~+10dBu
PEAK
1
3
MUTE
TAPE RETURN
PEAK
GRE RED
3-BAND EQ
+/-15dB
LOW MID HIGH
80 2.5K 12K
LOW MID HIGH
80 2.5K 12K
3-BAND EQ
+/-15dB
3-BAND EQ
+/-15dB
LOW MID HIGH
80 2.5K 12K
PEAK
PEAK
3-BAND EQ
+/-15dB
LOW MID HIGH
80 2.5K 12K
LOW MID HIGH
80 2.5K 12K
THRESHOLD
GAIN
-5dB~-45dB(MIC)
+20~-20dB(LINE)
80Hz
80Hz
-5dB~-45dB(MIC)
+20~-20dB(LINE)
LOW CUT
1
2
3
-5dB~-45dB(MIC)
+
PHANTOM
POWER
+48V
RIGHT-BUS
LEFT-BUS
MON-BUS
-00~+10dBu
FX-BUS
MON-BUS
RIGHT-BUS
LEFT-BUS
RIGHT-BUS
LEFT-BUS
-00~+10dBu
LEFT-BUS
RIGHT-BUS
EFX-BUS
-00~+10dBu
-00~+10dBu
FX
AUX Pre
RIGHT-BUS
LEFT-BUS
EFX-BUS
-00~+10dBu
BALANCE
FX
RIGHT-BUS
LEFT-BUS
MON-BUS
-00~+10dBu
AUX Pre
BALANCE
MON-BUS
-00~+10dBu
FX
EFX-BUS
-00~+10dBu
AUX Pre
PAN
LEFT-BUS
RIGHT-BUS
MON-BUS
EFX-BUS
FX-BUS
LEFT-BUS
RIGHT-BUS
MON-BUS
EFX-BUS
FX-BUS
+
CHANNELS (1-4)
RIGHT-BUS
LEFT-BUS
FX-BUS
EFX-BUS
MON-BUS
MXP144FX Only
USBMOD
-00~+10dBu
(RIGHT)
(LEFT)
MAIN MIX LEVEL
-00~+10dBu
LEVEL
-00~+10dBu
LEVEL
USB PLAYBACK
USB RECORD
CTRL/PHONES
-00~+10dBu
3c
R 4d
2b
T 1a
S
5e
0dB
0dB
METER DISPLAY
MAIN / 2TK
EFX SEND
3c
R 4d
2b
T 1a
S
5e
AUX SEND
5e
3c
4d
2b
1a
5e
3c
4d
2b
1a
5e
3c
4d
2b
1a
RIGHT METER
LEFT METER
3c
R 4d
2b
T 1a
S
5e
3c
R 4d
2b
T 1a
S
5e
TO USB RECORD
MXP144FX Only
2
3
1
2
3
1
RIGHT
LEFT
MAIN OUT
RIGHT
0dBu
LEFT
0dBu
0dBu
C.ROOM OUT
PHONES OUT
RIGHT
0dBu
LEFT
0dBu
RIGHT
+6dBu
LEFT
+6dBu
MAIN OUT
-10dBV
TAPE OUT
Block Diagram
23
Samson Technologies Corp.
45 Gilpin Avenue
Hauppauge, New York 11788-8816
Phone: 1-800-3-SAMSON (1-800-372-6766)
Fax: 631-784-2201
www.samsontech.com