Download Minuteman 747 Instruction manual
Transcript
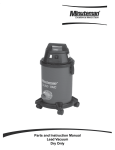
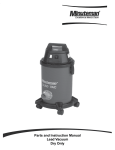
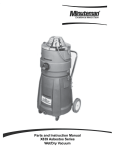
Parts and Instruction Manual
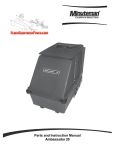
747 Wide Area Carpet Vacuum
This manual is furnished with each new MINUTEMAN 747 Wide Area Vacuum. This provides
the necessary operating and preventive maintenance instructions. Operators must read and understand this manual before operating or servicing this machine.
This machine was designed to give you excellent performance and efficiency. For best results
and minimal cost, please follow the general guidelines below:
• Operate the machine with reasonable care.
• Follow the manufacturers suggested maintenance instructions as provided in this booklet.
• Use original Minuteman supplied parts.
Technical Specifications
Model
Model No.
747
MC827969
MC828237
MC828968 (Canada)
Height (retracted)
Length (retracted)
Width
Bristle width
Volume flow rate
Brush diameter
Brush bristle
Bag volume
Filter area
Hose diameter
Motor
Wheel diameter (main)
Wheel diameter (casters)
Weight (without batteries)
24” (61 cm)
37¾” (96 cm)
29½” (75 cm)
26½” (67 cm)
200 CFM (340 m³/hr)
4” (10 cm)
Nylon
9 ft³ (.25 m³)
19 ft² (1.75 m²)
5” (13 cm)
1HP (.75 kW)
16” (41 cm)
4” (10 cm)
145 lbs (66 kg)
Parts and Instruction Manual
Table of Contents
IMPORTANT SAFETY INSTRUCTIONS .............................................................................................................................. 1
Inspection ........................................................................................................................................................................... 2
Electrical - 115 Volt ............................................................................................................................................................ 2
Electrical - 240 Volt ............................................................................................................................................................ 2
Grounding Instructions ...................................................................................................................................................... 2
Extension Cords ................................................................................................................................................................. 3
Operating ............................................................................................................................................................................ 3
Maintenance ........................................................................................................................................................................ 4
Main Assembly Bill of Material .......................................................................................................................................... 5
Main Assembly I ................................................................................................................................................................. 6
Main Assembly II ................................................................................................................................................................ 7
Fan Assembly ..................................................................................................................................................................... 8
Brush Assembly ................................................................................................................................................................. 9
Optional Accessories ....................................................................................................................................................... 10
Minuteman International Made Simple Commercial Limited Warranty ........................................................................ 11
Parts and Instruction Manual
FOR COMMERCIAL USE ONLY
IMPORTANT SAFETY INSTRUCTIONS
When using an electrical appliance, basic precautions should always be followed, including the
following:
READ ALL INSTRUCTIONS BEFORE USING
WARNING - To reduce the risk of fire, electric shock or injury:
•
Do not leave appliance plugged in. Unplug from outlet when not in use and before servicing.
WARNING
To avoid electric shock, use indoors only.
•
•
•
•
•
•
•
•
•
•
•
•
•
•
•
Never allow children or untrained adults to operate this equipment.
Keep the area of operation clear of all persons, particularly small children, and pets. Keep
bystanders at least 25 feet away from the area of operation.
Use only as described in this manual. Use only manufacturer’s recommended attachments.
Do not use with damaged cord or plug. If appliance is not working as it should, been dropped,
damaged, left outdoors, or dropped into water, return it to a service center.
Do not pull or carry by cord, use cord as a handle, close a door on cord, or pull cord around
sharp edges or corners. Do not run appliance over cord. Keep cord away from heated surfaces.
Do not unplug by pulling on cord. To unplug, grasp the plug, not the cord.
Do not handle plug or appliance with wet hands.
Do not put any object into openings. Do not use with any opening blocked. Keep free of dust,
lint, hair, and anything that may reduce airflow.
Keep hair, loose clothing, fingers, and all parts of body away from openings and moving parts.
Do not pick up anything that is burning or smoking, such as cigarettes, matches, or hot ashes.
Do not use without dust bag and/or filters in place.
Turn off all controls before unplugging.
Use extra care when cleaning on stairs.
Do not use to pick up flammable or combustible liquids such as gasoline or use in areas where
they may be present.
Connect to a properly grounded outlet only. See grounding instructions.
SAVE THESE INSTRUCTIONS
Parts and Instruction Manual
Page 1
Inspection
Carefully unpack and inspect your machine for shipping damage. Each unit is tested and thoroughly
inspected before shipment, and any damage is the responsibility of the delivering carrier who
should be notified immediately. Read all instructions carefully before operating.
WARNING
To avoid electric shock, use indoors only.
•
Electrical motors can cause explosions when operating near explosive materials or vapors.
Do not operate this machine near flammable materials such as solvents, thinners, fuels,
grain dust, etc.
•
This machine is designed to operate on a standard 15 amp. 115 volt, 60 hz, AC circuit.
Voltages below 105 volts AC or above 125 volts AC could cause serious damage to the
motor.
Electrical - 115 Volt
This machine is designed to operate on a standard 15 amp. 115 volt, 60 hz, AC circuit. Voltages
below 105 volts AC or above 125 volts AC could cause serious damage to the motor.
Electrical - 240 Volt
This machine is designed to operate on a standard 16 amp. type L fused 230 volt, 50 hz, AC
circuit. Voltages below 200 volts AC or above 250 volts AC could cause serious damage to the
motor. I.E.C. Class 1.
Grounding Instructions
To protect the operator from electrical shock, this machine must be grounded while in use. This
machine is equipped with an approved three-conductor power cord and grounding type plug to fit
the proper grounding type receptacle.
This machine is for use on a nominal 120-volt circuit and has a grounding plug that looks like the
plug illustrated in sketch A. Make sure that the machine is connected to an outlet having the same
configuration as the plug. No adapter should be used with this machine.
For equipment rated 150-250 volts: If the machine is provided with an attachment plug as shown
in sketch below, it is intended for use on a 240 volt (nominal circuit.) No adapter is available for
this plug.
Parts and Instruction Manual
Page 2
Extension Cords
Replace damaged or worn cords immediately. The table shows the correct size to use, depending
on cord length and nameplate amperage rating of machine. If in doubt, use the next heavier gauge.
An undersized cord will cause a drop in line voltage, resulting in loss of power and over-heating.
NOTE: the smaller the gauge number, the heavier the cord.
MAINTENANCE AND OPERATION INSTRUCTIONS
FOR AV-747-A VACUUM CLEANER
Though the AV-747-A is designed primarily for use on carpet, it performs very well on hard surface
floors. Sand, dust, paper, and so forth are readily vacuumed from these floors. However, it is not
recommended that this machine be used to vacuum metal slugs, metal shavings or similar type
debris from floors, either carpeted or otherwise.
Inspect the AV-747-A carton for shipping damage when received. Report any damage to delivering
freight carrier immediately.
Operating
a) Be sure the unit is used only on the voltage shown on nameplate.
b) When starting the AV-747-A, push down slightly and momentarily on the handle. Doing this
insures quick, easy starts, even when long pile carpets are being vacuumed.
c) In general, carpets with short naps - such as indoor/outdoor carpeting - are best vacuumed with
a setting of low, 2, or 3. Higher pile carpets are best cleaned with settings above 2. To adjust
brush height, disengage the cam lever (on right side) from the machine base and position it in
desired position. This handle is made to lock loosely in the positioning holes in the base.
d) The rate at which an operator pushes the machine depends on the debris load, carpet nap
length, and type of debris. In areas where large amounts of “tracked in” sand are present,
carpets should be vacuumed with a double pass - that is a forward and backward pass made
without turning the machine around at the end of one pass. A slow, moderate walk pace by an
operator, normally suffices to give good cleaning results.
e) The filter bag should be kept clean. When it contains 15-20 pounds of normal debris, it is ready
for cleaning. To clean, release bag clamp and remove from machine and empty.
f) When storing, the handle may be folded over the cover. Two screws with wing nuts need to be
removed from the handle assembly when it is put in this folded position.
Parts and Instruction Manual
Page 3
Maintenance
a)
b)
c)
Keep filter bag clean.
A drop of number 30 oil should be applied to the caster bearings and main wheel axles, two or so
times a year.
To replace brush, remove brush drive belt from motor pulley by rotating motor shaft by hand and
pulling outwardly on belt. Then, tip machine over on its top or side (hold motor mount assembly
in position when tipping or turning over); remove the sheet metal guard covering the brush
pulley. Use two small wrenches to simultaneously remove brush axle screws on each side of
frame, and slip brush out of brush cavity. Remove screws, axle, pulley and bearing end caps
from brush.
NOTE: Inspect and replace the brush bearing, if necessary, at the time of reassembly. When remounting
end caps be sure to press them squarely into the machined brush ends. Note: Be sure to line up
holes in caps and brush before pushing caps all the way into the brush core. After caps are lined up
and pressed in squarely, tighten cap screws securely. All parts can now be reassembled. Turn both
axle screws in brush axle at the same time for ease of installation. Also, be sure brush belt is on brush
before putting brush in brush cavity. After brush axle screws are securely tightened, line up belt on
brush pulley and then work the other end of the belt for tightness - it should be snugly tight, not taught.
Adjust tightness, when necessary, by adjusting screw heights on front of motor mount platform. Check
for tightness on fan belt also. If this belt is too loose, move motor toward front of machine by loosening
motor mount screws and sliding motor on forward. Be sure motor is at right angles (square) with
belts, then tighten mount screws. Recheck tightness of brush belt - adjust again, if necessary.
Reassemble other parts and unit is ready for use.
d)
e)
When the filter bag is removed for cleaning (or replacement) be sure unit is disconnected from
power source. It is good policy to inspect the fan to see if it has become fouled with debris such
as string, wire and so forth.
Periodically inspect the brush to determine whether it has become fouled with string, wire or
similar debris.
Parts and Instruction Manual
Page 4
Main Assembly Bill of Material
Item No.
1
3
4
5
6
7
8
10
11
12
13
14
15
16
17
18
19
20
21
22
23
25
26
28
29
30
32
33
34
35
36
37
38
39
42
43
44
45
46
47
48
51
52
53
54
56
57
58
59
60
61
Part No.
130010
601163
710195
711599
710755
710776
711016
711115
711124
711221
712565
711228
711231
710776
713045
711328
711359
711366
711379
833929
711439
711506
711516
711539
711544
711575
712300
711553
711515
712565
712904
712667
712810
712811
712822
712825
712904
712900
712908
715384
715029
808697
808706
833859
808720
808737
808744
827871
808756
808758
808760
Qty.
2
1
4
1
2
1
2
2
4
3
2
10
4
2
1
2
2
2
15
1
5
8
1
4
5
2
3
8
2
2
5
4
12
13
4
1
1
1
12
1
1
1
1
1
1
2
2
2
4
2
1
Description
CLAMP-CORD
Switch Assembly
SCR-MC 5/16-18 x .50
Flatwasher
SCR-MC 1/4-20 x .50
SCR-MC 5/16-18 x 2.25
SCR-SK 1/4-20 x .50
SCR-ST-A 8 x .62
SCR-ST-B 10 X .37 NI
BLT-HH 1/4-20 x 2.25
SCR-MC 1/4-20 X .62 SS
BLT-HH 5/16-18 x .75
BLT-HH 5/16-18 x 1.25
BLT-HH 5/16-18 x 2.50
BLT-HH 3/8-16 X 1.75 #5
Nut-Hex 3/8-16
Nut-Acorn 5/16-18BR
Nut-Wing 5/16-18
Nut-Flanged Wizz 5/16-18
Compression Spring
Nut-Flanged Wizz 3/8-16
WSR-Flat 5/16 ST PL
WSR-Flat .31 x 1.25 x .05
WSR-EXT LOCK 3/8
WSR-Helical 1/4
WSR-Flat .31 x .75 x .06
WSR-Finish #8
WSR-INT LOCK #10
WSR-FLT .406 X .812 X .0625
SCR-MC 1/4-20 x .62
NUT-ACORN 10-24 NIPL
Nut-Hex 1/4-20
SCR-MC 10-24 x .37
SCR-MC 10-24 x .62
SCR-THMS 10-24 x .50
BLT-Eye 10-24 x 1.50
Nut-Acorn 10-24
NUT-HEX 10-24 STPL
Nut-Flanged Wizz 10-24
Decal-MMan 1.4 X 9.68 DK GRY
Decal, Serial Name Plate
Clamp Cord
Blower Hose
BRUSH PLATE 747 14GA
Bumper Clip
Bumper Clip
Hose Clamp
Wheel
E Ring
Mount Bracket
Handle Bracket
Item No.
62
62A
62B
63
64
65
66
67
68
70
72
73
74
76
77
78
79
80
81
82
83
84
85
86
87
88
89
90
91
92
93
94
95
96
97
98
99
*100
101
102
103
104
105
106
107
108
109
110
111
112
*XX
Part No.
808766
832812
808115
808767
808776
808785
827703
808803
808829
809444
760428
760429
711910
827855
827873
827880
827890
827892
827906
827912
927973
827998
827999
828596
828778
828893
829182
829184
819186
829187
829202
829205
829296
711620
829299
829310
829880
831641
740108
808759CTD
833472
833695
833928
833926
833699
715506
833927
711717
832448
715504
829277
Qty.
1
1
1
2
1
1
1
2
1
4
1
1
4
1
1
1
1
1
1
1
1
1
1
2
1
6
1
2
2
1
2
1
3
4
2
2
1
1
1
1
1
1
1
1
1
1
1
1
1
1
1
Description
Motor, 115V, 60 hz
Motor, 230V, 50 hz
Brush Motor, 1 hp Canada)
Multi V Belt
Motor Pulley
Motor Cord
Key
Brkt. Hold Down
Wheel, Truck
Clip Cord
Latch Only
Latch-Keeper
Rivet-Pop
Base Weld
Mount Motor
Fan Assembly
Box Switch
Brush
Hinge Base
Baffle
Cover Base
Clamp
Spring
Grommet
Label Caution
Rivet Pop
Bumper Assembly
Caster Pivot
Caster Brkt.
Shaft
Axle Rear
Brkt. Handle
Roll Pin 1/4 x 7/8
PIN-ROLL .25 X 1.25
Swivel Caster
Spring
Cord 75 ft.
Bag, Cloth - 2 zipper
Strain Relief-Heyco
Handle 747 PVC Coated
End Cap
Cover Plate
Handle Adj.
Mount Handle Adj.
Gasket Handle
Decal Handle Adj.
Adj. Plate
Retaining Ring-E EXT .37
Shoulder Screw
Decal, Disengage
Paper Liner Bag
* Not Shown
Diagrams for part numbers listed can be found on pages 6 & 7
Parts and Instruction Manual
Page 5
Main Assembly I
Parts and Instruction Manual
Page 6
Main Assembly II
Parts and Instruction Manual
Page 7
Fan Assembly
Item
1
2
3
4
5
6
7
8
10
13
14
15
18
**
Part No.
827881
827883
808727BAL
801535
808733
808734
829183
808821
829285
711206
711544
711015
827885
827880
Parts and Instruction Manual
Qty.
1
1
1
2
2
1
1
1
1
8
8
8
1
Description
Housing, Fan (bottom)
Housing, Fan (top)
Fan
Bearing Ball
Ring, Retaining
Pulley, Fan
Shaft, Bearing
Key
Spacer
Bolt-HH 1/4-20 X .87
Washer-Helical 1/4
Screw, Set (#10 - 24 x 3/8) (812006)
Gasket, Housing
Fan Assembly Complete
Page 8
Brush Assembly
Item
1
2
3
4
5
6
7
8
9
11
12
**
Parts and Instruction Manual
Part No.
711161
711162
711553
712318
827893
827894
827896
827897
827898
828145
828588
827892
Qty.
6
6
12
2
1
2
1
1
1
2
2
Description
Screw #10-16 X 3/4
Screw #10 x 1 1/2
Washer-Int Lock #10
Washer-Flat .75 X 1.12 X .12
Nylon Tynex Brush Core
Cup, Bearing
Cover, Bearing
Shaft, Brush
Pulley, Brush
Ring, Retaining
Bearing
Brush Assembly Complete
Page 9
Optional Accessories
831641
829277
Cloth Bag w/Zipper
Paper Bag Liner
827892
827893
Nylon Tynex Brush Asy
Nylon Tynex Brush Core
830721
828927
Static-Free Brush Assembly
Static-Free Brush Core
Parts and Instruction Manual
Page 10
Minuteman International Made Simple Commercial Limited Warranty
Minuteman International, Inc. warrants to the original purchaser/user that the product is free from defects in
workmanship and materials under normal use. Minuteman will, at its option, repair or replace without charge, parts
that fail under normal use and service when operated and maintained in accordance with the applicable operation and
instruction manuals. All warranty claims must be submitted through and approved by factory authorized repair
stations.
This warranty does not apply to normal wear, or to items whose life is dependent on their use and care, such as belts,
cords, switches, hoses, rubber parts, electrical motor components or adjustments. Parts not manufactured by
Minuteman are covered by and subject to the warranties and/or guarantees of their manufacturers. Please contact
Minuteman for procedures in warranty claims against these manufacturers.
Special warning to purchaser -- Use of replacement filters and/or prefilters not manufactured by Minuteman or its
designated licensees, will void all warranties expressed or implied. A potential health hazard exits without original
equipment replacement.
All warranted items become the sole property of Minuteman or its original manufacturer, whichever the case may be.
Minuteman disclaims any implied warranty, including the warranty of merchantability and the warranty of fitness for a
particular purpose. Minuteman assumes no responsibility for any special, incidental or consequential damages.
This limited warranty is applicable only in the U.S.A. and Canada, and is extended only to the original user/purchaser
of this product. Customers outside the U.S.A. and Canada should contact their local distributor for export warranty
policies. Minuteman is not responsible for costs or repairs performed by persons other than those specifically
authorized by Minuteman. This warranty does not apply to damage from transportation, alterations by unauthorized
persons, misuse or abuse of the equipment, use of non-compatible chemicals, or damage to property, or loss of
income due to malfunctions of the product.
If a difficulty develops with this machine, you should contact the dealer from whom it was purchased.
This warranty gives you specific legal rights, and you may have other rights which vary from state to state. Some
states do not allow the exclusion or limitation of special, incidental or consequential damages, or limitations on how
long an implied warranty lasts, so the above exclusions and limitations may not apply to you.
Cord Electric Group………. Three years parts, two years labor, ninety days travel (Not to exceed two hours)
Exceptions………. Port-A-Scrub, one year parts, six months labor
MPV 13, one year parts
MPV 14 and 18, two years parts, one year labor
RapidAir blower, one year parts, one year labor
Explosion-Proof Vacuum, one year parts, one year labor
Pneumatic Vacuums, three years parts, one year labor
EX 12 and EX12H, one year parts, one year labor
Battery Operated Group….. Three years parts, two years labor, ninety days travel
(Not to exceed two hours)
Exceptions……Sweepers, one year parts, one year labor, ninety days travel
(Not to exceed two hours)
Internal Combustion Group….One year parts, one year labor, ninety day travel
(Not to exceed two hours)
Replacement Parts……………..Ninety days
Batteries………………………….0-3 months replacement, 4-12 months pro-rate
Polypropylene Plastic Tanks…Ten years, no additional labor
111 South Rohlwing Road · Addison, Illinois 60101 USA
Phone 630- 627-6900 · Fax 630- 627-1130
E-Mail, www.minutemanintl.com
A Member of the Hako Group
987839
Rev A 11/07


