1
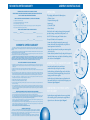
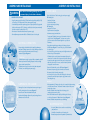
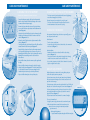
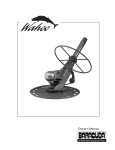
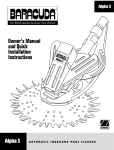
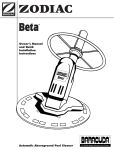
Owner’s Manual Zodiac Pool Systems, Inc. 2620 Commerce Way Vista, CA 92081 Tel: 800-822-7933 Fax: 877-327-1403 www.baracuda.com © 2009 Zodiac Pool Systems, Inc. All rights reserved. TL-3200 W1833A 2/09 IMPORTANT SAFETY INSTRUCTIONS CONTENTS Congratulations on purchasing the Baracuda® S3 Robotic cleaner. Please take a moment to read through the entire manual before installing your new unit. Your cleaner must be installed and operated as specified. Read and follow all instructions. ! WARNING Failure to heed the following warnings can result in permanent injury, electrocution or drowning. Prevent Electrical Shock • To reduce risk of electrical shock - Connect unit to receptacle protected by a ground fault circuit interrupter (GFCI). - Per United States National Electric Code (NEC), keep the power unit at least five (5) feet (Canada 3m (10ft.) per CEC requirements) from pool edge and do not remove it from caddy. Never submerge the power supply. - Do not enter pool while S3 Robotic is in water. - Do not bury cord. Locate cord so as to prevent it from being damaged by lawn mowers, hedge trimmers and other equipment. - S3 Robotic is designed with double insulation protection. Double insulation is a concept of safety in electric power products which eliminates the need for the usual three (3) wire grounded power cord. All exposed metal parts are isolated from the internal live parts with two insulation layers. - Double insulation—For continued protection against possible electric shock, use only identical replacement parts when servicing. Do not attempt repair of the S3 Robotic cleaner, power supply unit, power cord, or floating cable. -To reduce the risk of electrical shock, do not use S3 Robotic cleaner or power supply if the cord is worn or damaged. Contact Zodiac Pool Systems, Inc. immediately for a replacement cord. - NEVER OPEN POWER SUPPLY UNIT. - Do not use an extension cord to connect the unit to electric supply; provide a properly located outlet. The power supply unit shall be placed near the outlet box. PREVENT CHILD INJURY AND DROWNING • To reduce the risk of injury, do not permit children to operate this product. • Do not let anyone, especially small children, sit, step, lean, or climb on any equipment installed as part of your pool’s operational system. Unless otherwise stated, per United States National Electric Code (NEC), ALL components of your pool’s operational system should be located at least five (5) feet from the pool (3m (10ft.) in Canada per the Canadian Electrical Code (CEC) so children cannot use the equipment to gain access and be injured or drown. ! CAUTION Failure to heed the following warnings could cause damage to pool equipment or personal injury. • S3 Robotic must be installed and operated as specified. • Turn S3 Robotic off before removing it from water, and do not operate out of water. • Do not remove S3 Robotic from the pool for 15 minutes after the cleaning cycle has completed. • Clean filter element in the S3 Robotic after each use. • Do not use the product in your pool if the water temperature is above 95˚ F (35˚ C) or below 55˚ F (13˚ C). Save all instructions. 2 IMPORTANT SAFETY INSTRUCTIONS 2 S3 Robotic LIMITED WARRANTY 4 ASSEMBLY AND INITIAL USAGE 5 UNPACKING 5 ASSEMBLING THE TRANSPORT CADDY 5 CONNECTING THE POWER SUPPLY TO CADDY 5 ELECTRICAL CONNECTION 6 SUBMERGING THE Cleaner 6 INITIAL USAGE 7 RECOMMENDATIONS 7 CARE AND MAINTENANCE 8 CLEANING THE FILTER ELEMENT 8 CLEANING AND STORAGE OF THE Cleaner 9 CHANGING THE BRUSHES 9 WEIGHT ADJUSTMENTS 9 TROUBLESHOOTING 10 ELECTRICAL CERTIFICATIONS 3 11 ASSEMBLY AND INITIAL USAGE S3 Robotic LIMITED WARRANTY UNPACKING THANK YOU FOR PURCHASING THE S3 Robotic CLEANER. YOUR S3 Robotic HAS BEEN DESIGNED AND MANUFACTURED TO BE EASILY INSTALLED AND TO PROVIDE LOW MAINTENANCE OPERATION. The packaging should contain the following items: • S3 Robotic cleaner • Transport and storage caddy • Power supply • (1) Nut and (1) bolt • Owner’s Manual PRIOR TO INSTALLING YOUR NEW S3 Robotic, PLEASE DO THE FOLLOWING: 1) Complete and return the warranty card. 2) Record your purchase information on the spaces provided below. 3) Attach your invoice (or a copy) to this page. These actions will insure prompt warranty service, should it be required. Simply present your owner’s manual, along with the invoice at any of our a uthorized warranty centers nationwide. RECORD YOUR S3 Robotic POOL CLEANER DATA HERE: Power Supply Hook S3 Robotic LIMited warranty This S3 Robotic was carefully inspected before shipment from our warehouse. Upon unpacking, if any part proves defective or missing, please notify Zodiac Pool Systems, Inc. immediately. Please consult owner’s manual for complete instructions on the installation and operation of your S3 Robotic. Zodiac Pool Systems, Inc. WARRANTS THE S3 Robotic POOL CLEANER AGAINST MANUFACTURING DEFECTS FOR (2) YEARS. ALL WARRANTIES ARE EFFECTIVE FROM THE DATE OF PURCHASE. Should this product prove defective in workmanship, materials during the applicable warranty period, the consumer’s sole and exclusive remedy shall be such repair or replacement of the product as provided below. THE LIMITED WARRANTY PROVIDED HEREIN IS THE SOLE AND EXCLUSIVE WRITTEN WARRANTY WITH RESPECT TO THE S3 Robotic POOL CLEANER. ALL IMPLIED WARRANTIES IMPOSED BY APPLICABLE LAW, INCLUDING ANY IMPLIED WARRANTY OF MERCHANTABILITY OR FITNESS FOR A PARTICULAR PURPOSE, ARE LIMITED TO THE DURATION OF THE EXPRESS LIMITED WARRANTY. SOME STATES DO NOT ALLOW LIMITATIONS ON HOW LONG AN IMPLIED WARRANTY LASTS, SO THE ABOVE LIMITATION MAY NOT APPLY TO YOU. THIS limited warranty EXCLUDES THE FOLLOWING: 1.Discoloration of the S3 Robotic pool cleaner. This is caused by reaction to ultraviolet rays and the chemicals used in the pool water. Discoloration does not affect the operating ability of the S3 Robotic. Therefore, this Limited Warranty does not cover the replacement of discolored parts. 2. Damage to or malfunction of the unit resulting from excess chlorination or improper water chemistry balance. 3.Normal wear and tear of expendable parts including, but not limited to, filter elements, drive belts, drive tracks, brushes, rollers, and floating cables. 4.Age, pool water imbalance, and improper installation can cause vinyl pool liners to become brittle or unduly wrinkled. Corrosion of the supporting walls and/or irregularities in the pool base may also cause liner failure. The use of this product in such an environment is at the pool owner’s risk. Therefore, the pool owner hereby releases the manufacturer from any and all claims for damage where these conditions exist. 5.The S3 Robotic is designed for use in in-ground pools only. If unit is used in any other application, the pool owner hereby releases the manufacturer from any and all claims. This misuse will void all warranty on the unit. 6. Electrical damage caused by lightning or a bad electrical connection. 7. Abnormal use, misuse, mishandling or alteration of the S3 Robotic. 8. Under no circumstances will the warranty period on the appliance be extended or renewed as a result of a repair or replacement made under the terms of the warranty. 9. In no event shall Zodiac Pool Systems, Inc. be liable in contract or in tort, or under any other legal theory, for lost profits or revenues, loss of use or similar economic loss, or for indirect, special, incidental, consequential or similar damages, even if it has been advised of the possibility of such claim. Some states do not allow the exclusion or limitation of incidental or consequential damages, so the above limitation or exclusion may not apply to you. Important Warranty notices for Vinyl Liner Pool Owners • Certain vinyl liner patterns are particularly susceptible to rapid surface wear or pattern removal caused by objects coming into contact with the vinyl surface, including pool brushes, pool toys, floats, fountains, chlorine dispensers, and automatic pool cleaners. • Some vinyl liner patterns can be seriously scratched or abraded simply by rubbing the surface with a pool brush. Ink from the pattern can also rub off during the installation process or when it comes into contact with objects in the pool. Zodiac Pool Systems, Inc. is not responsible for, and the Limited Warranty does not cover, pattern removal, abrasion or marking on vinyl liners. • Vinyl liners are subject to deterioration or damage due to age, the effect of chemicals, corrosion or failure of the supporting walls; as well as improper installation, maintenance or cleaning of the supporting walls or base. • Before installing the S3 Robotic, examine the interior of your pool carefully. If your vinyl liner is brittle or has stones, wrinkles, roots or metal corrosion in contact with the underside of the liner, or has damage to the base material or supporting walls, do not install the S3 Robotic before having a qualified professional perform the necessary repairs. Zodiac Pool Systems, Inc. will not be responsible for liner damage. To unpack S3 Robotic and it’s components: • Remove the small box that contains the power supply. • Remove the handles (left and right) of the caddy, which are located against one side of the box. • Remove the cleaner from the box, taking care not to tangle the cable in the caddy. • Remove the lower portion of the caddy along with the upper and lower cable hooks, power supply hook, cable hook flange, locking plate, bolts and screws. Diagram 1. ASSEMBLING THE TRANSPORT CADDY • Insert the handles into the tubes on the lower portion of the caddy and align the screw holes. • Position the lower cable hook and flange on the caddy tubes. Secure the two (2) bolts through the flange, then secure the tapping screw. Do not over tighten. • Position the top cable hook and power supply hook over the holes on the handle tubes. Secure the bolts and tapping screw. Do not over tighten. Diagram 2. 1 ra m ag Di Upper Cable Hook Power Supply Hook Assembled Transport Caddy 2 City_______________________________________________________ State_________________ Zip Code_ ________________________________ Cable Hook Flange ra m (located on machine head) ag Di Connecting the Power supply to the caddy • Position the power supply hook over the power supply hook. • Slide the locking plate clips into the power supply hook and tighten the screws. Do not over tighten. Diagram 3. Locking Plate Power Supply Hook Power Supply m 3 Warranty Procedures No claim under this Limited Warranty will be recognized unless the registration card, included in your box, is completed and returned within fifteen (15) days of the purchase date. Only the original purchaser may submit a claim under this Limited Warranty. Purchaser’s claims against Zodiac Pool Systems, Inc., shall be limited to those claims which may be asserted under the Limited Warranty relating to any defect, malfunction or wear of the S3 Robotic. To obtain warranty replacements or repair, call (800) 822-7933 for authorization. When submitting a claim, always supply serial number, evidence of purchase date, retailer and a brief description of the problems/defects encountered. Zodiac Pool Cable Hooks Check that the unit has not been damaged during transport. If you detect damage, contact Zodiac Pool Systems, Inc. at 800-822-7933 before using your S3 Robotic cleaner. Date of Purchase____________ Purchased From_______________________________________ Serial Number:____________________________ Locking Plate 4 5 ra ag Di ASSEMBLY AND INITIAL USAGE INITIAL USAGE Failure to heed the following warnings can result in permanent injury, electrocution or drowning. Select either Perfect or Turbo cleaning cycle on the power supply: The Perfect Cycle • Completed in 3 hours • Cleans walls and floors • Intensive and complete cleaning The Turbo Cycle • Completed in 1.5 hours • Spends more time cleaning floor • Maximum coverage in minimal time Prevent Electrical Shock • Keep the power supply at least five (5) feet from the edge of the pool (3m (10ft.) in Canada per CEC requirements). Never submerge power supply. • You should only connect the power supply to a receptacle protected by a ground fault circuit interrupter (GFCI). Contact a certified electrician if you cannot verify that the receptacle is protected by a GFCI. • Do not use an extension cord to connect the power supply. • Do not allow anyone to swim while the S3 Robotic cleaner is in the pool. Floating Cable r ag Di am 4 • For your safety and to obtain the best possible performance from your S3 Robotic, connect the cleaner’s floating cable to the power supply and thread connector until it is snug— do not over tighten. Diagram 4. IMPORTANT: • S3 Robotic power supply is equipped with an automatic shut off feature to prevent over heating if operated in direct sunlight for an extended period of time. • S3 Robotic power supply is water-resistant, not waterproof. Therefore, never submerge the power supply. IMPORTANT: • Wait approximately 15 minutes after the cycle is completed before removing the cleaner from the water. This allows the motor to cool, and will prevent damage to the cleaner. • Remove S3 Robotic from the pool after the cleaning cycle is completed and store on the caddy. • Never lift S3 Robotic out of the pool by the floating cable. Always use the handle to remove S3 Robotic from the pool. Diagram 8. • Remove S3 Robotic from pool when super chlorinating. submerging THE CLEANER • Submerge the cleaner in the pool and remove any air trapped inside by turning it over if necessary. Diagram 5. • Ensure the unit sinks to the bottom of the pool. • Spread out the floating cable over the pool, ensuring there are no knots or coils in the cable. r ag Di am 6 m To turn the S3 Robotic off, press the OFF button. Diagram 7. • Disconnect the power supply cable from the electrical outlet. • Disconnect the cable from the power supply. • At the end of each cycle, coil the cable starting at the cleaner and go toward the connection point at power supply. Remove coils or twists along the way. 5 6 7 7 Connector ELECTRICAL CONNECTION ra ag Di m Power Supply • To start your S3 Robotic cleaner, press the button for the desired cycle (Perfect or Turbo). Diagram 6. The cleaner starts up after just a few seconds and the indicator light for the cycle selected illuminates. • If you wish to stop the cleaner or change cycles during a cycle, press the OFF button. Diagram 7. To start a new cycle, press the button for the desired cycle. • At the end of the cycle the cleaner stops and the light remains on to indicate the cycle it last completed. • S3 Robotic includes a safety feature that automatically stops the cleaner after 20 seconds, when it is powered on, but not submerged in water. For pools equipped with a beach area, this safety feature allows the cleaner to drive in reverse, and back into the pool when the propeller is out of the water. ra ag Di Handle RECOMMENDATIONS • Use your S3 Robotic cleaner as often as needed to keep your pool clean. • Clean filter element after each cleaning cycle. • Do not leave your cleaner in the pool on a permanent basis. 8 WARNING m ! ASSEMBLY AND INITIAL USAGE ra ag Di CARE AND MAINTENANCE CLEANING THE FILTER Element CLEANING AND STORAGE OF THE Cleaner • Ensure that the power supply cable has been disconnected from the electrical outlet or that the floating cable has been disconnected from the power supply. • Remove the cleaner from the water and lay it upside down to access the filter frame plate located on the bottom of the cleaner. Diagram 9. • Undo the 4 clips that hold the plate in place. Remove it, while holding it upside down so that the dirt remains in the filter element. Diagrams 9 & 10. • Release the two (2) plastic retainer clips to remove the filter element. Diagram 11. • Carefully remove the elastic from the base of the filter and then remove it from the filter frame plate. Diagram 12. • Empty the filter element and clean it with running water or if necessary with slightly soapy water. If you use soap, rinse it thoroughly while turning it over. You can also machine wash it, following the instructions given on the label inside the filter element. • Rinse the filter frame plate and remove any dirt caught under the flaps. • Replace the filter element and ensure the elastic fits snugly around the filter frame. Diagram 12. The Zodiac Pool Systems, Inc. label should be located in the corner, alongside a rod. • Position the plastic retainer clips at the top of the rods. • Replace the filter frame plate and snap it into place. Filter Element r ag Di am 10 13 m Front Bumper Weight ADJUSTMENTS Weight adjustments can improve the cleaning efficiency of your cleaner and adapt its pattern to your pool. If cleaner does not cover the entire pool, move the weight from the #5 post, closest to the floating cable side of the cleaner, to the #3 post and recheck coverage. To adjust coverage further, move the weight to the #1 post. The #2 and #4 posts can be used for fine tuning the cleaner balance. Diagram 15. If cleaner is too buoyant, sucking air when at the water line, add the extra weight (two stainless steel plates) included in the manual bag to the #3 post. Diagram 15. If cleaner does not climb walls to water line, remove all weights. m 12 r ag Di Metallic Rods (Inside) ra ag Di Roller Brush Installation: • Position the new brushes on the roller with the spikes facing outward. Diagram 14. • Thread each tab into the slot provided and gently feed it through so that the heel comes out at the other side of the slot. • Use a pair of scissors to cut the tabs 3/4 inch from the heel so that they are no higher than the spikes. Retainer Clips 11 ra ag Di Brush Removal: • Turn the cleaner upside down. • Separate the edges of the brush and undo the tabs, then remove the worn brushes. Diagram 13. Filter Frame am Spikes 8 To access the motor block: • Unplug the power supply and remove the cleaner from the pool. • With robot upside down, remove filter element frame plate. • Loosen the screws securing the motor block protection grid and remove it. • Make weight adjustment. 9 • Replace motor block protection grid and filter frame plate. 14 Filter Frame Plate We recommend that you change the brushes every two (2) years or once they have become worn. m 9 CHANGING THE brushes ra ag Di Motor Block 1 2 3 4 5 15 r ag Di am Slot • The cleaner must be cleaned regularly with clean or slightly soapy water. Rinse thoroughly in clean water. • Do not leave your cleaner to dry in the sun by the pool. • The cleaner must be stored on the caddy so that the brushes do not deteriorate and the cleaner dries quickly. Clean the filter element at the end of each cycle. Clips Tab Weight m CARE AND MAINTENANCE ra ag Di ELECTRICAL CERTIFICATIONS TROUBLESHOOTING ISSUE:The cleaner is not properly adhering to the bottom of the pool. SAFETY STANDARDS: Baracuda® S3 Robotic is ETL listed to UL Standards. SOLUTION:Repeat the instructions noted in “Submerging the Cleaner” section of the manual to release trapped air. This product is manufactured in accordance with UL 1081 5th Edition listed test standards. ISSUE:The cleaner will not climb the walls. SOLUTION: • Ensure the filter element is not full or clogged up. If it is, simply clean it. • Although the water seems clear, your pool may contain microscopic algae (not visible to the naked eye), which are making the sides slippery and are preventing the cleaner from climbing them. In this case, super chlorinate the pool and adjust the pH level. Do not leave the cleaner in the pool during super chlorination. ISSUE:The cleaner is not moving at all. SOLUTION:• Check that the power supply’s electrical plug is functioning correctly. Try another electrical product to verify. • Check that you have started a Perfect or Turbo cleaning cycle. ISSUE:The cleaner seems to be performing less efficiently. SOLUTION:• Ensure the surface of the brushes have not become smooth. We recommend that the brushes are changed every two (2) years, or sooner if they are worn. • Ensure the filter element is not full or clogged. If it is, simply clean it. • Ensure the floating cable is not excessively coiled or twisted. For further troubleshooting information, please contact Zodiac Pool Systems, Inc. at 800-822-7933. 10 11