1
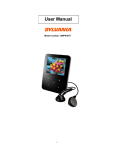
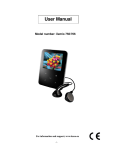
Version 1.0
1
This unit is a brand new generation of digital music player device supporting the music in the
formats of MP1, MP2, MP3, WMA, WMV, WAV, etc. The perfect acoustic, exceptionally high
reliability and exquisite appearance enhances each other’s beauty, hence the masterpiece. We
sincerely hope that she will bring you exceptional comfort in the digital times.
An Overview of Functions
●
●
●
●
●
●
“
●
●
●
●
●
●
●
Exquisite outer design and fashionable design of appearance as well as proper feel.
Supporting multiple audio formats such as the music formats of MP1, MP2, MP3, WMA, WMV,
WAV, etc.
Firmware upgrade functions: It provides the latest download of upgrade software for the
expanded functions of this unit.
FM stereophonic radio: powerful radio search function, capable of storing 30 different
frequencies of radio to allow you to listen to radio programs.
Internal recording function
While you listen to a radio program, you can record your favorite radio program into a voice
file.
U-disk function free of drive
Without any management procedures, you can perform file operation via the “moving disk” in
My Computer”, so it is unnecessary to install drive programs in the systems above WIN2000.
Recording
You can record using a microphone and save it as a voice file in the formats of WAV and MP3.
You can select fine record, long time record, fine acoustic and long acoustic.
EQ
Common, rock, classical, popular, jazz, bass (EQ defined audio)
Playing tempo regulation
1 time, 1.14 times, 1.33 times, 0.67 times and 0.8 times.
Multiple playing modes
No repeat, repeat one, playing within folder, repeat outside folder, repeat all, all random,
random within folder.
Timing shutdown
Automatic shutdown without power off while playing.
Fully animated menu
Visual animated menus along with corresponding display of words to facilitate application!
Format the player
It can be formatted without connecting to the computer.
2
Declaration
First of all, thank you for using the MP3 digital player product made by this company!
Please read this Manual before using the product.
Please note that the functions of the product and its manual many be changed without notice.
Battery
When the power is 3.7V or above, full battery will be shown. As the time for application
increases, the power indication will drop accordingly.
When power has all run out, the middle of the power icon turns into blank. Now it is the
time you charged your battery.
When charging is needed, you will have to turn on power for charging. Otherwise, the player will
be unable to respond to the charging operation.
While in charging, directly disconnect the power for the charger. If this unit is still in the USB
operation mode, it is normal! Now if you want to exit the USB mode, just disconnect the player
with the charger! When there is no need to use the player, please try to switch off the power.
3
Table of Contents
An Overview of Functions………………………………………… …………….....1
Declaration…………………………………………………………………..………2
Battery……….……………………...……………… ………………………………3
Basic Functions…………………… ………………………………………………..5
Operation of Buttons…………………… …………………..………………………8
Playing Music
……………………………………………………………..……9
Recording Voices………………………………… ………………………………….11
Playing Voice Files…………………………………………… ……………………..12
Using the FM Radio ………………………………………………………………..13
Game Modes ……………………………….……………...………………………...15
E-book ……………………………………………………………………………….16
Picture Browser ……………………………………………………………….……..17
Playing Films ………………………………………………………………….……..17
Archive Management……………….…..……………………...………………..…...18
System Setup ………………………………………………………...……..…..……19
Using the USB Disk ………………………………..…………………… ………….20
Troubleshooting…………………………………………...………………………….21
4
1. Basic Functions
Entering the Menu
Press MENU button to be able to access various menu. The menu can be divided into the main
menu (long press the button to access), the sub-menu while playing (short press to access) and the
sub-menu in the stopping state (short press to access).
Browsing Operation
○ Select the music menu option for browsing music in the playing process
○ Fast rewind or fast forward in playing music (by holding NEXT button for fast forward or
holding PREV button for fast rewind).
Entering Different Function Mode
You can access different function modes from the main menu.
Main menu: (long press MENU button to access)
Music mode:
FM mode:
Recording mode:
Picture browse:
Archive control:
System setup:
Video playing:
E-book:
Game:
Access the USB mode by connecting with the PC:
5
Controlling volume
Volume display:
25
Volume control: Short press VOL button ( 25 turns into red)
Short press “PREV” button to reduce the volume.
Short press “NEXT” button to increase the volume.
On/Off
In the power off state, dial ON-OFF button to the side of “ON”.
Short press Play button for power on
In the power on state, long press Play button for power off.
(Note whether power is on)
Play or stop; to exit from the submenu.
In the music mode, short press Play button for playing music.
In the state of playing music, short press Play button to pause playing.
Record/Pause (short press ) and stop recording (long press)
In the recording state, short press VOL button to pause recording. Short press MENU button
to stop recording and to save
2. Operation of buttons
Definition of button functions
“PLAY” button: power on/play/pause.
“MENU” button: to select and access.
“VOL” button: for volume control switching and recording.
“NEXT button”: for next option and fast forward by holding the button (Press “VOL” button to
switch to volume control, and increase in volume)
“PREV button”: previous option by holding the button for fast rewind. (Press “VOL” button to
switch over to the volume control and decrease in the volume)
Power button: to switch off or off power supply.
“VOL” button: to access the recording interface to start/pause recording.
“USB”: USB Connector.
“Earphone Connector”
“MIC”
Definition of buttons
The action of buttons include four operation methods such as short press, long press, hold and
single press. Unless otherwise specifically stated hereafter, it shall be referred to as short press.
Short press: to press the button once, and it immediately becomes effective.
Long press: to press down the button and will not it go of for 1.2 seconds, but this will be
effective only once.
Single press: to press down the button until it becomes effective the moment you release your
hand.
Hold: In the process from pressing to releasing your hand, the event takes effect at a
considerable frequency, which will be effective at a certain frequency.
6
3. Playing music
Simple operation
1.Insert the earphone into the hole for the earphone.
2.The power button is at the end of “ON”. Short press Play button for power on and access the
“music mode”, and then short press Play button to start playing music.
3.Selecting music: PREV button: Select one piece of music; Next button: Select the next
music
4.Control volume: Short press “VOL” button, short press “PREV button” to decrease volume;
and hold “PREV button” to quickly decrease in volume.
5.Short press “VOL” button, short press “NEXT button” to increase volume; and hold “NEXT
button” to quickly increase volume.
Playing tempo
1. Music in the playing process.
2. Short press MENU button to access the playing submenu.
3. Dial Next button to select “Playing Tempo” menu option.
4. 5-level free selection (1 time, 1.14 times, 1.33 times, 0.67 times, 0.8 times)
5. Short press “PLAY” button for confirmation.
EQ mode
1.In the music playing process.
2.Short press MENU button to access the playing submenu.
3.Dial Next button to select “EQ mode” menu option.
4.Short press the PLAY button to access the “EQ mode” to select the menu.
5.Various kinds of EQ, with the specific menus as follows:
Normal
Rock
Pop
Classic
Custom EQ
Jazz
Bass
Normal
Rock
Popular
Classical
Customized
definition
Jazz
Bass
6.Dial Next button to selection and short press PLAY button for confirmation.
7
Repeat mode:
1. In the music playing process,
2. Short press MENU button to access the playing submenu.
3. Dial Next button to select “Repeat mode” menu option.
4. Short press PLAY button to access the “Repeat mode” selection menu.
5. No repeat, Repeat one, Playing outside folder, Repeat within folder, Repeat all, Random all,
Random within folder.
6.Short press NEXT button for selection or short press PLAY button for confirmation.
File lists: to view all music files.
4. Recording Voices
While recording, make sure that there is sufficient power.
Recording in the “Recording mode”
1. Access the main menu:
2. Dial Next button to select the recording mode .
3. Short press PLAY button to access the recording mode.
4. Long press “VOL” button” to start recording with the frame as follows:
If there is “Memory full” displaying on the display screen, it indicates that there is no space for
recording new voice files, so please delete some files to release space.
After power off, it will automatically save without worrying about the loss of information.
Press MENU button to for automatic saving and exit this interface.
Selecting recording setup in the system menu
1. Long press MENU button to access the main menu.
2. Dial Next button to select the “Setup” menu option, and short press PLAY button to access
this option:
3. Short press Next to select “Recording setup” submenu and short press PLAY button to
access.
4. Short press Next to select appropriate recording type, and short press PLAY button to
confirm the types of recording.
Recording type: (set up in the system menu)
Common quality, Long time and Top quality
5. Playing voice files
1.Access the recording mode
2. Dial Next button to select the recorded voice for playing.
3.Short press PLAY button for recorded voice playing.
8
4.Selecting the recorded voice files.
PREV button: to select the previous recorded voice file
Next button: to select the next recorded voice file
5.Control volume
Short press “VOL” button, short press “PREV button” to decrease volume; or hold “PREV
button” to quickly decrease volume.
Short press “VOL” button, short press “NEXT button” to increase volume; hold “NEXT
button” to quickly increase volume.
6.Short press MENU button to access the submenu.
Repeat mode: refer to the “Repeat mode in the playing setup.
Playing tempo: refer to the “Playing tempo” in the playing setup.
EQ mode: refer to the “EQ” mode in the playing setup.
6. Using the FM radio
Each time you access, you must access the playing mode. It is necessary to recover the preset
radio channel, and play. When it is the first time to access, the
present frequency of the
radio channel is the minimum frequency.
Description of interface formats
: the current frequency location. As the current frequency changes, it will
dynamically change the location of frequency scale.
: Frequency scale table.
: current frequency value.
Listening to radio
1. Access the main menu
2. Dial Next button to select “FM mode”
3. Short press PLAY button to access “FM mode”
4. Tune
Short press PREV button: for single step forward by 0.1MHz
Short press Next button: for single step backward by 0.1MHz
5. Store the pre-set radio station
Short press MENU button to access the preset radio channel interface. Press NEXT/PREV
button to select the number saved. Short press PLAY button to save the radio channel.
6.Selecting the saved radio channels
9
Short press PLAY button to access the interface of preset radio channel. Press NEXT/PREV
button to select all saved radio channel serial numbers and to select the frequencies of all
radio channels. Short press MENU button to return to the radio channel you want to listen to
in the radio interface.
7. Internal recording function
While you are listening to the radio channel, you can record your favorite programs.
Long press VOL button to access FM recording, short press PLAY button to pause recording,
and short press MENU button to save and return to the radio interface.
Listen to recording; to return to the main menu, to select the “recording mode ”, press LAY
button to access and to select recorded files and press PLAY button for playing
8. Control volume
Refer to the volume control in the playing mode.
7. Game mode
1. Content of games: Russian Tetris, Greedy Snake, and Push Boxes.
2. In the main menu, select the game mode.
3. Use NEXT or PREV button to select games and use PLAY button for confirmation
4. Short press PLAY button to start games
Setting different game function buttons:
● Russian Tetris:
1.“PREV” button to move left and “NEXT” to move right
2. Use “PLAY” button to change the shape of the Tetris
3. Short press “MENU” button for pausing (Use NEXT or PREV button to select to continue
or to exit. And use PLAY button for confirmation)
●Greedy Snake:
1. “PREV” button for turning left and “NEXT” button for turning right
2. Use “MENU” button for turning up
3. Use VOL button for turning down
(Long press “MENU” button for pausing, and NEXT or PREV button to select continuing
games or exiting. Use PLAY button for confirmation)
● Push boxes:
1. Use “PREV” button to push left and Next button to push right.
2. Use “MENU” to push up.
3. “VOL” button to push down.
(Long press “MENU” button to pause, and use NEXT or PREV button to select resuming or
exiting, and use PLAY button for confirmation)
10
8. E-book
Access the main menu and dial Next button to select the electronic file.
Current selection: to select the root directory in the moving disk.
Short press Next button to select the folder where the e-book lies. Short press PLAY button for
confirmation.
Short press Next button to select the file you want to read or short press PLAY button for
confirmation. Now you can read the selected file.
In the reading process, read by dialing Next button or PREV button.
9. Picture browser
It is designed to carry out picture browsing. The pictures must be in the format of JPEG or
BMP. (The picture browsing is in the full screen mode)
File selection state
When it enters from the main menu, it is in the file selection state as shown below:
If there is no file, then it is a blank folder.
Press Play button to access the picture playing state
Press Next/PREV button to select the next//last file.
10. playing Films
File selection: In the main menu, select film playing and press PLAY button for confirmation.
Press Next/PREV button to select the next/last file.
Short press PLAY button to access the selected video playing. (The video playing is full screen
mode)
11. Archive management:
From the system menu, access the archive management,
Short press NEXT button to select all deleted files and short press MENU button to access the
next menu,
11
Use NEXT button to select “Yes” and short press PLAY button for confirmation to delete such
a file;
Use NEXT button to select “No” and short press PLAY button for confirmation and exit the
deleted file interface.
12. System setup
How to access
Here you can set the system parameters.
1. Access the main menu
2. Dial Next button to select “System setup”
3. Short press PLAY button to access “System setup”
A Brief introduction to parameters
(Power efficiency setup)
(Display setup)
(Language setup)
(Recording setup)
(System tool)
To set up the power off mode
To set up the screen brightness and
time for screen saver
To set up languages of different
countries
To set up recording mode
To format the player and restore to the
setup
and
view
the
system
information.
Detailed description of operation
○ “Recording setup”
Common quality, top quality, long time
○ “Language selection” setup
It supports as many as 10 languages.
Chinese (simplified), Chinese (traditional), English, Russian, French, German,
Italian, Polish, Portuguses, Russian and Spanish,
○ “Display setup”
1. Brightness setup: Short press NEXT or PREV button to select brightness and short press
PLAY button for conformation, and use MENU button to return.
2. Screen saver setup: Always on, 1s, 2s, 3s, 4s, 5s, 6s, 7s, 8s, 9s for your free option.
12
○ Power efficiency setup:
1. Automatic shutdown: In the stopping state, when there is no operation of buttons, use right
and left directional buttons to select the time for power off (at the range between 1 and 999
minutes adjustable). Short press VOL” before pressing NEXT button to increase the value
and short press PREV button to decrease the value.
2. It will not be power off while playing.
○ System tool:
1. Formatted player: complete format, and quick format
2. Restore to setup
3. System information: to view the software version, date, total capacity and remaining
capacity.
13. Using the USB disks
This unit is the standard USB disk function, supporting Windows98 (installation of drive
programs required), and Windows 2K or above (without the need to install drive programs)
system, Mac OS /X and above, Linux (Kernel 2.4.6 and above) without any drive programs.
Troubleshooting
Check whether the battery has power
Please make sure whether the unit is on
Please make sure that the volume is not in the state of 0,
and that there is no problem with the connection of the
earphone
You can not hear by Please make sure of the cleanliness of the earphone
using the earphone
The damaged MP3 is likely to make noise of different
No power supply
degrees, or even to make the unit unable to play music.
Please make sure of the completeness of files
Abnormal shape of
Please make sure that you will select the proper languages.
words on the screen
Adjust the location of the earphone and the player
Shut off the nearby power devices
Poor reception of FM
The earphone may be used as the antenna
Check whether the USB connection wires are damaged
and whether the connection is proper
Unable to normally
Check whether the drive program is properly installed
download music
Check whether there is any blank memory
13