1
::bathroomsource.com
Call 1-800-667-8721 anywhere in the US and Canada - www.bathroomsource.com
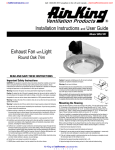
INSTALLATION INSTRUCTIONS
AK80LSL / AK100LSL
READ AND SAVE THESE INSTRUCTIONS
compartment shown in fig. 1. If you choose to wire from inside the
fan housing you will have to remove the fan’s blower assembly and
internal wiring compartment. The blower assembly is secured in
place with three # 8 sheet metal screws.
IMPORTANT SAFEGUARDS
CAUTION: To reduce the risk of fire and to properly exhaust air, be
sure to duct air outside - Do not vent exhaust air into spaces within
walls or ceilings or into attics, crawl spaces, or garages.
GREEN
WHITE
BLACK (FAN)
PURPLE (LIGHT)
YELLOW (NIGHT LIGHT)
WARNING: To Reduce The Risk Of Fire Or Electric Shock, Do Not
Use This Fan With Any Solid-State Speed Control Device.
GREEN
WHITE (LIGHT)
WHITE (FAN)
BLACK (FAN)
PURPLE (LIGHT)
YELLOW (NIGHT LIGHT)
WARNING: TO REDUCE THE RISK OF FIRE OR ELECTIC SHOCK
OR INJURY TO PERSONS OBSERVE THE FOLLOWING.
a) Use this unit only in the manner intended by the manufacturer.
If you have any question, contact the manufacturer.
b) Before servicing or cleaning unit, switch power to off at service
panel and lock the service disconnecting means to prevent power
from being switched on accidentally. When the service
disconnecting means cannot be locked, securely fasten a prominent
warning device, such as a tag, to the service panel.
"
-24
16
Figure 1.
MOUNTING THE HOUSING
CAUTION: For general ventilating use only. Do not use to exhaust
hazardous or explosive materials and vapors.
Select the best location to mount the housing in the ceiling. This fan
will require at least 8" of clearance in the ceiling will mount through
drywall up to 3/4" thick. The fan housing can be mounted between
16" or 24" on center joists using the supplied four fan mounting
rails. Figure 2 shows housing installation between 16" or 24" on
center joists. Figure 3 shows housing installation directly to the joist
(16" on center).
WARNING: TO REDUCE THE RISK OF FIRE, ELECTRIC SHOCK,
OR INJURY TO PERSONS, OBSERVE THE FOLLOWING:
a) Installation work and electrical wiring must be done by qualified
person (s) in accordance with all applicable codes and standards,
including fire-related construction.
b) Sufficient air is needed for proper combustion and exhausting of
gases through the flue (chimney) of fuel burning equipment to
prevent back drafting. Follow the heating equipment
manufacturer’s guideline and safety standards such as those
published by the National Fire Protection Association (NFPA) and
the American Society for Heating, Refrigeration, and Air
Conditioning Engineers (ASHRAE), and the local code authorities.
c) When cutting or drilling into wall or ceiling, do not damage
electrical wiring and other hidden utilities.
d) Ducted fans must always be vented to the outdoors.
"
-24
e) If this unit is to be installed over a tub or shower, it must be
marked as appropriate for the application and be connected to a
GFCI (Ground Fault Circuit Interrupter) - protected branch circuit.
16
Figure 2.
f) NEVER place a switch where it can be reached from a tub or shower.
To ensure the best air and sound performance it is recommended
that the largest diameter ducting is used (5" or 6"). The length of
ducting and the number of elbows should be kept to a minimum.
To protect against condensation problems use insulated ducting.
Hard ducting will provide maximum air delivery. If using flexible
ducting always ensure it is pulled as tight as possible; using a short
section of flexible ducting in combination with hard ducting will
reduce noise transmission.
As an added convenience for installation you do not have remove
the Fan’s Blower assembly in order to install and wire this unit. You
can gain access to the fans wiring via the external wire
"
-24
16
Air King at bathroom::accessories
U
N
L
I
M
I
T
E
D
Figure 3.
::bathroomsource.com
Call 1-800-667-8721 anywhere in the US and Canada - www.bathroomsource.com
If the fan is installed in a suspended ceiling installation and
mounting the fan from above is required, install the four fan
mounting rails onto the fan housing. Pushed the rails in as tight as
possible. Ensure the ends of the four mounting rails are evenly
spaced from the edge of the housing. Use galvanized ceiling wire
secured to the permanent ceiling and to the four mounting rail
ends. Adjust the fan height so the housing will be flush with the
finished ceiling.
wire from inside the fan’s junction box to the corresponding hot
wire from the switch . Black color = fan, purple color = light,
yellow color = night light (see wiring diagram). Connect the
ground to the green ground wire inside the fan’s junction box.
Use approved electrical wire nuts.
3. Replace the wire cover and secure in place with the screw
removed earlier.
Before cutting or drilling into any drywall check the area from
above to plan the unit’s wiring and duct run. Remember to keep
the number of elbows and duct length to a minimum.
COMPLETING THE INSTALLATION
1. Determine the best location for the fan.
1. If you removed the blower assembly to install the housing,
replace the blower assembly and secure in place with the three
screws removed earlier, plug the blower assembly into the motor
receptacle before installing the blower.
2. Select the most convenient electrical knockout and remove it.
3. Determine if you are going to use the internal or external wire
compartment – remove only one of the wire covers and place it
somewhere safe to be reinstalled later.
2. Install two 13-watt maximum PLC compact fluorescent lamps
and one 4-watt maximum candelabra bulb.
4. If the unit is being mounted in existing construction use the
housing as a template to mark the necessary space on the ceiling
to cut out.
3. Install the grill onto the fan housing. It is secured in place with
two grill springs which will fit into slots on the blower venture.
4. Turn the power back on and test your installation.
5. Determine the required mounting orientation (fig 1, 2,or 3).
6. Adjust the height of the fan housing so that it is flush with the
finished ceiling.
AIR-KING VENTILATION PRODUCTS
FIVE-YEAR WARRANTY
DUCTING
All products manufactured by Air King Limited are warranted for
one year from the date of purchase against defects in workmanship
and/or material. In addition, all ventilating/exhaust fans, heaters,
combination fan lights and/or heaters, and range hoods are
guaranteed for five years from the date of purchase against defects
in workmanship and/or material. This warranty does not cover any
labor or shipping costs or the cost of replacement components as
part of routine maintenance such as: range hood grease filters,
charcoal filters or combination charcoal/grease filters; replacement
light bulbs in range hoods or bathroom fan/light/bulb heater
combinations. As well, any damage or failure caused by abuse,
misuse, abnormal usage, faulty installation, or improper
maintenance will not be covered by this warranty. In order to make
a claim on this warranty, you must be the original consumer of the
product, and you must contact Air King Ltd. at 1-800-465-7300
between 8:00 am and 3:30 pm EST Monday to Friday at the first
sign of a defect. You will be required to present to Air King Ltd. the
original bill of sale showing: date of purchase, place of purchase
and model purchased. Failure to meet these requirements will void
your warranty. Air King Ltd. will not be held responsible for any
bodily injuries or damages to personal property or real estate
whether caused directly or indirectly by the product. Some states
and provinces do not allow the exclusion or limitation of incidental
or consequential damages and some states do not allow limitations
on how long an implied warranty lasts, so these exclusions or
limitations may not apply to you. This warranty gives you specific
legal rights and you may have other rights which vary from state to
state and province to province.
NOTE: All ducting must comply with local and national building codes.
1. Connect the ducting to the fan’s duct collar. Secure in place using
duct tape or a screw clamp. Always duct the fan to the outside
through a wall or roof cap. To ensure maximum air delivery, keep
the length of duct and the number of elbows to a minimum.
ELECTRICAL WIRING
Caution: Make sure the power is switched off before beginning this
installation.
Note: All wiring must comply with local and national codes. You
must ground this unit.
Note: It is recommended that you use a standard triple function
wall switch for independent control of the fan / fluorescent light /
and night light operations. – Air-King switch model S-3.
1. Run wiring from an approved wall switch carrying the
appropriate electrical ratings. One neutral (white), one ground
(green or bare copper), and three hot – one black for fan control
/ one purple for main lighting / one yellow for night light control.
Secure the electrical wires to the housing with an approved
electrical connector (make sure you leave enough wiring in the
box to make the connection to the fan’s wires.)
2. (See Figure 4.) From where you have access to inside the fan’s
junction box, connect the white wire from the house to two
white wires in the fan’s Junction box (one white if for the fan, the
other is for the lighting). Then connect the appropriate colored
Air King at bathroom::accessories
U
N
L
I
M
I
T
E
D
210572080
New 08•09•03