1
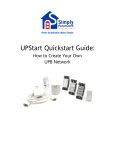
Overview Create Your Own UPB Network Using UPStart Download UPStart Add Links to Devices Install & Open UPStart Commands Connect the Computer Interface Module Menu Items Product Review Technical Talk Add Devices Create Links 2 Getting Started with UPStart Introduction Download UPStart Download the latest version of UPStart: What is UPStart? Who should use UPStart? Why is UPStart needed? Where is UPStart available? How much does it cost? Why should I use Simply Automated’s version of UPStart? http://www.simply-automated.com/products/sa_upstart.htm Select, “Save”. 3 4 Download UPStart Download UPStart Save the zip file. It can be saved to a folder used for downloads or the desktop. Make note of where you are saving it in case you want to find it later. 5 Once the download is complete the Download Complete window allows you to “Open” the file. 6 1 Download UPStart Double click on the executable file: UPB44Setup.exe. The 44 indicates the current version of UPStart as of this writing and is subject to change as UPStart evolves. Download UPStart Select the defaults that appear in the installation screens. Advanced users can put the files where they would like them. The defaults install the UPStart program under Program Files a folder named UPB. Once the installation is completed click on Finished. Close the zip file window. UPStart has been installed in the Program Files folder. Click on Run to start the UPStart installation 7 Computer Interface Module (CIM) Plug the CIM into a receptacle near your computer. 8 Computer Interface Module (CIM) Using the serial cable that came with the CIM plug the appropriate end into the CIM and the other into the serial port on your computer. The following is a list of USB to serial adapters that have been tested with the CIM and UPStart If you do not have a serial port you can use a USB to serial adapter. ELK ELKUSB232 – Sold by Home Controls SIIG JU-CB1S12 IO Gear USB-2930 IO GEAR GUC232A Belkin F5U109-CU Cables Unlimited USB-2920 BAFO Technologies BF-810 PCMCIA Card - Quatech SSP-100 Keyspan USA-19HS Follow the installation directions that came with your USB adapter. 9 Computer Interface Module (CIM) Find the Com port the USB adapter captured Go to Start → Control Panel → System → Hardware → Device Manager → Ports 10 Computer Interface Module (CIM) Connect to CIM 11 Select Interface Module Select Port Click on Connect… once connected → OK 12 2 UPStart UPStart Open UPStart In Windows XP click on Start → All Programs → UPB → UPStart. Enter Network Name(16 Characters), Network ID (1-250) and Password (0-9, A-F) Select: Create a new network file starting with choosing a network ID and password. 13 14 UPStart Add Devices Left side = Design Pane, Right side = Display Pane Click on the Add Device Icon or go to Device l Add… The Add Devices Wizard will open 15 Add Devices Add Devices To put a device into set up mode: Device is read Recessed button – Using a non-conductive tool such as a toothpick or a golf tee (aka: UPB device configuration tool) press the button 5 times consecutively. The LED should begin to flash green. US11-30 or US2-40 wall switches Plug-in & Wired-in devices 16 Press any button or rocker 5 times consecutively. The LED should begin to flash green. Devices will stay in Setup mode for 5 minutes or until the button or rocker is pressed 2 times consecutively. Time between button pushes must be less than ¾ of a second. 17 18 3 Add Devices Enter Room Name and Device Name After clicking on “>Next” UPStart writes and verifies the entries. 16 Characters Faceplate or configuration If all devices are added select “Done”, if not “Add more devices” Unit ID Click OK when complete. Device Type Add Devices 1-250 19 Adding and Changing Links Click on Network → Link Names… 20 Adding and Changing Links Clicking on any Link name in the top section of the window will reveal the devices that have the Link installed in the bottom window. Default Links Add, Delete or Edit.. Rename or Remove Unused Blue triangles (arrows pointing right) indicate transmitting devices. Purple triangles (arrows pointing left) indicate receiving devices. Orange footballs are indicators (LEDs) on transmitters, they are receivers. 21 Adding and Changing Links Link 241 is an internal Link that is used for Local Load control for the US2-40. Don’t delete… or make sure a Link (Local Load) exists in: Receive Component table Transmit Component table – in position of local load control Options – Transmit Enables… NOT. 23 22 Adding and Changing Links Optional Method to Open Link Name Table Edit Device Window Double Click on selected device Receive & Transmit Component tab Not as fully functional as opening it from the menu 24 4 Link Editing Visual Link Editor Drag and Drop, one Link, multiple devices Use when editing multiple devices The Visual Link Editor is enabled by going to Tools → Options → and clicking on the check box at the bottom of the UPStart Operation tab. Dialog Link Editor Visual Link Editor One Link, multiple devices, no graphics Good for multiple device editing Edit Device Window One device, multiple Links Use when configuring a small number of devices or clean up 25 26 Visual Link Editor Visual Link Editor Open the Visual Link Editor Left side = Design Pane, Right = Display Pane Double click or right-click and select Edit 27 Visual Link Editor 28 Visual Link Editor Drag & Drop Device is Receiving the Link 29 Click Preset Select Level Select Fade Rate 30 5 Visual Link Editor Visual Link Editor Device is Transmitting the Link Mode → Button Editor Click Rocker or Button Select Position Select Mode 31 Visual Link Editor 32 Dialog Link Editor Once all devices are added to Link → Right Click in Gray area and select Program – or Complete Edit and Yes, go ahead Click on Network → Link Names… Or if VLE is not enabled this will open when Link is double clicked in Design Pane Click on the desired Link in the top window of the Links screen. In the section named Link Builder click Edit Link 1 (where 1 is the Link ID of the selected Link) 33 Dialog Link Editor 34 Dialog Link Editor Add Controller (Transmitter) The Link name typically defines its function Controllers transmit Links Presets are receiving Links Indicators are LEDs on transmitters (controllers) Click on “Add Controller” button Select the desired device from the selection window. Click on the button with the Mode description 35 This device will have the Link added to its Transmit Component table when programming is completed. A window appears with the descriptions of the modes. Select the desired mode. It can be changed later. 36 6 Dialog Link Editor Add Preset (Receiver) Dialog Link Editor Indicators Presets are devices that have the Link in their Receive Component table. Select the Level and Fade Rate. Test is optional. Buttons that have LEDs are referred to as indicators. They are Receiving Components. A device with LED indicators should have the LED responding to the same Link. 37 Dialog Link Editor Dialog Link Editor Click on: “Program All needed to establish this Link” …to program the Link into each selected device. Indicators 38 Groups and function (Turn Off) can be set so the LED follows the function. LEDs for other buttons can turn on or off or do nothing when a button is pressed. An example: There are a room of lights that are set for 3 dimming levels. A separate Link is set for each desired dimming level. A separate button is assigned to each Link, 1, 2 & 3. If all buttons are in the same group and set to Turn Off then when any of the three buttons are pressed the LED on that button will illuminate and the button that was previously illuminated will extinguish. 39 Edit Device 40 Edit Device Double clicking on any device icon opens the Device Edit screen for that device 41 Double clicking on any device icon opens the Device Edit screen for that device 42 7 Edit Device Edit Device ID tab Receive Components 43 Edit Device Edit Device Transmit Components 44 Device and Faceplate will define this window Transmit Components Device and Faceplate will define this window 45 Edit Device Edit Device Transmit Components 46 Device and Faceplate will define this window 47 Transmit Components Device and Faceplate will define this window 48 8 Edit Device Edit Device Options Advanced 49 Edit Device 50 Edit Device Test Communications Test 51 Edit Device Edit Device Program Device 52 When edits are complete click OK or Program Device 53 Changes are written to Device Click OK when complete 54 9 Commands Commands UPB Commands are sent when a device has been configured to transmit a Link. Activate – There are commands that are fixed to each defined Mode. The Custom Button or Custom Rocker Modes allow the user to select the commands that are sent when a rocker or button is pressed. The response to the Activate command is dictated by the Receive Component table of the device(s) receiving the Link. The light Level and Fade Rate may be unique to each device. Light Level can be set from 100% down to 0%. 0% would appear to be off; however, If you Fade Up a Link even the devices set for 0% will brighten. Devices can be turned off by setting the light Level to 0%. A good rule of thumb would be to not allow Fade UP from a Link that has devices that are set to 0%. The best option is to create another Link that sets the next desired light Level. 55 Commands 56 Commands Deactivate – The response to the Deactivate command is to turn off. Goto On – Level goes to 100% at the default Fade Rate Goto Off – Level goes to 0% at the default Fade Rate Snap On – Level goes to 100% with zero Fade Rate Snap Off – Level goes to 0% with zero Fade Rate Quick On – Level goes to 100% at 0.8 seconds Quick Off – Level goes to 0% at 0.8 seconds Slow On – Level goes to 100% in 30 seconds Slow Off – Level goes ot 0% in 30 seconds Fade Up – Level increases to 100% in 6.6 seconds or until Fade Stop Fade Down – Level decreases to 0% in 6.6 seconds or until Fade Stop Null or Status – Sends UPB command that does nothing No Command – No UPB command sent Panic – Blinks the load or Linked module 57 Menu Items Menu Items Device (or Right Click on Device Icon) Verify – Confirms that the programming in the device and in the UPStart file match. 58 Device (or Right Click on Device Icon) The end of the Verify process has two outcomes: the device and file match or they do not. Two Choices Making the device match the file programs the device. Making the file match the device changes the UPStart file. 59 Install/Replace – Used to replace a device by writing the file information to a device. This can be used as a “Clone” file. If you have a configuration frequently used you can Install/Replace it into another device or use the Copy Configuration. Copy Configuration – Copies the configuration from a device with the same model number. 60 10 Menu Items Menu Items Device (or Right Click on Device Icon) Add Multiple – Allows several devices to be added at once. This is usually good for adding all devices in a room. Once the devices are added they still need to be given a room name and device name. The multiple add wizard directs the user to take action at the appropriate time and must be followed step by step to operate properly. Tools UPB Interface Device Connects to CIM (PIM) Signal & Noise Meters 61 Menu Items Menu Items Tools 62 Enable the Log Viewer Options Log Viewer Click on the check box. Click on the Current log file Browse button. Accept the default or rename and relocate the file The default location is: Program Files/Logs Save Click on the Historical log file Browse button Accept the default or rename and relocate the file The default location is: Program Files/Logs Options: Show all component effected by the message should be checked if it is desired to view the devices that are receiving the command. 63 Menu Items Menu Items Example of Log Viewer Output 64 All commands sent through the UPStart will be from unit 255. Tools Network Communications Test 65 Tools→ Network Comm Test. It is very useful for troubleshooting and pre-qualification. The information includes the transmit and receive signal level measured at the device and at the CIM (PIM), the phase with respect to the location of the CIM (PIM), and any noise found on the line. 66 11 Menu Items Menu Items To run a Network Comm Test: Click on the Run Communications Test button Network Communications Test Click Save to save the text file or Cancel to proceed with the test. The test can be run on one device or a group of selected devices Before opening the Network Comm Test click on the icon of the device to be tested. Click on the Test only the selected device check box in the lower right corner of the Network Comm Test window. To test a group of devices the Ctrl and Shift keys operate similarly to selecting text. Hold the Ctrl key and click on individual icons Hold the Shift key and select a sequence of icons. 67 PEP Kit Device Details Appliance Module, model: UMA-20-W Lamp Module, model: UML-20-W Computer Interface Module, model: UMC-DB9-W Wall Switch, model: US2-40 Table Top Pedestal, Model: US28OTP-W KPE-06 User Guide QuickStart Guide 68 UMA-20 The Appliance Module only receives UPB messages; it cannot Transmit a UPB message. The UMA can be included in 16 Links. Option The UMA is used for devices that should not be dimmed such as fans, motors, fluorescent lighting. It has an internal relay that will have a distinctive click when it changes state. Getting Started with UPStart It does communicate to UPStart when in Setup mode. A Link can turn the UML On or Off, there is no Level or Fade Rate. LED color. It will have a quiet buzz when communicating UPB. 69 UML-20 Default Level, Defalut Fade Rate and the Lamp Switch Trigger. The Lamp Switch Trigger The PEP Kit has 2 US2-40 switches. The US2-40 is a hybrid. Allows operation of the lamp with the local lamp switch. To use the Lamp Switch Trigger turn the lamp switch off and then on. The UML senses the current change and turns on without a UPB command. Report lamp level after lamp switch trigger activation A Link can set the UML to any Level at a desired Fade Rate. Each Link may have different Levels and Fade Rates. Options It does communicate to UPStart when in Setup mode. The UML can be included in 16 Links. US2-40 & US28OTP The Lamp Module only receives UPB messages; it cannot transmit a UPB message. 70 The lamp Level can be reported to a control system if the box is checked on the Options tab of the Edit Device window in UPStart. 71 Load controller Link (scene) controller Both. The US28OTP is only a transmitter The other US2-40 can accept any of our 8 faceplates. When mounted with a single rocker faceplate (ZS11) it can be a single load control. When the single rocker-4 button faceplate (ZS25) or the 8 button faceplate (ZS28O) is mounted the US2-40 can control a load and 4 or 7 Links, respectively. 72 12 US2-40 US2-40 The US2-40 is the only UPB device that can “hear” itself. These are the possibilities for local load control: To accomplish that the local load connected to the brown wire of the US2-40 is controlled by a Link. Link 241 is the default Link loaded at the factory and into the switch included in your kit. It can be any Link. Use the default Link 241. Put it in the Receive Component table, the Transmit Component table in the position desired for local load control and make sure the check box for Transmit Enables on the Options tab is not checked. The key is that the local load control Link must be in the Receive Component table, the Transmit Component table in the desired position for local load operation and the Transmit Enables box on the Options tab should not be checked. Use any Link but implement it as above. Use a separate Link for each US2-40. Don’t worry about the Options tab setting since each device will have a unique Link. Use a Link to turn on the US2-40 local load and another Link to turn off the US2-40 local load. Implement as it #1. This option allows the turn on rate to be different than the turn off rate. It is a nice effect. Most people like the light to turn on quickly and turn off slowly. The local load control can be from any button or rocker on the US240 making it extremely versatile. The load of the US2-40 can be included in any Link the US2-40 is sending. This was not possible with the US2-30 or any other UPB module that transmits and receives UPB. 73 Other Simply Automated UPB Lighting Devices US11-30 Most often used as a single load, single rocker switch. Can be a transmitter with no load connected. Shipped with a single rocker faceplate. USR Can also send a Link and control the local load but control of the local load alone is lost. Level and Fade Rates The single and double tap can be configured under the Options tab to allow custom function. Last on level. Other Simply Automated UPB Lighting Devices 16 Receive Component Links 74 If the switch is set to a desired dim level by holding the top rocker and then turned off with a single tap the next time it is turned on it will go to the previous dimmed level. Dedicated Remote for use in 3-way (or more) applications. The USR must be wired to a US11-30 or a US2-40. It emulates the switch to which it is wired. It has no intelligence and cannot be configured with UPStart. USR & US11-30 The USR and the US11-30 match up function to function. The US11-30 may be used with a USR in a 3-way, or more, application. 75 Other Simply Automated UPB Lighting Devices USR & US2-40. A US2-40 with a single rocker can be controlled by the USR with a single rocker. If the US2-40 has a multi-rocker or multi-button faceplate the USR will control the top two buttons on the left side of the US2-40 (buttons 1 & 2) via the Remote 1 connection (to white wire with brown stripe). Remote 2 controls the bottom two buttons on the left side of the US2-40 (buttons 3 & 4). The USR may be mounted with the ZS12 if operation via Remote 2 is used (wired to white wire with red stripe). 77 76 Other Simply Automated UPB Lighting Devices UFR-30 UFD-30 URD-30 UMI-32 UCS UPP ZPC 78 13 Troubleshooting and Technical Talk Troubleshooting and Technical Talk There have been thousands of UPB installations in the last 18 months. Very few installations have problems. It is best to qualify a house before quoting. Simply Automated has provided a solution for every application issue presented to us. UPB signals are transmitted between 4-40 kHz and start at about 25-40 Vp amplitude. UPB is very robust but opportunities for problems exist. UPB is using the power lines in a house as a communications bus. UPB communications may encounter attenuation between devices on the opposite phases in a house. 79 Troubleshooting and Technical Talk Pre-qualification can be done with the devices in the PEP Kit. 80 Troubleshooting and Technical Talk Four devices are used, models: UMA, UML and UMC along with a computer with UPStart and the Tabletop Controller. Move the UMA and UML around the house. Use the Tabletop Controller to communicate and control the UMA and UML. 81 Troubleshooting and Technical Talk There are two things that can affect UPB signals, noise and attenuation. UPB is a pulsed voltage signal. It will be affected by long wire lengths which can be represented as something called Impedance. Impedance is just as it sounds; it is an electrical quality that hinders the transmission of current and voltage. Pre-qualification can be done with the devices in the PEP Kit. Use UPStart to check the phase with respect to the UMC in each location. UPStart may also be used to run a Network Comm test after each move of the UMA and UML or check the Communications Tab of each device. The Communications Test tab can tell you what phase a device is on, the Network Comm Test will also indicate phase. Phase is indicated as “Same” or “Other”, both with respect to the location of the UMC. 82 Troubleshooting and Technical Talk Impedance can be created by loose wire connections at the panel or at a device. Tighten all connections to the breakers in the electrical panel(s). Wire nuts that connect wiredin products to the house wiring need to be screwed on tightly, until the wire into the nut begins to twist. Large impedances will diminish signals and reduce the amplitude of the UPB pulse. 83 84 14 Troubleshooting and Technical Talk More impedance sources Troubleshooting and Technical Talk Size of the house and the distance from the power transformer. Solution Other sources of impedance include devices that have large capacitance values. Uninterruptible Power Supplies (UPS) Projectors with metal halide bulbs Phase Coupler, model ZPC Creates a UPB bridge across the phases to shorten the distance UPB has to travel. One or more may be required depending on the size of a house, the distance to the power transformer and the number of devices installed. 85 Troubleshooting and Technical Talk These devices may need a filter to block their attenuation effect, sometimes referred to as a UPB Black Hole effect. 86 Troubleshooting and Technical Talk Other methods for choking attenuation effects The Leviton Plug-In Noise Filter, Model 6288 works well for devices that are rated at 5 A or less. This filter was built to block noise in X10 systems. It does not do a great job blocking noise in the UPB frequencies but it does act as a choke to block the UPB Black Hole effect. The key factor in the filter is an inductor. If the plug in style is not applicable an inductor that is appropriately sized for the current going through it and around 0.3 mH would work. That type of inductor can be found in catalogs such as Digikey (www.digikey.com) or Newark (www.newark.com). If the plug in style is not applicable an inductor that is appropriately sized for the current going through it and around 0.3 mH would work. That type of inductor can be found in catalogs such as Digikey (www.digikey.com) or Newark (www.newark.com). 87 Troubleshooting and Technical Talk Noise 88 Troubleshooting and Technical Talk To function reliably UPB needs a minimum 2:1 signal to noise ratio. It appears that asynchronous noise is much more damaging to UPB communication than synchronous noise at the same amplitude. Electronic low voltage ballasts often produce synchronous noise, non FCC47 CFR rated electronic ballasts for fluorescent lighting can produce asynchronous noise. 89 Noise Noise attenuates over distance just as UPB signals. Distance between a noise source and UPB devices can help the UPB devices that are struggling to work due to noise. Simply Automated is developing a 5 A and a 15 A filter in wired in and plug-in styles. They should be selling in 2006. These are designed to block noise in the UPB transmitting range that comes from offending devices. 90 15 Troubleshooting and Technical Talk Examples of known noise sources: Dacor Cooktop - MET304 Non-FCC 47 CFR rated electronic ballast for fluorescent lighting Some electronic low voltage ballasts Triac controlled dimmers that are dimmed very low, nearly off. Inverters – any inverting power supply that runs in the 4-40kHz range Variable frequency drives – Often filters are available from VFD manufacturers 91 Troubleshooting and Technical Talk Finding offending devices is often a matter of trial and error. Successful troubleshooting is performed by changing one variable at a time. UPStart has Signal and Noise Meters under Tools→UPB Interface Device→Signal & Noise Meters… There is also a small meter displayed in the lower right of center portion of the UPStart window. It usually will have white boxes. Red indicates noise Green is a good UPB signal Orange is recognized as UPB but not intelligible. 92 Troubleshooting and Technical Talk Open the Signal & Noise meters in UPStart and go to a breaker box. Turn off one breaker and check the noise level. If no change is observed turn the breaker back on and move to the next breaker and repeat. Once the offending breaker is found, there may be more than one, turn it back on and locate the devices on that breaker. One by one turn the devices off checking the meters between each change. Once the offending device is found the amount of current the device uses needs to known in order to size a filter. 93 16