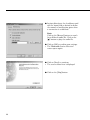
1
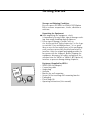
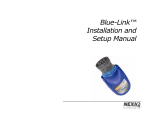
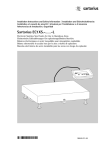
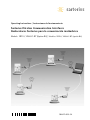
Operating Instructions | Instrucciones de funcionamiento
Sartorius Wireless Communication Interfaces
Radioenlaces Sartorius para la comunicación inalámbrica
Models: YBT01, YDO01C-BT (Option B2) | Modelos: YBT01, YDO01C-BT (opción B2)
98647-003-54
English – page 3
Español – página 42
2
Contents
Intended Use
3 Intended Use
4 Warnings and Safety
Precautions
7 Getting Started
11 Installing the YBT01
15 Installing the YDO01C-BT
(Option B2)
17 Establishing Data Connections
between the YBT01 or YDO01C-BT
(Option B2) and the F8T001v2 or
F8T012 from Belkin Corporation
35 Care and Maintenance
37 Specifications
38 Certificates
The wireless interface from Sartorius
enables wireless data communication,
using Bluetooth® wireless technology,
between a measuring instrument and
a remote device. This remote device may
be a PC, for example, equipped with a
Bluetooth® USB adapter. With the wireless interface, you no longer need data
cables to connect your RS-232 data
interfaces.
The following symbols are used in
these instructions:
§ indicates required steps
$ indicates steps required only under
certain conditions
> describes what happens after you have
performed a certain step
– indicates an item in a list
! indicates a hazard
Make sure you observe the warnings
and safety precautions in their entirety
during installation and operation, as
well as while performing maintenance
and repair work on the equipment.
It is important that all personnel using
the equipment understand this information, and have access to it at all times.
The warnings and safety precautions
can be supplemented by the equipment
operator. Make sure all operating personnel are informed of any additions to
these instructions.
The YBT01 is a Bluetooth® RS-232
adapter that can be connected to the
RS-232 port on a weighing instrument.
YDO01C-BT transmitter (Option B2)
is also a Bluetooth® RS-232 adapter,
for installation on the UniCOM interface
in a Combics indicator.
The YBT01 and YDO01C-BT (Option B2)
interfaces have a transmit power of up
to 100 milliwatts (in accordance with
Bluetooth® wireless technology specification V1.1/Class 1).
Once the radio connection has been
established, measured values can be
processed on the PC using, for example:
– WinScale®, or
– SPEXXIS®
from Sartorius.
3
Warnings and Safety Precautions
Legal Notices
– Bluetooth® is a registered trademark of
the Bluetooth® Special Interest Group
(Bluetooth® SIG, Inc.). The Bluetooth®
word mark and logos are owned by the
Bluetooth® SIG, Inc. and any use of
such marks by Sartorius is under license.
Other trademarks and trade names are
those of their respective owners.
– The Bluetooth® USB adapter model
F8T001v2 and Bluetooth® USB adapter
F8T012 are products of the Belkin
Corporation. All rights reserved.
The F8T001v2 and F8T012 Bluetooth®
USB adapters are available from
Sartorius AG under the model name
“YBT02.” Sartorius reserves the right
to integrate adapters from other
manufacturers, however, in place of
the F8T001v2 or F8T012 Bluetooth®
USB adapter.
– Windows® 98, Windows® 2000 and
Windows® XP are registered trademarks
of Microsoft Inc.
– WinScale® and SPEXXIS® are registered
software products of Sartorius AG.
4
Copyright
The programs and products named
in these instructions are subject to
proprietary, copyright and other laws.
The software products from the various
manufacturers may not be changed,
reverse engineered, or modified through
assimilation. The purchaser/end user
does not acquire any of the rights
named above at any time.
The software may not be reproduced
or copied. The purchaser/end user may
operate the software for his/her own
purposes only, and may not permit use
of the software by third parties, neither
free of charge nor in return for payment.
If you have any problems with the
software supplied, please inform the
software vendor. Sartorius AG reserves
the right to supply updated software
with this product. No liability is accepted
for software installed prior to the
purchase of this product.
The manufacturer of the Bluetooth®
USB adapter is responsible for the content of the compact disk (CD) supplied
with the Bluetooth® USB adapter,
which includes the operating instructions, the programs and software, legal
notices and installation instructions.
Safety Information
§ Please read these operating instructions
carefully before using your wireless
interface.
The manufacturer is not liable for damage resulting from failure to observe
these warnings and safety precautions
§ Read the operating instructions supplied with the Bluetooth® USB adapters
(on the enclosed CD) carefully as well,
and make sure you observe all warnings
and safety precautions therein.
! The wireless interface must not be used
in hazardous areas/locations in which
explosive gases or dusts are present, nor
in areas potentially endangered by
explosive material.
! The wireless interfaces may not be
operated in legal metrology, nor in
locations in the medical industry
! When the wireless interface is in use,
the risk of disturbance caused by other
approved devices that use the same
frequency cannot be ruled out.
If you need assistance, contact your
Sartorius dealer or the Sartorius Service
Center.
§ Have the equipment inspected by
a trained technician at appropriate
intervals for correct functioning and
safety. Make sure the applicable
accident prevention regulations are
observed by all operating personnel.
! Always make sure the equipment is
disconnected from AC power before
performing any installation, cleaning,
maintenance or repair work. If the
equipment housing is opened by anyone
other than persons authorized by
Sartorius, this will result in forfeiture
of all claims under the manufacturer’s
warranty. Use only original Sartorius
spare parts.
! Disconnect the equipment from power
before connecting or disconnecting
peripheral devices.
! The casing on all connecting cables,
as well as the casing on wires inside the
equipment housing, is made of PVC.
Chemicals that corrode these materials
must be kept away from these cables.
! Operating the equipment beyond the
specifications stated in the Declaration
of Conformity and in these instructions
is not permitted, and constitutes use of
the equipment for other than its intended purpose. All specifications stated in
the Declaration of Conformity and in
these operating instructions must be
strictly observed. The device meets the
EC Directives listed in the Declaration of
Conformity. Any installation work that
does not conform to the instructions in
this manual will result in forfeiture of
all claims under the manufacturer’s
warranty.
! Do not expose the equipment to
aggressive chemical vapors or to extreme
temperatures, moisture, shocks, or
vibration. The allowable operating
temperature range during operation is
0°C to +40°C (+32°F to +104°F).
C O!
! The YBT01 and YDO01C-BT (Option B2)
interfaces are based on Bluetooth®
wireless technology. This wireless technology operates in a frequency range
from 2.4 to 2.4835GHz, which is not
standardized through Europe. Always be
sure to observe the regulations applicable at the place of installation when
using this equipment.
! In France, the wireless interface may be
used only within buildings or enclosed
spaces.
5
Installation
! Proceed with extreme caution when using pre-wired
RS-232 connecting cables, as the pin assignments
may not be compatible with Sartorius equipment.
- The operator shall be solely responsible for any
damage or injuries that occur when using cables not
supplied by Sartorius.
! If there is visible damage to any of the equipment or
power cords, disconnect the equipment from power
and lock it in a secure place to ensure that it cannot
be used for the time being.
IP Rating:
! The IP65 protection rating for the YBT01 is ensured
only if installation is performed correctly in accordance with the instructions and acknowledged technological standards. The IP67 protection rating for
the YDO01C-BT (Option B2) is ensured only when it
is installed in the Combics CIS indicator correctly in
accordance with the instructions and acknowledged
technological standards.
The YDO01C-BT must be installed and tested by
a certified technician.
Using the Equipment in the EU:
– The model YBT01 and YDO01C-BT (Option B2)
equipment is intended for use only in the following
countries:
Austria, Belgium, Denmark, Finland, France (indoor
use only), Germany, Greece, Iceland, Ireland,
Liechtenstein, Luxembourg, Norway, Portugal,
Spain, Sweden, Switzerland, The Netherlands, United
Kingdom.
6
Getting Started
Storage and Shipping Conditions
Do not expose the YBT01 or YDO01C-BT (Option
B2) to extreme temperatures, shocks, vibration or
moisture.
Unpacking the Equipment
§ After unpacking the equipment, check
it immediately for any visible sign of damage resulting from rough handling during shipment.
$ If any sign of damage is visible, refer to
the section entitled “Safety Inspection” in the chapter entitled “Care and Maintenance.” It is a good
idea to save the box and all parts of the packaging
until you have successfully installed your wireless
interface. Only the original packaging provides the
best protection for shipment. Before shipping the
equipment, disconnect all cables and unscrew the
antenna from the YBT01 or YDO01C-BT (Option 2)
interface to prevent damage during shipment.
–
–
–
–
–
–
–
–
–
Equipment Supplied for YBT01
YBT01 (RS-232 adapter)
Connecting cable
Angle plug
Antenna
Bracket for wall mounting
Screws (2) for installing wall-mounting bracket
Packaging
Plastic bags (2)
Operating instructions (this manual)
7
Equipment Supplied for YDO01C-BT (Option B2)
YDO01C-BT (RS-232 adapter)
Connecting cable
Angle plug
Antenna
Seal
Nut (1)
2 printed circuit boards (PCBs)
Packaging (not with factory-installed Option B2)
Plastic bag (not with factory-installed Option B2)
Equipment designation labels (2) (not with factoryinstalled Option B2)
– Operating instructions (this manual)
–
–
–
–
–
–
–
–
–
–
Installation Instructions
The YBT01 and YDO01C-BT (Option B2) wireless
interfaces are designed to provide reliable results
under normal ambient conditions. When choosing
locations to set up your equipment, please observe
the following to ensure fast and precise operation
of the YBT01 or YDO01C-BT (Option B2) wireless
interface:
°C
!
– Position the interfaces for optimum signal transmission between devices.
Important Note:
Solid obstacles such as walls can restrict the transmission range.
– Avoid placing the equipment in close proximity to
a heater or otherwise exposing it to heat or direct
sunlight.
– Avoid locations that are subject to excessive vibration
– Protect the wireless interfaces from highly concentrated aggressive chemical vapors.
– Avoid locations subject to excessive moisture
– The wireless interfaces must not be used in
hazardous areas/locations, nor in areas in which
explosive gases or dusts are present.
– The equipment may not be operated in areas
potentially endangered by explosive material, nor in
locations in the medical industry.
8
Software from Sartorius
Sartorius offers two software programs
for fast and easy processing of the data
and control commands transmitted
between connected devices:
– WinScale
– SPEXXIS
Each of these programs comes with
complete instructions for simple installation on the PC used with your wireless
interfaces.
–
–
–
–
–
–
–
–
Configuring the Weighing Instrument
Data transmission parameters in the
RS-232 data interface on the YBT01 are
configured as follows:
Transmission speed
(baud rate): 9600 bit/s
Parity:
Odd
Stop bits: 1
Data bits: 7
–
–
–
–
–
–
–
–
Data transmission parameters in the
RS-232 data interface on the YDO01C-BT
(Option B2) are configured as follows:
Transmission speed
(baud rate): 9600 bit/s
Parity:
Odd
Stop bits: 1
Data bits: 8
Thus the data interface on the weighing
instrument must be adapted for data
transmission to the YBT01 or YDO01CBT (Option B2) wireless interface. Please
observe the following when configuring
the weighing instrument:
The weighing instrument models suitable for wireless data communication
use either the SBI (Sartorius Balance
Interface) or the XBPI (Xtended Balance
Protocol Interface) data transfer protocol. Which protocol is used in your
weighing instrument is indicated in the
–
–
–
–
operating instructions for the particular
instrument.
The XBPI protocol generally operates
with the following parameters:
Transmission speed
(baud rate): 9600 bit/s
Parity:
Odd
Stop bits: 1
Data bits: 8
With the SBI protocol, the transmission
speed, parity and number of stop bits
can be configured. The following
Sartorius instruments also permit configuration of the number of data bits:
GENIUS (ME models)
MA100 and MA50 (electronic moisture
analyzers)
Combics (CISL… models) (indicators and
complete scales)
Combics (CIS… models) (indicators and
complete scales)
Refer to the installation and operating
instructions for the particular instrument for details on which parameters
can be configured.
To enable communication with the
YBT01 or YDO01C-BT (Option B2) wireless interface, the data interface on the
weighing instrument must be configured accordingly.
To use the SBI protocol and a YBT01
with its factory-set parameters, configure the weighing instrument as follows:
Transmission speed
(baud rate): 9600 bit/s
Parity:
Odd
Stop bits: 1
Data bits: 7
9
Note:
The model YBT01 Bluetooth® RS-232
adapter with factory-set interface
parameters is not suitable for data communication using the XBPI protocol.
To use the weighing instrument and the
YBT01 with XBPI, or with SBI in a configuration other than the factory-set
configuration of the serial interface, the
desired parameters must be configured
in the serial interface of the YBT01.
The serial interface of the Bluetooth®
RS-232 model YBT01 adapter can be
configured at the factory in accordance
with specified parameters, or by one of
our service technicians in accordance
with customer specifications.
–
–
–
–
To use the SBI protocol and a YDO01CBT (Option B2) with factory-set parameters, configure the weighing instrument as follows:
SBI parameters:
Transmission speed
(baud rate): 9600 bit/s
Parity:
Odd
Stop bits: 1
Data bits: 8
To use the XBPI protocol and a
YDO01C-BT (Option B2) with factoryset parameters, configure the weighing
instrument as follows:
– Select “XBPI” in the scale or balance
operating menu
Note:
To use the weighing instrument and the
YDO01C-BT with SBI in a configuration
other than the factory-set configuration
of the serial interface, the desired
parameters must be configured in the
serial interface of the YDO01C-BT
(Option B2). The serial interface of the
10
Bluetooth® model YDO01C-BT adapter
can be configured at the factory in
accordance with specified parameters,
or by one of our service technicians in
accordance with customer specifications.
–
–
–
The model YBT01 Bluetooth® RS-232
adapter is designed for data transfer
with Sartorius premium laboratory
balances and analyzers of the following
series:
GENIUS (ME models)
Masterpro (LA models),
MA100 und MA50 (electronic moisture
analyzers)
Expert (LE models)
The model YBT01 Bluetooth® RS-232
adapter is designed for data transfer
with Sartorius industry scales of the following series:
- Combics (CISL… models) (indicators and
complete scales)
The model YDO01C-BT Bluetooth®
RS-232 adapter (Option B2) is designed
for data transfer with Sartorius industry
scales of the following series:
- Combics (CIS… models) (indicators and
complete scales)
Installing the YBT01
If you wish to install the YBT01 on the wall, attach
the enclosed bracket for wall mounting before
proceeding with the following instructions (see
“Installing the Bracket for Wall Mounting,” below).
Installing the YBT01
§ Connect the threaded angle plug (SMA adapter) to
the jack on the back of the YBT01 transmitter
§ Use an open-ended wrench (8 mm) to
tighten the plug carefully
§ Plug the antenna into the jack on the angle plug
and tighten it
11
§ Use an open-ended wrench (8 mm) to tighten the
antenna carefully
§ Connect the cable (RS-232) to the threaded jack on
the front of the YBT01
§ Connect the other end of the cable to the RS-232
data interface on the weighing instrument and
tighten the screws on the connector
§ This completes installation of the transmitter;
the YBT01 is ready to operate
12
Installing the Bracket for Wall Mounting
§ Remove the bracket and screws from the packaging
§ Remove the two screws nearest the antenna jack on
the YBT01. Save these two screws; e.g., in the plastic
bag supplied.
§ Use the screws supplied with the bracket to attach
the bracket to the YBT01 (see illustration)
13
§ Mount the YBT01 on the wall
§ Alternatively, you can install the antenna without
the angle plug. To do this, connect the antenna
directly to the jack on the YBT01.
§ Use an open-ended wrench (8 mm) to tighten the
antenna carefully. Store the angle plug in a safe
place.
14
Installing the YDO01C-BT
(Option B2)
! Because the installation of the YDO01C-BT (Option
B2) entails opening the indicator housing, it must be
performed by a technician with relevant training
(i.e., a service technician). Failure to observe the
applicable restrictions and regulations when opening
the indicator housing will result in forfeiture of all
claims under the manufacturer’s warranty.
§ Attach the PCBs
§ Remove the protective cap from the back of the
indicator housing
§ Pull the antenna cable through the opening
§ Fasten the nut by hand and then use an open-ended
wrench (19 mm) to tighten the antenna connector
carefully
§ Plug the antenna into the angle plug and tighten it
by hand
§ Use an open-ended wrench (8 mm) to tighten the
antenna carefully
15
§ Attach the antenna cable to the threaded connector
on the YDO01C-BT adapter
§ Close the indicator housing
§ Affix the enclosed ID label to the rear panel of the
indicator as shown:
Affix the warning label to the side panel of the
indicator next to the CE marking:
16
Establishing Data Connections between the YBT01
or YDO01C-BT (Option B2) and the F8T001v2 or
F8T012 from Belkin Corporation
Note:
Up to four connections can be used
simultaneously.
Installing F8T001v2 or F8T012
§ Install F8T001v2 or F8T012 in accordance with the installation instructions
provided on the CD.
Note:
A detailed installation manual for the
F8T001v2 is included on the enclosed
CD.
§ Once installation has been completed,
double-click on “My Bluetooth Places.”
> The “Initial Bluetooth Configuration
Wizard” opens.
Note:
The Bluetooth Configuration Wizard
starts automatically only the first time
you open “My Bluetooth Places.”
§ Add or delete checkmarks in the boxes
to indicate which shortcut(s) to
Bluetooth functions you wish to install.
§ Click on [Next] to continue.
> The “General” dialog opens.
17
§ Enter a name for the computer; e.g., the
name already assigned by the network
§ Select the computer type from the list;
e.g., “Laptop”
§ Click on [Next] to continue.
> The “Initial Bluetooth Configuration
Wizard” screen is shown again, with a
different message than shown on the
first screen.
§ Click on [Next] to continue.
> The “Bluetooth Service Selection” page
opens.
§ Add or delete checkmarks in the boxes
to select the required Bluetooth services.
Note:
Only the “Bluetooth Serial Port”
service is required for a data connection
between the YBT01 or YDO01C-BT and
the F8T001v2 or F8T012. Activate the
corresponding checkbox to select this
service.
§ Click on the [Configure] button.
> Windows installs the software automatically.
Afterwards, the “Bluetooth Properties”
page opens.
18
§ Edit the name of the Bluetooth port as
needed.
§ Activate the “Startup Automatically”
option to have the connection made on
this port automatically.
Note:
Depending on the receiving device,
automatic start might not be possible.
§ Select the “Secure Connection”
option to require input of a PIN for
authentication of the two devices
before the connection can be made.
Note:
The factory-set (default) PIN for the
YBT01 and the YDO01C-BT is 0000.
You can have the Sartorius Service
department change this number,
if desired.
§ Click on the “Notifications” tab.
> This opens the Notifications page.
19
§ Activate/deactivate the checkboxes and
edit the input field as desired to define
the manner of notification given when
a connection is established.
▲
Note:
Click on the [Browse] button to search
for a different audio file. Click on the
[ ] button to play the audio file.
§ Click on [OK] to confirm your settings.
> The “Bluetooth Service Selection”
screen opens again.
§ Click on [Next] to continue.
> The screen shown here is displayed
§ Click on the [Skip] button
20
§ Click on the [Finish] button to conclude
the initial configuration of your
Bluetooth environment.
> The basic Bluetooth® configuration is
now completed.
21
Establishing a Connection
Configuring the Virtual Serial COM Ports
Note:
Configuration of multiple virtual COM ports is required only if you wish to use more than
one connection at a time. Once you have configured the COM ports your settings are saved;
you do not need to configure the ports again the next time you open “My Bluetooth Places”
or re-start the computer.
§ Double-click on “My Bluetooth Places.”
> The “My Bluetooth Places” window
opens.
§ Open the “Bluetooth” menu.
§ Select “Advanced Configuration” from
the “Bluetooth” menu.
> The “Bluetooth Configuration” panel
opens.
22
§ Click on the “Client Applications” tab.
§ Click on “Bluetooth Serial Port” to
select it.
§ Click on the [Properties] button.
> Windows installs a virtual COM port for
the application automatically. The name
of the COM port is assigned automatically (in this example, COM4).
The “Bluetooth Properties” page opens.
23
§ Edit the name of the Bluetooth port in
the input field, if desired.
§ Select the “Secure Connection” option
to require input of a PIN for authentication before a connection can be made
on this port.
§ Click on the [OK] button to confirm
the settings for the selected COM port.
> The “Bluetooth Properties” page closes.
Creating Additional COM Ports
§ Click on the [Add COM port] button.
> Windows automatically installs an
additional virtual COM port for the
application. The name of the COM port
is assigned automatically (in this example, COM5). The “Bluetooth Properties”
page opens.
24
§ Edit the name of the Bluetooth port in
the input field, if desired.
§ Select the “Secure Connection”
option to require input of a PIN for
authentication before a connection can
be made on this port.
§ Click on the [OK] button to confirm the
settings for the selected COM port.
> The “Bluetooth Properties” page closes.
§ Repeat these steps to configure up to
four separate serial COM ports for
Bluetooth connections.
Note:
These ports can be used by applications
such as “WinScale” or “SPEXXIS” to
access up to four weighing instruments.
§ Click on the [Apply] button to save your
Bluetooth configurations.
> The computer is configured with your
settings.
§ Click on [OK] to close the “Bluetooth
Configuration” panel.
25
Connecting to other Bluetooth Devices
Search for and identify devices within
range of the Bluetooth USB adapter.
§ Open the “Bluetooth” menu.
§ Select the “Search for Devices” item
from the “Bluetooth” menu.
> The program searches for devices that
are equipped with Bluetooth® wireless
technology and are within range of the
F8T001v2 or F8T012
> The devices detected are displayed with
a symbol and a device name in the window pane on the right.
26
Note:
If more than one device is detected with the
same name, the devices cannot be unambiguously identified from the device names. For
clear identification, you need to check the
Device Properties for the device address and
compare this number with the ID numbers
printed on each device. The ID number of the
YBT01 is printed on the manufacturer’s ID
label, with is affixed to the bottom of the
device. The ID number of the YDO01C-BT
(Option B) is printed on the manufacturer’s ID
label affixed below the antenna connector
(see “Installing the YDO01C-BT (Option B2)”
in this manual for details).
§ Select the device you wish to identify (by
clicking on it) and then press the mouse button on the right (“right-click”); this opens a
device-specific menu (“popup menu”).
§ Select the “Properties” menu item.
> The “<Device Name> Properties” window
opens.
> The identification number is shown here as
the “Device Address” in hexadecimal code.
§ Click on [OK] to close the “<Device> Properties” window.
27
Searching for Available Services on the
Remote Device
§ Select the remote device and then right-click
on it to open the popup menu.
§ Select the “Discover Available Services” menu
item.
> The services available on the remote device are
listed. This is also known as the device profile.
Note:
Depending on the computer’s operating
system, the symbols for devices and services
may differ from those shown here. Devices
that are equipped with Bluetooth® wireless
technology can be connected to one another
only if they support the same profiles.
§ Select the “serial port” service and then rightclick on it to open the popup menu for
services.
§ Select the “Create Shortcut” menu item.
> A message is displayed indicating that a shortcut has been created at the highest folder
level of the “My Bluetooth Places” window.
28
Note:
The next time you start “My Bluetooth
Places” you can use this shortcut to
establish the connection, without having to search for the remote device and
detect its services. To establish a connection using the shortcut, make sure
the remote device is switched on and is
within range of the Bluetooth USB
adapter.
§ Click on [OK] to close the message
window.
§ Click on the [Back] button.
§ You can use the same procedure to
create shortcuts for all of the remote
devices with which you wish to establish
data connections.
§ Click on “My Bluetooth Places” in the
“Other Places” section on the left,
or:
29
§ Open the “View” menu.
§ Open the “Go To” submenu from the
“View” menu.
§ Select the “My Bluetooth Places” menu
item from the “Go To” submenu.
> The “My Bluetooth Places” window
opens. The shortcuts you have created
are shown in the window pane on the
right.
Assigning a Virtual Port
to a Connection Shortcut
§ Select the shortcut and then right-click
on it to open the popup menu for the
shortcut.
§ Select the “Properties” menu item.
The “Bluetooth Properties” page opens.
30
§ Edit the name of the shortcut in the
input field, if desired. Select the “Secure
Connection” option to require input
of a PIN for authentication before
a connection can be made using this
shortcut.
§ Select the desired COM port from the
list.
Note:
The remote device can communicate
with application software over the COM
port you select here. The COM ports
must be set up prior to opening the
“Properties” page.
§ Click on [Apply] and then [OK] to
confirm the settings for the selected
shortcut.
> The “Bluetooth Properties” page closes.
§ Repeat this procedure to assign COM
ports to the other connection shortcuts.
Note:
If a particular COM port is assigned
to more than one shortcut, the connections started by these shortcuts cannot
be used simultaneously. For connections that you wish to use simultaneously, separate COM ports must be
assigned to the respective shortcuts.
You can use up to four YBT01 and
YDO01C-BT (Option B2) connections
simultaneously.
31
Activating a Data Connection
§ Select the connection shortcut and then
right-click on it to open the popup
menu for the shortcut.
§ Select the “Connect” menu item.
> A status message is displayed, as well as
a message indicating that PIN code
must be entered.
Note:
The PIN input prompt is displayed only
if the “Secure Connection” option is
selected in the shortcut properties.
§ Click on the Bluetooth® logo in the
system tray of the task bar.
> A dialog box for PIN input opens.
§ Enter the PIN in the input field and
click on [OK] to confirm.
Note:
The factory-set (default) PIN for the
YBT01 and the YDO01C-BT (Option B2)
is 0000. You can have the Sartorius
Service department change this number,
if desired.
> A message window opens. The message
provides information on the configuration of the active port. The application
software (e.g., WinScale or SPEXXIS) can
use the established connection on the
port indicated here.
32
§ Click on [OK] to close the message window.
Note:
If the active connection is not used by any
application within approx. 2 minutes, it is
closed down automatically. When the application using this connection is closed down, the
connection is closed down automatically as
well.
Checking the Connection
Note:
The function for displaying connection status
is only available when at least one connection
is active. Always view the status of only one
connection at a time. Be sure to close the
active status window before opening a status
window for another connection.
§ Select the connection shortcut and then rightclick on it to open the popup menu for the
shortcut.
§ Select the “Status” menu item.
> The “Bluetooth Connection Status” window
opens.
> The “Connection” field shows the connection
status, device name and length of time the
connection has been active. “Status” indicates
whether a connection is active. “Device Name”
gives the name of the remote device connected. “Duration” shows the amount of time
elapsed since the connection was established.
The “Activity” field shows the number of bytes
sent and received.
The “Signal Strength” field shows the signal
strength of the connection on a scale from
“Too weak” to “Too strong.” You can refer to
this scale when setting up your remote devices
to make sure they are within range.
33
Click on the [Properties] button to open the
“Bluetooth Properties” window. The properties cannot be edited while the connection
is active.
Click on the [Disconnect] button to close
down the connection.
§ Click on the [Close] button to close the
“Bluetooth Connection Status” window.
Note:
For more information, refer to the functions
offered in the “Help” menu in the “My
Bluetooth Places” window.
34
Care and Maintenance
Service
Regular servicing by a Sartorius technician will ensure continuous correct
functioning of your wireless interface.
Sartorius offers service contracts with
regular maintenance intervals ranging
from 1 month to 2 years. The maintenance interval depends on operating
conditions and tolerance requirements.
Repairs
! Disconnect defective equipment from
power immediately. Repair work must
be performed by authorized Sartorius
service technicians using original spare
parts. Repairs performed by untrained
persons may result in considerable
hazards for the user. If the equipment
is still under warranty, send the entire
indicator to the factory for repairs.
–
–
–
–
§
$
$
Safety Inspection
Safe operation of the equipment is no
longer ensured when:
there is visible damage to the device or
cable,
the device no longer functions properly,
the device has been stored for a relatively long period under unfavorable
conditions (e.g., excessive moisture), or
the equipment has been subjected to
rough handling during shipment.
If there is any indication that safe
operation of the device is no longer
warranted:
disconnect the equipment from power
immediately.
Lock the device in a secure place to
ensure that it cannot be used for the
time being, and
notify your nearest Sartorius Service
Center or the International Technical
Support Unit based in Goettingen, Germany.
Cleaning
! Handle the YBT01 and YDO01C-
BT/Option B2 wireless interfaces with
care.
! Make sure no liquid enters the equipment housing.
! Do not use aggressive cleaning agents
(solvents or similar agents).
§ The accessible parts (antenna, adapter,
housing) can be cleaned by wiping with
a cloth slightly moistened with a mild
detergent.
!Using jets of water or compressed air
to clean the wireless interfaces is not
permitted.
Cleaning Stainless Steel Surfaces
Clean all stainless steel parts regularly.
Wipe down stainless steel parts gently
(e.g., the YBT01 housing) using a damp
cloth or sponge. You can use any
household cleaning agent that is suitable for use on stainless steel. Then
wipe the equipment thoroughly to
remove all residues. Afterwards, allow
the equipment to dry. If desired, you
can apply oil to the cleaned surfaces as
additional protection.
Note:
Do not apply detergents or cleaning
agents to ID labels or printed adhesive
tags!
Corrosive Environment
$ Remove all traces of corrosive substances on a regular basis.
35
Recycling
The packaging protects the equipment from damage
during transport. After successful installation of the
equipment, you should return this packaging for
recycling. For information on recycling options,
including recycling of used equipment, contact your
municipal waste disposal center or local recycling
depot.
Serial Number Coding
The month and year of manufacture are encoded in
the serial number as follows:
YMMxxxxx
Y
Year
1
2000–2006
2
2007–2013
3
2014–2020
4
2021–2027
5
2028–2034
6
2035–2041
7
2042–2048
8
2049-2055
9
2056-2062
The first digit represents a 7-year period (see the
table above); the next 2 digits represent the month.
Months are numbered consecutively over the entire
7-year period, starting at 13. Thus the number
representing the month also indicates the specific
year of manufacture.
2000 13-24
2001 25-26
...
Example:
113xxxxx -> January 2000
The individual devices are numbered consecutively
in the last 5 digits, starting from 00000 again at the
beginning of each month.
36
Specifications
YBT01
Transmit power
In acc. with Class 1
Specification
Bluetooth® V1.1
Profiles supported
Serial port profile
Data transmission speed
1200 to 115,200 bit/s
Operating temperature range
0°C to +40°C (+32°F to +104°F)
Type of IP protection
IP65
Dimensions (D + W + H)
121 mm + 84 mm + 32 mm
(without connecting cable,
antenna and bracket for wall mounting)
YDO01C-BT
(Option B2)
Transmit power
In acc. with Class 1
Specification
Profiles supported
Bluetooth® V1.1
Serial port profile
Data transmission speed
1200 to 115,200 bit/s
Operating temperature range
0°C to +40°C (+32°F to +104°F)
37
Certificates
38
39
40
41
Contenido
42
43
46
50
54
56
74
76
77
Uso previsto
Advertencias de seguridad
Puesta en marcha
Montaje de YBT01
Montaje de YDO01C-BT (opción
B2)
Crear comunicación de datos
entre YBT01, o bien YDO01C-BT
(opción B2) y un F8T001v2
ó F8T012 de la firma Belkin
Corporation
Cuidado y mantenimiento
Especificaciones técnicas
Certificados
Símbolos que aparecen en estas
instrucciones:
§ para realizar una acción
$ para realizar una acción sólo bajo determinadas condiciones
> describe lo que sucede después de realizar una acción
– para ítems de numeración
! para advertir sobre un peligro
Observar siempre todas las advertencias
de seguridad: durante la instalación, el
funcionamiento, mantenimiento y reparaciones del aparato. Estas advertencias
tienen que ser entendidas y acatadas
por todos los operadores, y tienen que
encontrarse siempre a mano.
Estas advertencias, en caso dado, han
de ser complementadas por el empresario, instruyendo correspondientemente
al personal.
42
Uso previsto
Los radioenlaces Sartorius permiten una
comunicación de datos inalámbrica
basada en la tecnología Bluetooth®,
entre un aparato de medida y un aparato remoto. El aparato remoto puede ser
un PC, por ejemplo, que está equipado
con un adaptador USB Bluetooth®.
Esto hace innecesario un cable de datos
convencional entre dos interfaces de
datos (RS232).
YBT01 es un adaptador Bluetooth®
RS232 que puede ser conectado a una
interfaz de datos de un aparato.
YDO01C-BT (opción B2) es también un
adaptador Bluetooth®, que se conecta a
la interfaz UniCom de un visor Combics.
Los radioenlaces YBT01 e YDO01C-BT
(opción B2) tienen una potencia de
emisión de hasta 100 milivatios (según
la especificación V1.1: clase 1).
Después de realizar el radioenlace
pueden procesarse de inmediato en el
PC los valores de medida, p. ej. con los
programas creados por Sartorius:
– Winscale®,
o bien
– SPEXXIS®
Advertencias de seguridad
Advertencias legales
– Bluetooth® es un nombre registrado
y protegido de Bluetooth® Special
Interest Group (Bluetooth® SIG, Inc.).
Marca y logotipo son propiedad de
Bluetooth® SIG, Inc., y el uso de tales
marcas tienen licencia de Sartorius AG.
Otras marcas y nombres de marcas
pertenecen al respectivo propietario.
– Los adaptadores USB Bluetooth®
F8T001v2 y F8T012 son productos de
la firma Belkin Corporation. Todos los
derechos para este producto están reservados a la firma Belkin Corporation. Los
adaptadores USB Bluetooth® F8T001v2
y F8T012 son adquirible en Sartorius
AG bajo el nombre YBT02. Sartorius, no
obstante, se reserva el derecho de utilizar adaptadores de otros fabricantes,
en lugar del adaptador USB Bluetooth®
F8T001v2 ó F8T012.
– Windows® 98, 2000 y XP es una marca
registrada de la firma Microsoft Inc.
– Winscale® o SPEXXIS® es un Software
registrado de la firma Sartorius AG
Copyright
Los programas o productos mencionados están sujetos a los derechos de
autor y otros derechos de protección.
El software del fabricante respectivo
no debe ser modificado, retrogradado
o modificado por asimilación. El adquirente/usuario no adquiere en ningún
caso el o los derechos anteriormente
mencionados.
El software no debe ser reproducido
o copiado. El adquirente/usuario debe
utilizar el software sólo para sus finalidades propias y no debe cederlo a terceros ni remunerativa ni gratuitamente.
En caso de producirse algún problema
con el software suministrado, rogamos
comunicarse con el proveedor. La firma
Sartorius AG está autorizada para
emplear software actualizados. Se descarta una responsabilidad por software
ya instalado.
Por los contenidos del CD que se
adjunta, respecto al adaptador USB
Bluetooth® (el manual, los programas
y software contenidos en el CD, así
como también las advertencias legales e
instrucciones de instalación correspondientes) se responsabiliza el fabricante
del adaptador USB Bluetooth®.
43
Seguridad
§ Leer con mucha atención las instrucciones de instalación, antes de la puesta en
marcha. El fabricante no se responsabiliza por daños a causa del no cumplimiento de las advertencias de seguridad.
§ Leer completamente el manual
de instrucciones del adaptador USB
Bluetooth® (en el CD adjunto). Observar
las advertencias de seguridad contenidas
en las instrucciones de funcionamiento.
! El aparato no debe utilizarse en zonas
con riesgo de explosión y zonas clasificadas para gases y polvo, ni tampoco
en zonas con existencia de material
explosivo.
! No se permite el empleo en el ámbito
de la medicina.
! Al usar el aparato no se descartan las
perturbaciones a causa de tros aparatos
aprobados que utilizan igual banda de
frecuencia.
En caso necesario, comunicarse con el
proveedor o servicio técnico Sartorius.
§ Hacer controlar la correcta funcionalidad
y seguridad del equipo, según intervalos
razonables, por un especialista correspondientemente cualificado para
realizar tales trabajos. Observar las
prescripciones para prevenir accidentes
y advertir correspondientemente
al personal operador.
! Todos los trabajos de mantenimiento,
limpieza y reparaciones en el aparato
tienen que realizarse separándolo primeramente de la tensión de red. Cualquier intervención en el aparato (excepto
la realizada por personal autorizado de
Sartorius) significa la pérdida de todos
los derechos de garantía. ¡Utilizar exclusivamente piezas de repuesto originales
Sartorius!
44
! Desconectar el aparato de la alimenta-
ción de red (separación de la red), antes
de conectar o separar dispositivos
adicionales.
! El recubrimiento de todos los cables
conectores, y de todos los conductores
internos, es de polivinilcloruro (PVC).
Sustancias químicas que ataquen este
material, deben mantenerse alejadas de
estos conductores.
! Un funcionamiento del equipo que no
cumpla con los datos indicados en la
Declaración de Conformidad y en estas
instrucciones se considera como uso
indebido. Todos los datos indicados en
la Declaración han de ser observados
rigorosamente. El aparato cumple los
requisitos de las Directivas CEE con respecto a la compatibilidad electromagnética y a la seguridad eléctrica (ver las
Declaraciones de Conformidad). Con
instalación realizada incorrectamente
caducan los derechos de garantía.
! No exponer innecesariamente el aparato
a temperaturas extremas, emanaciones
químicas agresivas, humedad, choques
y vibraciones. La temperatura ambiental
de régimen permitida oscila entre 0°C
y 40°C
C O!
! Los aparatos YBT01 e YDO01C-BT
(opción B2) se basan en la radiotecnología inalámbrica Bluetooth®. Esta radiotecnología opera en la banda de frecuencias 2,4 GHz...2,4835 GHz. Esta
banda de frecuencias no está armonizada dentro de la UE. Al usar estos aparatos han de cumplirse las prescripciones
pertinentes locales.
! En Francia, el aparato debe usarse sólo
en el interior de edificios o espacios
cerrados.
Instalación
! Cuidado al utilizar cables conectores RS232 de otros
fabricantes: ¡las asignaciones de pines no son, por lo
general, apropiadas para los aparatos Sartorius!
– Por cables no suministrados por Sartorius se responsabiliza el usuario mismo.
! Si el aparato o el cable de red presentan daños visi-
bles, separar la alimentación de tensión y asegurar el
aparato contra el uso.
Protección IP:
! El aparato YBT01 garantiza el grado de protección
IP 65 sólo al montarse correctamente. El aparato
YDO01C-BT (opción B2) garantiza un grado de protección IP 67 sólo en conexión con un visor Combics
CIS y montaje realizado correctamente.
La instalación de YDO01C-BT tiene que ser realizada
y controlada por un técnico autorizado.
Uso dentro de las Comunidades Europeas:
– Los aparatos YBT01 y YDO01C-BT (opción B2) han
de utilizarse sólo en los siguientes Estados:
Austria, Bélgica, Dinamarca, Finlandia, Francia (sólo
dentro de edificios), Alemania, Grecia, Islandia,
Irlanda, Liechtenstein, Luxemburgo, Noruega, Portugal, España, Suecia, Suiza, Países Bajos, Reino
Unido.
45
Puesta en marcha
Condiciones de almacenamiento y transporte
YBT01, o bien YDO01C-BT (opción B2) no deben ser
expuestos a temperaturas extremas, choques, vibraciones o humedad.
Desembalar
§ Controlar de inmediato las piezas al desembalar,
para detectar posibles daños visibles exteriormente.
$ En caso de daños: ver en el capítulo
“Cuidado y mantenimiento” bajo “Controles de
seguridad”. Conservar todas las partes del embalaje,
para un reenvío eventual, ya que sólo el embalaje
original garantiza un transporte seguro. Antes de
enviar, separar todos los cables conectados, desatornillar la antena de YBT01 ó YDO01C-BT (opción B2),
para evitar daños innecesarios.
–
–
–
–
–
–
–
–
–
46
Suministro YBT01
YBT01 (adaptador RS232)
Cable conector
Adaptador angular
Antena
Soporte de pared
2 tornillos para el soporte de pared
Embalaje
2 bolsitas
Instrucciones de funcionamiento
–
–
–
–
–
–
–
–
–
–
–
Suministro YDO01C-BT (opción B2)
YDO01C-BT (adaptador RS232)
Cable conector
Adaptador angular
Antena
Junta
1 tuerca
Placa de circuitos impresos (2 unidades)
Embalaje (no para la opción B2)
1 bolsita (no para la opción B2)
2 placas identificatorias (no para la opción B2)
Instrucciones de funcionamiento
Advertencias de instalación
Los radioenlaces YBT01, o bien YDO01C-BT (opción
B2) están construidos de manera que, bajo condiciones de uso normales, permitan un funcionamiento
fiable. El equipo trabaja con exactitud y rapidez,
si para los radioenlaces YBT01, YDO01C-BT (opción
B2) se ha seleccionado el lugar de instalación
apropiado.
°C
!
– Instalar los radioenlaces de manera que se garantice
una transmisión sin problema de las señales de
datos.
Advertencia:
¡Obstáculos, como p. ej. las paredes, pueden acortar
el alcance!
– Evitar el calor extremo (p. ej. instalación junto a
calefactores o exposición directa a los rayos solares)
– Evitar vibraciones extremas
– Proteger los radioenlaces contra las emanaciones
químicas agresivas
– Evitar la humedad extrema
– El aparato no debe ser usado en zonas con riesgo
de explosión y en las zonas clasificadas para gases
y polvos.
– No se permite el uso en zonas donde exista material
explosivo y tampoco en el ámbito de la medicina.
47
Software Sartorius
Para editar rápida y correctamente los
valores transferidos y los comandos de
control de los aparatos de medida
conectados, Sartorius ofrece dos programas:
– WinScale
– SPEXXIS
El software del programa respectivo
tiene que ser instalado en el PC; con las
instrucciones de funcionamiento adjuntas del programa esto no constituye
ningún problema.
–
–
–
–
–
–
–
–
48
Preconfiguración de la báscula
La insterfaz de datos RS232 de YBT01
se entrega ajustada de fábrica con los
siguientes parámetros:
veloc. de transmisión
(baudios) 9600 bit/s
paridad
Odd (impar)
bit stop
1
bit datos 7.
La interfaz de datos de YDO01C-BT
(opción B2) se entrega ajustada de
fábrica con los siguientes parámetros:
veloc. de transmisión
(baudios) 9600 bit/s
paridad
Odd (impar)
bit stop
1
bit datos 8.
Por esto, la interfaz de datos de la
báscula tiene que ser adaptada para la
transferencia de datos desde la báscula
hacia YBT01 o YDO01C-BT (opción B2).
Observar aquí los siguientes aspectos:
los modelos apropiados para la comunicación de datos inalámbrica pueden
apoyar diferentes protocolos de
transferencia de datos:
SBI
(Sartorius Balance Interface), o bien
XBPI
(Xtended Balance Protocol Interface)
Qué protocolo de transferencia de datos
existe en la báscula, se indica en las instrucciones de funcionamiento de la báscula respectiva.
–
–
–
–
–
–
–
–
XBPI opera en general con la siguiente
configuración de interfaz:
veloc. de transmisión
(baudios) 9600 bit/s
paridad
Odd (impar)
bit stop
1
bit datos 8.
SBI permite un ajuste de transmisión de
datos, paridad y cantidad de bits stop
en la báscula. Las series de aparatos
GENIUS (modelos ME)
MA100 y MA50 (analizadores de humedad electrónicos)
Combics (CISL...) (visores y básculas)
Combics (CIS) (visores y básculas)
permiten adicionalmente un ajuste de la
cantidad de bits datos. El parámetro
ajustable respectivo de la báscula se
indica en las instrucciones de funcionamiento de la báscula respectiva.
Para realizar una comunicación de
datos a través de los radioenlaces
YBT01 e YDO01C-BT (opción B2), la
interfaz de la báscula conectada tiene
que ser configurada en el menú de funcionamiento de la báscula, de acuerdo
con la configuración de interfaz de
YBT01 o de YDO01C-BT (opción B2).
–
–
–
–
Configuración de la báscula al utilizar
SBI y YBT01 con ajuste de fábrica:
veloc. de transmisión
(baudios) 9600 bit/s
paridad
Odd (impar)
bit stop
1
bit datos 7.
Advertencia:
Si la báscula y el YDO01C-BT con SBI
han de operar con una configuración
diferente respecto a la interfaz serial,
la configuración deseada tiene que
ajustarse también en la interfaz serial
de YDO01C-BT (opción B2). La interfaz
serial del adaptador YDO01C-BT
(opción B2) Bluetooth® puede
configurarse en fábrica, o por nuestro
servicio técnico, según los parámetros
específicos del cliente.
Advertencia:
El adaptador YBT01 Bluetooth® RS232,
con la configuración de interfaz de
fábrica, no es apropiado para la transferencia de datos según XBPI.
Si la báscula y el YBT01 con XBPI o SBI
han de operar con una configuración
diferente respecto a la interfaz serial, la
configuración deseada tiene que ajustarse también en la interfaz serial del
YBT01. La interfaz serial del adaptador
YBT01 Bluetooth® RS232 puede configurarse en fábrica, o por nuestro servicio técnico, según los parámetros específicos del cliente.
–
–
–
–
–
Configuración de báscula al utilizar SBI
o XBPI y un YDO01C-BT (opción B2)
con ajuste de fábrica:
SBI:
veloc. de transmisión
(baudios) 9600 bit/s
paridad
Odd (impar)
bit stop
1
bit datos 8.
Configuración de báscula al utilizar SBI
o XBPI y un YDO01C-BT (opción B2)
con ajuste de fábrica:
XBPI:
XBPI
–
–
–
El adaptador YBT01 Bluetooth® RS232
es apropiado para la serie de balanzas
de laboratorio Premium de Sartorius,
para la transferencia de datos:
GENIUS (modelos ME)
MasterPro (modelos LA),
MA100 y MA50 (analizadores de humedad electrónicos)
Expert (modelos LE)
El adaptador YBT01 Bluetooth® RS232
es apropiado para la serie de básculas
industriales Sartorius, para la transferencia de datos:
Combics (CISL...)
(visores y básculas)
El adaptador YDO01C-BT (opción B2)
Bluetooth® RS232 es apropiado para la
serie de básculas industriales Sartorius,
para la transferencia de datos:
Combics (CIS) (visores y básculas).
49
Montaje de YBT01
Si YBT01 tiene que montarse en una pared, instalar
primeramente el soporte de pared suministrado
(ver en el capítulo: Montaje del soporte de pared).
Montaje de YBT01
§ Atornillar el adaptador angular (serie: conector
enchufable SMA) en el lado posterior del transmisor.
§ Apretar cuidadosamente el adaptador angular
con llave de boca (ancho de llave 8).
§ Insertar la antena y atornillarla fijamente.
50
§ Apretar cuidadosamente la antena con llave de boca
(ancho de llave 8).
§ Atornillar el cable conector (RS232) en el lado
anterior de YBT01.
§ Insertar el cable conector a la interfaz de datos de la
báscula (RS232), y apretar los tornillos de seguro.
§ YBT01 está montado en la báscula y listo para el
funcionamiento.
51
Montaje del soporte de pared
§ Sacar el soporte de pared y los tornillos del embalaje.
§ Sacar ambos tornillos más cercanos a la conexión
de antena del YBT01 y conservarlos en la bolsita
respectiva.
§ Montar el soporte de pared, utilizando los tornillos
adjuntados (ver ilustración).
52
§ Montar YBT01 en la pared.
§ La antena también puede montarse directamente,
sin adaptador angular. Colocar la antena verticalmente.
Conservar el adaptador angular.
§ Apretar la antena cuidadosamente con llave de boca
(ancho de llave 8)
53
Montaje de YDO01C-BT
(opción B2)
! La instalación de YDO01C-BT (opción B2) ha de
ser realizada sólo por un especialista correspondientemente cualificado (técnico de servicio), debido
a que el aparato tiene que ser abierto. Si el aparato
es montado incorrectamente, se invalidan los
derechos de garantía.
§ Insertar las placas de circuitos impresos
§ Quitar la tapita de cierre atornillable
§ Pasar el cable de antena a través del agujero
§ Atornillar manualmente la tuerca, apretar cuidadosamente la antena con la llave de boca (ancho de
llave 19).
§ Insertar la antena en el adaptador angular y apretar.
§ Con la llave de boca (ancho de llave 8) atornillar
cuidadosamente la antena
54
§ Atornillar el cable de antena en el adaptador
§ Volver a cerrar el aparato.
§ Poner las placas identificatorias suministradas:
En el lado posterior del aparato.
En el lado del aparato, como complemento de la
placa identificatoria.
55
Crear comunicación de datos entre YBT01
o YDO01C-BT (opción B2) y un F8T001v2 ó
F8T012 de la firma Belkin Corporation
Advertencia:
¡Pueden existir cuatro conexiones al mismo
tiempo, como máximo!
Instalación de F8T001 v. 2 ó F8T012
§ Instalar F8T001 v. 2 ó F8T012 según las
instrucciones de instalación adjuntas
Advertencia:
Instrucciones de funcionamiento detalladas de F8T001 v. 2 se encuentran en
el CD adjunto.
§ Después de instalar, iniciar „Mis sitios
de Bluetooth“.
> En la pantalla aparece el cuadro de
diálogo para iniciar
asistente de configuración Bluetooth.
Advertencia:
¡El inicio de asistente de configuración
Bluetooth es automático sólo para
el primer inicio de „Mis sitios de
Bluetooth“!
§ Con ayuda de las casillas de control
buscar, en qué lugares del ordenador ha
de crearse un atajo de conexión para el
acceso a las funciones de Bluetooth.
§ Pulsar botón [Siguiente]
> En la pantalla aparece el cuadro de
diálogo: „General“
56
§ Entrar nombre de ordenador, p. ej.:
(aceptar nombre de ordenador desde la
dirección de red)
§ Seleccionar nombre de equipo, p. ej.
equipo portátil
§ Pulsar botón [Siguiente]
> Aparece el cuadro de diálogo
„Asistente de configuración inicial
Bluetooth“
§ Pulsar botón [Siguiente]
> En la pantalla aparece la superficie:
„Detectar servicios disponibles
Bluetooth“
§ Seleccionar servicios Bluetooth deseados con ayuda de las casillas de control.
Advertencia:
Para una comunicación de datos entre
un YBT01 o YDO01C-BT hacia un
F8T001 v. 2 ó F8T012 se necesita sólo
el servicio: „Puerto de serie Bluetooth“.
Tiene que activarse la casilla de control
respectiva.
§ Pulsar botón [Configurar]
> Windows instala automáticamente el
Software requerido. A continuación,
aparece la superficie:
„Propiedades de Bluetooth“.
57
§ en caso dado, cambiar el nombre de la
conexión Bluetooth en la casilla de editar
§ Con la casilla de control:
seleccionar „Iniciar automáticamente“,
si se desea un inicio automático de un
atajo a través de esta conexión.
Advertencia:
¡Un inicio automático de un atajo no
es posible con cada dispositivo receptor
contrario!
§ Con la casilla de control:
seleccionar „Conexión segura“, si una
autenticación de los dos aparatos ha de
realizarse por una solicitud de código
PIN para el emparejamiento.
Advertencia:
PIN de YBT01 y de YDO01C-BT es un
ajuste de fábrica: 0000.
A petición, el servicio técnico Sartorius
puede ajustar otro PIN.
§ En la tarjeta de registro:
cliquear „Notificaciones“
> Aparece la tarjeta de registro:
Avisos
58
§ Ajustar el tipo deseado de aviso, al realizar el atajo a través del aparato remoto,
con la ayuda de las casillas de control
y de la casilla de editar.
▲
Advertencia:
Con el botón [Examinar] puede
seleccionarse otro archivo de audio.
Pulsando el botón [ ] puede activarse
el archivo de audio.
§ Aceptar los ajustes pulsando el botón
[Aceptar].
> En la pantalla aparece nuevamente la
superficie:
„Detectar servicios disponibles
Bluetooth“
§ Pulsar el botón [Siguiente]
> Aparece la superficie representada en el
cuadro
§ Pulsar el botón [Omitir]
59
§ Para finalizar el asistente de configuración Bluetooth pulsar el botón
[Finalizar].
> La configuración básica Bluetooth® ha
finalizado.
60
Crear atajos
Configuración de las interfaces seriales virtuales (puertos COM)
Advertencia:
La configuración de varios puertos virtuales COM tiene que realizarse solamente si se utilizan
varias conexiones al mismo tiempo. Si estos puertos COM están configurados, no tienen que
configurarse otra vez al reiniciarse „Mis sitios de Bluetooth“ u ordenador. Los ajustes se
mantienen.
§ Reiniciar „Mis sitios de Bluetooth“.
> Aparece la superficie „Mis sitios de
Bluetooth“.
§ En la barra de menú, pulsar [Bluetooth]
§ Dentro del menú [Bluetooth]
seleccionar [Configuración avanzada].
> Aparece la superficie:
„Configuración Bluetooth“.
61
§ Confirmar tarjeta de registro:
„Aplicaciones cliente“
§ Nombre de la aplicación:
marcar cliqueando „Puerto de serie
Bluetooth“
§ Pulsar el botón [Propiedades...]
> Windows instala automáticamente un
puerto virtual COM para la aplicación.
El nombre del puerto COM se asigna
automáticamente (aquí COM 4).
Aparece la superficie: „Propiedades de
Bluetooth“.
62
§ En caso dado: modificar el nombre de
puerto Bluetooth en la casilla de editar
§ Con las casillas de control: seleccionar
„Conexión segura“, si ha de realizarse
una autenticación por solicitud de código
PIN al conectar a través de puerto COM
§ Aceptar ajustes, activando el botón
[Aceptar] para el puerto COM indicado.
> Desaparece la superficie „Propiedades
de Bluetooth“.
Generación de otros puertos COM
§ Confirmar la superficie [Agregar puerto
COM].
> Windows instala automáticamente otro
puerto virtual COM para la aplicación.
El nombre del puerto COM se asigna
automáticamente (aquí COM 5).
Aparece la superficie: „Propiedades de
Bluetooth“.
63
§ En caso dado, modificar nombre del
puerto Bluetooth en la casilla de editar
§ Con las casillas de control:
seleccionar „Conexión segura“, si ha
de realizarse una autenticación por
solicitud de código PIN al conectar
a través de puerto COM indicado.
§ Aceptar ajustes, activando el botón
[Aceptar] para el puerto COM indicado.
> Desaparece la superficie: „Propiedades
de Bluetooth“.
§ Repetir los pasos operativos hasta que
se haya generado en total cuatro puertos de serie Bluetooth con cuatro puertos COM diferentes.
Advertencia:
A través de los cuatro puertos COM
generados se puede acceder, con un
software de aplicación, como por ejemplo Winscale o Spexxis, a las balanzas.
§ Aceptar la configuración Bluetooth
activando el botón [Aceptar].
> El ordenador se configura con los
ajustes
§ Activando el botón [Aceptar] cerrar
la superficie „Configuración Bluetooth“
64
Conectar con otros aparatos Bluetooth
Buscar e identificar aparatos dentro del alcance de los adaptadores USB Bluetooth.
§ En la barra de menú, pulsar [Bluetooth]
§ Dentro del menú [Bluetooth] seleccionar la
superficie [Buscar dispositivos].
> Se buscan todos los aparatos equipados con
la tecnología de enlace Bluetooth® que se
encuentren dentro del alcance del F8T001 v. 2
ó F8T012 y que estén conectados.
> Los aparatos reconocidos aparecen con un
símbolo y con su nombre en la superficie.
65
Advertencia:
Con varios aparatos del mismo nombre no
es posible una identificación clara respecto al
nombre del aparato remoto. Para esto, tiene
que determinarse claramente el número de
identificación y compararse con el número
identificativo del aparato remoto. El número
de identificación de YBT01 se encuentra en la
placa de características fijado en la base del
aparato. El número de identificación del
YDO01C-BT (opción B2) se encuentra en la
placa de características bajo la conexión de
antena (ver capítulo Montaje de YDO01C-BT
(opción B2)).
§ Marcar el aparato a identificar cliqueando con
tecla izquierda de ratón y cliquear con la tecla
derecha de ratón, para abrir el menú específico de aparato.
§ Seleccionar ítem de menú [Propiedades].
> Se abre la ventana: „Propiedades de xyz“
> Dentro de esta ventana se encuentra el número de identificación junto al ítem: „Dirección
del dispositivo“ en codificación hexadecimal
§ Volver a cerrar la ventana, activando el botón
[Aceptar]
66
Detectar servicios disponibles del aparato
remoto
§ Volver a marcar el aparato cliqueando con la
tecla izquierda de ratón y cliquear con la tecla
derecha de ratón, para abrir el menú específico de aparato.
§ Seleccionar ítem de menú [Detectar servicios
disponibles].
> Los servicios disponibles del aparato remoto,
conocidos también como perfiles, se determinan y aparecen.
Advertencia:
Según el sistema operativo del ordenador,
los símbolos para el aparato y los servicios de
símbolos representados dentro del cuadro
pueden diferir. Aparatos equipados con tecnología Bluetooth® sólo pueden realizar un
enlace de datos en el caso de que ambos aparatos apoyen los mismos perfiles.
§ Marcar el servicio: „serial port“ cliqueando con
la tecla izquierda de ratón y cliquear con tecla
derecha de ratón, para abrir el menú específico de servicio.
§ Seleccionar ítem de menú [Crear atajo].
> Aparece un mensaje de que en la carpeta
principal de Mis sitios de Bluetooth se ha
creado un atajo de conexión para el servicio
seleccionado del aparato remoto.
67
Advertencia:
Con un reinicio de „Mis sitios de
Bluetooth“ puede iniciarse una conexión a través de este atajo, sin tener que
buscar previamente el aparato remoto
y determinar los servicio respectivos.
Para iniciar una conexión a través del
atajo, el aparato remoto tiene que estar
encendido y encontrarse dentro del
alcance del adaptador USB Bluetooth.
§ Cerrar el mensaje, activando el botón
[Aceptar].
§ Activar el botón [Atrás]
§ Crear atajos, así como se ha descrito,
para todos los aparatos remotos con los
que ha de realizarse una conexión de
datos.
§ Seleccionar [Mis sitios de Bluetooth]
en el campo atajos de conexión
o bien
68
§ Seleccionar [Ver] en la barra de menú.
§ En el menú [Ver] seleccionar el submenú [Ir a]
§ En el submenú [Ir a] seleccionar
[Mis sitios de Bluetooth].
> Aparece la superficie de „Mis sitios de
Bluetooth“. Dentro de la superficie se
encuentran los atajos creados.
Asignación de un determinado puerto
virtual COM para el atajo de conexión
§ Marcar el atajo cliqueando con la tecla
izquierda de ratón y cliquear con tecla
derecha de ratón, para abrir el menú
atajos de conexión.
§ Seleccionar ítem de menú
[Propiedades].
> Aparece la superficie:
„Propiedades de Bluetooth“
69
§ En caso dado, cambiar el nombre
del atajo en la casilla de editar.
Con las casillas de control: seleccionar
„Conexión segura“, si ha de realizarse
por solicitud de código PIN una
autenticación al conectar.
§ Ajustar puerto COM deseado con ayuda
de la casilla para seleccionar.
Advertencia:
A través del puerto COM ajustado
puede realizarse una comunicación de
datos entre software de aplicación y
aparato remoto, con conexión iniciada.
Sólo pueden ajustarse los puertos COM
previamente generados.
§ Aceptar los ajustes, activando los botones [Aplicar] y [Aceptar] para los atajos
seleccionados.
> Desaparece la superficie „Propiedades
de Bluetooth“
§ Realizar los ajustes en cada atajo de
conexión.
Advertencia:
A través de los atajos de conexión, en
los que está ajustado el mismo puerto
COM, no pueden existir conexiones al
mismo tiempo. Para conexiones, que
hayan de existir juntas al mismo tiempo,
tienen que seleccionarse diferentes
puertos COM dentro de los atajos de
conexión.
Pueden existir al mismo tiempo hasta
cuatro conexiones para diferentes
YBT01 o YDO01C-BT (opción B2).
70
Activar la conexión de datos
§ Marcar el atajo de conexión cliqueando
con la tecla izquierda de ratón y cliquear con la tecla derecha de ratón, para
abrir el menú de atajo de conexión.
§ Seleccionar ítem de menú [Conectar].
> Aparece un mensaje de estado y un
mensaje para una entrada de código
PIN requerida.
Advertencia:
El mensaje para entrar código PIN
aparece sólo en caso que dentro de las
propiedades del atajo de conexión esté
seleccionado:
„Conexión segura“.
§ Cliquear el logo Bluetooth® en la barra
de tareas con la tecla izquierda de
ratón.
> Aparece una ventana para la entrada de
código PIN.
§ Entrar código PIN en la casilla de editar
y confirmar con [Aceptar].
Advertencia:
El código PIN de YBT01 y de YDO01CBT (opción B2) es un ajuste de fábrica:
0000. A petición, el servicio técnico
Sartorius puede ajustar otro código PIN.
> Aparece un mensaje. El mensaje informa
sobre la conexión lista configurada y
activa. El software de aplicación
(p. ej. Winscale o Spexxis) puede usar
la conexión establecida a través del
puerto COM indicado.
71
§ Confirmar y cerrar el mensaje activando el
botón [Aceptar].
Advertencia:
Si la conexión activa no es utilizada por una
aplicación dentro de 2 minutos aprox., esta
conexión finaliza automáticamente. Al cerrar
una aplicación que ha utilizado esta conexión,
la conexión finaliza también automáticamente.
Control de la conexión
Advertencia:
La función para representar el estado de
conexión sólo es posible con conexión activa.
Indicar siempre el estado de conexión de sólo
una conexión. Antes de indicar el estado de
otra conexión, cerrar la indicación de estado
actual.
§ Marcar el atajo de conexión cliqueando con la
tecla izquierda de ratón y cliquear con la tecla
derecha de ratón, para abrir el menú de atajo
de conexión.
§ Seleccionar ítem de menú [Estado].
> Se abre la superficie „Estado de la conexión
Bluetooth“.
> Dentro del campo „Conexión“ se encuentran
las informaciones Estado, Nombre del dispositivo y Duración. Estado indica si existe una
conexión. Nombre de dispositivo indica el
nombre del aparato remoto con el que se
realiza la conexión. Duración indica el tiempo
que dura la conexión existente.
Dentro del campo: „Actividad“ se indican
los bytes emitidos y recibidos a través de la
conexión.
El campo: „Fuerza de la señal“ indica una
escala variable, que describe la fuerza de la
señal de la conexión. Esta escala puede utilizarse como medio auxiliar para la alineación
de los radioenlaces.
72
Activando el botón [Propiedades] se abre el cuadro
de diálogo: „Propiedades de Bluetooth“ y presenta
las propiedades seleccionadas de la conexión.
Las propiedades no pueden editarse con conexión
activa.
La activación del botón [desconectar] separa la
conexión actual.
§ Con el botón [Cerrar] se cierra el cuadro de diálogo
„Estado de la conexión Bluetooth“.
Advertencia:
Más apoyo ofrecen los ítems del menú Ayuda,
en la barra de menú de „Mis sitios de Bluetooth“
73
Cuidado y mantenimiento
Servicio
Un mantenimiento regular del aparato
por técnicos de servicio Sartorius garantiza la continua fiabilidad de funcionamiento. Sartorius ofrece contratos de
servicio en ciclos de 1 mes y hasta 2
años. La secuencia de los intervalos de
mantenimiento depende de las condiciones de funcionamiento y de los
requisitos de tolerancias del usuario.
Reparaciones
Limpieza
! Los radioenlaces YBT01 e YDO01C-BT
(opción B2) han de ser tratados con
mucho cuidado.
! No debe penetrar líquido en el aparato.
! No utilizar detergentes de limpieza
agresivos (disolventes o similares).
§ Piezas visibles, tales como antena,
adaptador o carcasa han de limpiarse
con un paño humectado levemente con
agua jabonosa.
! Aparato defectuoso ha de ser separado
de inmediato de la tensión de red.
Reparaciones tienen que ser realizadas
sólo por personal técnico autorizado de
Sartorius, con repuestos originales.
Debido a reparaciones incorrectas, el
usuario se expone a graves peligros.
Durante el plazo de garantía, enviar el
aparato completo.
–
–
–
–
Controles de seguridad
Un funcionamiento libre de riesgos ya
no se garantiza si:
el aparato o el cable presentan daños
visibles,
el aparato ya no funciona correctamente,
el aparato ha estado almacenado por
largo tiempo, bajo condiciones inapropiadas (p. ej humedad extrema),
ha sido transportado bajo condiciones
difíciles.
En estos casos
§ separar el aparato de la tensión de red,
$ asegurar el aparato contra el uso y
$ comunicarse con el servicio técnico
Sartorius.
74
! Los radioenlaces no deben rocearse con
agua o soplarse con aire a presión.
Limpieza de superficies de acero inoxidable
Es fundamental limpiar todas las piezas
de acero inoxidable en intervalos regulares. Limpiar las piezas de acero inoxidable (p. ej. la carcasa de YBT01) frotándolas suavemente con un paño o
esponja humectados. Utilizar sólo detergentes de limpieza de uso común, apropiados para el acero inoxidable. Después
de limpiar, enjuagar minuciosamente,
hasta eliminar el más mínimo residuo.
A continuación, dejar secar el aparato.
Como protección puede aplicarse adicionalmente un aceite cosmético.
Advertencia:
¡No limpiar placas identificatorias o
impresos con detergentes!
Ambiente corrosivo
$ Eliminar regularmente las sustancias
que favorecen la corrosión.
Eliminación de desechos
El embalaje protege los productos Sartorius
convenientemente contra los daños de transporte.
El embalaje consta exclusivamente de materiales no
nocivos para el medio ambiente, que como materia
prima secundaria y valiosa debería eliminarse correspondientemente. Lo mismo es válido también para
los aparatos en desuso.
Informaciones sobre eliminación de desechos, las
ofrecen las oficinas respectivas del ayuntamiento.
Informaciones específicas de báscula/codificación
del número de serie
La fecha de fabricación del aparato se codifica con
el número de serie, resultando lo siguiente:
JMM x x x x x
J
Año
1
2000–2006
2
2007–2013
3
2014–2020
4
2021–2027
5
2028–2034
6
2035–2041
7
2042–2048
8
2049-2055
9
2056-2062
La columna para el año J contiene el número de
grupo anual, que define un intervalo de tiempo de 7
años respectivamente. Dentro de cada grupo anual
se cuentan los meses (M M) a partir de 13.
2000 13-24
2001 25-26
...
Ejemplo:
113xxxxx (enero 2000)
xxxxx es un número consecutivo, que se cuenta de
nuevo aumentándolo cada mes.
75
Especificaciones técnicas
YBT01
Potencia de emisión
corresp. a la clase 1
Especificación
Perfil apoyado
Bluetooth® V1.1.
Puerto serial
Veloc. transmisión de datos
1200...115200 Bit/s
Rango de temperatura
0...40°C
Grado de protección IP
IP65
Dimensiones (L + A + A)
121 mm + 84 mm + 32 mm
(sin cable conector, antena y soporte de pared)
YDO01C-BT
(opción B2)
Potencia de emisión
corresp. a la clase 1
Especificación
Perfil apoyado
Bluetooth® V1.1.
Puerto serial
Veloc. transmisión de datos
1200...115200 Bit/s
Rango de temperatura
0...40°C
76
Certificados
77
78
79
Sartorius AG
Weender Landstrasse 94–108
37075 Goettingen, Germany
Phone +49.551.308.0
Fax +49.551.308.3289
www.sartorius.com
Copyright by Sartorius AG,
Goettingen, Germany.
All rights reserved. No part
of this publication may
be reprinted or translated in
any form or by any means
without the prior written
permission of Sartorius AG.
The status of the information,
specifications and illustrations
in this manual is indicated
by the date given below.
Sartorius AG reserves the
right to make changes to the
technology, features,
specifications and design of the
equipment without notice.
Status:
February 2006, Sartorius AG,
Goettingen, Germany
Printed in Germany on paper that has
been bleached without any use of chlorine
W1A000 · KT
Publication No.: WYB6002-al06022