1
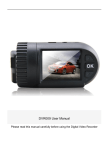
Global Headquarter 2 Alexandra Road, Delta House #02-03 Singapore 15991 www.makagps.com HD Digital Video RoadcorderTM User Manual R07 June 2013 Trademarks All brand and product names are trademarks or registered trademarks of Maka GPS Technologies Group. In association with Maka GPS Technologies Private Limited (Singapore), Maka GPS Technologies Sdn. Bhd. (Malaysia) & Maka Technologies Group (H.K.) Limited. The information in this manual is subject to change without notice. Page 1 © 2013 Maka Technologies Group. All Rights Reserved. Global Headquarter 2 Alexandra Road, Delta House #02-03 Singapore 15991 www.makagps.com Annex A: Product Layout Page 2 © 2013 Maka Technologies Group. All Rights Reserved. Global Headquarter 2 Alexandra Road, Delta House #02-03 Singapore 15991 www.makagps.com Technical Specifications Resolution Full HD 1080p -1920×1080 @ 30fps,1440×1080 @ 30fps Full HD 720p - 1280×720 @ 30fps, VGA - 800×480 @ 60fps, 640×480 @ 60fps Lens Wide Angle Lens 120°, 4 fixed focus lens, F/2.0, focal length of 3.4mm Image Sensor 1/2.5 "5 megapixel CMOS sensor TFT Screen 2.7"TFT - 960 X 240pixels The chip Ambarella A2S60 Internal Memory Embedded with 256MB GPS module External set Storage Card Type MicroSD Card - Maximum support 32GB Format JPEG (EXIF2.2), DCF Video format H.264 (MOV) The zoom video 3x digital zoom (Only under camera mode) Audio Built-in microphone / speaker (AAC) Exposure compensation -3.0EV~+3.0EV Loop Recording Off, 1 minutes, 3 minutes, 5 minutes Auto Power Off Off, 1 minute, 3 minutes, 5 minutes Auto. shut off screen Off, 1 minute, 3 minutes, 5 minutes PC Interface USB2.0 (high speed) Video/AV output NTSC / PAL HD TV interface HDMI signal output, the highest 1920X1080 P50 or 1920X1080 P60, Power Built-in 500mAh 3.7V polymer battery Page 3 © 2013 Maka Technologies Group. All Rights Reserved. Global Headquarter 2 Alexandra Road, Delta House #02-03 Singapore 15991 www.makagps.com General Troubleshooting Question Reason Solution Device cannot be turn on Device might be low in battery. Charge the Battery. Auto power-off 1. Automatic shutdown function is enabled. 1. Enter the setup menu to change [shutdown time] to off. 2. Low Battery. 2. Charge the battery Unable to take pictures or record videos MicroSD card might be full. Check your microSD card’s memory space. Delete files if required. Auto stop recording in video mode Use a compatible SDHC microSD card for HD video recording. Get a microSD card that has minimum of Class 10 speed. Encounter “file error” when trying to playback pictures or videos MicroSD card might be corrupted. There bad sectors in the card. Reformat the microSD card. No image is displayed on a high-definition TV screen 1. Cable plug might not be plugged in properly. 2. Wrong TV Input mode 1. Ensure AV/ HDMI cable is plug into the TV properly. 2. Refer to the back panel of your TV to track the correct TV input. Make sure you have selected the correct input. Hazy Images Lens might be dirty. Check if there are fingerprints or dust on the lens. Clean it with a micro fabric cloth if necessary. Supply light cannot be turn on Device might be low in battery. Supply light will not be able to on when power is insufficient. Charge the Battery. There are horizontal stripes interference on the image This could be due to wrong light frequency setting. Please set according to the local power supply respectively; 50Hz or 60Hz. For SG/MY: 50hz Page 4 © 2013 Maka Technologies Group. All Rights Reserved. Global Headquarter 2 Alexandra Road, Delta House #02-03 Singapore 15991 www.makagps.com Getting started with Marbella MXPro HD Video RoadcorderTM Charging: Warnings for charging: 1. A new battery may be empty and not charged before you get the device. 2. In normal charging with AC charger (Not included in the package), please make sure to charge it for 2 – 2.5 hours to get it fully charged. Note: A new battery will reach its best performance after number cycles of charging and discharging. If the device is not used for long time, it is better to charge it to full capacity every 2 or 3 months during storage. Note: The device will not be charge via USB from the computer unless USB charger is plug directly to the GPS logger port. (Not included in the package) Car Lighter Charger: Please insert the car charger into car cigarette lighter jack, then plug into the USB jack (see the illustration below). DVR automatically starts recording when it is connected to the power cable. When you remove the power cable, DVR will automatically shut down after 10 seconds. Note: Always use external DC 5V output car charger .When you use car charger, please start car engine first, then connect it to the device to avoid possible damage to the device due to overloaded pulse current during ignition. Please pull it out when you stop the engine, and plug it in again after next ignition. : Page 5 © 2013 Maka Technologies Group. All Rights Reserved. Global Headquarter 2 Alexandra Road, Delta House #02-03 Singapore 15991 www.makagps.com Install and remove the memory card Slot in your microSD card from this side To install the microSD card Follow the TF Card slot icon displayed on the device and insert the microSD card gently To remove the microSD card Push in the microSD card slightly and it will be ejected automatically. POWER ON/ OFF Top View of Marbella MXPRO ON/ OFF device Hold on to the power button for 5 seconds to turn on and shut off. Page 6 © 2013 Maka Technologies Group. All Rights Reserved. Global Headquarter 2 Alexandra Road, Delta House #02-03 Singapore 15991 www.makagps.com Set to Auto Shutdown Back View of Marbella MXPRO Press “M” button once Press “Down” button for 7 times till you see “Auto Power Off” feature on the menu page Press on “O” button (Rec/Ok button) once Toggle the specific timings with the “Up” & “Down” and press “O” button. Note: Once you have enable this mode, device will automatically shutdown when the camera does not have any operations within a set time. Setting of Time/Date Press “M” button will lead to the “SETUP” page Toggle with the “Up” and “Down” buttons till “TIME SETUP” is shown on the screen Press “O” button to confirm Set the time and date accordingly Press “O” button to confirm Press “M” button to Exit Page 7 © 2013 Maka Technologies Group. All Rights Reserved. Global Headquarter 2 Alexandra Road, Delta House #02-03 Singapore 15991 www.makagps.com Video mode Resolution: Full HD (1920 X 1080P)/ 1080P 30fps/ 720P 30fps/ WVGA 60fps/ VGA Effect Frequency/ Flicker: 50Hz/ 60Hz AE ISO: Auto/ 100/ 200/ 400 White Balance: Auto/ Sunny/ Cloudy/ Fluorescent/ Incanescent/ Exposure Offset/ AE Bias: 0/ 0.3/ 0.7/ 1/ 1.3/ 1.7/ 2/ -2/ -1.7/ -1.3/ -1/ -0.7/ -0.3 AE Meter Mode: Center/ Spot/ Average Set to the best video quality by the following steps: Press “M” button will lead to the “SETUP” page Select on Video Resolution Press on “O” to confirm Toggle with the “Up” and “Down” buttons to select the recording mode Most recommended mode – FULL HD. Please select FULL HD. Press “O” to confirm Press “M” to exit screen To Record Video Video Mode: Full HD 1080P Battery indicator Loop Recording: Set to 1 minute per clip Microphone has been disabled White Balance: AUTO Supply Light: OPEN Press on “O” (Ok/ Rec button) Once “REC” button is press, recording will starts Press on “REC” again to stop recording Page 8 © 2013 Maka Technologies Group. All Rights Reserved. Global Headquarter 2 Alexandra Road, Delta House #02-03 Singapore 15991 www.makagps.com Note: During recording, a red spot on the left hand side of the display screen will starts blinking. Lock files manually while recording To Enable / Disable Lock During recording, hold on “M” button for 3 seconds. To disable the manual lock, hold on “M” button for 3 seconds again. Note: A yellow lock icon will be shown on the right hand side of the screen. To Enable/ Disable Microphone Toggle with the “Up” and “Down” buttons till “VIDEO RECORD MODE” is shown on the screen Press “O” button to confirm Set to “VIDEO” to disable microphone or Toggle with the “Up” and “Down” buttons to Set to “VIDEO+AUDIO” to enable microphone Press “O” button to confirm Press “M” button to Exit Enable Motion Sensor Press “M” button will lead to the “SETUP” page Toggle with the “Up” and “Down” buttons till “MOTION DETECT” is shown on the screen Press “O” button to confirm Toggle with the “Up” and “Down” buttons to select “ON” Press “O” button to confirm Note: Recording will automatically on when camera detects any movements. Loop Recording Setting Press “M” button will lead to the “SETUP” page Toggle with the “Up” and “Down” buttons till “LOOP SETTING” is shown on the screen Press “O” button to confirm Toggle with the “Up” and “Down” buttons to select between ”OFF/ 1 / 3 / 5 min Press “O” button to confirm Note: This is a recording process which continues to record at the beginning, erasing the previously recorded material and replacing it with the new content. Page 9 © 2013 Maka Technologies Group. All Rights Reserved. Global Headquarter 2 Alexandra Road, Delta House #02-03 Singapore 15991 www.makagps.com Video Playback Top View of Marbella MXPRO Press “O” button to stop recording Hold on to the “Photo/Playback” button for 3 seconds to change to playback mode Sample of the video playback view Toggle with the “Up” and “Down” buttons to select the respective videos to playback Press on “O” button to select Press on “O” button to play To go back to video recording mode, hold on to the “Photo/Playback” button for 3 seconds again Delete All Videos Under playback mode, press on “M” button to delete Press on “O” button to delete Toggle with the “Up” and “Down” buttons to “ALL” to delete that specific video Press on “M” button to again to Exit Delete Individual Video Under playback mode, toggle with the “Up” and “Down” buttons to select the individual video you wish to delete Press on “O” button after you have highlighted the photo in Yellow Press on “M” button Page 10 © 2013 Maka Technologies Group. All Rights Reserved. Global Headquarter 2 Alexandra Road, Delta House #02-03 Singapore 15991 www.makagps.com Toggle with the “Up” and “Down” buttons to “YES” Press on “O” button to confirm Camera mode Photo Size 3M/ 5M/ 8M/ 12M Effect Frequency/ Flicker: 50Hz/ 60Hz AE ISO: Auto/ 100/ 200/ 400 White Balance: Auto/ Sunny/ Cloudy/ Fluorescent/ Incanescent/ Exposure Offset/ AE Bias: 0/ 0.3/ 0.7/ 1/ 1.3/ 1.7/ 2/ -2/ -1.7/ -1.3/ -1/ -0.7/ -0.3 AE Meter Mode: Center/ Spot/ Average To switch from Video to Camera Mode: Hold on to “M” button for 3 seconds to toggle the mode from video to camera Set to the best pictures quality by the following steps: Press “M” button will lead to the “SETUP” page Select on Photo Size Press on “O” to confirm Toggle with the “Up” and “Down” buttons to select the size of the image Most recommended mode – 5M Press “O” to confirm Press “M” to exit screen Page 11 © 2013 Maka Technologies Group. All Rights Reserved. Global Headquarter 2 Alexandra Road, Delta House #02-03 Singapore 15991 www.makagps.com To take Photo Camera Mode: 5 Megapixels Battery indicator White Balance: AUTO Supply Light: OPEN Top View of Marbella MXPRO Press on “Photo/Playback” button once Activate 3 X Digital Zoom Hold on to the “Up” and “Down” buttons to zoom in or out Press on “Photo/Playback” button once to take a photo Photo Playback Hold on to the “Photo/Playback” button for 3 seconds to change to playback mode Sample of the photo playback view Toggle with the “Up” and “Down” buttons to select the respective photo to view Page 12 © 2013 Maka Technologies Group. All Rights Reserved. Global Headquarter 2 Alexandra Road, Delta House #02-03 Singapore 15991 www.makagps.com Press on “O” button to select Toggle with the “Up” and “Down” buttons to scroll thru the photos To go back to camera mode, hold on to the “Photo/Playback” button for 3 seconds again Delete All Photos from the camera Under playback mode, press on “M” button to delete Press on “O” button to delete Toggle with the “Up” and “Down” buttons to “ALL” to delete that specific photo Press on “M” button to again to Exit Delete Individual Photo from the camera Under playback mode, toggle with the “Up” and “Down” buttons to select the individual photo you wish to delete Press on “O” button after you have highlighted the photo in Yellow Press on “M” button Toggle with the “Up” and “Down” buttons to “YES” Press on “O” button to confirm Page 13 © 2013 Maka Technologies Group. All Rights Reserved. Global Headquarter 2 Alexandra Road, Delta House #02-03 Singapore 15991 www.makagps.com GPS Function* This is an optional function which allows the DVR’s location to be displayed against a map backdrop either in real time or when analysing the track later. Note: *Only applicable to users who purchase the gps logger from Maka GPS Technologies Pte Ltd. Activation of GPS Logger GPS Logger Status: Not Lock Sample View of the recording with the GPS Logger - GPS Logger is not lock - GPS Logger locked Plug in the car charger to the GPS Logger’s USB port as shown below. (Note: this is a compulsory action for GPS logger to be locked.) Page 14 © 2013 Maka Technologies Group. All Rights Reserved. Global Headquarter 2 Alexandra Road, Delta House #02-03 Singapore 15991 www.makagps.com Wait for estimated 2 to 3 minutes to capture the GPS signals from the satellites Once its locked as shown on the sample view below, drive as per normal. GPS Logger Status: Locked Sample View of the recording with the GPS Logger Page 15 © 2013 Maka Technologies Group. All Rights Reserved. Global Headquarter 2 Alexandra Road, Delta House #02-03 Singapore 15991 www.makagps.com Mapping GPS tracks via Computer To sync with your computer Step 1: Plug your USB cable into your DVR’s USB port shown below Top View of Marbella MXPRO Step 2: Plug the other side of your USB to the computer Step 3: Your computer will detects 2 Removable Drive: Removable Drive 1 – Internal Memory Removable Drive 2 – External Memory (MicroSD Card) Step 4: Select Internal Memory Drive as shown in the sample above: Removable Drive (F:) Step 5: Double-click on “20120820_英文播放器.exe” Page 16 © 2013 Maka Technologies Group. All Rights Reserved. Global Headquarter 2 Alexandra Road, Delta House #02-03 Singapore 15991 www.makagps.com Step 6: Click on “Extract” button Step 7: Wait for 1 minute while it is extracting Page 17 © 2013 Maka Technologies Group. All Rights Reserved. Global Headquarter 2 Alexandra Road, Delta House #02-03 Singapore 15991 www.makagps.com Step 8: A new folder named “20120820_英文播放器” will be created. Double-click on the folder. Step 9: Double-click on the “CarGpsPlayer.exe”. Page 18 © 2013 Maka Technologies Group. All Rights Reserved. Global Headquarter 2 Alexandra Road, Delta House #02-03 Singapore 15991 www.makagps.com Step 10: This program will bring you the page. Click on the folder option as highlighted in the image below. Step 11: Select the Removable Drive 2 – External Memory (MicroSD Card) as shown in the sample below: Removable Drive (G:) Page 19 © 2013 Maka Technologies Group. All Rights Reserved. Global Headquarter 2 Alexandra Road, Delta House #02-03 Singapore 15991 www.makagps.com Step 12: Double-click on “DCIM folder” Step 13: Double-click on “100 Media folder” Step 14: Select videos which you would like to play and click on “Open” Step 15: Select videos which you would like to play and click on “PLAY” button Click Here to Play & Pause Select the video which you would like to PLAY Page 20 © 2013 Maka Technologies Group. All Rights Reserved.