1
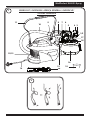
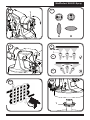
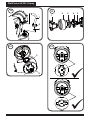
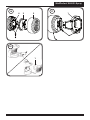
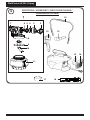
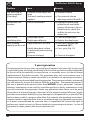
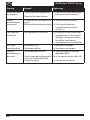
WallPerfect W 665 I-Spray GB Thinning recommendation Sprayed material Interior wall paint (dispersions and latex paint) dilute by 0-10 % 2. If the feed rate is too low even at maximum flow setting, dilute in steps of 5 - 10 % until the feed rate meets your requirements. 10. Start-up Before connecting to the mains supply, be sure that the supply voltage is identical with the value given on the rating plate. Attach the carrying strap to the unit. (Fig. 2) Unscrew the container from the spray gun. Aligning suction tube. (Fig. 3) If the suction tube is positioned correctly, the container contents can be sprayed without almost any residue. When spraying horizontal surfaces, turn suction tube forward. (Fig. 3 A) When spraying objects overhead, turn suction tube back. (Fig. 3 B) • • • i We recommend orienting the feed tube to the rear, to ensure optimal coating of walls and ceilings. •Place the container on a paper base and pour in the prepared coating substance with the aid of the feed hopper included in the scope of supply (Fig. 1, 18). Screw the container tightly onto the spray gun. Connect the front part with the rear part of the gun. (Fig. 5) Mount the air hose (Fig. 4, a + b). Insert the air hose firmly into the connection of the unit and the gun handle. The position of the hose is not relevant. Put the machine down only on a level, clean surface. Otherwise, the gun may suck in dust, etc. Sling on the carrying strap with the unit. Press the ON/OFF switch at the device. • • • • • 11. Selecting the Spray Setting (Fig. 6) WARNING! Danger of injury! Never pull the trigger guard while adjusting the air cap. 2 different spray jet shapes can be set by turning the adjustment ring (fig. 6, 1) Fig. 7 A = vertical flat jet Fig. 7 B = horizontal flat jet 24 for horizontal surfaces for vertical surfaces